Loading ...
Loading ...
Loading ...
en Time-setting options
8
OTime-setting options
Ti me - s et t i ng opt i ons
There are 3 different time-setting options:
■ A hotplate should switch off automatically
■ Kitchen timer
■ Stopwatch
Automatic hotplate switch-off
Enter a cooking time for the relevant hotplate. When the
cooking time has elapsed, the hotplate switches off
automatically.
Setting the cooking time
The hotplate must be switched on.
1. Set the heat setting.
2. Touch the 0 symbol twice. The y indicator lights
up. ‹‹ min lights up in the timer display.
3. Within the next 10 seconds, set the desired cooking
time on the control panel.
The cooking time counts down. If you have set a
cooking time for more than one hotplate, the cooking
time of the selected hotplate is always displayed.
When the time has elapsed,
When the cooking time has elapsed, the hotplate
switches off. You will hear an audible signal and
‹‹lights up in the display for 10 seconds. The indicator
y flashes. Touch any symbol. The displays go out and
the audible signal ceases.
Changing or cancelling the cooking time
Select the hotplate and then touch the 0 symbol twice.
Change the cooking time or set to ‹‹ in the settings
range.
Notes
■ You can set a cooking time of up to 99 minutes.
■ If the cooking time has counted down to the last
minute, the timer display changes from minutes to
seconds.
Automatic timer
You can use this function to preselect a cooking time
for all hotplates. Each time a hotplate is switched on,
the pre-selected cooking time then counts down. When
the cooking time has elapsed, the hotplate switches off
automatically.
You can find out how to switch on the automatic timer in
the Basic settings section.~ Page 9
Note: You can change the cooking time for a hotplate
or switch off the automatic timer for the hotplates:
Select the hotplate and then touch the
0 symbol twice.
Change the cooking time or set to ‹‹ in the settings
range.
Kitchen timer
You can use the kitchen timer to set a time of up to 99
minutes. It runs independently of all the other settings.
Setting the kitchen timer
1. Touch the 0 symbol repeatedly until the t indicator
lights up. ‹‹ lights up in the timer display min.
2. Set the desired time in the settings range.
The timer starts counting down after a few seconds.
When the time has elapsed,
When the time has elapsed, you will hear an audible
signal and
‹‹lights up in the display for 10 seconds.
The indicator t flashes. Touch any symbol. The
displays go out and the audible signal ceases.
Setting the correct time
Touch the 0 symbol repeatedly until the t indicator
lights up. Re-set in the control panel.
Stopwatch function
The stopwatch function displays the time which has
passed since activating the function.
The stopwatch function only works when the hob is
switched on. When the hob is switched off, the
stopwatch function is switched off as well.
To switch on: Touch the
0 symbol repeatedly until the
x indicator lights up.‹‹ appears in the timer display.
Touch the control panel at any point to start the time
measurement. Seconds are displayed during the first
minute, then minutes.
To switch off: Touch the 0 symbol repeatedly until the
x indicator lights up. Touch the control panel again at
any point. The timer display goes out.
PLQ
Í
jj
[
\\
PLQ
Í
\\
jj
Automatic safety cut-out en
9
bAutomatic safety cut-out
Aut omat i c saf et y cut - out
If a hotplate has been switched on for a long time
without the setting being changed, the automatic time
limit is activated.
The hotplate stops heating.
”‰ and the •/œ residual
heat indicator flash alternately on the hotplate display.
The display goes out when you touch any control. You
can make new settings.
When the time limit is activated depends on the heat
setting selected (1 to 10 hours).
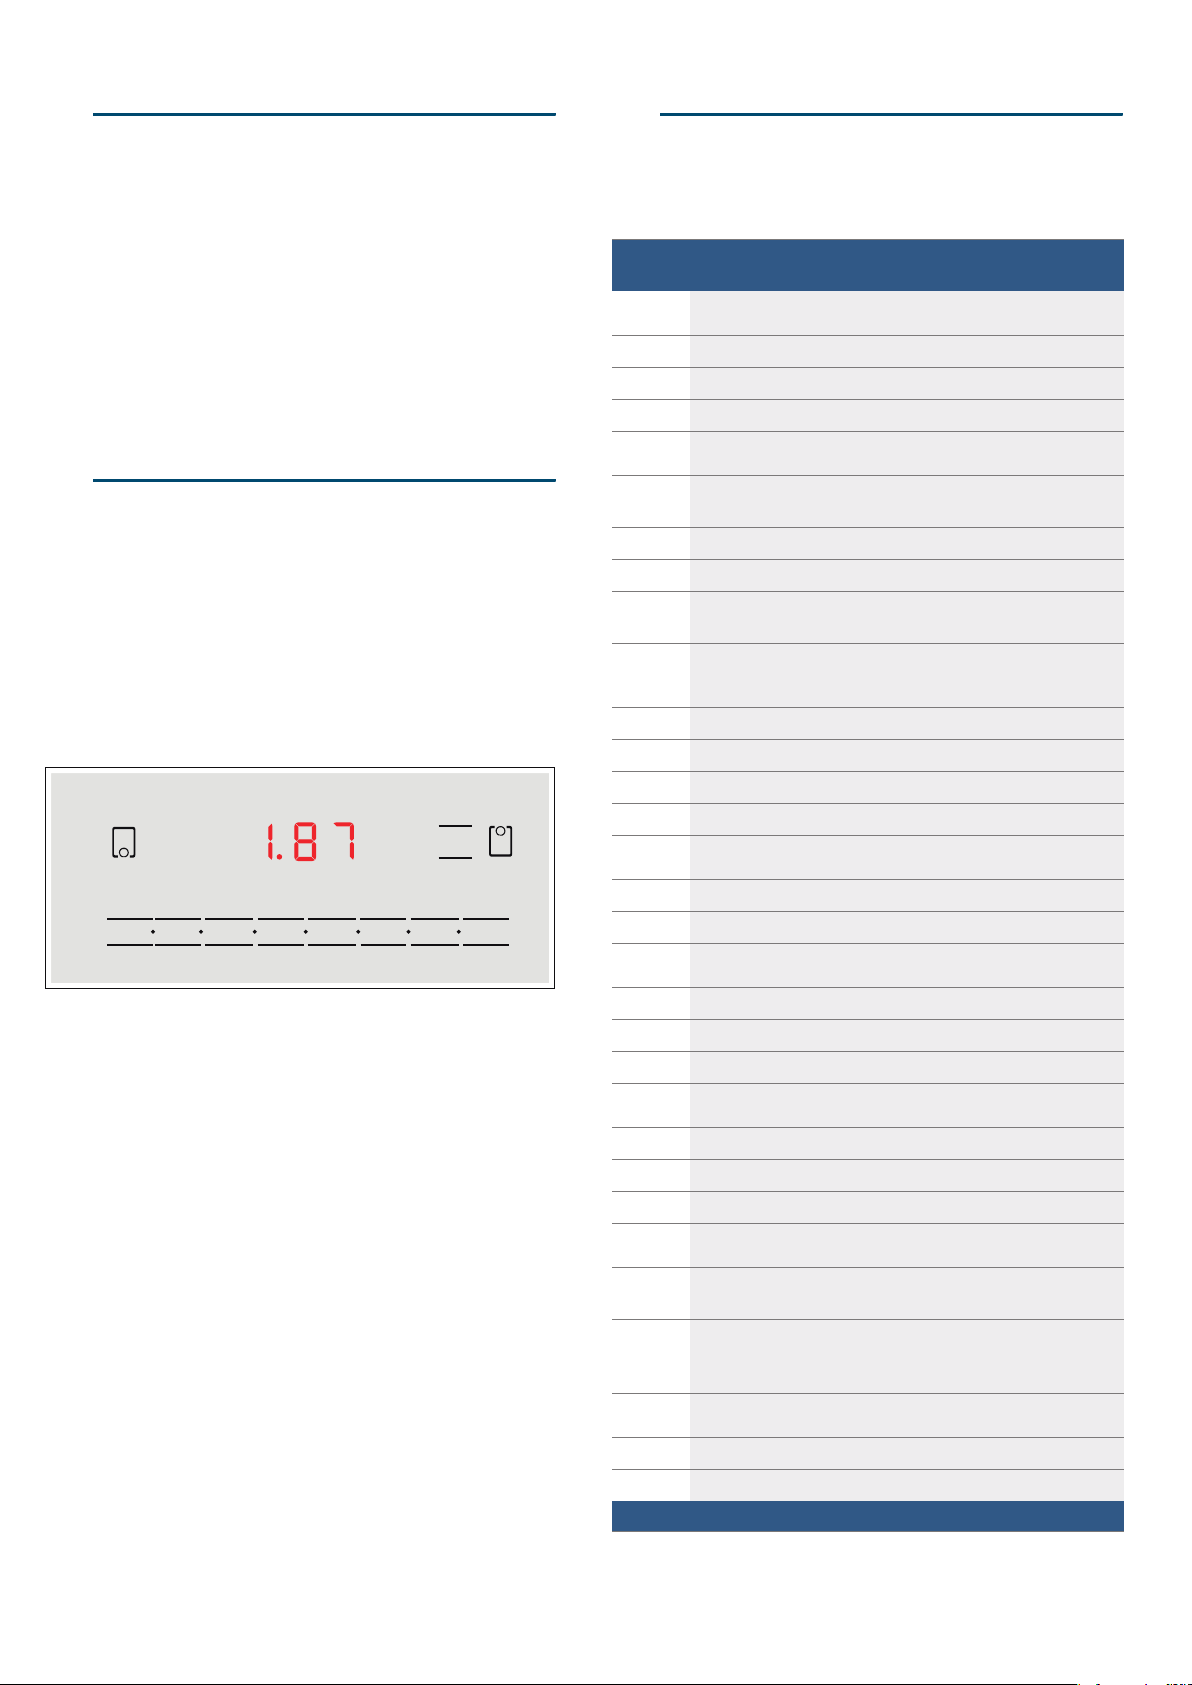
[Energy consumption
indicator
Ener gy c onsumpt i on i ndi cat or
You can use this function to have the total energy
consumption between switching the hob on and off
displayed.
Once switched off, the consumption in kilowatt hours
(e.g. 1.87 kWh) is displayed for 10 seconds
The accuracy of the display depends, amongst other
things, on the voltage quality of the power supply.
The display has not been activated. You can find out
how to activate the display in the Basic settings
section.~ Page 9
QBasic settings
Ba s i c set t i ngs
Your appliance has various basic settings. You can
adapt these settings to suit your own needs.
Display
screen
Function
™‚
Automatic childproof lock
‹
Switched off.*
‚
Switched on.
ƒ
Manual and automatic childproof lock switched off.
™ƒ
Audible signal
‹
Confirmation signal and operation error signal are
switched off (main switch signal always remains).
‚
Only the operation error signal is switched on.
ƒ
Only the confirmation signal is switched on.
„
Confirmation signal and operation error signal switched
on.*
™„
Energy consumption display (Ask your electricity sup-
ply company what the mains voltage is)
‹
Consumption display switched off.*
‚
Consumption display with mains voltage at 230 V.
„
Consumption display with mains voltage at 220 V.
…
Consumption display with mains voltage at 240 V.
™†
Automatic timer
‹‹
Switched off.*
‹‚-ŠŠ
Cooking time, after which the hotplates switch off.
™‡
Duration of the timer end signal
‚
10 seconds.*
ƒ
30 seconds
„
1 minute.
™ˆ
Activation of the heating elements
‹
Switched off.
‚
Switched on.
ƒ
Last setting before the hotplate was switched off.*
™Š
Time for selecting the hotplate
‹
Unlimited: the last selected hotplate can always be
adjusted without having to select it again.*
‚
Once you select a hotplate, you have 10 seconds to adjust
it, after which you will have to select it again in order to be
able to adjust it.
™‹
Reset the basic settings
‹
Switched off.*
‚
Switched on.
*Basic setting
Loading ...
Loading ...
Loading ...