Loading ...
Loading ...
Loading ...
1
2
5
5
7
3
5
5
6
6
6
6
6
6
5
5
3
1
2
4
5
5
6
6
1
2
3
6
6
6
4
5
5
5
6
6
5
5
3
1
2
5
5
6
6
1
2
3
6
6
6
5
5
5
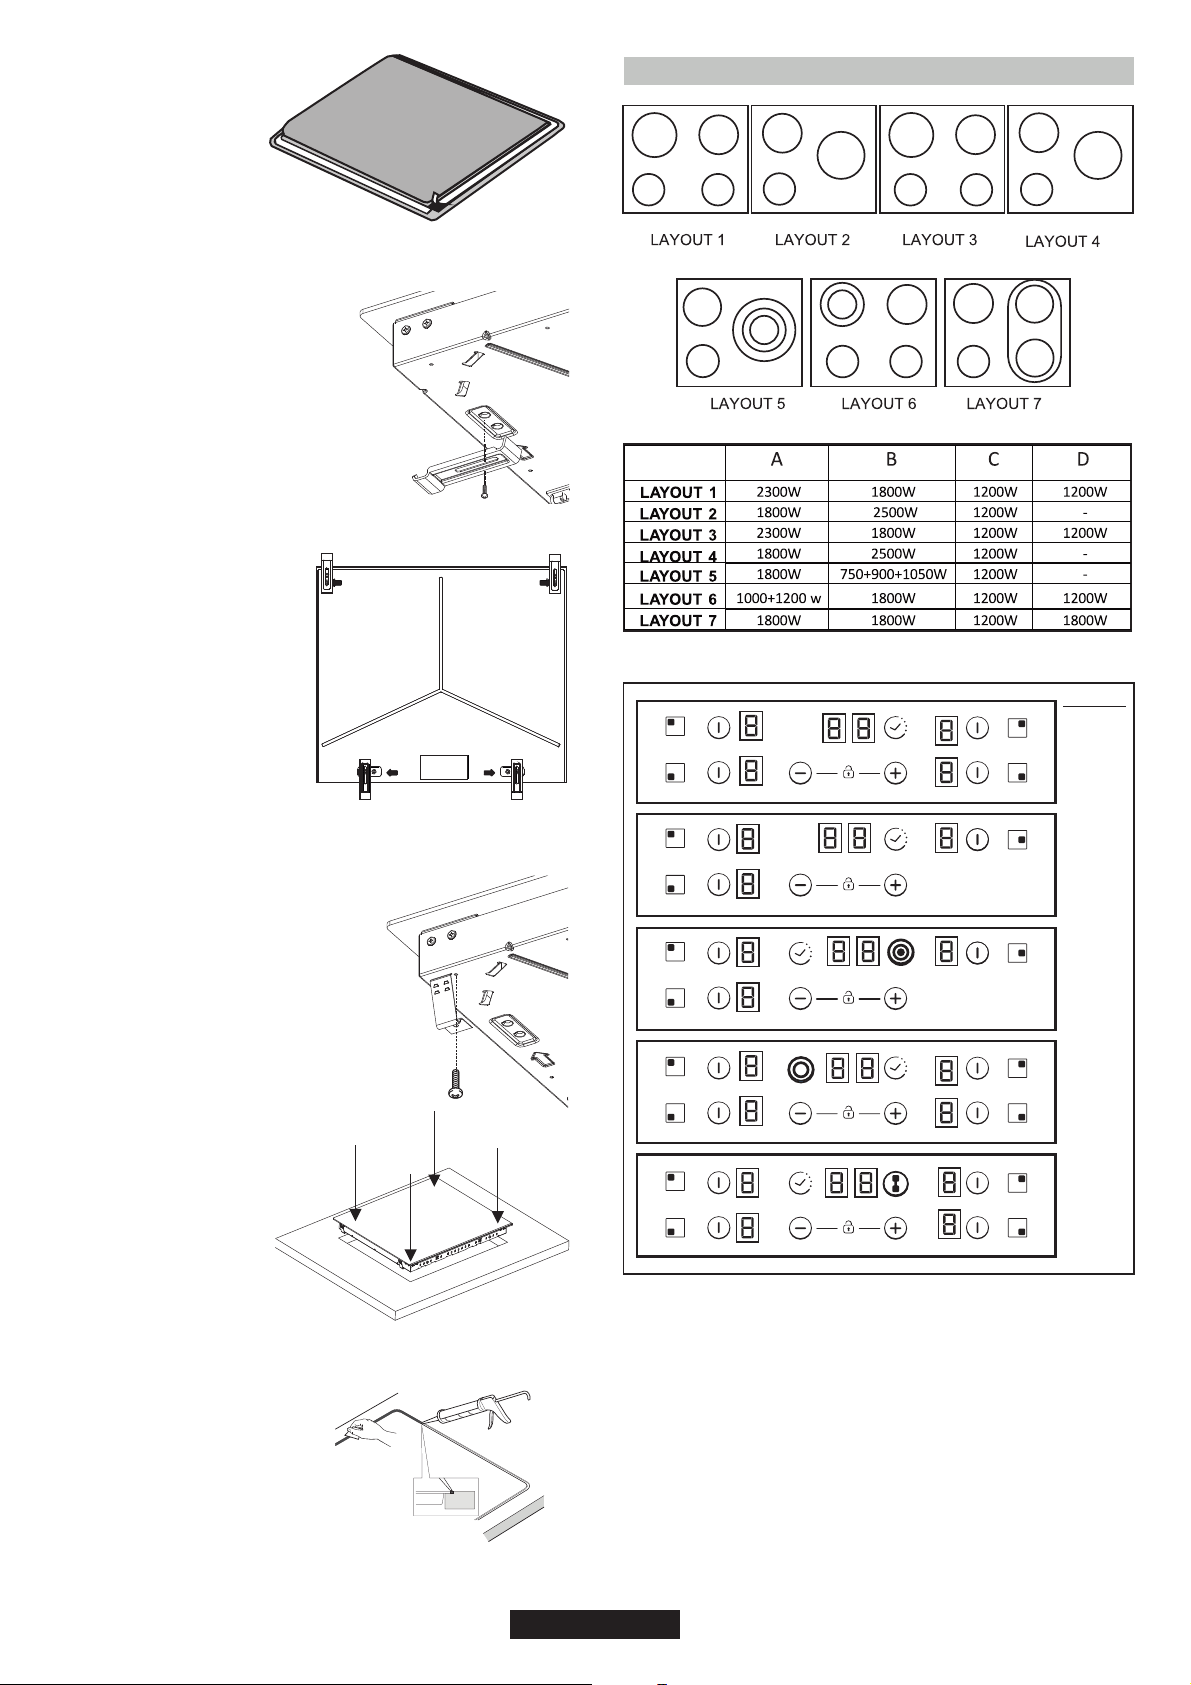
FLUSH INSTALLATION
After checking that the position
of the hob is correct fill the gap
between the worktop and the
hob with silicone adhesive.
Flatten the silicone layer with a
scraper or with wet finger
damped with water and soap
before it forms.
Do not use the hob until the
silicone layer it is completely dry.
A watertight seal gasket is
supplied with the hob. Fit
the seal gasket around the
bottom hob as described
and make sure that it is
properly fitted to avoid any
leakage into the supporting
furniture.
4. ELECTRICAL CONNECTION
Bottom
Normal Fixing:
- Get the fixing clips from accessory bag
and screw them into the position shown
on bottom box. (Do not tighten the
screws to block clips, they should move
freely)
- Insert the hob in center
position of cut out.
- Turn the clips and tighten
them fully.
Quick Fixing: (Depending on model)
Get four springs form accesory bag and
screw them onto bottom box as shown
in figure.
Center and insert the hob.
Press the sides of hob until it
is supported around its
entire perimeter.
1-3
2-4
5
6
7
LAYOUT
According to model
1."+"
2 "."-
3. TIMER
4.Additionalcooking zone led
5. Cooking zone programming indicator
6. Selection of the zone
7. Bridge
A
B
CD
A
B
C
A
B
CD
A
B
C
A
C
B
C
AB
D
A
B
C
D
06 GB
Loading ...
Loading ...
Loading ...