
US
ES
3-096-488-11(1)
© 2007 Sony Corporation
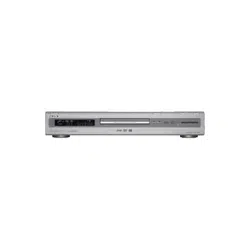
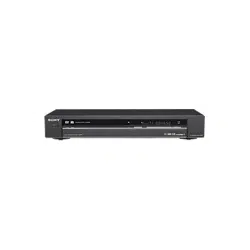
DVD Recorder
Operating Instructions
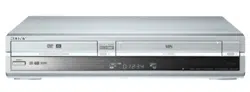
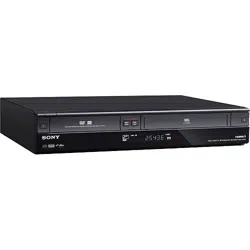
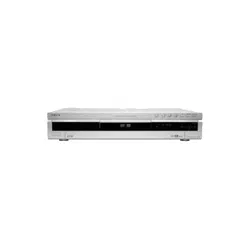
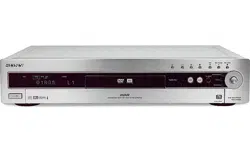
RDR-GXD455
Operating Instructions
Manual de instrucciones
2
WARNING
To reduce the risk of fire or
electric shock, do not expose
this apparatus to rain or
moisture.
To avoid electrical shock, do not
open the cabinet. Refer servicing
to qualified personnel only.
The AC power cord must be
changed only at a qualified
service shop.
Batteries or batteries installed
apparatus shall not be exposed
to excessive heat such as
sunshine, fire or the like.
CAUTION
The use of optical instruments with this
product will increase eye hazard. As
the laser beam used in this DVD
recorder is harmful to eyes, do not
attempt to disassemble the cabinet.
Refer servicing to qualified personnel
only.
This label is located on the laser
protective housing inside the
enclosure.
This symbol is intended
to alert the user to the
presence of uninsulated
“dangerous voltage”
within the product’s
enclosure that may be of sufficient
magnitude to constitute a risk of
electric shock to persons.
This symbol is intended
to alert the user to the
presence of important
operating and
maintenance (servicing)
instructions in the literature
accompanying the appliance.
For customers in the U.S.A
Owner’s Record
The model and serial numbers are located
at the rear of the unit.
Record the serial number in the space
provided below. Refer to them whenever
you call upon your Sony dealer regarding
this product.
Model No. RDR-GXD455
Serial No.______________
CAUTION
You are cautioned that any change or
modifications not expressly approved
in this manual could void your
authority to operate this equipment.
Note
This equipment has been tested and
found to comply with the limits for a
Class B digital device, pursuant to Part
15 of the FCC Rules. These limits are
designed to provide reasonable
protection against harmful interference
in a residential installation. This
equipment generates, uses, and can
radiate radio frequency energy and, if
not installed and used in accordance
with the instructions, may cause
harmful interference to radio
communications. However, there is no
guarantee that interference will not
occur in a particular installation. If this
equipment does cause harmful
interference to radio or television
reception, which can be determined by
turning the equipment off and on, the
user is encouraged to try to correct the
interference by one or more of the
following measures:
– Reorient or relocate the receiving
antenna.
– Increase the separation between the
equipment and receiver.
– Connect the equipment into an outlet
on a circuit different from that to
which the receiver is connected.
– Consult the dealer or an experienced
radio/TV technician for help.
Precautions
On safety
Should any solid object or liquid fall
into the cabinet, unplug the recorder
and have it checked by qualified
personnel before operating it any
further.
On power sources
• Operate the recorder only on
120 V AC, 60 Hz.
• The recorder is not disconnected
from the AC power source as long
as it is connected to the wall outlet,
even if the recorder itself has been
turned off.
• Install this system so that the
power cord can be unplugged from
the wall socket immediately in the
event of trouble.
• If you are not going to use the
recorder for a long time, be sure to
disconnect the recorder from the
wall outlet. To disconnect the AC
power cord, grasp the plug itself;
never pull the cord.
On placement
• Place the recorder in a location
with adequate ventilation to
prevent heat build-up in the
recorder.
• If the recorder is brought directly
from a cold to a warm location, or
is placed in a very damp room,
moisture may condense on the
lenses inside the recorder. Should
this occur, the recorder may not
operate properly. In this case,
remove the disc and leave the
recorder turned on for about half
an hour before operating the
recorder.
• Do not place the recorder on a soft
surface such as a rug that might
block the ventilation holes.
• Do not place the recorder in a
confined space such as a bookshelf
or similar unit.
DANGER
VISIBLE AND INVISIBLE LASER RADIATION WHEN OPEN AVOID DIRECT EXPOSURE TO BEAM
CLASS 3B VISIBLE AND INVISIBLE LASER RADIATION WHEN OPEN. AVOID DIRECT EXPOSURE TO THE BEAM.
KLASSE 3B SICHTBARE UND UNSICHTBARE LASERSTRAHLUNG WENN GEÖFFNET. DIREKTEN KONTAKT MIT DEM
STRAHL VERMEIDEN.
SYNLIG OG USYNLIG LASERSTRÅLING AF KLASSE 3B VED ÅBNING. UNDGÅ DIREKTE UDSÆTTELSE FOR STRÅLING.
SYNLIG OG USYNLIG LASERSTRÅLING I KLASSE 3B NÅR DEKSEL ÅPNES. UNNGÅ DIREKTE EKSPONERING FOR STRÅLEN.
KLASS 3B SYNLIG OCH OSYNLIG LASERSTRÅLNING NÄR DENNA DEL ÄR ÖPPNAD. UNDVIK ATT DIREKT EXPONERA DIG
FÖR STRÅLNINGEN.
AVATTUNA LUOKAN 3B NÄKYVÄÄ JA NÄKYMÄTÖNTÄ LASERSÄTEILYÄ. VÄLTÄ SUORAA ALTISTUMISTA SÄTEELLE.
CAUTION
VORSICHT
ADVARSEL
ADVARSEL
VARNING
VAR O!
3
• Do not place the recorder in a
location near heat sources, or in a
place subject to direct sunlight,
excessive dust, or mechanical
shock.
• Do not place the recorder in an
inclined position. It is designed to
be operated in a horizontal
position only.
• Keep the recorder and discs away
from equipment with strong
magnets, such as microwave
ovens, or large loudspeakers.
• Do not place heavy objects on the
recorder.
• To prevent fire or shock hazard, do
not place objects filled with
liquids, such as vases, on the
apparatus.
• When you move the recorder, take
out any discs. If you do not, the
disc may be damaged.
On recording
• Contents of the recording cannot
be compensated for if the
recording or playback is not made
due to a malfunction of the
recorder, disc, etc.
• Make trial recordings before
making the actual recording.
Copyrights
• Television programs, films, video
tapes, discs, and other materials
may be copyrighted. Unauthorized
recording of such material may be
contrary to the provisions of the
copyright laws. Also, use of this
recorder with cable television
transmission may require
authorization from the cable
television transmitter and/or
program owner.
• This product incorporates
copyright protection technology
that is protected by U.S. patents
and other intellectual property
rights. Use of this copyright
protection technology must be
authorized by Macrovision, and is
intended for home and other
limited viewing uses only unless
otherwise authorized by
Macrovision. Reverse engineering
or disassembly is prohibited.
Copy guard function
Since the recorder has a copy guard
function, programs received through
an external tuner (not supplied) may
contain copy protection signals
(copy guard function) and as such
may not be recordable, depending
on the type of signal.
If you have any questions or
problems concerning your recorder,
please consult your nearest Sony
dealer.
IMPORTANT SAFETY
INSTRUCTIONS
1) Read these instructions.
2) Keep these instructions.
3) Heed all warnings.
4) Follow all instructions.
5) Do not use this apparatus near
water.
6) Clean only with dry cloth.
7) Do not block any ventilation
openings. Install in accordance
with the manufacturer’s
instructions.
8) Do not install near any heat
sources such as radiators, heat
registers, stoves, or other
apparatus (including amplifiers)
that produce heat.
9) Do not defeat the safety purpose
of the polarized or grounding-
type plug. A polarized plug has
two blades with one wider than
the other. A grounding type plug
has two blades and a third
grounding prong. The wide
blade or the third prong are
provided for your safety. If the
provided plug does not fit into
your outlet, consult an
electrician for replacement of
the obsolete outlet.
10) Protect the power cord from
being walked on or pinched
particularly at plugs,
convenience receptacles, and the
point where they exit from the
apparatus.
11) Only use attachments/
accessories specified by the
manufacturer.
12) Use only with the cart, stand,
tripod, bracket, or table specified
by the manufacturer, or sold
with the apparatus. When a cart
is used, use caution when
moving the cart/apparatus
combination to avoid injury
from tip-over.
13) Unplug this apparatus during
lightning storms or when unused
for long periods of time.
14) Refer all servicing to qualified
service personnel. Servicing is
required when the apparatus has
been damaged in any way, such
as power-supply cord or plug is
damaged, liquid has been spilled
or objects have fallen into the
apparatus, the apparatus has
been exposed to rain or
moisture, does not operate
normally, or has been dropped.
IMPORTANT NOTICE
Caution: This recorder is capable
of holding a still video image or
on-screen display image on your
television screen indefinitely. If
you leave the still video image or
on-screen display image displayed
on your TV for an extended period
of time you risk permanent
damage to your television screen.
Plasma display panels and
projection televisions are
especially susceptible to this.
,continued
4
About this manual
• Instructions in this manual describe the controls on the
remote. You can also use the controls on the recorder if
they have the same or similar names as those on the
remote.
• The on-screen display illustrations used in this manual
may not match the graphics displayed on your TV
screen.
• The explanations regarding discs in this manual refer to
discs created on this recorder. The explanations do not
apply to discs that are created on other recorders and
played back on this recorder.
* MP3 (MPEG1 Audio Layer 3) is a standard format
defined by ISO/MPEG which compresses audio data.
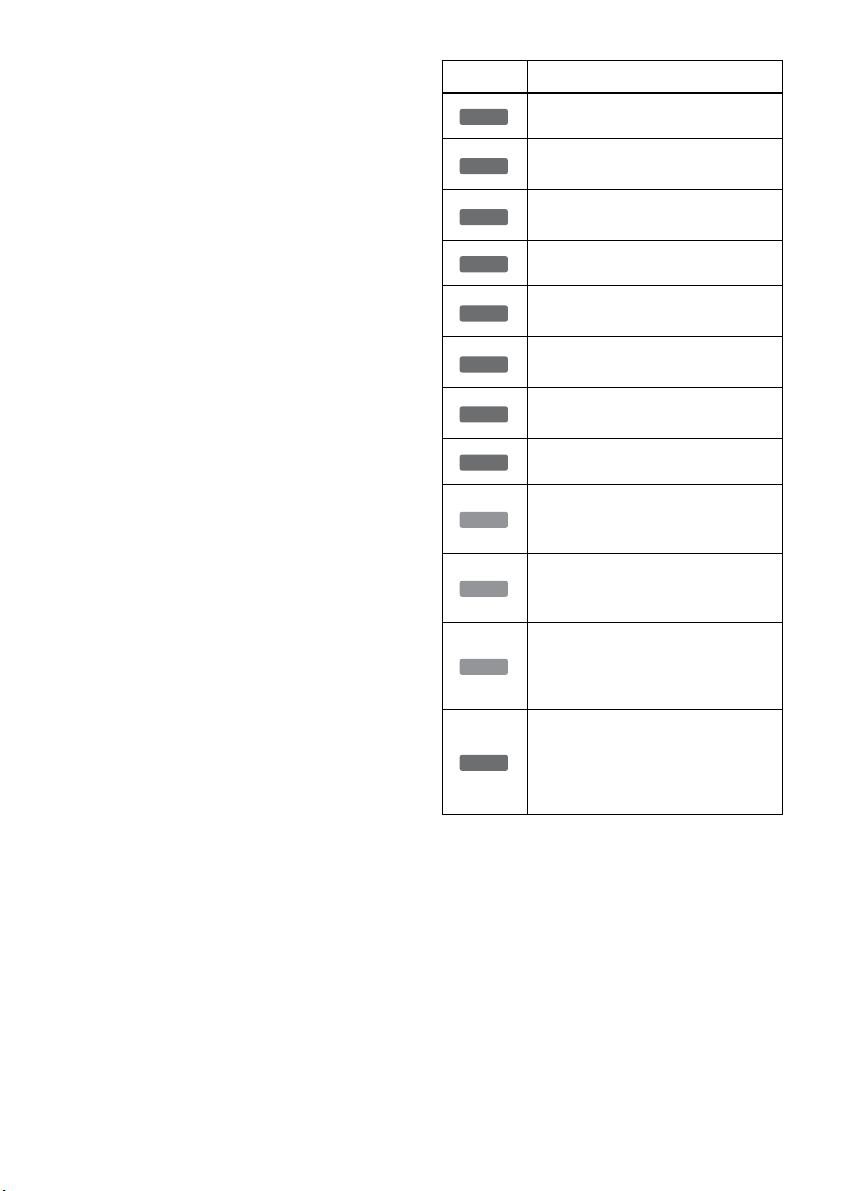
Icon Meaning
Functions available for DVD+RWs
Functions available for DVD-RWs
in VR (Video Recording) mode
Functions available for DVD-RWs
in video mode
Functions available for DVD+Rs
Functions available for DVD-Rs in
VR (Video Recording) mode
Functions available for DVD-Rs in
video mode
Functions available for DVD
VIDEOs
Functions available for DVD-RAMs
Functions available for VIDEO CDs
or CD-Rs/CD-RWs in video CD
format
Functions available for music CDs
or CD-Rs/CD-RWs in music CD
format
Functions available for DATA CDs
(CD-ROMs/CD-Rs/CD-RWs
containing MP3
* audio tracks or
JPEG image files)
Functions available for DATA
DVDs (DVD-ROMs/DVD+RWs/
DVD-RWs/DVD+Rs/DVD-Rs
containing MP3* audio tracks or
JPEG image files)
+
RW
-
RWVR
-
RW
Video
+
R
-
RVR
-
R
Video
DVD
RAM
VCD
CD
DATA CD
DATA DVD

5

6
Table of Contents
WARNING . . . . . . . . . . . . . . . . . . . . . . . . . . . . . . . . . . . . . . . . . . . . . . . . . . . . . . . . . . .2
Precautions . . . . . . . . . . . . . . . . . . . . . . . . . . . . . . . . . . . . . . . . . . . . . . . . . . . . . . . . . .2
Ways to Use Your DVD Recorder . . . . . . . . . . . . . . . . . . . . . . . . . . . . . . . . . . . . . . . . .8
How to Use the On-Screen Menus . . . . . . . . . . . . . . . . . . . . . . . . . . . . . . . . . . . . . . .10
Quick Guide to Disc Types . . . . . . . . . . . . . . . . . . . . . . . . . . . . . . . . . . 12
Recordable and Playable Discs . . . . . . . . . . . . . . . . . . . . . . . . . . . . . . . . . . . . . . . . .12
Playable Discs . . . . . . . . . . . . . . . . . . . . . . . . . . . . . . . . . . . . . . . . . . . . . . . . . . . . . . 15
Hookups and Settings . . . . . . . . . . . . . . . . . . . . . . . . . . . . . . . . . . . . . 17
Hooking Up the Recorder . . . . . . . . . . . . . . . . . . . . . . . . . . . . . . . . . . . . . . . . . . . . . . 17
Step 1: Unpacking . . . . . . . . . . . . . . . . . . . . . . . . . . . . . . . . . . . . . . . . . . . . . . . . . . . . 17
Step 2: Connecting the Antenna Cable . . . . . . . . . . . . . . . . . . . . . . . . . . . . . . . . . . . .17
Step 3: Connecting to Your TV . . . . . . . . . . . . . . . . . . . . . . . . . . . . . . . . . . . . . . . . . . 21
Step 4: Connecting to Your AV Amplifier (Receiver) . . . . . . . . . . . . . . . . . . . . . . . . . .24
Step 5: Connecting the Power Cord . . . . . . . . . . . . . . . . . . . . . . . . . . . . . . . . . . . . . .26
Step 6: Preparing the Remote . . . . . . . . . . . . . . . . . . . . . . . . . . . . . . . . . . . . . . . . . . . 26
Step 7: Easy Setup . . . . . . . . . . . . . . . . . . . . . . . . . . . . . . . . . . . . . . . . . . . . . . . . . . .29
Connecting a VCR or Similar Device . . . . . . . . . . . . . . . . . . . . . . . . . . . . . . . . . . . . .32
Watching TV . . . . . . . . . . . . . . . . . . . . . . . . . . . . . . . . . . . . . . . . . . . . . . . . . . . . . . . . 34
Playback . . . . . . . . . . . . . . . . . . . . . . . . . . . . . . . . . . . . . . . . . . . . . . 36
Playing Discs . . . . . . . . . . . . . . . . . . . . . . . . . . . . . . . . . . . . . . . . . . . . . . . . . . . . . . . 36
Playback Options . . . . . . . . . . . . . . . . . . . . . . . . . . . . . . . . . . . . . . . . . . . . . . . . . . . .37
Playing a Title From the Title List . . . . . . . . . . . . . . . . . . . . . . . . . . . . . . . . . . . . . . . . 40
Searching for a Title/Chapter/Track, etc. . . . . . . . . . . . . . . . . . . . . . . . . . . . . . . . . . . 41
Playing MP3 Audio Tracks and JPEG Image Files . . . . . . . . . . . . . . . . . . . . . . . . . . . 42
Displaying the Playing Time and Play Information . . . . . . . . . . . . . . . . . . . . . . . . . . . 46
Recording . . . . . . . . . . . . . . . . . . . . . . . . . . . . . . . . . . . . . . . . . . . . . 47
Before Recording . . . . . . . . . . . . . . . . . . . . . . . . . . . . . . . . . . . . . . . . . . . . . . . . . . . .47
Recording Without the Timer . . . . . . . . . . . . . . . . . . . . . . . . . . . . . . . . . . . . . . . . . . . 49
Timer Recording . . . . . . . . . . . . . . . . . . . . . . . . . . . . . . . . . . . . . . . . . . . . . . . . . . . . .51
Recording From Connected Equipment With a Timer (Synchro Rec) . . . . . . . . . . . . 53
Changing or Canceling Timer Settings (Timer List) . . . . . . . . . . . . . . . . . . . . . . . . . . 54
Recording From Connected Equipment Without a Timer . . . . . . . . . . . . . . . . . . . . . .55
Editing . . . . . . . . . . . . . . . . . . . . . . . . . . . . . . . . . . . . . . . . . . . . . . . 57
Before Editing . . . . . . . . . . . . . . . . . . . . . . . . . . . . . . . . . . . . . . . . . . . . . . . . . . . . . . . 57
Editing a Title . . . . . . . . . . . . . . . . . . . . . . . . . . . . . . . . . . . . . . . . . . . . . . . . . . . . . . . 58
Changing the Name of a Title . . . . . . . . . . . . . . . . . . . . . . . . . . . . . . . . . . . . . . . . . . . 61
Creating a Playlist . . . . . . . . . . . . . . . . . . . . . . . . . . . . . . . . . . . . . . . . . . . . . . . . . . . . 62
Editing a Playlist . . . . . . . . . . . . . . . . . . . . . . . . . . . . . . . . . . . . . . . . . . . . . . . . . . . . . 64
Formatting/Renaming/Protecting a Disc . . . . . . . . . . . . . . . . . . . . . . . . . . . . . . . . . . .68
Finalizing a Disc (Preparing a Disc for Playback on Other Equipment) . . . . . . . . . . .69

7
DV/D8 Dubbing (DV/D8 t DVD) . . . . . . . . . . . . . . . . . . . . . . . . . . . . . . 71
Before DV/D8 Dubbing . . . . . . . . . . . . . . . . . . . . . . . . . . . . . . . . . . . . . . . . . . . . . . . . 71
Connecting a Digital Video Camera to the DV IN Jack . . . . . . . . . . . . . . . . . . . . . . . 71
Dubbing From a DV/D8 Format Tape to a DVD . . . . . . . . . . . . . . . . . . . . . . . . . . . . . 72
Settings and Adjustments . . . . . . . . . . . . . . . . . . . . . . . . . . . . . . . . . . . 75
Using the Setup Displays . . . . . . . . . . . . . . . . . . . . . . . . . . . . . . . . . . . . . . . . . . . . . . 75
Antenna Reception Setting (Tuner Preset) . . . . . . . . . . . . . . . . . . . . . . . . . . . . . . . . . 76
Clock Setting (Clock Set) . . . . . . . . . . . . . . . . . . . . . . . . . . . . . . . . . . . . . . . . . . . . . . 78
Video Settings (Video) . . . . . . . . . . . . . . . . . . . . . . . . . . . . . . . . . . . . . . . . . . . . . . . . 79
Audio Settings (Audio) . . . . . . . . . . . . . . . . . . . . . . . . . . . . . . . . . . . . . . . . . . . . . . . . 81
Recording Settings (Features) . . . . . . . . . . . . . . . . . . . . . . . . . . . . . . . . . . . . . . . . . . 83
Language, Parental, Digital broadcast settings/Factory Settings (Options) . . . . . . . . 84
Easy Setup
(Resetting the Recorder) . . . . . . . . . . . . . . . . . . . . . . . . . . . . . . . . . . . . . . . . . . . 88
Additional Information . . . . . . . . . . . . . . . . . . . . . . . . . . . . . . . . . . . . . 89
Troubleshooting . . . . . . . . . . . . . . . . . . . . . . . . . . . . . . . . . . . . . . . . . . . . . . . . . . . . . 89
Notes About This Recorder . . . . . . . . . . . . . . . . . . . . . . . . . . . . . . . . . . . . . . . . . . . . 93
Specifications . . . . . . . . . . . . . . . . . . . . . . . . . . . . . . . . . . . . . . . . . . . . . . . . . . . . . . . 94
About i.LINK . . . . . . . . . . . . . . . . . . . . . . . . . . . . . . . . . . . . . . . . . . . . . . . . . . . . . . . . 96
Guide to Parts and Controls . . . . . . . . . . . . . . . . . . . . . . . . . . . . . . . . . . . . . . . . . . . . 97
Glossary . . . . . . . . . . . . . . . . . . . . . . . . . . . . . . . . . . . . . . . . . . . . . . . . . . . . . . . . . . 100
DVD Audio/Subtitle Language . . . . . . . . . . . . . . . . . . . . . . . . . . . . . . . . . . . . . . . . . 102
Index . . . . . . . . . . . . . . . . . . . . . . . . . . . . . . . . . . . . . . . . . . . . . . . . . . . . . . . . . . . . . 103
8
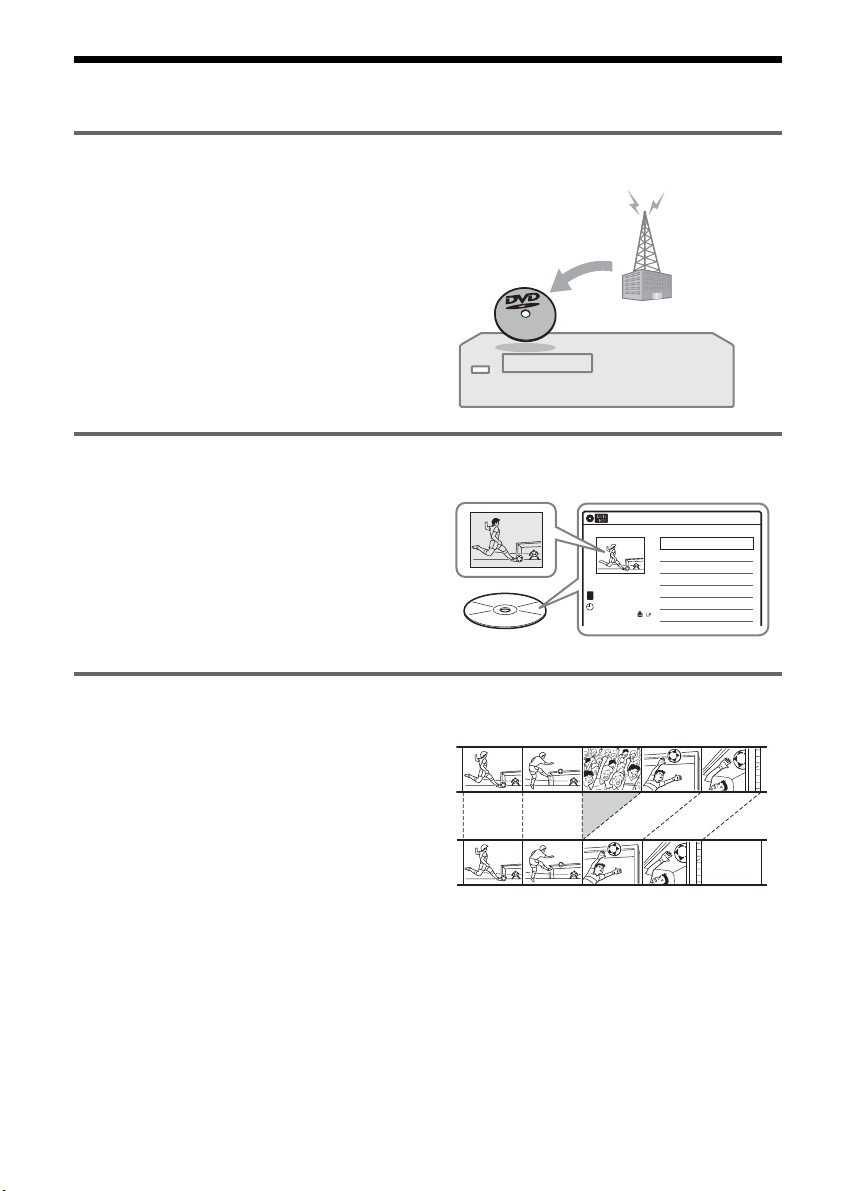
Ways to Use Your DVD Recorder
Recording and timer recording
, Record TV programs on a DVD, either
manually or using the timer.
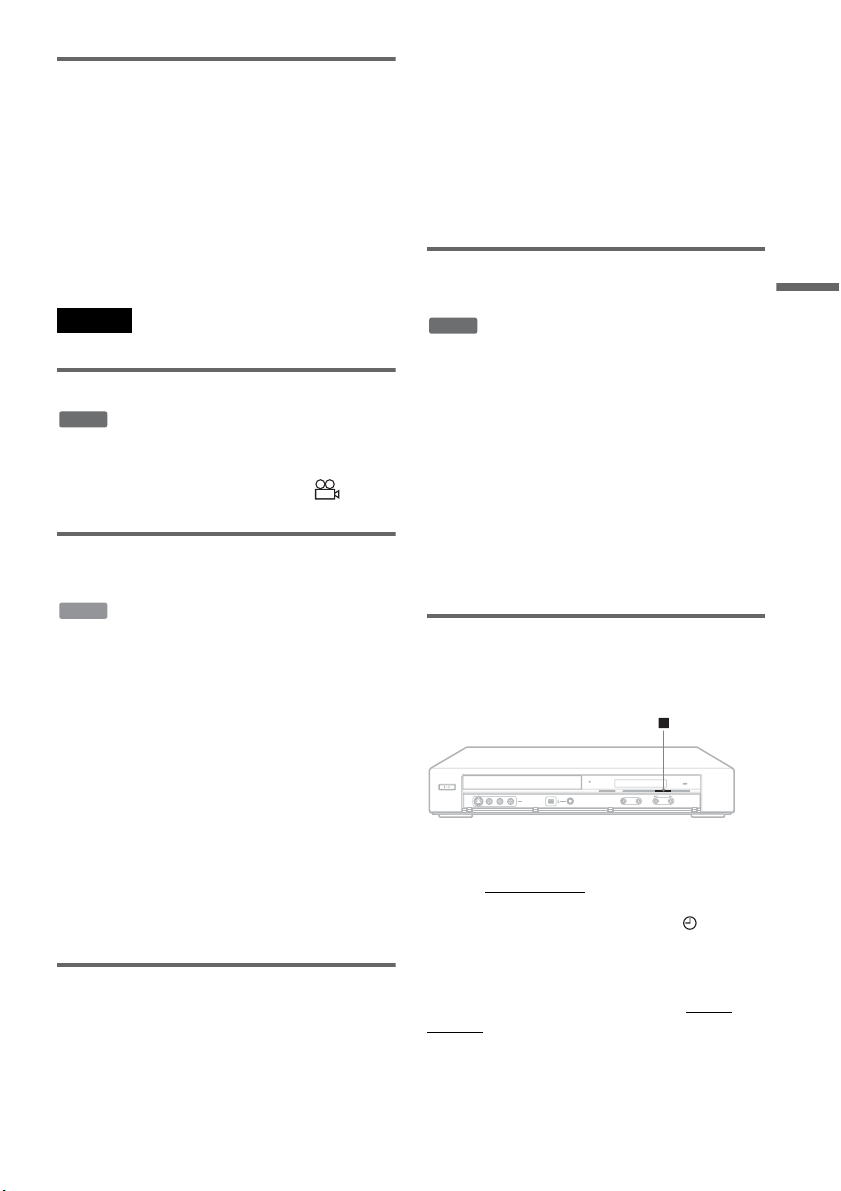
Quick access to recorded titles – Title List
, Display the Title List to view all titles on a
disc and select a title for playback or editing
(page 40).
Creating your own program – Playlist
, Record a program on a DVD-RW (VR
mode) or DVD-R (VR mode), then erase,
move or add scenes as you like without
changing the original contents (page 62).
Title List
10:10 AM
>
>
>
>
D11.1
08:00 PM
May/02/2007
T
No.1/4
01
02
03
04
Title Length Edit
D11.1 01:29:03
D22.2 00:31:23
Ch 23 01:59:00
Ch 66 00:58:56
Title List (Original)
Original
Playlist
9
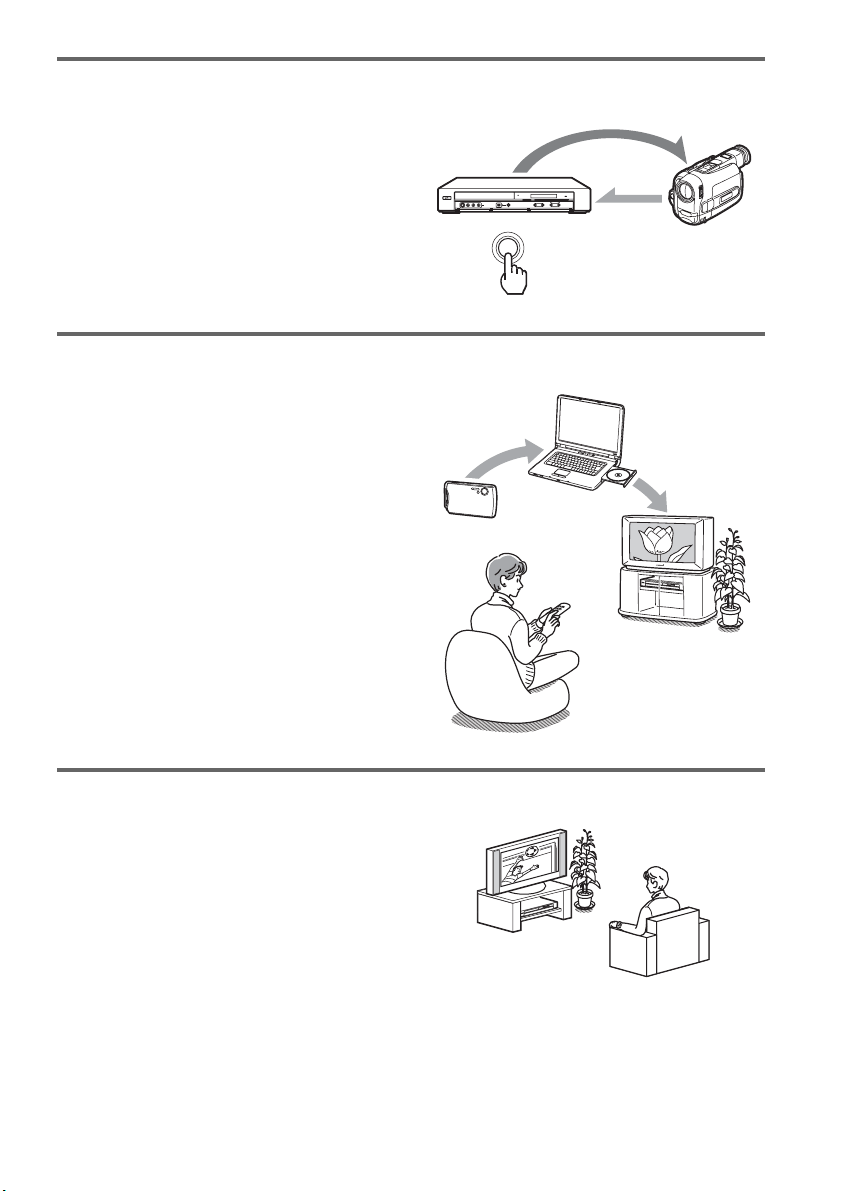
One Touch Dubbing – DV/D8 Dubbing
, Connect your digital video camera to the
DV IN jack and press the ONE TOUCH
DUBBING button to dub a DV/D8 format
tape over to a disc (page 71).
Playing JPEG image files or MP3 audio files
, You can enjoy viewing JPEG images on
your TV screen. First, take pictures with a
digital camera and save them in JPEG
format to a DATA CD (CD-RW/CD-R) or
DATA DVD (DVD+RW/DVD-RW/
DVD+R/DVD-R) on a PC. Then play the
disc on this recorder (page 43).
You can also play MP3 audio files on this
recorder (page 42).
A list of recordable and playable discs is on page 12.
Progressive playback
, If your TV is compatible with progressive
signals, you can enjoy accurate color
reproduction and high quality images in
Progressive mode (page 80).
+
-
ONE-TOUCH DUBBING
Control
Dubbing
Shoot
Save
Play!

10
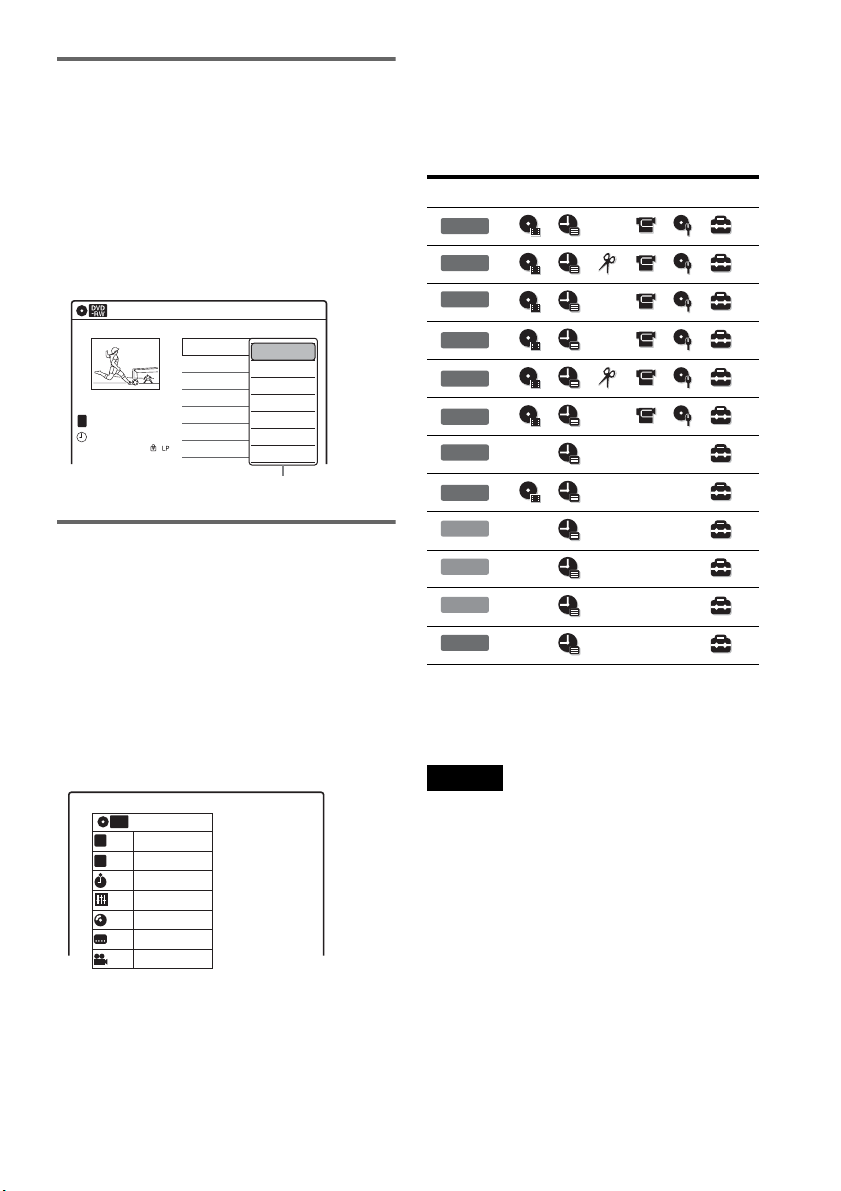
How to Use the On-Screen
Menus
The following three displays are mainly used to
operate this recorder. Once you become familiar
with the basic operations, you will find the
recorder easy to use.
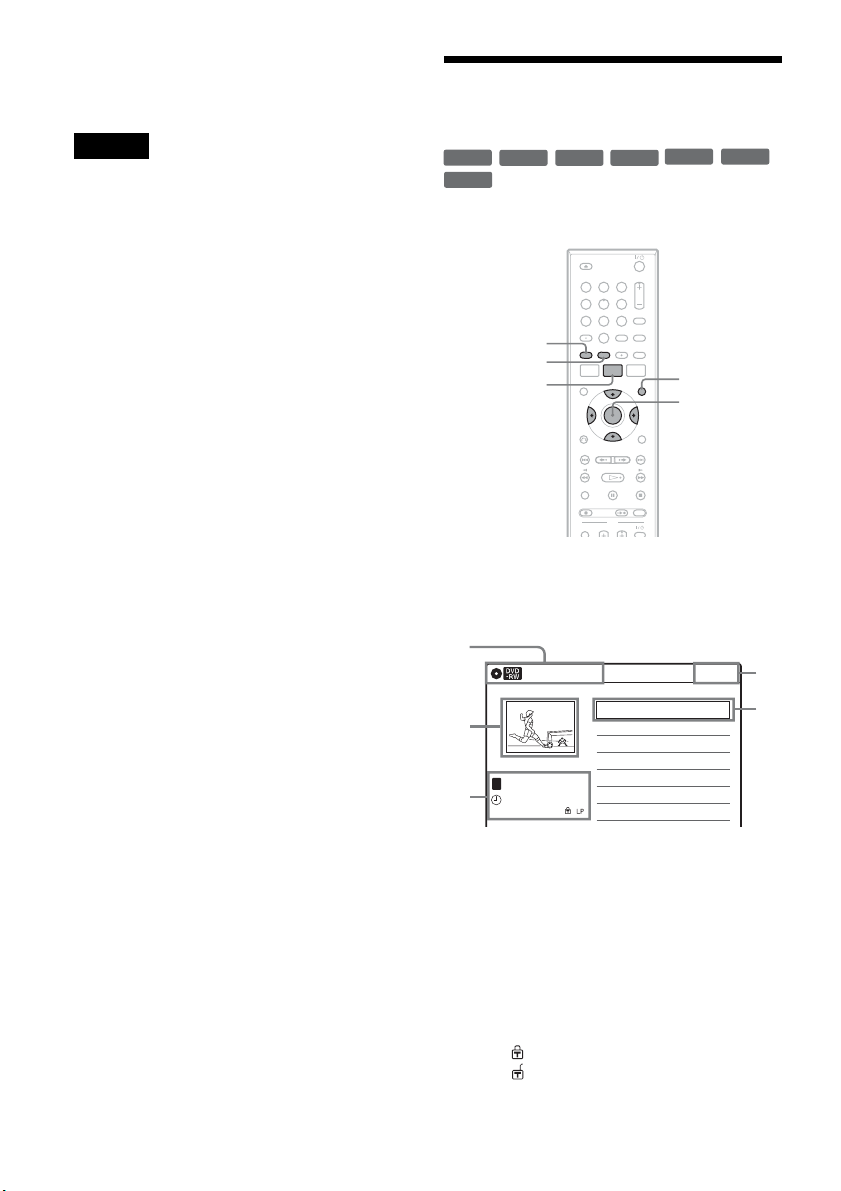
System Menu
The System Menu appears when you press
SYSTEM MENU, and provides entries to all of
the recorder’s main functions, such as timer
recording and setup.
Select an option by pressing M/m and ENTER.
A “Title List”
Displays the list of the disc contents,
including the recording information and
movie thumbnail image, which allows you to
select a title to play or edit.
B “Timer”
Used to set a new timer recording, as well as
change or cancel the timer recordings you set.
C “Edit”
Used to create or edit a Playlist (unfinalized
DVD-RWs (VR mode)/DVD-Rs (VR mode)
only).
D “DV/D8 Dubbing”
Used to dub from a DV/D8 format tape to a
disc.
E “Disc Setting”
Used to rename, protect, format, or finalize a
disc, and erase all titles on the disc. Also,
displays the disc information.
F “Setup”
Displays the “Setup” display for setting up the
recorder to suit your preferences.
M/m/</,,
ENTER
SYSTEM
MENU
OPTIONSO RETURN
11 22 33
44 55 66
77 88
00
99
Title List (Original)
10:10 AM
Press ENTER :
Title Menu for DVD Title List.
Setup
Disc Setting
Edit
Title List
Timer
DV/D8 Dubbing
6
10:10 AM
01 >01:29:03
02 >00:31:23
03 >01:59:00
04 >00:58:56
08:00 PM
T
No. Title Length Edit
Title List (Original)
1/4
D11.1
D22.2
Ch 23
Ch 66
D11.1
May/02/2007
11
Sub-menu
The sub-menu appears when you select an item
from a list menu (e.g., a title from the Title List
menu), and press ENTER. The sub-menu displays
options applicable only to the selected item. The
displayed options differ depending on the
situation and disc type.
Select an option by pressing M/m and ENTER.
Example: The Title List menu
OPTIONS
The OPTIONS menu appears when you press
OPTIONS. You can search for a title/chapter/
track, check the playing and remaining time, or
change settings for audio/angle/subtitle. The
displayed options differ depending on the media
type.
Press M/m to select an option, press </, to
select the desired item, and press ENTER.
Example: When you press OPTIONS while a
DVD VIDEO is playing.
Selectable options
Selectable options on the System Menu differ
depending on the media type, disc condition, and
operating status.
Example: When a disc is stopped.
* Unfinalized disc only
To return to the previous display
Press O RETURN.
Notes
• The OPTIONS menu may not appear during DVD
recording.
• The System Menu does not appear when recording on
a DVD.
Title List (Original)
10:10 AM
No. Title Length Edit
01 D11.1 >01:29:03
02 D22.2 >00:31:23
03 Ch 23 >01:59:00
04 Ch 66 >00:58:56
D11.1
May/02/2007
08:00 PM
T
1/4
Play
Title Erase
Chapter Erase
Protect
Title Name
A·B Erase
Divide Title
Options for the selected item
1/4
1/1
00:00:25
T
C
Title
Chapter
Time
Remain
Audio
Angle
00:01:30
Subtitle
2/2 ENG
1/1
ENG Dolby D2ch (1/1)
DVD
VIDEO
Type Selectable option
+
RW
-
RWVR
**
-
RW
Video
**
+
R
***
-
RVR
***
-
R
Video
***
DVD
RAM
VCD
CD
DATA CD
DATA DVD
12
Quick Guide to Disc Types
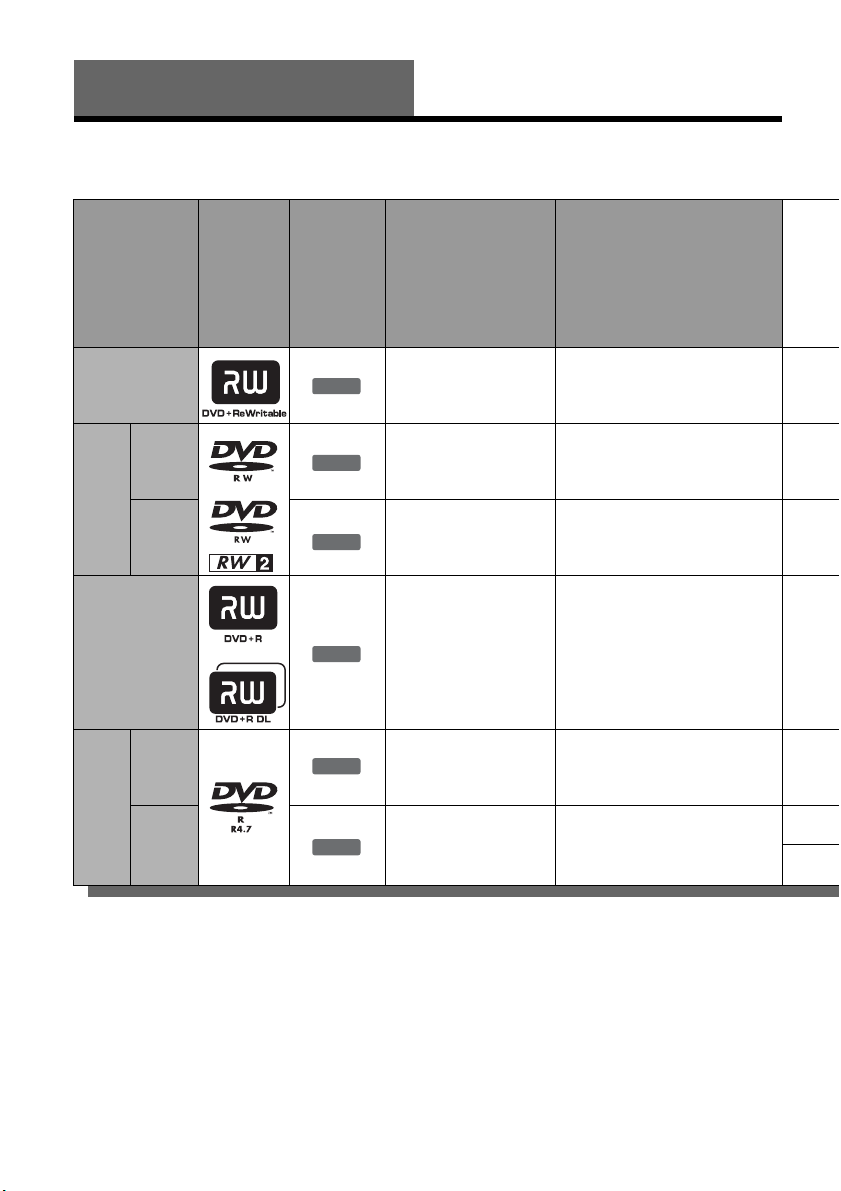
Recordable and Playable Discs
Usable disc versions (as of March 2007)
• 8×-speed or slower DVD+RWs
• 6×-speed or slower DVD-RWs (Ver.1.1, Ver.1.2
with CPRM
*1
)
• 16×-speed or slower DVD+Rs
• 16×-speed or slower DVD-Rs (Ver.2.0, Ver.2.1
with CPRM)
• 8×-speed or slower DVD+R DL (Double Layer)
discs
*6
“DVD+RW,” “DVD-RW,” “DVD+R,” “DVD+R DL,”
and “DVD-R” logos are trademarks.
Disc Type
Disc
Logo
Icon used
in this
manual
Formatting
(new discs)
Compatibility with other
DVD players (finalizing)
DVD+RW
Automatically
formatted
Playable on DVD+RW
compatible players
(automatically finalized)
DVD-
RW
VR
mode
Format in VR mode
*2
(page 48)
Playable only on VR mode
compatible players (finalization
unnecessary) (page 69)
Video
mode
Format in Video
mode
*2
(page 48)
Playable on most DVD players
(finalization necessary)
(page 69)
DVD+R
Automatically
formatted
Playable on DVD+R compatible
players (finalization necessary)
(page 69)
DVD+R DL
DVD-
R
VR
mode
Format in VR mode
using the “Disc Setting”
display (page 68)
Playable only on DVD-R VR
mode compatible players
(finalization necessary)
(page 69)
Video
mode
Automatically
formatted in Video
mode
Playable on most DVD players
(finalization necessary)
(page 69)
+
RW
-
RWVR
-
RW
Video
+
R
-
RVR
-
R
Video

13
Quick Guide to Disc Types
*1
CPRM (Content Protection for Recordable Media) is
a coding technology that protects copyrights for
images.
*2
Unused DVD-RWs are automatically formatted
according to the setting of “Format DVD-RW” in
“Features” setup (page 84).
*3
Erasing titles only frees up disc space if you erase the
last title.
*4
Erasing titles or chapters frees up disc space.
*5
Erasing titles or chapters does not free up disc space.
*6
When using DVD+R DL (Double Layer) discs, see
the instructions supplied with the discs.
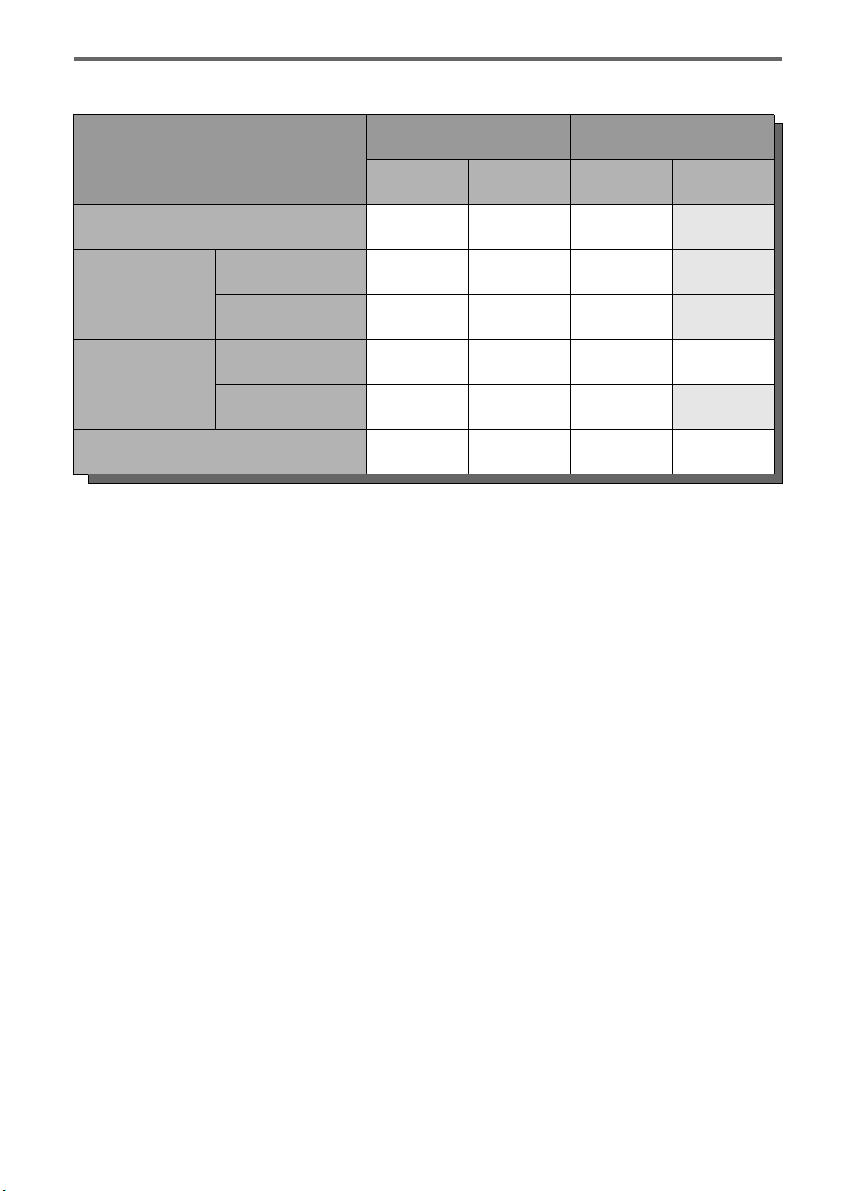
Recording Features Editing Features
Rewrite
(page 68)
Auto
Chapter
(page 50)
Change
Title Name
(page 61)
Erase
Title/
Chapter
(page 58)
A-B Erase
(page 59)
Divide
Title
(page 60)
Playlist
(page 62)
Yes Yes Yes Yes/No
*3
Yes Yes No
Yes Yes Yes Yes/Yes
*4
Yes Yes Yes
Yes Yes Yes Yes/No
*3
No No No
No Yes Yes Yes/No
*5
No No No
No Yes Yes Yes/Yes
*5
Yes Yes Yes
No Yes Yes Yes/No
*5
No No No
,continued
14
12 cm/8 cm discs
Discs that cannot be recorded on
•8 cm discs
• DVD-RAMs
Disc Type
12 cm 8 cm
Playback Recording Playback Recording
DVD+RW Yes Yes Yes No
DVD-RW
VR mode Yes Yes Yes No
Video mode Yes Yes Yes No
DVD-R
VR mode Yes Yes — —
Video mode Yes Yes Yes No
DVD+R Yes Yes — —
15
Quick Guide to Disc Types
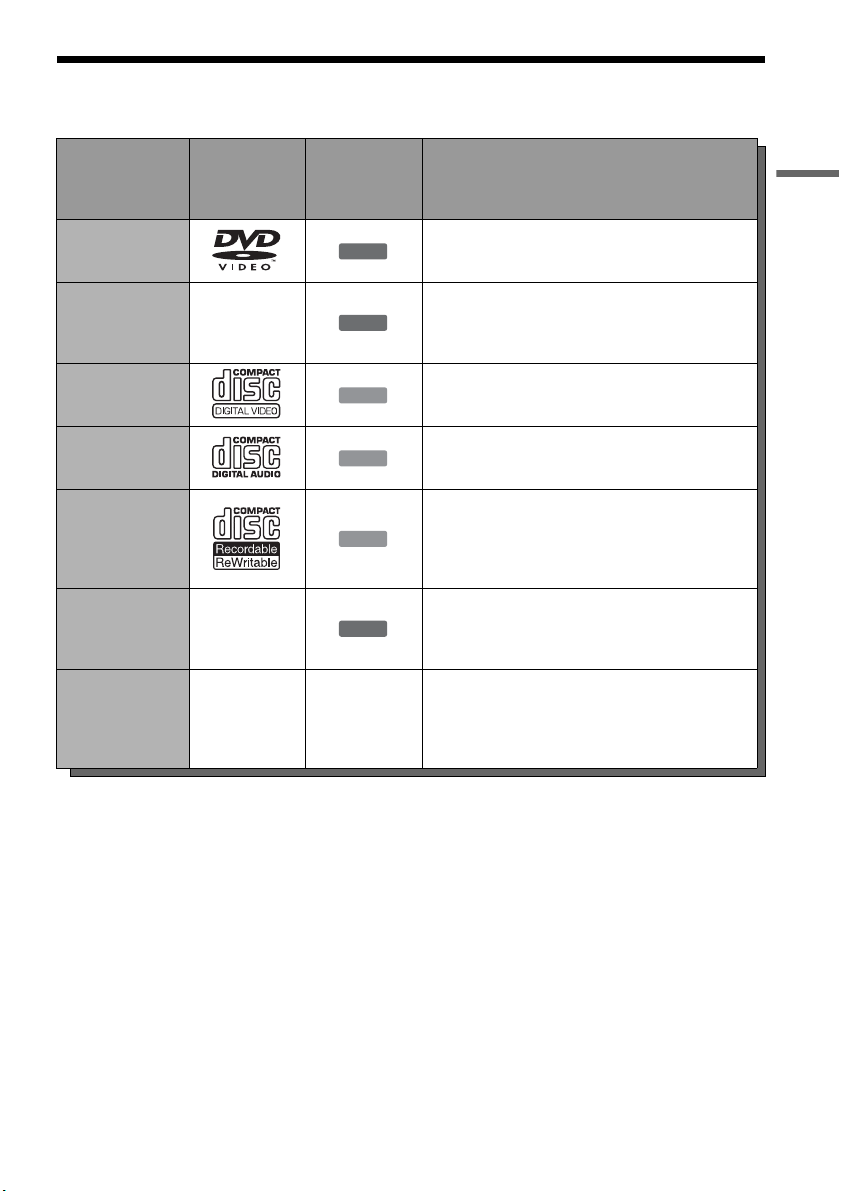
Playable Discs
“DVD VIDEO” and “CD” logos are trademarks.
* A logical format of files and folders on DATA-CDs,
defined by ISO (International Organization for
Standardization).
Discs that cannot be played
• CD-ROMs/CD-Rs/CD-RWs that are not
recorded in music CD or Video CD format, or do
not contain MP3 audio tracks or JPEG image
files.
• Data part of CD-Extras
• DVD-ROMs that are not recorded in DVD
Video format, or do not contain MP3 audio
tracks or JPEG image files.
• DVD Audio discs
• HD layer on Super Audio CDs
• DVD VIDEOs with a different region code
(see page 16)
• A disc recorded in a color system other than
NTSC, such as PAL or SECAM
Disc Type Disc Logo
Icon Used
in This
Manual
Characteristics
DVD VIDEO
Discs such as movies that can be purchased or
rented
DVD-RAM —
DVD-RAMs recorded by another recording
device. 12 cm discs without cartridges, or
removable from their cartridges can be played.
VIDEO CD
VIDEO CDs or CD-Rs/CD-RWs in VIDEO CD
format (with PBC function)
CD
Music CDs or CD-Rs/CD-RWs in music CD
format that can be purchased
DATA CD
CD-ROMs/CD-Rs/CD-RWs created on a PC or
similar device in music format, or MP3 or JPEG
format that conforms to ISO9660* Level 1/
Level 2
DATA DVD —
DVD-ROMs/DVD+RWs/DVD-RWs/DVD+Rs/
DVD-Rs in MP3 or JPEG format conforming to
Universal Disk Format (UDF)
8 cm DVD+RW/
DVD-RW/DVD-R
——
8 cm DVD+RWs, DVD-RWs, and DVD-Rs
recorded with a DVD video camera (Still images
recorded with a DVD video camera cannot be
played.)
DVD
RAM
VCD
CD
DATA CD
DATA DVD
,continued

16
Note on playback operations of DVD VIDEOs/
VIDEO CDs
Some playback operations of DVD VIDEOs/
VIDEO CDs may be intentionally set by software
producers. Since this recorder plays DVD
VIDEOs/VIDEO CDs according to the disc
contents the software producers designed, some
playback features may not be available. Also, see
the instructions supplied with the DVD VIDEOs/
VIDEO CDs.
Note on DualDiscs
A DualDisc is a two sided disc product which
mates DVD recorded material on one side with
digital audio material on the other side.
However, since the audio material side does not
conform to the Compact Disc (CD) standard,
playback on this product is not guaranteed.
Region code (DVD VIDEO only)
Your recorder has a region code printed on the rear
of the unit and will only play DVD VIDEOs
(playback only) labeled with identical region
codes. This system is used to protect copyrights.
DVD VIDEOs labeled will also play on this
recorder.
If you try to play any other DVD VIDEO, a
message will appear on the TV screen to indicate
that the disc is not playable. Depending on the
DVD VIDEO, no region code indication may be
labeled even though playing the DVD VIDEO is
prohibited by area restrictions.
Music discs encoded with copyright protection
technologies
This product is designed to playback discs that
conform to the Compact Disc (CD) standard.
Recently, various music discs encoded with
copyright protection technologies are being
marketed by some record companies. Please be
aware that among those discs, there are some that
do not conform to the CD standard and may not be
playable by this product.
Note on DVD+RWs/DVD+Rs, DVD-RWs/DVD-
Rs, or CD-RWs/CD-Rs recorded on other
equipment
Some DVD+RWs/DVD+Rs, DVD-RWs/DVD-
Rs, or CD-RWs/CD-Rs cannot be played on this
recorder due to the recording quality or physical
condition of the disc, or the characteristics of the
recording device and authoring software. The disc
will not play if it has not been correctly finalized.
For more information, see the operating
instructions for the recording device.
Notes
• You cannot mix VR mode and Video mode on the same
DVD-RW or DVD-R. To change the DVD-RW’s
format, reformat the disc (page 68). Note that a disc’s
contents will be erased after reformatting.
• You cannot shorten the time required for recording
even with high-speed discs. Also, you cannot record on
the disc if the disc is not 1x speed compatible.
• It is recommended that you use discs with “For Video”
printed on their packaging.
• You cannot add new recordings to DVD-RWs (Video
mode), DVD+R, or DVD-Rs (Video mode) recorded
on other equipment.
• You may not be able to further record on a DVD+RW
recorded on other equipment. Note that recording on
such discs may cause the recorder to rewrite the DVD
menu.
• If the disc contains PC data unrecognizable by this
recorder, the data may be erased.
ALL
X
Region code

17
Hookups and Settings
Hookups and Settings
Hooking Up the Recorder
Follow steps 1 to 7 to hook up and adjust the
settings of the recorder.
Notes
• Plug cords securely to prevent unwanted noise.
• See the instructions supplied with the components to be
connected.
• You cannot connect this recorder to a TV that does not
have a video input jack.
• Be sure to disconnect the power cord of each
component before connecting. Do not connect the
power cord until you reach “Connecting the Power
Cord” on page 26.
Step 1: Unpacking
Check that you have the following items:
• Audio/video cord
(phono plug × 3 y phono plug × 3) (1)
• Antenna cable (1)
• Remote commander (remote) (1)
• Size AA (R6) batteries (2)
Step 2: Connecting the
Antenna Cable
Select one of the following antenna hookups. Do
not connect the power cord until you reach
“Connecting the Power Cord” on page 26.
Notes
• If your antenna is a flat cable (300-ohm twin lead
cable), use an external antenna connector (not
supplied) to connect the antenna to the recorder.
• If you have separate cables for VHF and UHF
antennas, use a UHF/VHF band mixer (not supplied) to
connect the antenna to the recorder.
If you have Hookup
Cable box or satellite receiver with a
video/audio output
A (page 18)
Cable box with an antenna output
only
B (page 19)
Cable without cable box, or antenna
only (no cable TV)
C (page 20)
,continued
18
A: Cable box or satellite receiver with a video/audio output
With this hookup, you can record any channel on the cable box or satellite receiver. Be sure that the cable
box or satellite receiver is turned on. This connection is necessary to use the Synchro-Rec function
(page 53).
To watch cable or satellite programs, you need to match the channel on the recorder (LINE1) to the input
jack connected to the cable box or satellite receiver (LINE 1 IN).
Note
Synchro-Recording does not work with some tuners. For details, see the tuner’s operating instructions.
L
R
VIDEO
AUDIO
LINE OUT VHF/UHF
VIDEO
YL
P
B
R
P
R
AUDIO
LINE 1 IN
AUDIO OUT S VIDEO OUT
COMPONENT
VIDEO OUT
DIGITAL AUDIO OUT
OPTICAL COAXIAL
HDMI OUT
IN
OUT
ANT IN
RL
AUDIO
OUT
VIDEO
OUT
TO TV
VIDEO
LINE 1 IN
AUDIO
VHF/UHF
IN
OUT
Cable box/
satellite receiver
Antenna cable
(supplied)
to antenna input
Audio/video
cord (not supplied)
to LINE 1 IN
DVD recorder
: Signal flow
to VHF/UHF IN
to VHF/UHF
OUT
TV
Wall
19
Hookups and Settings
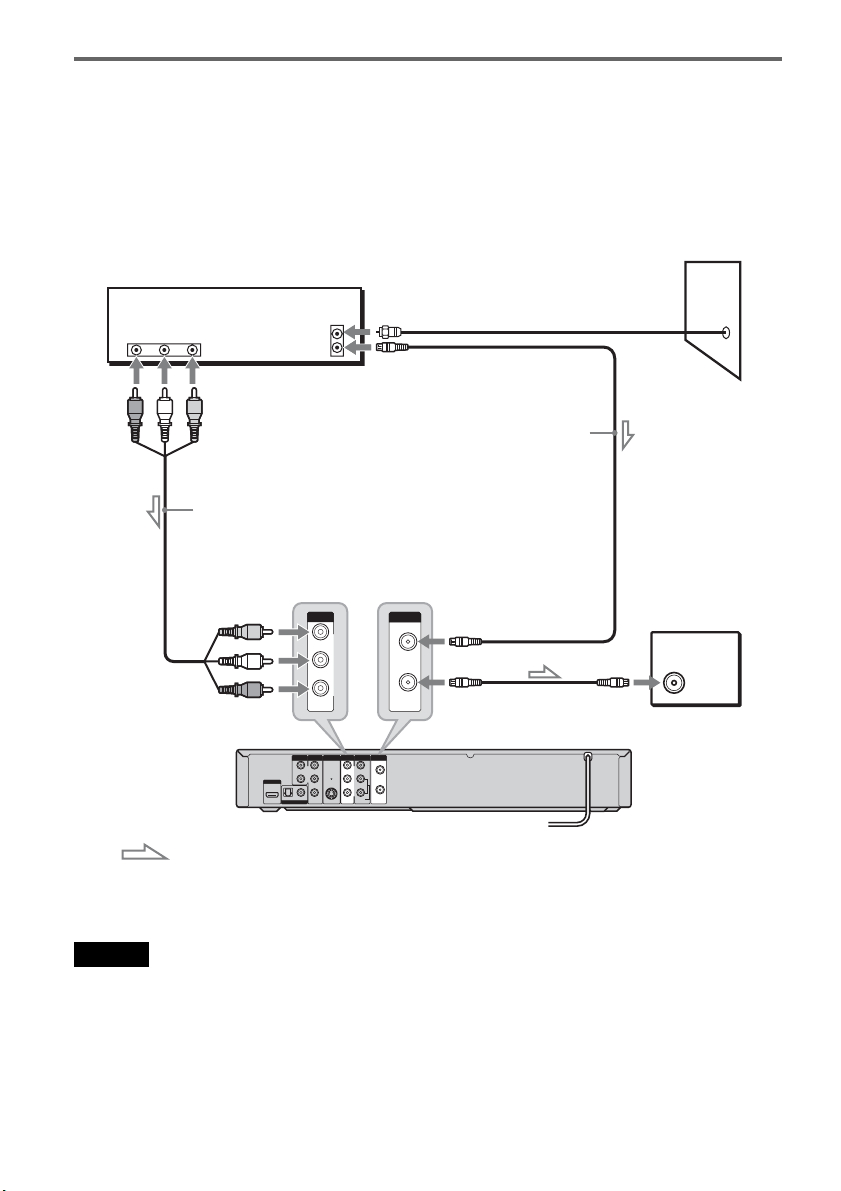
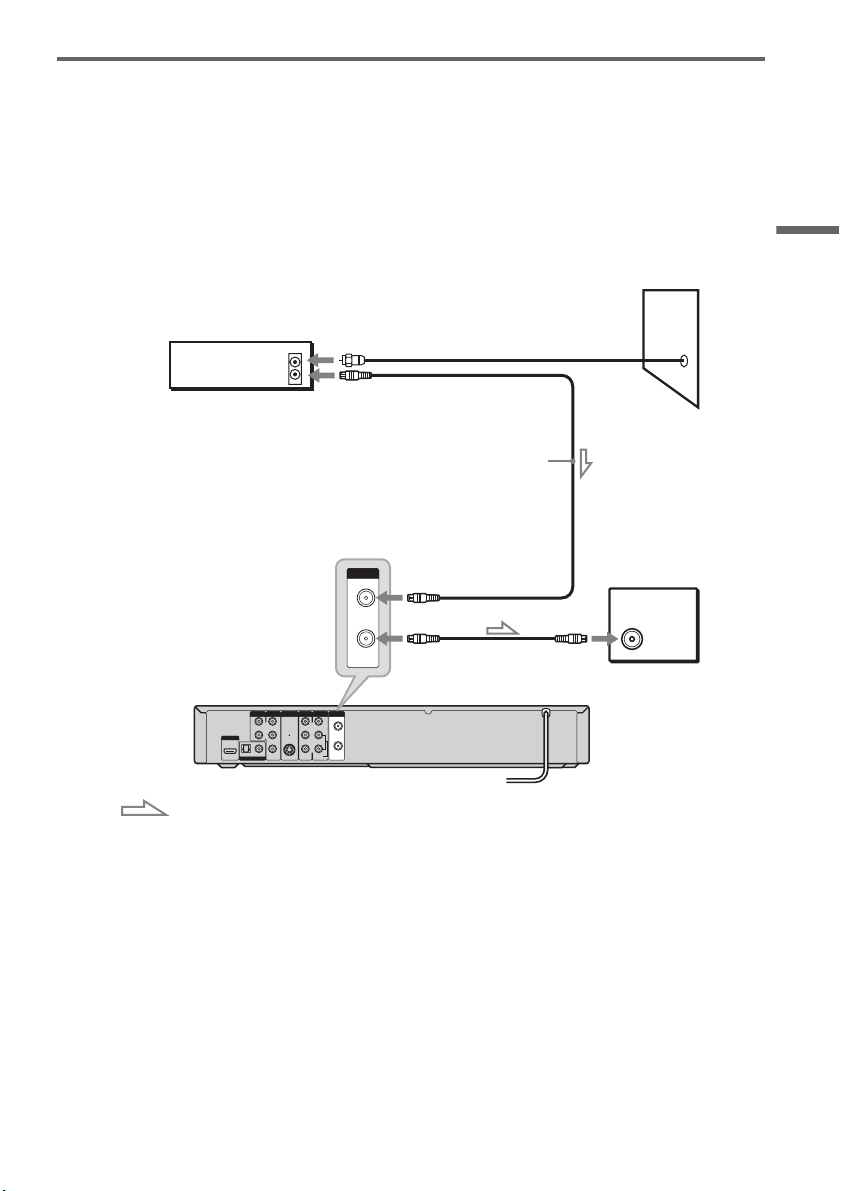
B: Cable box with an antenna output only
With this hookup, you can record any channel on the satellite receiver or cable box. Be sure that the cable
box or satellite receiver is turned on.
To record cable programs, you need to match the channel on the recorder (2ch, 3ch or 4ch) to the antenna
output channel on the cable box (2ch, 3ch or 4ch).
L
R
VIDEO
AUDIO
LINE OUT VHF/UHF
VIDEO
YL
P
B
R
P
R
AUDIO
LINE 1 IN
AUDIO OUT S VIDEO OUT
COMPONENT
VIDEO OUT
DIGITAL AUDIO OUT
OPTICAL COAXIAL
HDMI OUT
IN
OUT
VHF/UHF
IN
OUT
ANT IN
TO TV
Antenna cable
(supplied)
Cable box
DVD recorder
to VHF/UHF IN
to VHF/UHF
OUT
to antenna input
: Signal flow
TV
Wall
,continued
20
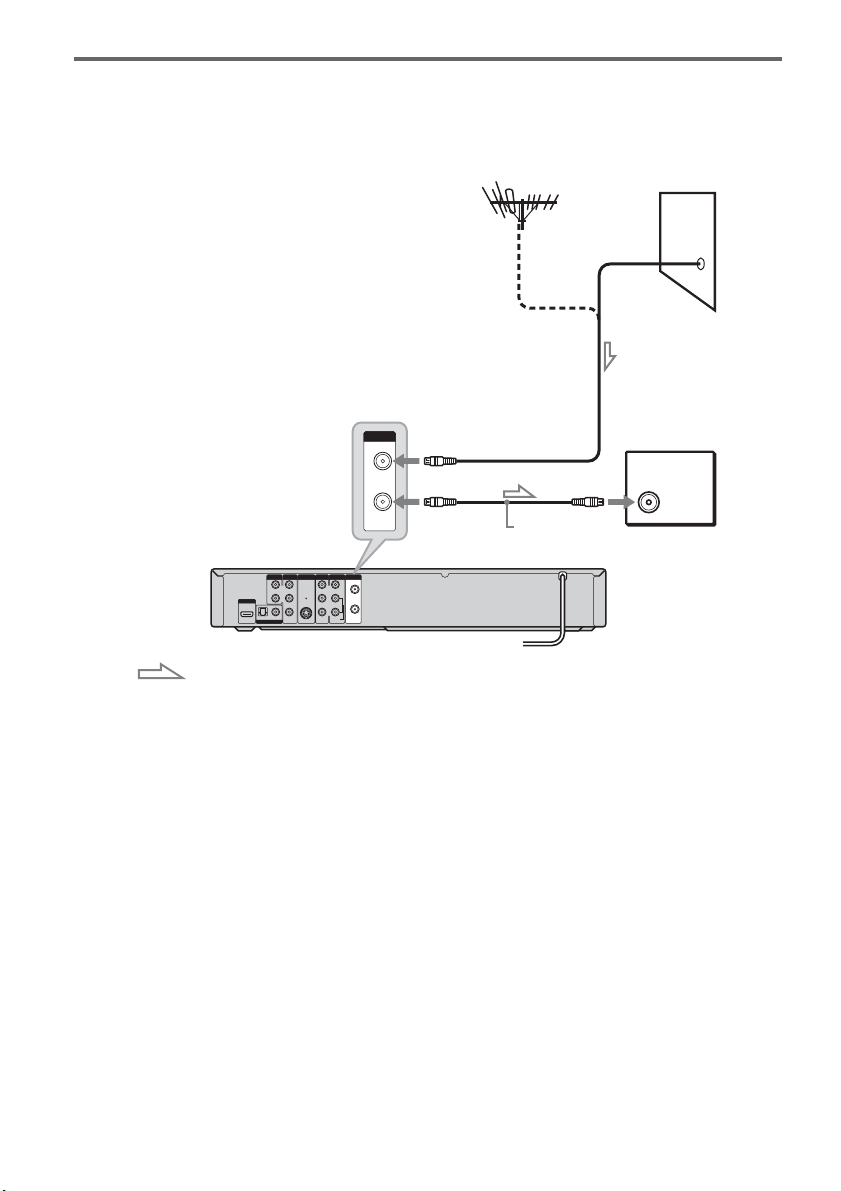
C: Cable without cable box, or antenna only (no cable TV)
Use this hookup if you watch cable channels without a cable box. Also use this hookup if you are using
a VHF/UHF antenna or separate VHF and UHF antennas.
With this hookup, you can record any channel by selecting the channel on the recorder.
L
R
VIDEO
AUDIO
LINE OUT VHF/UHF
VIDEO
YL
P
B
R
P
R
AUDIO
LINE 1 IN
AUDIO OUT S VIDEO OUT
COMPONENT
VIDEO OUT
DIGITAL AUDIO OUT
OPTICAL COAXIAL
HDMI OUT
IN
OUT
VHF/UHF
IN
OUT
to VHF/UHF
OUT
to antenna input
: Signal flow
DVD recorder
to VHF/UHF IN
Antenna cable
(supplied)
TV
Wall
21
Hookups and Settings
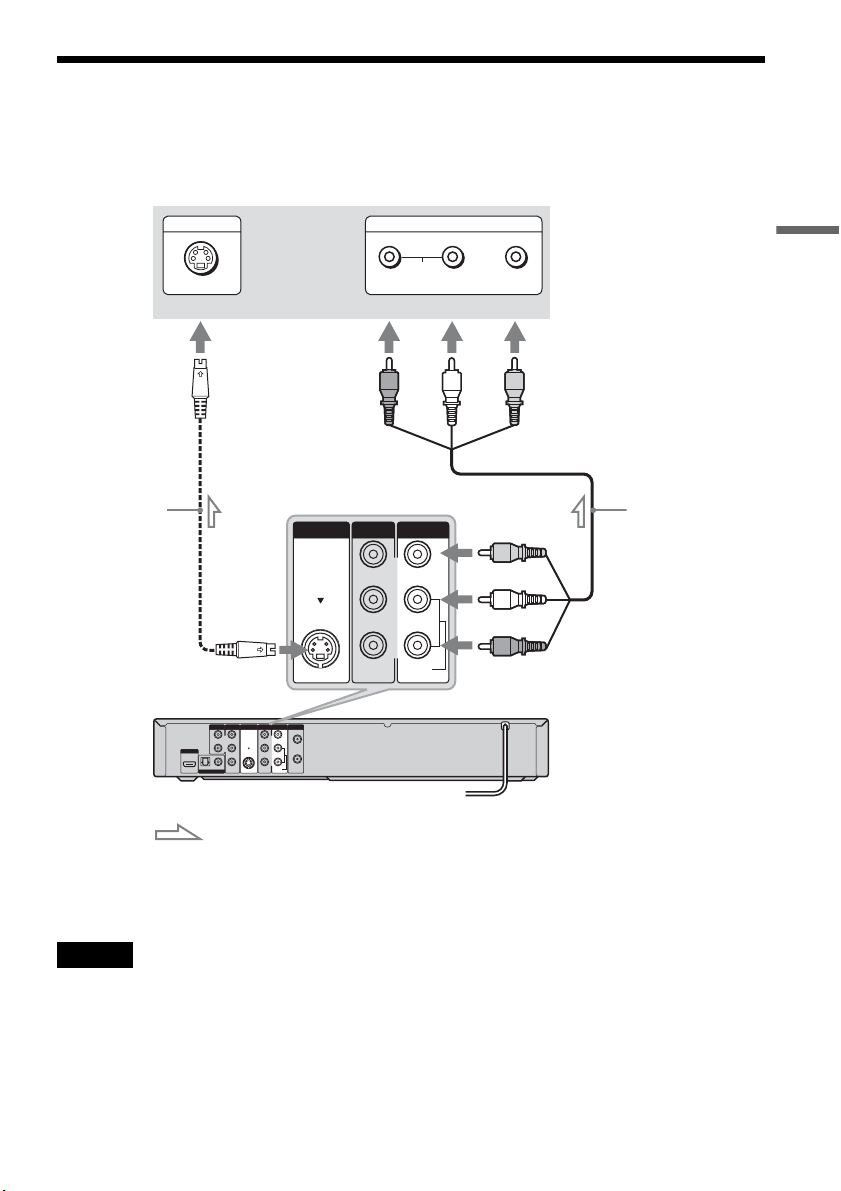
Step 3: Connecting to Your TV
Connect the supplied audio/video cord to the LINE OUT (VIDEO/AUDIO L/R) jacks of the recorder.
To enjoy higher quality images, connect an S video cord (not supplied) instead of the yellow (video) plug.
When using this connection, be sure to connect the audio cord to the LINE OUT (AUDIO L/R) jacks.
When playing “wide screen” images
Some recorded images may not fit your TV screen. To change the picture size, see page 79.
Notes
• Do not connect to the S VIDEO OUT and yellow LINE OUT (VIDEO) jacks at the same time.
• Do not connect your TV’s audio output jacks to the LINE IN (AUDIO L/R) jacks at the same time. This will cause
unwanted noise to come from your TV’s speakers.
L
R
VIDEO
AUDIO
LINE OUT VHF/UHF
VIDEO
YL
P
B
R
P
R
AUDIO
LINE 1 IN
AUDIO OUT S VIDEO OUT
COMPONENT
VIDEO OUT
DIGITAL AUDIO OUT
OPTICAL COAXIAL
HDMI OUT
IN
OUT
L
R
VIDEO
AUDIO
LINE OUT
VIDEO
AUDIO
LINE 1 IN
S VIDEO OUT
AUDIO
INPUT
R L VIDEO
INPUT
S VIDEO
: Signal flow
S video cord
(not supplied)
TV or projector
(red) (white) (yellow)
Audio/video cord
(supplied)
(red)
(white)
(yellow)
to S VIDEO OUT
DVD recorder
to LINE OUT
(VIDEO/AUDIO L/R)
,continued

22
If your TV has an HDMI input jack
Connect the HDMI* OUT jack using a certified HDMI cord (not supplied). You will enjoy high-quality
picture and sound. The HDMI indicator lights up on the front panel when the recorder outputs signals
through the HDMI OUT jack.
Be sure to turn off the recorder before connecting an HDMI cord.
* This DVD recorder incorporates High-Definition Multimedia Interface (HDMI
TM
) technology.
HDMI, the HDMI logo and High-Definition Multimedia Interface are trademarks or registered trademarks of HDMI
Licensing LLC.
Notes
• You cannot connect the HDMI OUT jack to DVI jacks that are not HDCP compliant (e.g., DVI jacks on PC displays).
• HD (High Definition) signal through this recorder is converted to SD (Standard Definition) signal, even if the HDMI
OUT connection is used.
L
R
VIDEO
AUDIO
LINE OUT VHF/UHF
VIDEO
YL
P
B
R
P
R
AUDIO
LINE 1 IN
AUDIO OUT S VIDEO OUT
COMPONENT
VIDEO OUT
DIGITAL AUDIO OUT
OPTICAL COAXIAL
HDMI OUT
IN
OUT
HDMI IN
HDMI OUT
: Signal flow
TV or
projector
to HDMI OUT
DVD recorder
HDMI cord (not supplied)
to HDMI input
23
Hookups and Settings
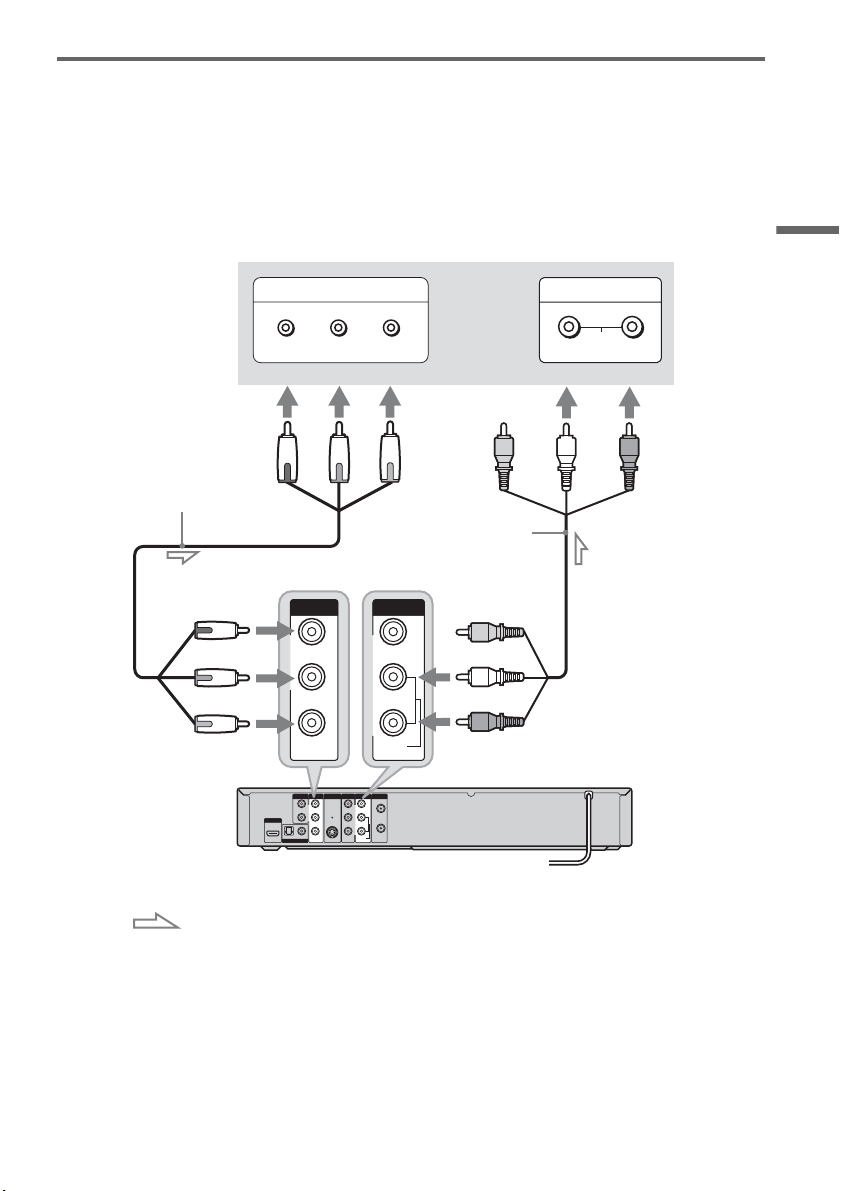
If your TV has component video input jacks
Connect the COMPONENT VIDEO OUT jacks using a component video cord (not supplied) or three
video cords (not supplied) of the same kind and length. You will enjoy accurate color reproduction and
high quality images.
If your TV accepts progressive 480p format signals, you must use this connection and then set
“Progressive” of “Video” to “On” in the “Setup” display (page 80). The “PROGRESSIVE” indicator
lights up when the recorder outputs progressive signals.
When using this connection, be sure to connect the audio cord to the LINE OUT (AUDIO L/R) jacks.
L
R
VIDEO
AUDIO
LINE OUT VHF/UHF
VIDEO
YL
P
B
R
P
R
AUDIO
LINE 1 IN
AUDIO OUT S VIDEO OUT
COMPONENT
VIDEO OUT
DIGITAL AUDIO OUT
OPTICAL COAXIAL
HDMI OUT
IN
OUT
L
R
VIDEO
AUDIO
LINE OUT
Y
P
B
P
R
COMPONENT
VIDEO OUT
COMPONENT VIDEO IN
PB PRY
AUDIO
LR
INPUT
: Signal flow
TV or projector
(red)
(white) (green)
Component video cord
(not supplied)
(red)(blue)
(red)
(green)
(blue)
to COMPONENT
VIDEO OUT
Audio/video cord
(supplied)
(white)
(red)
to LINE OUT
(AUDIO L/R)
DVD recorder

24
Step 4: Connecting to Your AV Amplifier (Receiver)
Select one of the following patterns A or B, according to the input jack on your AV amplifier (receiver).
This will enable you to listen to DVD audio tracks through your AV amplifier (receiver).
L
R
VIDEO
AUDIO
LINE OUT VHF/UHF
VIDEO
YL
P
B
R
P
R
AUDIO
LINE 1 IN
AUDIO OUT S VIDEO OUT
COMPONENT
VIDEO OUT
DIGITAL AUDIO OUT
OPTICAL COAXIAL
HDMI OUT
IN
OUT
L
R
AUDIO OUT
AUDIO
INPUT
L
R
B
A
DIGITAL AUDIO OUT
OPTICAL COAXIAL
HDMI OUT
: Signal flow
AV amplifier (receiver)
(red)
(white)
Audio cord
(not supplied) (white)
(red)
DVD recorderto AUDIO OUT (L/R)
to DIGITAL AUDIO OUT
(COAXIAL or OPTICAL)
Optical digital cord
(not supplied)
Coaxial digital cord
(not supplied)
[Speakers]
Rear (L)
Front (L)
Center
[Speakers]
Rear (R)
Front (R)
Subwoofer
or
AV amplifier (receiver)
with a decoder
HDMI cord
(not supplied)
or
to HDMI OUT
to coaxial or optical
digital input
to HDMI input
25
Hookups and Settings
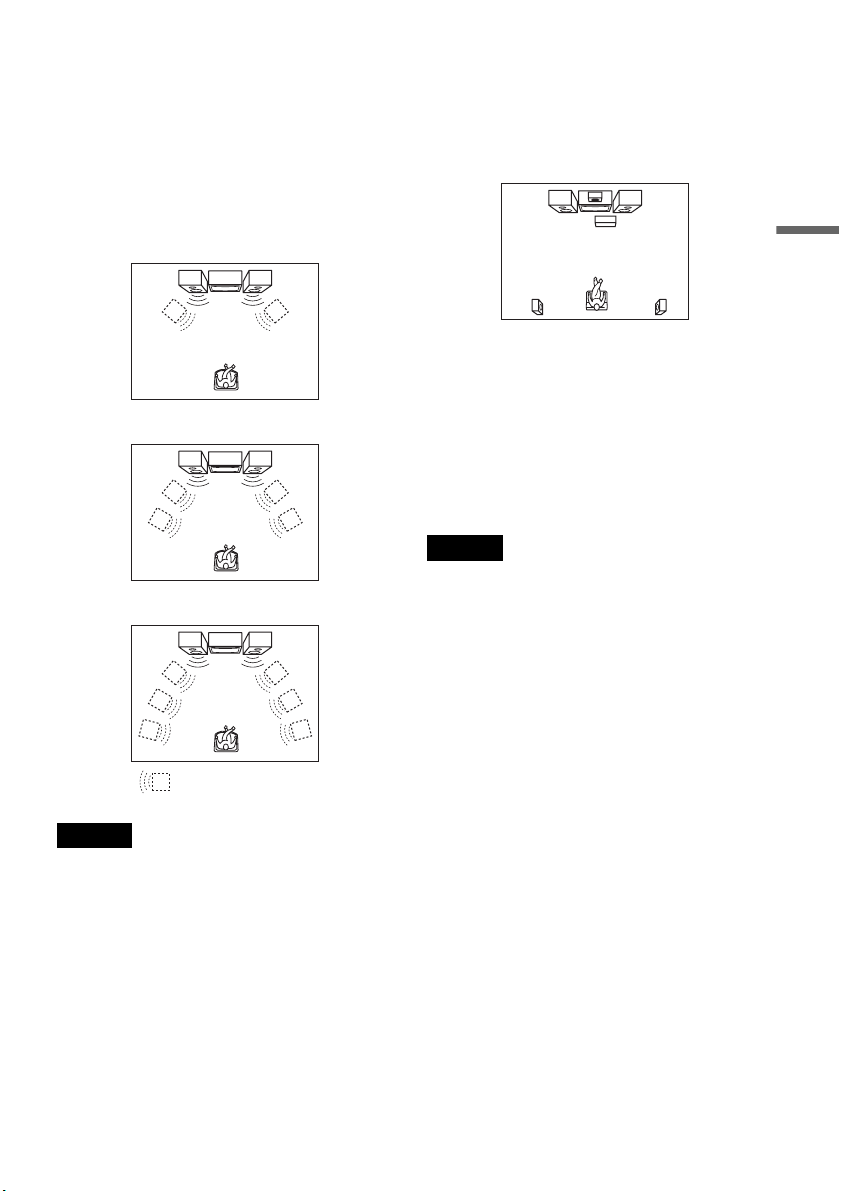
A Connecting to audio L/R jacks
This connection uses a stereo amplifier’s
(receiver’s) two front speakers for sound.
You can enjoy the surround function that creates
virtual speakers from two stereo speakers. Select
“Surround1,” “Surround2,” or “Surround3” in
“Surround” of “Audio” setup (page 82).
Surround 1
Surround 2
Surround 3
Note
Make sure that your listening position is between and at
an equal distance from your speakers, and that the
speakers are located in similar surroundings.
B Connecting to a digital audio input jack
Use this connection if your AV amplifier
(receiver) has a Dolby
*1
Digital or DTS
*2
decoder
and a digital input jack. You can enjoy the
surround effect of Dolby Digital (5.1ch) or DTS
(5.1ch).
*1
Manufactured under license from Dolby Laboratories.
“Dolby” and the double-D symbol are trademarks of
Dolby Laboratories.
*2
“DTS” and “DTS Digital Out” are trademarks of DTS,
Inc.
z Hint
For correct speaker location, see the operating
instructions supplied with the connected components.
Notes
• After you have completed the connection, make the
appropriate settings under “Audio Connection Setup”
in Easy Setup (page 29). Otherwise, no sound or a loud
noise will come from your speakers.
• With a coaxial or optical digital connection, you cannot
use the virtual surround effects of this recorder.
• When outputting from the DIGITAL AUDIO OUT
jacks, you cannot switch the bilingual sounds on a
DVD-RW (VR mode) or DVD-R (VR mode) by
pressing AUDIO.
• When you connect the recorder to an AV amplifier
(receiver) using an HDMI cord, you will need to do one
of the following:
– Connect the AV amplifier (receiver) to the TV with
an HDMI cord.
– Connect the recorder to the TV with a video cord
other than HDMI cord (component video cord, S
VIDEO cord, or audio/video cord).
• The HDMI OUT jack cannot output Dolby Digital
signals for digital broadcasts. To hear Dolby Digital,
use the DIGITAL AUDIO OUT jacks.
Virtual speaker
26
Step 5: Connecting the
Power Cord
Plug the recorder and TV power cords into an AC
outlet. After you connect the power cord, you
must wait for a short while before
operating the recorder. You can operate the
recorder only after the front panel display lights up
and the recorder enters standby mode.
If you connect additional equipment to this
recorder (page 32), be sure to connect the power
cord only after all connections are complete.
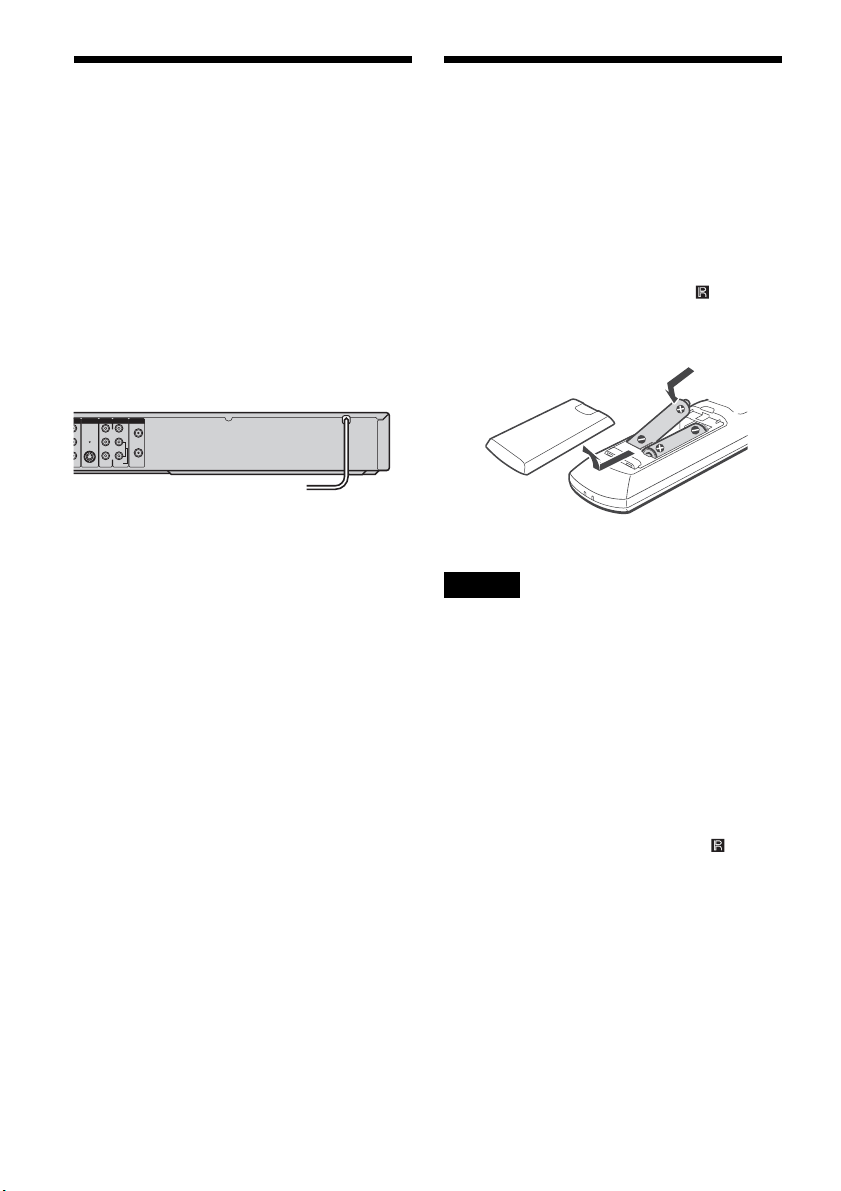
Step 6: Preparing the
Remote
You can control the recorder using the supplied
remote.
Insert two size AA (R6) batteries by matching the
3 and # ends on the batteries to the markings
inside the battery compartment. Be sure to close
the battery cover properly. When using the
remote, point it at the remote sensor on the
recorder.
Notes
• If the supplied remote interferes your other Sony DVD
recorder or player, change the command mode number
for this recorder (page 28).
• Use the batteries correctly to avoid possible leakage
and corrosion. Do not touch the liquid with bare hands
should leakage occur. Observe the following:
– Do not use a new battery with an old battery, or
batteries of different manufacturers.
– Do not attempt to recharge the batteries.
– If you do not intend to use the remote for an extended
period of time, remove the batteries.
– If battery leakage occurs, wipe out any liquid inside
the battery compartment, and insert new batteries.
• Do not expose the remote sensor (marked on the
front panel) to strong light, such as direct sunlight or
lighting apparatus. The recorder may not respond to the
remote.
• With normal use, the batteries should last about three to
six months.
• Do not leave the remote in an extremely hot or humid
place.
• Do not drop any foreign object into the remote casing,
particularly when replacing the batteries.
HDMI OUT
L
R
VIDEO
AUDIO
LINE OUT VHF/UHF
VIDEO
Y
P
B
P
R
AUDIO
LINE 1 IN
S VIDEO OUT
O
NENT
O
OUT
IN
OUT
to AC outlet <
27
Hookups and Settings
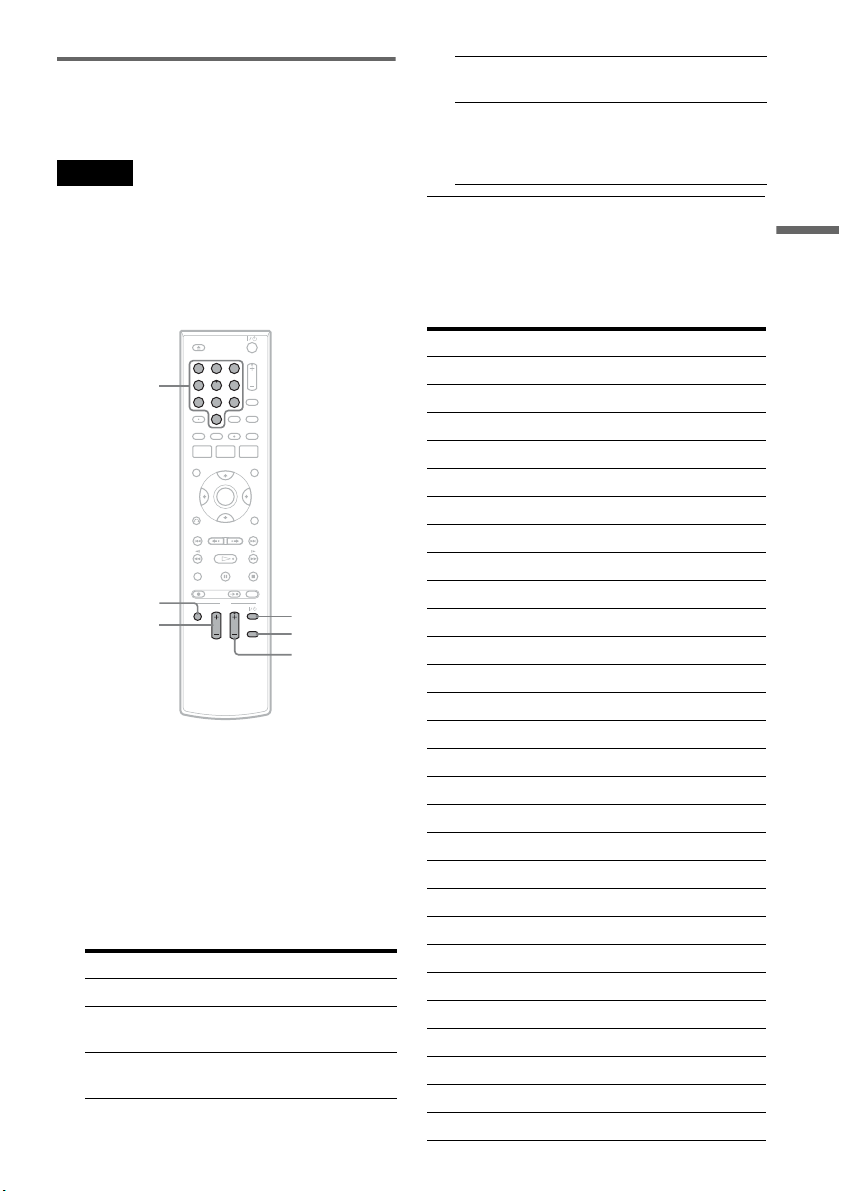
Controlling TVs with the remote
You can adjust the remote control’s signal to
control your TV.
Notes
• Depending on the TV, some or all of the buttons below
may not work for the TV.
• If you enter a new code number, the code number
previously entered will be erased.
• When you replace the batteries of the remote, the code
number may be reset to the default setting. Set the
appropriate code number again.
1 Hold down TV "/1 located at the bottom of
the remote.
Do not press "/1 at the top of the remote.
2 With TV "/1 pressed down, enter your
TV’s manufacturer code (see below) using
the number buttons.
3 Release TV "/1.
The following buttons are for TV.
Code numbers of controllable TVs
If more than one code number is listed, try
entering them one at a time until you find the one
that works with your TV.
Press To
TV "/ 1 Turn your TV on or off
TV VOL +/– Adjust the volume of
your TV
TV CH +/– Select the channel on
your TV
11 22 33
44 55 66
77 88
00
99
Number
buttons
TV INPUT
TV VOL +/–
TV DIGITAL/
ANALOG
TV CH +/–
TV "/1
TV INPUT Switch your TV’s input
source
TV DIGITAL /
ANALOG
Select the broadcast on a
Sony TV that can switch
between digital and
analog
Manufacturer Code number
Sony 01 (default)
Akai 04
AOC 04
Centurion 12
Coronado 03
Curtis-Mathes 12, 14
Daewoo 04, 22
Daytron 03, 12
Fisher 11
General Electric 04, 06, 10
Hitachi 02, 03, 04
J.C.Penney 04, 10, 12
JVC 09
KMC 03
LG/Gold Star 03, 04, 17
Magnavox 03, 04, 08, 12, 21
Marantz 04, 13
MGA/Mitsubishi 04, 12, 13, 17
NEC 04, 12
Panasonic 06, 19
Philco 02, 03, 04, 08
Philips 08, 21
Pioneer 06, 16
Portland 03
Proscan 10
Quasar 06, 18
Radio Shack 05, 10, 14
RCA 04, 10
,continued
28
If you have a Sony DVD player or
more than one Sony DVD recorder
If the supplied remote interferes with your other
Sony DVD recorder or player, set the command
mode number for this recorder and the supplied
remote to one that differs from the other Sony
DVD recorder or player after you have completed
“Step 7: Easy Setup.”
The default command mode setting for this
recorder and the supplied remote is DVD 3.
1 Check that Easy Setup (page 29) has been
finished. If Easy Setup has not been
finished, first perform Easy Setup.
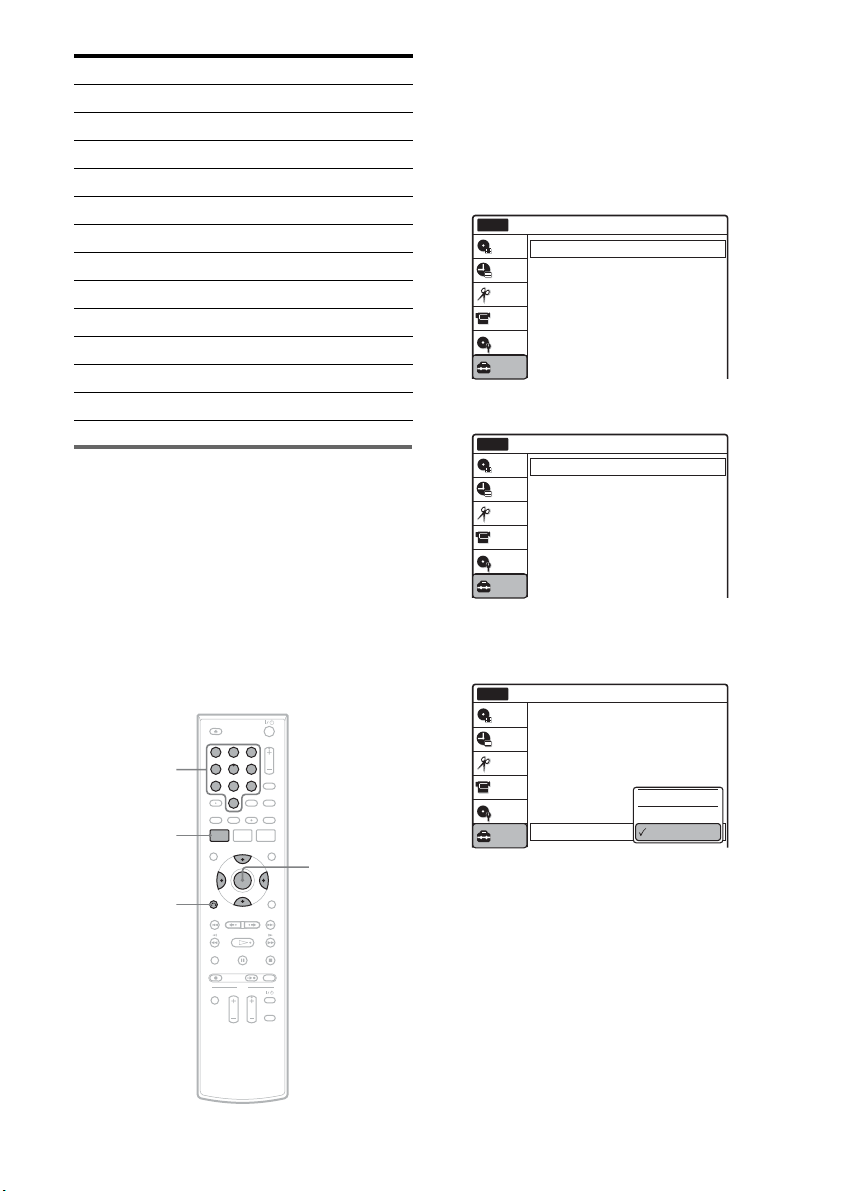
2 Press SYSTEM MENU.
The System Menu appears.
3 Select “Setup,” and press ENTER.
4 Select “Options,” and press ENTER.
5 Select “Command Mode,” and press
ENTER.
6 Select a command mode (“DVD 1,” “DVD
2,” or “DVD 3”), and press ENTER.
7 Set the command mode for the remote so it
matches the command mode for the
recorder you set above.
Follow the steps below to set the command
mode on the remote.
A Hold down ENTER.
Sampo 12
Samsung 03, 04, 12, 20
Sanyo 11, 14
Scott 12
Sears 07, 10, 11
Sharp 03, 05, 18
Sylvania 08, 12
Teknika 03, 08, 14
Toshiba 07, 18
Wards 03, 04, 12
Yorx 12
Zenith 14, 15
Manufacturer Code number
11 22 33
44 55 66
77 88
00
99
SYSTEM
MENU
M/m/</,,
ENTER
O RETURN
Number
buttons
10:10 AM
Tuner Preset
Clock Set
Video
Audio
Features
Options
Easy Setup
Setup
Disc Setting
Edit
Title List
Timer
Setup
No Disc
DV/D8 Dubbing
Options
Language
Parental
Digital Wide Control
Caption Service
Caption Setting
Front Display
Command Mode
Factory Setting
: 16:9
: Off
: Auto
: DVD 3
10:10 AM
Setup
Disc Setting
Edit
Title List
Timer
No Disc
DV/D8 Dubbing
Options
10:10 AM
Setup
Disc Setting
Edit
Title List
Timer
No Disc
Language
Parental
Digital Wide Control
Caption Service
Caption Setting
Front Display
Command Mode
Factory Setting
: 16:9
: Off
: Auto
: DVD 3
DV/D8 Dubbing
DVD 1
DVD 2
DVD 3

29
Hookups and Settings
B While holding down ENTER, enter the
command mode code number using the
number buttons.
C Hold down both the number buttons and
ENTER at the same time for more than
three seconds.
To return to the previous display
Press O RETURN.
To check the command mode for the recorder
Press x (stop) on the recorder when the recorder
is turned off. The command mode for the recorder
appears in the front panel display.
Step 7: Easy Setup
Follow the steps below to make the minimum
number of basic adjustments for using the
recorder. If you do not complete Easy Setup, it
will appear each time you turn on your recorder.
Settings are made in the following order.
m
m
m
m
m
1 Turn on the TV.
2 Press "/1.
The recorder turns on.
Command Mode Code number
DVD1 number button 1
DVD2 number button 2
DVD3 number button 3
If the command mode for the recorder has not
been changed, set the command mode for the
remote to the default setting of DVD3. If the
command mode for the remote is changed to
DVD1 or DVD2, you will be unable to operate
this recorder.
OSD Language Setup
Tuner and Channel Setup
Clock Setup
TV Type Setup
Audio Connection Setup
Finished!
11 22 33
44 55 66
77 88
00
99
M/m/</,,
ENTER
O RETURN
"/1
,continued
30
3 Switch the input selector on your TV so that
the signal from the recorder appears on
your TV screen.
“Initial setting necessary to operate the DVD
recorder will be made. You can change them
later using setup.” appears.
• If this message does not appear, select “Easy
Setup” in the “Setup” display to run Easy
Setup (page 88).
4 Press ENTER.
The setup display for selecting the language
used in the on-screen display appears.
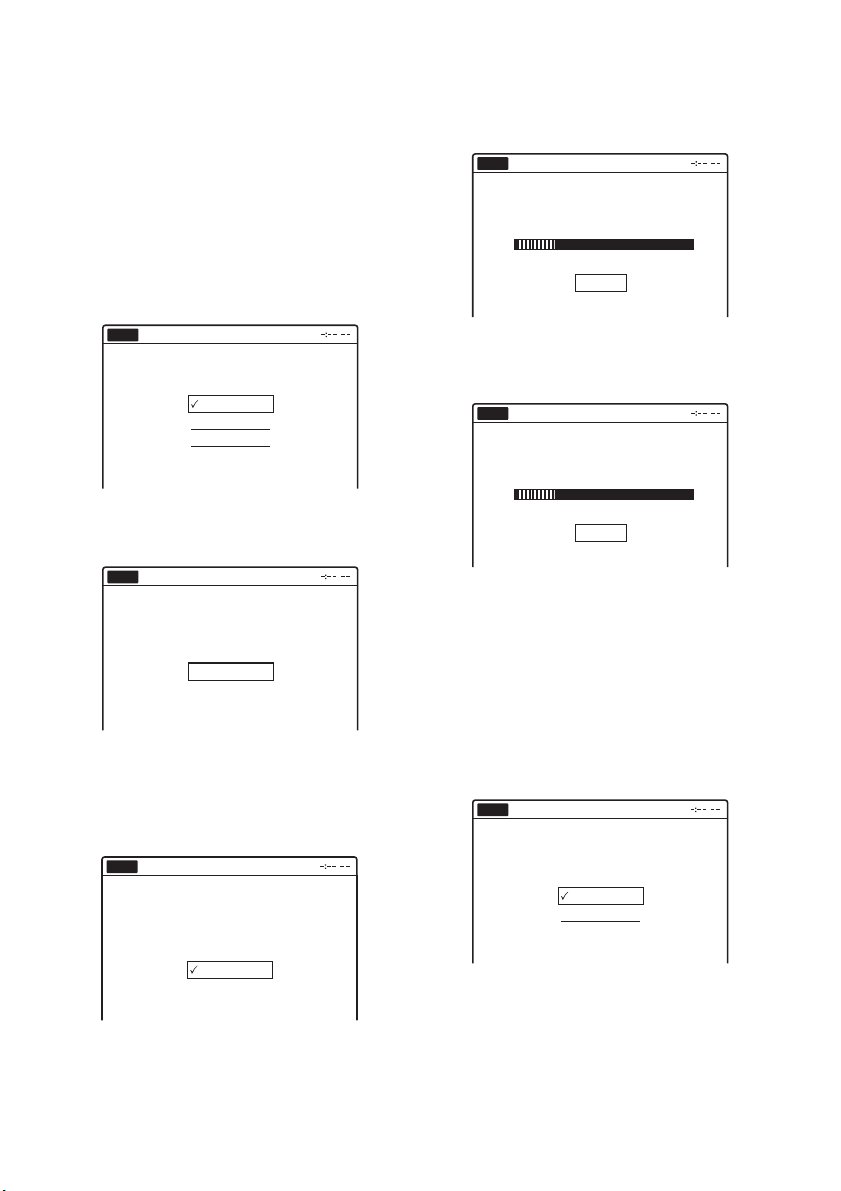
5 Select a language, and press ENTER.
The display to confirm scanning appears.
6 Press ENTER.
The setup display for channel setting appears.
7 Select whether or not you have a cable
connection.
If you use an antenna only (no cable TV),
select “Antenna.”
For all other connections, select “Cable.”
8 Press ENTER.
The Tuner Preset function automatically starts
searching for all of receivable analog channels
and presets them.
After searching for analog channels is
complete, receivable digital channels are then
searched for automatically.
• This may take 40 minutes or more to
complete.
• If you press ENTER during search for
channels, the recorder will stop searching
for channels and advance the next step.
To set analog channels manually, see page 77.
After the Tuner Preset is finished, the setup
display for clock setting appears.
9 Select a method for setting the clock.
English
Français
Español
Easy Setup
Select the screen language.
No Disc
Easy Setup
No Disc
Press [ENTER] to start scanning
Digital and Analog channels.
Start
Select the way in which you will receive
channels.
Antenna
Cable
Easy Setup
No Disc
Searching for receivable Analog channels.
Please wait.
Easy Setup
No Disc
Stop
Searching for receivable Digital channels.
Please wait.
Allow 40+ minutes for completion.
To stop searching, press [Enter].
Easy Setup
No Disc
Stop
Select a method for setting the clock.
If you select "Auto", this recorder will look
for a time signal when you turn it off.
Auto
Manual
Easy Setup
No Disc
31
Hookups and Settings
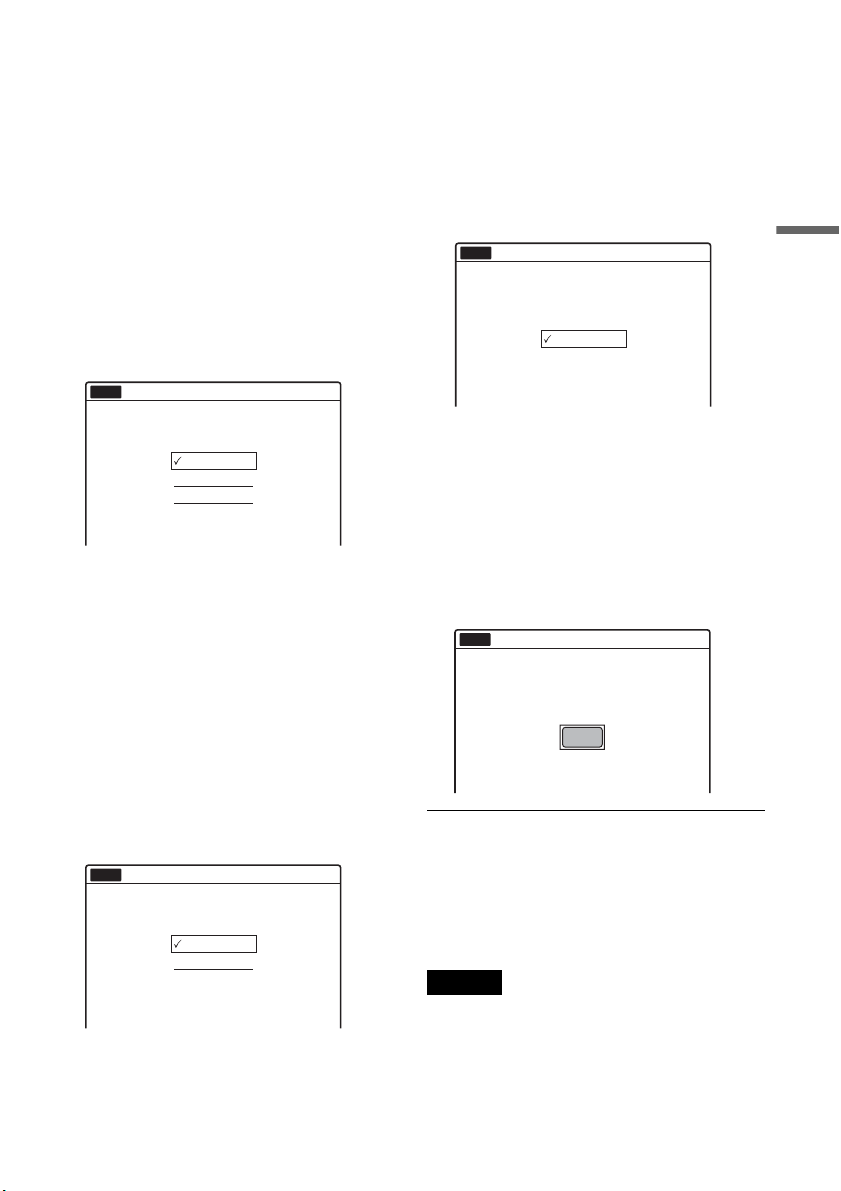
10
Select “Manual,” and press ENTER.
Press M/m to set the month and press ,. Set
the day, year, hour, minutes, and AM/PM in
the same way, then press ENTER. The day of
the week is set automatically.
• If you used antenna hookup C (page 20),
you can select “Auto.” The recorder will
automatically search for a channel that
carries a time signal when you turn off the
recorder after finishing Easy Setup.
The setup display for selecting the picture size
of the connected TV appears.
11
Select the setting that matches your TV
type.
“16:9”: For wide-screen TVs or standard TVs
with a wide screen mode.
“4:3 Letter Box”: For standard TVs.
Displays “wide screen” pictures with bands
on the upper and lower sections of the screen.
“4:3 Pan Scan”: For standard TVs.
Automatically displays “wide screen”
pictures on the entire screen and cuts off the
sections that do not fit.
For details, see “Video Settings (Video)” on
page 79.
12
Press ENTER.
The setup display for selecting the type of
Dolby Digital signal appears.
13
Select the type of Dolby Digital signal you
want to send to your amplifier (receiver).
If your AV amplifier (receiver) has a Dolby
Digital decoder, select “Dolby Digital.”
Otherwise, select “D-PCM.”
14
Press ENTER.
The setup display for selecting the type of
DTS signal appears.
15
Select whether or not you want to send a
DTS signal to your amplifier (receiver),
and press ENTER.
If your AV amplifier (receiver) has a DTS
decoder, select “On.” Otherwise, select “Off.”
16
Press ENTER when “Finish” appears.
Easy Setup is finished. All connections and
setup operations are complete.
To return to the previous display
Press O RETURN.
z Hint
If you want to run Easy Setup again, select “Easy Setup”
in the “Setup” display (page 88).
Note
To record TV programs using the timer, you must set the
clock accurately.
16 : 9
4 : 3 Letter Box
4 : 3 Pan Scan
Easy Setup
Select your TV screen type.
10:10 AM
No Disc
D-PCM
Dolby Digital
Easy Setup
Dolby Digital
10:10 AM
No Disc
On
Off
Easy Setup
DTS
10:10 AM
No Disc
Finish
Easy Setup
Easy Setup is finished.
10:10 AM
No Disc
32
Connecting a VCR or Similar Device
After disconnecting the recorder’s power cord from an AC outlet, connect a VCR or similar recording
device to the LINE IN jacks of this recorder. See also the instruction manual supplied with the connected
equipment.
If you connect equipment that has a timer function, you can use the Synchro Rec function (page 53). In
this case, connect the equipment to the LINE 1 IN jacks (page 33).
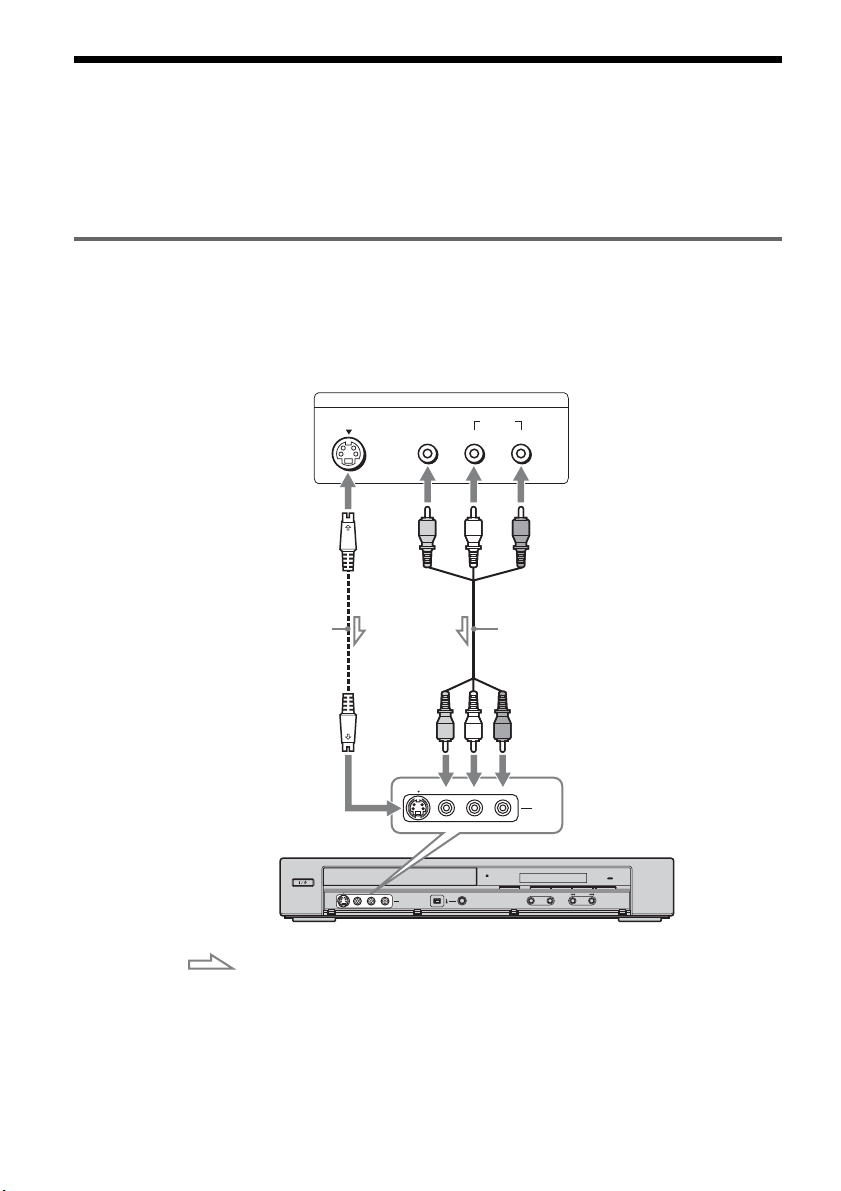
Connecting to the LINE 2 IN jacks on the front panel
Connect a VCR or similar device to the LINE 2 IN jacks of this recorder. If the equipment has an S video
jack, you can use an S video cord (not supplied) instead of the yellow (video) plug of the audio/video cord.
Do not connect to the S VIDEO and yellow VIDEO jacks at the same time.
You can connect a second DVD player and record DVDs.
HDMI
DV IN
L(MONO) AUDIO RVIDEOS VIDEO
LINE-2 IN
ONE-TOUCH DUBBING
+
CHANNEL
-
S VIDEO
AUDIO
LR
VIDEO
OUTPUT
L(MONO) AUDIO RVIDEOS VIDEO
LINE-2 IN
VCR, etc.
S video cord
(not supplied)
Audio/video cord
(not supplied)
DVD recorder
to LINE 2 IN
: Signal flow
33
Hookups and Settings
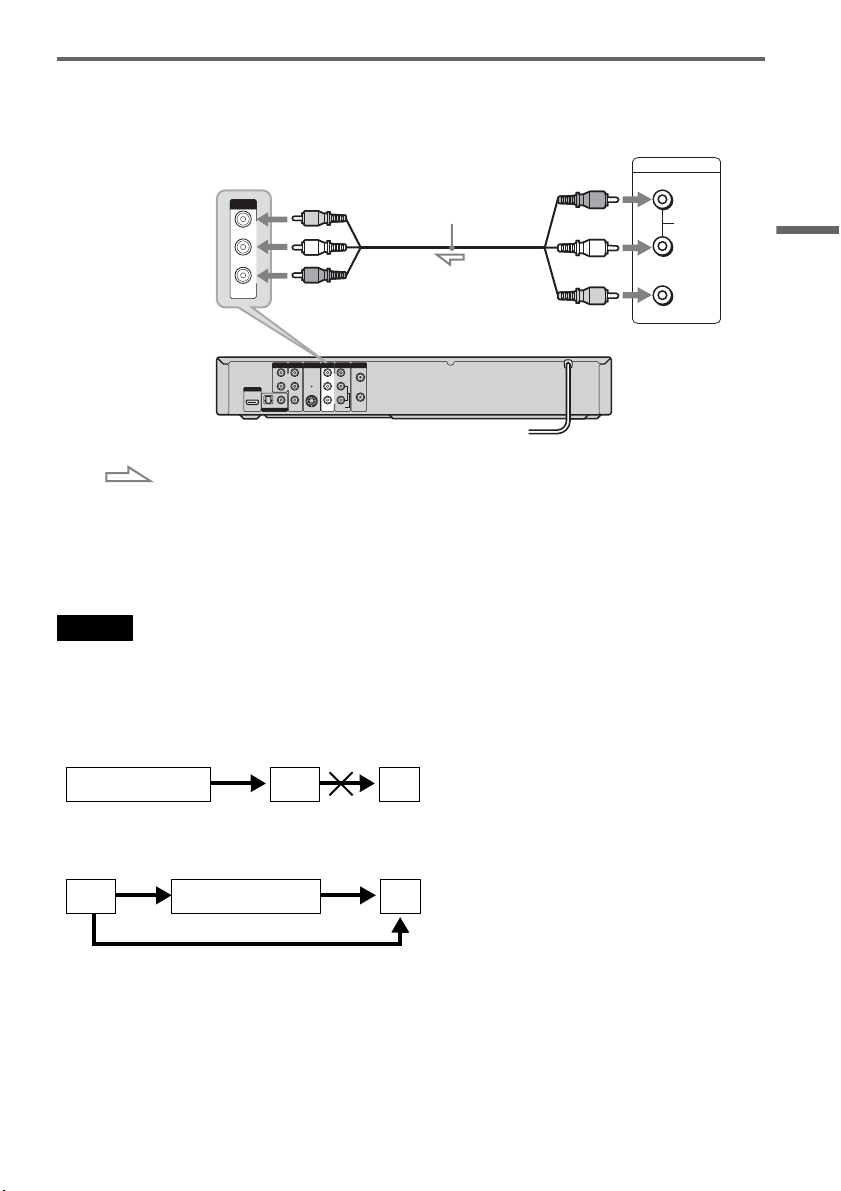
Connecting to the LINE 1 IN jacks
You can connect a VCR or similar device.
z Hints
• When the connected equipment outputs only monaural sound, connect an audio cord to the white LINE IN AUDIO L
(mono) jack.
• To record from connected equipment, select an input source (LINE1 or LINE2) to match the jack you connected to
(page 55).
Notes
• Do not connect more than one type of video cord between the recorder and your TV at the same time.
• Pictures containing copy protection signals that prohibit any copying cannot be recorded. You cannot dub from DVD
VIDEOs to this recorder.
• Do not connect the output jack of this recorder to another equipment’s input jack with the other equipment’s output
jack connected to the input jack of this recorder. Noise (feedback) may result.
• If you pass the recorder signals via the VCR, you may not receive a clear image on your TV screen.
Be sure to connect your VCR to the DVD recorder and your TV in the order shown below. To watch video tapes,
watch the tapes through a second line input on your TV.
L
R
VIDEO
AUDIO
LINE OUT VHF/UHF
VIDEO
YL
P
B
R
P
R
AUDIO
LINE 1 IN
AUDIO OUT S VIDEO OUT
COMPONENT
VIDEO OUT
DIGITAL AUDIO OUT
OPTICAL COAXIAL
HDMI OUT
IN
OUT
LINE OUTPUT
AUDIO
R
L
VIDEO
VIDEO
LINE 1 IN
AUDIO
Audio/video cord
(not supplied)
VCR, etc.
: Signal flow
to LINE 1 IN
DVD recorder
VCRDVD recorder TV
VCR DVD recorder TV
Line input 1
Line input 2
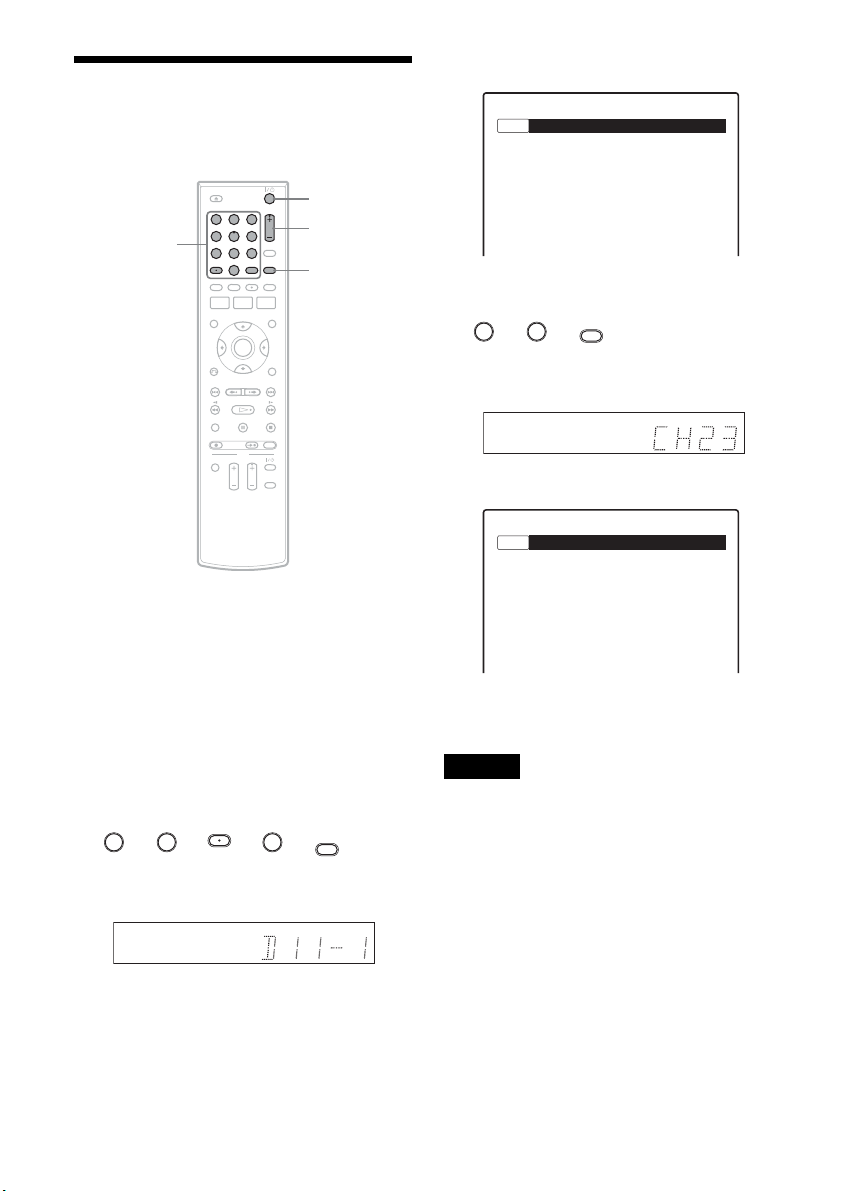
34
Watching TV
By connecting your TV to this recorder, you can
watch digital and analog channels on your TV.
1 Turn on this recorder.
2 Turn on the TV and switch the TV's input
selector so that the signal from the
recorder appears on your TV screen.
3 Press DIGITAL/ANALOG to select the
broadcast, digital or analog.
4 Press the number buttons to select the
channel you want to watch, and press SET.
For example, to select digital channel number
D11.1
t t t t
The front panel display should show the
following:
The TV screen should show the following:
For example, to select analog channel number
Ch23
t t
The front panel display should show the
following:
The TV screen should show the following:
z Hint
You can also select a channel using the CH +/– button.
Notes
• If you do not press the SET button after setting the
number buttons, the channel is not changed.
• When you change an analog channel to a digital
channel, press the DIGITAL/ANALOG button. Even if
you press the ·(dot) button, an analog channel is not
changed to digital.
• If you receive new digital channels, or the black screen
appears on your TV, set “Auto Preset” of “Tuner
Preset” again (page 76).
• Some digital channels do not have a “·” (dot). Refer to
the TV program.
• Confirm the digital broadcast content of the channel
number received before timer recording. If the recorder
receives a digital broadcast without channel number
information, the recorder assigns the channel number
automatically.
11 22 33
44 55 66
77 88
00
99
"/1
Number
buttons,
SET,
· (dot)
DIGITAL/
ANALOG
CH +/–
11 11 11
SET
SP D11.1
No Disc
22 33
SET
SP Ch23
No Disc

35
Hookups and Settings
Enjoying Digital Broadcasts
You can enjoy digital broadcasts. Digital
broadcasts are better quality, more varied, and
more controllable than analog broadcasts. By
using digital functions such as rating, closed
caption, or audio setting, you can make various
adjustments to enjoy a digital broadcast.
To use the digital rating
Digital Rating is controlled by the Rating Region
Table (RRT). The RRT is decided by the
broadcaster. This table can be used as parental
ratings. For details, see “Digital Rating” of
“Parental” in “Options” setup (page 85).
Note
This recorder cannot receive the program guide table,
therefore, you cannot set the rating in advance. But as the
dimension that was set once is memorized, the future
program will be able to refer this setting.
To use digital closed captions
Digital Closed Caption supports programs that
have the caption service. If the support service
number is selected, closed captions appear on
screen. For details, see “Caption Service” in
“Options” setup (page 87).
Note
Digital closed captions cannot be recorded.
To select digital audio settings
You can adjust audio settings using the OPTIONS
menu.
1 Press OPTIONS.
2 Press M
/
m to select “Audio.”
3 Press <
/
, to select the stream you want to
listen to, then press ENTER.
The contents of a stream depends on the
program.
Depending on the program, you can switch
the left and right sound using the AUDIO
button.
Notes
• Only the selected audio can be recorded. When
recording with the timer, “Stream 1” is usually
recorded.
• Dolby Digital (5.1ch) signals will be automatically
converted to Downmix (2ch) signal and recorded.
• The HDMI OUT jack cannot output Dolby Digital
signals for digital broadcasts. To hear Dolby Digital,
use the DIGITAL AUDIO OUT jacks.
• HD (High Definition) signal through this recorder is
converted to SD (Standard Definition) signal. You
cannot record in HD (High Definition).
36
Playback
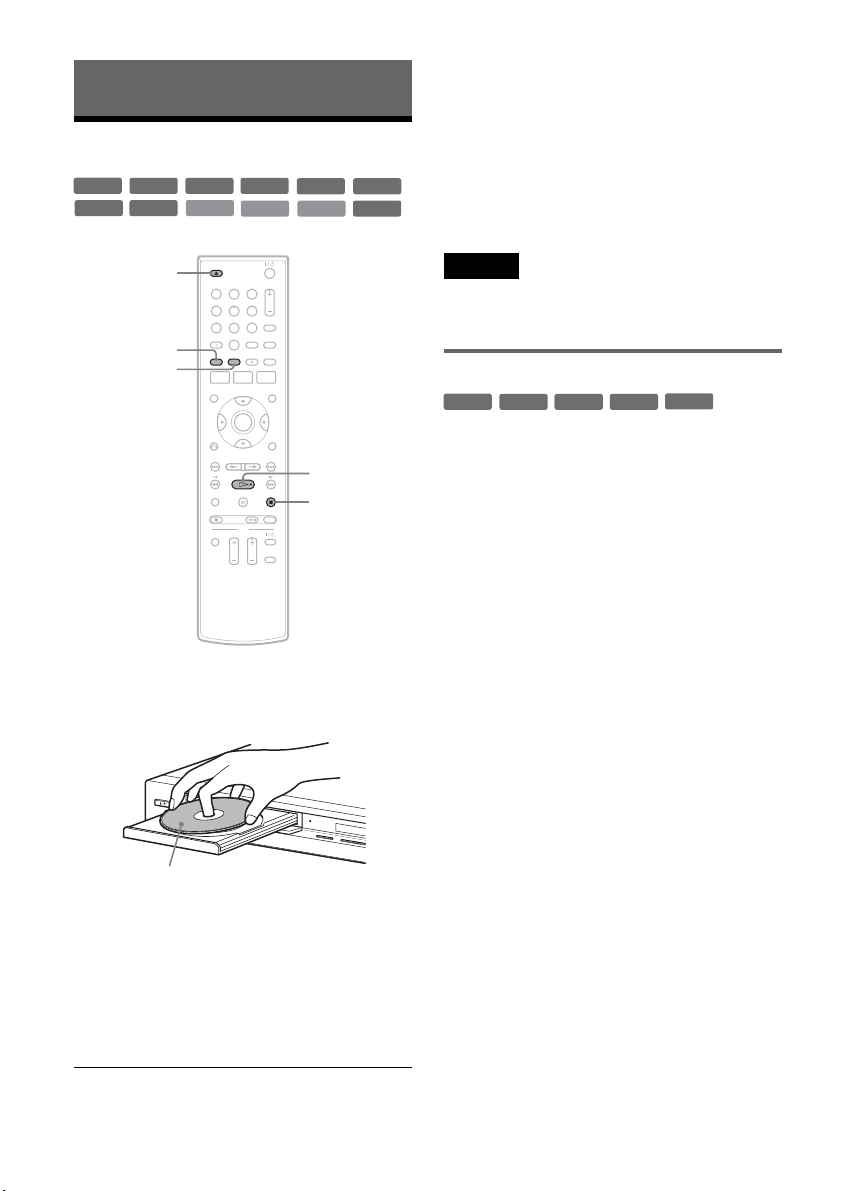
Playing Discs
1 Press Z OPEN/CLOSE, and place a disc on
the disc tray.
2 Press Z OPEN/CLOSE to close the disc
tray.
Wait until “LOAD” disappears from the front
panel display.
3 Press H PLAY.
Playback starts.
To stop playback
Press x STOP.
z Hints
• You can play DATA CDs or DATA DVDs with MP3
audio tracks or JPEG image files (pages 42 or 43).
• If you insert a DVD VIDEO, VIDEO CD, or CD,
playback starts automatically depending on the disc.
• When playing a DVD+RW, DVD-RW, DVD+R,
DVD-R, and DVD-RAM, you can select the title from
the Title List menu (page 40).
• When using a DVD-RAM with a cartridge, remove the
disc from the cartridge.
Note
To play a disc recorded with other equipment on this
recorder, finalize the disc on the recording equipment
first.
Using the DVD’s Menu
When you play a DVD VIDEO, or a finalized
DVD+RW, DVD-RW (Video mode), DVD+R, or
DVD-R (Video mode), you can display the disc’s
menu by pressing TOP MENU or MENU.
+
RW
+
R
DVD
VCD
CD
-
RWVR
-
RW
Video
DATA DVD
DATA CD
-
RVR
-
R
Video
RAM
11 22 33
44 55 66
77 88
00
99
x STOP
Z OPEN/
CLOSE
H PLAY
TOP MENU
MENU
D
V IN
L
(
M
O
N
O
)
A
U
D
I
O
R
V
I
D
E
O
S
V
I
D
E
O
L
I
N
E
-
2
I
N
O
NE-TO
UC
H DU
BB
IN
G
Playback side facing down
+
RW
+
R
DVD
-
RW
Video
+
R
-
R
Video
37
Playback
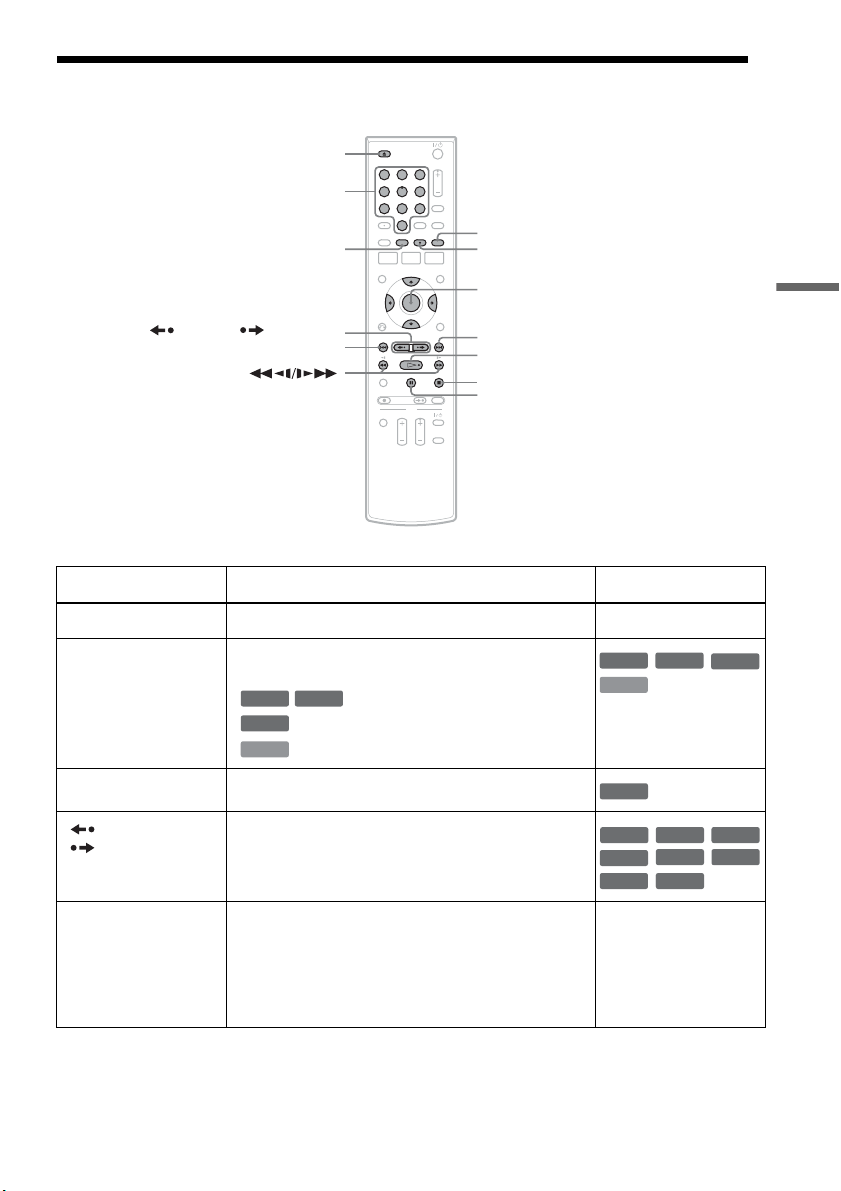
Playback Options
Button Operation Disc
Z OPEN/CLOSE Stops playing and opens the disc tray. All discs
AUDIO Selects one of the audio tracks recorded on the disc
when pressed repeatedly.
: Selects the main or sub sound.
: Selects the audio source.
: Selects stereo or monaural audio tracks.
SUBTITLE Selects a subtitle language when pressed repeatedly.
.
REPLAY/
ADVANCE
• Replays or briefly fast forwards a scene when
pressed during playback.
• Goes to the previous or next frame when pressed
during pause mode.
. PREV/
NEXT >
• Goes to the beginning of the current or next title/
chapter/scene/track and starts playback when
pressed during playback.
• Goes to the beginning of the previous title/chapter/
scene/track when .PREV is pressed within three
seconds after starting a title/chapter/scene/track.
All discs
11 22 33
44 55 66
77 88
00
99
Z OPEN/CLOSE
X PAUSE
. PREV
REPLAY/ ADVANCE
x STOP
H PLAY
M/m/</,,
ENTER
Number buttons
> NEXT
MENU
AUDIO
SUBTITLE
-
RWVR
-
RVR
DVD
VCD
DVD
VCD
-
RWVR
-
RVR
DVD
+
RW
+
R
DVD
-
R
Video
RAM
RAM
-
RWVR
-
RW
Video
-
RVR
,continued
38
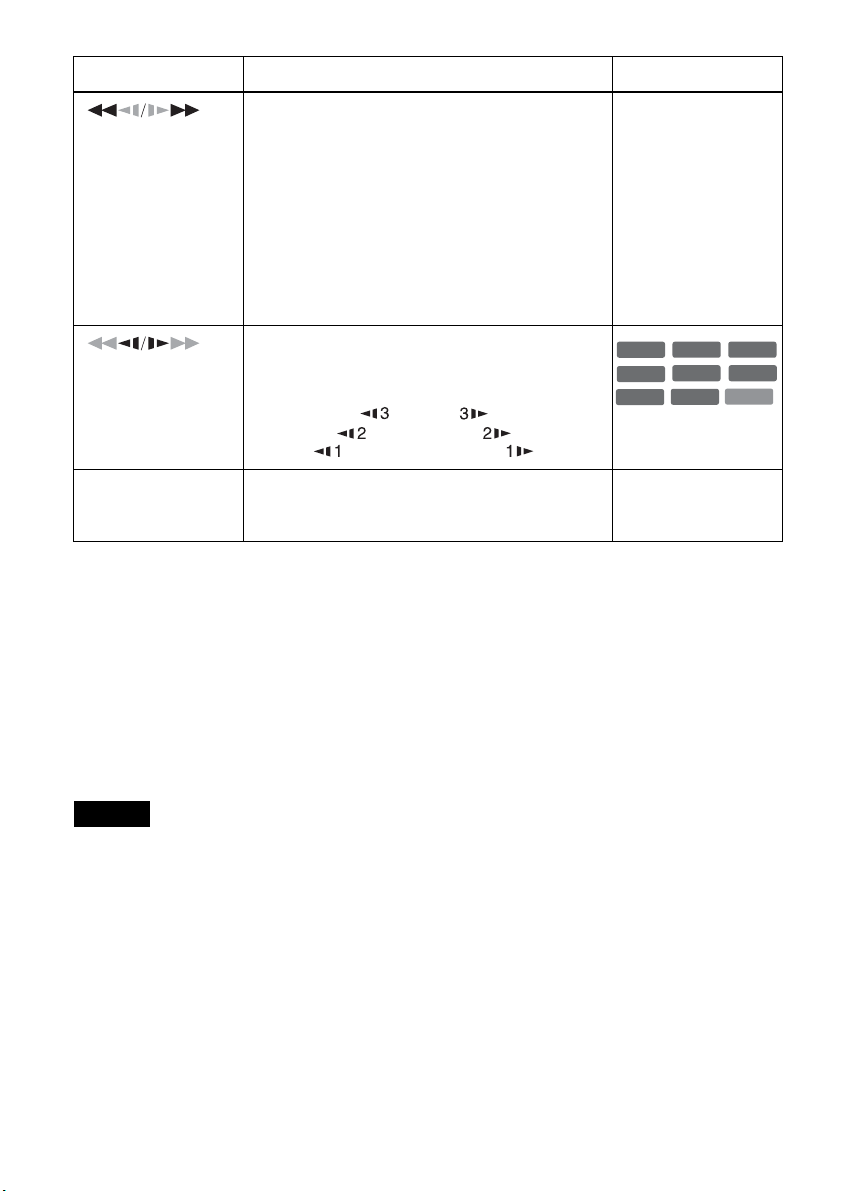
To resume normal playback after playing at various speeds, press H PLAY.
z Hints
• You can change playback options, such as subtitle,
audio track, etc., using the OPTIONS menu (page 11).
• During playback or pause mode, the recorder’s m/
M buttons and the remote’s .PREV/>NEXT
buttons work the same way (page 37). Hold the buttons
down during playback to fast forward or fast reverse. In
pause mode, you can play in slow motion. Three speeds
are available, depending on the duration of the press.
• See “DVD Audio/Subtitle Language” on page 102 for
the meaning of the language abbreviation.
Notes
• If you pause playback of a CD, or DATA CD/DATA
DVD containing MP3 audio tracks, playback will not
start until you press H PLAY or X PAUSE.
• Sound will be interrupted during Scan Audio
(page 39).
Notes on playing DTS soundtracks on a CD
When playing DTS-encoded CDs, excessive noise
will be heard from the analog stereo jacks. To
avoid possible damage to the audio system, the
consumer should take proper precautions when
the analog stereo jacks of the recorder are
connected to an amplification system. To enjoy
DTS Digital Surround™ playback, an external
5.1-channel decoder system must be connected to
the digital jack of the recorder.
Notes on playing DVDs with a DTS soundtrack
DTS audio signals are output only through the
DIGITAL AUDIO OUT (COAXIAL or
OPTICAL)/HDMI OUT jacks.
When you play a DVD with DTS soundtracks, set
“Digital Out” – “DTS” to “On” of “Audio” in the
“Setup” display (page 81).
If you connect the recorder to audio equipment
without a DTS decoder, do not set “DTS” to “On”
in “Audio” setup. A loud noise (or no sound) may
come out from the speakers, which might disturb
your ears or cause damage to the speakers.
(fast reverse/fast
forward)
Fast reverses or fast forwards the disc when pressed
during playback.
Search speed changes with each press:
fast reverse fast forward
FR1 T t FF1
*1
FR2
*2
T T t t FF2
*2
FR3
*3
T T T t t t FF3
*3
All discs
*1
FF1 with sound
(Scan Audio) is
available for DVDs
with Dolby Digital
soundtracks.
*2
FR2 and FF2 are not
available for MP3.
*3
FR3 and FF3 are only
available for DVDs
and VIDEO CDs.
(slow)
Plays in slow motion when pressed in pause mode.
Playback speed changes with each press:
reverse slow motion forward slow motion
T t
T T t t
T T T t t t
* Playback direction
only
X PAUSE Pauses playback.
If you pause playback for more than five minutes,
playback starts automatically.
All discs
Button Operation Disc
VCD
+
RW
+
R
-
RWVR
-
RW
Video
DVD
-
RVR
-
R
Video
RAM
*
39
Playback
Playing quickly with sound (Scan
Audio)
(DVDs with Dolby Digital soundtracks
only)
You can play quickly with dialog or sound during
FF1 fast-forward of a DVD with Dolby Digital
soundtracks. Simply press M during playback.
z Hint
To turn off the Scan Audio function, set “Scan Audio” of
“Audio” to “Off” in the “Setup” display (page 82).
Note
Sound will be interrupted during Scan Audio.
Changing angles
You can enjoy various angles using the OPTIONS
menu (page 11). If various angles (multi-angles)
for a scene are recorded on the disc, “ ”
appears in the front panel display.
Playing VIDEO CDs with PBC
functions
PBC (Playback Control) allows you to play
VIDEO CDs interactively using a menu on your
TV screen.
When you start playing a VIDEO CD with PBC
functions, a menu appears.
Select an item using the number buttons and press
ENTER. Then follow the instructions in the menu
(press H PLAY when “Press SELECT”
appears).
Operations differ depending on the disc. See the
instructions supplied with the disc.
To cancel PBC Playback
Press MENU to display “Menu: Off.” To use the
PBC functions, press MENU again to display
“Menu:On.”
Resuming playback from the point
where you stopped the disc (Resume
Play)
Press H PLAY again after stopping a disc to
resume playback from the same point.
To start from the beginning, press x STOP twice,
and press H PLAY.
The point where you stopped playing is cleared
when:
– you open the disc tray.
– you play another title.
– you switch the Title List menu to original or
Playlist (DVD-RW (VR mode)/DVD-R (VR
mode)/DVD-RAM only).
– you edit the title after stopping playback.
– you make a recording.
Playing restricted DVDs (Parental
Control)
If you play a restricted DVD, a message appears
asking whether you want to override the
restriction.
1 Select “OK” and press ENTER.
The display for entering your password
appears.
2 Enter your four digit password using the
number buttons.
The recorder starts playback.
To register or change the password, see “DVD
VIDEO” on page 86.
Locking the recorder (Child Lock)
You can lock all of the buttons on the recorder so
that the settings are not canceled by mistake.
With the recorder turned on and stopped, hold
down x on the recorder for more than ten seconds.
The recorder turns off and “CHILD LOCK”
appears in the front panel display. The indicator
remains lit if there is a timer setting. The recorder
will not work except for timer recordings.
To unlock the recorder, hold down x on the
recorder until “CHILD LOCK” disappears from
the front panel display. The recorder is unlocked
and turns on.
DVD
VCD
DVD
+
-
,continued
40
To stop timer recording while the recorder is
locked, press x twice. The recording stops and the
recorder is unlocked.
Note
The recorder will be unlocked when you stop timer
recording by pressing x.
Playing a Title From the
Title List
The Title List menu displays the program titles on
the disc.
1 Place a disc on the disc tray.
2 Press TITLE LIST.
Example: DVD-RW (VR mode)
A Disc type:
Displays a disc type.
Also displays the title type (original or
Playlist) for DVD-RWs (VR mode),
DVD-Rs (VR mode), and DVD-RAMs.
B Movie thumbnail image
C Title information:
Displays the title number, title name,
recording date, and recording mode.
“ ” indicates a protected title, while
“ ” indicates unprotected.
D Clock
+
RW
+
R
-
RWVR
-
RW
Video
RAM
-
RVR
-
R
Video
11 22 33
44 55 66
77 88
00
99
TOP MENU
M/m/</,,
ENTER
MENU
TITLE LIST
ORIGINAL/
PLAYLIST
10:10 AM
01 >01:29:03
02 >00:31:23
03 >01:59:00
04 >00:58:56
08:00 PM
T
No. Title Length Edit
Title List (Original)
1/4
D11.1
D22.2
Ch 23
Ch 66
D11.1
May/02/2007
1
2
3
4
3
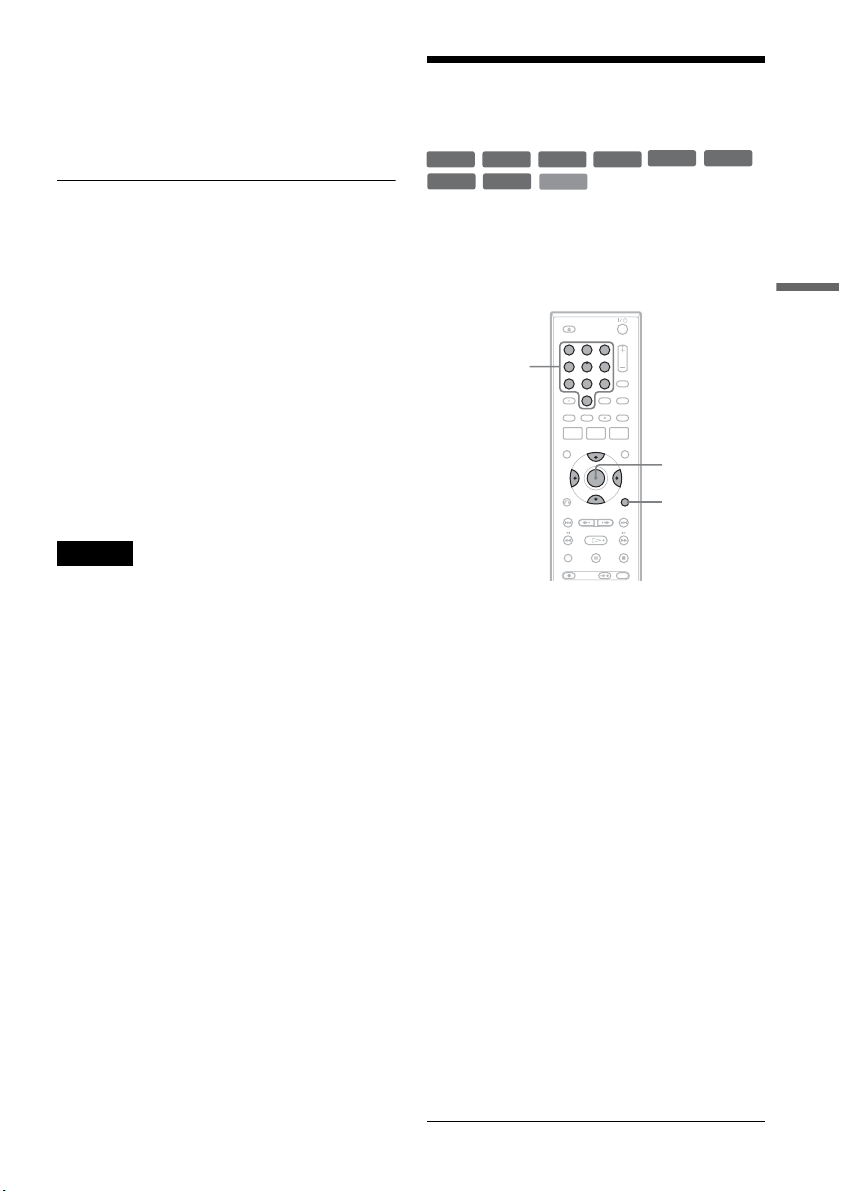
41
Playback
3 Select the title, and press ENTER.
The sub-menu appears.
4 Select “Play,” and press ENTER.
Playback starts from the selected title on the
disc.
About the Title List for DVD-RWs (VR mode)
and DVD-Rs (VR mode)
You can switch the Title List to show an original
or Playlist.
While the Title List menu is turned on, press
ORIGINAL/PLAYLIST repeatedly to select
either “Title List (Original)” or “Playlist.”
For details, see “Edit options for DVD-RWs (VR
mode)/DVD-Rs (VR mode)” on page 57.
To turn off the Title List
Press TITLE LIST.
z Hint
You can also switch the Title List of DVD-RAMs to
show an original or Playlist.
Notes
• The Title List does not appear for DVD-RWs (Video
mode), DVD+Rs, or DVD-Rs (Video mode) that have
been finalized. To view a title, press TOP MENU or
MENU (page 36).
• The Title List may not appear for discs created on other
DVD recorders.
• Letters that cannot be displayed are replaced with “
*
.”
Searching for a Title/
Chapter/Track, etc.
You can search a DVD by title or chapter, and
VIDEO CD by track or scene. As titles and tracks
are assigned individual numbers on the disc, select
the title or track by entering its number. You can
also search for a scene using the time code.
1 Press OPTIONS during playback.
The OPTIONS menu appears.
2 Select a search method.
“Title” (for DVDs)
“Chapter” (for DVDs)
“Track” (for VIDEO CDs with PBC function
off)
“Time” (for DVDs/VIDEO CDs with PBC
function off): Searches for a starting point
using the time code.
3
Press
M
/
m
/
<
/
,
to select the number of
the title, chapter, track, etc., you want, or
press the number buttons to enter the time
code.
For example: “Time”
To find a scene at 2 hours, 5 minutes, and 20
seconds, enter “20520.”
If you make a mistake, wait a moment until
the display returns to the elapsed playing time
display, then select another number.
4 Press ENTER.
The recorder starts playback from the selected
point.
To turn off the display, press OPTIONS.
+
RW
+
R
VCD
-
RWVR
-
RW
Video
RAMDVD
-
RVR
-
R
Video
11 22 33
44 55 66
77 88
00
99
OPTIONS
M/m/</,,
ENTER
Number
buttons
,continued
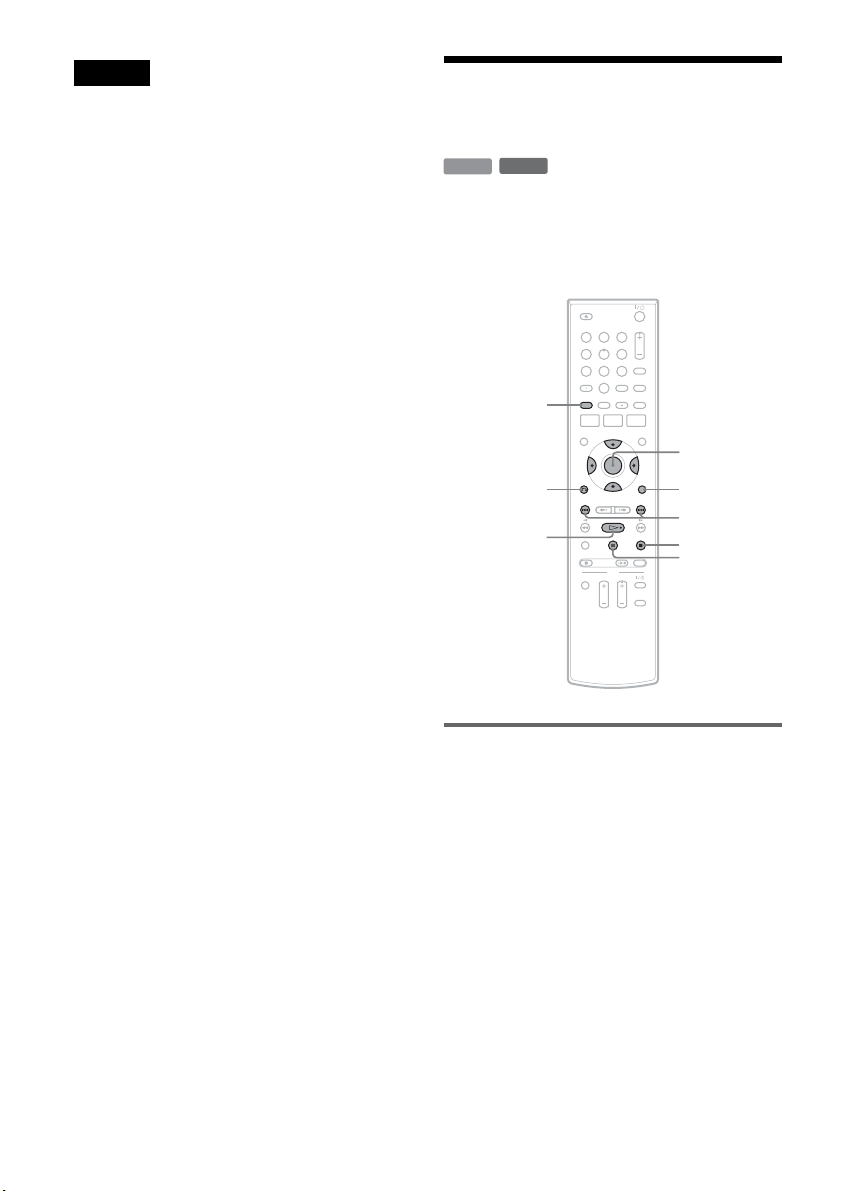
42
Notes
• Depending on the disc, you may not be able to use the
OPTIONS menu to search for a title/chapter/track, or
enter the time code for a playback point.
• When playing a Playlist title, you may not be able to
search for a scene using the time code.
Playing MP3 Audio Tracks
and JPEG Image Files
You can play DATA CDs (CD-ROMs/CD-Rs/
CD-RWs)/DATA DVDs (DVD-ROMs/
DVD+RWs/DVD-RWs/DVD+Rs/DVD-Rs) that
contain MP3 audio tracks or JPEG image files.
Playing MP3 audio tracks
You can play MP3 audio tracks on DATA CDs or
DATA DVDs.
1 Place a DATA CD/DATA DVD on the disc
tray.
When you insert a DATA CD/DATA DVD
containing MP3 audio tracks and JPEG image
files, the display for selecting a media type
appears. When you select “Mix,” you can
enjoy a slide show with sound (page 44).
DATA CD
DATA DVD
11 22 33
44 55 66
77 88
00
99
H PLAY
O RETURN
M/m/</,,
ENTER
./>
TOP MENU
x STOP
OPTIONS
X PAUSE
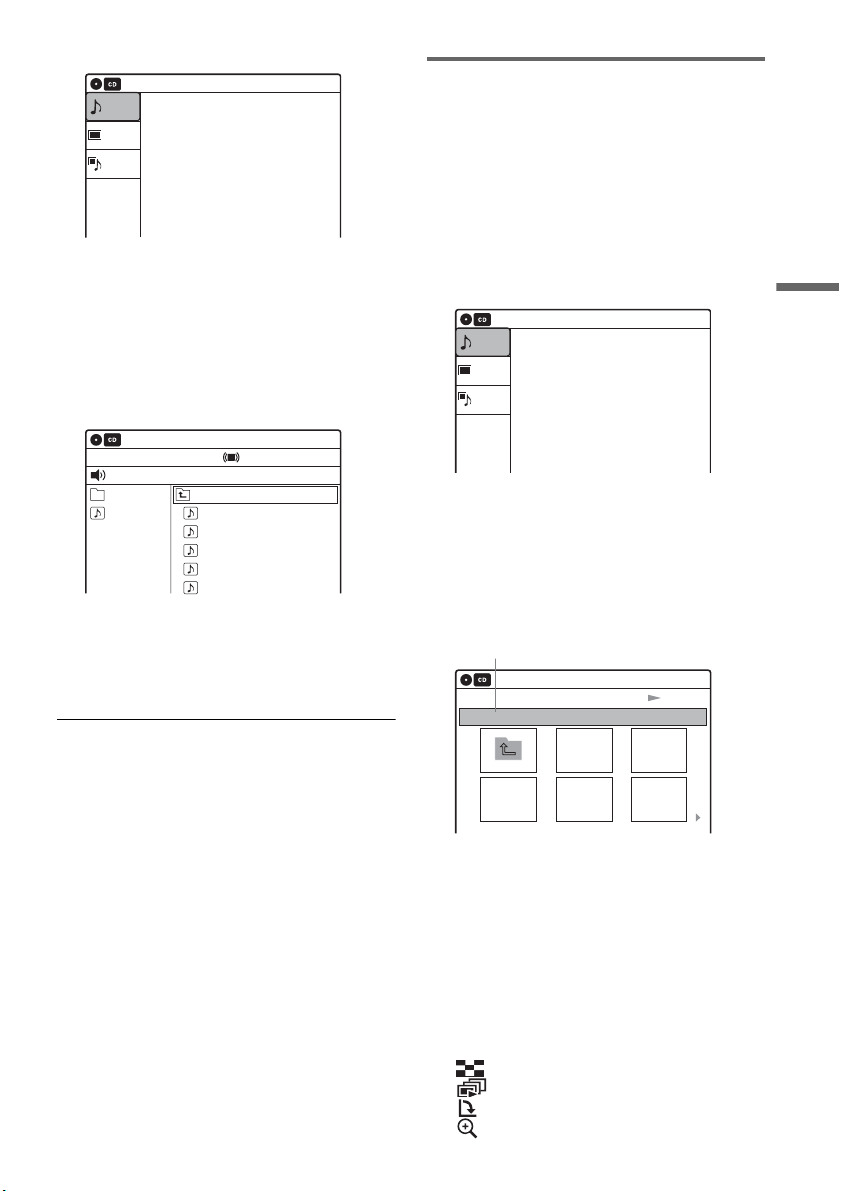
43
Playback
If you insert a DATA CD/DATA DVD
containing only MP3 audio tracks, the
“Music” display appears. Go to step 3.
2 Select “Music,” and press ENTER.
The “Music” display appears.
3 Select an album, and press ENTER.
4 Select a track, and press ENTER.
Playback starts from the selected track.
When a track or album is being played, the
title is shown in a box.
To stop playback
Press x STOP.
To pause playback
Press X PAUSE.
To restart playback, press H PLAY or X
PAUSE.
To return to the previous display
Press O RETURN.
To switch between MP3 audio tracks and JPEG
image files
Press x STOP, and press TOP MENU.
z Hint
When playback of all the MP3 audio tracks within the
album finishes, the recorder stops.
Playing JPEG image files
You can play JPEG image files on DATA CDs or
DATA DVDs.
1 Place a DATA CD/DATA DVD on the disc
tray.
When you insert a DATA CD/DATA DVD
containing MP3 audio tracks and JPEG image
files, the display for selecting a media type
appears.
When you select “Mix,” you can
enjoy a slide show with sound (page 44).
If you insert a DATA CD/DATA DVD
containing only JPEG image files, the
“Photo” display appears. Go to step 3.
2 Select “Photo,” and press ENTER.
The “Photo” display appears.
3 Select a folder, and press ENTER.
To display the previous or next page, press
./>.
4 Select an image file, and press ENTER.
The selected image is displayed over the
entire screen.
To display the previous or next image, press
./>.
The following menu icons appear in the upper
part of the screen.
: Returns to the “Photo” display.
: Starts the slide show (page 44).
: Rotates the image (page 44).
: Zooms the image (page 44).
10:10 AM
Photo
Music
Mix
Press ENTER :
Music menu for this disc.
Stop 00:00:00
Prev Directory
01-Track1.mp3
02-Track2.mp3
03-Track3.mp3
04-Track4.mp3
05-Track5.mp3
MP3_001
0/9
10:10 AM
Music
Surround:Off
10:10 AM
Photo
Music
Press ENTER :
Mix
Music menu for this disc.
Slideshow
\abc\defg
Page 1 / 2
10:10 AM
Photo
Directory information
,continued
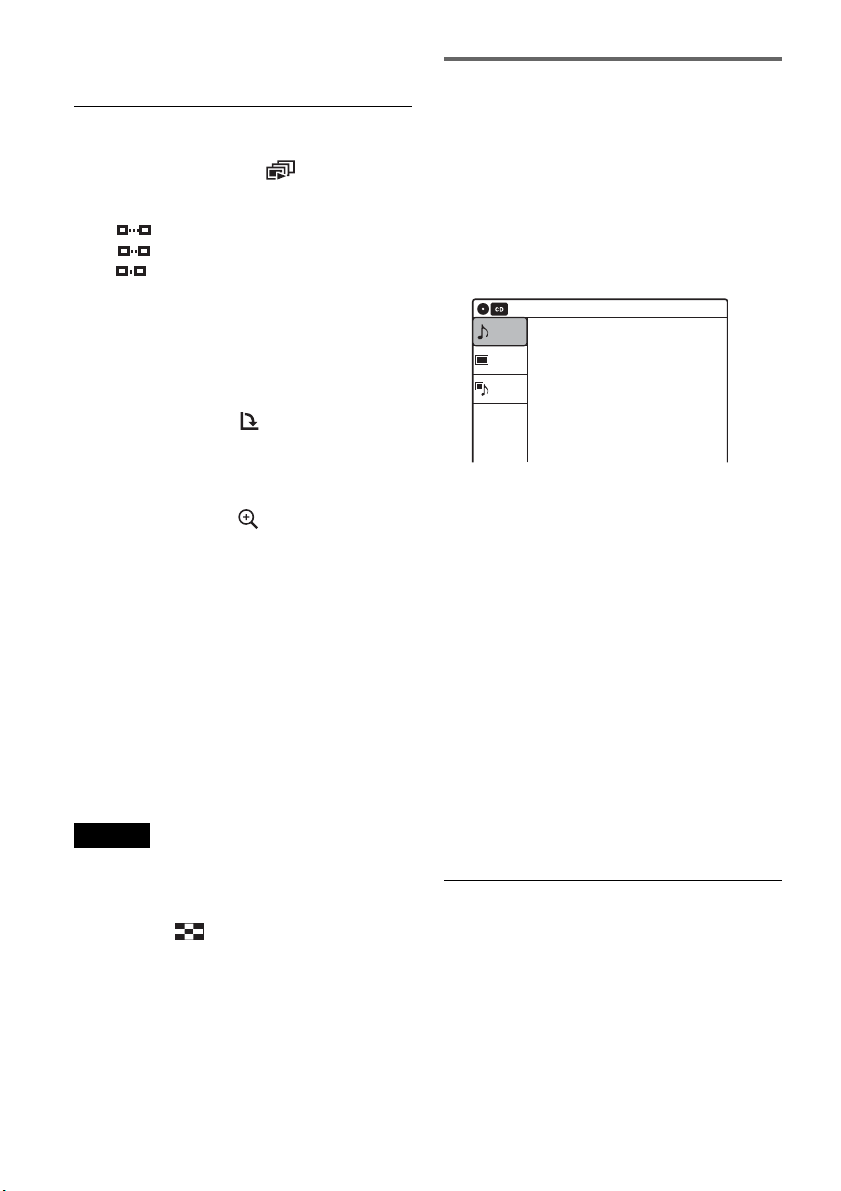
44
Press OPTIONS to turn on/off the menu
icons.
To play the slide show
1 Press </, to select “ ,” and press
ENTER.
The “Slideshow Speed” menu appears.
“”: Slow
“”: Normal
“”: Fast
2 Press </, to select the desired play speed,
and press ENTER.
The slide show starts from the selected image.
To stop playing, press x STOP.
To rotate the selected image
Press </, to select “ ,” and press ENTER.
Each time you press ENTER, the image turns
clockwise by 90°.
To zoom in an image
Press </, to select “ ,” and press ENTER.
Each time you press ENTER, the magnification
changes as follows:
2× t 4× t 2× t normal
To return to the previous display
Press O RETURN.
To switch between MP3 audio tracks and JPEG
image files
Press x STOP, and press TOP MENU.
z Hint
You can also start the slide show by pressing H PLAY
in step 4 above.
Notes
• You cannot use M/m/</, to move the image within
the screen while zooming.
• Slide show can play in only one direction.
• You cannot rotate or zoom during slide show.
• If you select “ ” in the rotated image display, the
images in the “Photo” display will not be rotated.
Enjoying a slide show with sound
When a disc contains both MP3 audio tracks and
JPEG image files, you can enjoy a slide show with
sound.
1 Insert a DATA CD/DATA DVD containing
both the MP3 audio tracks and JPEG image
files.
The display for selecting a media type
appears.
2 Select “Mix,” and press ENTER.
The “Music” display appears.
3 Select an album, and press ENTER.
4 Select a track, and press ENTER.
Playback starts from the selected track, and
the display asks for confirmation.
5 Select “Yes,” and press ENTER.
The “Photo” display appears.
6 Select the folder you want to view, and
press ENTER.
7 Press H PLAY to start the slide show.
The “Slideshow Speed” menu appears.
8 Press </, to select the slide show
speed, and press ENTER.
The slide show starts with sound.
To stop the slide show
Press x STOP.
z Hints
• When playing JPEG images, you can also use the on-
screen menu. For details, see “Playing JPEG image
files” (page 43).
• The slide show is played repeatedly until MP3
playback stops.
10:10 AM
Photo
Music
Press ENTER :
Mix
Music menu for this disc.

45
Playback
About MP3 audio tracks and JPEG
image files
MP3 is audio compression technology that
satisfies the ISO/IEC MPEG regulations.
JPEG is image compression technology.
You can play back DATA CDs (CD-ROMs/CD-
Rs/CD-RWs) or DATA DVDs (DVD-ROMs/
DVD+RWs/DVD-RWs/DVD+Rs/DVD-Rs)
recorded in MP3 (MPEG1 Audio Layer 3) and
JPEG format.
However, this recorder only plays DATA CDs
whose logical format is ISO9660 Level 1/Level 2
or Joliet, and DATA DVDs of Universal Disk
Format (UDF).
See the instructions supplied with the disc drives
and the recording software (not supplied) for
details on the recording format.
Note
The recorder may not be able to play some DATA CDs
or DATA DVDs created in the Packet Write format.
MP3 audio tracks or JPEG image files that the
recorder can play
The recorder can play the following tracks and
files:
– MP3 (MPEG1 Audio Layer 3) audio tracks.
– MP3 audio tracks with the extension “.MP3.”
– JPEG image files with the extension “.JPEG” or
“.JPG.”
z Hints
• If you add numbers (01, 02, 03, etc.) to the front of the
file names, the files will be played in that order.
• Since a disc with many trees takes longer to start
playback, it is recommended that you create albums
with no more than two trees.
Notes
• Some DATA CDs or DATA DVDs cannot be played
on this recorder depending on file format.
• Only one session of a multi-session DATA DVD can
be played back.
• Only alphabet and numbers can be used for album or
track names. Anything else is displayed as an asterisk.
• The recorder will play any data with the extension
“.MP3,” even if they are not in MP3 format. Playing
such data may generate a loud noise which could
damage your speaker system.
• The recorder does not conform to audio tracks in
MP3PRO format.
• The recorder can recognize up to 499 MP3 audio tracks
within a single album. The recorder may not recognize
some discs depending on the recording device used for
recording or the disc condition.
• The recorder can play MP3 audio tracks recorded in the
following sampling frequencies: 32 kHz, 44.1 kHz,
48 kHz.
• ID3 tags cannot be displayed.
• If you add the extension “.JPG” or “.JPEG” to data not
in JPEG format, a message appears indicating that the
format is not supported.
• Depending on the disc, or the size or total number of
files, playback may take some time to start.
• The recorder can recognize up to 999 JPEG image files
within a single folder. The recorder may not recognize
some discs depending on the recording device used for
recording or the disc condition.
• Progressive and lossless compression JPEG image files
are not supported.
• The image size that the recorder can display is limited
to width 32 - 7680 pixels by height 32 - 8192 pixels.
• JPEG image files that conform to the DCF* image file
format are not supported.
* “Design rule for Camera File system”: Image standards
for digital cameras regulated by JEITA (Japan
Electronics and Information Technology Industries
Association).
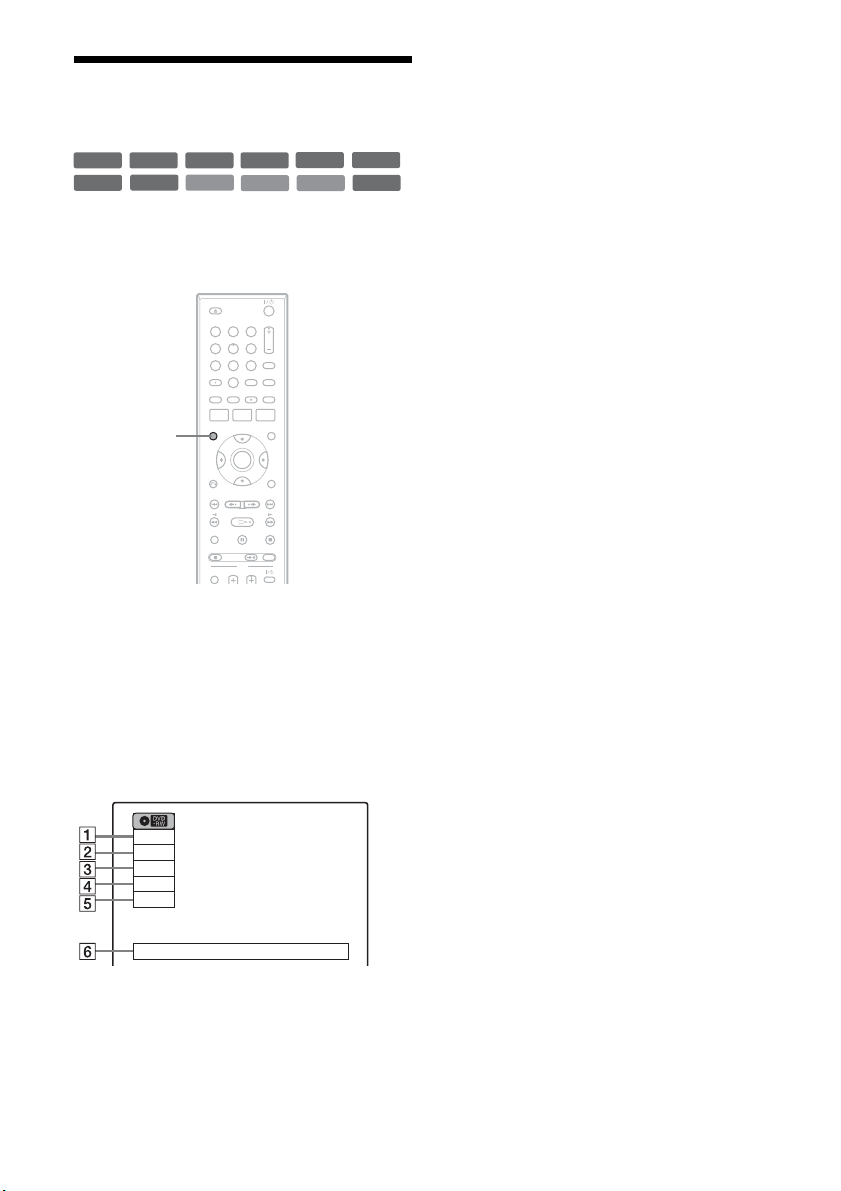
46
Displaying the Playing Time
and Play Information
You can check disc information, such as playing
time, recording mode, and remaining disc space.
Press DISPLAY.
The information display appears.
Each time you press the button, the display
changes as follows:
Disc information/date and time
m
Disc information only
m
No display
A Playing status
B Playing time
C Recording mode
D Remaining disc space (in stop mode)
Remaining time of the current title (during
playback
*1
)
E Channel or input source
*2
F Date and time
*1
Also appears in stop mode with Resume Play
activated (page 39).
*2
Title type (original or Playlist) for DVD-RWs (VR
mode)/DVD-Rs (VR mode)/DVD-RAMs.
+
R
DVD
VCD
CD
-
RWVR
-
RW
Video
+
RW
DATA CD
DATA DVD
RAM
-
RVR
-
R
Video
11 22 33
44 55 66
77 88
00
99
DISPLAY
Wed May 02. 2007 10:10 AM
Play
0:05:30
HQ
Rem 00:25
Original
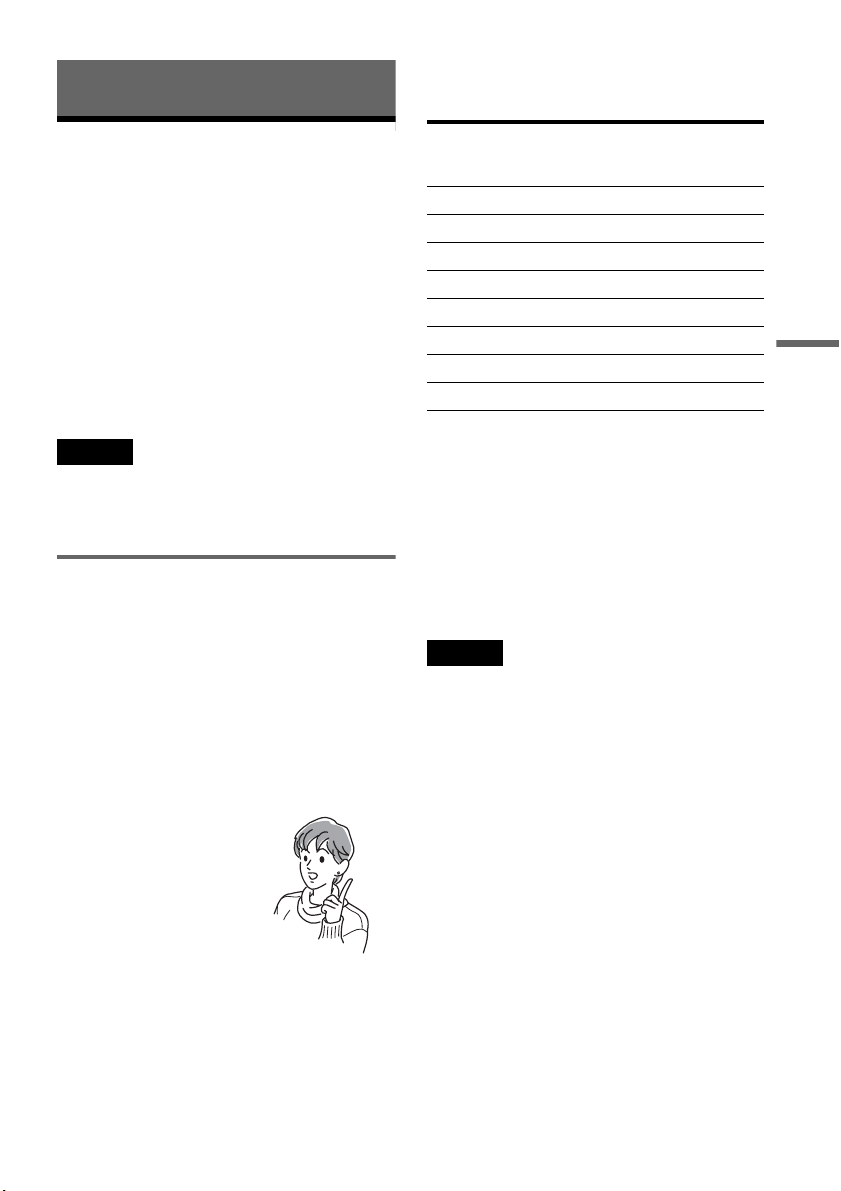
47
Recording
Recording
Before Recording
Before you start recording…
• This recorder can record on various disc types.
Select the disc type according to your needs
(page 12).
• Check that the disc has enough available space
for the recording (page 46). For DVD+RWs or
DVD-RWs, you can free up disc space by
erasing titles (page 58).
z Hint
To play a disc recorded with this recorder on other
equipment, finalize the disc (page 69).
Notes
• Timer recordings will start with or without the recorder
turned on. The recorder automatically turns off after a
recording has finished.
• This recorder records at ×1 speed.
Recording mode
Like the SP or EP recording mode of VCRs, this
recorder has eight different recording modes.
Select a recording mode according to the time and
picture quality you need. For example, if picture
quality is your top priority, select “HQ” (high
quality). If recording time is your priority, “SLP”
can be a possible choice.
Press REC MODE repeatedly to switch the
recording modes.
Recording mode and recording time
The following table is an approximate guide for
the recording time on a single DVD (4.7 GB).
z Hint
The approximate recording time for DVD+R DL
(Double Layer) discs is as follows:
HQ: 1 hour 48 minutes
HSP: 2 hours 42 minutes
SP: 3 hours 37 minutes
LSP: 4 hours 31 minutes
ESP: 5 hours 25 minutes
LP: 7 hours 14 minutes
EP: 10 hours 51 minutes
SLP: 14 hours 28 minutes
Notes
• When in a recording mode other than HQ, the recorder
compresses the audio/video data before recording.
Since the compression rate needs to decrease for fast-
moving images or if picture noise is present, recorded
data size increases, and available recording time
becomes shorter. When recording such pictures, a
recording mode offering longer recording time is
recommended.
• Situations below may cause slight inaccuracies with
the recording time.
– Recording fast-moving or images containing picture
noise.
– Recording a program with poor reception, or a
program or video source of low picture quality
– Recording on a disc that has already been edited
– Recording only a still picture or just sound
• Since the recording mode for recorded titles is
calculated after sampling the recorded data during
playback, it may be displayed differently from the
mode you selected when recording. However, the
actual recording itself is correctly made in the selected
mode.
I want to record with the
best possible picture
quality, so I’ll select HQ.
Recording mode Approximate
recording time
(minute)
HQ (High quality) 60
HSP R 90
SP (Standard mode) 120
LSP r 150
ESP r 180
LP r 240
EP r 360
SLP (Long duration) 480
,continued
48
Recording a stereo/SAP program
The recorder can receive and record stereo/SAP
programs.
When recording a digital channel, only the
selected audio can be recorded. When recording
with the timer, “Stream 1” is usually recorded
(page 35).
Stereo programs
When a stereo program is received, the
“STEREO” indicator lights up in the front panel
display. If there is noise in the stereo program,
press AUDIO repeatedly until the “MONO”
appears on the TV screen. The sound will be
recorded in monaural but with less noise.
SAP (Second Audio Program)
When a SAP is received, the “SAP” indicator
lights up in the front panel display. To record only
SAP sound, set “Tuner Audio” of “Audio” to
“SAP” in the “Setup” display (page 81).
Unrecordable pictures
Pictures with copy protection cannot be recorded
on this recorder. Recording stops when a copy
guard signal is detected.
* The recorded disc can be played only on CPRM
compatible equipment (page 12).
Formatting a new disc
New, unformatted discs are automatically
formatted when first inserted in the recorder.
For DVD-RWs/DVD-Rs, you can select a
recording format (VR mode or Video mode)
according to your needs (page 12).
• Unused DVD-RWs are automatically formatted
according to the setting of “Format DVD-RW”
in “Features” setup (page 84).
• Unused DVD-Rs are automatically formatted in
Video mode. To format in VR mode, change the
recording format using the “Disc Setting”
display (page 68).
Notes
• You cannot mix VR mode and Video mode on the same
DVD-RW or DVD-R.
• You can change the recording format on DVD-RWs by
reformatting (page 68).
• You cannot change the recording format on used DVD-
Rs.
• The recorder records on new DVD-Rs in Video mode
unless you first format the discs in VR mode.
Copy control
signals
Recordable discs
Copy-Free
Copy-Once
Ver.1.1, Ver.1.2 with CPRM*
Ver.2.0, Ver.2.1 with CPRM*
Copy-Never None
+
RW
-
RWVR
-
RW
Video
+
R
-
RVR
-
R
Video
-
RWVR
-
RVR
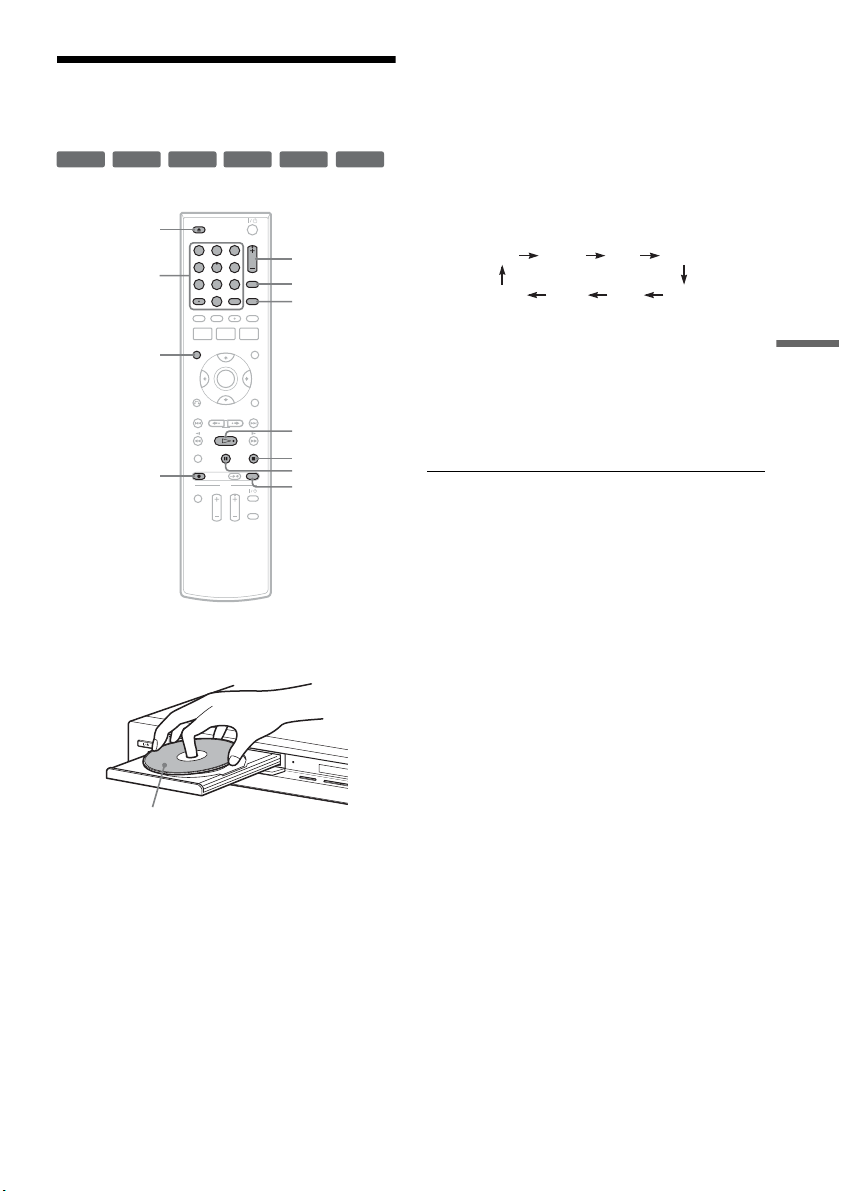
49
Recording
Recording Without the
Timer
1 Press Z OPEN/CLOSE, and place a
recordable disc on the disc tray.
2 Press Z OPEN/CLOSE to close the disc
tray.
Wait until “LOAD” disappears from the front
panel display.
Unused discs are automatically formatted. For
the DVD-RW/DVD-R’s recording format
(VR mode or Video mode), see “Formatting a
new disc” on page 48.
3 Press DIGITAL/ANALOG to select the
broadcast.
4 Press number buttons to select the channel
you want to record, and press SET.
For details to set the channel, see “Watching
TV” (page 34).
5 Press REC MODE repeatedly to select the
recording mode.
The display changes on the TV screen as
follows:
For details about the recording mode, see
page 47.
6 Press z REC.
Recording starts.
Recording continues until you stop the
recording or the disc is full.
To stop recording
Press x STOP.
Note that it may take a few seconds for the
recorder to stop recording.
To pause recording
Press X PAUSE.
To restart recording, press X PAUSE again.
z Hints
• To play a disc recorded with this recorder on other
equipment, finalize the disc (page 69).
• You can use the CH+/– button to select a channel.
• You can select a video source from the LINE 1 IN or
LINE 2 IN jacks using the INPUT button.
• You can turn off the TV during recording. If you are
using a cable box or a satellite receiver, make sure to
leave it on.
+
RW
+
R
-
RWVR
-
RW
Video
-
RVR
-
R
Video
11 22 33
44 55 66
77 88
00
99
REC MODE
X PAUSE
x STOP
CH +/–
z REC
Z OPEN/
CLOSE
H PLAY
DISPLAY
INPUT
DIGITAL/
ANALOG
Number
buttons,
SET,
· (dot)
DV IN
L
(
M
O
N
O
)
A
U
D
I
O
R
V
I
D
E
O
S
V
I
D
E
O
L
I
N
E
-
2
I
N
O
N
E-TO
U
CH
D
UBBING
Recording side facing down
HQ SPHSP LSP
SLP LPEP ESP
,continued

50
Notes
• Recording may not start immediately after z REC is
pressed.
• You cannot change the recording mode during
recording or recording pause.
• If there is a power failure, the program you are
recording may be erased.
• You cannot change the channel or input source during
recording.
• You cannot record digital closed captions (page 35).
• Only selected audio can be recorded (page 35).
Recording using the Quick Timer
(One-touch Timer Recording)
You can set the recorder to record in 30-minute
increments.
Press z REC repeatedly to set the duration.
Each press increases the time by 30 minutes,
up to eight hours*.
“c” and “OTR” light up, and the remaining
recording time appears in the front panel
display.
When the time counter reaches “0:00,” the
recorder stops recording and turns off.
* 14 hours 30 minutes for DVD+R DL (Double Layer)
discs.
To cancel the Quick Timer
Press z REC repeatedly until the counter appears
in the front panel display. The recorder returns to
normal recording mode.
To stop recording
Press x STOP twice.
Note that it may take a few seconds for the
recorder to stop recording.
Checking the disc status while
recording
You can check the recording information such as
recording time or disc type.
Press DISPLAY during recording.
The information display appears.
Press the button repeatedly to change the display
(page 46).
A Disc type
B Recording status
C Recording time
D Recording mode
E Remaining disc space
F Channel or input source
Creating chapters in a title
The recorder will automatically divide a recording
(a title) into chapters by inserting chapter marks at
5 or 15-minute intervals during recording. Select
the interval, “5 Min” (default) or “15 Min” in
“DVD Auto Chapter” of “Features” in the “Setup”
display (page 83).
If you do not want to divide titles, select “Off.”
0:30 1:00 7:30 8:00
(Normal
recording)
Record
0:00:03
HQ
Rem 00:59
Ch 1

51
Recording
Timer Recording
You can set the timer for a total of 12 programs, up
to one month in advance.
Note that the maximum continuous recording time
for a single title is 12 hours. Contents beyond this
time will not be recorded.
Follow the steps below to set each timer recording
item.
Note
Do not operate your cable box or satellite receiver just
before or during a timer recording. This may prevent the
accurate recording of a program.
1 Press Z OPEN/CLOSE, and place a
recordable disc on the disc tray.
2 Press Z OPEN/CLOSE to close the disc
tray.
Wait until “LOAD” disappears from the front
panel display.
Unused discs are automatically formatted. For
the DVD-RW/DVD-R’s recording format
(VR mode or Video mode), see “Formatting a
new disc” on page 48.
3 Press TIMER.
4 Select an item using </, and adjust
using M/m.
A “Date”: Sets the date using M.
To record the same program every day or
the same day every week, press m.
The item changes as follows:
Today y Sun-Sat (Sunday to Saturday)
y Mon-Sat (Monday to Saturday) y
Mon-Fri (Monday to Friday) y Sun
(every Sunday) y Mon (every Monday)
y … y Sat (every Saturday) y
1 month later y … y Today
B “Start”: Sets the start time.
C “End”: Sets the stop time.
D “Ch”: Selects the channel or input
source.
You can switch the broadcast using the
DIGITAL/ANALOG button.
E “Mode”: Selects the recording mode
(page 47).
To use the Rec Mode Adjust function
(page 52), select “AUTO.”
If you make a mistake, select the item and
change the setting.
+
RW
+
R
-
RWVR
-
RW
Video
-
RVR
-
R
Video
11 22 33
44 55 66
77 88
00
99
M/m/</,,
ENTER
Z OPEN/
CLOSE
x STOP
SYSTEM
MENU
TIMER
DIGITAL/
ANALOG
D
V IN
L
(
M
O
N
O
)
A
U
D
I
O
R
V
I
D
E
O
S
V
I
D
E
O
L
I
N
E
-
2
I
N
O
NE-TOU
CH
D
UBBING
Recording side facing down
01 DVD 04/15 09:00PM 10:00PM CH8
--- --/-- --:-- --:-- ---- ---04
--- --/-- --:-- --:-- ---- ---05
--- --/-- --:-- --:-- ---- ---06
03 --- --/-- --:-- --:-- ---- ---
02 DVD 04/30 09:15PM 09:45PM CH11
10:10 AM
No Rec To Date Start End Source Mode Edit
Timer – Standard
No.01
: PM PM
:
09 00 10 00 Ch 8 SP
12 3 45
Date Start End Ch Mode
Tod ay
,continued
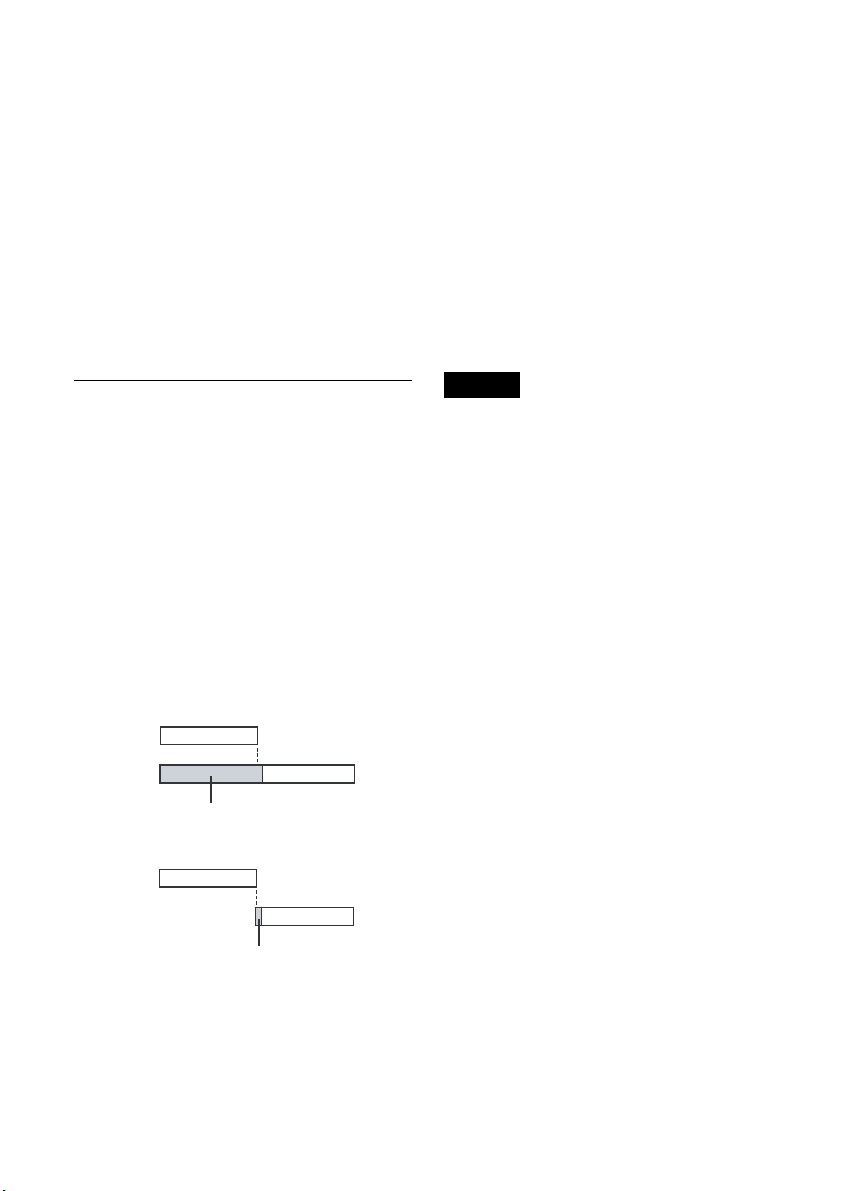
52
5 Press ENTER.
The Timer List menu (page 54) appears.
The c indicator lights up in the front panel
display, and the recorder is ready to start
recording.
•If the c indicator flashes in the front panel
display, a recordable disc is not inserted.
Insert a recordable disc and check that there
is enough disc space for the recording.
• If timer settings overlap, a message appears.
To change or cancel a timer recording, select
“Edit” from the Timer List (page 54).
6 Press SYSTEM MENU to turn off the menu.
There is no need to turn off the recorder before
the timer recording starts.
To stop recording
Press x STOP twice.
Note that it may take a few seconds for the
recorder to stop recording.
If timer settings overlap
The program that starts first has priority and the
second program starts recording only after the first
program has finished. If the programs start at the
same time, the program listed first in the menu has
priority. If the end time of one setting and the start
time of another timer setting is the same, the
beginning of the program that starts later will be
cut.
To change or cancel timer recording
See “Changing or Canceling Timer Settings
(Timer List)” on page 54.
To use the Rec Mode Adjust function
If the remaining disc space is not enough for the
current recording, the recorder automatically
adjusts the recording mode. Select “AUTO” for
“Mode” when setting the timer.
z Hints
• You can play the recorded program by selecting the
program title in the Title List menu.
• You can also turn on the timer programming menu
from the System Menu. Press SYSTEM MENU to
select “Timer,” and select “Timer-Standard.”
• You can use the number buttons and the dot (·) button
to select a channel.
• You can select a video source from the LINE 1 IN or
LINE 2 IN jacks, using the INPUT button.
Notes
• To record a cable or satellite program, turn on the cable
box or satellite receiver and select the program you
want to record. Leave the cable box or satellite receiver
turned on until the recorder finishes recording.
• Even when correctly set, the program may not be
recorded if another recording is underway, or other
prioritized timer setting overlaps.
• Before the timer recording starts, “TIMER REC”
flashes in the front panel display.
• The recorder automatically turns off when a timer
recording finishes, even if the recording started with
the recorder turned on.
• The recorder does not record programs with Copy-
Never signals. Such recordings stop after a few
seconds.
• Digital closed captions cannot be recorded (page 35).
• For audio settings, “Stream 1” is usually recorded
(page 35).
• When you set the Digital Rating, a program with a
digital rating beyond your limit setting cannot be
recorded correctly (page 85).
7:00 8:00 9:00 10:00
7:00 8:00 9:00 10:00
Program 1
Program 2
will be cut off
Program 1
Program 2
will be cut off
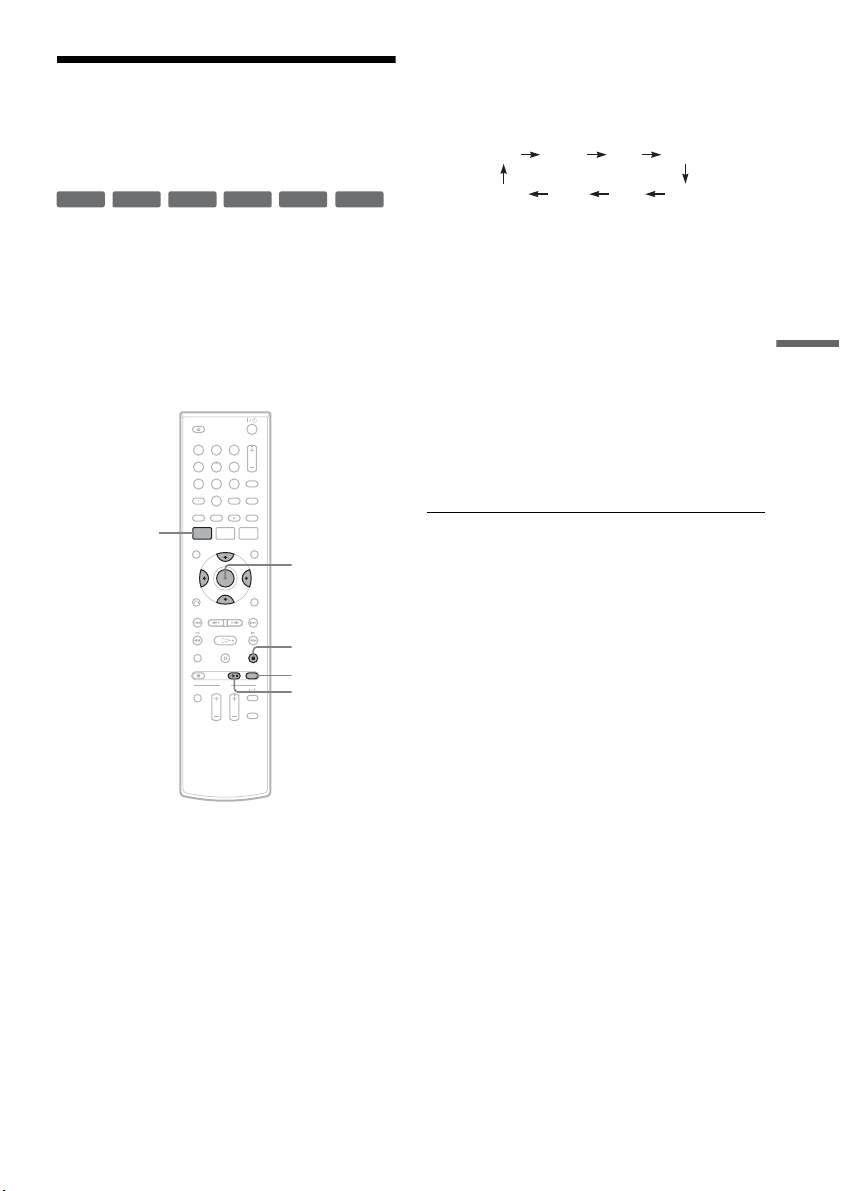
53
Recording
Recording From Connected
Equipment With a Timer
(Synchro Rec)
You can set the recorder to automatically record
programs from connected equipment that has a
timer function (such as a satellite tuner). Connect
the equipment to the LINE 1 IN jacks on the rear
of the recorder (page 18).
When the connected equipment turns on, the
recorder starts recording a program from the LINE
1 IN jacks.
1 Insert a recordable disc.
2 Select the line input audio.
Set “Line Audio Input” of “Audio” setup to
“Stereo” or “Main/Sub” in the “Setup”
display (page 83).
3 Press REC MODE repeatedly to select the
recording mode.
The display changes on the TV screen as
follows:
For details about the recording mode, see
page 47.
4
Set the timer on the connected equipment
to the time you want to record, and turn it
off.
5
Press SYNCHRO REC.
The SYNCHRO REC indicator lights up on
the front panel and the recorder stands by for
Synchro-Rec.
The recorder starts recording when a signal is
received from the connected equipment.
When the connected equipment turns off, the
recording stops and the recorder turns off.
To stop recording
Press x STOP twice.
To cancel a Synchro-Rec function
Press SYNCHRO REC before recording starts.
The SYNCHRO REC indicator on the recorder
turns off.
If you press SYNCHRO REC during Synchro-
Rec, the recording stops, the SYNCHRO REC
indicator turns off, and the recorder turns off.
+
RW
+
R
-
RWVR
-
RW
Video
-
RVR
-
R
Video
11 22 33
44 55 66
77 88
00
99
M/m/</,,
ENTER
SYNCHRO
REC
x STOP
REC MODE
SYSTEM
MENU
HQ SPHSP LSP
SLP LPEP ESP
,continued
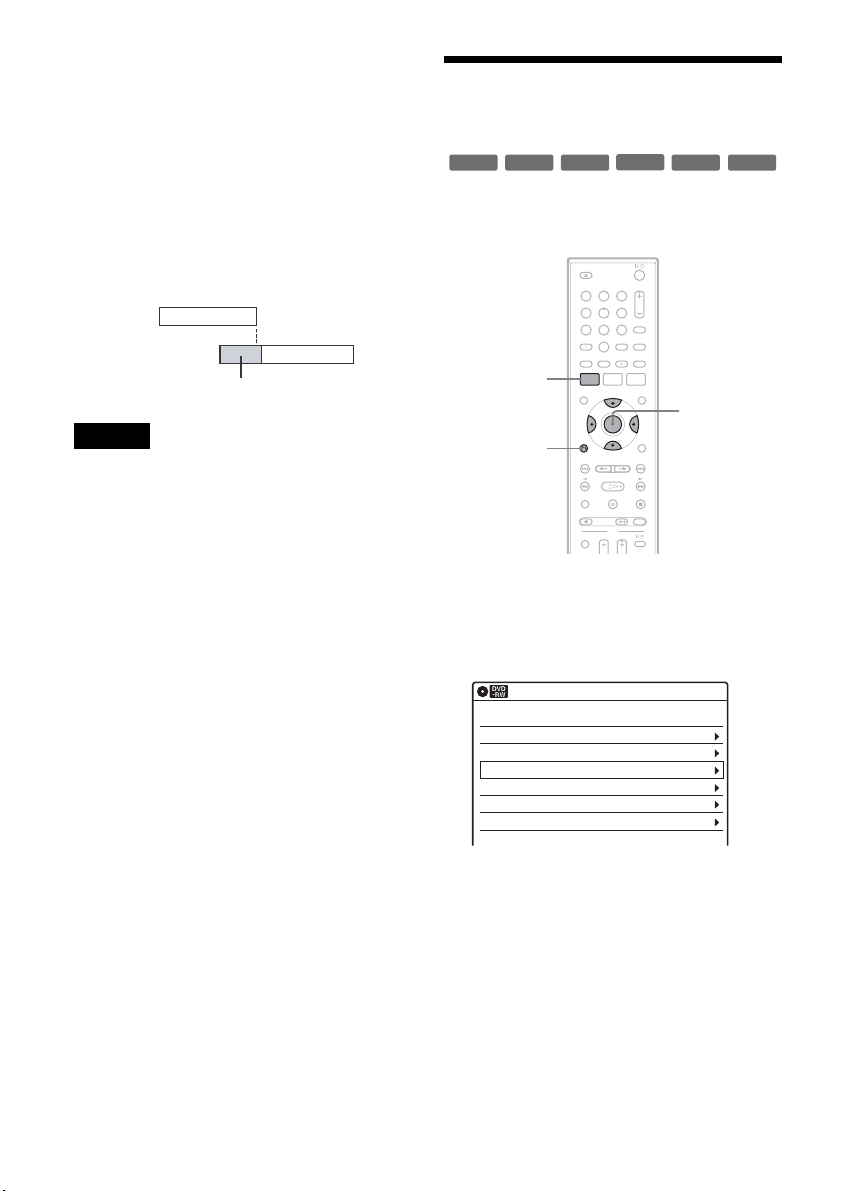
54
If the timer settings of a Synchro-Recording
and another timer recording overlap
Regardless of whether or not the program is a
Synchro-Rec program, the program that starts first
has priority. The recorder starts recording the
second program about ten seconds after the first
program has finished. If the end time of one
setting and the start time of another timer setting is
the same, the beginning of the program that starts
later will be cut.
Notes
• The recorder starts recording only after detecting the
video signal from the connected equipment. The
beginning of the program may not be recorded
regardless of whether or not the recorder’s power is on
or off.
• To use the connected equipment during Synchro-Rec
standby, cancel the standby mode by pressing
SYNCHRO REC. To return to standby mode again, be
sure to turn off the equipment and press SYNCHRO
REC, before Synchro-Rec starts.
• The Synchro-Rec function does not work with some
tuners. For details, see the tuner’s operating
instructions.
• During Synchro-Rec standby, the Auto Clock Set
function does not work (page 78).
• After a recording has finished, the recorder enters the
Synchro-Rec standby mode until the SYNCHRO REC
indicator turns off.
• If Synchro-Rec starts with the recorder turned on, the
recorder will turn off when the recording ends.
• The recorder does not record programs with Copy-
Never signals. Such recordings stop after a few
seconds.
Changing or Canceling
Timer Settings (Timer List)
You can change or cancel timer settings using the
Timer List menu.
1 Press SYSTEM MENU.
The System Menu appears.
2 Select “Timer,” and press ENTER.
3 Select “Timer List,” and press ENTER.
Timer information displays the recording
date, time, recording mode, etc.
If there are more than six timer settings, press
m to display the next page.
4 Select the timer setting you want to change
or cancel, and press ENTER.
The sub-menu appears.
7:00 8:00 9:00 10:00
Program 1
Program 2
will be cut off
+
RW
+
R
-
RWVR
-
RW
Video
-
RVR
-
R
Video
11 22 33
44 55 66
77 88
00
99
SYSTEM
MENU
M/m/</,,
ENTER
O RETURN
01 04/15 09:00PM 10:00PM Ch 8
--/-- --:-- --:-- ---- ---04
--/-- --:-- --:-- ---- ---05
--/-- --:-- --:-- ---- ---06
03 --/-- --:-- --:-- ---- ---
02 04/30 09:15PM 09:45PM D11.1
10:10 AM
SP
SP
Timer List
No Date Start End Ch Mode Edit

55
Recording
5 Select one of the options, and press
ENTER.
“Edit”: Changes the timer setting.
Select an item using </, and adjust using
M/m. Press ENTER.
“Erase”: Erases the timer setting.
Select “OK” and press ENTER when asked
for confirmation.
6 Press SYSTEM MENU to turn off the Timer
List.
To return to the previous display
Press O RETURN.
Notes
• Even when correctly set, the program may not be
recorded if another recording is underway, or other
prioritized timer setting overlaps. For priority, see
page 52.
• You cannot change the timer settings for a recording
currently underway.
Recording From Connected
Equipment Without a Timer
You can record from a connected VCR or similar
device. For connection details, see “Connecting a
VCR or Similar Device” on page 32.
Use the DV IN jack on the front panel if the
equipment has a DV/D8 output jack (i.LINK
jack).
To record from a digital video camera connected
to the DV IN jack, see page 71.
1 Insert a recordable disc.
2 Press INPUT repeatedly to select an input
source according to the connection you
made.
The front panel display changes as follows:
When selecting a digital channel
When selecting an analog channel
01 04/15 09:00PM 10:00PM Ch 8
--/-- --:-- --:-- ---- ---04
--/-- --:-- --:-- ---- ---05
--/-- --:-- --:-- ---- ---06
03 --/-- --:-- --:-- ---- ---
02 04/30 09:15PM 09:45PM D11.1
10:10 AM
Timer List
No Date Start End Ch Mode Edit
Edit
Erase
01 DVD 04/15 09:00PM 10:00PM CH8
--- --/-- --:-- --:-- ---- ---04
--- --/-- --:-- --:-- ---- ---05
--- --/-- --:-- --:-- ---- ---06
03 --- --/-- --:-- --:-- ---- ---
02 DVD 04/30 09:15PM 09:45PM CH11
10:10 AM
No Rec To Date Start End Source Mode Edit
Timer – Standard
No.01
: PM PM
:
09 00 10 00 Ch 8 SP
Date Start End Ch Mode
04/15
01 DVD 04/15 09:00PM 10:00PM CH8
--- --/-- --:-- --:-- ---- ---04
--- --/-- --:-- --:-- ---- ---05
--- --/-- --:-- --:-- ---- ---06
03 --- --/-- --:-- --:-- ---- ---
02 DVD 04/30 09:15PM 09:45PM CH11
10:10 AM
No Media Date Start End Source Mode Edit
Timer List
Do you want to erase ‘‘No.01’’?
OK
Cancel
+
RW
+
R
-
RWVR
-
RW
Video
-
RVR
-
R
Video
11 22 33
44 55 66
77 88
00
99
INPUT
x STOP
REC MODE
z REC
LINE2 DVLINE1 Digital Channel
LINE2 DVLINE1 Analog Channel
,continued

56
3 Press REC MODE repeatedly to select the
recording mode.
The display changes on the TV screen as
follows:
For details about the recording mode, see
page 47.
4 Select the line input audio.
Set “Line Audio Input” of “Audio” setup to
“Stereo” or “Main/Sub” in the “Setup”
display (page 83).
5 Insert the source tape into the connected
equipment and set to playback pause.
6 Press z REC on this recorder and the
pause or play button on the connected
equipment at the same time.
Recording starts.
To stop recording, press x STOP on this
recorder.
Notes
• A video game image may not be recorded clearly.
• The recorder does not record programs with Copy-
Never signals. Such recordings stop after a few
seconds.
• During recording or recording pause, you cannot
change the recording mode.
• You cannot change the channel or input source during
recording.
HQ SPHSP LSP
SLP LPEP ESP
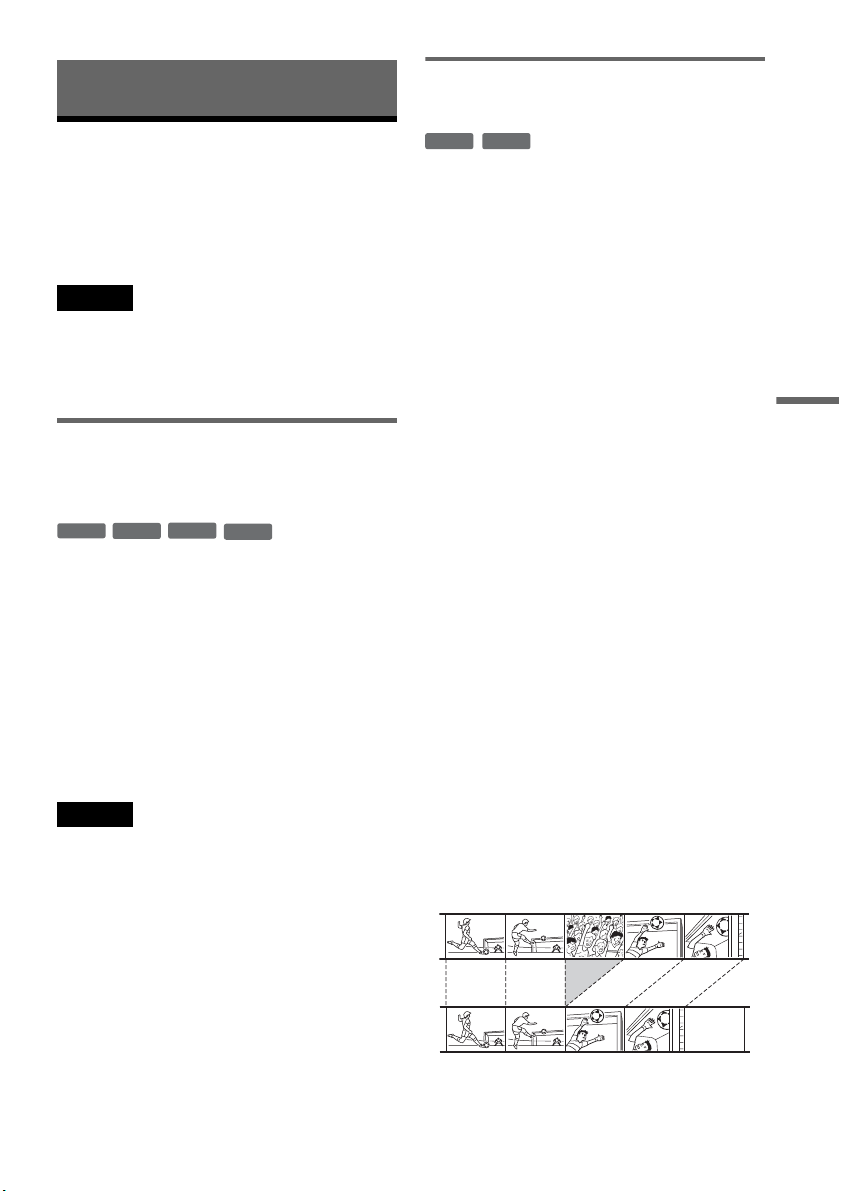
57
Editing
Editing
Before Editing
This recorder offers various edit options for
various disc types. Before you edit, check the disc
type in the front panel display, and select the
option available for your disc (page 12).
Notes
• You may lose the edited contents if you remove the disc
or a timer recording starts while editing.
• You cannot edit recordings on DVD-RWs (Video
mode), DVD+R, or DVD-Rs (Video mode) recorded
on other DVD equipment.
Edit options for DVD+RWs/DVD-RWs
(Video mode)/DVD+Rs/DVD-Rs
(Video mode)
You can perform simple edits. Since Video mode
titles are actual recordings on the disc, you cannot
undo any edits you make. The edit functions
available for Video mode titles are:
– Renaming a title (page 61).
– Erasing a title (page 58).
– Setting protection against erasure (DVD+RWs
only) (page 58).
– Erasing a section of a title (A-B Erase)
(DVD+RWs only) (page 59).
– Dividing a title (DVD+RWs only) (page 60).
Notes
• Once the disc is finalized, you cannot edit or record on
the disc (except for DVD+RWs).
• If a message appears and indicates that the disc’s
control information is full, erase unnecessary titles.
Edit options for DVD-RWs (VR mode)/
DVD-Rs (VR mode)
You can enjoy advanced edit functions. First you
have two options for a DVD-RW (VR mode) and
DVD-R (VR mode): editing either the original
recording (called the “original”), or the playback
information created from the original (called a
“Playlist”). Since each is different in nature and
offers different merits, read the following and
select the one that better suits your needs.
To edit original titles
Edits made to the original titles are final. If you
plan to retain an unaltered original recording,
create and edit a Playlist (see below). The edit
functions available for original titles are:
– Renaming a title (page 61).
– Erasing a title (page 58).
– Erasing a chapter (page 59).
– Setting protection against erasure (page 58).
– Erasing a section of a title (A-B Erase) (page 59).
– Dividing a title (page 60).
To create and edit Playlist titles
A Playlist is a group of Playlist titles created from
the original title for editing purposes. When you
create a Playlist, only the control information
necessary for playback, such as the playback
order, is stored on the disc. Since the original titles
are left unaltered, Playlist titles can be re-edited.
If you erase an original title used in a Playlist, that
Playlist is also erased.
Example: You have recorded the final few
matches of a soccer tournament on a DVD-RW
(VR mode). You want to create a digest with the
goal scenes and other highlights, but you also want
to keep the original recording.
-
RW
Video
+
RW
+
R
-
R
Video
-
RWVR
-
RVR
,continued

58
In this case, you can compile highlight scenes as a
Playlist title. You can even rearrange the scene
order within the Playlist title. See “Editing a
Playlist” on page 64.
The advanced edit functions available for Playlist
titles are:
– Renaming a title (page 61).
– Erasing a title (page 58).
– Erasing a chapter (page 59).
– Erasing a section of a title (A-B Erase) (page 59).
– Editing a Playlist scene (page 64).
– Dividing a title (page 60).
– Combining titles (page 65).
z Hint
You can switch the Title List to show original or Playlist.
While the Title List menu is turned on, press ORIGINAL/
PLAYLIST repeatedly.
Notes
• You cannot protect Playlist titles.
• If a message appears and indicates that the disc’s
control information is full, erase unnecessary titles.
• You cannot create or edit Playlist titles on a finalized
disc. When you want to edit or record on the DVD-RW
(VR mode) again, unfinalize the disc (page 69).
Editing a Title
This section explains the basic edit functions. Note
that editing is irreversible. To edit a DVD-RW
(VR mode) or DVD-R (VR mode) without
changing the original recordings, create a Playlist
title (page 62).
1 Press TITLE LIST.
When editing a DVD-RW (VR mode) or
DVD-R (VR mode), press ORIGINAL/
PLAYLIST to switch to the “Title List
(Original),” if necessary.
2 Select a title, and press ENTER.
The sub-menu appears.
-
RWVR
-
RW
Video
+
RW
+
R
-
R
Video
-
RVR
11 22 33
44 55 66
77 88
00
99
M/m/</,,
ENTER
TITLE LIST
H PLAY
x STOP
X PAUSE
ORIGINAL/
PLAYLIST
./>
O RETURN
Title List (Original)
10:10 AM
>
>
T
No. Title Length Edit
01 01:29:03
02 00:31:23
03 >01:59:00
04 >00:58:56
1/4
D11.1
D22.2
Ch 23
Ch 66
D11.1
May/02/2007
08:00 PM
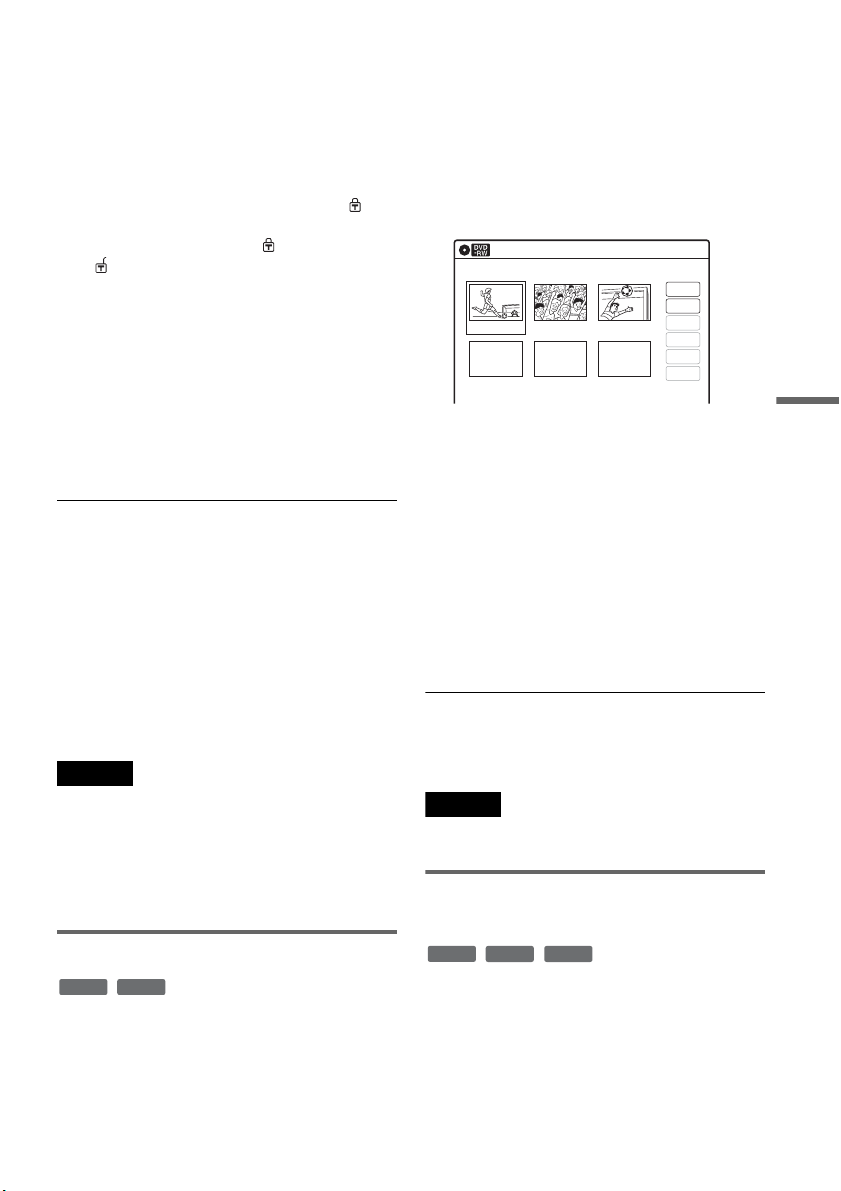
59
Editing
3 Select an option, and press ENTER.
You can select from the following:
“Title Erase”: Erases the selected title. Select
“OK” when asked for confirmation.
“Chapter Erase”
*1
: Allows you to select a
chapter in the title and erase it (see below).
“Protect”
*2
: Protects the title. Select “On”
when the Protection display appears. “ ”
appears for the protected title. To cancel the
protection, select “Off.” “ ” changes to
“.”
“Title Name”: Allows you to rename the title
(page 61).
“A-B Erase”
*2
: Erases a section of the title
(see below).
“Divide Title”
*2
: Divides a title into two
(page 60).
*1
DVD-RWs (VR mode) and DVD-Rs (VR mode)
only
*2
DVD+RWs, DVD-RWs (VR mode), and DVD-R
(VR mode) only
About freeing up disc space
Erasing titles, chapters, or scenes:
– frees up disc space on a DVD-RW (VR mode).
– frees up disc space on a DVD+RW/DVD-RW
(Video mode) only when you erase the last title
or chapter.
– cannot free up disc space on a DVD+R/DVD+R
DL/DVD-R.
z Hint
You can also rename a disc (page 68).
Notes
• When editing a DVD-RW (Video mode), DVD+R, or
DVD-R, finish all editing before finalizing the disc.
You cannot edit a finalized disc.
• You cannot erase protected titles or erase chapters from
a protected title.
• If you erase an original title used in a Playlist, that
Playlist is also erased.
Erasing a chapter (Chapter Erase)
You can select a chapter within a title and erase it.
Note that erasing chapters from original titles
cannot be undone.
1 Press TITLE LIST.
Press ORIGINAL/PLAYLIST to switch to the
“Title List (Original),” if necessary.
2 Select a title, and press ENTER.
The sub-menu appears.
3 Select “Chapter Erase,” and press ENTER.
The display for erasing chapters appears.
4 Select the chapter you want to erase, and
press ENTER.
“Check” is selected. To preview the chapter,
press ENTER. When playback finishes or
when you press O RETURN, the display
returns to “Chapter Erase (Original).”
5 Select “Erase,” and press ENTER.
The display asks for confirmation.
6 Select “OK,” and press ENTER.
The selected chapter is erased from the title.
To erase other chapters, repeat from step 4.
z Hint
You can also erase chapters from a Playlist title
(page 64).
Note
If you erase an original title used in a Playlist, that Playlist
is also erased.
Erasing a section of a title
(A-B Erase)
You can select a section (scene) within a title and
erase it. Note that erasing scenes from original
titles cannot be undone.
-
RWVR
-
RVR
Chapter Erase (Original)
10:10 AM
Chapter No. 1 / 3 Title No.01
03 00:04:2002 00:00:1001 00:00:34
Check
Erase
Modify
Move
Add
Copy
-
RWVR
-
RVR
+
RW
,continued
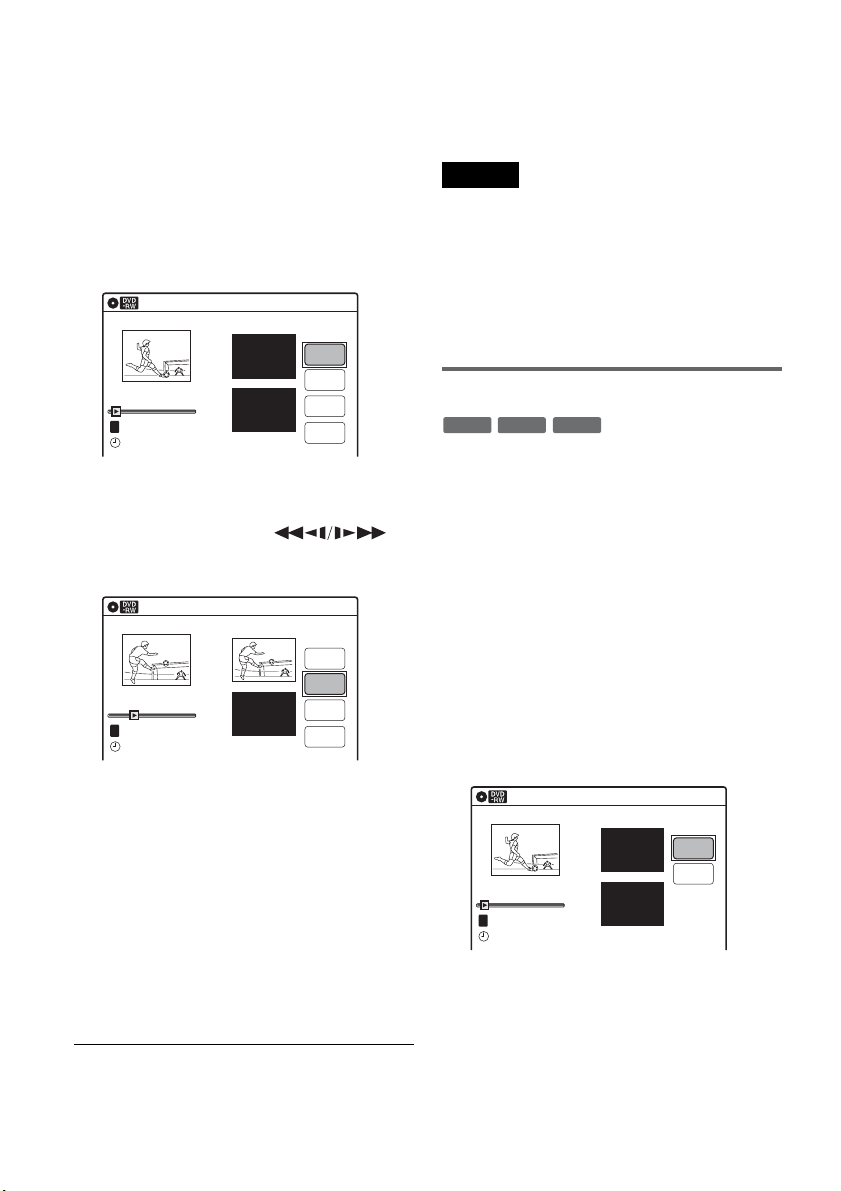
60
1 Press TITLE LIST.
When editing a DVD-RW (VR mode) or
DVD-R (VR mode), press ORIGINAL/
PLAYLIST to switch to the “Title List
(Original),” if necessary.
2 Select a title, and press ENTER.
The sub-menu appears.
3 Select “A-B Erase,” and press ENTER.
The display for setting point A and B appears.
“Start” is selected.
4 Press ENTER at the start point of the
section to be erased (point A).
You can use H PLAY, ,
./>, x STOP, and X PAUSE to find
the point. “End” is selected.
5 Press ENTER at the end point of the section
(point B).
“Erase” is selected.
To reset the start or end point, select “Start” or
“End” and repeat from step 4 or 5.
6 Press ENTER.
The display asks for confirmation.
7 Select “OK,” and press ENTER.
The scene is erased.
To continue, repeat from step 4.
To finish, select “Finish,” and press ENTER.
z Hints
• A chapter mark is inserted after the scene was erased.
The chapter mark divides the title into separate chapters
on either side of the mark.
• You can also erase a section of a Playlist title (page 64).
Notes
• Images or sound may be momentarily interrupted at the
point where you erase a section of a title.
• Sections shorter than five seconds may not be erased.
• The start and end points of a title may be different from
what you have set.
• The total playing time of the title does not change even
if a scene was erased.
• If you erase an original title used in a Playlist, that
Playlist is also erased.
Dividing a title into two (Divide Title)
You can divide a title into two. Note that dividing
original titles cannot be undone.
1 Press TITLE LIST.
When editing a DVD-RW (VR mode) or
DVD-R (VR mode), press ORIGINAL/
PLAYLIST to switch to the “Title List
(Original),” if necessary.
2 Select a title, and press ENTER.
The sub-menu appears.
3 Select “Divide Title,” and press ENTER.
The display for setting the dividing point
appears.
“Point” is selected.
A-B Erase
10:10 AM
Title No.01
End 00:00:00
Start 00:00:00
Start
End
Erase
Finish
00:00:07
T
Title No.01
May/02/2007 08:00 PM
A-B Erase
10:10 AM
Title No.01
End 00:00:00
Start 00:00:10
Start
End
Erase
Finish
00:00:10
T
Title No.01
May/02/2007 08:00 PM
-
RWVR
+
RW
-
RVR
Divide Title (Original)
10:10 AM
Title No.01
T
Point
Divide
00:00:07
Title No. 01
Start 00:00:00
End 00:00:00
May/02/2007 08:00 PM
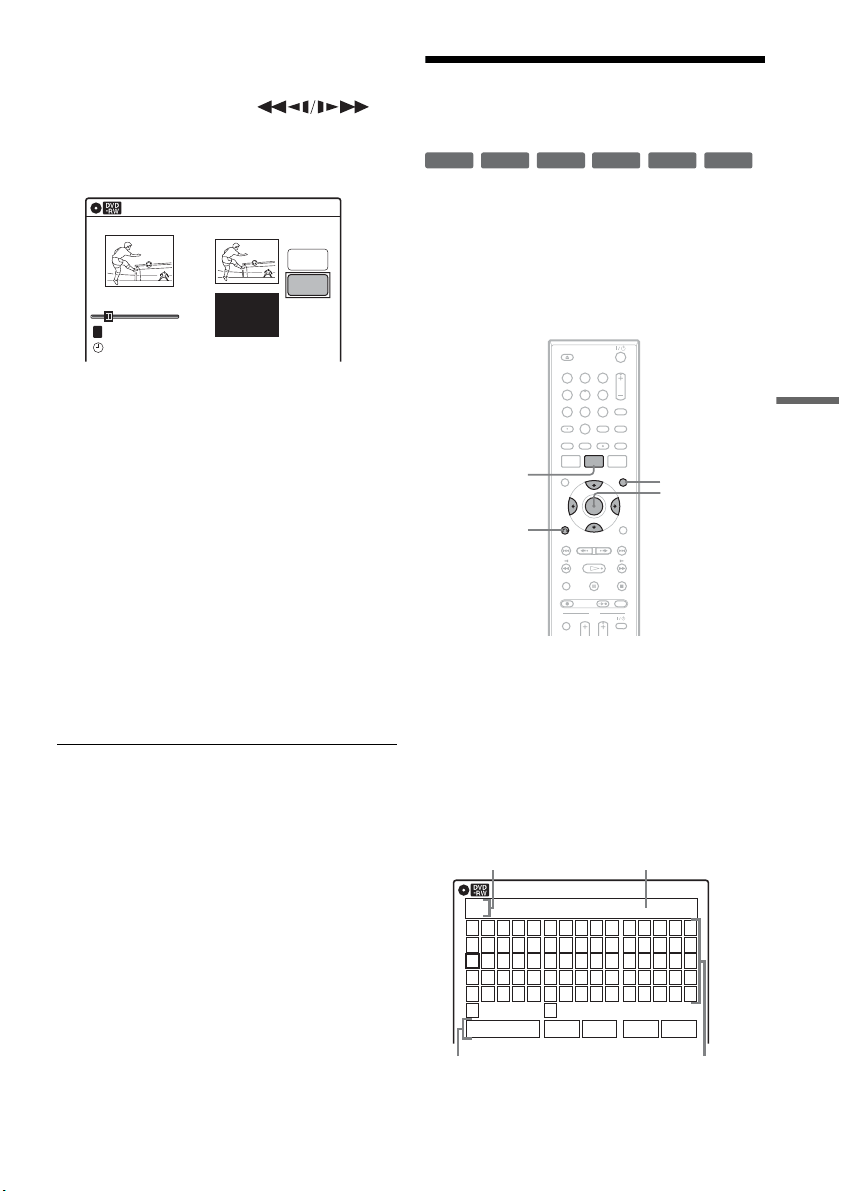
61
Editing
4 Press ENTER at the point where you want to
divide the title.
You can use H PLAY, ,
./>, x STOP, and X PAUSE to find
the point.
“Divide” is selected.
5 Press ENTER.
The display asks for confirmation.
To reset the dividing point, select “No” and
press ENTER, then repeat from step 4.
6 Select “Yes,” and press ENTER.
The display asks whether to rename the title.
To use the same name as before, select “No”
and press ENTER to finish.
7 Select “Yes,” and press ENTER.
The “Title Name” display appears.
8 Follow steps 4 to 6 of “Changing the Name
of a Title” (page 61) to complete
renaming.
The divided title appears in the Title List with
the new name.
z Hints
• You can also divide a Playlist title (page 64).
• If the dividing point is set too close to the beginning of
the title, the title cannot be divided.
Changing the Name of a
Title
You can enter a title name of up to 32 characters.
Since the displayed number of characters is
limited, their appearance in menus such as Title
List may be different. When the display for
entering characters appears, follow the steps
below.
1 Press TITLE LIST.
When editing a DVD-RW (VR mode) or
DVD-R (VR mode), press ORIGINAL/
PLAYLIST to switch to the “Title List
(Original),” if necessary.
2 Select a title, and press ENTER.
The sub-menu appears.
3 Select “Title Name,” and press ENTER.
The “Title Name” display appears.
10:10 AM
Title No.01
T
00:00:10
Divide Title (Original)
Title No. 01
End 00:00:10
Start 00:00:00
Point
Divide
May/02/2007 08:00 PM
+
R
-
RWVR
-
RW
Video
+
RW
-
RVR
-
R
Video
11 22 33
44 55 66
77 88
00
99
M/m/</,,
ENTER
O RETURN
TITLE LIST
ORIGINAL/
PLAYLIST
Title Name
K
_
A B C D E
F G H I J
K L M N O
P Q R S T
U V W X Y
Z
a b c d e
f g h i j
k l m n o
p q r s t
u v w x y
z
1 2 3 4 5
6 7 8 9 0
- _ + = .
~
!
@ # $
%
^
& ( )
Backspace Space Delete Clear Finish
10:10 AM
Input row
Character paletteSetting buttons
Cursor
,continued

62
4 Select the character you want to enter
using M/m/</,, and press ENTER.
The selected character appears in the input
row.
You can only enter characters and symbols
that are displayed.
• To change the cursor position, select the
input row using M, and press </,.
• To erase a character, select either of the
following setting buttons and press ENTER.
“Backspace”: Erases the character to the left
of the cursor.
“Delete”: Erases the character at the cursor
position.
“Clear”: Erases all the characters in the input
row.
• To insert a space, move the cursor to the
desired position, select “Space,” and press
ENTER.
• To insert a character, move the cursor to the
desired position, select the character, and
press ENTER.
5 Repeat step 4 to enter the remaining
characters.
To return to the Title List without renaming
the title, press O RETURN.
6 Select “Finish,” and press ENTER.
z Hint
You can also rename a disc (page 68). Follow steps 4 to
6 above when the “Disc Name” display appears.
Creating a Playlist
Playlist titles allow you to edit without changing
the original recordings (see “Edit options for
DVD-RWs (VR mode)/DVD-Rs (VR mode)” on
page 57). You can create a Playlist title by
combining up to 99 sections (scenes) from original
titles.
Notes
• If you erase an original title used in a Playlist, that
Playlist is also erased.
• You cannot create or edit Playlist titles on a finalized
disc. When you want to edit or record on the DVD-RW
(VR mode) again, unfinalize the disc (page 69).
1 Press SYSTEM MENU while the recorder is
in stop mode.
-
RWVR
-
RVR
11 22 33
44 55 66
77 88
00
99
M/m/</,,
ENTER
SYSTEM
MENU
H PLAY
TITLE LIST
x STOP
X PAUSE
ORIGINAL/
PLAYLIST
./>
Press ENTER :
Title Menu for DVD Title List.
10:10 AM
Title List (Original)
Setup
Disc Setting
Edit
Title List
Timer
DV/D8 Dubbing
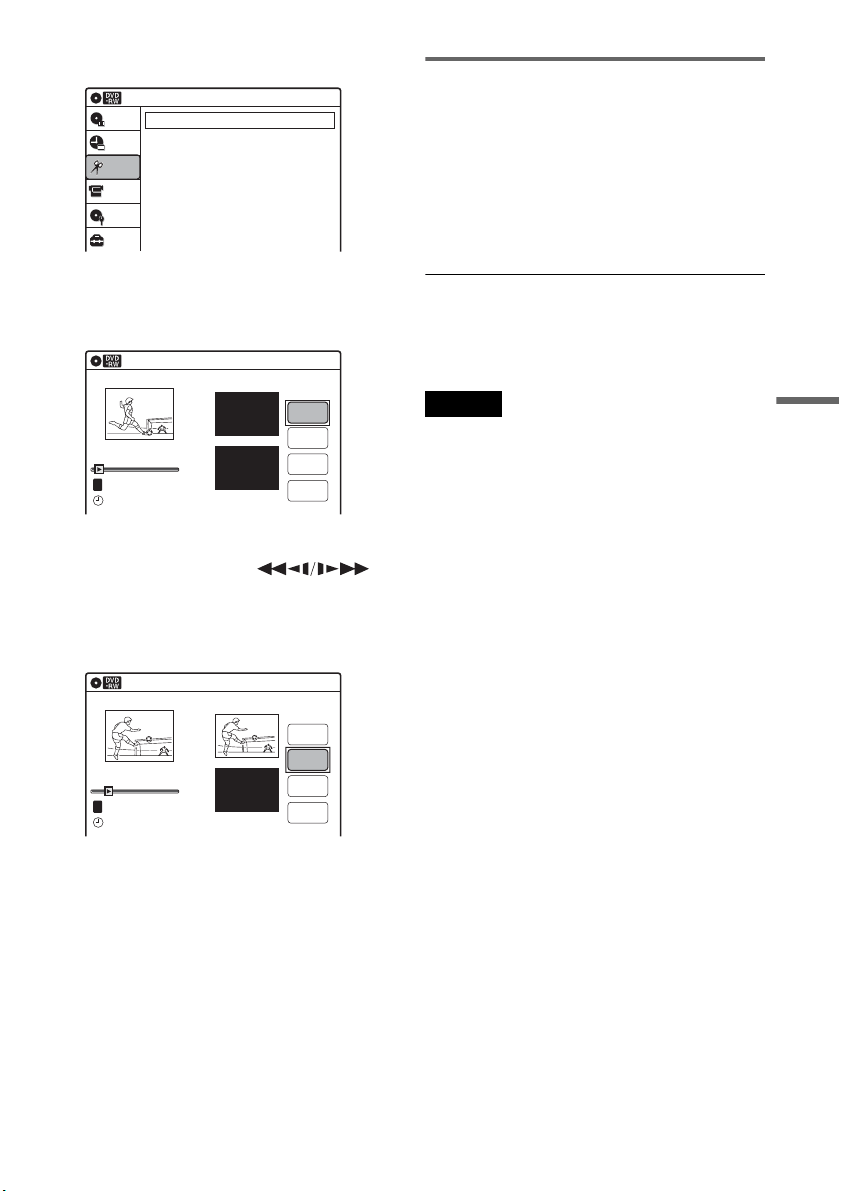
63
Editing
2 Select “Edit,” and press ENTER.
3 Select “Create Playlist,” and press ENTER.
The display for creating a Playlist appears.
“Start” is selected.
4 Press ENTER at the start point.
You can use H PLAY, ,
./> and X PAUSE to find the point. At
the point you want to select, press H PLAY
or X PAUSE, and press ENTER.
“End” is selected.
5 Press ENTER at the end point.
“Make” is selected.
To reset the start or end point, select “Start” or
“End” and repeat step 4 or 5.
6 Press ENTER.
The selected section is captured as a scene. To
continue, repeat from step 4.
7 When you finish capturing scenes, select
“Finish” and press ENTER.
Playing a Playlist title
1 Press TITLE LIST.
2 Press ORIGINAL/PLAYLIST to switch to the
“Playlist” Title List.
3 Select a Playlist title, and press ENTER.
The sub-menu appears.
4 Select “Play,” and press ENTER.
z Hint
When a Playlist title is created, the start and end points
will become chapter marks, and each scene will become
a chapter.
Notes
• The picture may pause when an edited scene is played.
• The start and end points in a title may be different from
what you have set.
10:10 AM
Create Playlist
Edit Playlist
Edit
Setup
Disc Setting
Edit
Title List
Timer
DV/D8 Dubbing
Create Playlist
10:10 AM
Scene No.01
End 00:00:00
Start 00:00:00
T
Start
End
Make
Finish
00:00:07
---/--/---- --:--
Playlist No. 01
10:10 AM
Scene No.01
T
Finish
00:00:10
Create Playlist
Playlist No. 01
End 00:00:00
Start 00:00:10
Start
End
Make
---/--/---- --:--
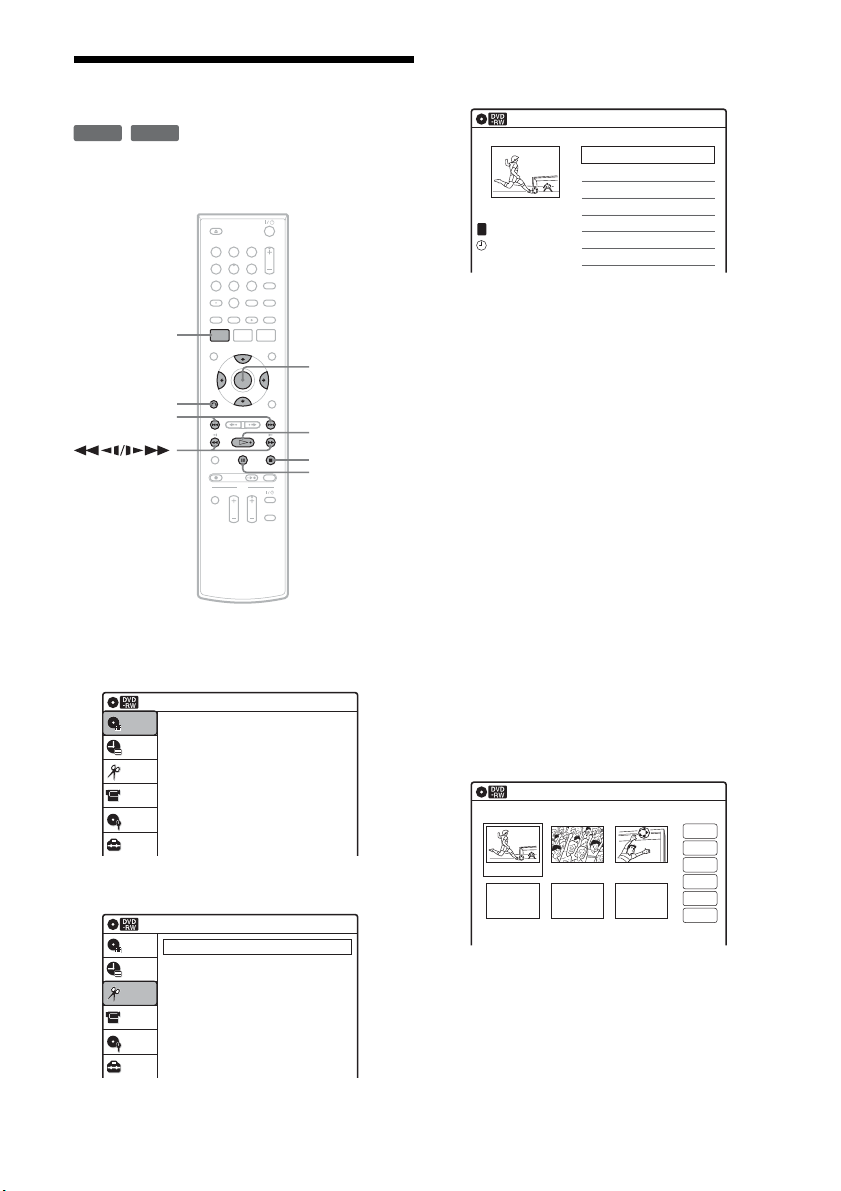
64
Editing a Playlist
You can edit Playlist titles or scenes within them,
without changing the actual recordings.
1 Press SYSTEM MENU while the recorder is
in stop mode.
2 Select “Edit,” and press ENTER.
3 Select “Edit Playlist,” and press ENTER.
The “Playlist” Title List appears.
4 Select a Playlist title, and press ENTER.
The sub-menu appears.
5 Select an option, and press ENTER.
Select from the following options. For details,
see the pages in parentheses.
“Title Erase”: Erases the title. Select “OK”
when asked for confirmation.
“Chapter Erase”: Allows you to select
chapters in the Playlist title to erase (page 59).
“Title Name”: Allows you to rename the title
(page 61).
“A-B Erase”: Allows you to select sections in
the title to erase (page 59).
“Edit Scene”: Allows you to re-edit scenes in
the Playlist title. Go to step 6.
“Divide Title”: Divides the title in two at a
desired point (page 60).
“Combine Titles”: Allows you to combine
two titles into one (page 65).
6 Select “Edit Scene,” and press ENTER.
The display for editing scenes appears.
“Check”: Allows you to preview a scene.
Starts playback of the selected scene when
you press ENTER. The display returns to the
“Edit Scene” display when the playback
finishes or when you press O RETURN.
“Erase”: Erases a scene (page 65).
“Modify”: Allows you to change the start and
end point of a scene (page 65).
-
RWVR
-
RVR
11 22 33
44 55 66
77 88
00
99
SYSTEM
MENU
M/m/</,,
ENTER
H PLAY
x STOP
X PAUSE
O RETURN
./>
Press ENTER :
Title Menu for DVD Title List.
10:10 AM
Title List (Original)
Setup
Disc Setting
Edit
Title List
Timer
DV/D8 Dubbing
10:10 AM
Create Playlist
Edit Playlist
Edit
Setup
Disc Setting
Edit
Title List
Timer
DV/D8 Dubbing
Playlist
10:10 AM
01 >00:05:04
02 >00:00:51
T
No. Title Length Edit1/2
D11.1
Ch 96
D11.1
May/02/2007
03:25 PM
Edit Scene
10:10 AM
Scene No.01 / 03 Playlist No.01
03 00:04:2002 00:00:1001 00:00:34
Check
Erase
Modify
Move
Add
Copy
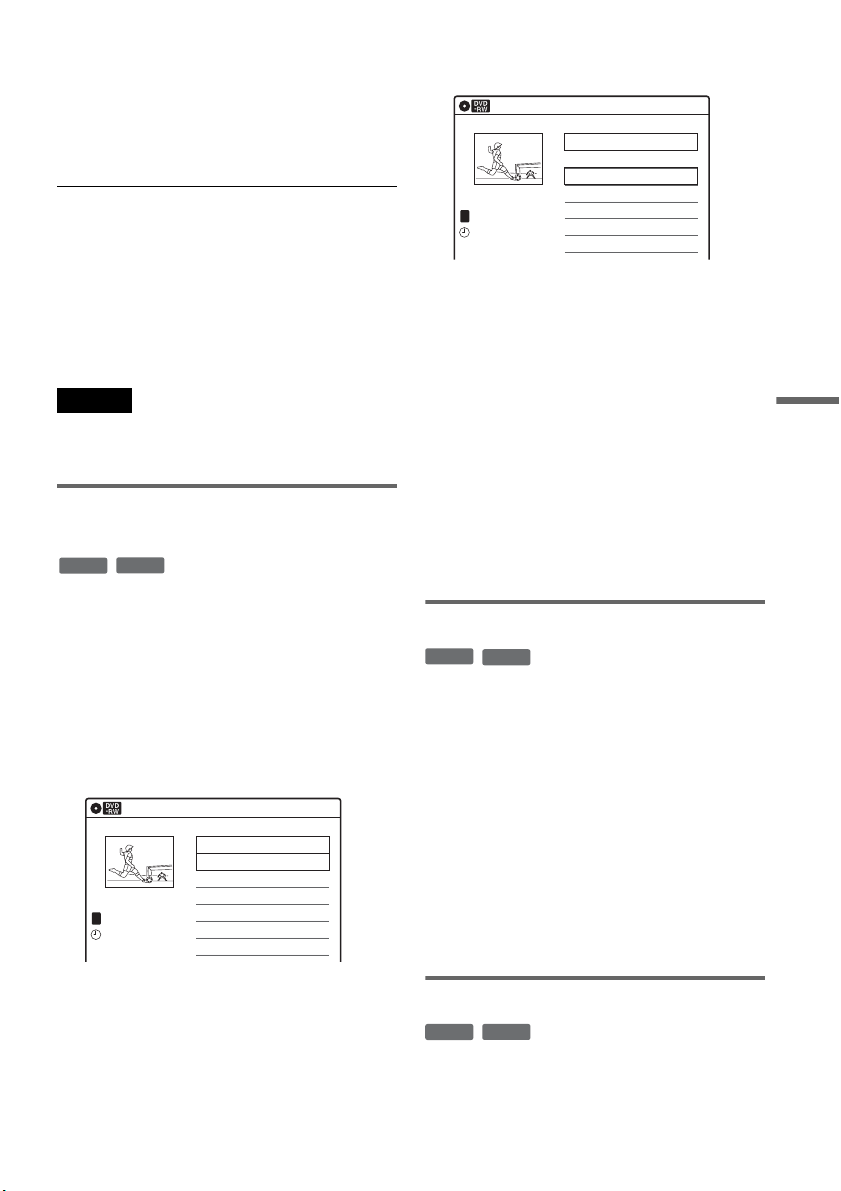
65
Editing
“Move”: Allows you to change scene order
(page 66).
“Add”: Allows you to add other scenes before
a selected scene (page 66).
“Copy”: Allows you to copy a scene
(page 67).
To return to the previous display
Press O RETURN.
To turn off the display
Press SYSTEM MENU.
z Hint
The Resume Play function will work for scene playback.
Note
You cannot create or edit Playlist titles on a finalized
disc. When you want to edit or record on the DVD-RW
(VR mode) again, unfinalize the disc (page 69).
Combining two titles into one
(Combine Titles)
You can select a Playlist title and combine it with
another Playlist title.
1 Follow steps 1 to 4 of “Editing a Playlist”
(page 64) to select a Playlist title.
The sub-menu appears.
2 Select “Combine Titles,” and press
ENTER.
The next title below is also selected.
3 Select a Playlist title to be combined.
4 Press ENTER.
The display asks for confirmation.
5 Select “Yes,” and press ENTER.
The display asks whether to rename the title.
To use the same name as before, select “No”
and press ENTER to finish.
6 Select “Yes,” and press ENTER.
The “Title Name” display appears.
7 Follow steps 4 to 6 of “Changing the Name
of a Title” (page 61) to complete
renaming.
The two Playlist titles become one Playlist
title with the new name.
Erasing a scene (Erase)
You can erase a selected scene.
1 Follow steps 1 to 6 of “Editing a Playlist”
(page 64).
The “Edit Scene” display appears.
2 Select the scene you want to erase, and
press ENTER.
3 Select “Erase,” and press ENTER.
The display asks for confirmation.
4 Select “OK,” and press ENTER.
The selected scene is erased.
To erase other scenes, repeat from step 2.
Modifying a scene (Modify)
You can change the start and end point of the
selected scene.
-
RWVR
-
RVR
Playlist
10:10 AM
>
>
T
No. Title Length Edit
01 00:05:04
02 00:00:51
03 >01:59:00
04 >00:58:56
1/4
D11.1
D22.2
Ch 23
Ch 66
D11.1
May/02/2007
03:25 PM
Playlist
10:10 AM
>
>
T
No. Title Length Edit
01 00:05:04
02 00:00:51
03 >01:59:00
04 >00:58:56
3/4
D11.1
D22.2
Ch 23
Ch 66
D11.1
May/15/2007
11:30 PM
-
RWVR
-
RVR
-
RWVR
-
RVR
,continued
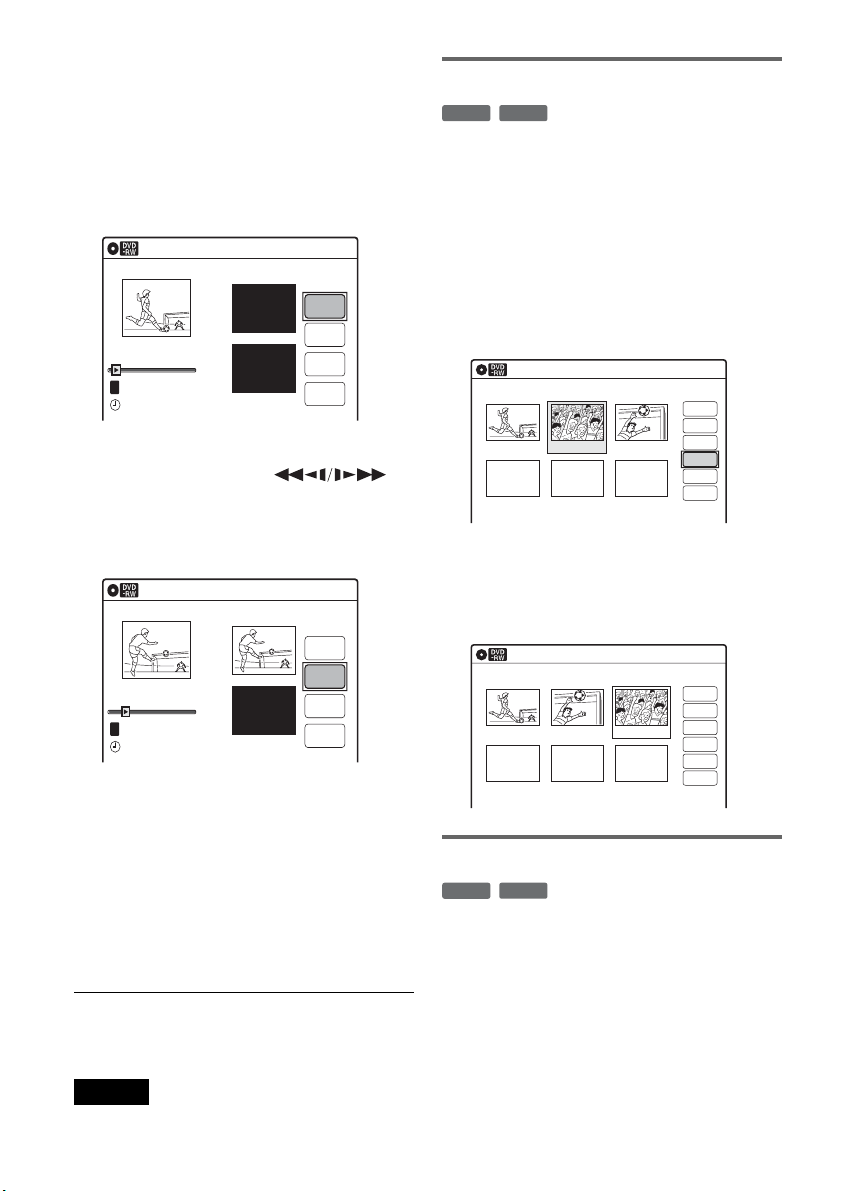
66
1 Follow steps 1 to 6 of “Editing a Playlist”
(page 64).
The “Edit Scene” display appears.
2 Select the scene you want to modify, and
press ENTER.
3 Select “Modify,” and press ENTER.
“Start” is selected.
4 Press ENTER at the start point.
You can use H PLAY, ,
./> and X PAUSE to find the point. At
the point you want to select, press H PLAY
or X PAUSE, and press ENTER.
“End” is selected.
5 Press ENTER at the end point.
“Change” is selected.
To reset the start or end point, select “Start” or
“End” and repeat step 4 or 5.
6 Press ENTER.
The display returns to the “Edit Scene”
display.
The re-selected section is captured as a scene.
To modify other scenes, repeat from step 2.
To cancel modifying
Select “Cancel,” and press ENTER.
Note
The start and end point of a scene may be different from
what you have set.
Moving a scene (Move)
You can change the scene order within the Playlist
title.
1 Follow steps 1 to 6 of “Editing a Playlist”
(page 64).
The “Edit Scene” display appears.
2 Select the scene you want to move, and
press ENTER.
3 Select “Move,” and press ENTER.
4 Select a new location using </,, and
press ENTER.
The selected scene moves to the new location.
To move other scenes, repeat from step 2.
Adding a scene (Add)
You can add a scene before the selected scene.
1 Follow steps 1 to 6 of “Editing a Playlist”
(page 64).
The “Edit Scene” display appears.
2 Select the location where you want to add,
and press ENTER.
A new scene will be added before the selected
scene.
Modify
10:10 AM
T
Change
Cancel
00:00:07
Playlist No. 01
Scene No.01
End 00:00:00
Start 00:00:00
Start
End
May/02/2007 03:25 PM
Modify
10:10 AM
Scene No.01
T
00:00:10
May/02/2007 03:25 PM
Playlist No. 01
Change
Cancel
End 00:00:00
Start 00:00:10
Start
End
-
RWVR
-
RVR
Edit Scene
10:10 AM
Scene No. 02 / 03
03 00:04:2002 00:00:1001 00:00:34
Playlist No.01
Check
Erase
Modify
Move
Add
Copy
Edit Scene
10:10 AM
Scene No. 03 / 03
02 00:04:20 03 00:00:1001 00:00:34
Playlist No.01
Check
Erase
Modify
Move
Add
Copy
-
RWVR
-
RVR
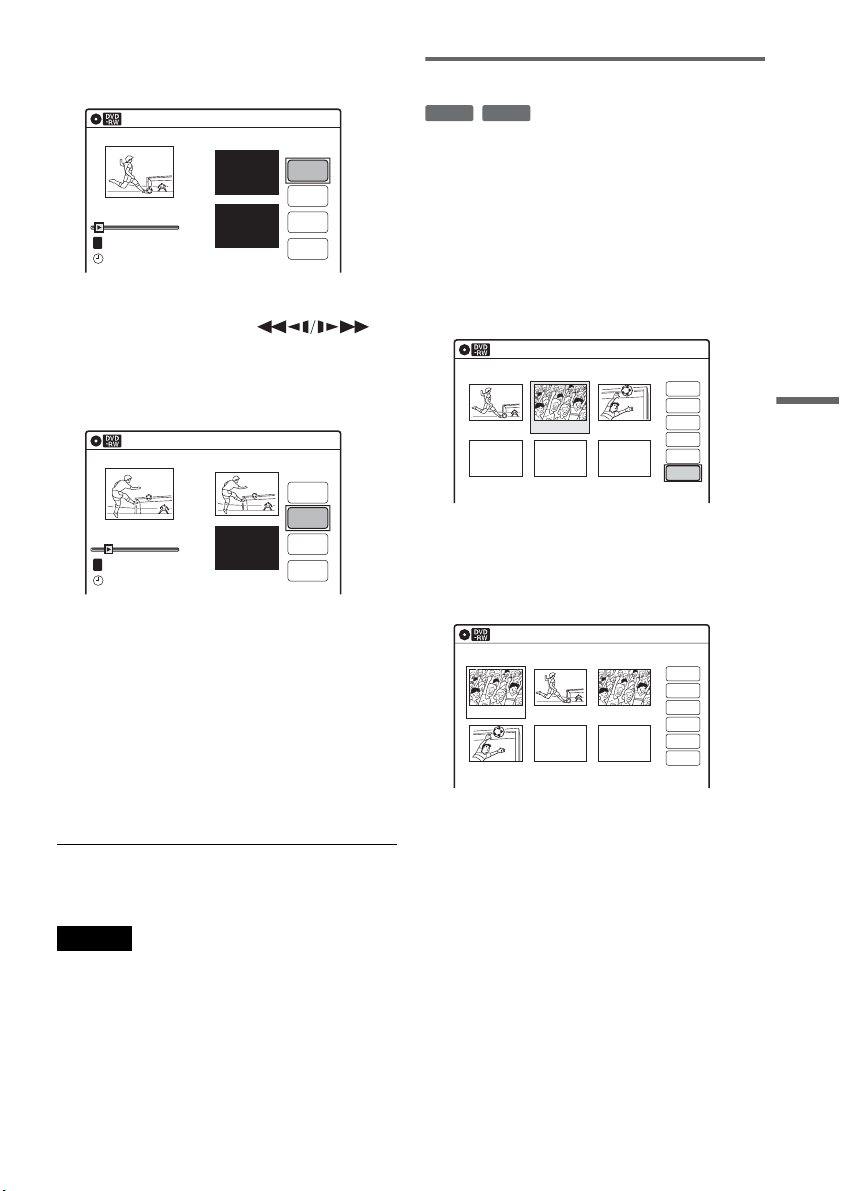
67
Editing
3 Select “Add,” and press ENTER.
“Start” is selected.
4 Press ENTER at the start point.
You can use H PLAY, ,
./> and X PAUSE to find the point. At
the point you want to select, press H PLAY
or X PAUSE, and press ENTER.
“End” is selected.
5 Press ENTER at the end point.
“Add” is selected.
To reset the start or end point, select “Start” or
“End” and repeat step 4 or 5.
6 Press ENTER.
The display returns to the “Edit Scene”
display.
The selected section is added before the scene
selected in step 2.
To add other scenes, repeat from step 2.
To cancel adding
Select “Cancel,” and press ENTER.
Note
The start and end point of a scene may be different from
what you have set.
Copying a scene (Copy)
You can copy and add a selected scene.
1 Follow steps 1 to 6 of “Editing a Playlist”
(page 64).
The “Edit Scene” display appears.
2 Select the scene you want to copy, and
press ENTER.
3 Select “Copy,” and press ENTER.
4 Select a location to copy to using </,
and press ENTER.
The scene is copied to the selected location.
To copy other scenes, repeat from step 2.
Add
10:10 AM
T
00:00:07
Playlist No. 01
Scene No.01
Add
Cancel
End 00:00:00
Start 00:00:00
Start
End
May/02/2007 03:25 PM
Add
10:10 AM
Scene No.01
T
00:00:10
Playlist No. 01
Add
Cancel
End 00:00:00
Start 00:00:10
Start
End
May/02/2007 03:25 PM
-
RWVR
-
RVR
Edit Scene
10:10 AM
Scene No. 02 / 03
03 00:04:2002 00:00:1001 00:00:34
Check
Erase
Modify
Move
Add
Copy
Playlist No.01
Edit Scene
10:10 AM
Scene No. 01 / 04
04 00:04:20
03 00:00:1002 00:00:3401 00:00:10
Playlist No.01
Check
Erase
Modify
Move
Add
Copy
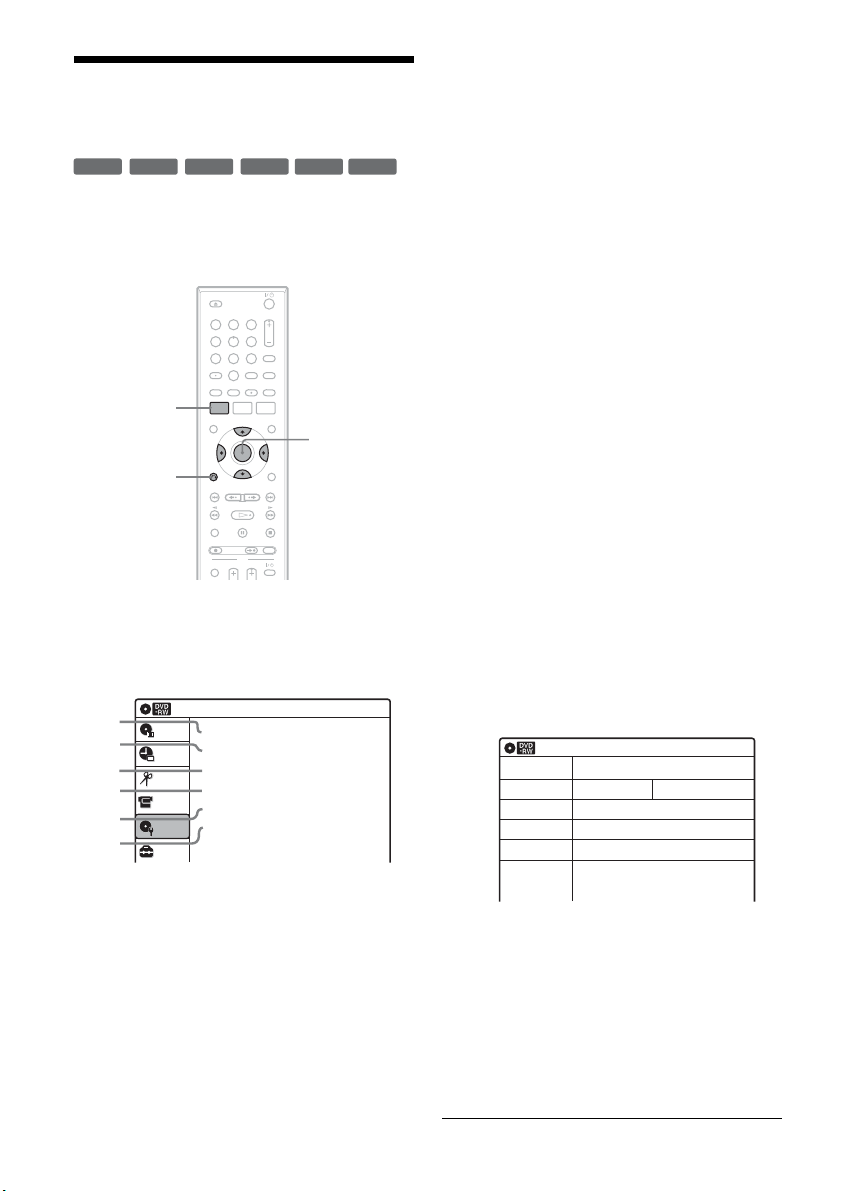
68
Formatting/Renaming/
Protecting a Disc
The “Disc Setting” display allows you to check the
disc information or change the disc name.
Depending on the disc type, you can also format or
set protection.
1 Press SYSTEM MENU while the recorder is
in stop mode.
2 Select “Disc Setting,” and press ENTER.
The “Disc Setting” display appears.
3 Select an option, and press ENTER.
A “Disc Name”: Allows you to rename a
disc.
For details on how to enter characters,
see page 61.
B “Disc Protect” (DVD+RWs/DVD-RWs
(VR mode)/DVD-Rs (VR mode) only):
Protects all titles on the disc when
“Protected” is selected. To cancel the
protection, select “Not Protected.”
C “Disc Format” (DVD+RWs/DVD-
RWs/DVD-Rs only): Erases all
contents of the disc, including protected
titles, and makes a blank disc (except
DVD-Rs).
For DVD-RWs, select a recording
format (“VR Mode” or “Video Mode”)
according to your needs.
To format unused DVD-Rs in VR
mode, select “VR Mode” and then
“OK.”
D “Disc Finalize”: Finalizes a disc. See
page 69 for details.
E “Disc Information”: Displays the
following information.
• Disc name
• Disc type (and recording format for a
DVD-RW (VR mode)/DVD-R (VR
mode))
• Total number of titles
• Protect setting
• The oldest and most recent recording
date
• The total available recording time in
each recording mode
F “Erase All Titles” (DVD+RWs/DVD-
RWs/DVD-Rs (VR mode) only):
Erases all titles on the disc (except
protected titles). Select “OK” when
asked for confirmation.
For DVD-RWs (VR mode)/DVD-Rs
(VR mode), Playlist titles created with
protected titles are also erased.
+
RW
-
RWVR
-
RW
Video
+
R
-
RVR
-
R
Video
11 22 33
44 55 66
77 88
00
99
SYSTEM
MENU
M/m/</,,
ENTER
O RETURN
Disc Setting
10:10 AM
Disc Name :
Disc Protect : Not Protected
Disc Format : VR Mode
Disc Finalize : Unfinalized
Disc Information
Erase All Titles
Setup
Disc Setting
Edit
Title List
Timer
DV/D8 Dubbing
2
3
4
5
1
6
10:10 AM
Disc Information
Disc Name
Media
Title No.
Protected
Date
Remainder
Disc 1
DVD-RW VR ModeFormat
Original 6 / Playlist 1
Not Protected
4/05/2007 ~ 4/30/2007
HQ : 0H 57M
LSP : 2H 23M
EP : 5H 46M
HSP : 1H 26M
ESP : 2H 52M
SLP : 7H 40M
SP : 1H 55M
LP : 3H 50M
4.4/4.7GB

69
Editing
To return to the previous display
Press O RETURN.
z Hints
• You can set protection for individual titles (page 58).
• By reformatting, you can change the recording format
on DVD-RWs, or record again on DVD-RWs (Video
mode) that have been finalized.
Notes
• You can label a disc using up to 32 characters;
however, the name may not display on other DVD
equipment.
• You cannot label an unused DVD-R (Video mode)
disc. Label the disc after you first record on it.
• You cannot mix VR mode and Video mode on the same
DVD-RW or DVD-R.
• You cannot change the recording format on used DVD-
Rs.
• The recorder records on new DVD-Rs in Video mode
unless you first format the discs in VR mode (page 48).
Finalizing a Disc (Preparing
a Disc for Playback on
Other Equipment)
Finalizing is necessary in order to play discs
recorded with this recorder on other DVD
equipment.
When you finalize a DVD+RW/DVD-RW (Video
mode)/DVD+R/DVD-R (Video mode), a DVD
menu will be automatically created, which can be
displayed on other DVD equipment.
Before finalizing, check the differences between
the disc types in the table below.
Differences between the disc types
Discs are automatically finalized when
removed from the recorder. You can edit
or record on the disc even after
finalizing.
Finalizing is unnecessary when playing a
disc on VR format compatible equipment.
Even if your other DVD equipment is
VR format compatible, you may need to
finalize the disc, especially if the
recording time is short. After finalizing,
you cannot edit or record on the disc. If
you want to edit or record on it again,
unfinalize or reformat the disc (page 68).
Note however, that reformatting a disc
erases all its contents.
Finalizing is necessary in order to play
on equipment other than this recorder.
After finalizing, you cannot edit or
record on the disc. If you want to edit or
record on it again, unfinalize or reformat
the disc (page 68). Note however, that
reformatting a disc erases all its
contents.
Finalizing is necessary in order to play
on equipment other than this recorder.
The finalized discs can be played on
other VR mode compatible players.
After finalizing, you cannot further edit
or record on the disc.
Finalizing is necessary in order to play
on equipment other than this recorder.
After finalizing, you cannot further edit
or record on the disc.
-
RWVR
-
RW
Video
+
RW
+
R
-
RVR
-
R
Video
+
RW
-
RWVR
-
RW
Video
-
RVR
+
R
-
R
Video
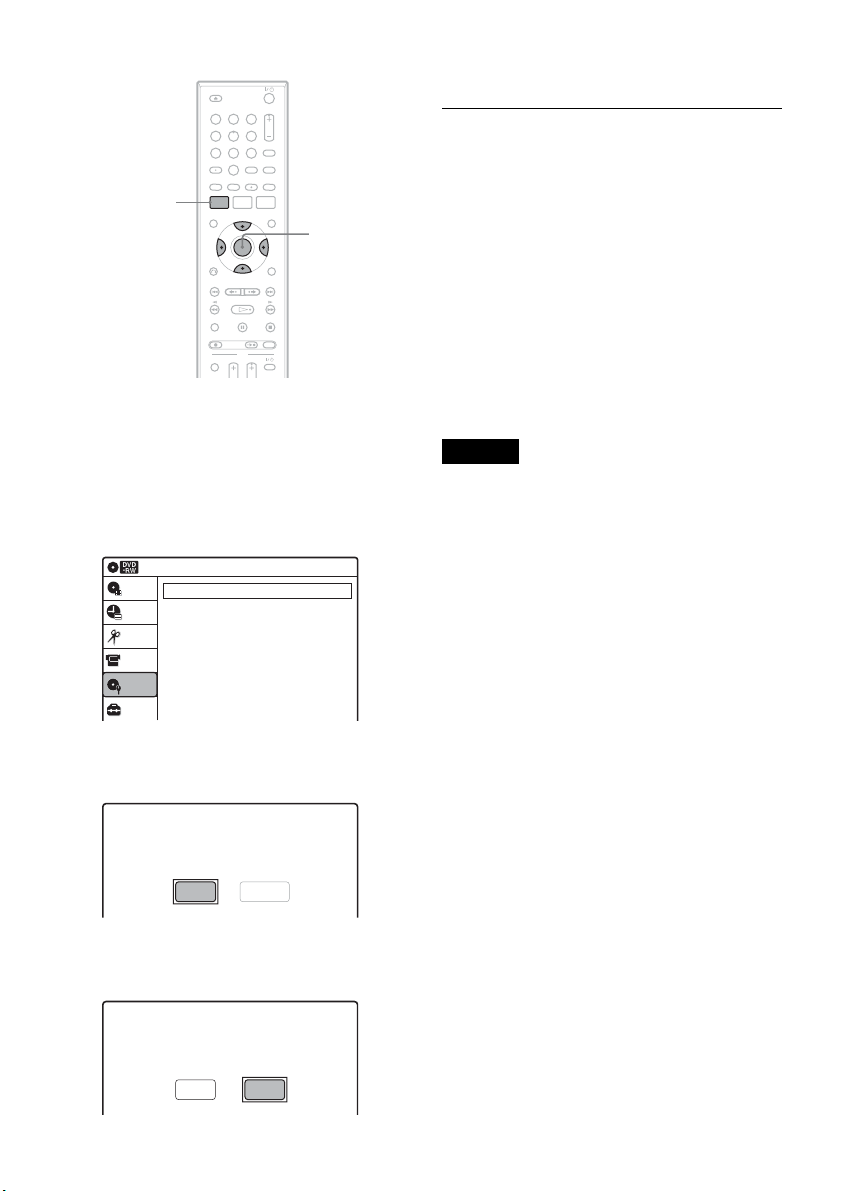
70
1 Insert a disc.
2 Press SYSTEM MENU while the recorder is
in stop mode.
The System Menu appears.
3 Select “Disc Setting,” and press ENTER.
The “Disc Setting” display appears.
4 Select “Disc Finalize,” and press ENTER.
The display asks for confirmation.
5 Select “Finalize,” and press ENTER.
The display asks for confirmation again.
6 Select “OK,” and press ENTER.
The recorder starts finalizing the disc.
To turn off the display
Press SYSTEM MENU.
To unfinalize a DVD-RW (VR mode)
If you cannot record or edit on a DVD-RW (VR
mode) that has been finalized, unfinalize the disc
by selecting “Unfinalize” in step 5 above.
z Hints
• You can check whether the disc has been finalized or
not. If you cannot select “Finalize” in step 5 above, the
disc has already been finalized.
• To check the disc information, select “Disc
Information” in the “Disc Setting” display and press
ENTER. See page 68 for details.
Notes
• Depending on the condition of the disc, the recording,
or the DVD equipment, discs may not play even if the
discs are finalized.
• The recorder may not be able to finalize a disc if it was
recorded on another recorder.
11 22 33
44 55 66
77 88
00
99
SYSTEM
MENU
M/m/</,,
ENTER
Disc Setting
10:10 AM
Disc Name :
Disc Protect : Not Protected
Disc Format : VR Mode
Disc Finalize : Unfinalized
Disc Information
Erase All Titles
Setup
Disc Setting
Edit
Title List
Timer
DV/D8 Dubbing
Do you want to finalize this disc ?
UnfinalizeFinalize
Disc will be finalized.
Do you want to continue ?
CancelOK
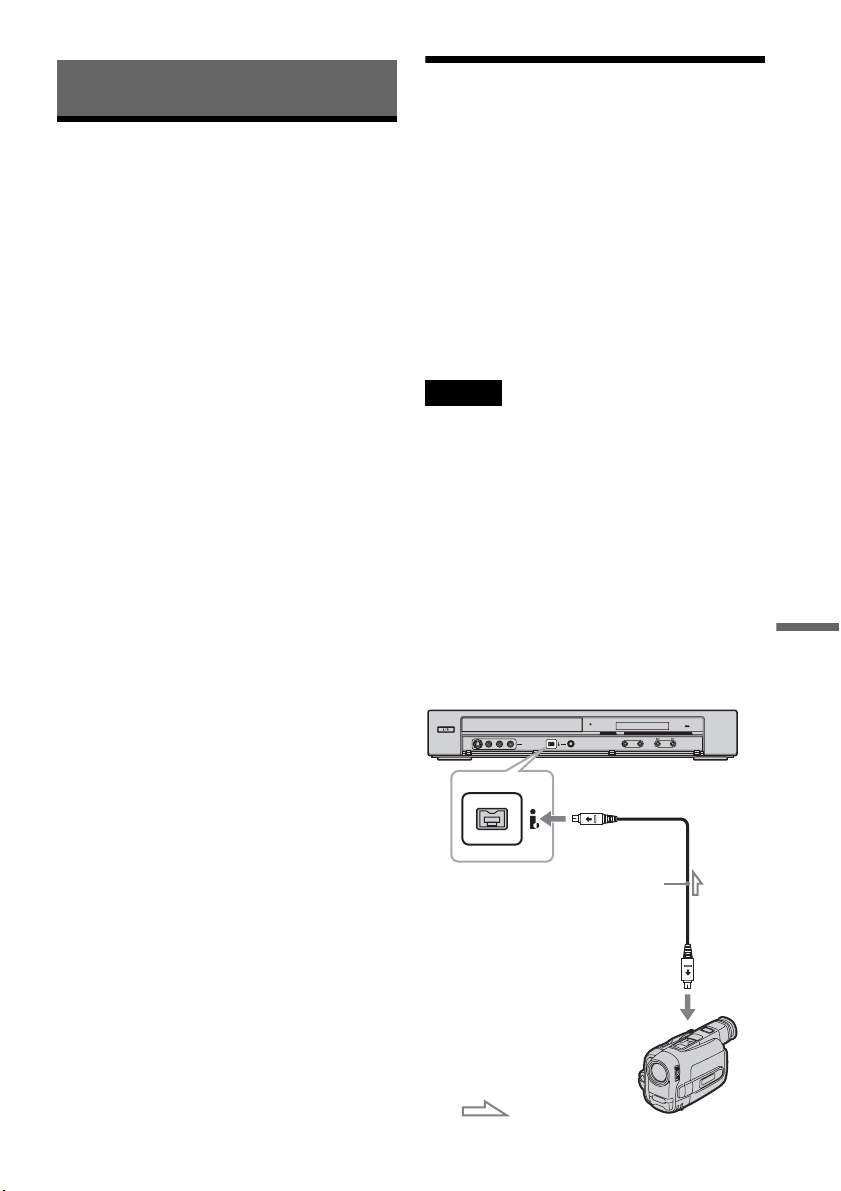
71
DV/D8 Dubbing (DV/D8 t DVD)
DV/D8 Dubbing (DV/D8 t DVD)
Before DV/D8 Dubbing
This section explains dubbing with a digital video
camera via the DV IN jack on the front panel. If
you want to dub by way of the LINE IN jacks, see
“Recording From Connected Equipment With a
Timer (Synchro Rec)” on page 53.
To record from the DV IN jack
The DV IN jack on this recorder conforms to the
i.LINK standard. You can connect any other
equipment that has an i.LINK (DV) jack, and
record digital signals.
Follow the instructions in “Connecting a Digital
Video Camera to the DV IN Jack,” and then move
on to the section on dubbing. For more
information about i.LINK, see “About i.LINK” on
page 96.
z Hint
If you plan to do additional editing on a disc after the
initial dub, use the DV IN jack and record on a DVD-RW
(VR mode) or DVD-R (VR mode). Note that erasing
unwanted scenes does not free up disc space for DVD-Rs
(VR mode).
Connecting a Digital Video
Camera to the DV IN Jack
You can connect a digital video camera to the DV
IN jack on the recorder to record or edit from a
DV/D8 format tape. Operation is straightforward
because the DVD recorder will fast forward and
rewind the tape for you – you do not need to
operate your digital video camera. Do the
following to start using the “DV/D8 Edit”
functions of this recorder.
See the instruction manual supplied with the
digital video camera as well before connecting.
Notes
• The DV IN jack is for input only. It will not output
signals.
• You cannot use the DV IN jack when:
– your digital video camera does not work with this
recorder. Connect the camera to the LINE IN jack and
follow the instructions of “Recording From
Connected Equipment Without a Timer” on page 55.
– the input signal is not in DVC-SD format. Do not
connect a MICROMV format digital video camera
even if it has an i.LINK jack.
– the images on the tape contain copy protection
signals, which limit recording.
Hookups
HDMI
DV IN
L(MONO) AUDIO RVIDEOS VIDEO
LINE-2 IN
ONE-TOUCH DUBBING
+
CHANNEL
-
DV IN
DVD recorder
to DV IN
: Signal flow
i.LINK cable
(not supplied)
to DV output
Digital video camera
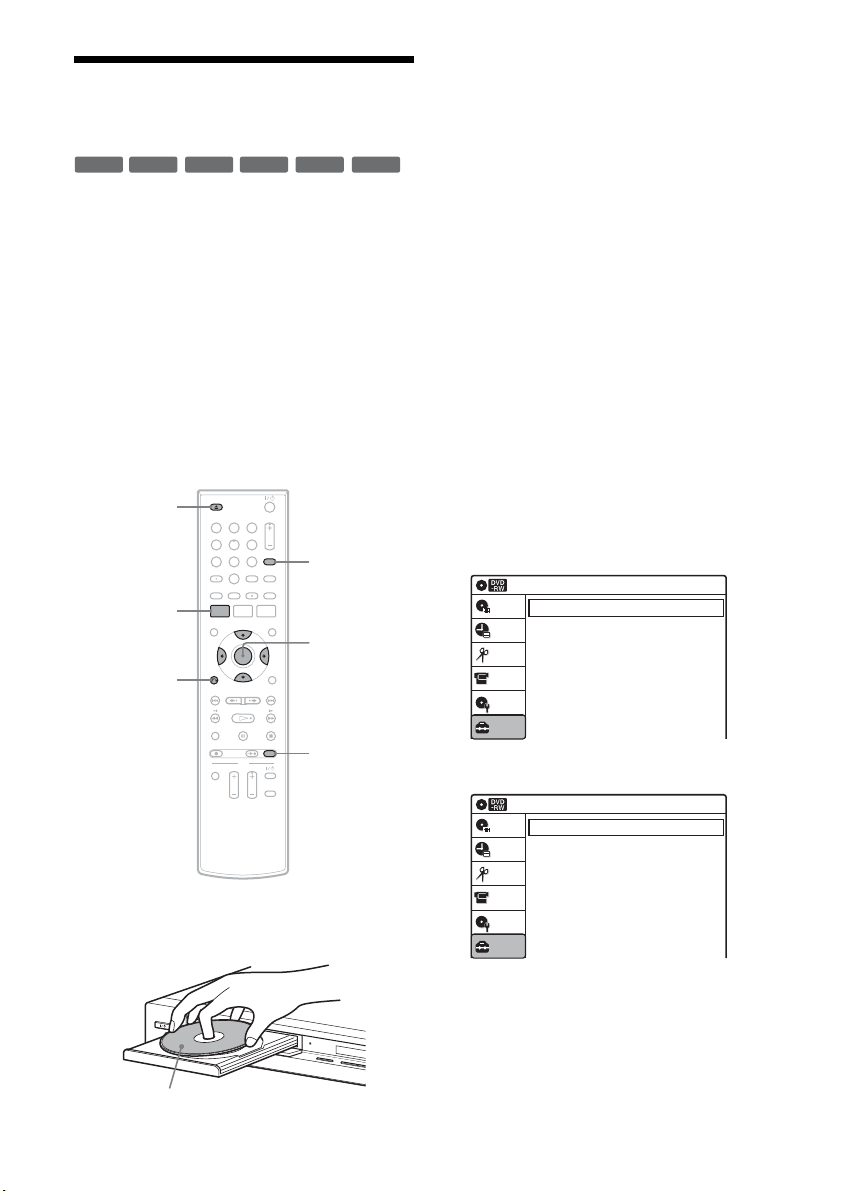
72
Dubbing From a DV/D8
Format Tape to a DVD
You can record a DV/D8 format tape onto a disc.
The recorder controls the digital video camera.
You can fast forward, rewind, play in slow motion,
and stop the tape to select the scenes using the on-
screen menu.
To simply dub the entire contents of a DV/D8
format tape (One Touch Dubbing), see page 74.
◆How titles and chapters are created
The dubbed contents on the disc become one title,
and the title is then divided into chapters at either
5 or 15-minute intervals, according to the “DVD
Auto Chapter” setting of “Features” in the “Setup”
display.
1 Press Z OPEN/CLOSE, and place a
recordable disc on the disc tray.
2 Press Z OPEN/CLOSE to close the disc
tray.
Wait until “LOAD” disappears from the front
panel display.
Unused discs are automatically formatted. For
the DVD-RW/DVD-R’s recording format
(VR mode or Video mode), see “Formatting a
new disc” on page 48.
3 Insert the source DV/D8 format tape into
your digital video camera.
For the recorder to record or edit, your digital
video camera must be set to video playback
mode.
4 Press INPUT repeatedly to select “DV.”
5 Press REC MODE repeatedly to select the
recording mode.
For details about the recording mode, see
page 47.
6 Press SYSTEM MENU while the recorder is
in stop mode.
The System Menu appears.
7 Select “Setup,” and press ENTER.
8 Select “Audio,” and press ENTER.
-
RWVR
-
RW
Video
+
RW
+
R
-
RVR
-
R
Video
11 22 33
44 55 66
77 88
00
99
REC MODE
INPUT
Z OPEN/
CLOSE
SYSTEM
MENU
M/m/</,,
ENTER
O RETURN
D
V
IN
L
(
M
O
N
O
)
A
U
D
I
O
R
V
I
D
E
O
S
V
I
D
E
O
L
I
N
E
-
2
I
N
O
NE-TO
UCH DUBBING
Recording side facing down
Setup
Tuner Preset
Clock Set
Video
Audio
Features
Options
Easy Setup
10:10 AM
Setup
Disc Setting
Edit
Title List
Timer
DV/D8 Dubbing
Audio
10:10 AM
Setup
Disc Setting
Edit
Title List
Timer
Tuner Audio
Digital Out
Downmix
Audio DRC
Audio (HDMI)
Scan Audio
Surround
DV/D8 Audio Input
Line Audio Input
: Main
: Dolby Surround
: Standard
: Auto
: On
: Off
: Stereo 1
: Stereo
DV/D8 Dubbing
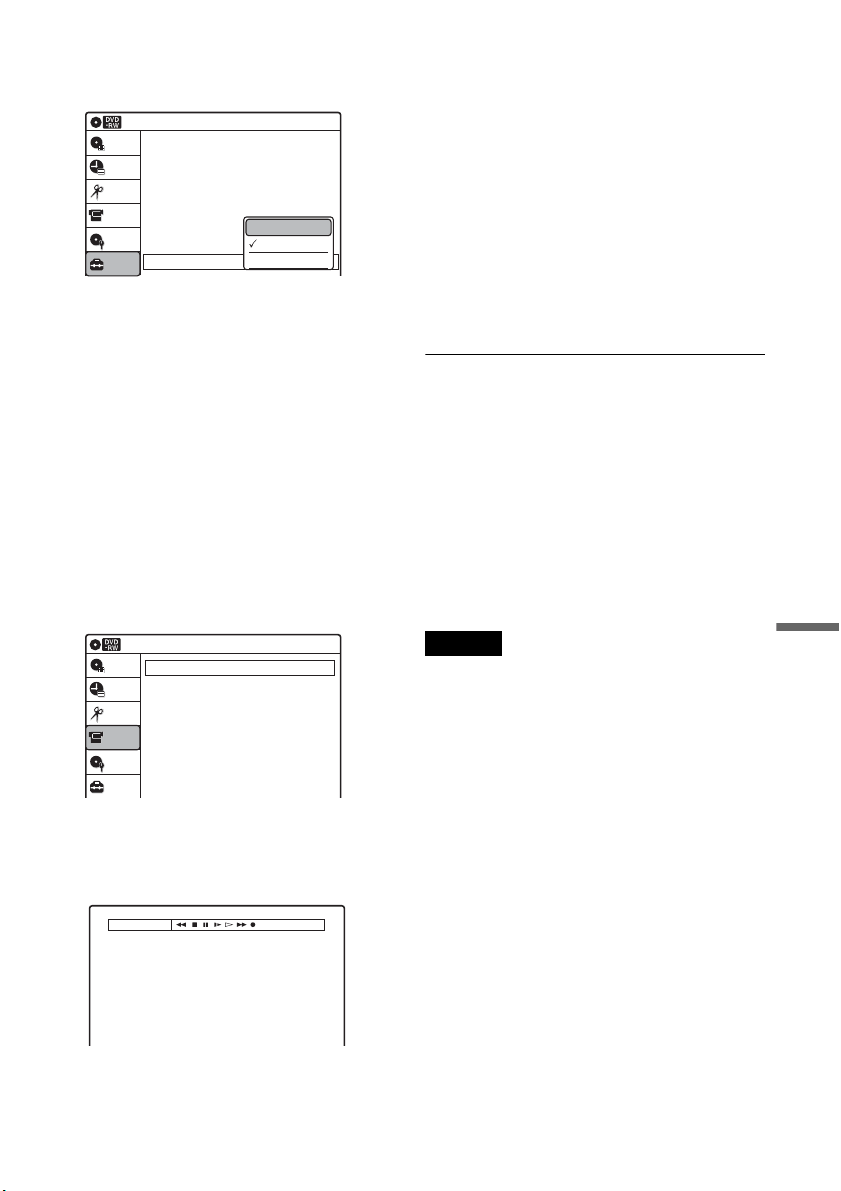
73
DV/D8 Dubbing (DV/D8 t DVD)
9
Select “DV/D8 Audio Input,” and press
ENTER.
“Stereo 1”: Records original sound only.
Normally select this when dubbing a DV
format tape.
“Stereo 2”: Records additional audio only.
“Mix”: Records original and additional
sounds.
Select “Stereo 2” or “Mix” if you have added
a second audio channel when recording with
your digital video camera. For the details, see
page 83.
10
Select an option, and press ENTER.
11
Press O RETURN twice.
12
Select “DV/D8 Dubbing,” and press
ENTER.
13
Select “DV/D8 Simple Dubbing,” and
press ENTER.
The following display appears.
If “DV” or “DV Camera Mode” is displayed
instead of “DV Tape Mode,” check that the
digital video camera is correctly connected
and its power turned on, and that its mode is
set for dubbing.
14
Find the dubbing start point on the tape,
and stop or pause playback.
Press </, to select m, x, X, y, H, or
M on the TV screen and press ENTER to
find the point, and stop or pause with x or X.
15
Press , to select z on the TV screen, and
press ENTER.
Dubbing starts.
To stop recording
Select x on the TV screen, and press ENTER.
Note that it may take a few seconds for the
recorder to stop recording.
To turn off the display for DV/D8 dubbing
Press INPUT.
z Hint
If “DV Camera Mode” appears on the screen, you can use
z on the TV screen to record the camera image directly
on the recorder.
Notes
• If you want to play the disc on other DVD equipment,
finalize the disc (page 69).
• You cannot connect more than one piece of digital
video equipment to the recorder.
• You cannot record the date, time, or contents of a DV/
D8 format tape onto the disc.
• If you record from a DV/D8 format tape with a
soundtrack that is recorded in multiple sampling
frequencies (48 kHz, 44.1 kHz, or 32 kHz), no sound,
or an unnatural sound will be output when playing back
the sampling frequency switch point on the disc.
• The recorded picture may be momentarily affected if
the picture size of the source image changes, or if there
is nothing recorded on the tape.
• Noise may occur when you switch the audio sampling
mode (48 kHz/16 bits t 32 kHz/12 bits).
Audio
10:10 AM
Setup
Disc Setting
Edit
Title List
Timer
Tuner Audio
Digital Out
Downmix
Audio DRC
Audio (HDMI)
Scan Audio
Surround
DV/D8 Audio Input
Line Audio Input
: Main
: Dolby Surround
: Standard
: Auto
: On
: Off
: Stereo 1
: Stereo
DV/D8 Dubbing
Stereo 1
Stereo 2
Mix
DV/D8 Dubbing
10:10 AM
DV/D8 Simple Dubbing
DV/D8 One Touch Dubbing
Setup
Disc Setting
Edit
Title List
Timer
DV/D8 Dubbing
DV Tape Mode
,continued
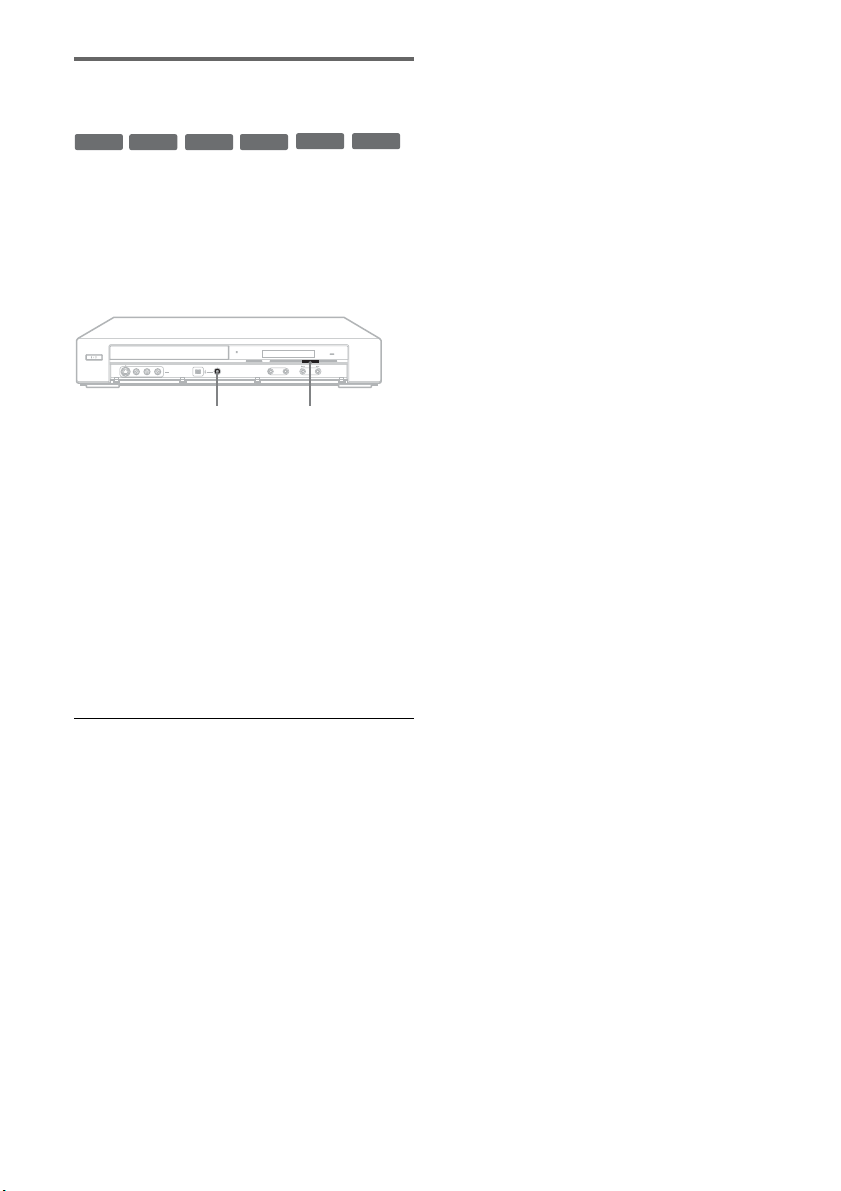
74
Dubbing an entire DV/D8 format tape
to a DVD (One Touch Dubbing)
You can record the entire contents of a DV/D8
format tape onto a disc with a single press of the
ONE-TOUCH DUBBING button on the recorder.
The recorder controls the digital video camera for
the whole process, and completes the recording.
1 Follow steps 1 to 10 of “Dubbing From a
DV/D8 Format Tape to a DVD” (page 72),
and press SYSTEM MENU to turn off the
display.
2 Press ONE-TOUCH DUBBING on the
recorder.
The recorder rewinds the tape in the digital
video camera and then starts recording the
tape contents from the beginning.
When playback of the tape stops, One Touch
Dubbing ends automatically.
To stop recording
Press x (stop).
Note that it may take a few seconds for the
recorder to stop recording.
z Hint
You can also perform One Touch Dubbing when you
select “DV/D8 One Touch Dubbing” and press ENTER
in step 14 of “Dubbing From a DV/D8 Format Tape to a
DVD” on page 72. Follow the instructions appearing on
the TV screen.
-
RWVR
-
RW
Video
+
RW
+
R
-
RVR
-
R
Video
+
-
ONE-TOUCH DUBBING
x
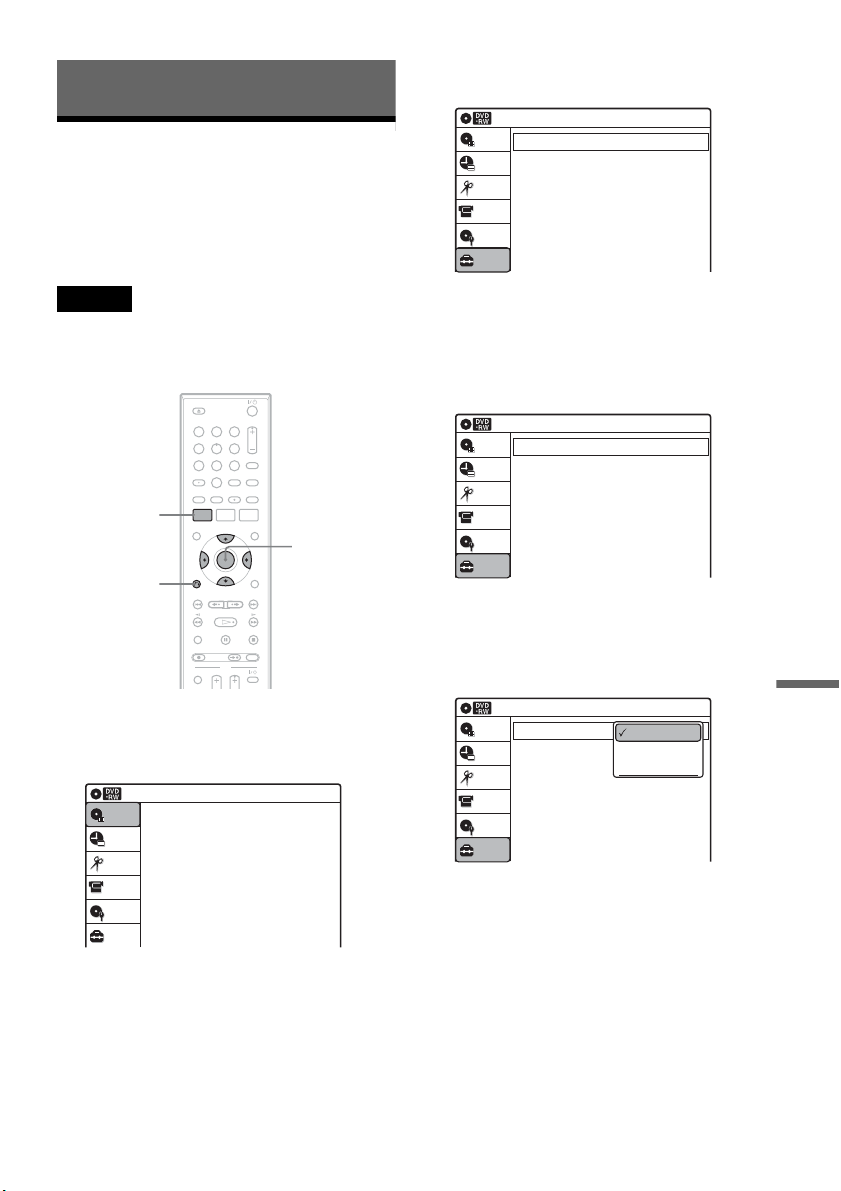
75
Settings and Adjustments
Settings and Adjustments
Using the Setup Displays
By using the setup displays, you can make various
adjustments to items such as picture and sound, as
well as select a language for the subtitles.
The setup displays are used in the following way.
Note
Playback settings stored on the disc take priority over the
setup display settings, and not all of the functions
described may work.
1 Press SYSTEM MENU while the recorder is
in stop mode.
The System Menu appears.
2 Select “Setup,” and press ENTER.
The “Setup” display appears.
3 Select “Tuner Preset,” “Clock Set,”
“Video,” “Audio,” “Features,” “Options,”
or “Easy Setup,” and press ENTER.
The selected setup display appears.
Example: “Video” setup
4 Select the item you want to set up, and
press ENTER.
Available options for the item appear.
Example: “TV Type”
M/m/</,,
ENTER
11 22 33
44 55 66
77 88
00
99
SYSTEM
MENU
O RETURN
10:10 AM
Title List (Original)
Press ENTER :
Title Menu for DVD Title List.
Setup
Disc Setting
Edit
Title List
Timer
DV/D8 Dubbing
10:10 AM
Setup
Tuner Preset
Clock Set
Video
Audio
Features
Options
Easy Setup
Setup
Disc Setting
Edit
Title List
Timer
DV/D8 Dubbing
Video
10:10 AM
TV Type
HDMI Resolution
Video (HDMI)
Black Level
Picture Control
Progressive
: 16:9
: Auto
: Y Cb Cr
: On
: Standard
: Off
Setup
Disc Setting
Edit
Title List
Timer
DV/D8 Dubbing
Video
10:10 AM
TV Type
HDMI Resolution
Video (HDMI)
Black Level
Picture Control
Progressive
: 4:3 Letter Box
: Auto
: Y Cb Cr
: On
: Standard
: Off
Setup
Disc Setting
Edit
Title List
Timer
DV/D8 Dubbing
16:9
4:3 Letter Box
4:3 Pan Scan
,continued
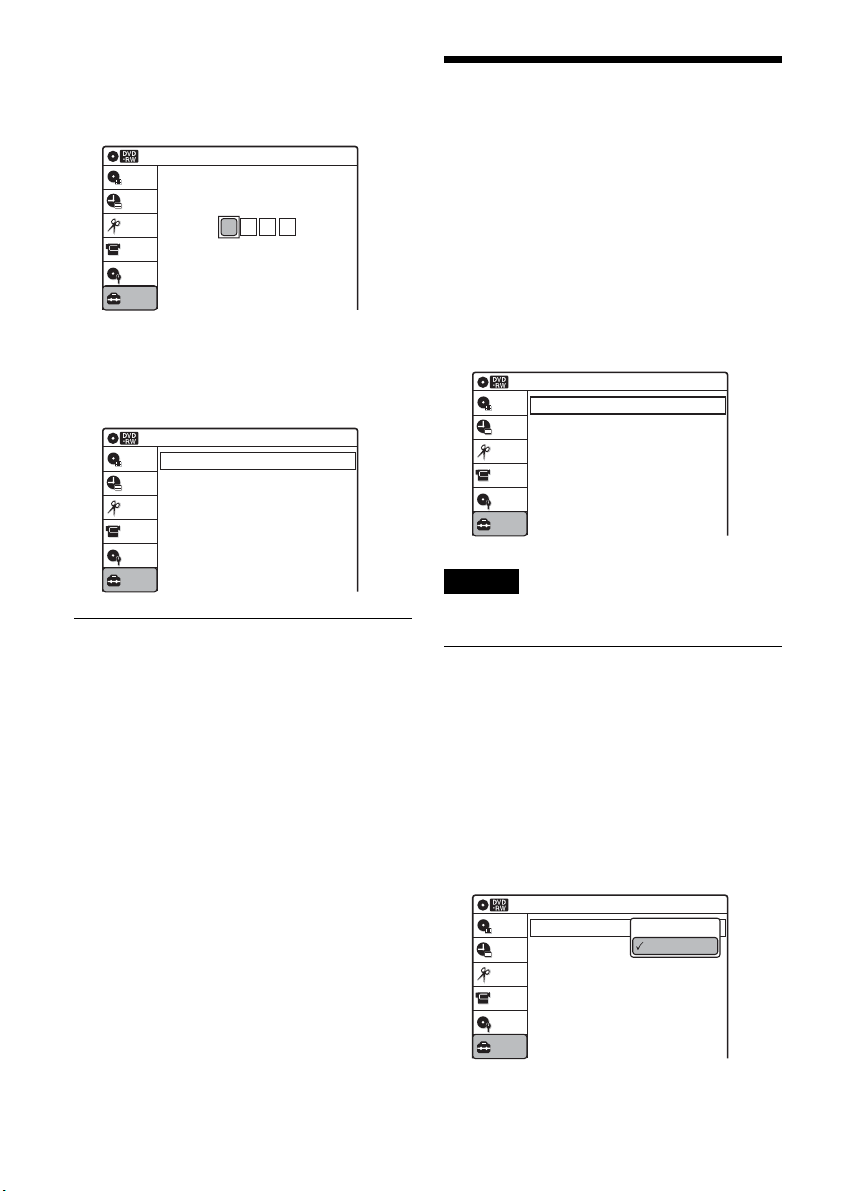
76
Some items display a dialog box that requires
additional settings.
Example: When “Parental” in “Options”
setup is selected.
5 Select an option, and press ENTER.
The currently selected option is displayed
next to the setup item.
Example: When “4:3 Letter Box” is set.
To return to the previous display
Press O RETURN.
To turn off the display
Press SYSTEM MENU.
Antenna Reception Setting
(Tuner Preset)
The “Tuner Preset” setup allows you to make
tuner settings for the recorder.
1 Press SYSTEM MENU while the recorder is
in stop mode.
2 Select “Setup,” and press ENTER.
3 Select “Tuner Preset,” and press ENTER.
The “Tuner Preset” setup appears with the
following options.
Note
You cannot preset channels for a connected cable box or
satellite receiver.
Auto Preset
Automatically presets the receivable channels.
The recorder can receive analog and digital
channels 2 to 69. For unscrambled CATV, analog
channels 1 to 125, and digital channels 1 to 135
can be received. First, we recommend that you
preset the receivable channels in your area using
automatic presetting methods. Digital channels
are only scanned when “Auto Preset” is set.
1 Select “Antenna/Cable,” and press ENTER.
“Antenna”: Presets VHF and UHF channels.
“Cable”: Presets cable TV channels.
2 Select an option, and press ENTER.
10:10 AM
Setup
Disc Setting
Edit
Title List
Timer
Create the password.
Create the password
DV/D8 Dubbing
Video
10:10 AM
TV Type
HDMI Resolution
Video (HDMI)
Black Level
Picture Control
Progressive
: 4:3 Letter Box
: Auto
: Y Cb Cr
: On
: Standard
: Off
Setup
Disc Setting
Edit
Title List
Timer
DV/D8 Dubbing
10:10 AM
Setup
Disc Setting
Edit
Title List
Timer
Antenna/Cable
Auto Preset
Manual Set
: Cable
Tuner Preset
DV/D8 Dubbing
10:10 AM
Setup
Disc Setting
Edit
Title List
Timer
Antenna/Cable
Auto Preset
Manual Set
: Antenna
Tuner Preset
DV/D8 Dubbing
Antenna
Cable
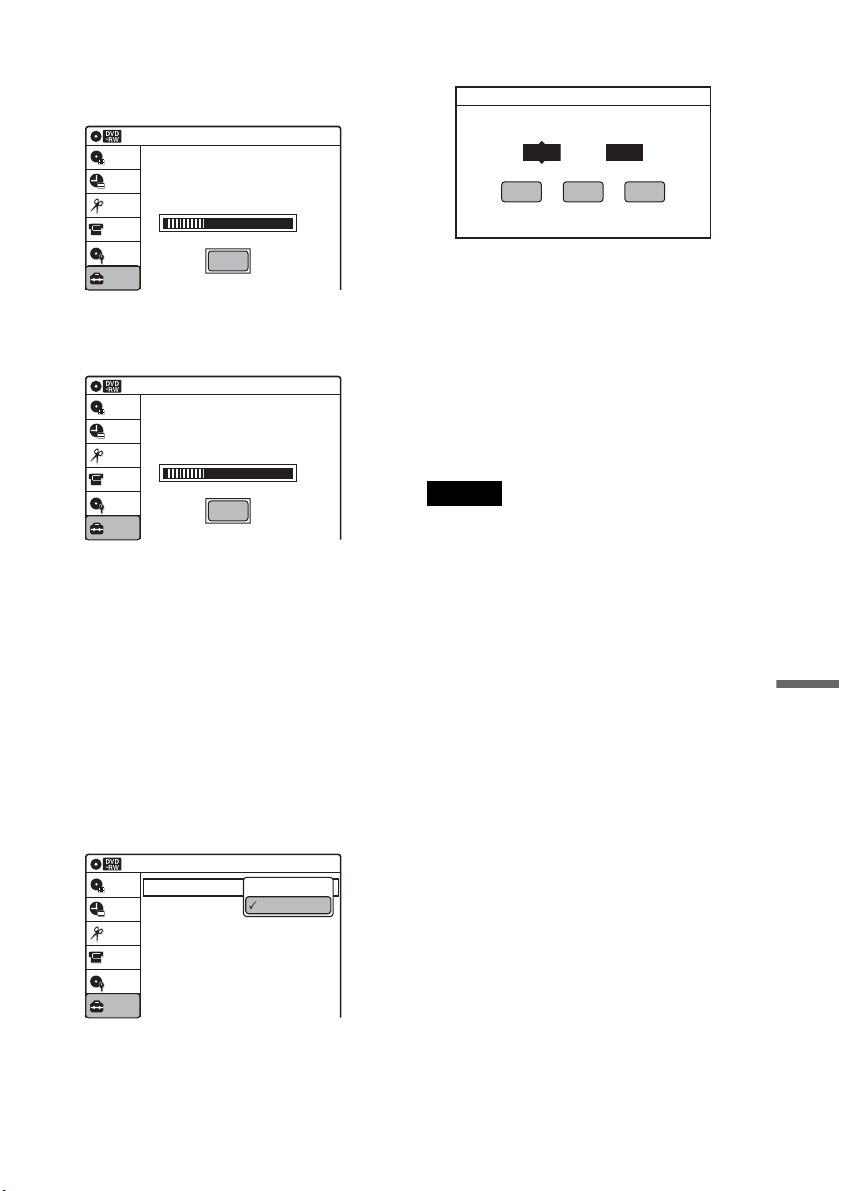
77
Settings and Adjustments
3 Select “Auto Preset,” and press ENTER.
All receivable channels are preset in
numerical sequence.
After searching for analog channels is
complete, receivable digital channels are then
searched for automatically.
Searching for channels may take 40 minutes
or more to complete.
If you press ENTER while searching for
channels, searching will stop.
Manual Set
Presets analog channels manually.
If some channels cannot be set using the “Auto
Preset” or “Easy Setup” function, you can set them
manually. Digital channels are only scanned when
“Auto Preset” is set (page 76).
Erases any unnecessary digital or analog channels
manually.
1 Select “Antenna/Cable,” and press ENTER.
“Antenna”: Presets VHF and UHF channels.
“Cable”: Presets cable TV channels.
2 Select an option, and press ENTER.
3 Select “Manual Set,” and press ENTER.
4 Select the broadcast you want using M/m.
Press , to select a channel.
5 Select the channel you want preset using CH
+/–, or disable using M/m, and press ENTER.
6 Select “Add” or “Erase” using </,, and
press ENTER.
To cancel the setting, select “Exit” and press
ENTER.
7 To preset or disable another channel, repeat
steps 4 and 5.
Note
The recorder does not allow you to add digital channels
manually.
If some digital channels could not be set, set “Auto
Preset” again.
10:10 AM
Auto Preset
Searching for receivable Analog channels.
Please wait.
Setup
Disc Setting
Edit
Title List
Timer
Stop
DV/D8 Dubbing
10:10 AM
Auto Preset
Searching for receivable Digital channels.
Please wait.
Allow 40+ minutes for completion.
To stop searching, press [Enter].
Setup
Disc Setting
Edit
Title List
Timer
Stop
DV/D8 Dubbing
10:10 AM
Setup
Disc Setting
Edit
Title List
Timer
Antenna/Cable
Auto Preset
Manual Set
: Antenna
Tuner Preset
DV/D8 Dubbing
Antenna
Cable
Select a broadcast and channel.
Channel
Broadcast
Analog
Erase
Add
Exit
Manual Set
69
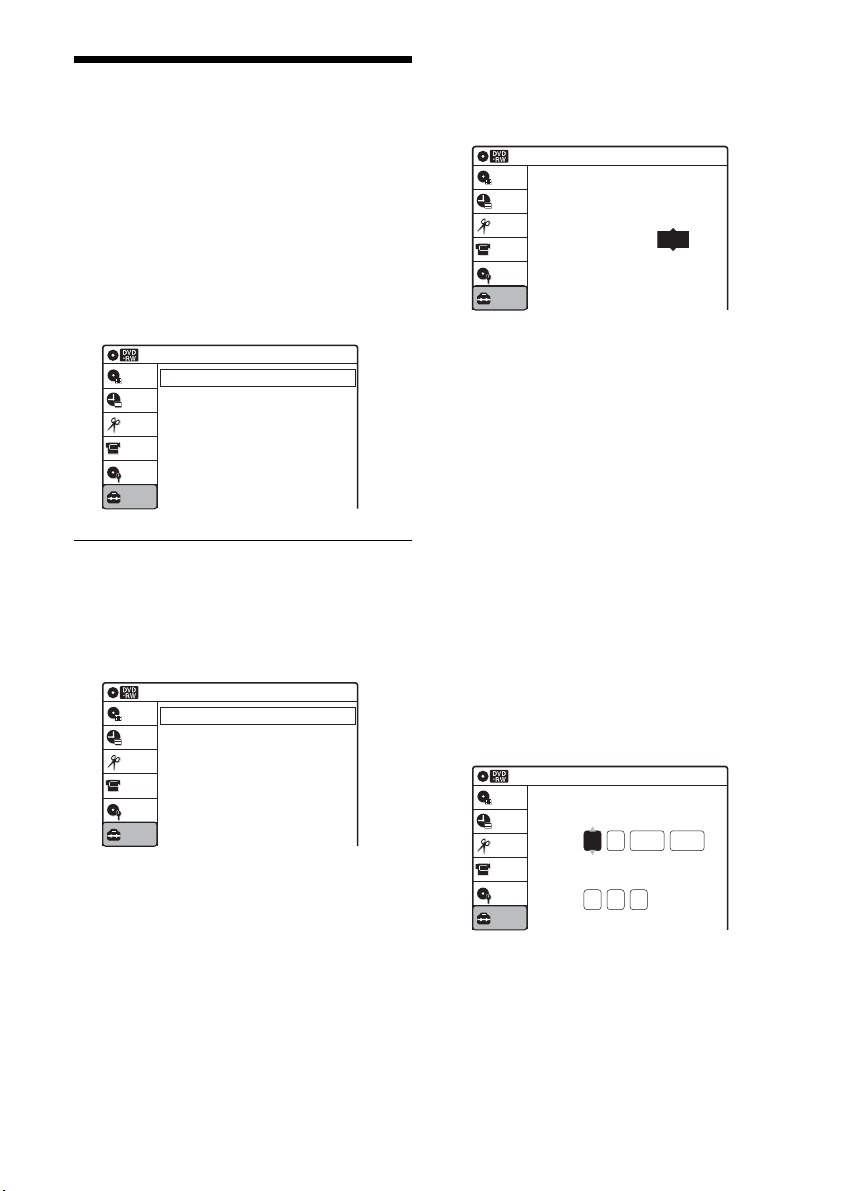
78
Clock Setting (Clock Set)
The “Clock Set” setup allows you to make clock
settings for the recorder.
1 Press SYSTEM MENU while the recorder is
in stop mode.
2 Select “Setup,” and press ENTER.
3 Select “Clock Set,” and press ENTER.
The “Clock Set” setup appears with the
following options.
Auto (Auto Clock Set)
Turns on the Auto Clock Set function when a digital
channel or an analog channel in your local area
broadcasts a time signal.
1 Select “Auto,” and press ENTER.
2 Select “Clock Set CH,” “Time Zone,” or
“Daylight Saving” and press ENTER.
3 Adjust these settings by pressing M/m and
ENTER.
◆ Clock Set CH
This setting is effective when the recorder
works using a time signal carried on an analog
channel.
Select an analog channel that carries a time
signal using M/m.
Use this option if you know of a channel that
carries a time signal. Most PBS member
stations broadcast a time signal. For the fastest
response, select your local PBS station. Leave
the setting at “Auto” to have the recorder
automatically search for a digital or analog
channel that carries a time signal.
◆ Time Zone
Select the time zone for your area.
The options are:
Atlantic y Eastern y Central y
Mountain y Pacific y Alaska y Hawaii
y Atlantic
◆ Daylight Saving
Select “On” or “Off” (standard time), or select
“Auto” to have the recorder automatically set
the daylight saving time.
z Hint
When “Auto” is selected, this setting may not be set
correctly depending on the signal. In this case, select
“On” or “Off.”
Manual
If the Auto Clock Set function did not set the clock
correctly for your local area, set the clock
manually.
1 Select “Manual,” and press ENTER.
2 Press M/m to set the month, and press ,.
Set the day, year, hour, minutes, and AM/PM
in sequence. Press </, to select the item to
be set, then press M/m to set the item. The day
of the week is set automatically.
3 Press ENTER to start the clock.
Clock Set
10:10 AM
Auto
Manual
Setup
Disc Setting
Edit
Title List
Timer
DV/D8 Dubbing
Auto Clock Set
10:10 AM
Clock Set CH
Time Zone
Daylight Saving
: Auto
: Atlantic
: Auto
Setup
Disc Setting
Edit
Title List
Timer
DV/D8 Dubbing
Clock Set CH
10:10 AM
Select a Channel:
Auto
Setup
Disc Setting
Edit
Title List
Timer
DV/D8 Dubbing
2007
Mon
01 01
10 : 10
AM
10:10 AM
Clock Set
Set the time and date manually.
Hour Min
AM/PM
Month Day Year
Setup
Disc Setting
Edit
Title List
Timer
DV/D8 Dubbing
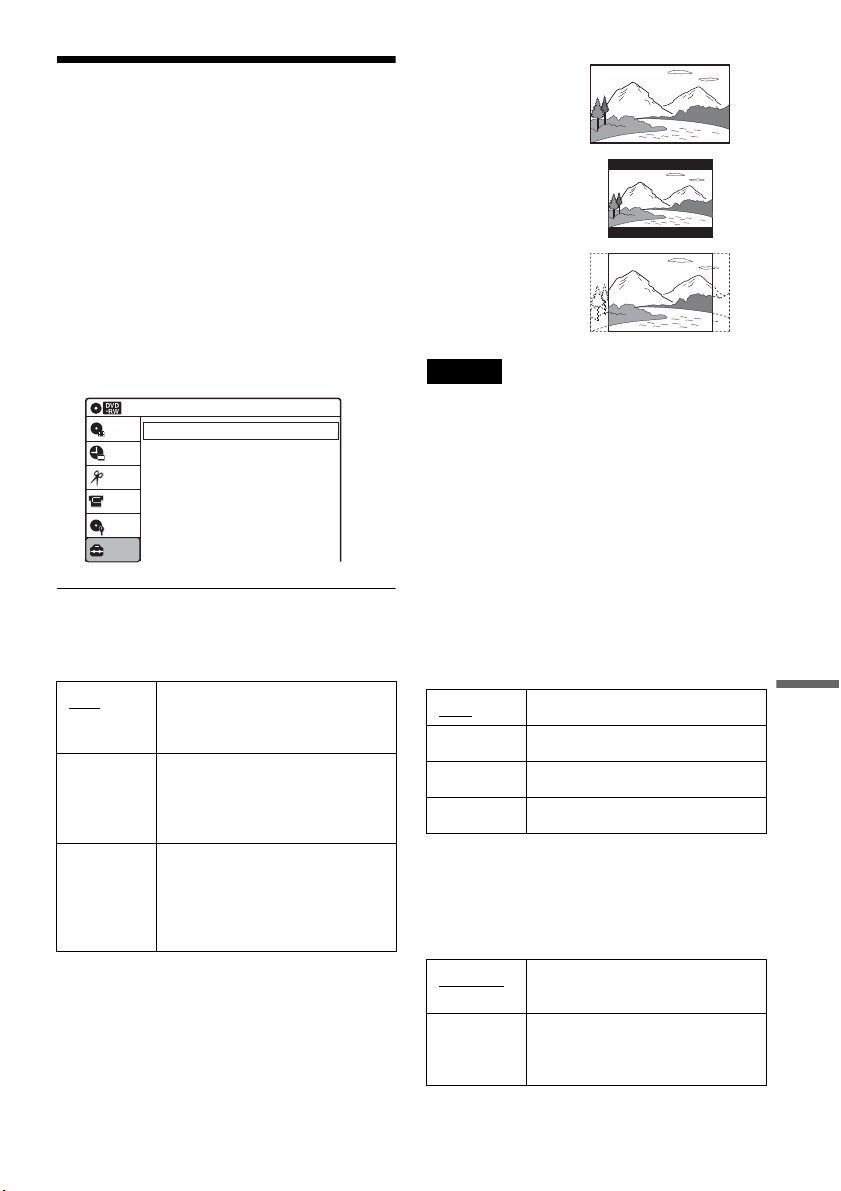
79
Settings and Adjustments
Video Settings (Video)
The “Video” setup allows you to adjust items
related to the image, such as size and color.
Choose the settings according to the type of TV,
tuner, or decoder connected to the recorder.
1 Press SYSTEM MENU while the recorder is
in stop mode.
2 Select “Setup,” and press ENTER.
3 Select “Video,” and press ENTER.
The “Video” setup appears with the following
options. The default settings are underlined.
TV Type
Selects the aspect ratio of the connected TV (4:3
standard or wide).
Note
Depending on the disc, “4:3 Letter Box” may be selected
automatically instead of “4:3 Pan Scan” or vice versa.
HDMI Resolution
Selects the type of video signals output from the
HDMI OUT jack. When you select
“Auto”(default), the recorder outputs video
signals of the highest resolution acceptable for
your TV. If the picture is not clear, unnatural or
not to your satisfaction, try another option that
suits the disc and your TV/projector, etc. For
details, refer also to the instruction manual
supplied with the TV/projector, etc.
The setting is effective only when you connect an
HDMI equipped TV to the HDMI OUT jack.
Video (HDMI)
Selects the type of output from the HDMI OUT
jack.
The setting is effective only when you connect an
HDMI equipped TV to the HDMI OUT jack.
16:9 Select this when connecting to a
wide-screen TV or TV with a
wide mode function.
4:3 Letter
Box
Select this when connecting to a
4:3 screen TV. Displays a wide
picture with bands on the upper
and lower portions of the screen.
4:3 Pan
Scan
Select this when connecting to a
4:3 screen TV. Automatically
displays a wide picture on the
entire screen and cuts off the
portions that do not fit.
Video
10:10 AM
TV Type
HDMI Resolution
Video (HDMI)
Black Level
Picture Control
Progressive
: 16:9
: Auto
: Y Cb Cr
: On
: Standard
: Off
Setup
Disc Setting
Edit
Title List
Timer
DV/D8 Dubbing
Auto Normally, select this.
1920×1080i
Sends 1920×1080i video signals.
1280×720P
Sends 1280×720p video signals.
720×480P Sends 720×480p video signals.
Y Cb Cr Selects this when connecting to
an HDMI device.
RGB Gives brighter colors and deeper
black. Select this if colors are
weak.
16:9
4:3 Letter Box
4:3 Pan Scan
,continued
80
Black Level
Selects the black level (setup level) for the video
signals output from the LINE OUT jacks
(page 21).
This setting is not effective when the
“PROGRESSIVE” indicator lights up on the front
panel display and the recorder outputs progressive
signals.
Picture Control
Selects the picture control for the video signals
output from the LINE OUT jacks (page 21).
You can adjust the video signal of DVD or
VIDEO CD (with PBC function off) from the
recorder to obtain the picture quality you want.
Select the setting that best suits the program you
are watching.
z Hint
When you watch a movie, “Cinema 1” or “Cinema 2” is
recommended.
Progressive
If your TV accepts progressive (480p) format
signals, you will enjoy accurate color reproduction
and high quality image.
Connect your TV to the COMPONENT VIDEO
OUT jacks (page 23).
Notes
• If you select progressive signals when you connect the
recorder to a TV that cannot accept the signal in
progressive format, the image quality will deteriorate.
In this case, set “Progressive” to “Off.” Or, while the
recorder is in stop mode, and then hold down
X PAUSE on the recorder
for five seconds or more.
• When you connect your TV using an HDMI cable, the
“Progressive” setting is set to “On.”
On Raises the standard black level.
Select this when the picture
appears too dark.
Off Sets the black level of the output
signal to the standard level.
Dynamic 1 Produces a bold dynamic picture
by increasing the picture contrast
and the color.
Dynamic 2 Produces a more dynamic picture
than “Dynamic 1” by further
increasing the picture contrast
and the color.
Standard
Displays a standard picture
(function turned off).
Cinema 1 White colors become brighter
and black colors become richer,
and the color contrast is
increased.
Cinema 2 Enhances details in dark areas by
increasing the black level.
Personal Adjusts “Contrast,” “Brightness,”
“Color,” and “Hue” using M/m/
</,.
On Set the recorder to output
progressive signals.
Off
Outputs video signals in interlace
format.
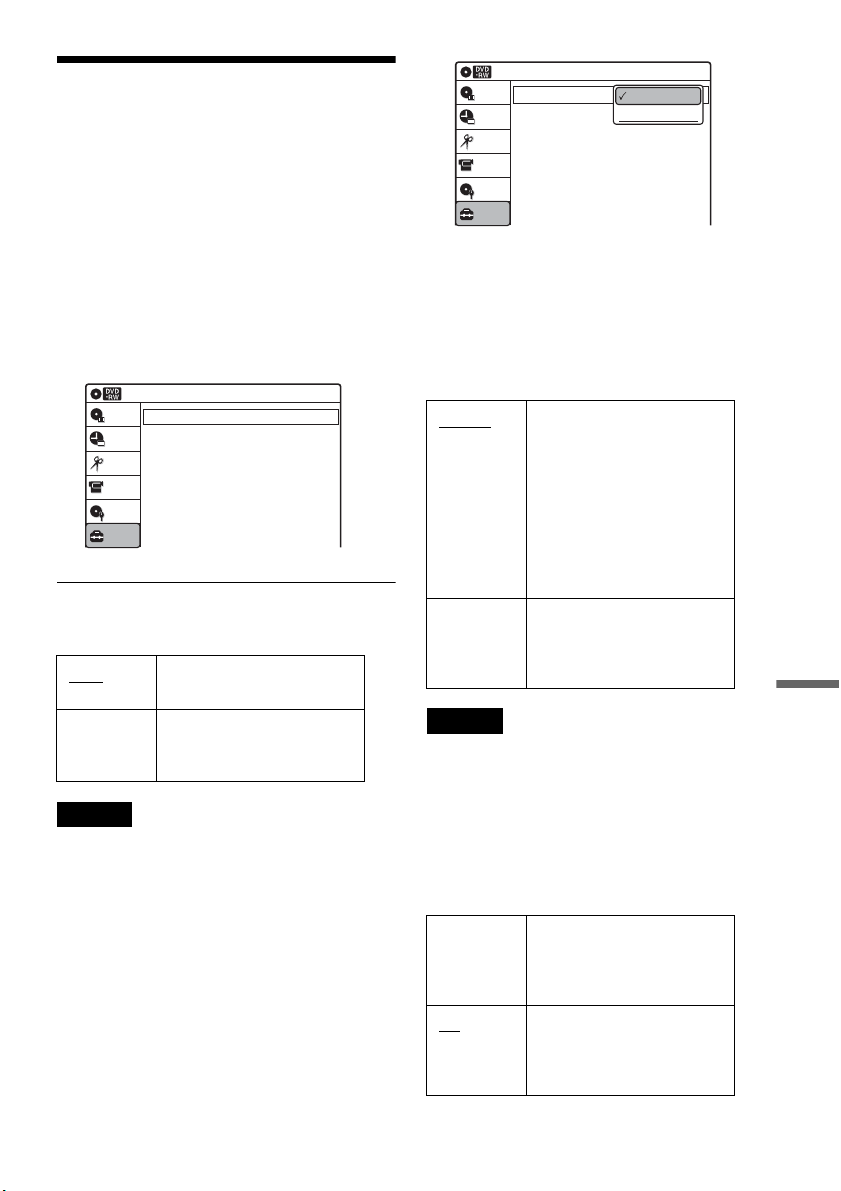
81
Settings and Adjustments
Audio Settings (Audio)
The “Audio” setup allows you to adjust the sound
according to the playback and connection
conditions.
1 Press SYSTEM MENU while the recorder is
in stop mode.
2 Select “Setup,” and press ENTER.
3 Select “Audio,” and press ENTER.
The “Audio” setup appears with the following
options. The default settings are underlined.
Tuner Audio
Selects the sound to be recorded.
Note
If no SAP sound is received, the main sound is recorded
regardless of the setting.
Digital Out
The following setup items switch the method of
outputting audio signals when you connect a
component such as an amplifier (receiver) with a
digital input jack to the DIGITAL AUDIO OUT
(OPTICAL or COAXIAL)/HDMI OUT jack.
For connection details, see “Connecting to Your
AV Amplifier (Receiver)” on page 24.
Press ENTER, and select “Dolby Digital” or
“DTS.”
If you connect a component that does not accept
the selected audio signal, a loud noise (or no
sound) will come out from the speakers, and may
affect your ears or cause speaker damage.
◆ Dolby Digital
Selects the type of Dolby Digital signal.
Notes
• If the HDMI OUT jack is connected to equipment not
compatible with Dolby Digital signals, D-PCM signals
will be automatically output, even when “Dolby
Digital” is selected.
• The HDMI OUT jack cannot output Dolby Digital
signals for digital broadcasts. To hear Dolby Digital,
use the DIGITAL AUDIO OUT jacks.
◆ DTS (DVD VIDEOs only)
Selects whether or not to output DTS signals.
Main Records only the main
sound.
SAP Records only the SAP
(Second Audio Program)
sound.
Audio
10:10 AM
Setup
Disc Setting
Edit
Title List
Timer
Tuner Audio
Digital Out
Downmix
Audio DRC
Audio (HDMI)
Scan Audio
Surround
DV/D8 Audio Input
Line Audio Input
: Main
: Dolby Surround
: Standard
: Auto
: On
: Off
: Stereo 1
: Stereo
DV/D8 Dubbing
D-PCM Select this when the recorder
is connected to an audio
component lacking a built-in
Dolby Digital decoder. You
can select whether the
signals conform to Dolby
Surround or not by making
adjustments to the
“Downmix” item in “Audio”
setup (page 82).
Dolby
Digital
Select this when the recorder
is connected to an audio
component with a built-in
Dolby Digital decoder.
On Select this when the recorder
is connected to an audio
component with a built-in
DTS decoder.
Off
Select this when the recorder
is connected to an audio
component without a built-in
DTS decoder.
10:10 AM
Dolby Digital
DTS
Digital Out
: 4:3 Letter Box
On
Setup
Disc Setting
Edit
Title List
Timer
DV/D8 Dubbing
D-PCM
Dolby Digital
,continued
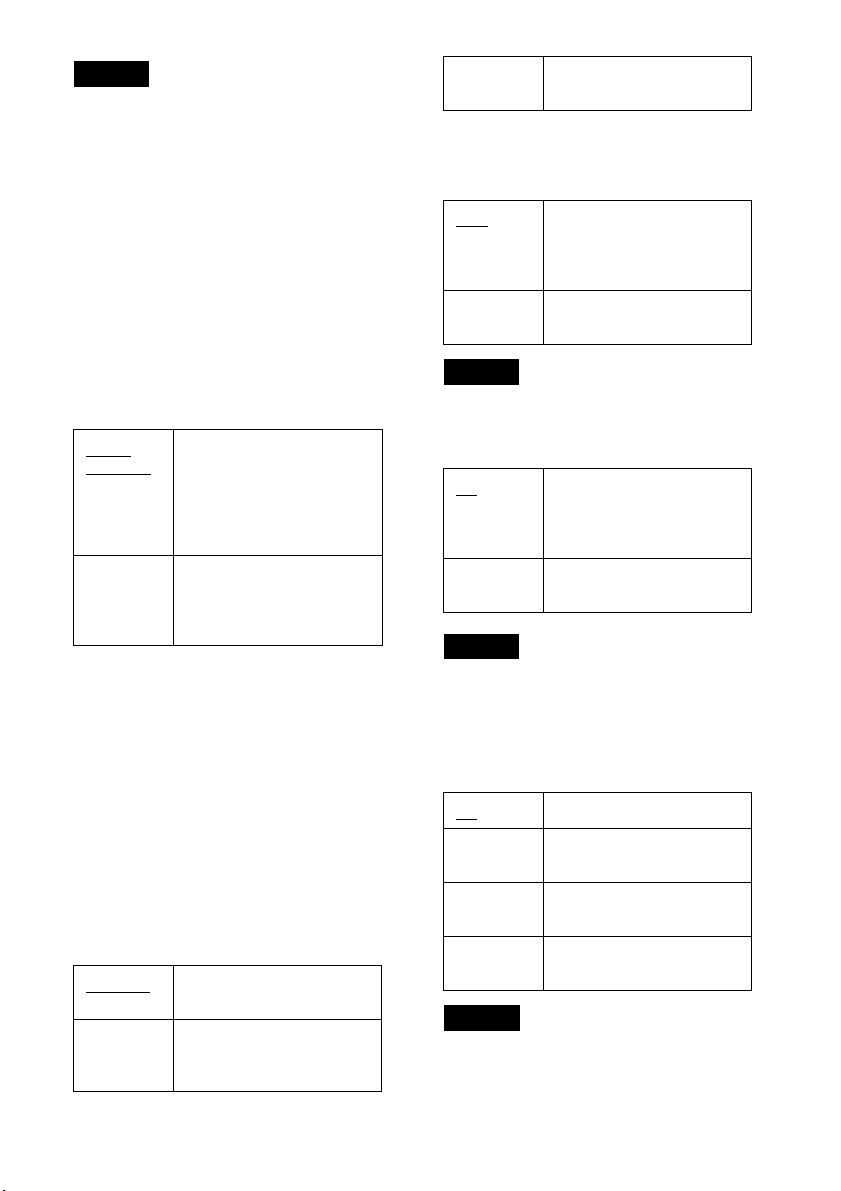
82
Note
If the HDMI OUT jack is connected to equipment not
compatible with DTS signals, no signal will be output,
regardless of the “DTS” setting.
Downmix (DVDs only)
Switches the method for mixing down to two
channels when you play a DVD which has rear
sound elements (channels) or is recorded in Dolby
Digital format. For details on the rear signal
components, see “A Connecting to audio L/R
jacks” on page 25. This function affects the output
of the following jacks:
– LINE OUT (AUDIO L/R) jacks
– AUDIO OUT L/R jacks
– DIGITAL AUDIO OUT (OPTICAL or
COAXIAL)/HDMI OUT jack when “Dolby
Digital” is set to “D-PCM” (page 81).
To enjoy the surround effect of Dolby Digital, turn
off the surround settings of this recorder (page
102).
Audio DRC (Dynamic Range Control) (DVDs
only)
Makes the sound clear when the volume is turned
down when playing a DVD that conforms to
“Audio DRC.” This affects the output from the
following jacks:
– LINE OUT (AUDIO L/R) jacks
– AUDIO OUT L/R jacks
– DIGITAL AUDIO OUT (OPTICAL or
COAXIAL)/HDMI OUT jack only when
“Dolby Digital” is set to “D-PCM” (page 81).
Audio (HDMI) (DVD VIDEOs only)
Select the output method from the HDMI OUT
jack.
Note
Dolby Digital signals on digital broadcasts will be
converted to PCM signals.
Scan Audio (DVDs only)
Note
Sound will be interrupted during Scan Audio.
Surround
Turns on the surround function to create virtual
rear speakers from a stereo TV or two front
speakers (page 25).
Notes
• When the playback signal does not contain a signal for
the surround speakers, the surround effects will be
difficult to hear.
• When you select one of the surround modes, turn off
the surround settings of the connected TV or amplifier
(receiver).
Dolby
Surround
Normally select this
position.
Multi-channel audio signals
are output to two channels
for enjoying surround
sounds.
Normal Multi-channel audio signals
are downmixed to two
channels for use with your
stereo.
Standard
Normally select this
position.
TV Mode Makes low sounds clear
even if you turn the volume
down.
Wide
Range
Gives you the feeling of
being at a live performance.
Auto
Normally, select this.
Outputs audio signals
according to the “Dolby
Digital” setting.
PCM Converts Dolby Digital to
PCM.
On
Outputs audio signals during
FF1 fast-forward of a DVD
disc with Dolby Digital
soundtracks.
Off No sound is output during
FF1 fast-forward.
Off
No surround effect.
Surround1 Creates one set of virtual
surround speakers.
Surround2 Creates two sets of virtual
surround speakers.
Surround3 Creates three sets of virtual
surround speakers.
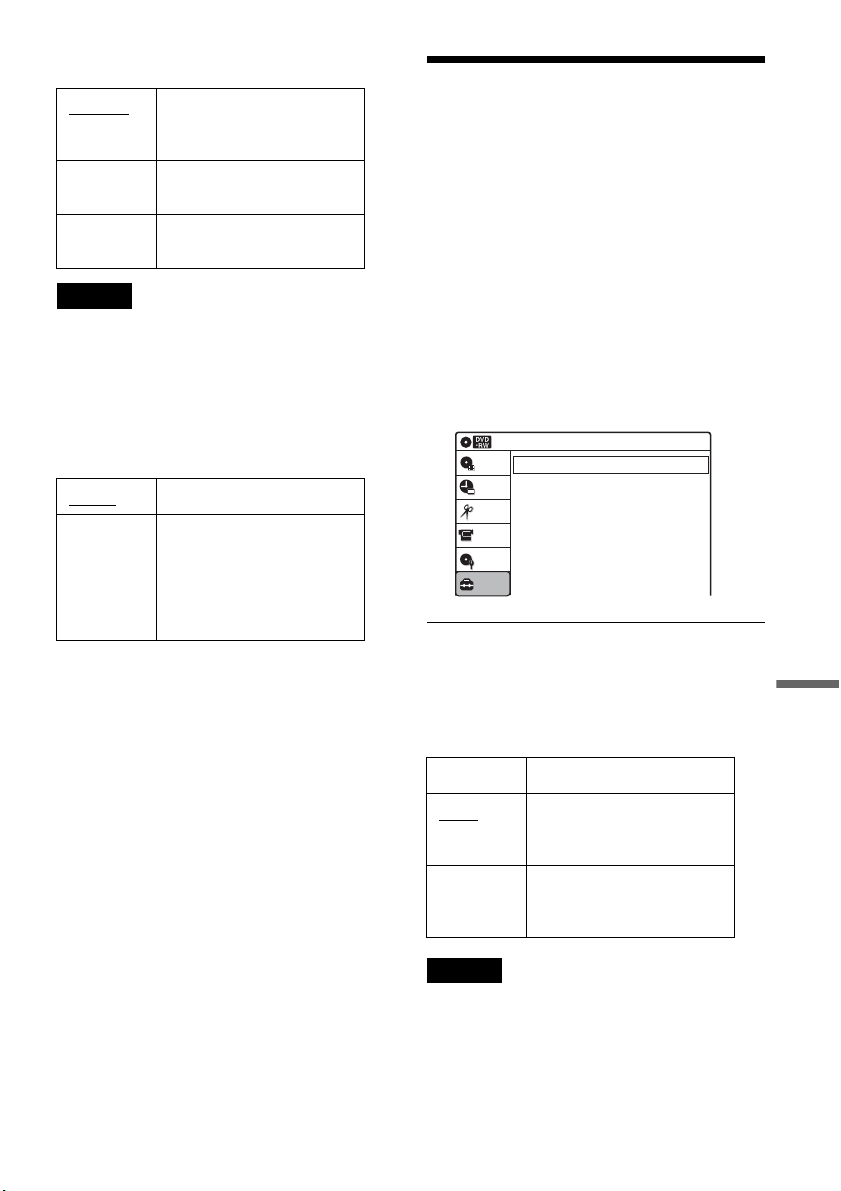
83
Settings and Adjustments
DV/D8 Audio Input
Note
Select “Stereo 2” or “Mix” if you have added a second
audio channel when recording with your digital video
camera.
Line Audio Input
When recording from equipment connected to the
LINE 1 IN or LINE 2 IN jacks to a DVD disc in
this recorder, select line input audio.
z Hint
When recording on a disc other than DVD-RWs (VR
mode)/DVD-Rs (VR mode), select either sound track
with the connected equipment before recording.
Recording Settings
(Features)
The “Features” setup allows you to insert chapter
markings automatically, or select the recording
format for DVD-RW.
1 Press SYSTEM MENU while the recorder is
in stop mode.
2 Select “Setup,” and press ENTER.
3 Select “Features,” and press ENTER.
The “Features” setup appears with the
following options. The default settings are
underlined.
DVD Auto Chapter
Automatically divides a recording (a title) into
chapters by inserting chapter markings at
specified intervals. The markings are inserted
while the recording is being made.
Note
Actual intervals may differ depending on the size of the
recording. The selected setting should be regarded as an
approximate chapter interval.
Stereo 1 Records original sound only.
Normally select this when
dubbing a DV format tape.
Stereo 2 Records additional audio
only.
Mix Records both original and
additional sounds.
Stereo
Records stereo sound only.
Main/Sub Records the two different
soundtracks on DVD-RWs
(VR mode)/DVD-Rs (VR
mode). You can select either
soundtrack when playing
back the disc.
Off No chapter mark is inserted.
5 Min
Inserts chapter marks at
approximately 5 minute
intervals.
15 Min Inserts chapter marks at
approximately 15 minute
intervals.
Setup
Disc Setting
Edit
Title List
Timer
10:10 AM
DVD Auto Chapter
Format DVD-RW
Features
: 5 Min
: VR
DV/D8 Dubbing
,continued
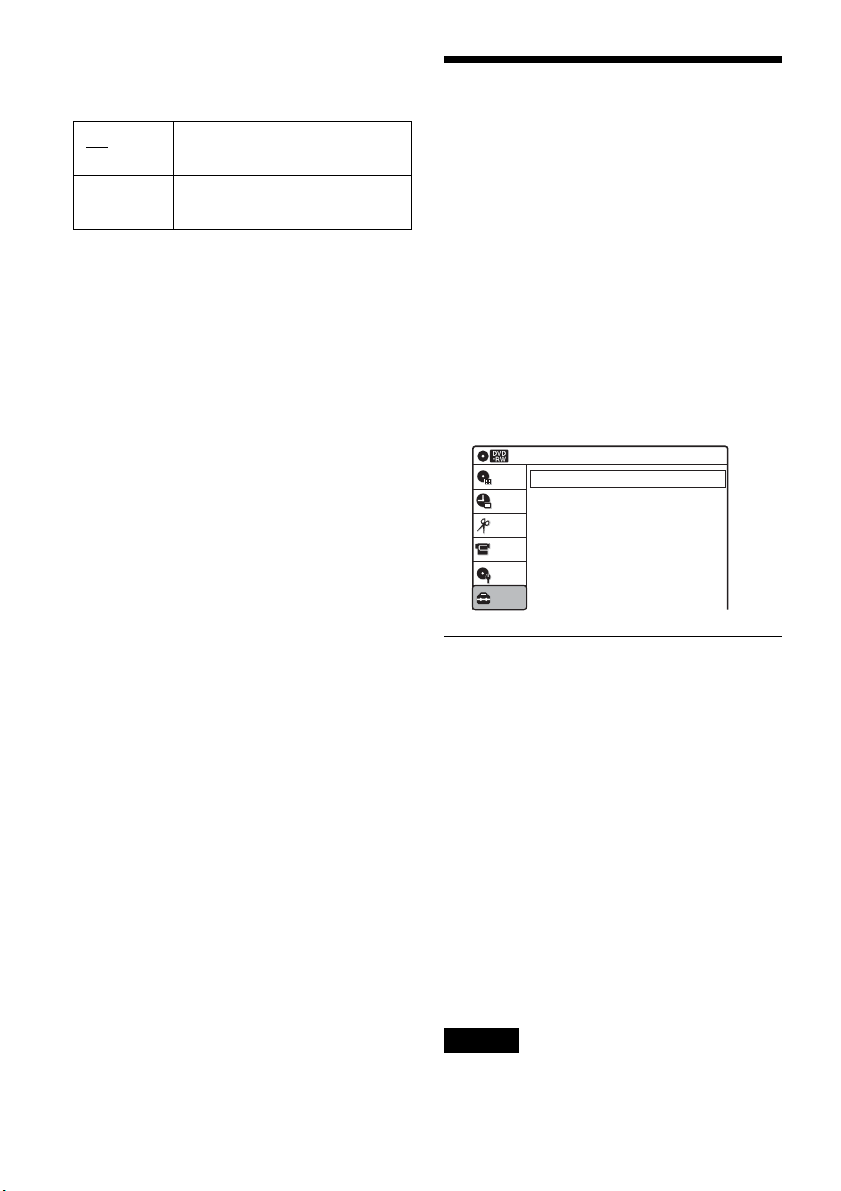
84
Format DVD-RW (DVD-RWs only)
Selects the recording format for an unused DVD-
RW, when first inserted.
Language, Parental, Digital
broadcast settings/Factory
Settings (Options)
The “Options” setup allows you to set up other
operational settings.
1 Press SYSTEM MENU while the recorder is
in stop mode.
2 Select “Setup,” and press ENTER.
3 Select “Options,” and press ENTER.
The “Options” setup appears with the
following options. The default settings are
underlined.
Language
◆ OSD (On-Screen Display)
Switches the display language on the screen.
◆ Disc Menu (DVD VIDEOs only)
Switches the language for the DVD menu.
◆ Audio (DVD VIDEOs only)
Switches the language of the soundtrack.
When you select “Original,” the language given
priority in the disc is selected.
◆ Subtitle (DVD VIDEOs only)
Switches the language of the subtitles recorded on
the disc.
When you select “Auto,” the subtitle language
changes according to the language you selected
for the soundtrack. See page 102 for an
explanation of the language abbreviations.
Note
If you select a language in “Disc Menu,” “Subtitle,” or
“Audio” that is not recorded on the DVD VIDEO, one of
the recorded languages will be automatically selected.
VR Automatically formats the disc in
VR mode.
Video Automatically formats the disc in
Video mode.
10:10 AM
Options
Setup
Disc Setting
Edit
Title List
Timer
Language
Parental
Digital Wide Control
Caption Service
Caption Setting
Front Display
Command Mode
Factory Setting
: 16:9
: Off
: Auto
: DVD 3
DV/D8 Dubbing
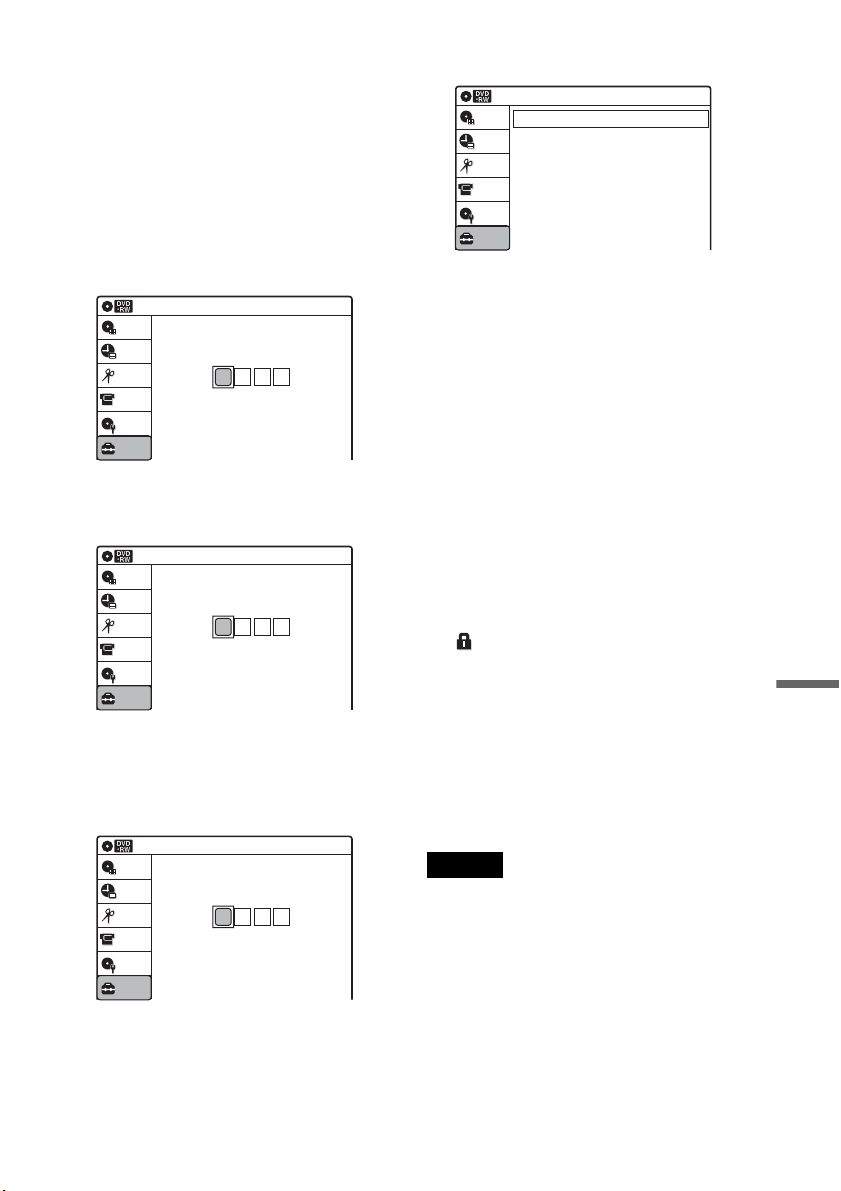
85
Settings and Adjustments
Parental
Digital programs with a digital rating or some
DVD VIDEOs can be restricted according to a
predetermined level.
1 After step 3 above, select “Parental,” and
press ENTER.
• If you have not entered a password, the
display for registering a new password
appears.
Enter a 4-digit password using the number
buttons.
The display for confirming the password
appears.
Re-enter the password.
• When you have already registered a
password, the display for entering the
password appears.
Enter a 4-digit password using the number
buttons.
2 The “Parental” menu appears.
z Hint
If you enter a wrong number, press < or CLEAR and
reenter.
◆Digital Rating
You can lock certain unsuitable channels to
prevent children accessing them , or set a rating, so
that any program classed above that rating by the
broadcaster will be restricted (page 35).
1 Select “Digital Rating,” and press ENTER.
2 Select “Rating Setting,” and press ENTER.
Select “On,” and press ENTER.
3 Select “Custom,” and press ENTER.
The dimension that is had by the program is
displayed.
4 Press M/m to set the desired rating and press
ENTER.
is displayed next to the rating setting.
• To unlock the Digital Rating setting in the
“Custom” display, set “Rating Setting” to
“Off” in step 2. The Digital Rating setting
itself is not canceled.
• If you forget your password, return the
settings to their defaults in the “Factory
Setting” display (page 88), and enter a new
password.
Notes
• This function relies on the broadcaster sending the
correct rate classification for each program.
• If you try to record a program with a rating beyond your
limit setting by a timer recording, a message indicating
that the program cannot be recorded at the current
rating set is recorded instead.
• To cancel the Digital Rating setting, set “Clear All” to
“OK” in the “Digital Rating” display. The Digital
Rating setting is canceled.
10:10 AM
Create the password.
Create the password
Setup
Disc Setting
Edit
Title List
Timer
DV/D8 Dubbing
10:10 AM
Confirm the password.
Create the password
Setup
Disc Setting
Edit
Title List
Timer
DV/D8 Dubbing
10:10 AM
Enter your password.
Enter your password
Setup
Disc Setting
Edit
Title List
Timer
DV/D8 Dubbing
Digital Rating
DVD VIDEO
Change Password
10:10 AM
Parental
Setup
Disc Setting
Edit
Title List
Timer
DV/D8 Dubbing
,continued

86
◆DVD VIDEO
Playback of some DVD VIDEOs can be limited
according to a predetermined level, such as the age
of the users. Scenes may be blocked, or replaced
with different scenes.
1 Select “DVD VIDEO,” and press ENTER.
2 Press ENTER.
The selection items for “Rating Level” are
displayed.
The lower the value, the stricter the limitation.
3 Select the level, and press ENTER.
The Parental setting is complete.
• To cancel the Parental setting for the disc,
set “Rating Level” to “Off” in step 3.
• If you forget your password, return the
settings to their defaults in the “Factory
Setting” display (page 88), and enter a new
password.
Notes
• Playback of discs without the Parental Control function
cannot be limited on this recorder.
• Depending on the disc, you may be asked to change the
Parental Control level while playing the disc. In this
case, enter your password, then change the level.
◆Change password
To change the password, select “Change
Password” of “Parental,” and press ENTER.
When the display for registering a password
appears, enter a new four-digit password using the
number buttons.
Digital Wide Control
Digital Wide Control is effective for wide signals
on digital broadcasts. When watching a digital
channel, select a TV type depending on your TV.
When recording a digital channel, select a setting
depending on the media type to be recorded.
The picture may differ from the actual view
depending on the TV.
Rating Level
: Level 1 (Kids)
10:10 AM
DVD VIDEO
Setup
Disc Setting
Edit
Title List
Timer
DV/D8 Dubbing
Off
Level 8 (Adults)
Level 7
Level 6
Level 5
Level 4
Level 3
Level 2
16:9 Select this when connecting to a
wide-screen TV.
When recording a digital program
with wide signals, this setting is
recommended.
4:3 Letter
Box
Select this when connecting to a
4:3 screen TV.
16:9
4:3 Letter Box
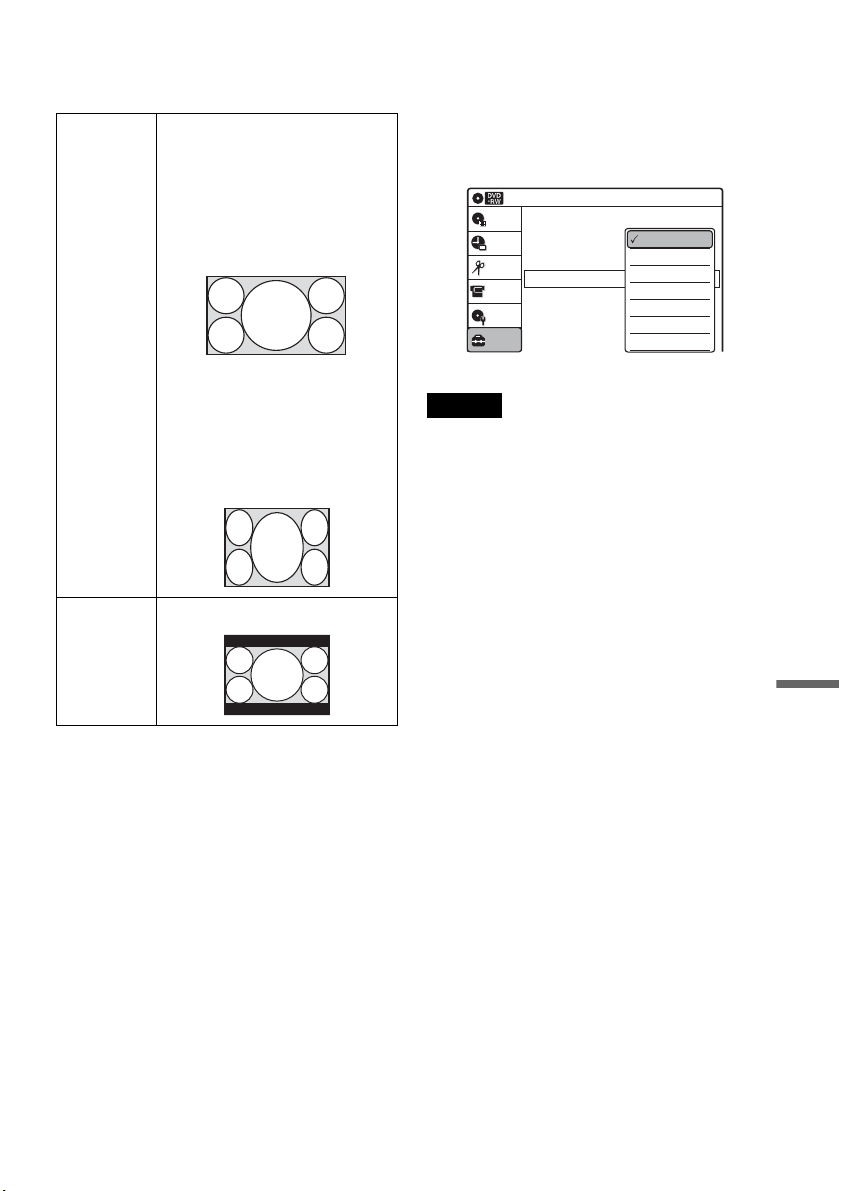
87
Settings and Adjustments
z Hints
• When recording a digital program with wide signals on
digital broadcasts, refer to the table below.
• This setting is linked with the setting of “TV type” in
the “Easy Setup” display.
When you select “4:3 Letter Box” or “4:3 Pan Scan” of
“TV type” in the “Easy Setup” display, the “Digital
Wide Control” setting is automatically set to “4:3
Letter Box” (page 29).
Caption Service
You can select a service from several closed
caption services for programs that are broadcast
with closed caption.
If the support service number is selected, the
caption appears on the screen.
Note
Digital closed captions cannot be recorded.
Caption Setting
The default setting is decided by the broadcaster.
◆Character Size
Select a character size from Small, Standard, or
Large.
◆Character Style
Select a character style from Style 1~7.
◆Character Color
Change the character color to your preference.
◆Character Opacity
Change the character opacity.
◆Edge Color
Change the edge color to your preference.
◆Edge Type
Change the edge type to your preference.
◆Background Color
Change the background color to your preference.
◆Background Opacity
Change the background opacity.
16:9 Record wide signals on digital
broadcasts as they are.
• DVD-RWs/DVD-Rs in VR
mode
• DVD-RWs/DVD-Rs in Video
mode, DVD+RWs/DVD+Rs
(when recording in HQ, HSP,
SP, or LSP mode)
Record as 4:3. When playing a
disc, change the setting on your
TV.
• DVD-RWs/DVD-Rs in Video
mode, DVD+RWs/DVD+Rs
(when recording in ESP, LP, EP,
or SLP mode)
4:3 Letter
Box
Record as 4:3 Letter Box.
10:10 AM
Options
Setup
Disc Setting
Edit
Title List
Timer
Language
Parental
Digital Wide Control
Caption Service
Caption Setting
Front Display
Command Mode
Factory Settin
g
: 16:9
: Off
: Auto
: DVD 3
DV/D8 Dubbing
Off
Service1
Service2
Service3
Service4
Service5
Service6
,continued
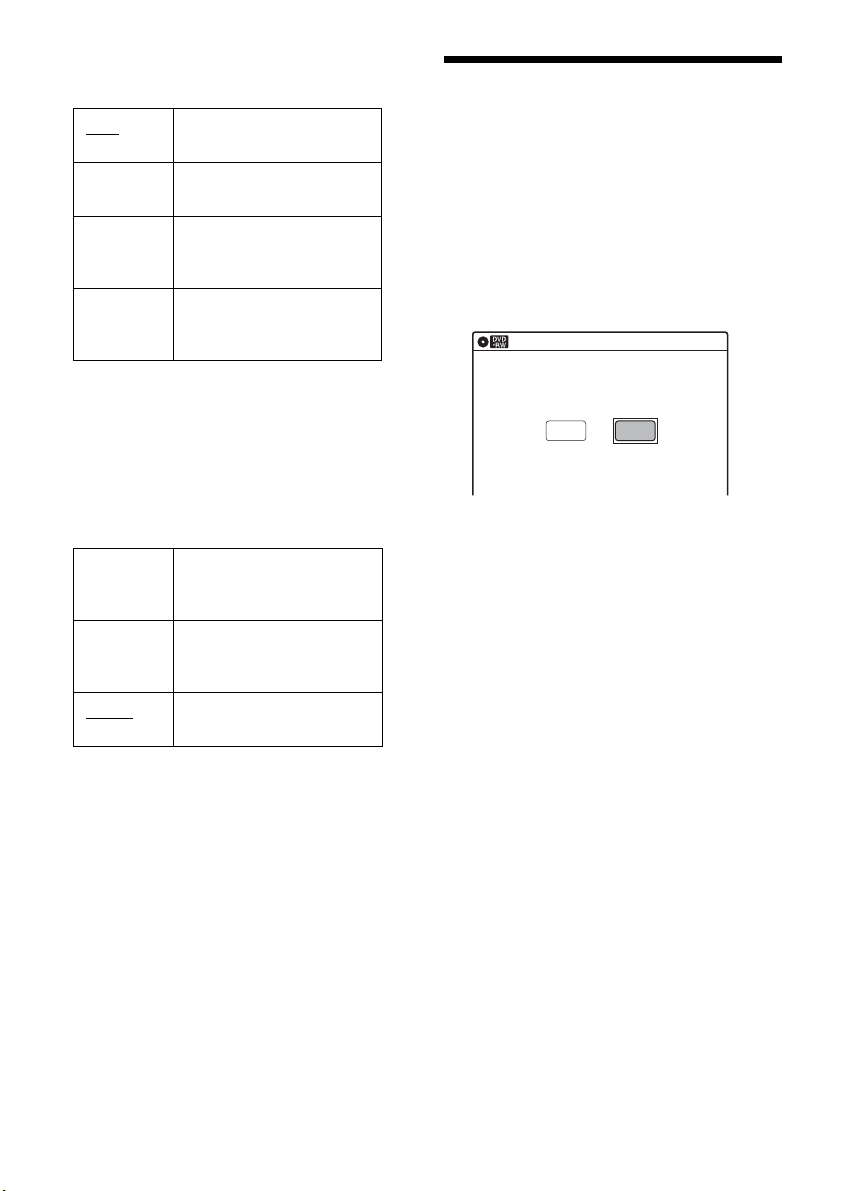
88
Front Display
Adjusts the lighting of the front panel display.
Command Mode
Changes the command mode of this recorder if
other DVD equipment is assigned the same
command mode. Be sure to match the command
mode of the supplied remote to the setting made
here. For details, see “If you have a Sony DVD
player or more than one Sony DVD recorder” on
page 28.
Factory Setting
Allows you to return the setup settings to their
default settings. Note that all of your previous
settings will be lost.
1 After step 3 on page 84, select “Factory
Setting,” and press ENTER.
2 Select “Start,” and press ENTER.
The setup settings return to their default
settings.
3 Press ENTER when “Finish” appears.
The power automatically turns off and then on
again, and the recorder is reset to the factory
settings.
When the “Easy Setup” display appears,
follow the instructions for Easy Setup
(page 29) from step 5.
Easy Setup
(Resetting the Recorder)
Select this to run the Easy Setup program.
1 Press SYSTEM MENU while the recorder is
in stop mode.
2 Select “Setup,” and press ENTER.
3 Select “Easy Setup,” and press ENTER.
4 Select “Start,” and press ENTER.
5 Follow the instructions for Easy Setup
(page 29) from step 5.
Auto Adjusts to low lighting when
power is off.
Bright Maintains bright lighting
when power is off.
Dimmer Maintains low lighting
regardless of whether power
is on or off.
Off Turns off the lighting when
power is off. Maintains the
lighting when power is on.
DVD 1 Select this if the default
command mode conflicts
with other DVD equipment.
DVD 2 Select this if the default
command mode conflicts
with other DVD equipment.
DVD 3
The default command mode
of the recorder.
10:10 AM
Easy Setup
Follow the guide to make initial settings.
Before you start,
Check that you have made all necessary connections.
Start Cancel

89
Additional Information
Additional Information
Troubleshooting
If you experience any of the following difficulties
while using the recorder, use this troubleshooting
guide to help remedy the problem before
requesting repairs. Should any problem persist,
consult your nearest Sony dealer.
Power
The power does not turn on.
, Check that the AC power cord is connected
securely.
Picture
There is no picture.
, Re-connect all connecting cords securely.
, The connecting cords are damaged.
, Check the connection to your TV (page 21).
, Switch the input selector on your TV (such as to
“VIDEO”) so that the signal from the recorder
appears on the TV screen.
Picture noise appears.
, Check the connection to your TV (page 17) and
switch the input selector on your TV so that the
signal from the recorder appears on the TV
screen.
, If the picture output signal from your recorder
passes through your VCR to get to your TV, or if
you are connected to a combination TV/VIDEO
player, the copy-protection signal applied to
some DVD programs could affect picture
quality. If you still experience this problem even
when you connect your recorder directly to your
TV, try connecting your recorder to your TV’s
S VIDEO input.
, You have set the recorder to progressive format
(the “PROGRESSIVE” indicator lights up) even
though your TV cannot accept the progressive
signal. In this case, set “Progressive” to “Off” in
“Video” setup (page 80).
, Even if your TV is compatible with progressive
format (480p) signals, the image may be affected
when you set the recorder to progressive format.
In this case, set “Progressive” to “Off” in
“Video” setup (page 80).
There is no picture or the picture noise appears
when connected to the DV IN jack.
, Try the following: 1Turn the recorder off and
on again. 2Turn the connected equipment off
and on again. 3Disconnect and then connect the
i.LINK cable again.
There is no picture or the picture noise appears
when connected to the HDMI OUT jack.
, Try the following: 1Turn the recorder off and
on again. 2Turn the connected equipment off
and on again. 3Disconnect and then connect the
HDMI cord again.
, If the HDMI OUT jack is used for video output,
changing the “HDMI Resolution” setting in the
“Video” setup may solve the problem (page 79).
Connect the TV and the recorder using a video
jack other than the HDMI OUT, and switch the
TV’s input to the connected video input so that
you can see the on-screen displays. Change the
“HDMI Resolution” setting in the “Video” setup,
and switch the TV’s input back to HDMI. If the
picture still does not appear, repeat the steps and
try other options.
, The recorder is connected to an input device that
is not HDCP compliant (page 22).
TV program reception does not fill the screen.
, Set the channel manually in “Tuner Preset” setup
(page 76).
, Select the correct source using the INPUT
button, or select a channel of any TV program
using the CH +/– button.
TV program pictures are distorted.
, Reorient the TV antenna.
, Adjust the picture (see the TV’s instruction
manual).
, Place the recorder and TV farther apart.
, Place the TV and any bunched antenna cables
farther apart.
TV channels cannot be changed.
, The channel is disabled (page 77).
, A timer recording started, which cause the
channels to change.
,continued

90
The picture from equipment connected to the
recorder’s input jack does not appear on the
screen.
, If the equipment is connected to the LINE 1 IN
jack, select “LINE1” in the front panel display by
pressing INPUT.
If the equipment is connected to the LINE 2 IN
jacks, select “LINE2” in the front panel display
by pressing INPUT.
The playback picture or TV program from the
equipment connected through the recorder is
distorted.
, If the playback picture output from a DVD
player, VCR, or tuner goes through your recorder
before reaching your TV, the copy-protection
signal applied to some programs could affect
picture quality. Disconnect the playback
equipment in question and connect it directly to
your TV.
The picture does not fill the screen.
, Set “TV Type” in “Video” setup to fit the aspect
ratio of your TV (page 79).
The picture does not fill the screen, even
though the aspect ratio is set in “TV Type” in
“Video” setup.
, The aspect ratio of the disc is fixed on your DVD.
Sound
There is no sound.
, Re-connect all connections securely.
, The connecting cord is damaged.
, The input source setting on the amplifier or the
connection to the amplifier is incorrect.
, The recorder is in reverse play, fast-forward,
slow motion, or pause mode.
, If the audio signal does not come through the
DIGITAL AUDIO OUT (OPTICAL or
COAXIAL) jack, check the “Audio” setup
settings (page 81).
No sound is output from the HDMI OUT jack.
, Try the following: 1Turn the recorder off and
on again. 2Turn the connected equipment off
and on again. 3Disconnect and then connect the
HDMI cord again.
, The HDMI OUT jack is connected to a DVI
device (DVI jacks do not accept audio signals).
, The equipment connected to the HDMI OUT
jack does not conform to the audio signal format.
Sound is noisy.
, When playing a CD with DTS soundtracks, noise
will come from the LINE OUT (AUDIO L/R) or
AUDIO OUT L/R jacks (page 38).
The sound volume is low.
, The sound volume is low on some DVDs.
The sound volume may improve if you set
“Audio DRC” in “Audio” setup to “Wide
Range” (page 82).
An alternate audio track cannot be recorded or
played.
, Second Audio Program (SAP) is not available
for all programs. The program you are recording
does not have a second audio program.
, You have set “Tuner Audio” in “Audio” setup to
“Main” (page 81). Select “SAP” to record
alternate audio programs.
, If you have connected an AV amplifier to the
DIGITAL AUDIO OUT (OPTICAL or
COAXIAL) jack and want to change the audio
track for a DVD-RW (VR mode)/DVD-R (VR
mode) during playback, set “Dolby Digital” in
“Audio” setup to “D-PCM” (page 81).
, When recording to a disc other than DVD-RWs
(VR mode)/DVD-Rs (VR mode), set “Line
Audio Input” in “Audio” setup to “Stereo.”
Playback
The disc does not play.
, The disc is upside down. Insert the disc with the
labeled side facing up.
, The disc is not correctly inserted.
, Moisture has condensed inside the recorder.
Remove the disc and leave the recorder turned on
for about half an hour until the moisture
evaporates.
, If the disc was recorded on another recorder, the
recorder cannot play the disc if it was not
finalized (page 69).
The disc does not start playback from the
beginning.
, Resume play was activated (page 39).
, You have inserted a disc whose Title menu or
DVD menu automatically appears on the TV
screen when it is first inserted. Use the menu to
start playback.

91
Additional Information
The recorder starts playing the disc
automatically.
, The DVD VIDEO features an auto playback
function.
Playback stops automatically.
, If the disc has an auto pause signal, the recorder
stops playback at the auto pause signal.
Some functions such as Stop, Search, or Slow-
motion Play cannot be performed.
, Depending on the disc, you may not be able to do
some of the operations above. See the instruction
manual supplied with the disc.
, While the recorder is reading disc information,
playback operations will not work.
The language for the soundtrack cannot be
changed.
, Multilingual tracks are not recorded on the disc
being played.
, The DVD VIDEO prohibits the changing of the
language for the soundtrack.
, Try changing the language using the DVD
VIDEO’s menu.
The subtitle language cannot be changed or
turned off.
, Multilingual subtitles are not recorded on the
DVD VIDEO.
, The DVD VIDEO prohibits changing of the
subtitles.
, Try changing the subtitle using the DVD
VIDEO’s menu.
, The subtitles cannot be changed for the titles
recorded on this recorder.
The angles cannot be changed.
, Multi-angles are not recorded on the DVD
VIDEO being played.
, You are trying to change the angles when “ ”
does not appear in the front panel display
(page 39).
, The DVD VIDEO prohibits changing angles.
, Try changing the angle using the DVD VIDEO’s
menu.
, The angles cannot be changed for the titles
recorded on this recorder.
The MP3 audio track cannot be played.
, The DATA CD is not recorded in the MP3
format that conforms to ISO9660 Level 1/
Level 2.
, The MP3 audio track does not have the extension
“.MP3.”
, The data is not formatted in MP3 even though it
has the extension “.MP3.”
, The data is not MPEG1 Audio Layer 3 data.
, The recorder cannot play audio tracks in
MP3PRO format.
, When playing a disc containing JPEG image
files, “Photo” is selected (page 43).
The JPEG image file cannot be played.
, The DATA CD is not recorded in a JPEG format
that conforms to ISO9660 Level 1/Level 2.
, The JPEG image file does not have the extension
“.JPG” or “.JPEG.”
, The data is not formatted in JPEG even though it
has the extension “.JPG” or “JPEG.”
, The length or width of the image is more than
4,720 dots.
, When playing a disc containing MP3 audio
tracks, “Music” is selected (page 42).
The title of the MP3 audio album/ track or JPEG
image folder/file is not correctly displayed.
, The recorder can only display numbers and
alphabet. Other characters are displayed as
asterisks.
Recording/Timer recording/Editing
The channel cannot be changed from the
channel you are recording.
, Set the TV’s input source to “TV.”
Recording does not start immediately after
z REC is pressed.
, Operate the recorder only after “LOAD,”
“FORMAT,” or “INF WRITE” disappears from
the front panel display.
,continued

92
Nothing was recorded even though the timer
setting is set correctly.
, There was a power failure during recording.
, Disconnect the AC power cord from the AC
outlet, and connect it again.
, The program contains copy protection signals
that restrict copying.
, The program that starts first has priority and the
second program starts recording only after the
first program has finished. If the programs start
at the same time, the program listed first in the
menu has priority (page 52).
, There is no DVD inserted in the recorder.
, There is not enough disc space for the recording.
, The cable box/satellite receiver was turned off.
Recording does not stop immediately after
x STOP is pressed.
, It will take a few seconds for the recorder to input
disc data before recording can stop.
Timer recording is not complete or did not start
from the beginning.
, There was a power failure during recording.
, The recorder’s internal clock stopped due to a
power failure. The clock is automatically set by
Auto Clock Set function (page 78), but it is reset
during a power failure when the time signal
cannot be received. Reset the clock (page 78).
, The channel or input changed from the one you
are recording.
, The program that starts first has priority and the
second program starts recording only after the
first program has finished. If the programs start
at the same time, the program listed first in the
menu has priority (page 52).
, There is not enough disc space for the recording.
The c indicator flashes after timer recording is
set.
, Insert a recordable disc (page 12).
, Insert a disc with any space for recording.
, The disc has 99 or more titles, which prevents
further recording.
, The disc is protected (page 68).
The SYNCHRO REC indicator flashes after
Synchro-Recording is set.
, Insert a recordable disc (page 12).
, Insert a disc with enough space for the recording.
, The disc has 99 or more titles, which prevents
further recording.
, The disc is protected (page 68).
Contents previously recorded were erased.
, Data that has been recorded on a DVD with a PC
will be erased from the disc when the disc is
inserted.
Display
Menus or displays do not appear on the
screen.
, While the recorder is reading disc information,
the System Menu, OPTIONS menu, or
information display will not appear.
“- -:- -” appears in the front panel display.
, Set the clock again (page 78).
The c indicator is flashing.
, The disc does not have any space for recording.
, Insert a recordable disc inside the recorder.
The recording mode indication is incorrect.
, Since the recording mode for recorded titles is
calculated after sampling the recorded data
during playback, it may be displayed differently
from the mode you selected when recording.
However, the actual recording itself is correctly
made in the selected mode.
Remote control
The remote does not function.
, Batteries are weak.
, The remote is too far from the recorder.
, The remote’s manufacturer code returned to the
default setting when you replaced the batteries.
Reset the code (page 27).
, Turn on the recorder.
, The remote is not pointed at the remote sensor on
the recorder.
, Different command modes are set for the
recorder and remote. Set the same command
mode (page 28).
93
Additional Information
Other Sony equipment responds to the remote.
, The same command mode is set for both the
Sony DVD equipment. Set a different command
mode for the recorder (page 28).
Others
The recorder does not operate properly.
, When static electricity, etc., causes the recorder
to operate abnormally, turn off the recorder and
wait until the clock appears in the front panel
display. Then, unplug the recorder and after
leaving it off for a while, plug it in again.
The disc tray does not open after you press
Z OPEN/CLOSE.
, It may take a few seconds for the disc tray to
open after you have recorded or edited a disc.
This is because the recorder is adding disc data to
the disc.
“Cannot record because of high temperature.”
appears on the TV screen.
, Check that the vent on the rear of the recorder is
not blocked. Then, turn off the recorder, wait
until the clock appears in the front panel display,
and disconnect the AC power cord. Leave the
recorder off for a while, then re-connect the
power cord, and press "/1 on the recorder.
“CHILD LOCK” appears in the front panel
display.
, The recorder is locked. Cancel the Child Lock
(page 39).
Notes About This Recorder
On adjusting volume
Do not turn up the volume while listening to a
section with very low level inputs or no audio
signals. If you do, the speakers may be damaged
when a peak level section is played.
On cleaning
Clean the cabinet, panel, and controls with a soft
cloth slightly moistened with a mild detergent
solution. Do not use any type of abrasive pad,
scouring powder or solvent such as alcohol or
benzine.
On cleaning discs, disc/lens cleaners
Do not use cleaning discs or disc/lens cleaners
(including wet or spray types). These may
cause the apparatus to malfunction.
On replacement of parts
In the event that this unit is repaired, repaired parts
may be collected for reuse or recycling purposes.
Notes about the discs
• To keep the disc clean, handle the disc by its
edge. Do not touch the surface. Dust,
fingerprints, or scratches on the disc may cause
it to malfunction.
• Do not expose the disc to direct sunlight or heat
sources such as hot air ducts, or leave it in a car
parked in direct sunlight as the temperature may
rise considerably inside the car.
• After playing, store the disc in its case.
• Clean the disc with a cleaning cloth. Wipe the
disc from the center out.
• Do not use solvents such as benzine, thinner,
commercially available disc/lens cleaners, or
anti-static spray intended for vinyl LPs.
• Do not use the following discs.
,continued

94
– A disc that has a non-standard shape (e.g.,
card, heart).
– A disc with a label or sticker on it.
– A disc that has cellophane tape or sticker
adhesive on it.
Specifications
System
[DVD recorder section]
Laser
Semiconductor laser
Audio recording format
Dolby Digital
Video recording format
MPEG Video
[Tuner section]
Television system
NTSC: American TV standard
ATSC (8VSB terrestrial): ATSC compliant
8VSB
QAM on cable: ANSI/SCTE 07 2000
(Does not include CableCARD
functionality)
Channel coverage
Terrestrial
Analog 2-69 Digital 2-69
Cable
Analog 1-125 Digital 1-135
Antenna
75-ohm antenna terminal for VHF/UHF
[Timer section]
Clock
Quartz locked
Timer indication
12-hour cycle
Timer setting
12 programs in total (max.)

95
Additional Information
Inputs and outputs
LINE 1 IN and LINE 2 IN
VIDEO IN, phono jack (1 each)
Input signal: 1 Vp-p, 75 ohms, unbalanced,
sync negative
AUDIO IN, phono jacks (2 each)
Input level: 327 mVrms
Input impedance: more than 47 kilohms
LINE 2 IN
S VIDEO, 4-pin, mini-DIN jack
Y: 1.0 Vp-p, unbalanced, sync negative
C: 0.286 Vp-p, load impedance 75 ohms
DV IN, 4-pin jack, i.LINK S100
LINE OUT
VIDEO OUT, phono jack (1)
Output signal: 1 Vp-p, 75 ohms,
unbalanced, sync negative
AUDIO OUT, phono jacks (2)
Standard output: 327 mVrms
Load impedance: 47 kilohms
Output impedance: less than 10 kilohms
DIGITAL AUDIO OUT
OPTICAL, Optical output jack
–18 dBm (wave length: 660 nm)
COAXIAL, phono jack
Output signal: 0.5 Vp-p, 75 ohms
COMPONENT VIDEO OUT (Y, PB, PR)
Phono jack
Y: 1.0 Vp-p/P
B, PR: 0.7 Vp-p, 75 ohms
S VIDEO OUT
4-pin, mini-DIN jack
Y: 1.0 Vp-p, unbalanced, sync negative
C: 0.286 Vp-p, load impedance 75 ohms
HDMI
HDMI 19 pin-Standard Connector
General
Power requirements
120 V AC, 60 Hz
Power consumption
28 W
Power back-up
Back-up duration: 0 min
Operating temperature
5°C to 35°C (41°F to 95°F)
Storage temperature
–20°C to 60°C (–4°F to 140°F)
Operating humidity
25% to 80%
Dimensions including projecting parts
and controls (w/h/d)
Approx. 430 × 70 × 287 mm
(Approx. 17 × 2
7
/8 × 11
3
/8 inches)
Mass
Approx. 3.2 kg (Approx. 7.1 lbs)
Supplied accessories
Remote commander (remote) (1)
Size AA (R6) batteries (2)
Antenna cable (1)
Audio/video cord (1)
Design and specifications are subject to change
without notice.
,continued

96
About i.LINK
The DV IN jack on this recorder is an i.LINK-
compliant DV IN jack. This section describes the
i.LINK standard and its features.
What is i.LINK?
i.LINK is a digital serial interface for handling
digital video, digital audio and other data in two
directions between equipment having the i.LINK
jack, and for controlling other equipment.
i.LINK-compatible pieces of equipment can be
connected by a single i.LINK cable. Possible
applications are operations and data transactions
with various digital AV equipment. When two or
more i.LINK-compatible equipment are
connected to this recorder in a daisy chain,
operations and data transactions are possible with
not only the equipment that this recorder is
connected to but also with other devices via the
directly connected equipment.
Note, however, that the method of operation
sometimes varies according to the characteristics
and specifications of the equipment to be
connected, and that operations and data
transactions are sometimes not possible on some
connected equipment.
Note
Normally, only one piece of equipment can be connected
to this recorder by the i.LINK cable (DV connecting
cable). When connecting this recorder to i.LINK-
compatible equipment having two or more i.LINK jacks
(DV jacks), see the instruction manual of the equipment
to be connected.
About the name “i.LINK”
i.LINK is a more familiar term for IEEE 1394 data
transport bus proposed by SONY, and is a
trademark approved by many corporations.
IEEE 1394 is an international standard
standardized by the Institute of Electrical and
Electronics Engineers.
i.LINK baud rate
i.LINK’s maximum baud rate varies according to
the equipment. Three maximum baud rates are
defined:
S100 (approx. 100 Mbps*)
S200 (approx. 200 Mbps)
S400 (approx. 400 Mbps)
The baud rate is listed under “Specifications” in
the instruction manual of each equipment. It is
also indicated near the i.LINK jack on some
equipment.
The maximum baud rate of equipment on which it
is not indicated such as this unit is “S100.”
When units are connected to equipment having a
different maximum baud rate, the baud rate
sometimes differs from the indicated baud rate.
* What is Mbps?
Mbps stands for megabits per second, or the amount of
data that can be sent or received in one second. For
example, a baud rate of 100 Mbps means that 100
megabits of data can be sent in one second.
i.LINK functions on this recorder
For details on how to dub when this recorder is
connected to other video equipment having DV
jacks, see page 71.
The DV jack on this recorder can only input DVC-
SD signals. It cannot output signals. The DV jack
will not accept MICROMV signals from
equipment such as a MICROMV digital video
camera with an i.LINK jack.
For further precautions, see the notes on page 71.
For details on precautions when connecting this
recorder, also see the instruction manuals for the
equipment to be connected.
Required i.LINK cable
Use the Sony i.LINK 4-pin-to-4-pin cable (during
DV/D8 dubbing).
i.LINK and are trademarks.
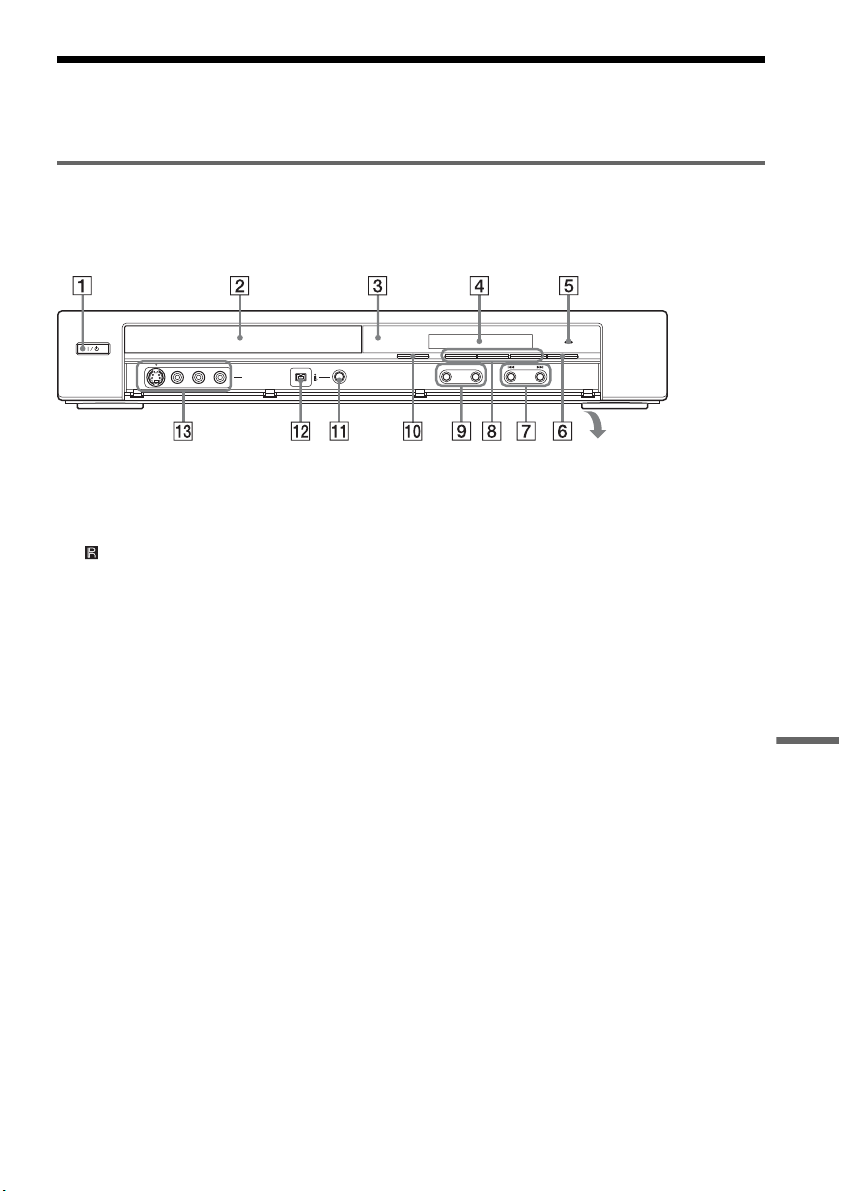
97
Additional Information
Guide to Parts and Controls
For more information, see the pages in parentheses.
Front panel
Buttons on the recorder have the same function as the buttons on the remote if they have the same or
similar names.
A "/1 (on/standby) switch (29)
B Disc tray (36, 49, 72)
C (remote sensor) (26)
D Front panel display (34, 55)
E HDMI indicator (22)
F z REC (record) button (49)
G ./> (previous/next) buttons (38)
H H (play) button (36)
X (pause) button (37, 49)
x (stop) button (36, 49)
I CHANNEL +/– buttons* (27, 49)
J A (open/close) button (36, 49)
K ONE-TOUCH DUBBING button (74)
L DV IN jack (71)
M LINE 2 IN (S VIDEO/VIDEO/AUDIO L
(MONO)/R) jacks (32)
* The CHANNEL + button has a tactile dot. Use the
tactile dot as a reference.
HDMI
DV IN
+
CHANNEL
-
L(MONO) AUDIO RVIDEOS VIDEO
LINE-2 IN
ONE-TOUCH DUBBING
Open the cover
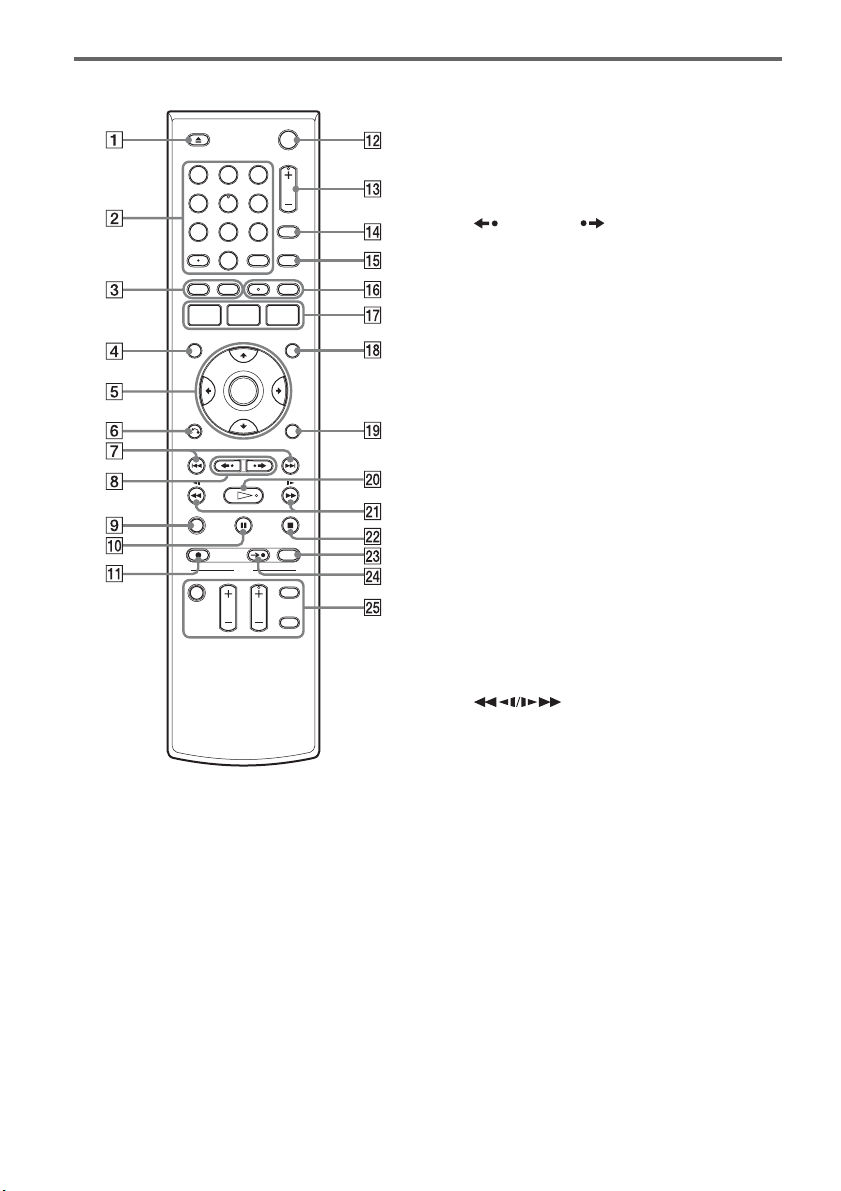
98
Remote
A Z OPEN/CLOSE button (36, 49, 72)
B Number buttons* (34, 37)
SET button (34)
· (dot) button (34)
C TOP MENU button (36)
MENU button (36)
D DISPLAY button (46)
E M/m/</,/ENTER button (29)
F O RETURN button (29)
G . PREV (previous)/> NEXT buttons
(37)
H REPLAY/ ADVANCE buttons
(37)
I CLEAR button (85)
J X PAUSE button (49)
K z REC (record) button (49)
L ?/1 (on/standby) switch (29)
M CH (channel) +/– button* (49)
N INPUT button (49, 72)
O DIGITAL/ANALOG button (34)
P AUDIO button* (37)
SUBTITLE button (37)
Q SYSTEM MENU button (10)
TITLE LIST button (40, 58)
TIMER button (51)
R ORIGINAL/PLAYLIST button (40, 58)
S OPTIONS button (42)
T H PLAY button* (36)
U (search) buttons (37)
V x STOP button (36, 49)
W REC MODE button (49, 72)
X SYNCHRO REC button (53)
Y TV buttons
• ?/1 (on/standby) switch (27)
• INPUT button (
27)
• CH (channel) +/– button* (27)
• VOL (volume) +/– button (
27)
• DIGITAL/ANALOG button (
27)
* Number 5, AUDIO, CH +, and H PLAY buttons have
a tactile dot. Use the tactile dot as a reference.
11 22 33
44 55 66
77 88
00
99
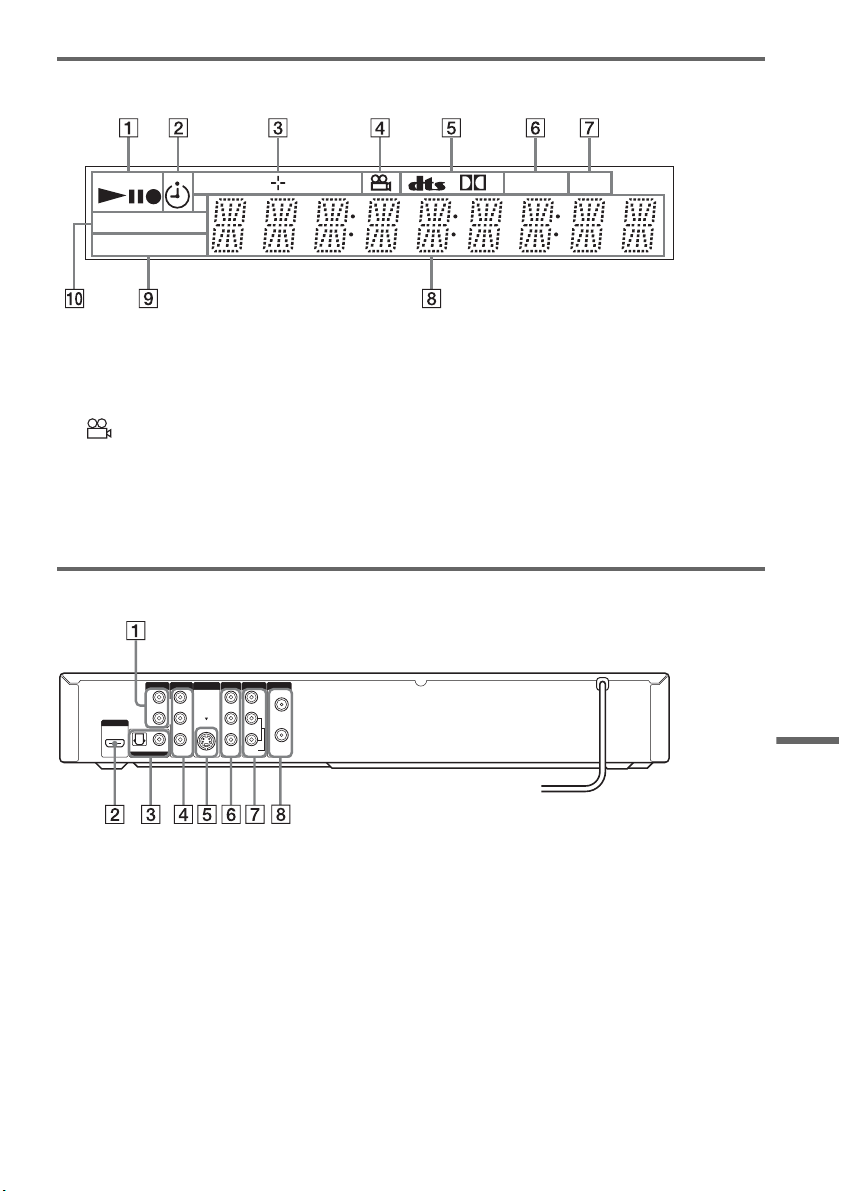
99
Additional Information
Front panel display
A Playing/recording status
B Timer indicator
C Disc type/recording format
D (angle) indicator (39)
E Audio signal indicators
F STEREO indicator (48)
G SAP (Second Audio Program) indicator
(48)
H Displays the following (34, 55):
• Playing time/remaining time
• Current title/chapter/track/index number
• Recording time/recording mode
•Clock
• Channel
I PROGRESSIVE indicator (23, 80)
J SYNCHRO REC indicator (53)
Rear panel
A AUDIO OUT L/R jacks (24)
B HDMI OUT jack
C DIGITAL AUDIO OUT (COAXIAL/
OPTICAL) jacks (24)
D COMPONENT VIDEO OUT (Y, P
B, PR)
jacks (23)
E S VIDEO OUT jack (21)
F LINE 1 IN (VIDEO/AUDIO L/R) jacks
(33)
G LINE OUT (VIDEO/AUDIO L/R) jacks
(21, 23)
H VHF/UHF IN/OUT jacks (19)
RW
VR
VCDVD
SAP
SYNCHRO
PROGRESSIVE
REC
STEREO
D
L
R
VIDEO
AUDIO
LINE OUT VHF/UHF
VIDEO
YL
P
B
R
P
R
AUDIO
LINE 1 IN
AUDIO OUT S VIDEO OUT
COMPONENT
VIDEO OUT
DIGITAL AUDIO OUT
OPTICAL COAXIAL
HDMI OUT
IN
OUT
,continued

100
Glossary
Chapter (page 41)
Sections of a picture or a music feature that are
smaller than titles. A title is composed of several
chapters. Depending on the disc, no chapters may
be recorded.
Copy protection signals (page 48)
Copy restriction set by copyright owners, etc.
These signals are included in some software or TV
programs and restrict recording on this recorder.
Dolby Digital (page 81)
Digital audio compression technology developed
by Dolby Laboratories. This technology conforms
to multi-channel surround sound. The rear channel
is stereo and there is a discrete subwoofer channel
in this format. Dolby Digital provides the same
discrete channels of high quality digital audio
found in “Dolby Digital” theater surround sound
systems. Good channel separation is realized
because all of the channel data is recorded
discretely, and little deterioration occurs because
all channel data processing is digital.
DTS (page 81)
Digital audio compression technology by DTS,
Inc. This technology conforms to multi-channel
surround sound. The rear channel is stereo and
there is a discrete subwoofer channel in this
format. DTS provides the same discrete channels
of high quality digital audio.
Good channel separation is realized because all of
the channel data is recorded discretely, and little
deterioration occurs because all channel data
processing is digital.
DVD+RW (page 12)
A DVD+RW (read “plus RW”) is a recordable and
rewritable disc. DVD+RWs use a recording
format that is comparable to the DVD VIDEO
format.
DVD-RW (page 12)
A DVD-RW is a recordable and rewritable disc
that is the same size as a DVD VIDEO. The DVD-
RW has two different modes: VR mode and Video
mode. DVDs created in Video mode have the
same format as a DVD VIDEO, while discs
created in VR (Video Recording) mode allow the
contents to be programmed or edited.
DVD+R (page 12)
A DVD+R (read “plus R”) is a recordable disc that
is the same size as a DVD VIDEO. Contents can
be recorded only once to a DVD+R, and will have
the same format as a DVD VIDEO.
DVD-R (page 12)
A DVD-R is a recordable disc that is the same size
as a DVD VIDEO. Contents can be recorded only
once to a DVD-R. The DVD-R has two different
modes: VR mode and Video mode. DVDs created
in Video mode have the same format as a DVD
VIDEO, while discs created in VR (Video
Recording) mode allow the contents to be
programmed or edited.
DVD VIDEO (page 15)
A disc that contains up to eight hours of moving
pictures on a disc the same diameter as a CD.
The data capacity of a single-layer and single-
sided DVD is 4.7 GB (Giga Byte), which is 7
times that of a CD. The data capacity of a double-
layer and single-sided DVD is 8.5 GB, a single-
layer and double-sided DVD is 9.4 GB, and
double-layer and double-sided DVD is 17 GB.
The picture data uses the MPEG 2 format, which
is a worldwide standard of digital compression
technology. The picture data is compressed to
about 1/40 (average) of its original size. The DVD
also uses a variable rate coding technology that
changes the data to be allocated according to the
status of the picture. Audio information is
recorded in a multi-channel format, such as Dolby
Digital, allowing you to enjoy a more real audio
presence.
Furthermore, various advanced functions such as
the multi-angle, multilingual, and Parental
Control functions are provided on the DVD.

101
Additional Information
HDMI (High-Definition Multimedia Interface)
(page 22)
HDMI is an interface that supports both video and
audio on a single digital connection. The HDMI
connection carries standard to high definition
video signals and multi-channel audio signals to
AV components such as HDMI equipped TVs, in
digital form without degradation.
The HDMI specification supports HDCP (High-
bandwidth Digital Contents Protection), a copy
protection technology that incorporates coding
technology for digital video signals.
Interlace format
Interlace format shows every other line of an
image as a single “field” and is the standard
method for displaying images on television. The
even number field shows the even numbered lines
of an image, and the odd numbered field shows the
odd numbered lines of an image.
Original (page 57)
Titles actually recorded on a DVD-RW (VR
mode) or DVD-R (VR mode). Erasing original
titles frees up disc space on DVD-RWs.
Playlist (page 57)
Playback information created from the actual
recordings on a DVD-RW (VR mode) or DVD-R
(VR mode). A Playlist leaves the original titles as
they are, and contains only the information needed
to control playback. A Playlist title takes up very
little disc space.
Progressive format (page 80)
Compared to the Interlace format that alternately
shows every other line of an image (field) to create
one frame, the Progressive format shows the entire
image at once as a single frame. This means that
while the Interlace format can show 30 frames/60
fields in one second, the Progressive format can
show 60 frames in one second. The overall picture
quality increases and still images, text, and
horizontal lines appear sharper.
Title (page 41)
The longest section of a picture or music feature
on a DVD, movie, etc., in video software, or the
entire album in audio software.
Track (page 41)
Sections of a music feature on a CD (the length of
a song).
102
DVD Audio/Subtitle
Language
When you play a DVD VIDEO, the language of
the selected audio track or subtitle is abbreviated
as follows. See page 84 to change the audio track
or subtitle.
Abbreviation Language
ARA Arabic
BUL Bulgarian
CHI Chinese
CRO Croatian
CZE Czech
DAN Danish
DEU German
ENG English
ESP Spanish
FIN Finnish
FRA French
GRE Greek
HUN Hungarian
IDN Indonesian
IND Hindi
ISL Icelandic
ITA Italian
IWR Hebrew
JPN Japanese
KOR Korean
MAL Malay
NLD Dutch
NOR Norwegian
POL Polish
POR Portuguese
RUS Russian
SVE Swedish
THA Thai
TUR Turkish
VIE Vietnamese
ZAF Afrikaans
Abbreviation Language

103
Index
Words in quotations appear in
the on-screen displays.
Numerics
16:9 31, 79
4:3 Letter Box
31, 79
4:3 Pan Scan
31, 79
A
“A-B Erase” 59
“Add”
65, 66
ADVANCE
37
Angle
39
Antenna
19, 20
AUDIO
37
“Audio”
84
“Audio (HDMI)”
82
Audio cords
24
“Audio DRC”
82
Audio settings
81
Auto Clock Set
78
“Auto Preset”
76
B
Batteries 26
“Black Level”
80
C
Cable box 18, 19
“Caption Service”
87
“Caption Setting”
87
Changing or canceling timer
settings (Timer List) 54
Chapter
100
“Chapter Erase”
59
“Check”
64
Child Lock
39
Cleaning discs
93
“Clock Set CH”
78
Clock Set settings
78
“Combine Titles”
65
“Command Mode”
28, 88
COMPONENT VIDEO OUT
23
Connecting
the antenna cable
17
to your AV/amplifier
(receiver) 24
to your TV
21
Controlling TVs with the
remote 27
“Copy”
67
Copy protection
48, 100
Copy-Free
48
Copy-Never
48
Copy-Once
48
CPRM
12
“Create Playlist”
63
Creating chapters
50
D
“Daylight Saving” 78
“Digital Out”
81
“Digital Rating”
85
“Digital Wide Control”
86
“Disc Finalize”
68, 70
“Disc Format”
68
“Disc Information”
68
“Disc Menu”
84
“Disc Name”
68
“Disc Protect”
68
“Disc Setting”
68, 70
Disc types
12
Display
front panel display 99
Setup Display
75
“Divide Title”
60, 64
Dolby Digital
31, 81, 100
“Downmix”
82
DTS
31, 38, 81, 100
“DV/D8 Audio Input”
73, 83
“DV/D8 Dubbing”
73
“DV/D8 One Touch
Dubbing” 74
“DV/D8 Simple Dubbing”
73
“DVD Auto Chapter”
83
DVD Editing
57
DVD VIDEO
15, 100
DVD+R
12, 100
DVD+R DL
12
DVD+RW
12, 100
DVD-R
12, 100
DVD-RAM
15
DVD-RW
12, 100
E
Easy Setup 88
“Edit”
55
“Edit Playlist”
64
“Edit Scene”
64
Enter characters
61
“Erase”
55, 59
“Erase All Titles”
68
F
“Factory Setting” 88
Fast forward
38
Fast reverse
38
Feature settings
83
Finalizing
69
“Format DVD-RW”
84
Formatting
48, 68
“Front Display”
88
Front panel
97
Front panel display
99
H
Handling discs 93
HDMI
22, 101
“HDMI Resolution”
79
I
i.LINK 71, 96
INPUT
72
Interlace format
101
J
JPEG image files 43
L
“Language” 84
Language abbreviation
102
LINE 1 IN
33
LINE 2 IN
32
“Line Audio Input”
53, 56,
83
M
Manual Clock Set 78
“Manual Set”
77
MENU
36
,continued

104
Menu
Top menu
36
“Modify”
65
“Move”
66
MP3 audio tracks
42
N
NEXT 37
Number buttons
27, 41
O
One Touch Dubbing 74
On-screen display
OPTIONS menu 11
Setup Display
75
Sub-menu
11
System Menu
10
OPTIONS
11
Options settings
84
Original
41, 101
ORIGINAL/PLAYLIST
41,
58
“OSD” language
30, 84
P
Parental 85
Parental Control
39
Parts and controls
97
PAUSE
38, 49
PBC
39
“Picture Control”
80
PLAY
36
Playable discs
15
Playback
36
JPEG image files
43
MP3 audio tracks
42
Resume Play
39
Slow-motion play
38
Playlist
41, 62, 101
Power cord
26
PREV
37
“Progressive”
80
Progressive format
101
“Protect”
59
Q
Quick Timer 50
R
Rear panel 99
REC
49
REC MODE
49
Recording
47
recordable discs
12
recording format
12
recording mode
47
Recording mode
47
Recording time
47, 50
Region code
16
Remaining time
46
Remote
26, 98
REPLAY
37
Resetting
88
Resume Play
39
Rotate
44
S
SAP (Second Audio Program)
48
Satellite receiver
18
“Scan Audio”
39, 82
Searching
for “Chapter” 41
for “Title”
41
for “Track”
41
Time Search
41
Settings
75
Setup Display
75
Slide show
44
Stereo programs
48
STOP
36, 49
Sub-menu
11
SUBTITLE
37
“Subtitle”
84
“Surround”
82
SYNCHRO REC
53
System Menu
10
T
“Time Zone” 78
TIMER
51
Timer List
54
Timer recording
51
change or cancel
54
Title
101
“Title Erase”
59, 64
TITLE LIST
40, 58
Title List
40
“Title Name”
59, 64
TOP MENU
36
Track
101
Troubleshooting
89
“Tuner Audio”
81
Tuner Preset
30
Tuner Preset settings
76
TV INPUT
27
“TV Type”
79
U
“Unfinalize” 70
Unrecordable pictures
48
V
“Video (HDMI)” 79
VIDEO CD
15
Video mode
12
Video settings
79
VR mode
12
Z
Zoom 44


2
ES
Índice
Este manual muestra la configuración básica y el funcionamiento de la grabadora de DVD.
Para obtener más información, consulte el manual de instrucciones en inglés.
Conexiones y ajustes . . . . . . . . . . . . . . . . . . . . . . . . . . . . . . . . . . . . . . . 3
Conexión de la grabadora . . . . . . . . . . . . . . . . . . . . . . . . . . . . . . . . . . . . . . . . . . . . . . .3
Paso 1: Desembalaje. . . . . . . . . . . . . . . . . . . . . . . . . . . . . . . . . . . . . . . . . . . . . . . . . . .3
Paso 2: Conexión del cable de antena . . . . . . . . . . . . . . . . . . . . . . . . . . . . . . . . . . . . .3
Paso 3: Conexión al televisor . . . . . . . . . . . . . . . . . . . . . . . . . . . . . . . . . . . . . . . . . . . .7
Paso 4: Conexión del cable de alimentación. . . . . . . . . . . . . . . . . . . . . . . . . . . . . . . .10
Paso 5: Preparación del mando a distancia . . . . . . . . . . . . . . . . . . . . . . . . . . . . . . . . 10
Paso 6: Configuración fácil . . . . . . . . . . . . . . . . . . . . . . . . . . . . . . . . . . . . . . . . . . . . .11
Ver la televisión . . . . . . . . . . . . . . . . . . . . . . . . . . . . . . . . . . . . . . . . . . . . . . . . . . . . . . 14
Funcionamiento básico
Reproducción . . . . . . . . . . . . . . . . . . . . . . . . . . . . . . . . . . . . . . . . . . . 15
Reproducción de discos . . . . . . . . . . . . . . . . . . . . . . . . . . . . . . . . . . . . . . . . . . . . . . . 15
Opciones de reproducción . . . . . . . . . . . . . . . . . . . . . . . . . . . . . . . . . . . . . . . . . . . . . 16
Reproducción de un título de la Lista títulos . . . . . . . . . . . . . . . . . . . . . . . . . . . . . . . .18
Grabación . . . . . . . . . . . . . . . . . . . . . . . . . . . . . . . . . . . . . . . . . . . . . 19
Antes de grabar . . . . . . . . . . . . . . . . . . . . . . . . . . . . . . . . . . . . . . . . . . . . . . . . . . . . . 19
Grabación de discos sin temporizador . . . . . . . . . . . . . . . . . . . . . . . . . . . . . . . . . . . .20
Grabación de discos con temporizador . . . . . . . . . . . . . . . . . . . . . . . . . . . . . . . . . . .22

3
ES
Conexiones y ajustes
Conexiones y ajustes
Conexión de la grabadora
Siga los pasos del 1 al 6 para conectar y realizar
los ajustes de la grabadora.
Notas
• Enchufe los cables firmemente para prevenir
perturbaciones no deseadas.
• Consulte las instrucciones suministradas con los
componentes que va a conectar.
• No es posible conectar la grabadora a un televisor que
no disponga de toma de entrada de video.
• Asegúrese de desconectar el cable de alimentación de
cada componente antes de realizar las conexiones. No
conecte el cable de alimentación hasta haber llegado al
apartado “Conexión del cable de alimentación” en la
página 10.
Paso 1: Desembalaje
Compruebe que dispone de los siguientes
elementos:
• Cable de audio/video
(clavija fono × 3 y clavija fono × 3) (1)
• Cable de antena (1)
• Controlador del decodificador (1)
• Pilas de tamaño AA (R6) (2)
Paso 2: Conexión del cable
de antena
Seleccione una de las siguientes conexiones de la
antena. No conecte el cable de alimentación hasta
haber llegado al apartado “Conexión del cable de
alimentación” en la página 10.
Notas
• Si la antena es un cable plano (cable bifilar de 300
ohmios), utilice un conector de antena externa (no
suministrado) para conectar la antena a la grabadora.
• Si dispone de cables independientes para antenas de
VHF y UHF, utilice un mezclador de bandas UHF/
VHF (no suministrado) para conectar la antena a la
grabadora.
Si dispone de Conexión
Decodificador de cable o receptor
vía satélite con salida de video/audio
A (página 4)
Decodificador de cable con salida de
antena únicamente
B (página 5)
Cable sin decodificador de cable o
sólo antena (sin cable de televisión)
C (página 6)
,continúa
ES
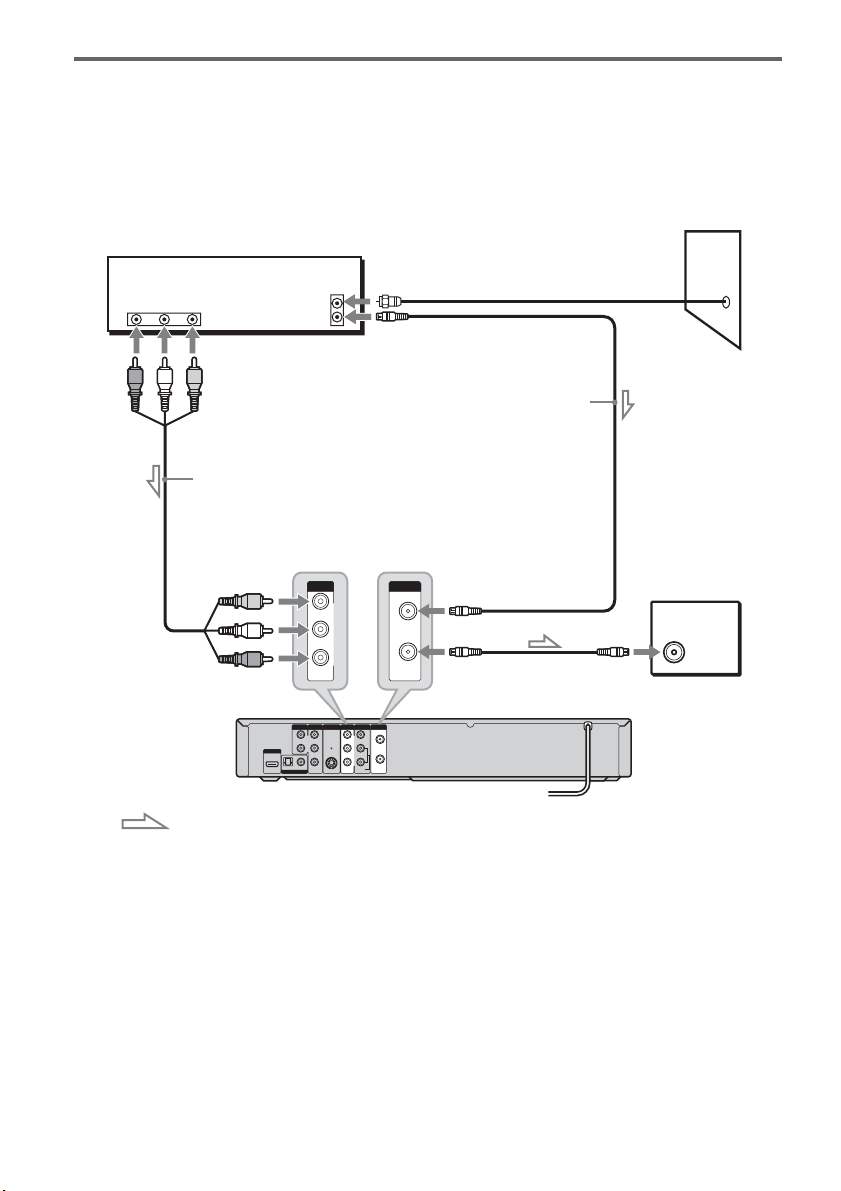
4
ES
A: Decodificador de cable o receptor vía satélite con salida de video/audio
Con esta conexión, puede grabar cualquier canal del decodificador de cable o receptor vía satélite.
Asegúrese de que el receptor vía satélite o decodificador de cable está encendido.
Para ver programas por cable o vía satélite, debe hacer coincidir el canal de la grabadora (LINE1) con la
toma de entrada que está conectada al decodificador de cable o receptor vía satélite (LINE 1 IN).
L
R
VIDEO
AUDIO
LINE OUT VHF/UHF
VIDEO
YL
P
B
R
P
R
AUDIO
LINE 1 IN
AUDIO OUT S VIDEO OUT
COMPONENT
VIDEO OUT
DIGITAL AUDIO OUT
OPTICAL COAXIAL
HDMI OUT
IN
OUT
ANT IN
RL
AUDIO
OUT
VIDEO
OUT
TO TV
VIDEO
LINE 1 IN
AUDIO
VHF/UHF
IN
OUT
Decodificador de cable/
receptor vía satélite
Cable de antena
(suministrado)
a la entrada
de antena
Cable de audio/video
(no suministrado)
a la toma
LINE 1 IN
Grabadora de DVD
: Flujo de señales
a la toma VHF/UHF IN
a la toma
VHF/UHF OUT
Televisor
Pared
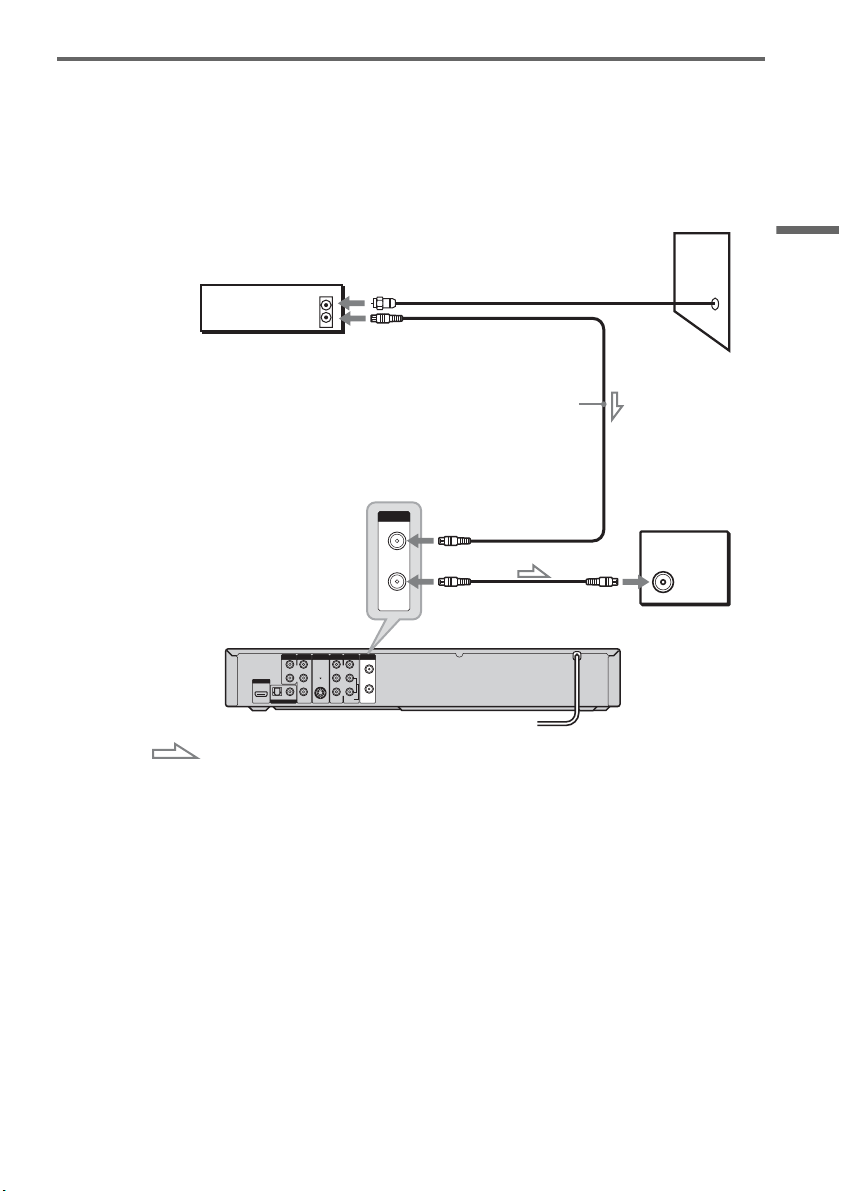
5
ES
Conexiones y ajustes
B: Decodificador de cable con salida de antena únicamente
Con esta conexión, puede grabar cualquier canal del decodificador de cable o receptor vía satélite.
Asegúrese de que el receptor vía satélite o decodificador de cable está encendido.
Para grabar programas por cable debe hacer coincidir el canal de la grabadora (2, 3 ó 4 canales) con canal
de salida de la antena del decodificador de cable (2, 3 ó 4 canales).
L
R
VIDEO
AUDIO
LINE OUT VHF/UHF
VIDEO
YL
P
B
R
P
R
AUDIO
LINE 1 IN
AUDIO OUT S VIDEO OUT
COMPONENT
VIDEO OUT
DIGITAL AUDIO OUT
OPTICAL COAXIAL
HDMI OUT
IN
OUT
VHF/UHF
IN
OUT
ANT IN
TO TV
Cable de antena
(suministrado)
Decodificador de cable
Grabadora de DVD
a la toma VHF/UHF IN
a la toma
VHF/UHF OUT
a la entrada
de antena
: Flujo de señales
Televisor
Pared
,continúa
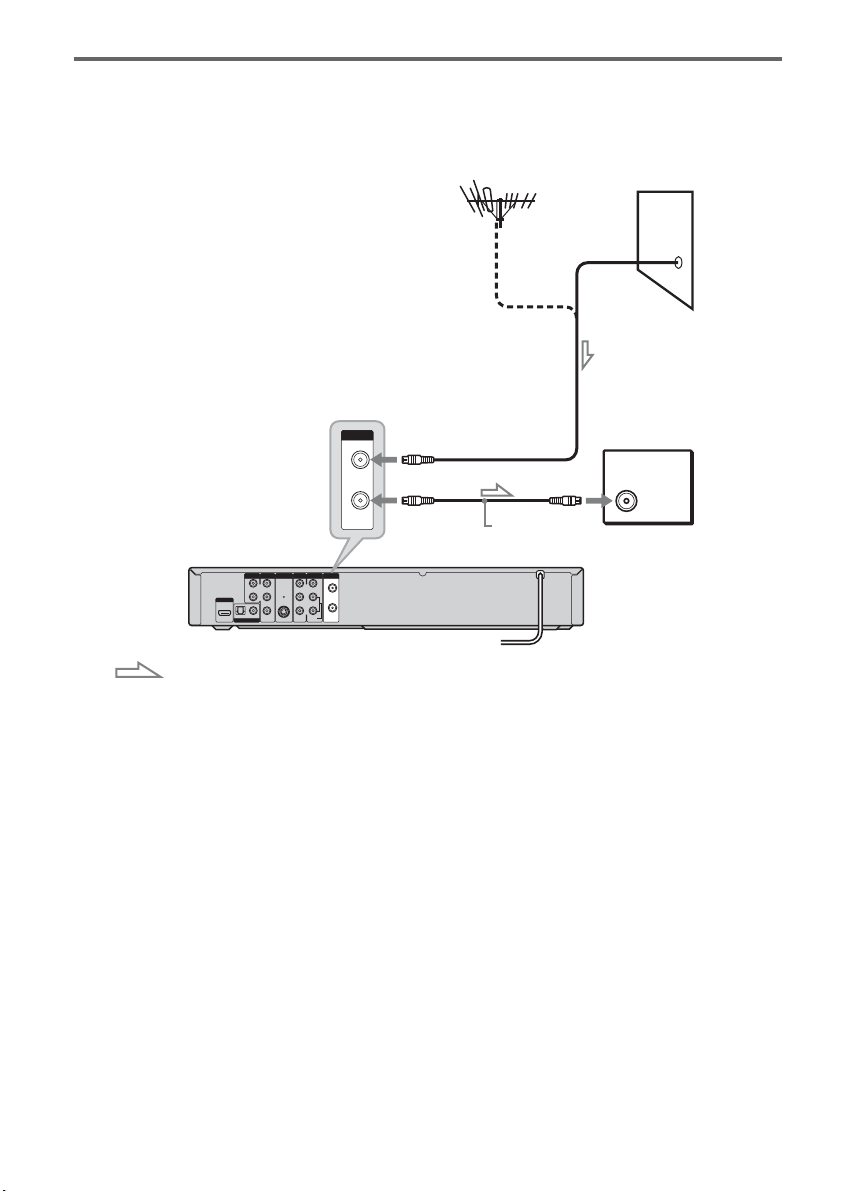
6
ES
C: Cable sin decodificador de cable o sólo antena (sin cable de televisión)
Utilice esta conexión si ve canales de televisión por cable sin decodificador de cable. Asimismo, utilice
esta conexión si utiliza una antena de VHF/UHF o antenas de VHF y UHF independientes.
Con esta conexión, puede grabar cualquier canal mediante la selección del canal en la grabadora.
L
R
VIDEO
AUDIO
LINE OUT VHF/UHF
VIDEO
YL
P
B
R
P
R
AUDIO
LINE 1 IN
AUDIO OUT S VIDEO OUT
COMPONENT
VIDEO OUT
DIGITAL AUDIO OUT
OPTICAL COAXIAL
HDMI OUT
IN
OUT
VHF/UHF
IN
OUT
a la toma
VHF/UHF
OUT
a la entrada
de antena
: Flujo de señales
Grabadora de DVD
Cable de antena
(suministrado)
Televisor
Pared
a la toma VHF/UHF IN
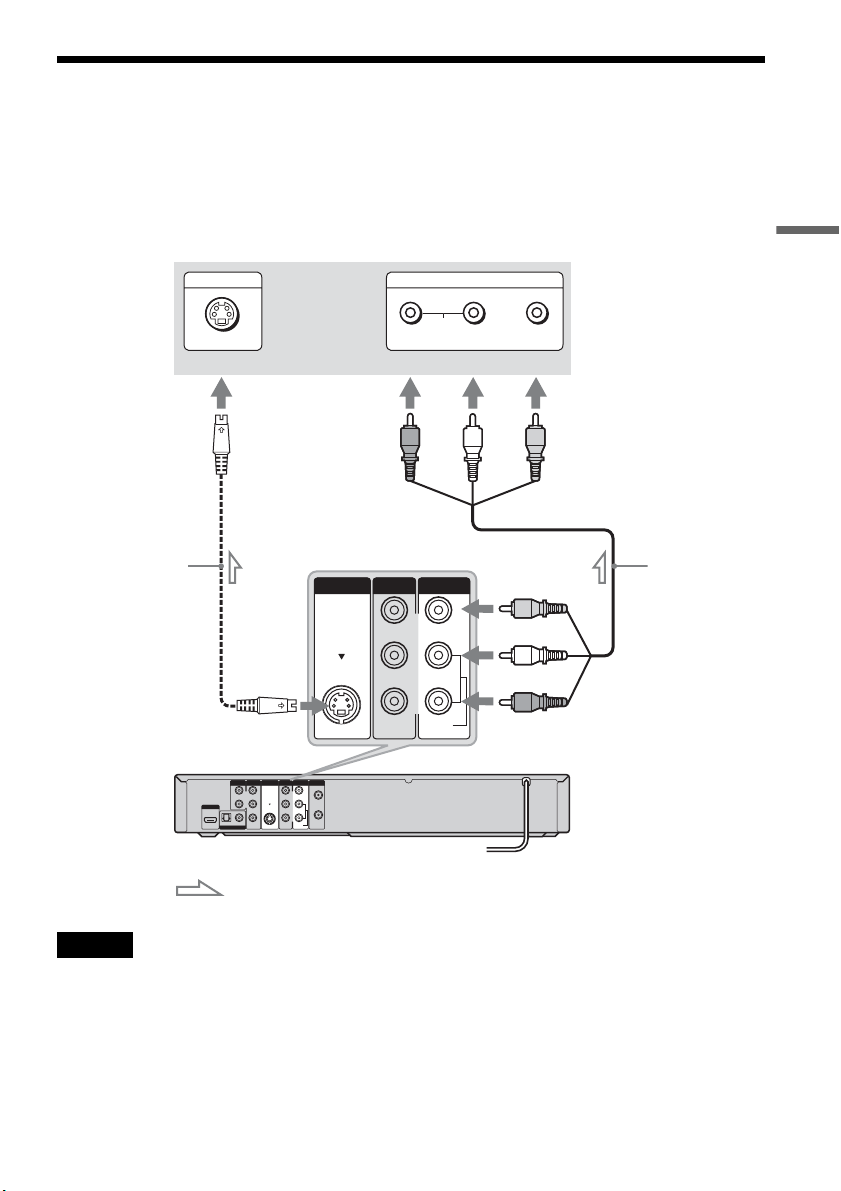
7
ES
Conexiones y ajustes
Paso 3: Conexión al televisor
Conecte el cable de audio/video suministrado a las tomas LINE OUT (VIDEO/AUDIO L/R) de la
grabadora.
Para disfrutar de una calidad de imagen superior, conecte un cable de S video (no suministrado) en lugar
de la clavija amarilla (video). Si utiliza esta conexión, asegúrese de conectar el cable de audio a las tomas
LINE OUT (AUDIO L/R).
Notas
• No realice la conexión a la tomas S VIDEO OUT y LINE OUT (VIDEO) amarilla a la vez.
• No conecte las tomas de salida de audio del televisor a las tomas LINE IN (AUDIO L/R) a la vez. De lo contrario, se
producirá ruido no deseado en los altavoces del televisor.
L
R
VIDEO
AUDIO
LINE OUT VHF/UHF
VIDEO
YL
P
B
R
P
R
AUDIO
LINE 1 IN
AUDIO OUT S VIDEO OUT
COMPONENT
VIDEO OUT
DIGITAL AUDIO OUT
OPTICAL COAXIAL
HDMI OUT
IN
OUT
L
R
VIDEO
AUDIO
LINE OUT
VIDEO
AUDIO
LINE 1 IN
S VIDEO OUT
AUDIO
INPUT
R L VIDEO
INPUT
S VIDEO
: Flujo de señales
Cable de S video
(no suministrado)
Televisor o
proyector
(rojo) (blanco) (amarillo)
Cable de audio/
video
(suministrado)
(rojo)
(blanco)
(amarillo)
a S VIDEO OUT
Grabadora de DVD
a LINE OUT
(VIDEO/AUDIO L/R)
,continúa
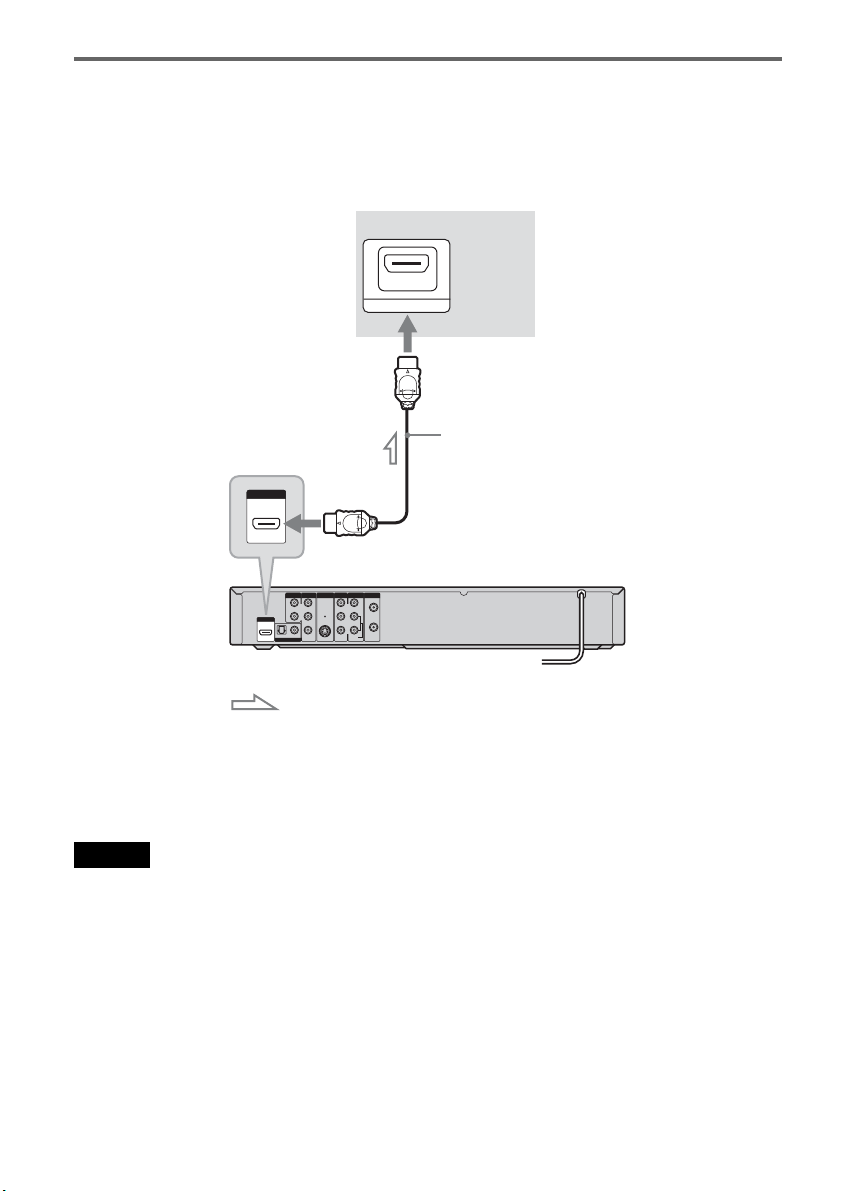
8
ES
Si el televisor dispone de una toma de entrada de HDMI
Conecte la toma de salida de HDMI* OUT mediante un cable HDMI certificado (no suministrado).
Disfrutará de imágenes y sonido de alta calidad. El indicador de HDMI se ilumina en el panel frontal
cuando la grabadora emite señales a través de las tomas de salida de HDMI OUT.
Asegúrese de apagar la grabadora antes de conectar un cable HDMI.
* Esta grabadora de DVD incorpora tecnología de interfaz multimedia de alta definición (HDMI
TM
).
HDMI, el logotipo de HDMI y High-Definition Multimedia Interface son marcas comerciales o marcas comerciales
registradas de HDMI Licensing LLC.
Notas
• No es posible conectar la toma de salida HDMI OUT a tomas DVI que no sean compatibles con HDCP (por ejemplo,
tomas DVI en pantallas de PC).
• La señal HD (alta definición) emitida a través de esta grabadora se convierte en señal SD (definición estándar) aunque
se utilice la conexión HDMI OUT.
L
R
VIDEO
AUDIO
LINE OUT VHF/UHF
VIDEO
YL
P
B
R
P
R
AUDIO
LINE 1 IN
AUDIO OUT S VIDEO OUT
COMPONENT
VIDEO OUT
DIGITAL AUDIO OUT
OPTICAL COAXIAL
HDMI OUT
IN
OUT
HDMI IN
HDMI OUT
: Flujo de señales
Televisor o
proyector
a HDMI OUT
Grabadora de DVD
Cable HDMI (no suministrado)
a la entrada de HDMI
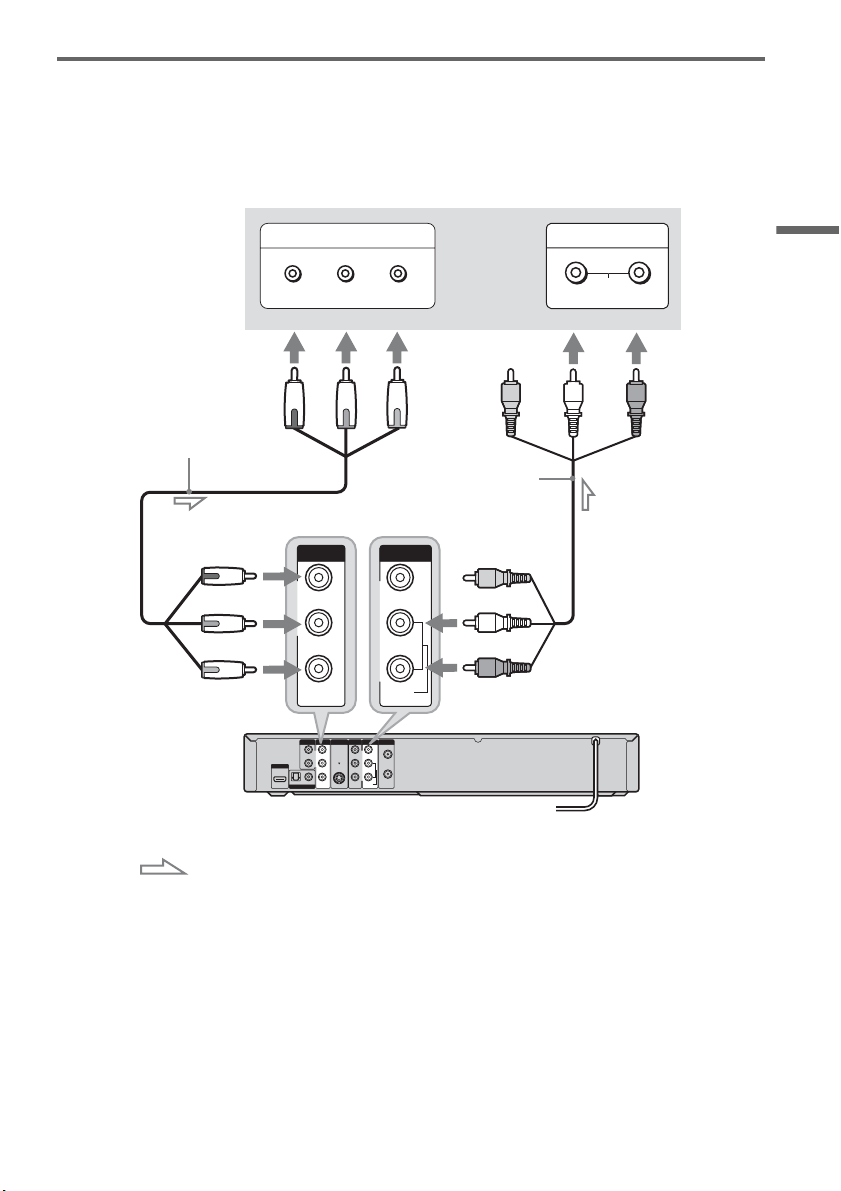
9
ES
Conexiones y ajustes
Si el televisor tiene tomas de entrada de video componente
Conecte las tomas COMPONENT VIDEO OUT mediante un cable de video componente (no
suministrado) o tres cables de video (no suministrados) del mismo tipo y longitud. Disfrutará de una fiel
reproducción del color y de imágenes de alta calidad.
Si utiliza esta conexión, asegúrese de conectar el cable de audio a las tomas LINE OUT (AUDIO L/R).
L
R
VIDEO
AUDIO
LINE OUT VHF/UHF
VIDEO
YL
P
B
R
P
R
AUDIO
LINE 1 IN
AUDIO OUT S VIDEO OUT
COMPONENT
VIDEO OUT
DIGITAL AUDIO OUT
OPTICAL COAXIAL
HDMI OUT
IN
OUT
L
R
VIDEO
AUDIO
LINE OUT
Y
P
B
P
R
COMPONENT
VIDEO OUT
COMPONENT VIDEO IN
PB PRY
AUDIO
LR
INPUT
: Flujo de señales
Televisor o
proyector
(rojo)
(blanco)
(verde)
Cable de video componente
(no suministrado)
(rojo)
(azul)
(rojo)
(verde)
(azul)
a COMPONENT
VIDEO OUT
Cable de audio/video
(suministrado)
(blanco)
(rojo)
a LINE OUT
(AUDIO L/R)
Grabadora de DVD
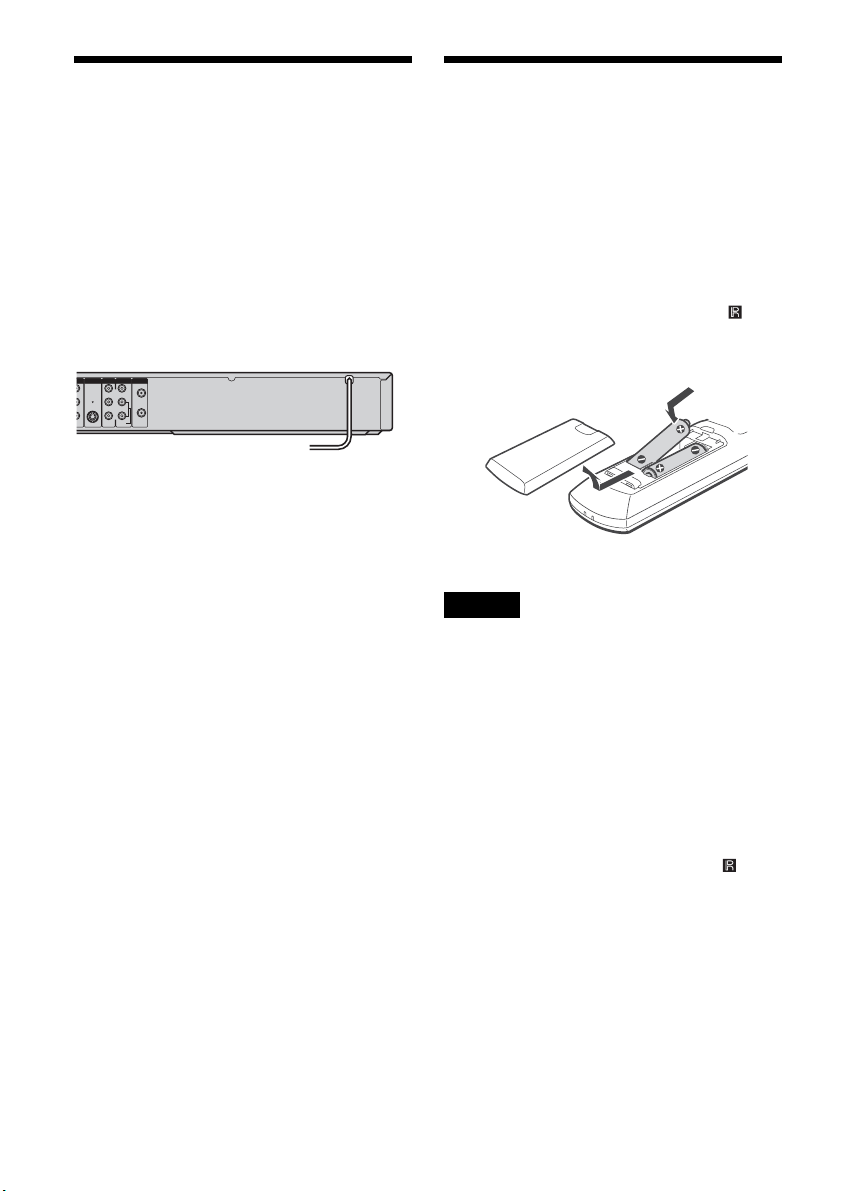
10
ES
Paso 4: Conexión del cable
de alimentación
Enchufe los cables de alimentación de la
grabadora y del televisor a una toma de ca. A
continuación, debe esperar unos instantes
antes de utilizar la grabadora. Podrá
utilizarla sólo después de que la pantalla del panel
frontal se ilumine y la grabadora pase al modo de
espera.
Paso 5: Preparación del
mando a distancia
La grabadora puede controlarse con el mando a
distancia suministrado.
Inserte dos pilas de tamaño AA (R6) haciendo
coincidir sus extremos 3 y # con las marcas del
interior del compartimiento de las pilas.
Asegúrese de cerrar la tapa de las pilas
correctamente. Cuando utilice el mando a
distancia, oriéntelo hacia el sensor remoto de la
grabadora.
Notas
• Utilice correctamente las pilas para evitar posibles
daños por fugas y corrosión. No toque el líquido
directamente con las manos si se produjera alguna
fuga. Respete las indicaciones siguientes:
– No utilice una pila nueva con otra usada, ni pilas de
distintos fabricantes.
– No intente cargar las pilas.
– Si no tiene intención de utilizar el mando a distancia
durante un periodo de tiempo prolongado, extraiga
las pilas.
– Si se produce una fuga de las pilas, seque todo líquido
que haya en el compartimiento de las pilas e inserte
pilas nuevas.
• No exponga el sensor remoto (marcado con en el
panel frontal) a luz intensa, tal como la luz directa del
sol o de aparatos de iluminación. La grabadora podría
no responder al control del mando a distancia.
• Con un uso normal, la duración de las pilas es
aproximadamente de tres a seis meses.
• No deje el control remoto en un lugar excesivamente
cálido o húmedo.
• No deje caer ningún objeto extraño dentro de la carcasa
del mando a distancia, especialmente cuando
reemplace las pilas.
HDMI OUT
L
R
VIDEO
AUDIO
LINE OUT VHF/UHF
VIDEO
Y
P
B
P
R
AUDIO
LINE 1 IN
S VIDEO OUT
O
NENT
O
OUT
IN
OUT
a la toma de ca <
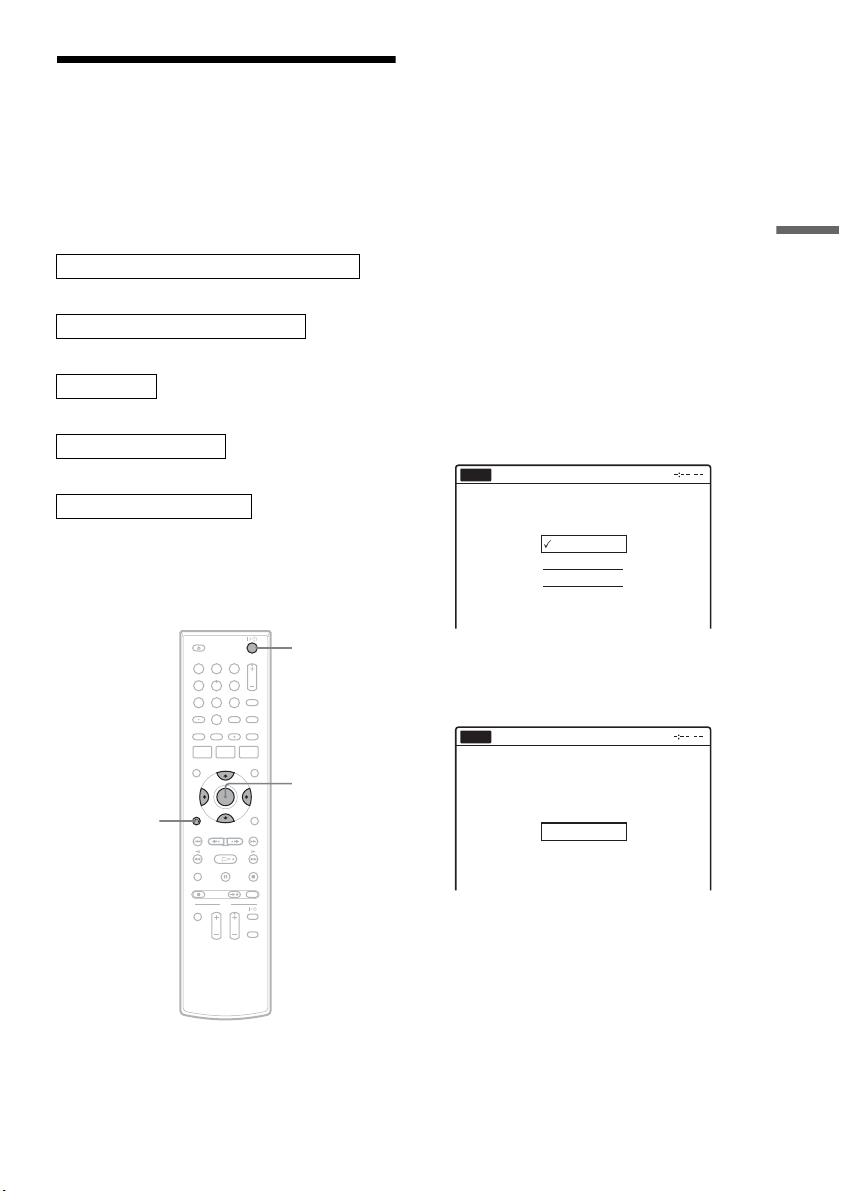
11
ES
Conexiones y ajustes
Paso 6: Configuración fácil
Siga los pasos que se indican a continuación para
realizar el mínimo número de ajustes básicos
necesarios para utilizar la grabadora. Si no
completa la Configuración fácil, aparecerá cada
vez que encienda la grabadora.
Los ajustes se realizan en el orden siguiente.
m
m
m
m
m
1 Encienda el televisor.
2 Presione "/1.
La grabadora se enciende.
3 Cambie el selector de entrada del televisor
para que la señal de la grabadora aparezca
en la pantalla del televisor.
Aparecerá el siguiente mensaje “Initial setting
necessary to operate the DVD recoder will be
made. You can change them later using
setup.” (“Se realizarán los ajustes iniciales
necesarios para usar la grabadora DVD. Podrá
cambiarlos posteriormente utilizando la
configuración.”).
• Si no aparece este mensaje, presione
SYSTEM MENU y seleccione
“Configuración fácil” en la pantalla
“Configuración” para ejecutar la
Configuración fácil.
4 Presione ENTER.
Aparece la pantalla de configuración que le
permite seleccionar el idioma utilizado en las
indicaciones en pantalla.
5 Seleccione un idioma y presione ENTER.
Aparecerá la pantalla para confirmar la
lectura.
6 Presione ENTER.
Aparecerá la pantalla de configuración para
ajustar los canales.
Ajuste del idioma de las indicaciones en pantalla
Ajuste del sintonizador y de los canales
Ajuste del reloj
Ajuste del tipo de televisor
Ajuste de la conexión de audio
Fin!
11 22 33
44 55 66
77 88
00
99
M/m/</,,
ENTER
O RETURN
"/1
English
Français
Español
Easy Setup
Select the screen language.
No Disc
No Disc
Pulse [ENTER] para iniciar la
exploración de canales
digitales y analógicos.
Inicio
Configuración fácil
,continúa
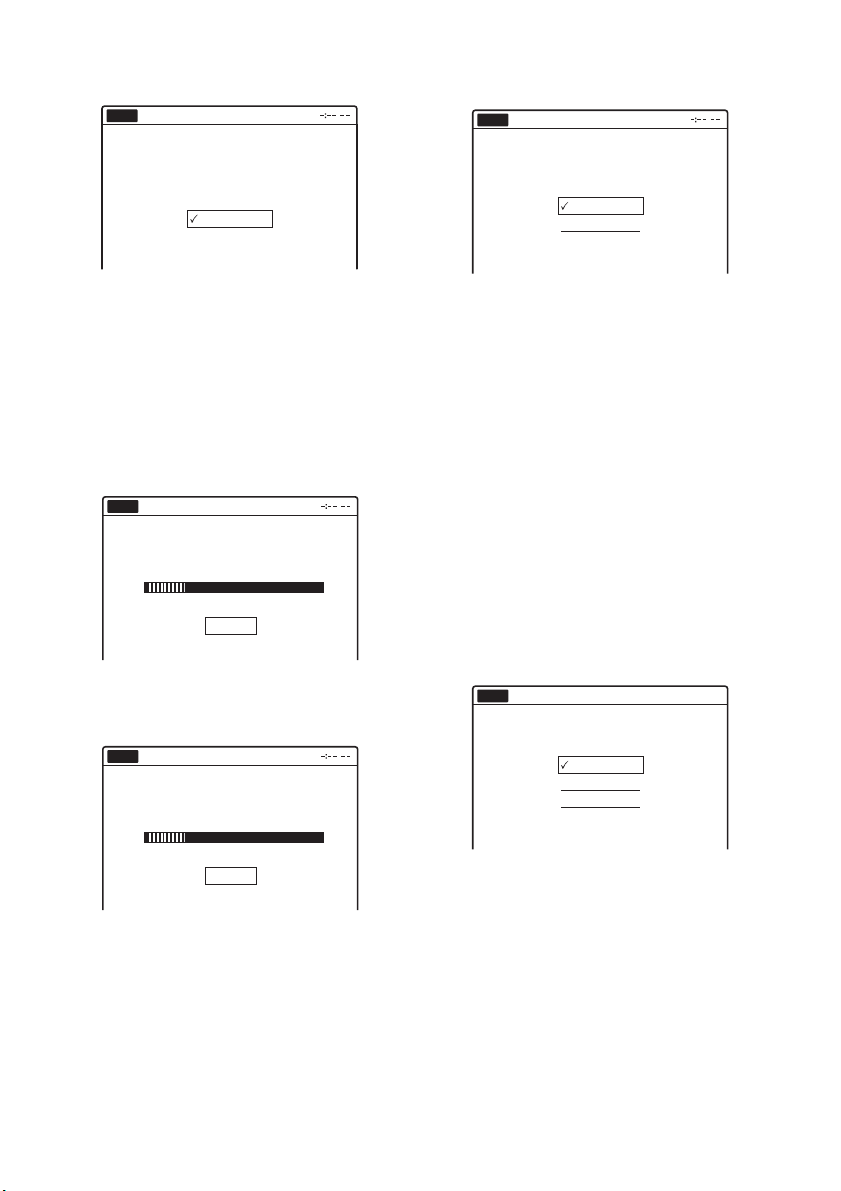
12
ES
7 Seleccione si dispone o no de conexión de
cable.
Si sólo utiliza una antena (sin cable de
televisión), seleccione “Antena”.
Para el resto de conexiones, seleccione
“Cable”.
8 Presione ENTER.
La función Preajuste de sintonizador inicia la
búsqueda de todos los canales analógicos que
se pueden recibir automáticamente y los
presintoniza.
Una vez finalizada la búsqueda de canales
analógicos, se buscan los canales digitales que
se pueden recibir automáticamente.
• Este proceso puede tardar 40 o más minutos
en completarse.
• Si presiona ENTER durante la búsqueda de
canales, la grabadora detendrá la búsqueda
de canales y avanzará hasta el siguiente
paso.
Una vez finalizado el Preajuste de
sintonizador, aparecerá la pantalla de
configuración para ajustar el reloj.
9 Seleccione un método para ajustar el
reloj.
10
Seleccione “Manual” y presione ENTER.
Presione M/m para establecer el mes y
presione ,. Establezca el día, el año, la hora,
los minutos y AM/PM del mismo modo y, a
continuación, presione ENTER. El día de la
semana se ajusta automáticamente.
• Si utilizó una conexión de antena C
(página 6), puede seleccionar “Auto”. La
grabadora buscará automáticamente un
canal que incluya una señal horaria cuando
la apague después de finalizar la
Configuración fácil.
Aparecerá la pantalla de configuración para
seleccionar el tamaño de la imagen del
televisor conectado.
11
Seleccione el ajuste que coincida con su
tipo de televisor.
“16:9”: para televisores con pantalla
panorámica o televisores estándar con modo
panorámico.
“4:3 Tipo buzón”: para televisores estándar.
Muestra imágenes “panorámicas” con franjas
en las secciones superior e inferior de la
pantalla.
“4:3 Explo pan”: para televisores estándar.
Muestra automáticamente imágenes
“panorámicas” que ocupan toda la pantalla y
corta las secciones que no caben.
Seleccione la forma en la
que recibirá los canales.
Antena
Cable
No Disc
Configuración fácil
Buscar canales analógicos recibibles.
Espere.
No Disc
Deten.
Configuración fácil
Buscar canales digitales recibibles.
Espere.
Tomará 40+ minutos para terminar.
Para detener la búsqueda, pulse [Enter].
No Disc
Deten.
Configuración fácil
Seleccione un método para ajustar el reloj.
Si selecciona "Auto", esta grabadora buscará una
señal horaria cuando la apague.
Auto
Manual
Configuración fácil
No Disc
16 : 9
4 : 3 Tipo buzón
4 : 3 Explo pan
10:10 AM
Seleccione el tipo de pantalla de su TV.
Configuración fácil
No Disc
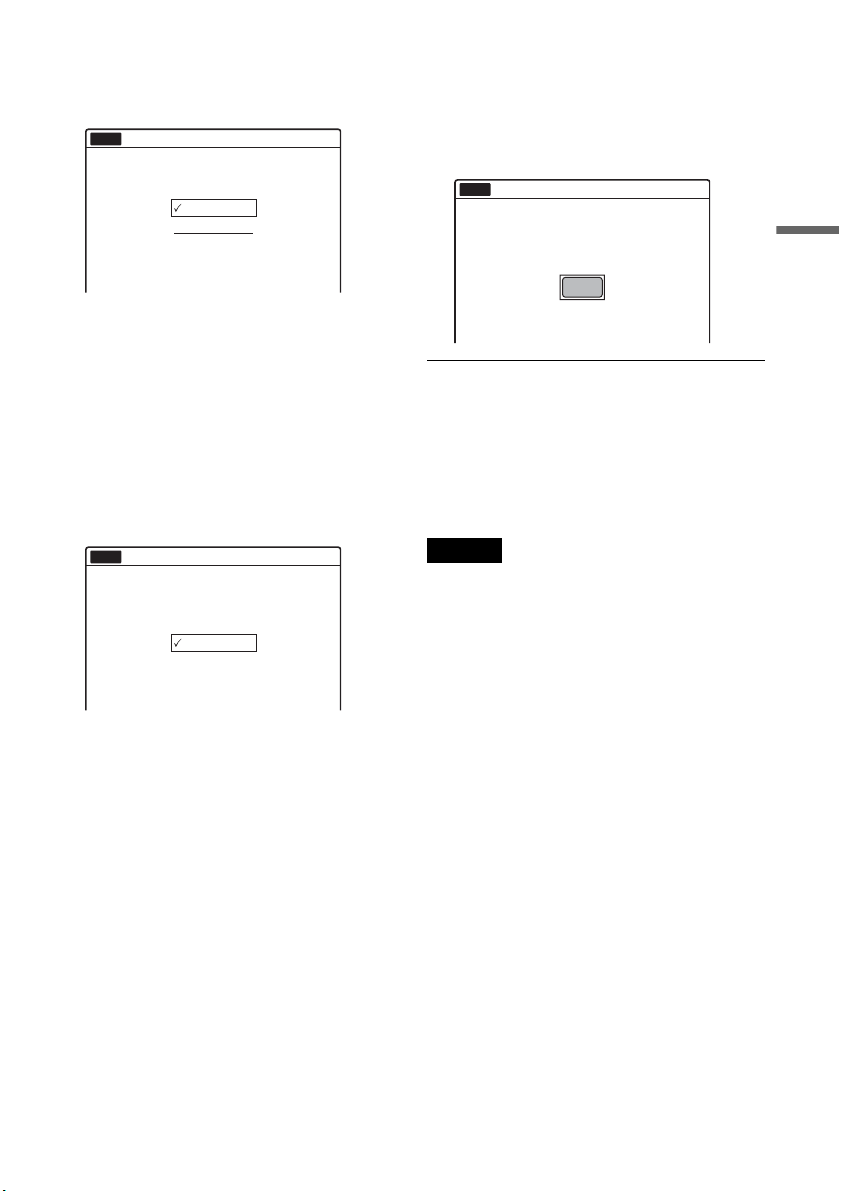
13
ES
Conexiones y ajustes
12
Presione ENTER.
Aparece la pantalla de configuración para
seleccionar el tipo de señal Dolby Digital.
13
Seleccione el tipo de señal Dolby Digital
que desea enviar al amplificador
(receptor).
Si el amplificador (receptor) de AV cuenta
con un decodificador Dolby Digital,
seleccione “Dolby Digital”. En caso
contrario, seleccione “D-PCM”.
14
Presione ENTER.
Aparece la pantalla de configuración para
seleccionar el tipo de señal DTS.
15
Seleccione si desea o no enviar una señal
DTS al amplificador (receptor), y presione
ENTER.
Si el amplificador (receptor) de AV cuenta
con un decodificador DTS, seleccione “Sí”.
En caso contrario, seleccione “No”.
16
Presione ENTER cuando aparezca
“Finalizar”.
Finalizada la configuración fácil. Se han
realizado todas las conexiones y operaciones
de configuración.
Para volver a la indicación anterior
Presione O RETURN.
z Observación
Si desea ejecutar la Configuración fácil de nuevo,
presione SYSTEM MENU y seleccione “Configuración
fácil” en la pantalla “Configuración”.
Nota
Para grabar programas de televisión utilizando el
temporizador, deberá ajustar el reloj con exactitud.
D-PCM
Dolby Digital
10:10 AM
Dolby Digital
Configuración fácil
No Disc
Sí
No
10:10 AM
DTS
Configuración fácil
No Disc
Finalizar
10:10 AM
Finalizada la configuración fácil.
Configuración fácil
No Disc
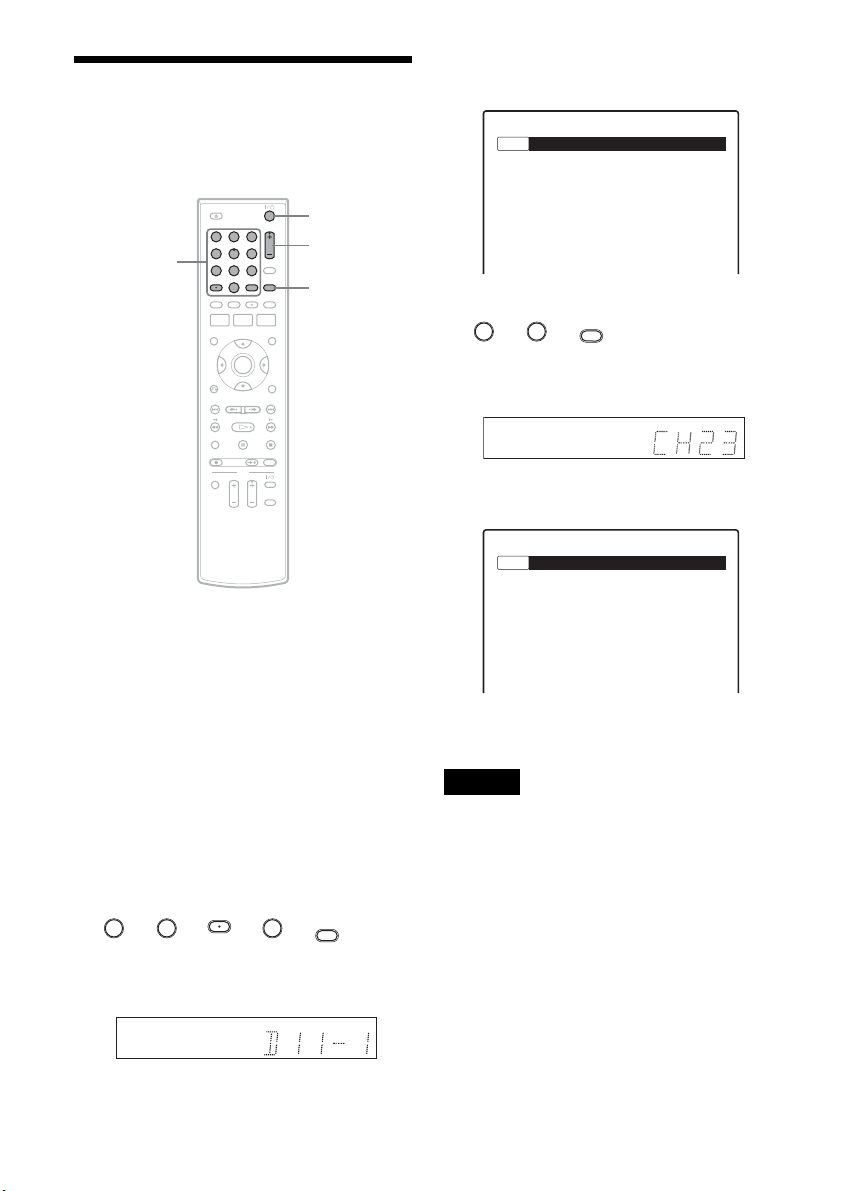
14
ES
Ver la televisión
Mediante la conexión del televisor a la grabadora,
es posible ver canales digitales y analógicos en el
televisor.
1 Encienda la grabadora.
2 Encienda el televisor y ajuste el selector
de entrada de éste de modo que la señal
procedente de la grabadora aparezca en la
pantalla del televisor.
3 Presione DIGITAL/ANALOG para
seleccionar la emisión, digital o
analógica.
4 Presione los botones numéricos para
seleccionar el canal que desea ver y
presione SET.
Por ejemplo, para seleccionar el número del
canal digital D11.1
t t t t
En la pantalla del panel frontal debería
mostrarse lo siguiente:
En la pantalla del televisor debería mostrarse
lo siguiente:
Por ejemplo, para seleccionar el número del
canal analógico Can23
t t
En la pantalla del panel frontal debería
mostrarse lo siguiente:
En la pantalla del televisor debería mostrarse
lo siguiente:
z Observación
También puede seleccionar canales mediante el botón
CH +/–.
Notas
• Si no presiona el botón SET después de ajustar los
botones numéricos, no se cambiará el canal.
• Al cambiar de un canal analógico a un canal digital,
presione el botón DIGITAL/ANALOG. Aunque
presione el botón ·(punto), el canal analógico no
cambiará a digital.
• Si recibe nuevos canales digitales o aparece una
pantalla negra en el televisor, presione SYSTEM
MENU y seleccione “Configuración fácil” en la
pantalla “Configuración” y, a continuación, realice el
ajuste de nuevo.
• Algunos canales digitales no disponen de “·” (punto).
Consulte el programa de televisión.
• Compruebe el contenido de la emisión digital del
número de canal recibido en la grabadora antes de
grabar con el temporizador. Si la grabadora recibe una
emisión digital sin información acerca del número de
canal, la grabadora asignará el número de canal
automáticamente.
11 22 33
44 55 66
77 88
00
99
"/1
Botones
numéricos,
SET,
· (punto)
DIGITAL/
ANALOG
CH +/–
11 11 11
SET
SP D11.1
No Disc
22 33
SET
SP Can 23
No Disc
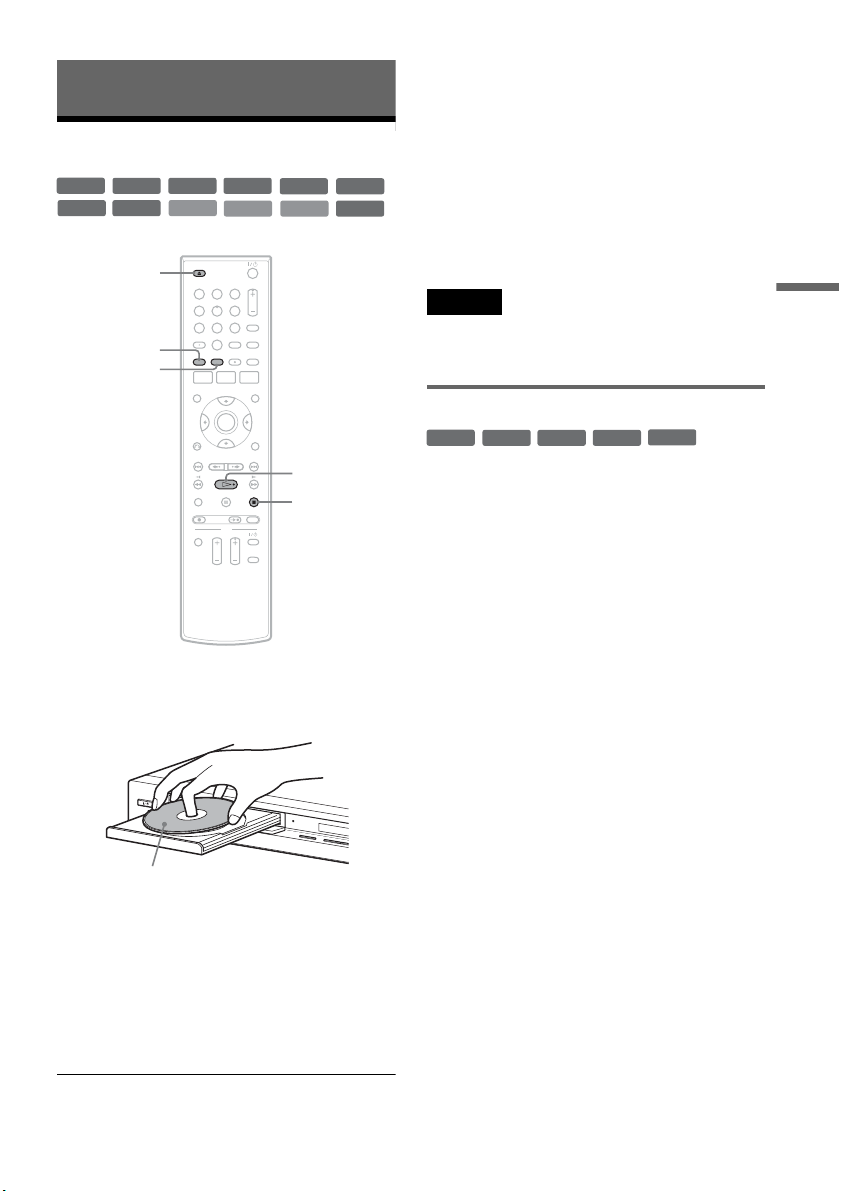
15
ES
Reproducción
Reproducción
Reproducción de discos
1 Presione Z OPEN/CLOSE y coloque un
disco en la bandeja de discos.
2 Presione Z OPEN/CLOSE para cerrar la
bandeja de discos.
Espere hasta que “LOAD” desaparezca de la
pantalla del panel frontal.
3 Presione H PLAY.
Se inicia la reproducción.
Para detener la reproducción
Presione x STOP.
z Observaciones
• Es posible reproducir DATA CD o DATA DVD con
pistas de audio en formato MP3 o archivos de imagen
en formato JPEG.
• Si inserta un DVD VIDEO, VIDEO CD o un CD, la
reproducción se iniciará automáticamente en función
del disco.
• Al reproducir un DVD+RW, DVD-RW, DVD+R,
DVD-R y DVD-RAM, podrá seleccionar el título del
menú Lista títulos (página 18).
• Cuando utilice un DVD-RAM con un cartucho,
extraiga el disco del mismo.
Nota
Para reproducir un disco grabado con otro equipo en esta
grabadora, primero finalice el disco en el equipo de
grabación.
Utilización del menú del DVD
Cuando reproduzca un DVD VIDEO, o un
DVD+RW, DVD-RW (Modo Video), DVD+R o
DVD-R (Modo Video) finalizado, podrá acceder
al menú del disco presionando TOP MENU o
MENU.
+
RW
+
R
DVD
VCD
CD
-
RWVR
-
RW
Video
DATA DVD
DATA CD
-
RVR
-
R
Video
RAM
11 22 33
44 55 66
77 88
00
99
x STOP
Z OPEN/
CLOSE
H PLAY
TOP MENU
MENU
DV
IN
L
(
M
O
N
O
)
A
U
D
I
O
R
V
I
D
E
O
S
V
I
D
E
O
L
I
N
E
-
2
I
N
O
NE-TO
UC
H
D
UBB
IN
G
La cara de reproducción debe
mirar hacia abajo
+
RW
+
R
DVD
-
RW
Video
+
R
-
R
Video
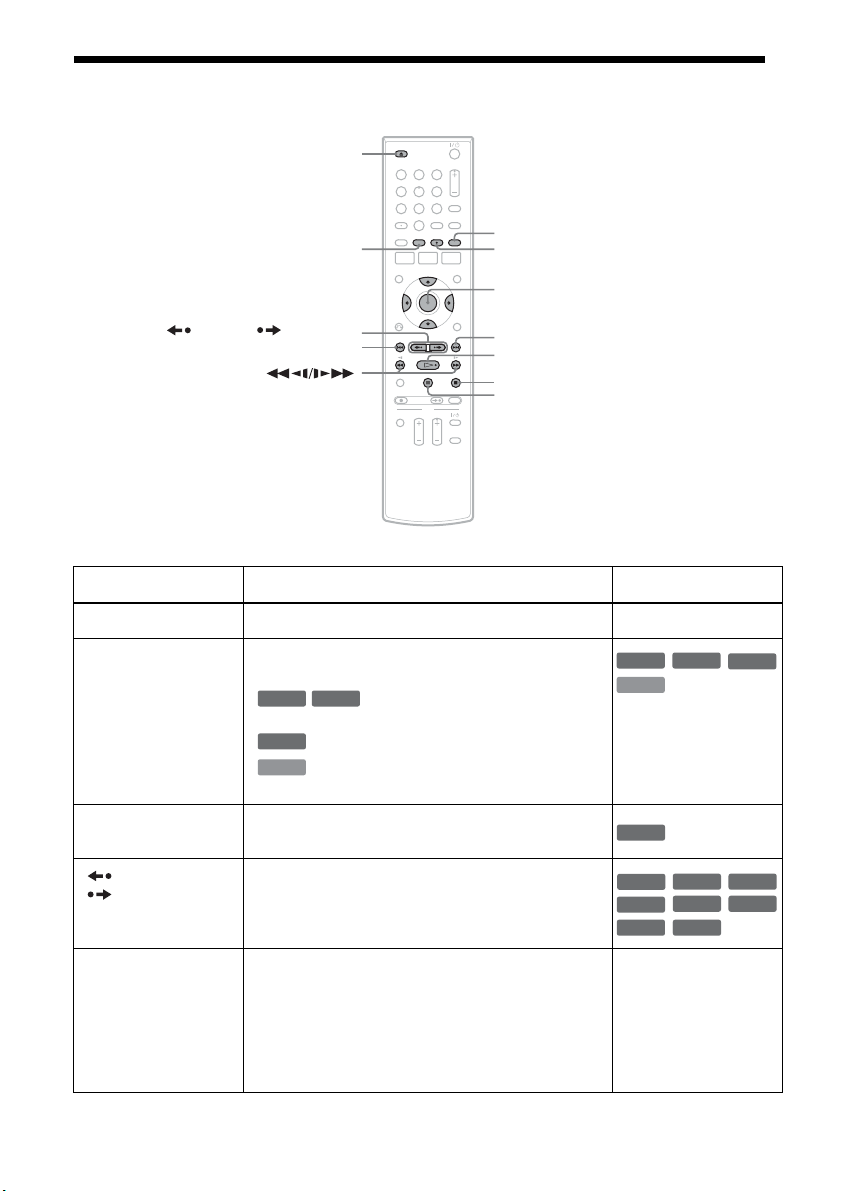
16
ES
Opciones de reproducción
Botón Operación Disco
Z OPEN/CLOSE Detiene la reproducción y abre la bandeja de discos. Todos los discos
AUDIO Selecciona una de las pistas de audio grabadas en el
disco cuando se presiona varias veces.
: selecciona el sonido principal o
secundario.
: selecciona la fuente de audio.
: selecciona las pistas de audio estéreo o
monoaurales.
SUBTITLE Selecciona el idioma de los subtítulos cuando se
presiona varias veces.
.
REPLAY/
ADVANCE
• Vuelve a reproducir o avanza rápidamente una
escena si se presiona durante la reproducción.
• Se desplaza al fotograma anterior o siguiente si se
presiona en el modo de pausa.
. PREV/
NEXT >
• Se desplaza al principio del título/capítulo/escena/
pista actual o siguiente e inicia la reproducción
cuando se presiona durante la reproducción.
• Se desplaza al principio del título/capítulo/escena/
pista anterior si se presiona .PREV en los 3
segundos posteriores al inicio de un título/capítulo/
escena/pista.
Todos los discos
11 22 33
44 55 66
77 88
00
99
Z OPEN/CLOSE
X PAUSE
. PREV
REPLAY/ ADVANCE
x STOP
H PLAY
M/m/</,,
ENTER
>NEXT
MENU
AUDIO
SUBTITLE
-
RWVR
-
RVR
DVD
VCD
DVD
VCD
-
RWVR
-
RVR
DVD
+
RW
+
R
DVD
-
R
Video
RAM
RAM
-
RWVR
-
RW
Video
-
RVR
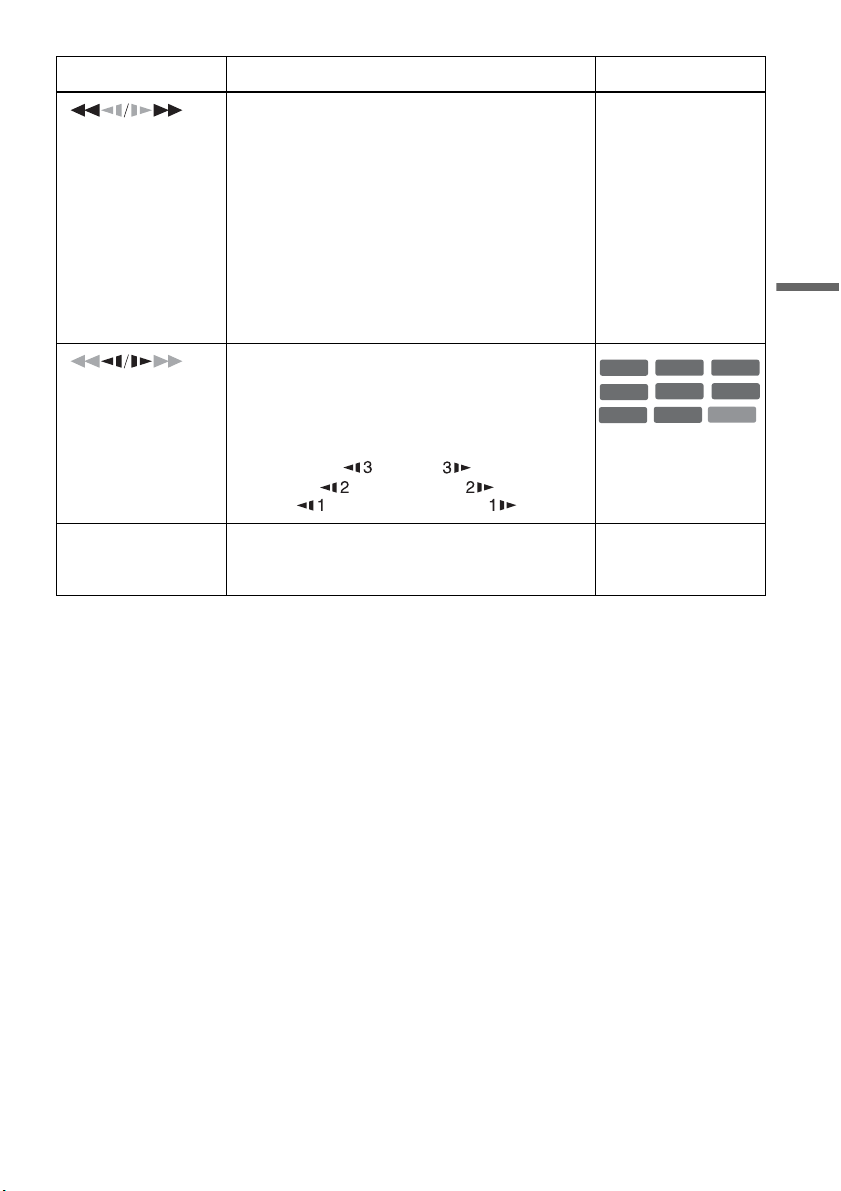
17
ES
Reproducción
Para reanudar la reproducción normal después de reproducir a diferentes velocidades, presione
H PLAY.
(retroceso rápido/
avance rápido)
Avanza o retrocede rápidamente el disco cuando se
presiona durante la reproducción.
La velocidad de búsqueda cambia cada vez que
presiona el botón:
retroceso rápido avance rápido
FR1 T t FF1
*1
FR2
*2
T T t t FF2
*2
FR3
*3
T T T t t t FF3
*3
Todos los discos
*1
FF1 con sonido
(Explorar audio) está
disponible para DVD
con pistas de sonido
Dolby Digital.
*2
FR2 y FF2 no están
disponibles para
MP3.
*3
FR3 y FF3 sólo están
disponibles para
DVD y VIDEO CD.
(lento)
Reproduce a cámara lenta cuando se presiona en el
modo de pausa.
La velocidad de reproducción cambia cada vez que se
presiona el botón:
retroceso a cámara lenta avance a cámara lenta
T t
T T t t
T T T t t t
* Sólo dirección de
reproducción
X PAUSE Hace una pausa en la reproducción.
Si ésta dura más de cinco minutos, la reproducción se
inicia automáticamente.
Todos los discos
Botón Operación Disco
VCD
+
RW
+
R
-
RWVR
-
RW
Video
DVD
-
RVR
-
R
Video
RAM
*
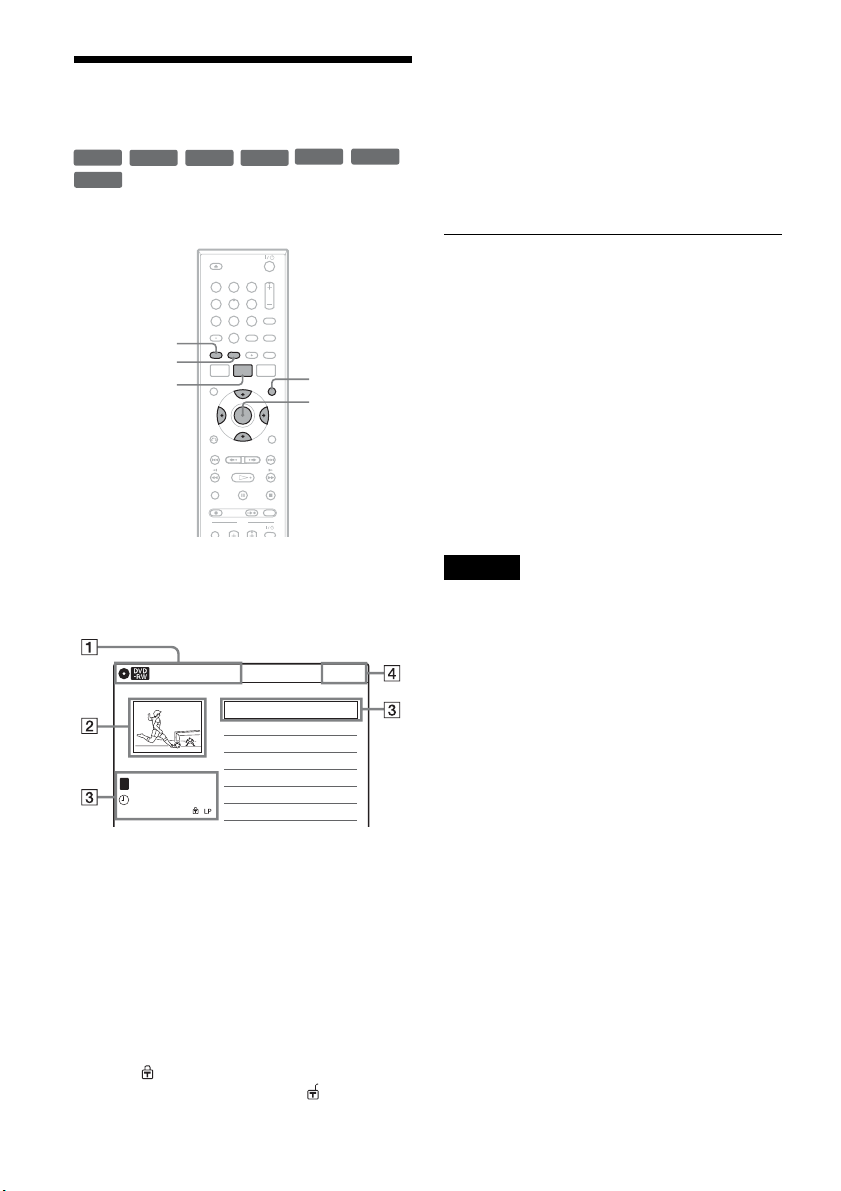
18
ES
Reproducción de un título
de la Lista títulos
El menú Lista títulos muestra los títulos de los
programas del disco.
1 Coloque un disco en la bandeja de discos.
2 Presione TITLE LIST.
Ejemplo: DVD-RW (modo VR)
A Tipo de disco:
Muestra el tipo de disco.
También muestra los tipos de título
(original o Playlist) para DVD-RW
(Modo VR), DVD-R (Modo VR) y DVD-
RAM.
B Imagen en miniatura de película
C Información del título:
Muestra el número del título, su nombre,
la fecha y el modo de grabación.
“ ” indica que se trata de un título
protegido, mientras que “ ” indica que
está desprotegido.
D Reloj
3 Seleccione el título y presione ENTER.
Aparece el submenú.
4 Seleccione “Reproducir” y presione
ENTER.
La reproducción comienza desde el título
seleccionado en el disco.
Acerca de las listas de títulos para DVD-RW
(Modo VR) y DVD-R (Modo VR)
Es posible cambiar la lista de títulos para que se
muestre un título original o una Playlist.
Presione ORIGINAL/PLAYLIST varias veces
mientras se muestra el menú Lista títulos para
seleccionar “Lista títulos (Original)” o “Playlist”.
Para quitar la lista de títulos
Presione TITLE LIST.
z Observación
También es posible cambiar la lista de títulos de DVD-
RAM para mostrar un original o Playlist.
Notas
• La lista de títulos no aparece con DVD-RW (Modo
video), DVD+R o DVD-R (Modo video) que hayan
finalizado. Para visualizar un título, presione TOP
MENU o MENU (página 15).
• Es posible que la lista de títulos no aparezca en discos
creados en otras grabadoras de DVD.
• Las letras que no pueden mostrarse se reemplazan por
“
*
”.
+
RW
+
R
-
RWVR
-
RW
Video
RAM
-
RVR
-
R
Video
11 22 33
44 55 66
77 88
00
99
TOP MENU
M/m/</,,
ENTER
MENU
TITLE LIST
ORIGINAL/
PLAYLIST
10:10 AM
01 D11.1 >01:29:03
02 D22.2 >00:31:23
03 Can 23 >01:59:00
04 Can 66 >00:58:56
D11.1
08:00 PM
May/02/2007
T
No. Edit.1/4 Título Long.
Lista títulos (Original)
19
ES
Grabación
Grabación
Antes de grabar
Modo de grabación
Esta grabadora dispone de ocho modos de
grabación distintos, al igual que los modos de
grabación SP o EP de las videograbadoras.
Seleccione el modo de grabación en función del
tiempo y la calidad de imagen deseada. Por
ejemplo, si la calidad de la imagen es su principal
prioridad, seleccione el modo “HQ” (alta calidad).
Si su principal prioridad es el tiempo de grabación,
el modo “SLP” puede ser su alternativa.
Presione REC MODE varias veces para
cambiar los modos de grabación.
Modo de grabación y tiempo de grabación
La siguiente tabla es una guía aproximada del
tiempo de grabación en un DVD (4,7 GB).
z Observación
El tiempo de grabación aproximado para los discos
DVD+R DL (doble capa) es el que se indica a
continuación:
HQ: 1 hora y 48 minutos
HSP: 2 horas y 42 minutos
SP: 3 horas y 37 minutos
LSP: 4 horas y 31 minutos
ESP: 5 horas y 25 minutos
LP: 7 horas y 14 minutos
EP: 10 horas y 51 minutos
SLP: 14 horas y 28 minutos
Notas
• En modos de grabación distintos a HQ, la grabadora
comprime los datos de audio/video antes de la
grabación. Dado que las escenas de movimientos
rápidos o la existencia de ruido en la imagen requieren
que las tasas de compresión disminuyan, el tamaño de
los datos grabados aumenta y el tiempo de grabación
disponible se acorta. En la grabación de estas
imágenes, se recomienda un modo de grabación que
proporcione un tiempo de grabación más largo.
• Los siguientes casos pueden producir inexactitudes en
el tiempo de grabación.
– Grabación de imágenes con ruido de imagen o
escenas de movimiento rápido.
– Grabación de un programa con recepción defectuosa,
o una fuente de programa o video con imagen de baja
calidad
– Grabación en un disco ya editado
– Grabación de imágenes fijas o sonido únicamente
• Debido a que el modo de grabación de títulos grabados
se calcula después del muestreo de datos grabados
durante la reproducción, es posible que se muestre
diferente del modo que seleccionó durante la
grabación. Sin embargo, la grabación real se realizó
correctamente en el modo seleccionado.
Deseo grabar con la
mejor calidad de imagen
posible, por eso
seleccionaré HQ.
Modo de grabación Tiempo de
grabación
(minutos)
aproximado
HQ (alta calidad) 60
HSP R 90
SP (Modo estándar) 120
LSP r 150
ESP r 180
LP r 240
EP r 360
SLP (Larga duración) 480
,continúa
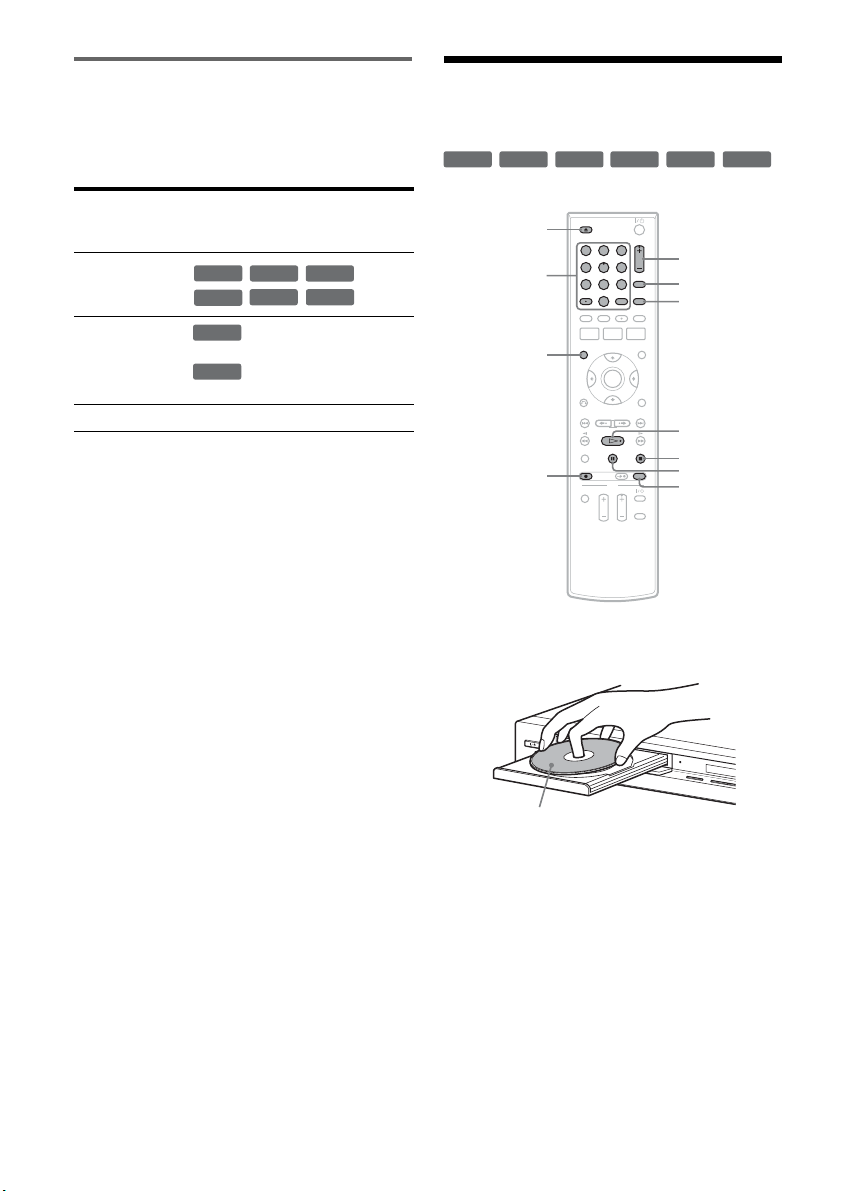
20
ES
Imágenes que no pueden grabarse
En esta grabadora no pueden grabarse imágenes
con protección contra copias. La grabación se
detiene cuando se detecta una señal de protección
contra copias.
* El disco grabado sólo puede reproducirse en un equipo
compatible con CPRM.
Grabación de discos sin
temporizador
1 Presione Z OPEN/CLOSE y coloque un
disco grabable en la bandeja de discos.
2 Presione Z OPEN/CLOSE para cerrar la
bandeja de discos.
Espere hasta que “LOAD” desaparezca de la
pantalla del panel frontal.
3 Presione DIGITAL/ANALOG para
seleccionar la emisión.
4 Presione los botones numéricos para
seleccionar el canal que desea grabar y
presione SET.
Para obtener más información sobre cómo
ajustar el canal, consulte “Ver la televisión”
(página 14).
Señales de
control
de copias
Discos grabables
Copy-Free
Copy-Once
Ver.1.1, Ver.1.2 con CPRM*
Ver.2.0, Ver.2.1 con CPRM*
Copy-Never Ninguna
+
RW
-
RWVR
-
RW
Video
+
R
-
RVR
-
R
Video
-
RWVR
-
RVR
+
RW
+
R
-
RWVR
-
RW
Video
-
RVR
-
R
Video
11 22 33
44 55 66
77 88
00
99
REC MODE
X PAUSE
x STOP
CH +/–
z REC
Z OPEN/
CLOSE
H PLAY
DISPLAY
INPUT
DIGITAL/
ANALOG
Botones
numéricos,
SET,
· (punto)
D
V
IN
L
(
M
O
N
O
)
A
U
D
I
O
R
V
I
D
E
O
S
V
I
D
E
O
L
I
N
E
-
2
I
N
ONE-TO
UCH DUBBING
La cara de grabación debe mirar hacia abajo
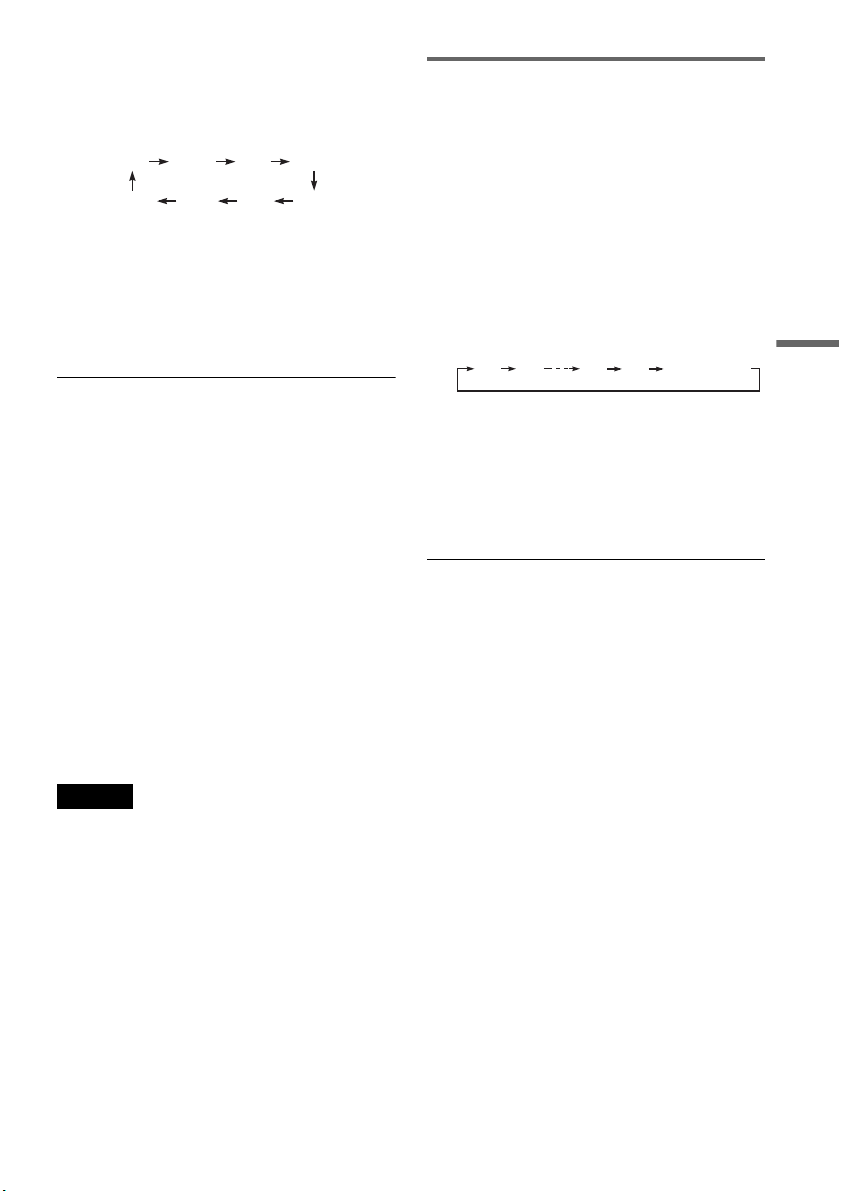
21
ES
Grabación
5 Presione REC MODE varias veces para
seleccionar el modo de grabación.
La pantalla cambiará en la pantalla del
televisor del modo siguiente:
Para obtener más detalles sobre el modo de
grabación, consulte la página 19.
6 Presione z REC.
Comienza la grabación.
La grabación continúa hasta que usted la
detiene o el disco se llena.
Para detener la grabación
Presione x STOP.
Tenga en cuenta que la grabadora demora algunos
segundos en detener la grabación.
Para hacer una pausa en la grabación
Presione X PAUSE.
Para reiniciar la grabación, presione X PAUSE de
nuevo.
z Observaciones
• Puede utilizar el botón CH +/– para seleccionar un
canal.
• Es posible seleccionar una fuente de video de entre las
tomas LINE 1 IN o LINE 2 IN mediante el botón
INPUT.
• Es posible apagar el televisor durante la grabación. Si
está utilizando un decodificador de cable o un receptor
vía satélite, asegúrese de dejarlo encendido.
Notas
• Es posible que la grabación no se inicie
inmediatamente después de presionar
z REC.
• No se puede cambiar el modo de grabación mientras
graba o durante una pausa de grabación.
• Si se produce un corte en el suministro eléctrico, se
eliminará el programa que se está grabando.
• No es posible cambiar el canal ni la fuente de entrada
durante la grabación.
Grabación mediante la función
Quick Timer
(Grabación con temporizador
presionando un solo botón)
Puede ajustar la grabadora para que grabe en
incrementos de 30 minutos.
Presione z REC varias veces para definir la
duración.
Cada vez que presione el botón, aumentará el
tiempo en 30 minutos, hasta un máximo de
ocho horas*.
“c” y “OTR” se iluminan y el tiempo de
grabación restante aparece en la pantalla del
panel frontal.
Cuando el contador llega a “0:00”, la
grabadora detiene la grabación y se apaga.
* 14 horas 30 minutos para discos DVD+R DL (doble
capa).
Para cancelar el Quick Timer
Presione z REC varias veces hasta que aparezca
el contador en la pantalla del panel frontal. La
grabadora vuelve al modo de grabación normal.
Para detener la grabación
Presione x STOP dos veces.
Tenga en cuenta que la grabadora demora algunos
segundos en detener la grabación.
HQ SPHSP LSP
SLP LPEP ESP
0:30 1:00 7:30 8:00
(Grabación
normal)
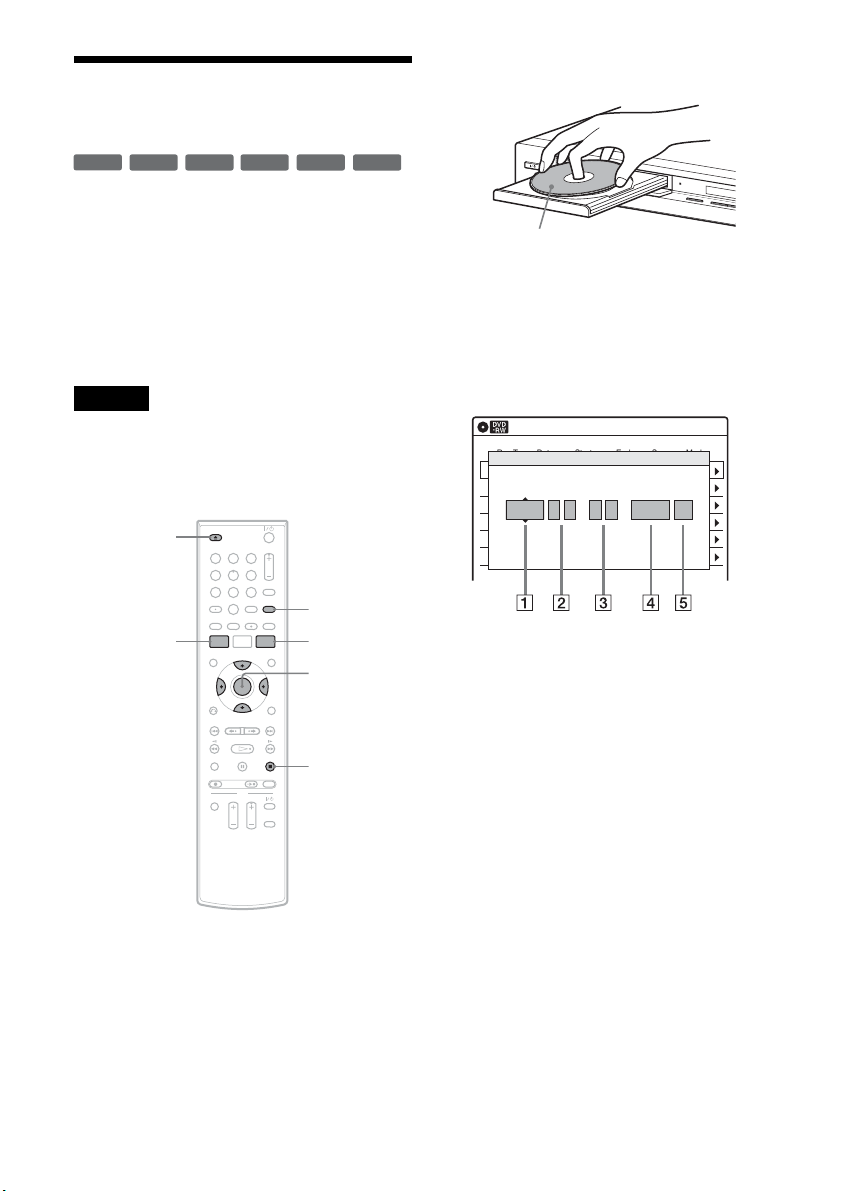
22
ES
Grabación de discos con
temporizador
Puede ajustar el temporizador para un total de 12
programas con un máximo de un mes de
anticipación.
Tenga en cuenta que el tiempo de grabación
continua máximo de un único título es de 12 horas.
El contenido que supere este tiempo no se grabará.
Siga los pasos indicados a continuación para
ajustar cada elemento de grabación con
temporizador.
Nota
No opere el decodificador de cable ni el receptor vía
satélite justo antes ni durante una grabación con
temporizador, ya que ello puede impedir la grabación
correcta de un programa.
1 Presione Z OPEN/CLOSE y coloque un
disco grabable en la bandeja de discos.
2 Presione Z OPEN/CLOSE para cerrar la
bandeja de discos.
Espere hasta que “LOAD” desaparezca de la
pantalla del panel frontal.
3 Presione TIMER.
4 Seleccione un elemento utilizando </,
y ajústelo utilizando M/m.
A “Fecha”: Ajusta la fecha mediante M.
Para grabar el mismo programa todos los
días o el mismo día todas las semanas,
presione m.
El elemento cambia de la siguiente
manera:
Hoy y Dom-Sáb (de domingo a sábado)
y Lun-Sáb (de lunes a sábado) y
Lun-Vie (de lunes a viernes) y Dom
(todos los domingos) y Lun (todos los
lunes) y … y Sáb (todos los sábados)
y 1mes más tarde y … y Hoy
B “Inicio”: Establece la hora de inicio.
C “Fin”: Establece la hora de finalización.
D “Can”: Selecciona el canal o la fuente
de entrada.
Es posible cambiar la emisión mediante el
botón DIGITAL/ANALOG.
+
RW
+
R
-
RWVR
-
RW
Video
-
RVR
-
R
Video
11 22 33
44 55 66
77 88
00
99
M/m/</,,
ENTER
Z OPEN/
CLOSE
x STOP
SYSTEM
MENU
TIMER
DIGITAL/
ANALOG
DV IN
L
(
M
O
N
O
)
A
U
D
I
O
R
V
I
D
E
O
S
V
I
D
E
O
L
I
N
E
-
2
I
N
O
NE
-TO
U
C
H DU
B
BING
La cara de grabación debe mirar
hacia abajo
01 DVD 04/15 09:00PM 10:00PM CH8
--- --/-- --:-- --:-- ---- ---04
--- --/-- --:-- --:-- ---- ---05
--- --/-- --:-- --:-- ---- ---06
03 --- --/-- --:-- --:-- ---- ---
02 DVD 04/30 09:15PM 09:45PM CH11
10:10 AM
No Rec To Date Start End Source Mode Edit.
Temporizador – Estándar
No.01
: PM PM
:
09 00 10 00 Can 8 SP
Can ModoFecha Inicio Fin
Hoy

23
ES
Grabación
E “Modo”: Selecciona el modo de
grabación (página 19).
Para utilizar la función Ajustar modo
grab. (página 23), seleccione “AUTO”.
Si se equivoca, seleccione el elemento y
cambie el ajuste.
5 Presione ENTER.
Aparecerá el menú Lista de temporizador.
Se ilumina el indicador c en la pantalla del
panel frontal, y la grabadora está lista para
comenzar a grabar.
• Si el indicador c parpadea en la pantalla del
panel frontal, significa que no hay un disco
grabable insertado. Inserte un disco grabable
y compruebe si hay espacio suficiente para
efectuar la grabación.
6 Presione SYSTEM MENU para quitar el
menú.
No es necesario apagar la grabadora antes de
que empiece la grabación con temporizador.
Para detener la grabación
Presione x STOP dos veces.
Tenga en cuenta que la grabadora demora algunos
segundos en detener la grabación.
Para utilizar la función Ajustar modo grab.
Si el espacio restante en el disco no es suficiente
para realizar la grabación actual, la grabadora
ajustará el modo de grabación automáticamente.
Seleccione “AUTO” en “Modo” al ajustar el
temporizador.
Notas
• Para grabar un programa por cable o satélite, encienda
el decodificador de cable o el receptor vía satélite y
seleccione el programa que desee grabar. Deje el
decodificador de cable o el receptor vía satélite
encendidos hasta que la grabadora finalice la
grabación.
• Aunque lo ajuste correctamente, es posible que el
programa no se grabe si se está realizando otra
grabación o si se superpone otro ajuste de temporizador
con prioridad.
• Antes de comenzar la grabación con temporizador,
“TIMER REC” parpadea en la pantalla del panel
frontal.
• La grabadora se apaga automáticamente cuando
finaliza una grabación con temporizador, incluso
aunque la grabación comenzase con la grabadora
encendida.
• La grabadora no graba programas con señales Copy-
Never. Este tipo de grabaciones se detienen al cabo de
unos segundos.

Sony Corporation Printed in China AK68-01329A