Metal Front Panels
7004566 / Rev A / February, 2008
Page 1 of 4
CONT
AINS:
QTY
DESCRIPTION
1 Panel
1 Bag of Front Panel Clips
1 Instruction Sheet
FRONT P
ANEL
CLIP INSTALLATION PROCEDURE:
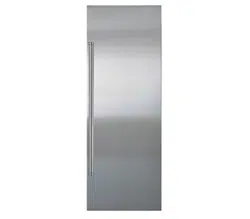
Insert the clips into the rectangular holes in the rear flanges of the front panel as shown in Figure 1, making sure
the 1/4” (6 mm) wide part of the clips is facing toward the outer edge of the panel as this will slide under the door
trim.
PANEL
(REAR VIEW)
PANEL CLIP
PANEL CLIP
Figure 1. Front Panel Clip Installation
NOTE: The clip installation is the same regardless of the panel.
(Over/under Refrigerator door panel shown)
1
2
3
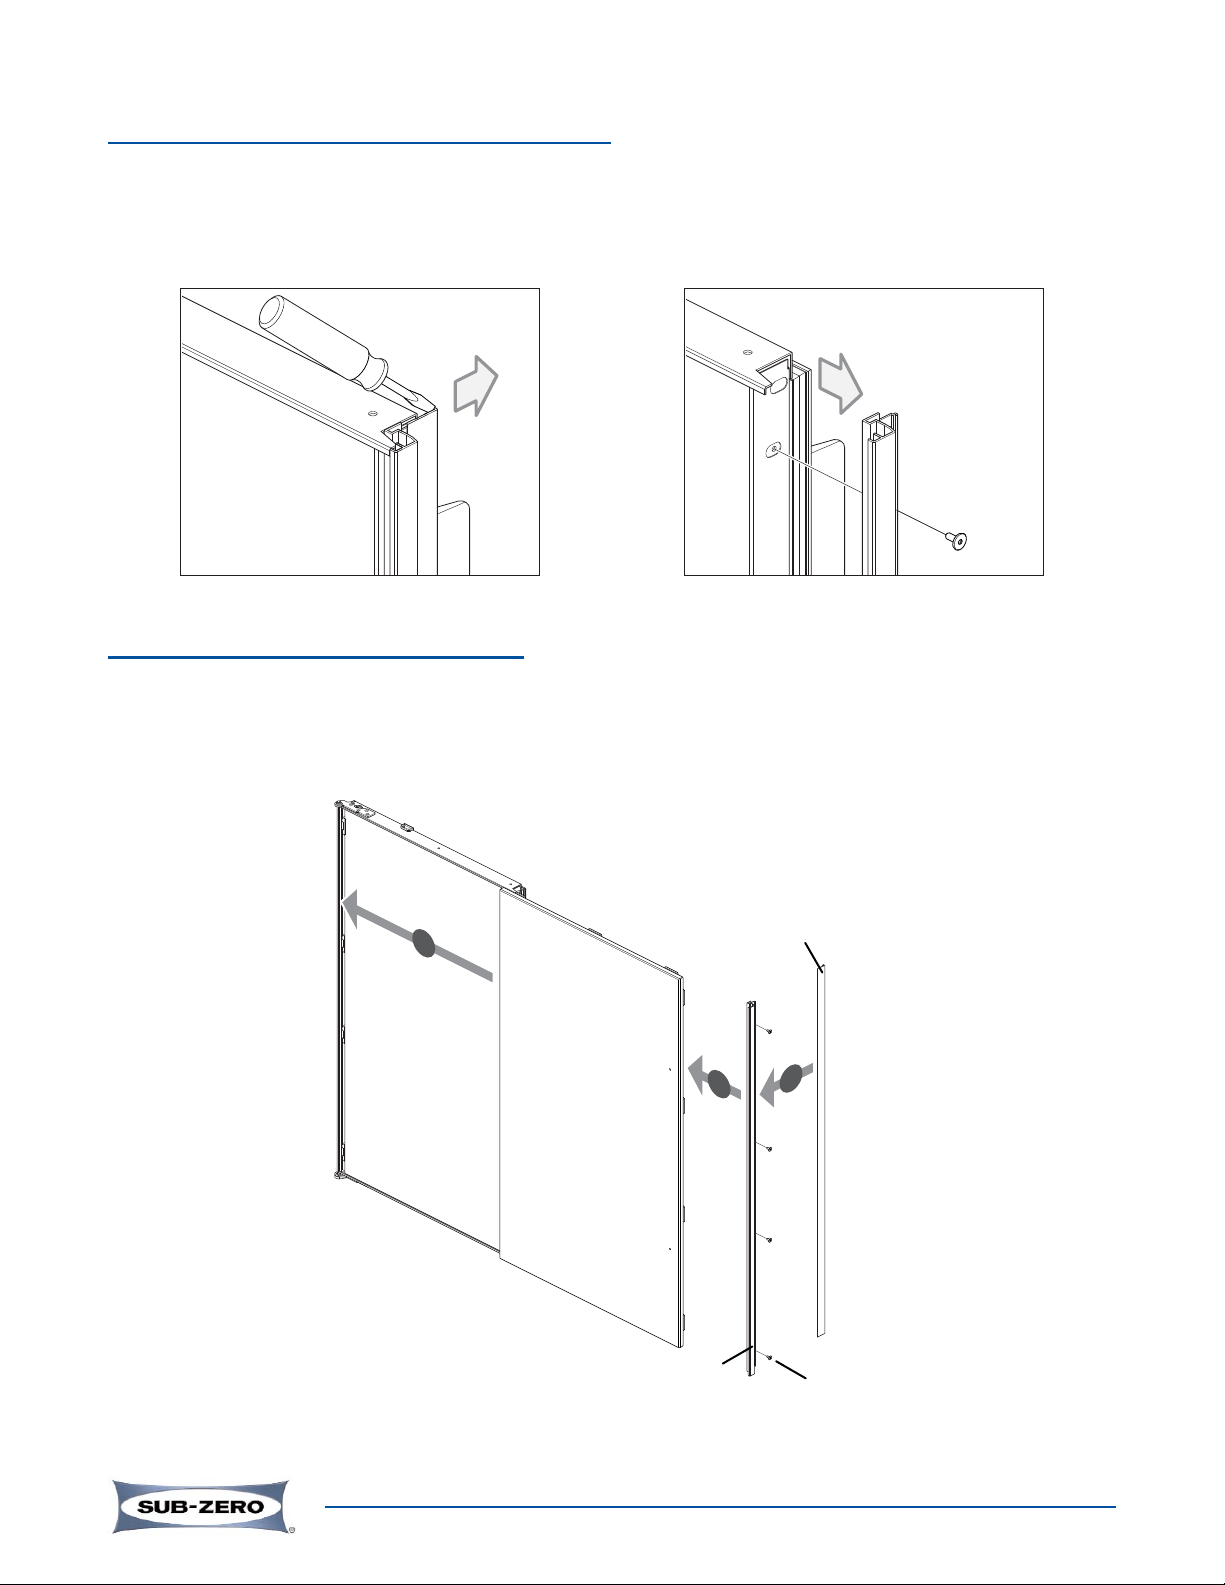
DOOR
HANDLE-SIDE TRIM
SCREWS
SCREW COVER
METAL FRONT
PANEL
Figure 4. Door Metal Front Panel Installation
Metal Front Panels
7004566 / Rev A / February, 2008
Page 2 of 4
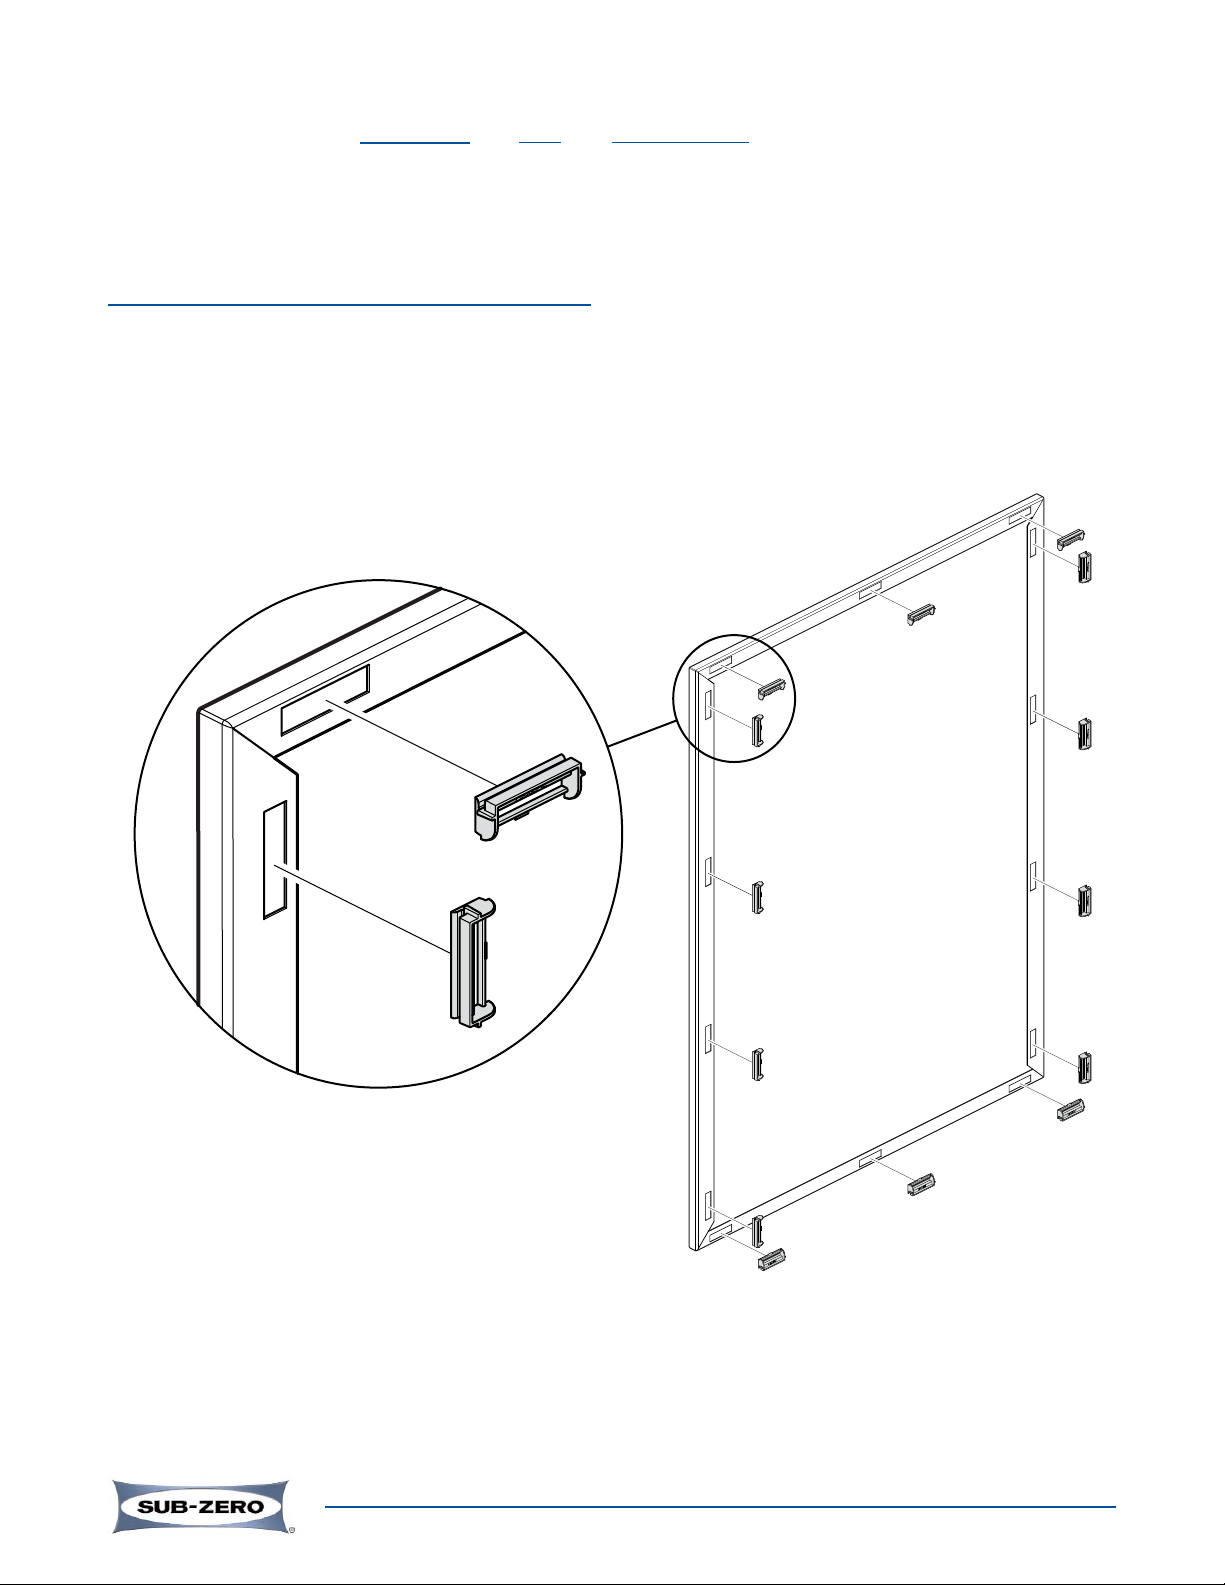
DOOR HANDLE-SIDE TRIM REMOVAL PROCEDURE:
1. At the top of the door, insert a flat blade screwdriver into the channel of the screw cover and push the cover
away form the handle-side trim so that it disengages from the handle-side trim (See Figure 2).
2. With a T-20, 6-lobe Torx type bit, extract the handle-side mounting screws and pull the trim from the door
(See Figure 3).
Figure 2. Screw Cover Removal
Figure 3. Handle-Side Trim Removal
DOOR
SCREW COVER
HANDLE-SIDE TRIM
HANDLE-SIDE TRIM
DOOR PANEL INSTALLATION PROCEDURE (See Figure 4):
1. Install the door front panel onto the door so that the panel clips slide under the door trim and the front panel
slides in over the door trim.
22. Reattach the handle-side trim.
3. Reinstall the screw cover.
Metal Front Panels
7004566 / Rev A / February, 2008
Page 3 of 4
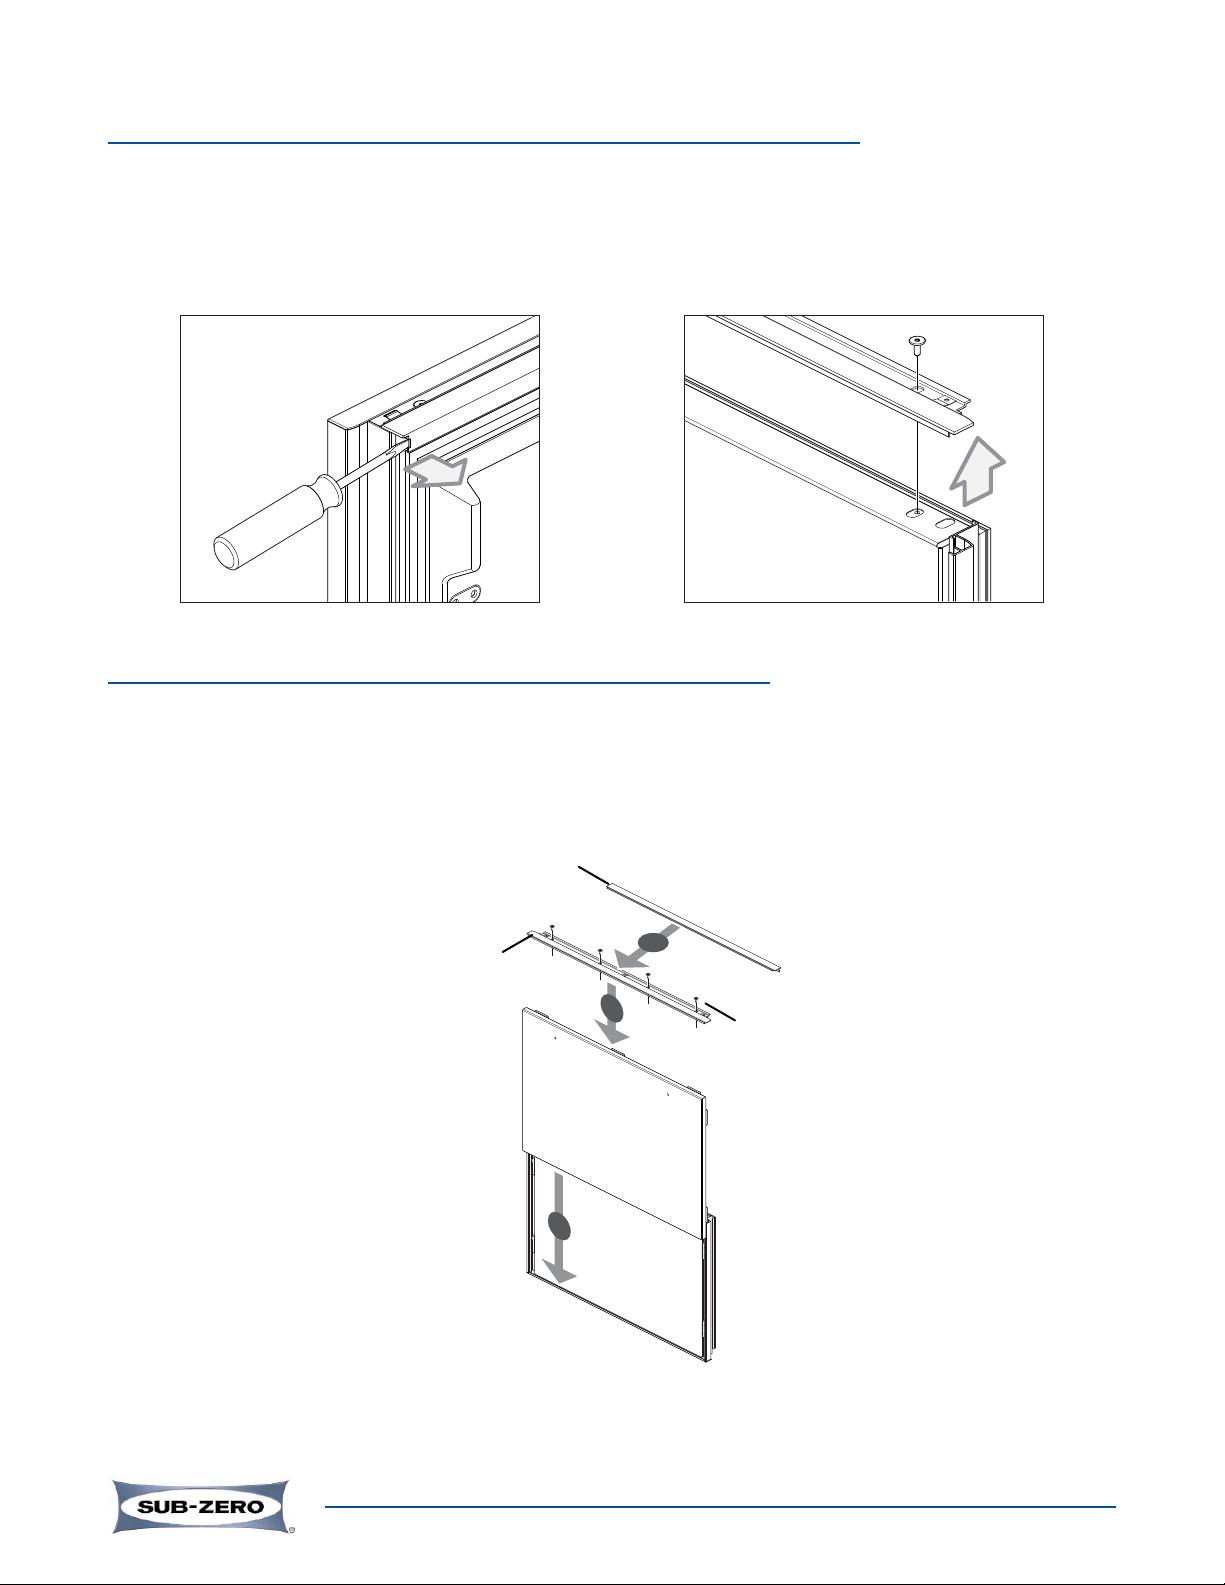
DRAWER
TOP TRIM
SCREW COVER
1
2
3
SCREWS
METAL FRONT
PANEL
Figure 7. Drawer Metal Front Panel Installation
SCREW COVER
TOP DRAWER TRIM
OVER/UNDER MODEL
FREEZER DRAWER TOP TRIM REMOVAL PROCEDURE:
1. At the back right-hand side of the top drawer trim (or handle-side trim), insert a flat blade screwdriver into the
notch in the screw cover and pry the cover away form the top trim, disengaging it from the top trim (See
Figure 5).
2. With a T-20, 6-lobe Torx type bit, extract the top trim mounting screws and pull the top trim from the drawer
(See Figure 6).
Figure 5. Screw Cover Removal
DRAWER
HANDLE-SIDE TRIM
Figure 6. Top Trim Removal
OVER/UNDER MODEL
DRAWER P
ANEL INSTALLA
TION PROCEDURE
(See Figure 7):
1. Install the drawer panel onto the drawer so that the panel clips slide under the drawer trim and the front panel
slides over the drawer trim.
2
2. Reattach the handle-side trim.
3. Reinstall the screw cover.
Metal Front Panels
7004566 / Rev A / February, 2008
Page 4 of 4
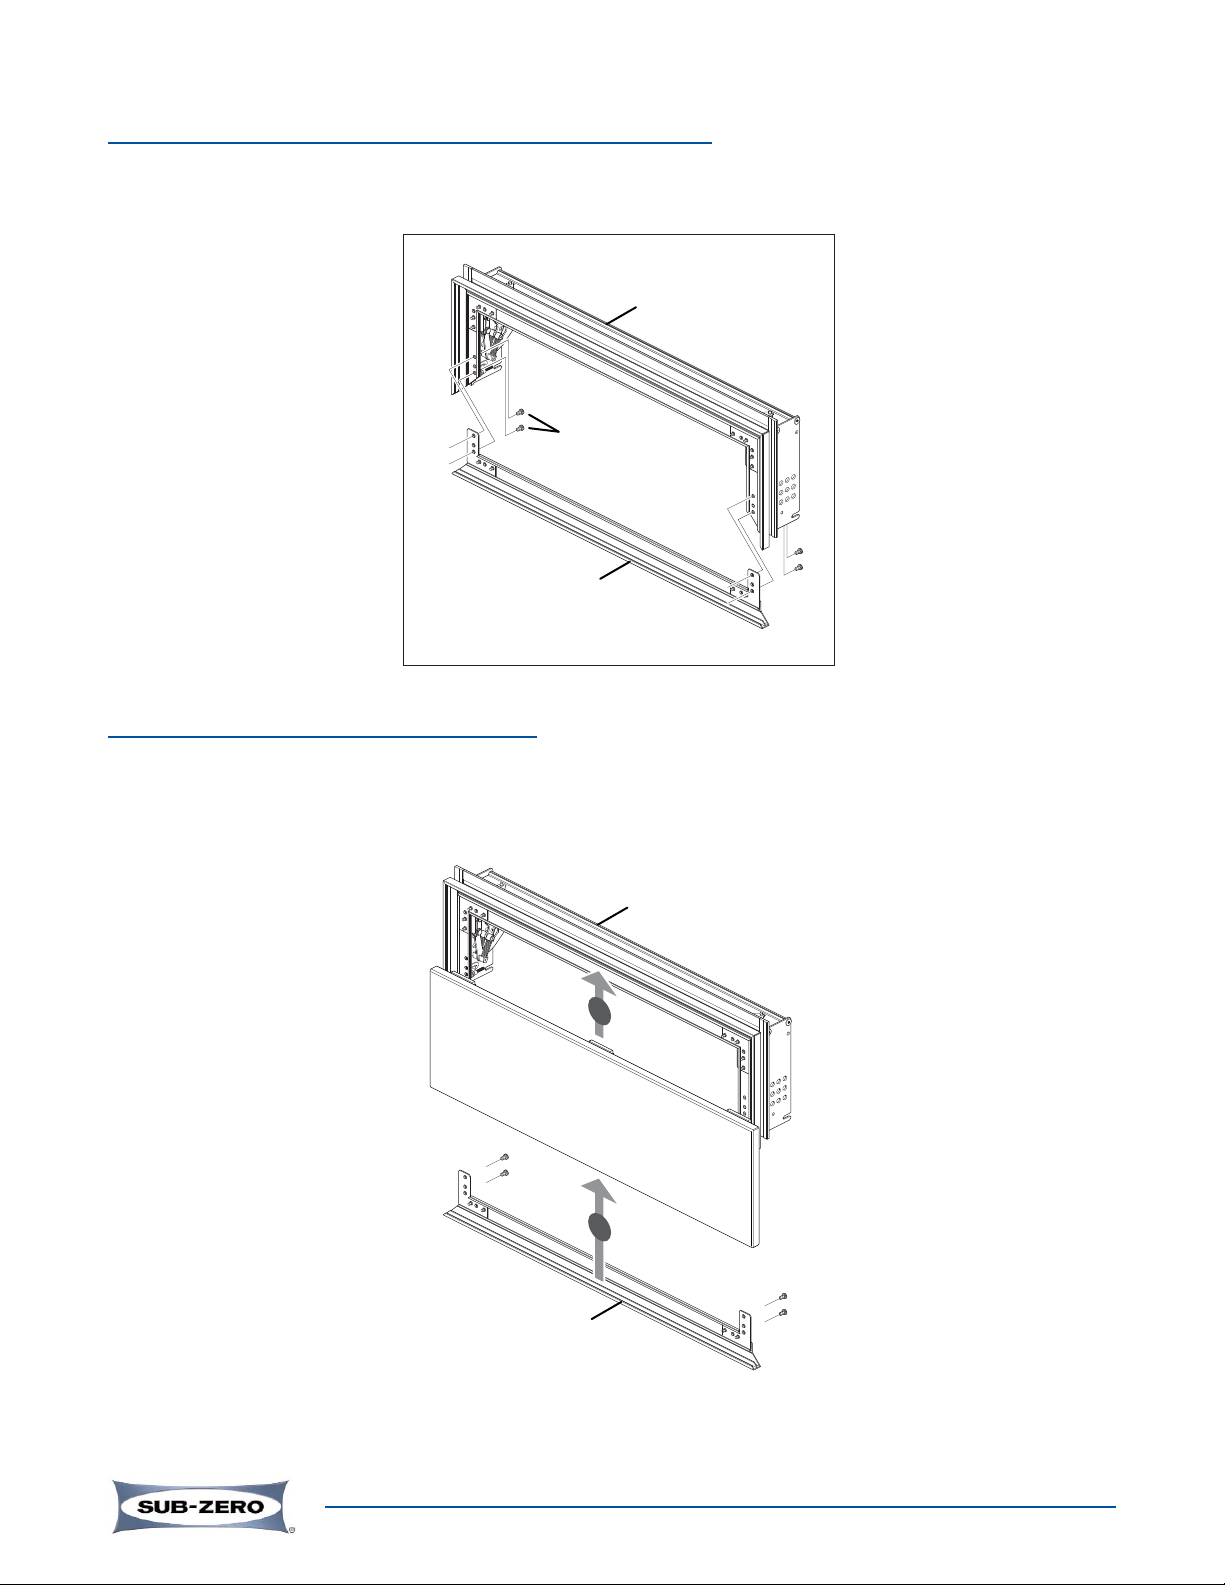
BOTT
OM GRILLE FRAME EXTRUSION REMOVAL PROCEDURE
(See Figure 8):
Use a T-20, 6-lobe Torx type bit to extract the two lower grille frame extrusion mounting screws from each side of
the grille and pull the bottom grille extrusion along with the corner brackets from the side grille extrusions.
BOTTOM GRILLE
FRAME EXTRUSION
PANEL GRILLE
FRAME ASSEMBLY
SCREWS
(2 OF 4)
Figure 8. Bottom Frame Extrusion Removal
BOTTOM GRILLE
FRAME EXTRUSION
PANEL GRILLE
FRAME ASSEMBLY
2
1
METAL FRONT
PANEL
Figure 9. Grille Metal Front Panel Installation
GRILLE P
ANEL INST
ALLATION PROCEDURE
(See Figure 9):
1. Install the grille panel into the grille frame so that the panel clips slide under the outer flange of the grille
frame extrusions and the front panel slides over the frame.
2. Reattach the bottom grille extrusion.