
3
Ú Table of contents
[en]Instructi on manual
Important safety information.....................................................3
Environmental protection..........................................................5
Saving energy......................................................................................5
Environmentally-friendly disposal.....................................................5
Operating modes........................................................................5
Exhaust air mode................................................................................5
Circulating-air mode ...........................................................................5
Operating the appliance ............................................................6
Setting the fan .....................................................................................6
Lighting .................................................................................................6
Cleaning and maintenance........................................................6
Trouble shooting ........................................................................8
Fault table.............................................................................................8
After-sales service .....................................................................8
Accessories ................................................................................9
Produktinfo
Additional information on products, accessories, replacement
parts and services can be found at www.bosch-home.com and
in the online shop www.bosch-eshop.com
: Important safety information
Read these instructions carefully. Only then
will you be able to operate your appliance
safely and correctly. Retain the instruction
manual and installation instructions for
future use or for subsequent owners.
The appliance can only be used safely if it
is correctly installed according to the safety
instructions. The installer is responsible for
ensuring that the appliance works perfectly
at its installation location.
This appliance is intended for domestic use
and the household environment only. The
appliance is not intended for use outside.
Do not leave the appliance unattended
during operation. The manufacturer is not
liable for damage which is caused by
improper use or incorrect operation.
This appliance is intended for use up to a
maximum height of 2000 metres above sea
level.
This appliance is not intended for use by
persons (including children) with reduced
physical, sensory or mental capabilities, or
lack of experience and knowledge, unless
they have been given supervision or
instruction concerning use of the appliance
by a person responsible for their safety.
Children must not play with, on, or around
the appliance. Children must not clean the
appliance or carry out general maintenance
unless they are at least 8 years old and are
being supervised.
Keep children below the age of 8 years old
at a safe distance from the appliance and
power cable.
Check the appliance for damage after
unpacking it. Do not connect the appliance
if it has been damaged in transport.
This appliance is not intended for operation
with an external clock timer or a remote
control.
Danger of suffocation!
Packaging material is dangerous to
children. Never allow children to play with
packaging material.
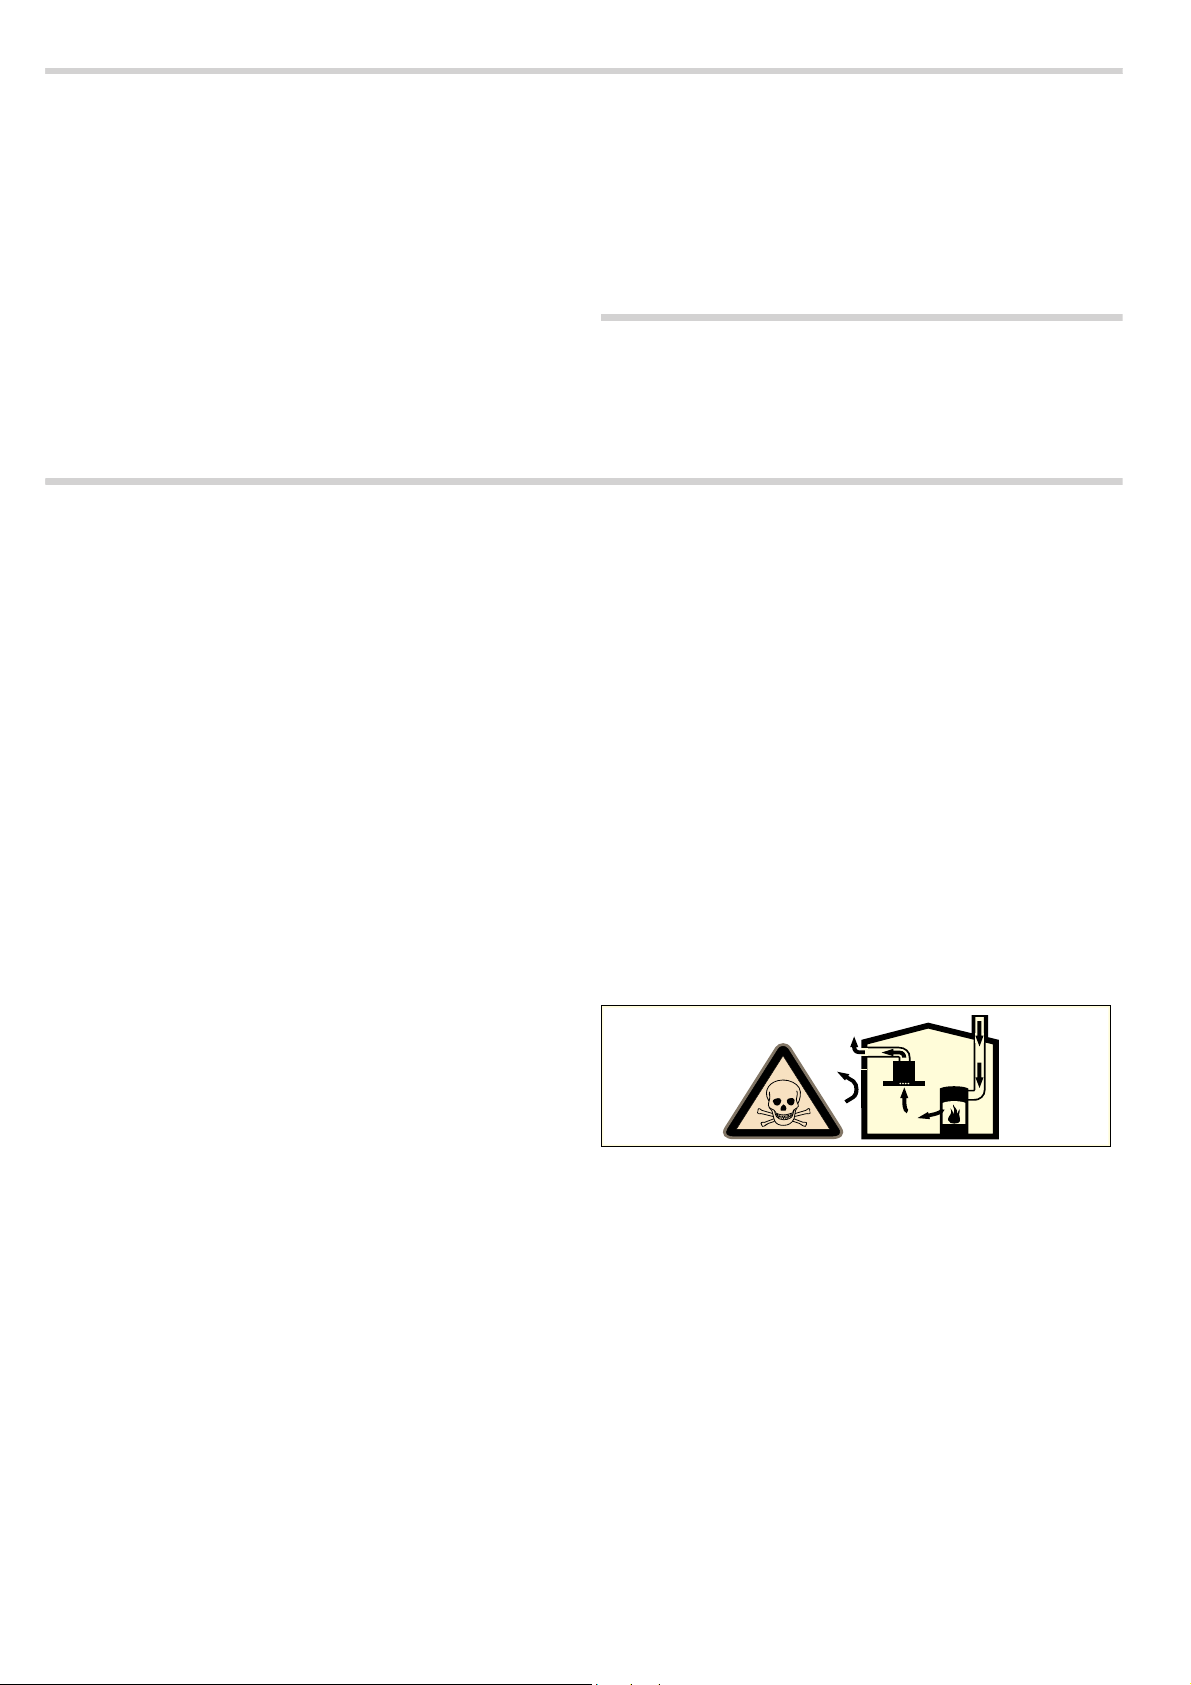
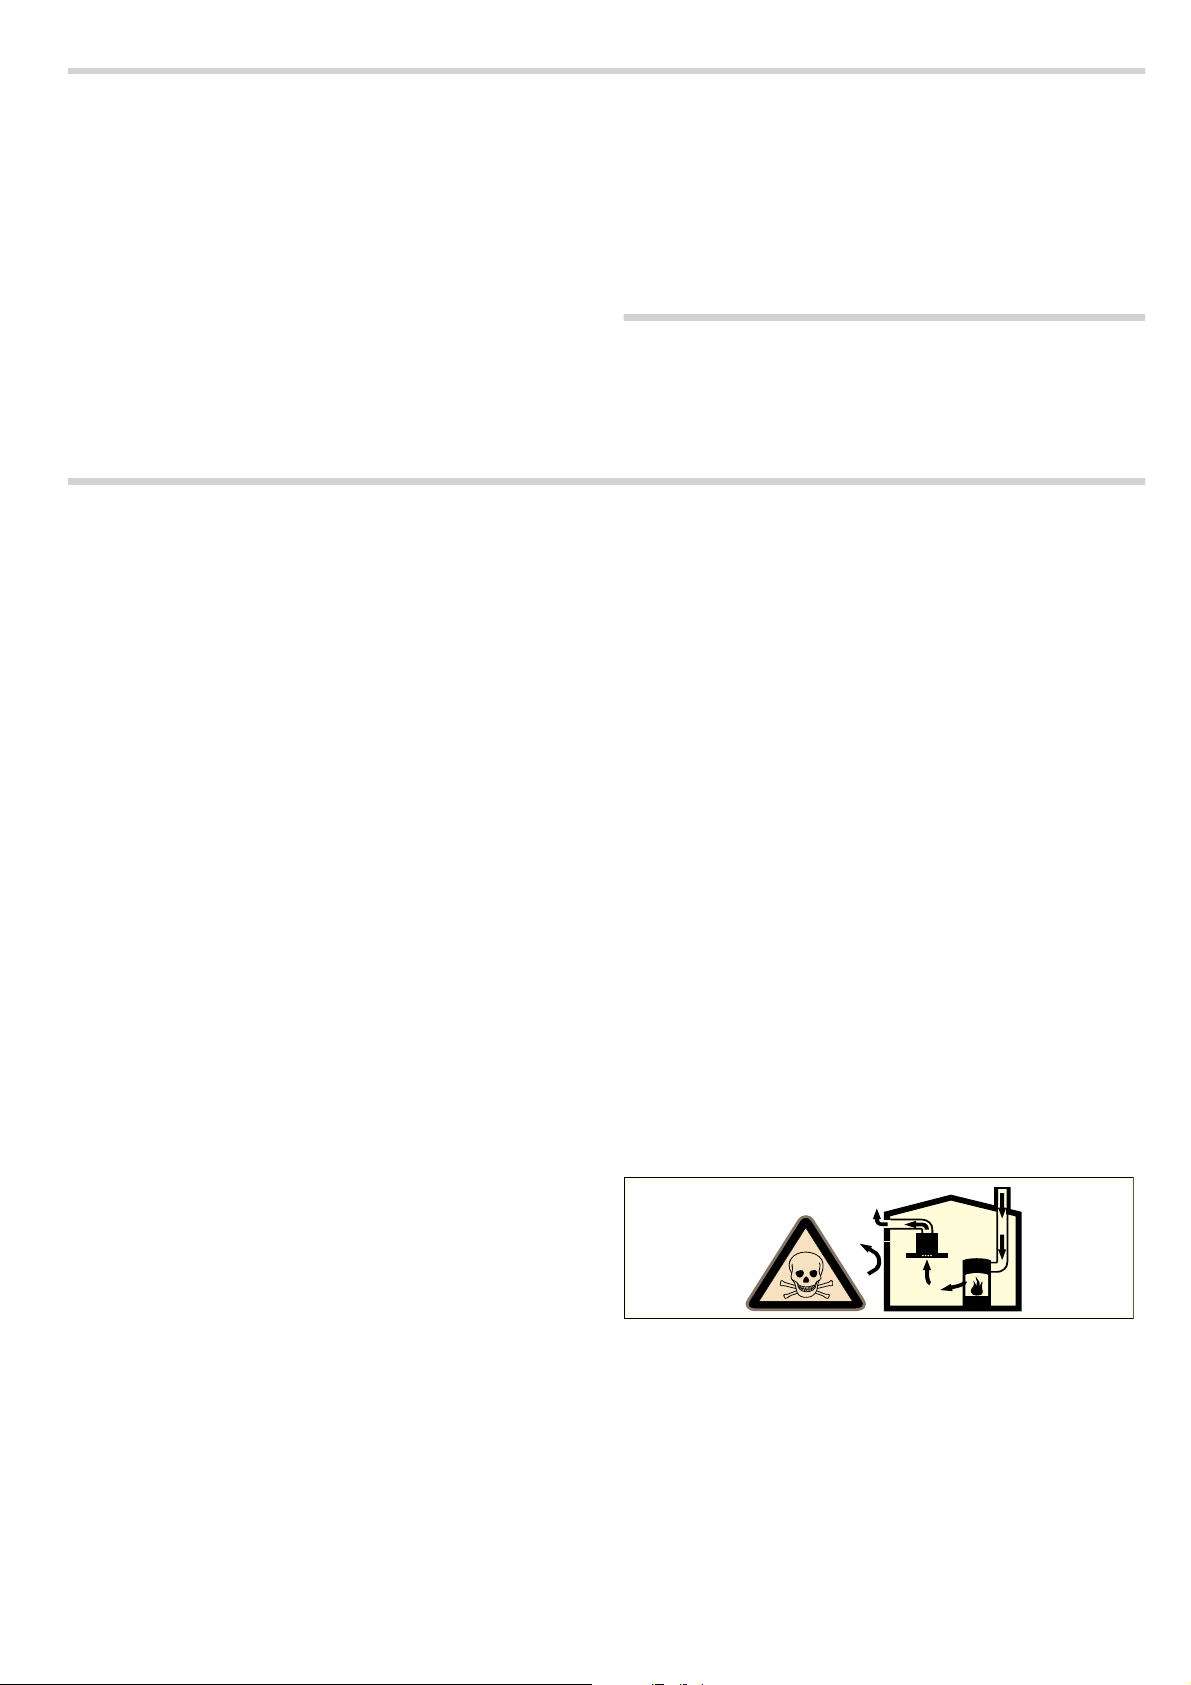
Danger of death!
Risk of poisoning from flue gases that are
drawn back in.
Always ensure adequate fresh air in the
room if the appliance is being operated in
exhaust air mode at the same time as room
air-dependent heat-producing appliance is
being operated.
Room air-dependent heat-producing
appliances (e.g. gas, oil, wood or coal-
operated heaters, continuous flow heaters
or water heaters) obtain combustion air
from the room in which they are installed
and discharge the exhaust gases into the
open air through an exhaust gas system
(e.g. a chimney).
In combination with an activated vapour
extractor hood, room air is extracted from
the kitchen and neighbouring rooms - a
partial vacuum is produced if not enough
fresh air is supplied. Toxic gases from the
chimney or the extraction shaft are sucked
back into the living space.
4
■
Adequate incoming air must therefore
always be ensured.
■
An incoming/exhaust air wall box alone
will not ensure compliance with the limit.
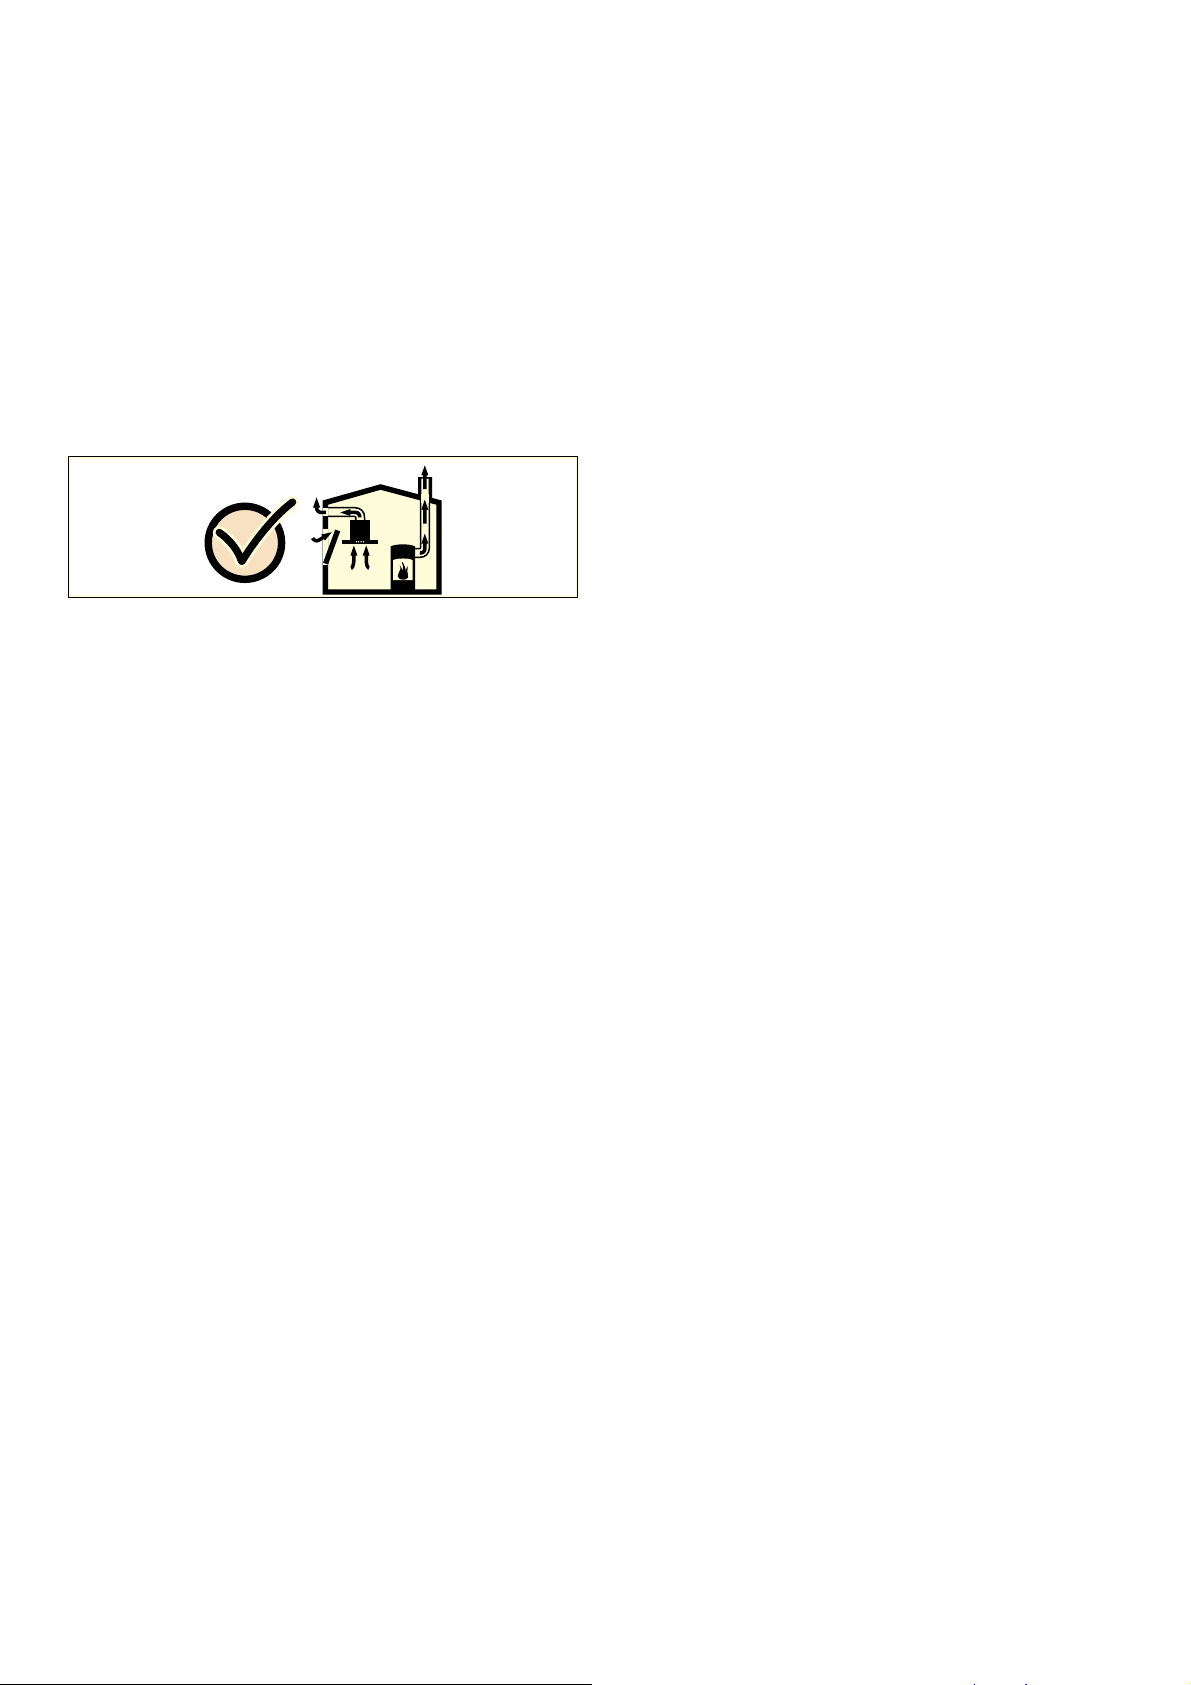
Safe operation is possible only when the
partial vacuum in the place where the heat-
producing appliance is installed does not
exceed 4 Pa (0.04 mbar). This can be
achieved when the air needed for
combustion is able to enter through
openings that cannot be sealed, for
example in doors, windows, incoming/
exhaust air wall boxes or by other technical
means.
In any case, consult your responsible
Master Chimney Sweep. He is able to
assess the house's entire ventilation setup
and will suggest the suitable ventilation
measures to you.
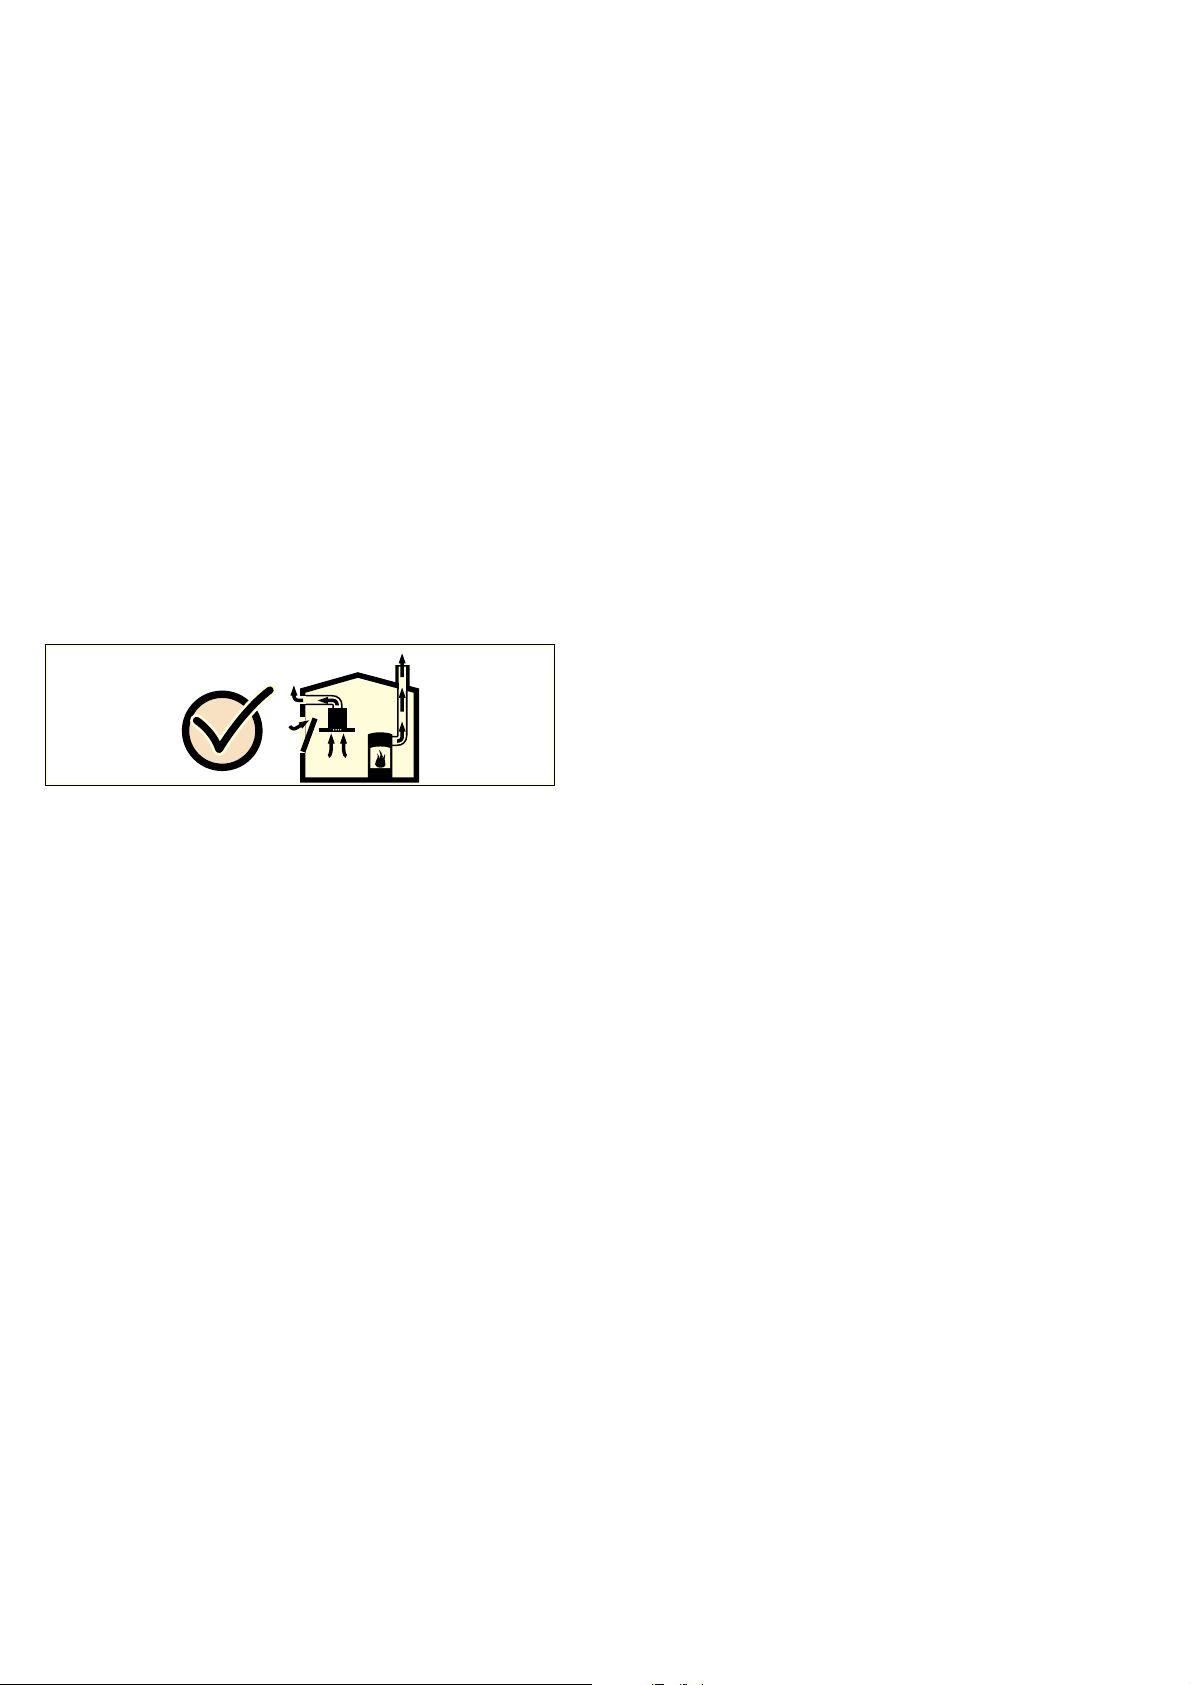
Unrestricted operation is possible if the
vapour extractor hood is operated
exclusively in the circulating-air mode.
Risk of fire!
■
Grease deposits in the grease filter may
catch fire.
Replace the grease filter at least every
two months.
Never operate the appliance without the
grease filter.
Risk of fire!
■
Grease deposits in the grease filter may
catch fire. Never work with naked flames
close to the appliance (e.g. flambéing). Do
not install the appliance near a heat-
producing appliance for solid fuel (e.g.
wood or coal) unless a closed, non-
removable cover is available. There must
be no flying sparks.
Risk of fire!
■
Hot oil and fat can ignite very quickly.
Never leave hot fat or oil unattended.
Never use water to put out burning oil or
fat. Switch off the hotplate. Extinguish
flames carefully using a lid, fire blanket or
something similar.
Risk of fire!
■
When gas burners are in operation without
any cookware placed on them, they can
build up a lot of heat. A ventilation
appliance installed above the cooker may
become damaged or catch fire. Only
operate the gas burners with cookware on
them.
Risk of fire!
■
Operating several gas burners at the
same time gives rise to a great deal of
heat. A ventilation appliance installed
above the cooker may become damaged
or catch fire. Never operate two gas
burners simultaneously on the highest
flame for longer than 15 minutes. One
large burner of more than 5 kW (wok) is
equivalent to the power of two gas
burners.
Risk of burns!
The accessible parts become very hot when
in operation. Never touch hot parts. Keep
children at a safe distance.
Risk of injury!
■
Components inside the appliance may
have sharp edges. Wear protective gloves.
Risk of injury!
■
Items placed on the appliance may fall
down. Do not place any objects on the
appliance.
Risk of injury!
■
The light emitted by LED lights is very
dazzling, and can damage the eyes (risk
group 1). Do not look directly into the
switched on LED lights for longer than
100 seconds.
Risk of electric shock!
■
A defective appliance may cause electric
shock. Never switch on a defective
appliance. Unplug the appliance from the
mains or switch off the circuit breaker in
the fuse box. Contact the after-sales
service.
Risk of electric shock!
■
Incorrect repairs are dangerous. Repairs
may only be carried out and damaged
power cables replaced by one of our
trained after-sales technicians. If the
appliance is defective, unplug the
appliance from the mains or switch off the
circuit breaker in the fuse box. Contact the
after-sales service.
Risk of electric shock!
■
Do not use any high-pressure cleaners or
steam cleaners, which can result in an
electric shock.
5
Causes of damage
Caution!
Risk of damage due to corrosion. Always switch on the
appliance while cooking to avoid condensation. Condensate
can produce corrosion damage.
Risk of damage due to ingress of humidity into the electronic
circuitry. Never clean operator controls with a wet cloth.
Surface damage due to incorrect cleaning. Clean stainless
steel surfaces in the direction of the grain only. Do not use any
stainless steel cleaners for operator controls.
Surface damage due to strong or abrasive cleaning agents.
Never use strong and abrasive cleaning agents.
Risk of damage from returning condensate. Install the exhaust
duct in such a way that it falls away from the appliance slightly
(1° slope).
Environmental protection
Your new appliance is particularly energy-efficient. Here you
can find tips on how to save even more energy when using the
appliance, and how to dispose of your appliance properly.
Saving energy
■ During cooking, ensure that there is a sufficient supply of air
so that the extractor hood can work efficiently and with a low
level of operating noise.
■ Adjust the fan speed to the intensity of the cooking fumes.
Only use intensive mode where this is required. A lower fan
speed means that less energy is consumed.
■ If there are intensive cooking fumes, select a higher fan
speed in good time. If cooking fumes have already spread in
the kitchen, the extractor hood must be operated for longer.
■ Switch off the extractor hood if you no longer require it.
■ Switch off the lighting if you no longer require it.
■ Clean and, if required, replace the filter at regular intervals in
order to increase the effectiveness of the ventilation system
and to prevent the risk of fire.
Environmentally-friendly disposal
Dispose of packaging in an environmentally-friendly manner.
Operating modes
This appliance can be used in exhaust-air mode or circulating-
air mode.
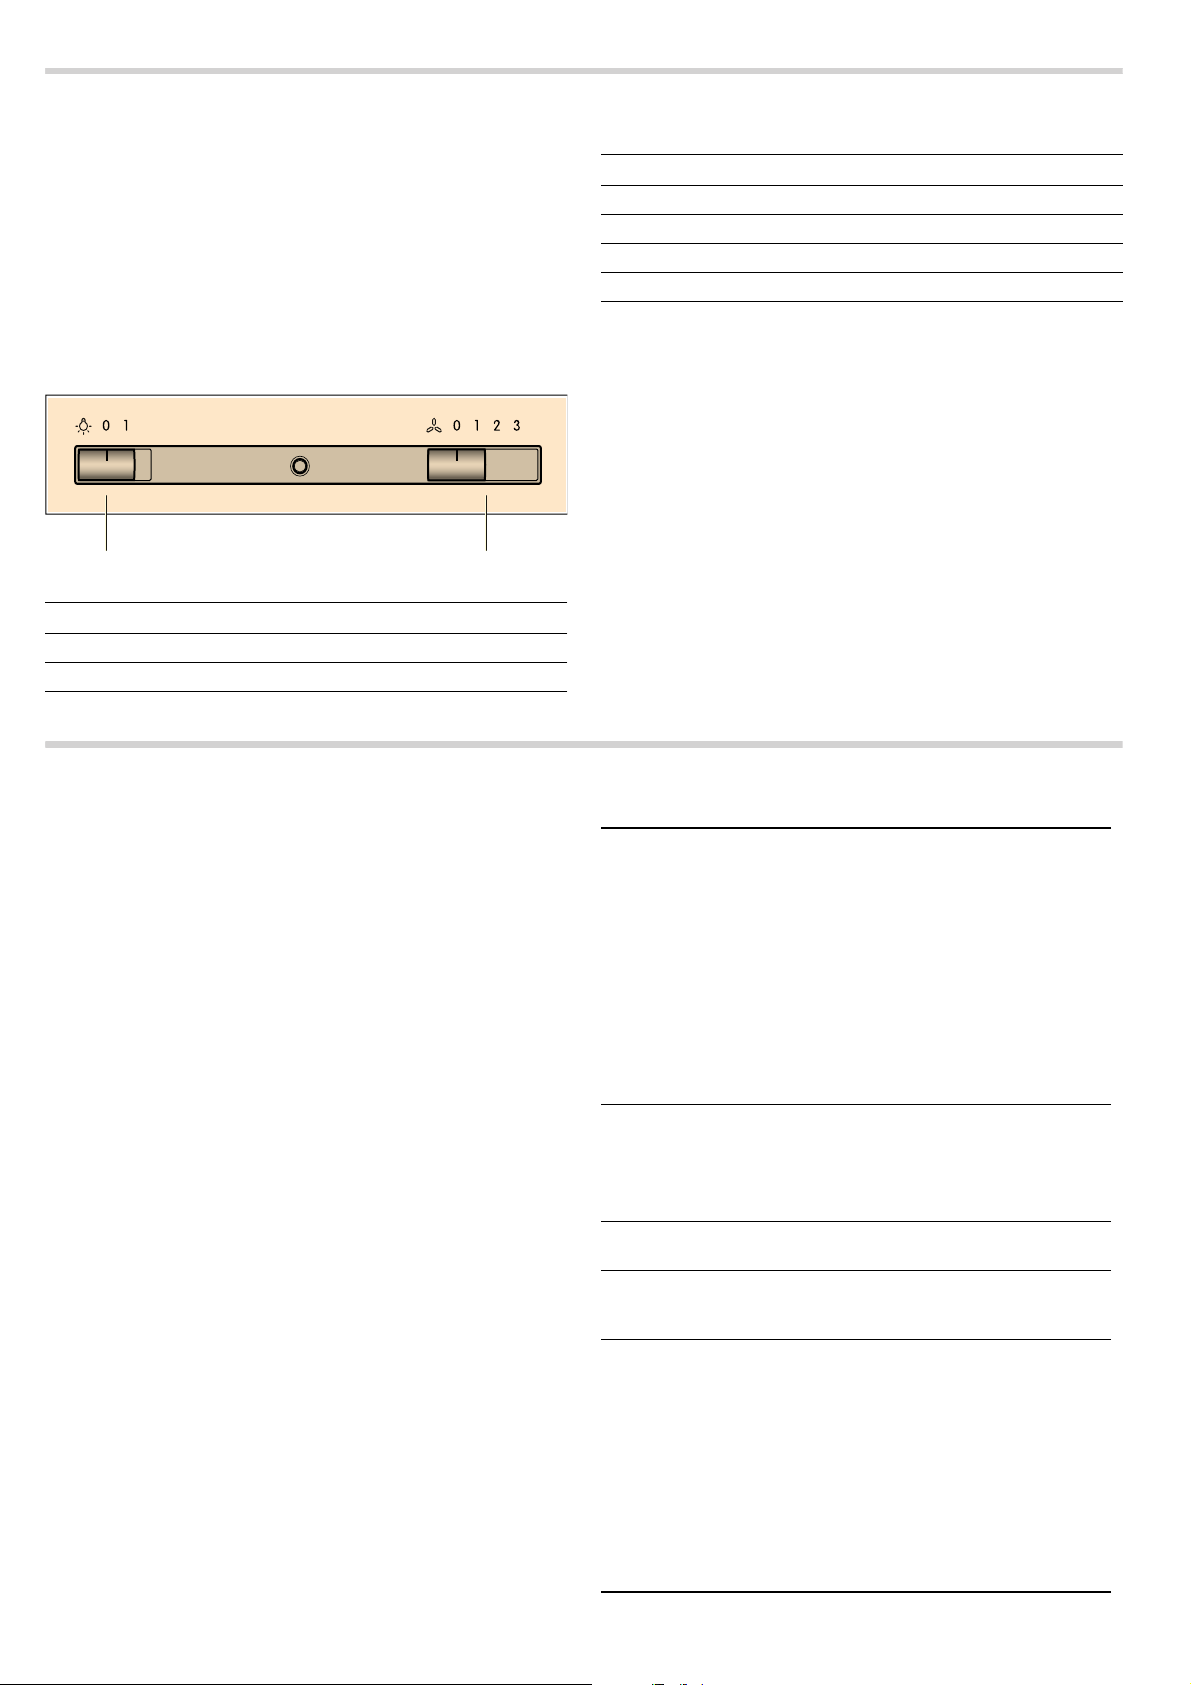
Exhaust air mode
Note: The air must not be discharged into a flue that is used for
exhausting fumes from appliances burning gas or other fuels
(not applicable to appliances that only discharge the air back
into the room).
■ Before conveying the exhaust air into a non-functioning
smoke or exhaust gas flue, obtain the consent of the heating
engineer responsible.
■ If the exhaust air is conveyed through the outer wall, a
telescopic wall box should be used.
Circulating-air mode
Note: To bind odours in circulating-air mode, you must install
an activated carbon filter. The different options for operating the
appliance in circulating-air mode can be found in the brochure.
Alternatively, ask your dealer. The required accessories are
available from specialist outlets, from customer service or from
the Online Shop. The accessory numbers can be found at the
end of the instructions for use.
This appliance is labelled in accordance with
European Directive 2012/19/EU concerning used
electrical and electronic appliances (waste
electrical and electronic equipment - WEEE). The
guideline determines the framework for the return
and recycling of used appliances as applicable
throughout the EU.
The air which is drawn in is cleaned by the
grease filters and conveyed to the exterior
by a pipe system.
The air which is drawn in is cleaned by the
grease filters and an activated carbon filter and
conveyed back into the kitchen.

6
Operating the appliance
These instructions apply to several appliance variants. It is
possible that individual features are described which do not
apply to your appliance.
Note: Switch on the extractor hood when you start cooking and
switch it off again several minutes after you have finished
cooking. This is the most effective way of removing the kitchen
fumes.
Note: Fold the glass cover forwards. This increases the
extraction area.
Control panel
Setting the fan
Note: Always adjust the fan strength to meet current conditions.
If there is a large build-up of steam or fumes, select a high fan
setting.
Switching on
Set the slide control to position 1, 2 or 3.
Note: If the fan is switched on, an LED lights up.
Switching off the appliance
Set the slide control to position 0.
Lighting
The lighting can be switched on and off independently of the
ventilation.
Set the slide control to position 1.
Cleaning and maintenance
: Risk of burns!
The appliance becomes hot during operation. Allow the
appliance to cool down before cleaning.
: Risk of electric shock!
Penetrating moisture may result in an electric shock. Clean the
appliance using a damp cloth only. Before cleaning, pull out the
mains plug or switch off the circuit breaker in the fuse box.
: Risk of electric shock!
Do not use any high-pressure cleaners or steam cleaners,
which can result in an electric shock.
: Risk of injury!
Components inside the appliance may have sharp edges. Wear
protective gloves.
Cleaning agents
To ensure that the different surfaces are not damaged by using
the wrong cleaning agent, observe the information in the table.
Do not use any of the following:
■ Harsh or abrasive cleaning agents,
■ Cleaning agents with a high alcohol content,
■ Hard scouring pads or cleaning sponges,
■ High-pressure cleaners or steam cleaners.
Wash new sponge cloths thoroughly before use.
Follow all instructions and warnings included with the cleaning
agents.
1 Lighting
0 Switches off the lighting
1 Switches on the lighting
2 Fan
0 Switches off the fan
1 Switches on fan speed 1
2 Switches on fan speed 2
3 Switches on fan speed 3
Area Cleaning agent
Stainless steel Hot soapy water:
Clean with a dish cloth and then dry
with a soft cloth.
Clean stainless steel surfaces in the
grind direction only.
Special stainless steel cleaning prod-
ucts are available from our after-sales
service or from specialist retailers.
Apply a very thin layer of the cleaning
product with a soft cloth.
Painted surfaces Hot soapy water:
Clean using a damp dish cloth and dry
with a soft cloth/towel.
Do not use any stainless steel cleaners.
Aluminium and plas-
tic
Glass cleaner:
Clean with a soft cloth.
Glass Glass cleaner:
Clean with a soft cloth. Do not use a
glass scraper.
Controls Hot soapy water:
Clean using a damp dish cloth and dry
with a soft cloth/towel.
Risk of electric shock caused by pene-
trating moisture.
Risk of damage to the electronics from
penetrating moisture. Never clean
operating controls with a wet cloth.
Do not use any stainless steel cleaners.
7
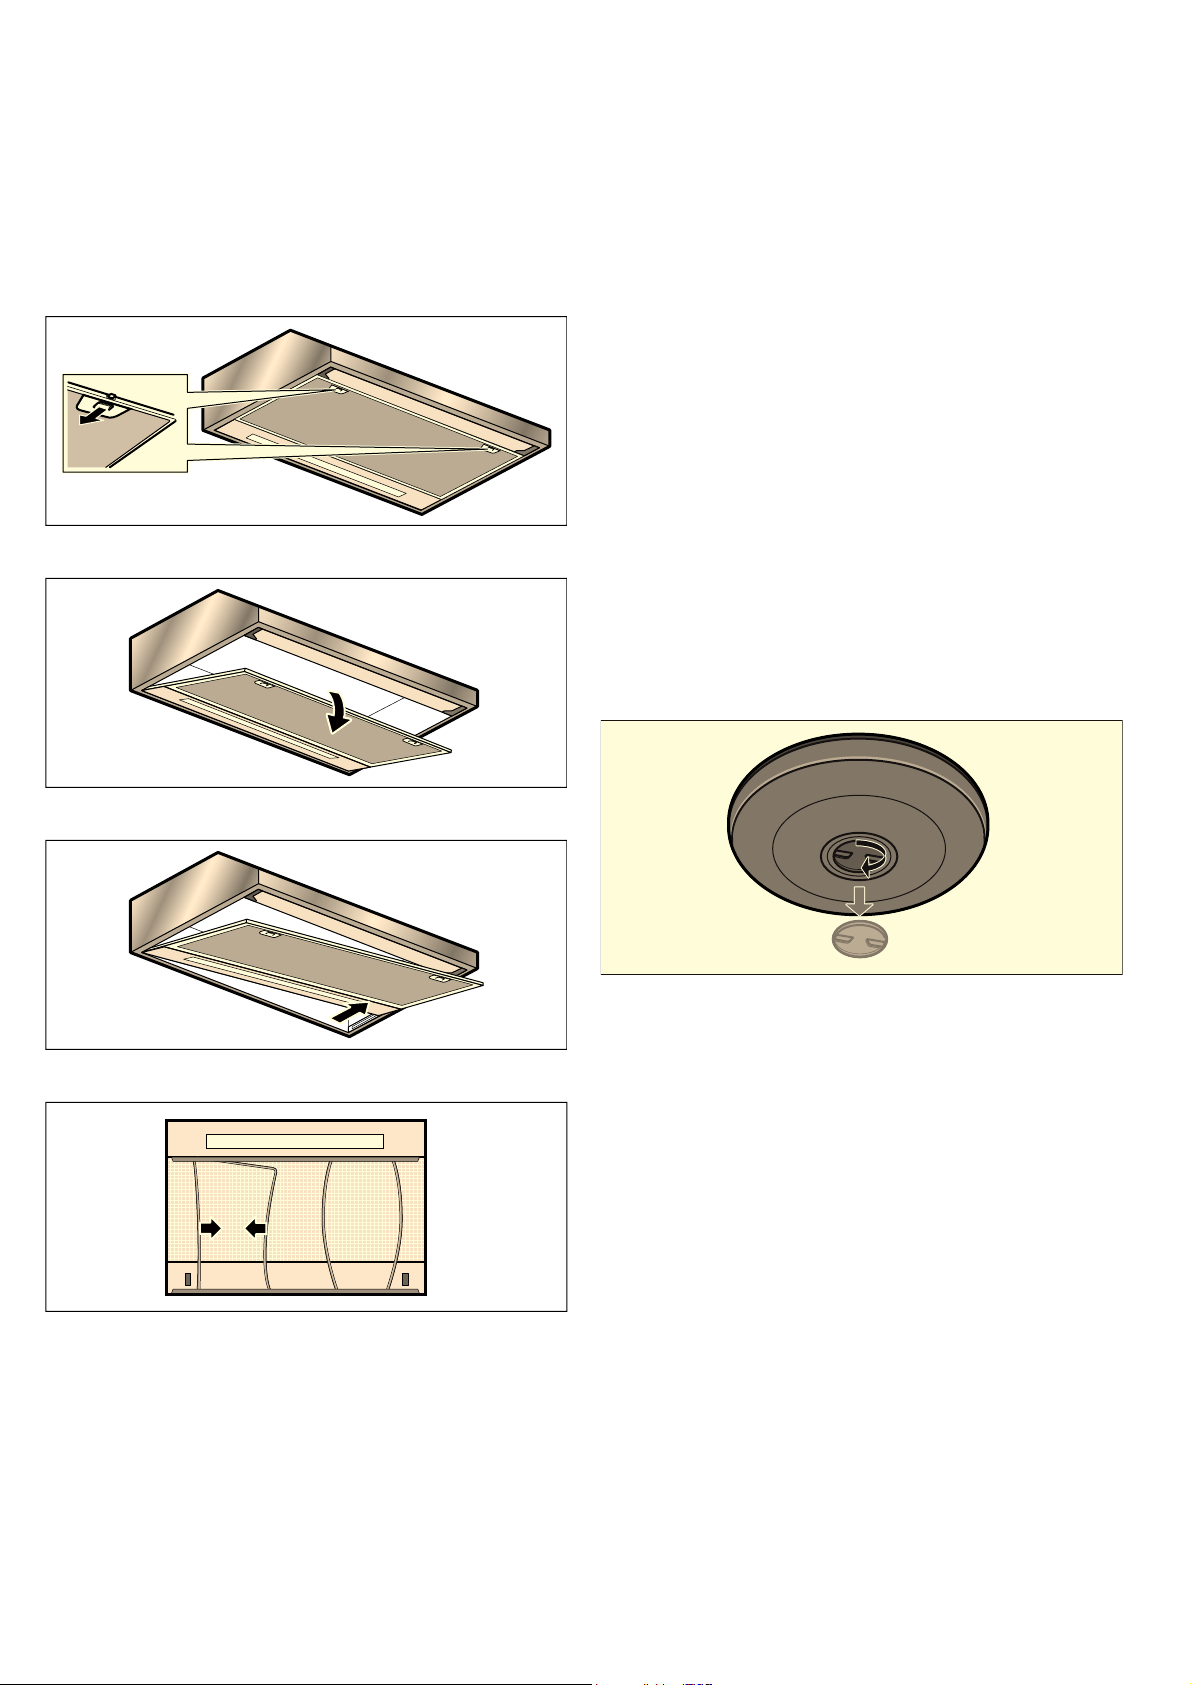
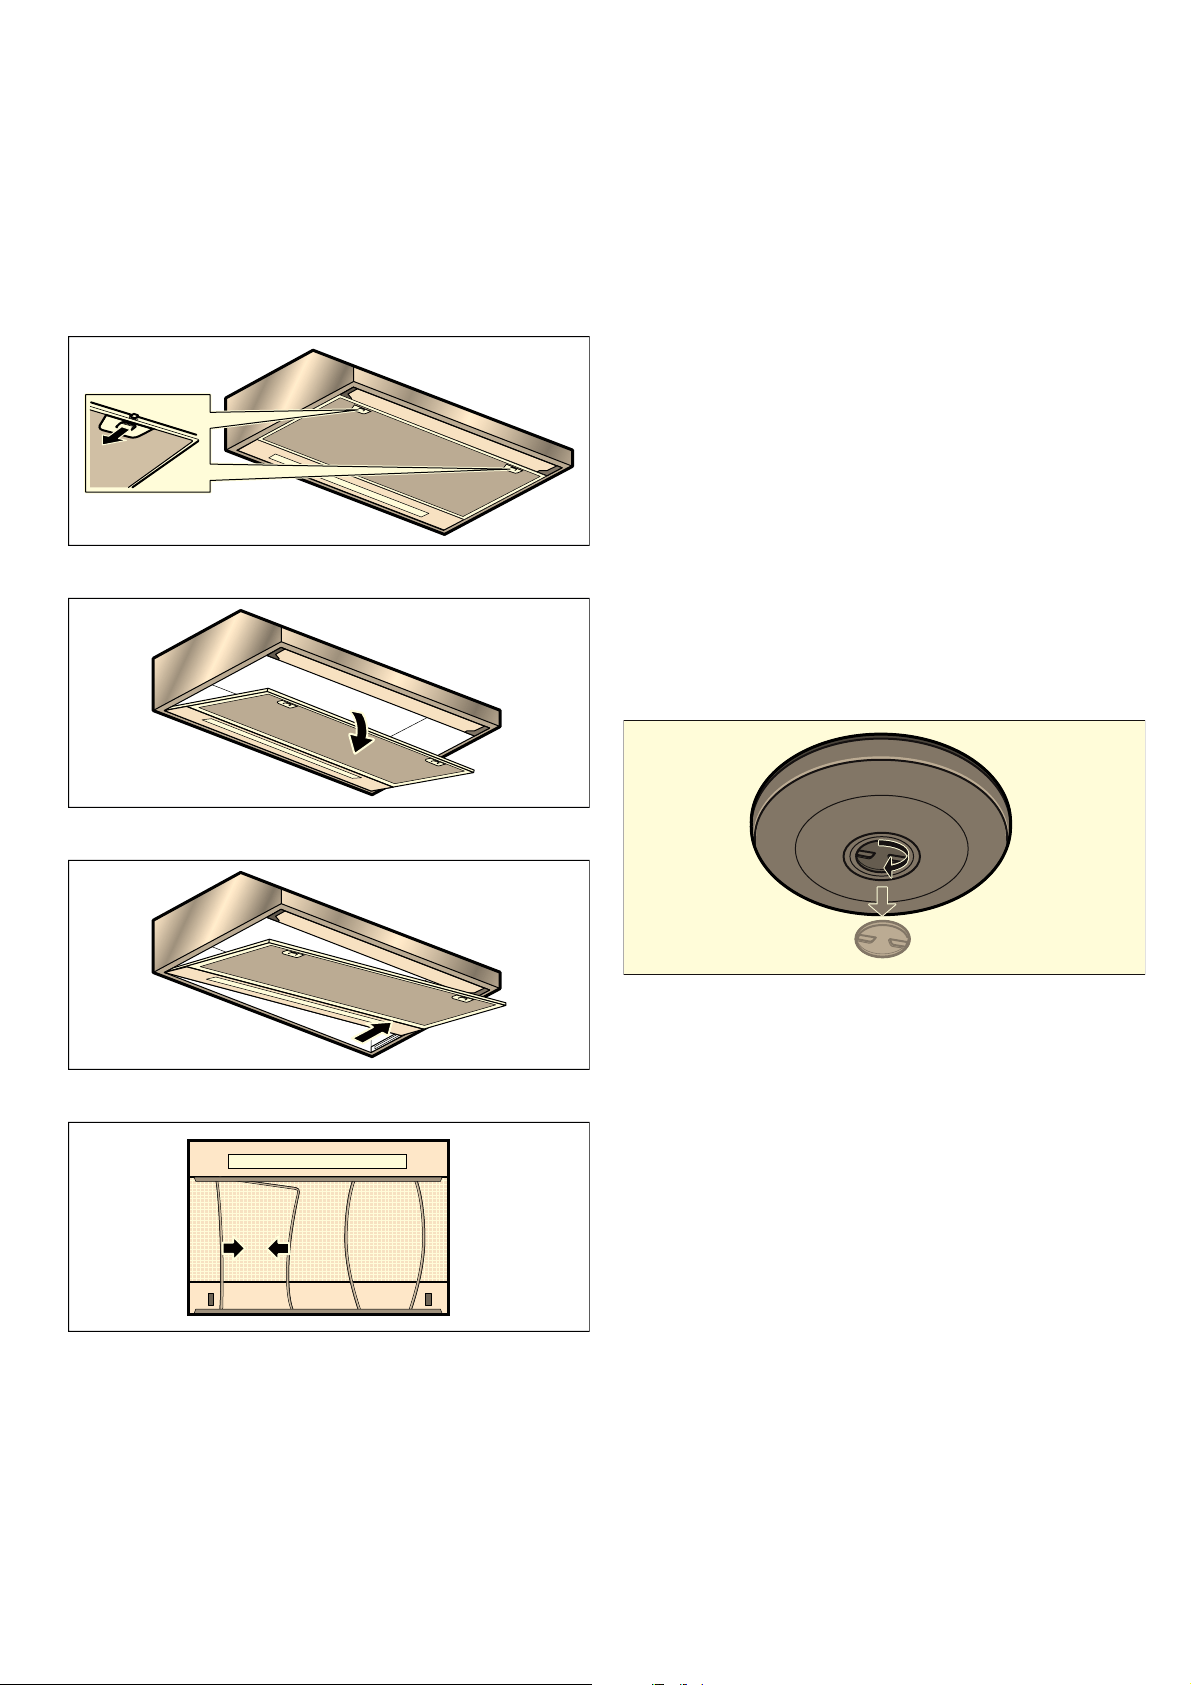
Removing the fleece grease filter
: Risk of fire!
Grease deposits in the grease filter may catch fire.
Replace the grease filter at least every two months.
Never operate the appliance without the grease filter.
Note: Only use genuine replacement filters. This ensures
compliance with safety regulations and optimal performance of
the appliance.
1. Press the locks on the left and right of the filter grid.
2. Swing the filter grid down.
3. Position the filter grid at an angle and remove it.
4. Remove the wires and then remove the fleece grease filter.
5. After removing the fleece grease filter, clean the inside of the
appliance.
6. Clean the filter grid.
Fitting the fleece grease filter
1. Trim the new fleece grease filter to the required size and
place it in the filter grid.
2. Clamp the fleece grease filter in place with the wires.
3. Insert the filter grid.
Note: Make sure that the locks on the left and right of the
filter grid engage.
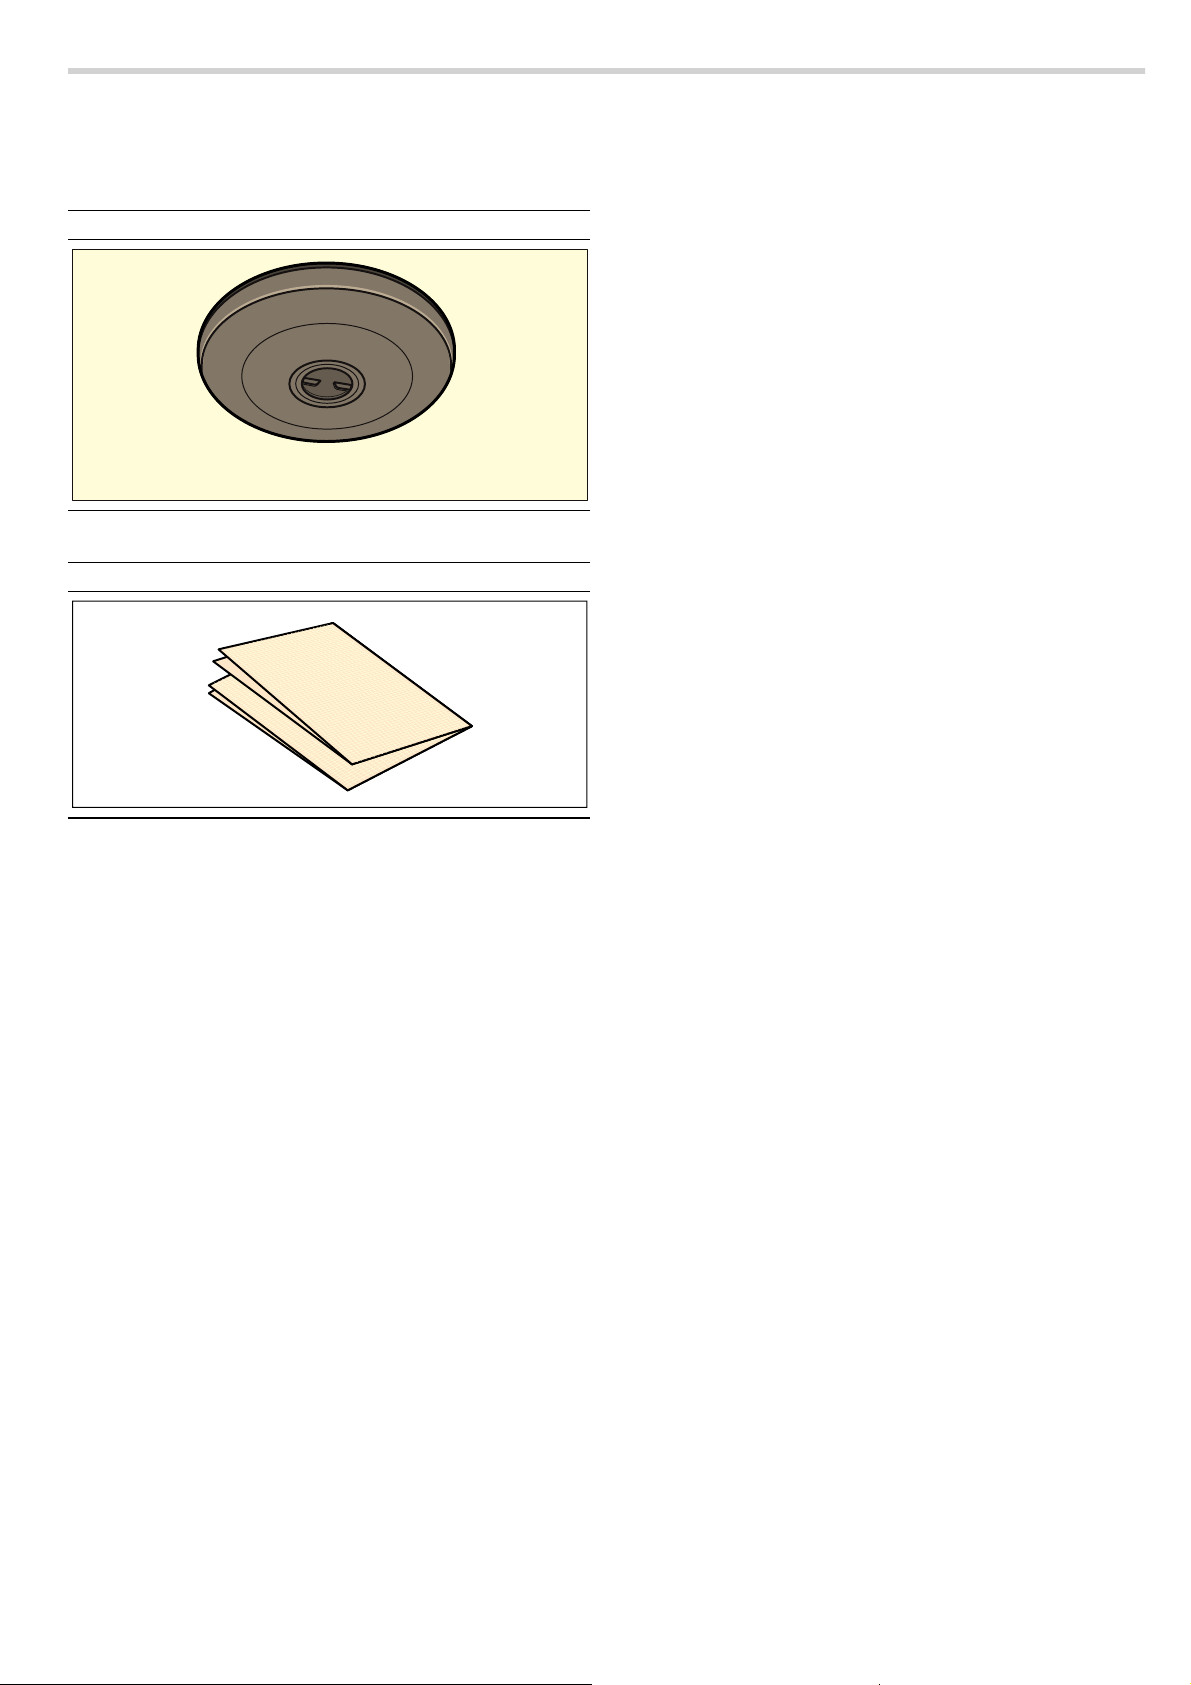
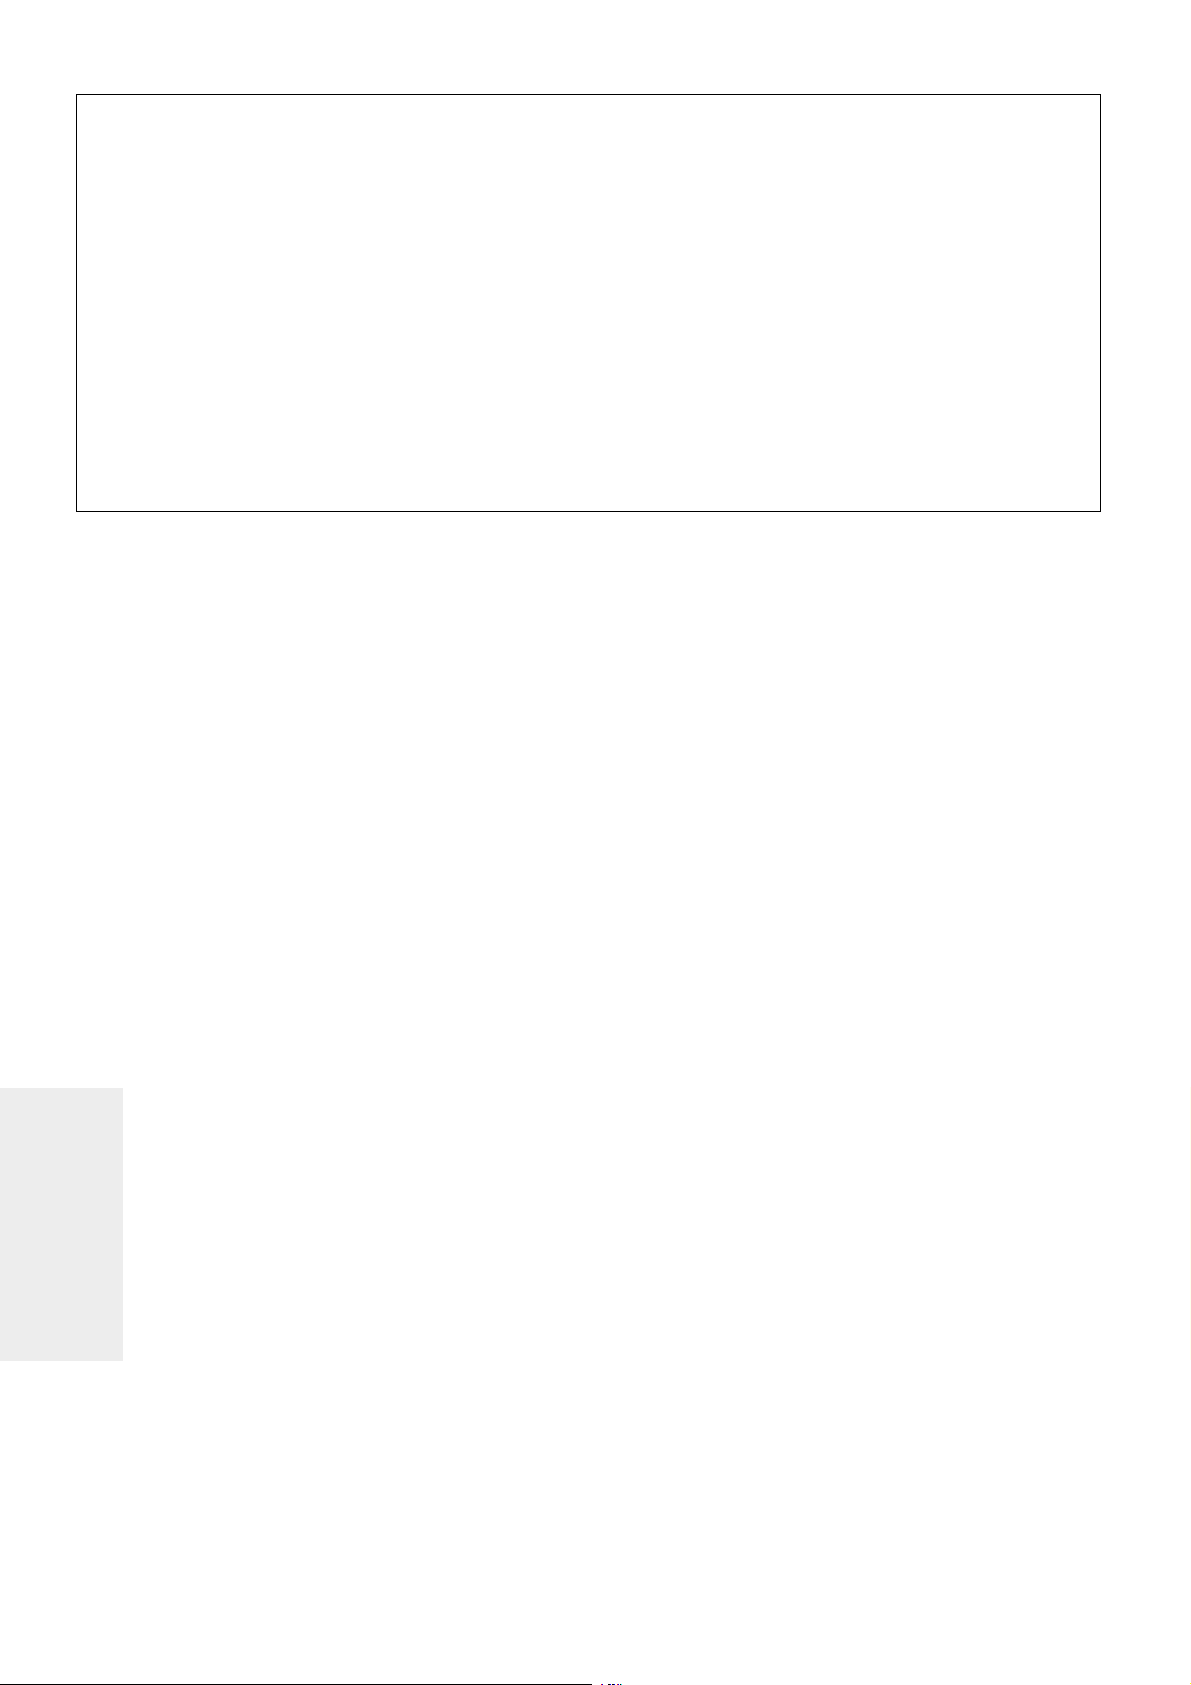
Changing the activated charcoal filter (only in
circulating-air mode)
In order to guarantee efficient odour filtration, the filter must be
serviced regularly.
The activated charcoal filters must be replaced at least every
4 months.
Notes
■ The activated charcoal filters are not included in the delivery.
The activated charcoal filters can be obtained from specialist
retailers, from our after-sales service or from the Online Shop.
■ The activated charcoal filters cannot be cleaned or
reactivated.
Note: Only use genuine replacement filters. This ensures
optimal performance of the appliance.
1. Remove the fleece grease filter; see the Removing the fleece
grease filter section.
2. Undo the threaded joints on the activated charcoal filter
cover.
3. Remove the activated charcoal filter.
4. Insert the new activated charcoal filter.
5. Screw the covers into place.
6. Fit the fleece grease filter; see the Fitting the fleece grease
filter section.
8
Trouble shooting
Malfunctions often have simple explanations. Please read the
following notes before calling the after-sales service.
: Risk of electric shock!
Incorrect repairs are dangerous. Repairs may only be carried
out and damaged power cables replaced by one of our trained
after-sales technicians. If the appliance is defective, unplug the
appliance from the mains or switch off the circuit breaker in the
fuse box. Contact the after-sales service.
Fault table
--------
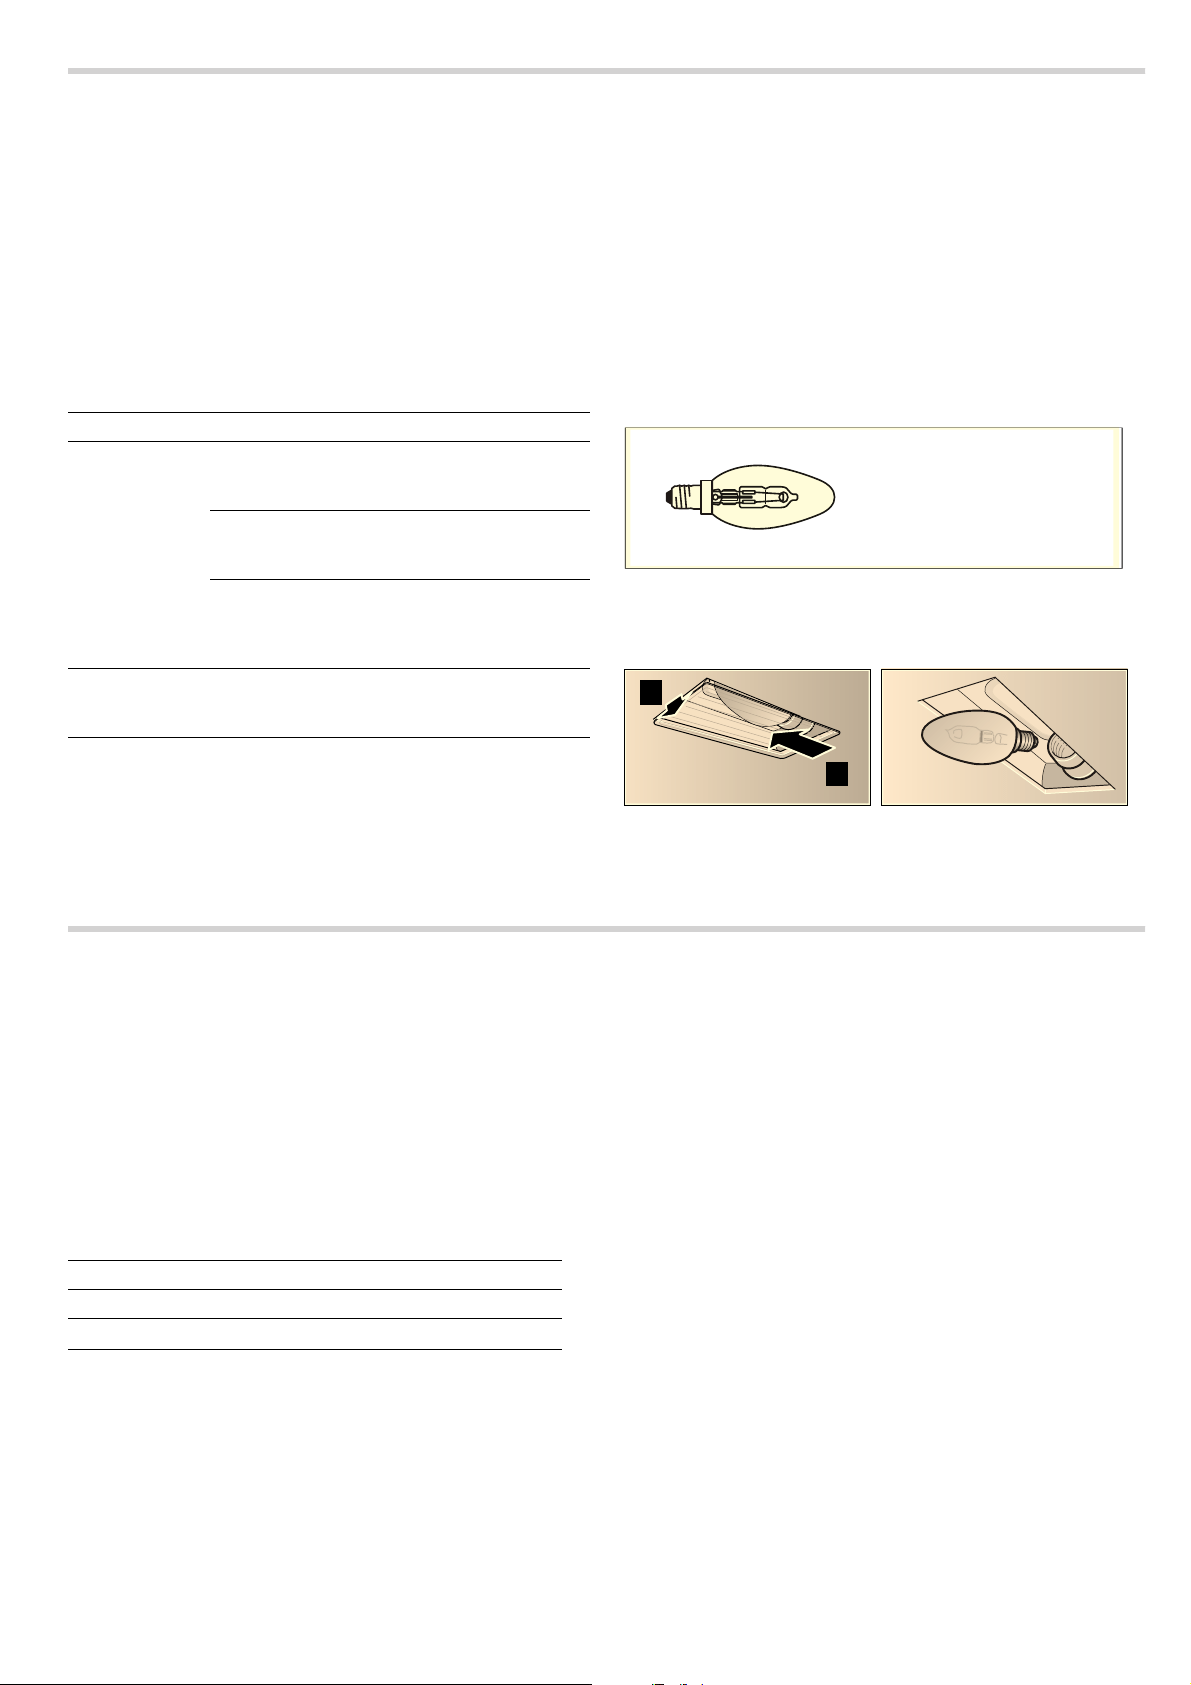
Replacing the LED lights
: Risk of electric shock!
When changing the bulbs, the bulb socket contacts are live.
Before changing the bulb, unplug the appliance from the mains
or switch off the circuit breaker in the fuse box.
: Risk of injury!
The light emitted by LED lights is very dazzling, and can
damage the eyes (risk group 1). Do not look directly into the
switched on LED lights for longer than 100 seconds.
Important! Only use bulbs of the same type and wattage.
1. Lift the bulb cover slightly and move it towards the outside of
the appliance.
2. Unscrew the bulb and replace it with a bulb of the same type.
3. Fit the bulb cover.
4. Plug in the mains plug and switch the fuse back on.
After-sales service
Our after-sales service is there for you if your appliance needs
to be repaired. We will always find the right solution in order to
avoid unnecessary visits from a service technician.
When calling us, please quote the product number (E no.) and
the production number (FD no.) so that we can provide you with
the correct advice. The rating plate with these numbers can be
found inside the appliance (remove the filter grid to gain
access).
You can make a note of the numbers of your appliance and the
telephone number of the after-sales service in the space below
to save time should it be required.
Please be aware that a visit by an after-sales engineer will be
charged if a problem turns out to be the result of operator error,
even during the warranty period.
Please find the contact data of all countries in the enclosed
customer service list.
To book an engineer visit and product advice
Rely on the professionalism of the manufacturer. You can
therefore be sure that the repair is carried out by trained service
technicians who carry original spare parts for your appliances.
Problem Possible cause Solution
The appliance
does not work
The plug is not
plugged into the
mains
Connect the appliance to
the power supply
Power cut Check whether other
kitchen appliances are
working
The fuse is
faulty
Check in the fuse box to
make sure that the fuse for
the appliance is in working
order
The lighting
does not work.
The LED lights
are defective.
You can read about this in
the section entitled "Replac-
ing the LED lights".
DRBB/F-4-220-240-E14-35/100
E no. FD no.
After-sales service
O
GB 0344 892 8979
Calls charged at local or mobile rate.
IE 01450 2655
0.03 € per minute at peak. Off peak 0.0088 € per
minute.
9
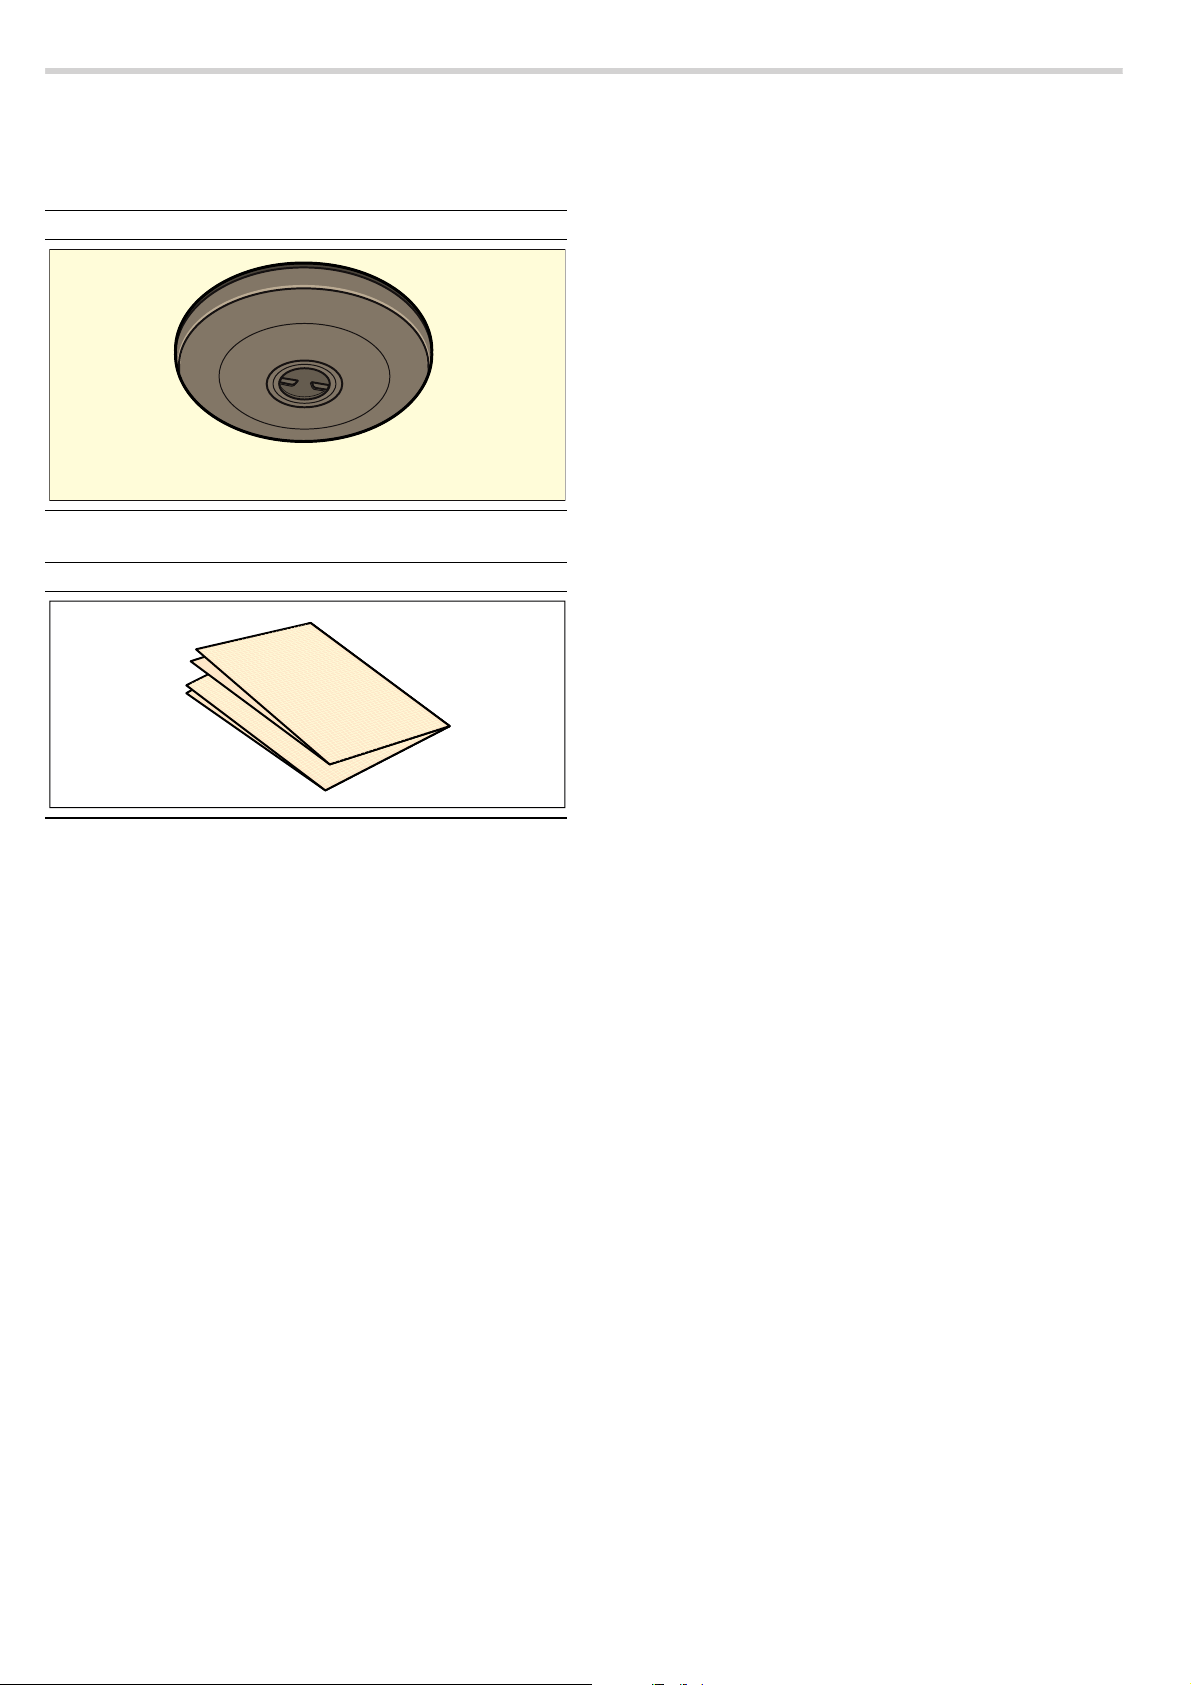
Accessories
(not included in the scope of delivery)
Activated charcoal filter
Fleece grease filter
--------
DHZ2701
DHZ2140
10
ì Índice
[pt]Instruções de serviço
Instruções de segurança importantes................................... 10
Protecção do meio ambiente.................................................. 12
Poupar energia.................................................................................12
Eliminação ecológica......................................................................12
Tipos de funcionamento ......................................................... 12
Função com exaustão de ar..........................................................12
Função com recirculação de ar....................................................12
Operar o aparelho.................................................................... 13
Regular o ventilador........................................................................ 13
Iluminação.........................................................................................13
Limpeza e manutenção ........................................................... 13
Anomalias, o que fazer? ......................................................... 15
Tabela de anomalias.......................................................................15
Serviço de Assistência Técnica ............................................. 15
Acessórios ............................................................................... 16
Produktinfo
Obtenha mais informações relativas a produtos, acessórios,
peças sobresselentes e Assistência Técnica na Internet:
www.bosch-home.com e na loja Online:
www.bosch-eshop.com
: Instruções de segurança importantes
Leia atentamente o presente manual. Só
assim poderá utilizar o seu aparelho de
forma segura e correcta. Guarde as
instruções de utilização e montagem para
consultas futuras ou para futuros
utilizadores.
Só com uma montagem especializada e
em conformidade com as instruções de
montagem, pode ser garantida a segurança
durante a utilização. O instalador é
responsável pelo funcionamento correto no
local de montagem.
Este aparelho foi concebido apenas para
uso doméstico. O aparelho não foi
concebido para o funcionamento no
exterior. Vigie o aparelho durante o
funcionamento. O fabricante não é
responsável por danos provocados pela
utilização inadequada ou por
manuseamento errado.
O aparelho foi concebido para ser utilizado
até a uma altitude de 2000 metros acima
do nível do mar, no máximo.
Este aparelho não pode ser usado por
pessoas (incluindo crianças) com
capacidades físicas, sensoriais ou
psíquicas limitadas ou com pouca
experiência e conhecimentos, a não ser
que estas pessoas sejam supervisionadas
ou acompanhadas na utilização do
aparelho por uma pessoa responsável pela
sua segurança.
Crianças não podem brincar com o
aparelho. A limpeza e a manutenção a
serem efetuadas pelo utilizador não devem
ser executadas por crianças, a não ser com
idade igual ou superior a 8 anos e se
encontrem sob vigilância.
As crianças menores de 8 anos devem
manter-se afastadas do aparelho e do cabo
de ligação.
Examine o aparelho depois de o
desembalar. Se forem detectados danos de
transporte, não ligue o aparelho.
Este aparelho não foi previsto para ser
utilizado com um temporizador externo ou
um telecomando externo.
Perigo de asfixia!
O material de embalagem é perigoso para
as crianças. Nunca deixe as crianças
brincarem com o material de embalagem.
Perigo de vida!
Os gases de combustão aspirados podem
levar a intoxicação.
Certifique-se de que há sempre reposição
de ar fresco suficiente quando o aparelho é
utilizado no modo de exaustão em conjunto
com equipamentos de aquecimento que
consomem o ar ambiente.
Os equipamentos de aquecimento que
consomem o ar ambiente (p. ex. sistemas
de aquecimento a gás, óleo, lenha ou
carvão, esquentadores, cilindros) utilizam
para a combustão o ar do local de
montagem e transportam os gases de
combustão para o exterior através de um
sistema de exaustão (p. ex. uma chaminé).
Quando o exaustor está ligado, retira o ar
ambiente à cozinha e aos espaços
11
adjacentes - sem ar suficiente é criada uma
pressão negativa. Os gases tóxicos da
chaminé ou da conduta de extração voltam
a ser aspirados para os espaços de
habitação.
■
Por isso, tem que existir sempre a
reposição de ar fresco suficiente no local
da instalação.
■
Uma caixa de entrada/exaustão de ar, só
por si, não garante a manutenção do valor
limite.
O funcionamento sem perigos só é possível
se a pressão negativa no local da
instalação do fogão não ultrapassar os 4
Pa (0,04 mbar). Isto pode ser conseguido
se o ar necessário para a combustão puder
ser reposto através de aberturas que não
fechem (p. ex. portas, janelas), em ligação
com uma caixa de entrada/exaustão de ar,
que permitam uma circulação de ar
suficiente para a combustão.
Consulte sempre a entidade responsável
para avaliar a interligação da ventilação de
toda a casa e sugerir as medidas
adequadas de ventilação.
Se o exaustor funcionar exclusivamente em
circulação de ar, não existe qualquer
limitação na sua utilização.
Perigo de incêndio!
■
A gordura acumulada no filtro pode
incendiar-se.
Substitua o filtro de gorduras, no
mínimo, de 2 em 2 meses.
Nunca utilize o aparelho sem filtro de
gorduras.
Perigo de incêndio!
■
A gordura acumulada no filtro pode
incendiar-se. Nunca trabalhe com uma
chama aberta perto do aparelho (p. ex.
flambear). Instalar o aparelho perto de um
fogão para combustíveis sólidos (p. ex.
madeira ou carvão), somente se existir no
local uma cobertura fechada e não
retirável. Não pode haver fagulhas a voar.
Perigo de incêndio!
■
O óleo e a gordura quentes incendeiam-
se rapidamente. Nunca deixe óleo ou
gordura quentes sem vigilância. Nunca
apague fogo com água. Desligue a zona
de cozinhar. Abafe as chamas com uma
tampa, manta de amianto ou um objecto
equivalente.
Perigo de incêndio!
■
As zonas de cozinhar a gás que não
tenham louça para cozinhar colocada em
cima ficam muito quentes durante o
funcionamento. Um aparelho de
ventilação montado por cima pode ficar
danificado ou incendiar-se. As zonas de
cozinhar a gás devem apenas funcionar
com louça para cozinhar colocada em
cima.
Perigo de incêndio!
■
Quando são utilizados vários bicos a gás
em simultâneo, é produzido grande calor.
Um aparelho de ventilação montado por
cima da placa pode ficar danificado ou
incendiar-se. Nunca utilizar
simultaneamente dois bicos a gás com a
chama no máximo por um período
superior a 15 minutos. Um bico grande
com uma potência superior a 5 kW (Wok)
corresponde à potência de dois bicos a
gás normais.
Perigo de queimaduras!
As peças que se encontram acessíveis
ficam quentes durante o funcionamento do
aparelho. Nunca toque nas peças quentes.
Manter fora do alcance das crianças.
Perigo de ferimentos!
■
Os componentes interiores do aparelho
podem ter arestas vivas. Use luvas de
proteção.
Perigo de ferimentos!
■
Os objetos colocados sobre o aparelho
podem cair. Não colocar objetos sobre o
aparelho.
Perigo de ferimentos!
■
A luz dos LED de iluminação é muito
agressiva e pode provocar danos
oculares (grupo de risco 1). Não olhe
diretamente para as luzes LED acesas
durante mais de 100 segundos.
Perigo de choque eléctrico!
■
Um aparelho avariado pode causar
choques eléctricos. Nunca ligue um
aparelho avariado. Puxe a ficha da
tomada ou desligue o disjuntor no quadro
eléctrico. Contacte o Serviço de
Assistência Técnica.
Perigo de choque eléctrico!
■
As reparações indevidas são perigosas.
As reparações e substituições de cabos
danificados só podem ser efectuadas por
técnicos especializados do Serviço de
Assistência Técnica. Se o aparelho estiver
avariado, puxe a ficha da tomada ou
desligue o disjuntor no quadro eléctrico.
Contacte o Serviço de Assistência
Técnica.
Perigo de choque eléctrico!
12
■
A humidade que se infiltra no aparelho
pode dar origem a um choque eléctrico.
Não utilize aparelhos de limpeza a alta
pressão ou de limpeza a vapor.
Causas de danos
Atenção!
Perigo de danificação devido a danos provocados por
corrosão. Ligar sempre o aparelho quando se cozinha, para
evitar a formação de água de condensação. A água de
condensação pode provocar danos de corrosão.
Perigo de danificação devido a humidade que penetra no
sistema eletrónico. Nunca limpar os elementos de comando
com um pano húmido.
Danos na superfície devido a uma limpeza incorreta. Limpar as
superfícies de aço inoxidável apenas no sentido do polimento.
Não usar produto de limpeza para aço inoxidável nos
elementos de comando.
Danos na superfície devido a produtos de limpeza agressivos
ou abrasivos. Nunca usar produtos de limpeza agressivos ou
abrasivos.
Perigo de danificação devido ao retorno de condensação.
Instalar a conduta de ar com ligeira queda a partir do
equipamento (1ª inclinação).
Protecção do meio ambiente
O seu novo aparelho é especialmente eficiente do ponto de
vista energético. Nesta secção encontrará conselhos para
poupar ainda mais energia ao utilizar o seu aparelho e para o
eliminar de forma adequada.
Poupar energia
■ Quando cozinhar deve garantir uma entrada de ar suficiente,
para que o exaustor funcione de forma eficiente e sem muito
ruído de funcionamento.
■ Adaptar o nível de ventilação à intensidade dos vapores
produzidos ao cozinhar. Utilize o nível intensivo apenas em
caso de necessidade. Um nível de ventilação inferior provoca
um menor consumo de energia.
■ Em caso de vapores intensos, selecione previamente um
nível de ventilação superior. Os vapores já espalhados pela
cozinha tornam necessário um funcionamento mais
prolongado do exaustor.
■ Desligue o exaustor quando ele já não for necessário.
■ Desligue a iluminação quando ela já não for necessária.
■ Limpe ou substitua o filtro nos intervalos indicados, para
aumentar a eficiência da ventilação e evitar o perigo de
incêndio.
Eliminação ecológica
Elimine a embalagem de forma ecológica.
Tipos de funcionamento
Este aparelho pode ser utilizado em modo de exaustão ou de
recirculação de ar.
Função com exaustão de ar
Nota: O ar não deve ser desviado para uma chaminé, que seja
usada para gases de escape de aparelhos que queimem gás
ou outros combustíveis (não se aplica a aparelhos de
circulação de ar).
■ Caso o ar evacuado tenha de ser encaminhado por uma
chaminé de exaustão de fumos ou de gases queimados que
não esteja em funcionamento, é necessária uma autorização
da entidade supervisora da instalação dos aparelhos de
queima.
■ Se o ar evacuado for encaminhado através da parede
exterior, deve ser utilizada uma caixa mural telescópica.
Função com recirculação de ar
Nota: Para se poder eliminar os odores na função com
recirculação de ar, tem que ser montado um filtro de carvão
activo. Para poder tirar proveito das diversas possibilidades de
utilização do aparelho em circulação de ar, leia os prospectos
anexos ou consulte o seu agente especializado. Os acessórios
necessários para o efeito podem ser adquiridos no comércio
especializado, nos Serviços Técnicos ou na loja Online. Os
números de referência dos acessórios encontram-se no final
das Instruções de Serviço.
Este aparelho está marcado em conformidade com
a Directiva 2012/19/UE relativa aos resíduos de
equipamentos eléctricos e electrónicos (waste
electrical and electronic equipment - WEEE).
A directiva estabelece o quadro para a criação de
um sistema de recolha e valorização dos
equipamentos usados válido em todos os Estados
Membros da União Europeia.
O ar aspirado é limpo na sua passagem
pelo filtro de gordura e encaminhado para
o exterior através de um sistema de
tubagem.
O ar aspirado é limpo através da sua passagem
pelo filtro de gorduras e pelo filtro de carvão
activo e conduzido, de novo, para a cozinha.
13
Operar o aparelho
Estas instruções aplicam-se a vários modelos de aparelhos. É
possível que sejam descritos vários pormenores de
equipamento individuais que não se aplicam ao seu aparelho.
Nota: Ligue o exaustor no início da cozedura e desligue-o
apenas após passados alguns minutos da cozedura terminar.
O vapor da cozinha é, desta forma, eliminado com maior
eficácia.
Nota: Abra a tampa de vidro para a frente. Deste modo, a área
de exaustão é aumentada.
Painel de comandos
Regular o ventilador
Nota: Adapte a potência do ventilador sempre às condições
atuais. No caso de elevada formação de vapores, selecione
uma fase de ventilação mais elevada.
Ligar
Coloque o botão deslizante na posição 1, 2 ou 3.
Nota: Se o ventilador estiver ligado, acende-se um LED.
Desligar
Coloque o botão deslizante na posição 0.
Iluminação
A iluminação pode ser ligada ou desligada,
independentemente da ventilação.
Coloque o botão deslizante na posição 1.
Limpeza e manutenção
: Perigo de queimaduras!
O aparelho aquece durante o funcionamento. Deixe o aparelho
arrefecer antes de realizar a limpeza.
: Perigo de choque elétrico!
A penetração de humidade pode causar choque elétrico.
Limpar o aparelho apenas com um pano húmido. Antes da
limpeza, retire a ficha da tomada ou o fusível da caixa de
fusíveis.
: Perigo de choque eléctrico!
A humidade que se infiltra no aparelho pode dar origem a um
choque eléctrico. Não utilize aparelhos de limpeza a alta
pressão ou de limpeza a vapor.
: Perigo de ferimentos!
Os componentes interiores do aparelho podem ter arestas
vivas. Use luvas de proteção.
Produtos de limpeza
Para que as diferentes superfícies não sejam danificadas por
produtos de limpeza errados, tenha em atenção os dados
constantes da tabela. Não utilize
■ produtos de limpeza agressivos ou abrasivos,
■ produtos de limpeza com elevado teor de álcool,
■ esfregões de palha de aço ou esponjas abrasivas,
■ aparelhos de limpeza a alta pressão ou de limpeza a vapor.
Lave bem os panos de esponja novos, antes de os utilizar.
Tenha em atenção todas as instruções e advertências que
acompanham os produtos de limpeza.
1 Iluminação
0 Desligar a iluminação
1 Ligar a iluminação
2 Ventilador
0 Desligar o ventilador
1 Ligar o nível do ventilador 1
2 Ligar o nível do ventilador 2
3 Ligar o nível do ventilador 3
Zona Produto de limpeza
Aço inox Solução de água quente e detergente:
Limpe com um pano multiusos e seque
com um pano macio.
Limpar as superfícies de aço inoxidável
apenas no sentido do polimento.
Através da assistência técnica ou numa
loja especializada podem ser adquiri-
dos produtos de limpeza especiais
para aço inoxidável. Aplique uma
camada fina do produto de limpeza
com um pano macio.
Superfícies lacadas Solução quente à base de detergente:
Limpe com um pano multiusos húmido
e seque com um pano macio.
Não utilize produtos de limpeza para
aço inoxidável.
Alumínio e plástico Limpa-vidros:
Limpe com um pano macio.
Vidro Limpa-vidros:
Limpe com um pano macio. Não utilize
raspadores de vidros.
Elementos de
comando
Solução quente à base de detergente:
Limpe com um pano multiusos húmido
e seque com um pano macio.
Perigo de choque elétrico devido à
entrada de umidade.
Perigo de danificação do sistema ele-
trónico devido à entrada de umidade.
Nunca limpe os elementos de
comando com um pano molhado.
Não utilize produtos de limpeza para
aço inoxidável.
14
Desmontar o filtro de gorduras de feltro
: Perigo de incêndio!
A gordura acumulada no filtro pode incendiar-se.
Substitua o filtro de gorduras, no mínimo, de 2 em 2 meses.
Nunca utilize o aparelho sem filtro de gorduras.
Nota: Utilize apenas filtros originais. Deste modo, são
cumpridas as normas de segurança e é assegurado o
funcionamento ideal.
1. Pressione as fixações da grelha do filtro, do lado esquerdo e
direito.
2. Abra a grelha do filtro para baixo.
3. Coloque a grelha do filtro em posição inclinada e retire-a.
4. Remova os arames e retire o filtro de gorduras de feltro.
5. Após a desmontagem do filtro de gorduras de feltro, limpe o
aparelho por dentro.
6. Limpe a grelha do filtro.
Montar o filtro de gorduras de feltro
1. Recorte o novo filtro de gorduras de feltro com o tamanho
necessário e insira-o na grelha do filtro.
2. Fixe o filtro de gorduras de feltro com os arames.
3. Insira a grelha do filtro.
Nota: Certifique-se de que as fixações à esquerda e direita
da grelha do filtro encaixam.
Mudar o filtro de carvão ativo (só para
funcionamento com recirculação de ar)
Para garantir o grau de eliminação de odores, a manutenção
do filtro tem de ser efetuada regularmente.
Os filtros de carvão ativo devem ser substituídos, pelo menos,
a cada 4 meses.
Notas
■ Os filtros de carvão ativo não vêm incluídos no fornecimento.
Os filtros de carvão ativo podem ser adquiridos no comércio
especializado, no Serviço de Assistência Técnica ou na loja
online.
■ Os filtros de carvão ativo não podem ser limpos nem
ativados de novo.
Nota: Utilize apenas filtros originais. Deste modo, é
assegurado o funcionamento ideal.
1. Desmonte o filtro de gorduras de feltro, consulte o capítulo
Desmontar o filtro de gorduras de feltro.
2. Solte os parafusos das tampas dos filtros de carvão ativo.
3. Retire os filtros de carvão ativo.
4. Monte os filtros de carvão ativo novos.
5. Aparafuse as tampas.
6. Monte o filtro de gorduras de feltro, consulte o capítulo
Montar o filtro de gorduras de feltro.

15
Anomalias, o que fazer?
Muitas vezes, é fácil reparar as falhas sem a ajuda de terceiros.
Observe as seguintes indicações antes de contactar o Serviço
de Apoio ao Cliente.
: Perigo de choque eléctrico!
As reparações indevidas são perigosas. As reparações e
substituições de cabos danificados só podem ser efectuadas
por técnicos especializados do Serviço de Assistência Técnica.
Se o aparelho estiver avariado, puxe a ficha da tomada ou
desligue o disjuntor no quadro eléctrico. Contacte o Serviço de
Assistência Técnica.
Tabela de anomalias
--------
Substituir luzes LED
: Perigo de choque elétrico!
Ao substituir as lâmpadas, os contactos do casquilho da
lâmpada estão sob corrente. Antes de proceder à substituição,
retire a ficha ou desligue o disjuntor no quadro elétrico.
: Perigo de ferimentos!
A luz dos LED de iluminação é muito agressiva e pode
provocar danos oculares (grupo de risco 1). Não olhe
diretamente para as luzes LED acesas durante mais de 100
segundos.
Importante!Utilize apenas lâmpadas do mesmo tipo e com a
mesma potência.
1. Levante ligeiramente a cobertura da lâmpada e desloque-a
para o lado exterior do aparelho.
2. Desmonte a lâmpada e substitua-a por outra do mesmo tipo.
3. Monte a cobertura da lâmpada.
4. Ligue a ficha à tomada ou volte a ligar o fusível.
Serviço de Assistência Técnica
Se o seu aparelho precisar de ser reparado, o nosso Serviço
de Assistência Técnica está à sua disposição. Encontramos
sempre uma solução adequada, também para evitar
deslocações desnecessárias do técnico.
Quando efetuar a chamada, indique o número de produto (N.°
E) e o número de fabrico (N.° FD) do aparelho para podermos
prestar um serviço de qualidade. A placa de caraterísticas com
os números encontra-se no compartimento interior do aparelho
(para isso, desmontar a grelha do filtro).
Para que, em caso de necessidade, não tenha de procurar,
poderá introduzir aqui os dados do seu aparelho e o número
de telefone do serviço de assistência técnica.
Tenha em atenção que a visita do técnico da assistência ao
cliente não é gratuita em caso de uma utilização incorreta,
mesmo durante o período de garantia.
Os dados para contacto com todos os países encontram-se no
índice dos Serviços Técnicos anexo.
Ordem de reparação e apoio em caso de anomalias
Confie na competência do fabricante. Assim, poderá ter a
certeza de que a reparação é executada por técnicos
especializados com a devida formação e com as peças de
reparação originais para o seu aparelho.
Anomalia Causa possível Resolução
O aparelho não
funciona
A ficha não está
ligada
Ligue o aparelho à corrente
elétrica
Falha de cor-
rente
Verifique se os outros ele-
trodomésticos funcionam
Falha do fusível Verifique na caixa de fusí-
veis se o fusível correspon-
dente ao aparelho está em
boas condições
A iluminação
não funciona.
As luzes LED
estão avaria-
das.
Leia sobre este assunto, a
secção "Substituir luzes
LED".
DRBB/F-4-220-240-E14-35/100
N.º E N.° FD
Serviço de Assistência
Técnica
O
PT 21 4250 730
PT 0,10€/min. Mobile 0,25€/min
İthala
tçı
Firma
:
BSH Ev Aletleri ve Sanayi Ticaret
A.Ş.
Fatih Sultan Mehmet Mah. Balkan
Cad. No:51
Ümraniye-İstanbul-Türkiye
Tel : 0216 528 90 00 Fax : 0216
528 99 99
Üretic
i
Firma
:
Robert Bosch Hausgeräte GmbH
Carl-Wery Straße 34
81739 München, Germany
www.bosch-home.com
Phone : 00 49 89 4590-00
16
Acessórios
(não fornecidos com o equipamento)
Filtro de carvão ativo
Filtro de gorduras de feltro
--------
DHZ2701
DHZ2140


960501
*9001317404*
9001317404
Robert Bosch Hausgeräte GmbH
Carl-Wery-Straße 34
81739 München
Germany
www.bosch-home.com