Loading ...
Loading ...
3
INSTRUCTIONS FOR USE
1. Before using your Cuisinart
®
Griddler™
overstuffed sandwich maker for the
first time, remove all protective paper
and wrapping. Remove any dust from
shipping by wiping the plates with
a damp cloth.
2. Preheat the sandwich maker. Close
lid and plug cord into a 120V AC wall
outlet. The red light will go on to signal
power. The green indicator light will go
on when unit is ready to use.
Note: The first time you use your
sandwich maker, it may have a slight
odor and may smoke a bit. This is
normal, and common to appliances
with a nonstick surface.
Note:
The cooking plates of this
Cuisinart
®
Griddler™ overstuffed
sandwich maker have been treated with
a special nonstick coating. Before the
first use, we suggest you season the
grids with cooking spray or oil. If using
oil, apply with a paper towel or pastry
brush. You may find it helpful to repeat
this process before each use of the
sandwich maker.
3. When the green indicator light goes
on, place ingredients on bottom plate
according to recipes. Close the lid and
lock it.
4. It may take several seconds for the
green light to go off. This is normal.
5. Once the food is ready to eat, the green
light will come on again.
6. Remove food by gently loosening the
edges with a heat-proof plastic spatula.
Never use metal utensils, as they may
damage the nonstick coating.
7. Always disconnect the plug from the
wall outlet once cooking is completed.
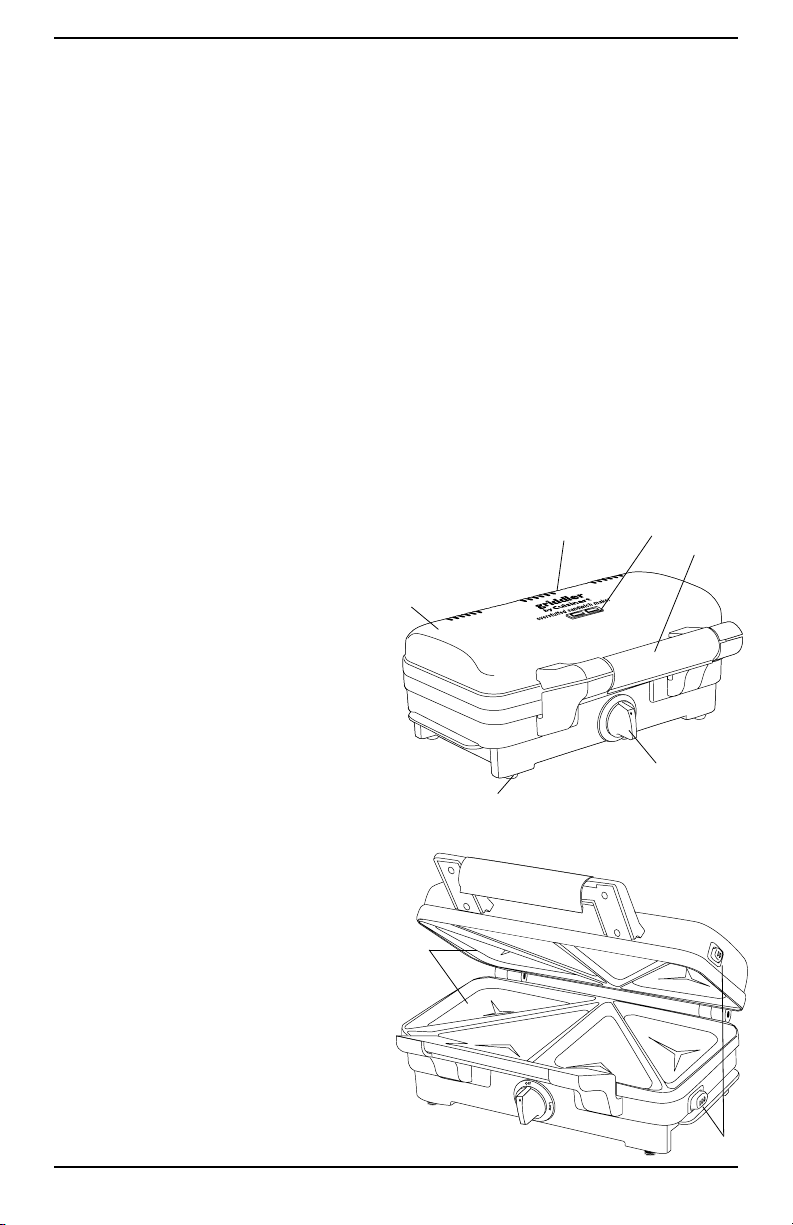
SPECIAL FEATURES
1. Indicator Lights
Red light illuminates when sandwich
maker has power on.
Green light illuminates when sandwich
maker is ready to cook.
Green light illuminates again when food
is ready.
2. Lock Down Lid
Lock-on handle secures contents while
cooking.
3. Rubber Feet
Will not mark countertop; keep unit
steady.
4. Nonstick Plates
Removable and dishwasher safe.
5. Brushed Stainless Steel Housing
Cover
6. Cord Storage (not shown)
Cord wraps under unit for easy storage.
7. Plate Release Button
Push in to release and remove cooking
plates.
8. Temperature Control Knob
Low, Medium and High settings.
1.
5.
3.
6.
2.
8.
4.
7.
Loading ...
Loading ...
Loading ...