User Manual Smart Lock Touch & Wi-Fi
PRODUCT OVERVIEW
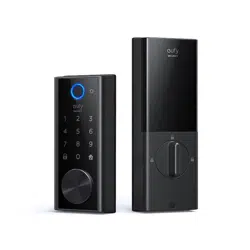
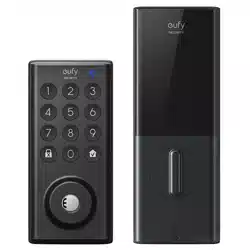
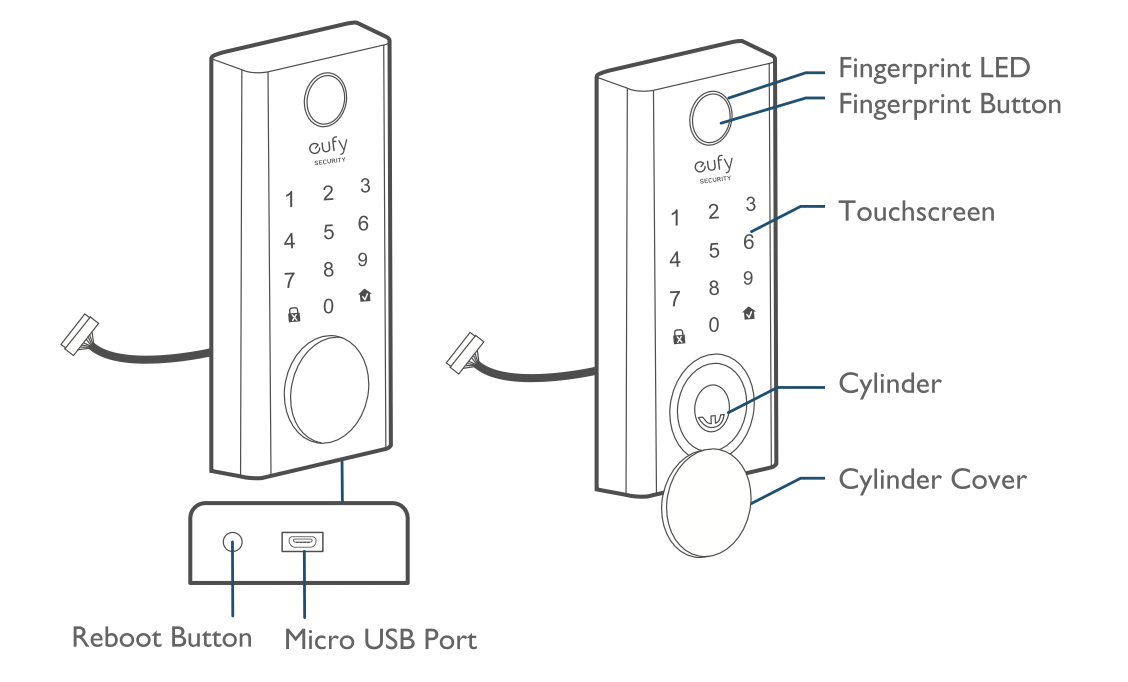
Front View
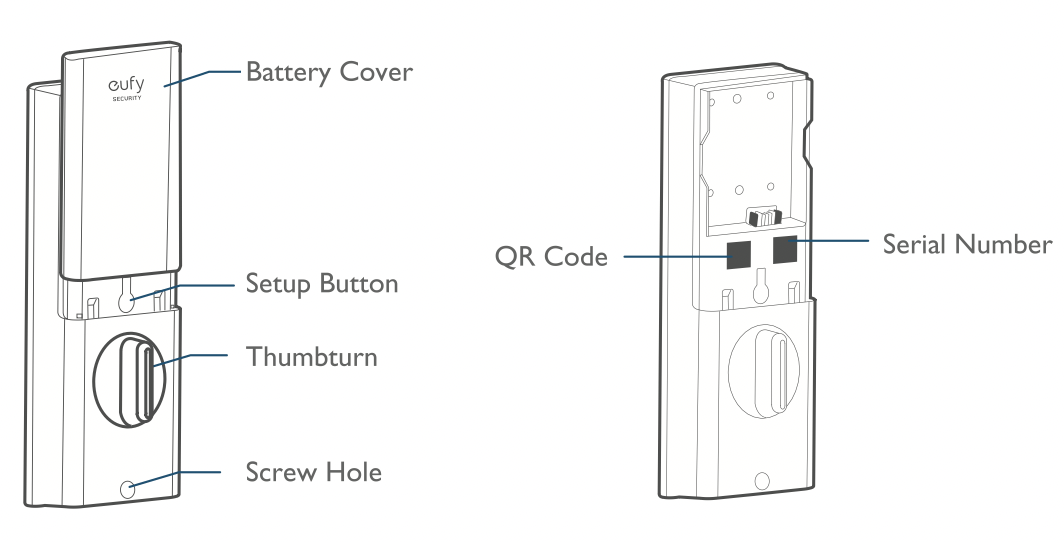
Rear View
GETTING STARTED
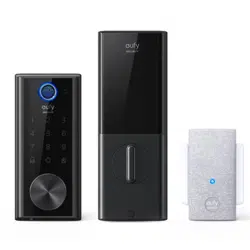
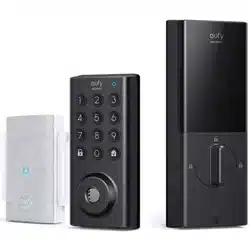
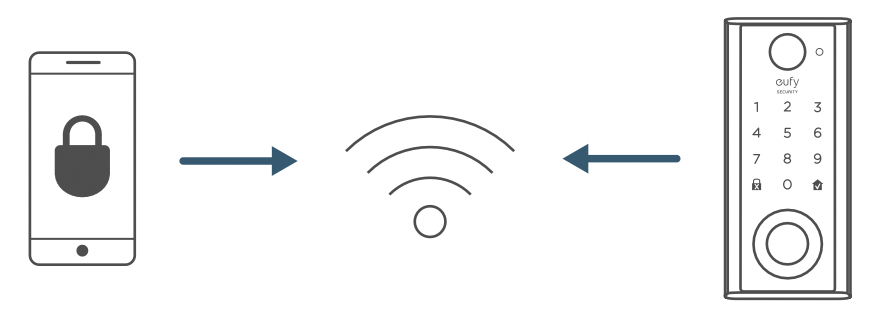
Connect to the Network via Wi-Fi
Featuring a built-in Wi-Fi module, the Smart Lock Touch & Wi-Fi can be connected to the network via your home router.
Prepare Door for Installation
1. Make sure that the following criteria are met so that the Smart Lock Touch & Wi-Fi can be installed properly:
- Check the door status. Make sure the doorframe is aligned with the door.
- There are no obstructions stuck in the door frame.
- Leave enough space for the deadbolt to extend into the doorframe when the door is locked.
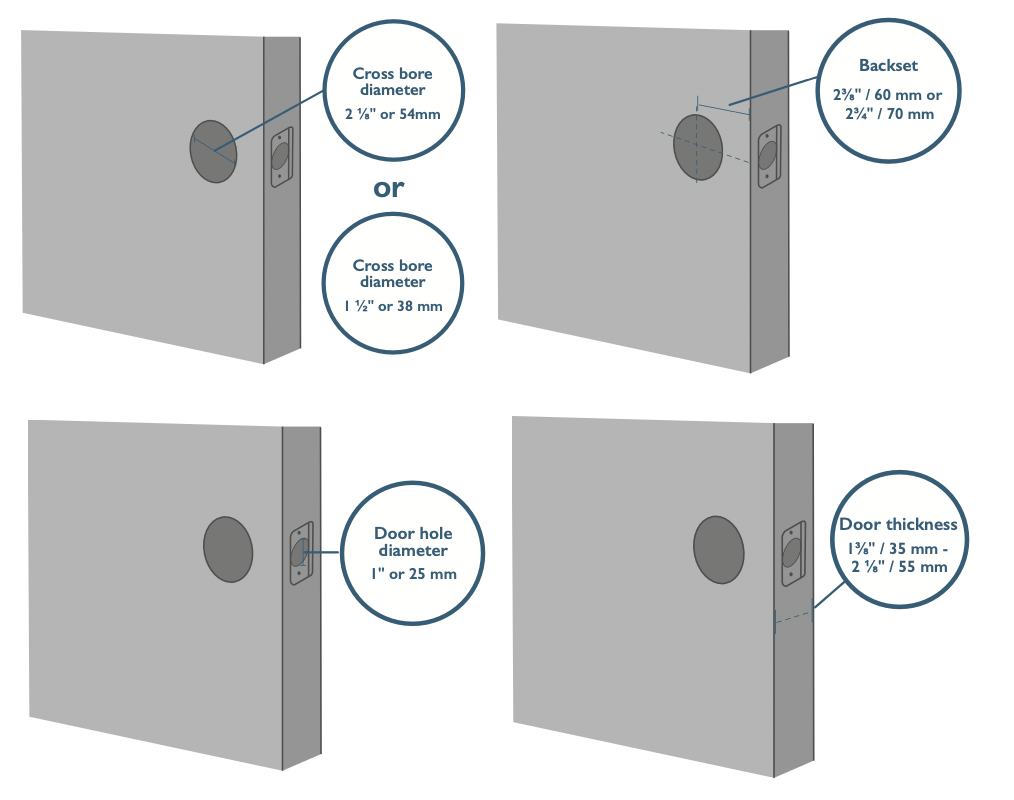
2. Check your door / frame dimensions to make sure that they fit the following measurements:
- The cross bore diameter (2 1/8'' / 54mm or 1 1/2'' / 38mm)
- Backset (2 3/8 / 60mm or 2 3/4'' / 70mm)
- Diameter of the door hole (1'' / 25mm)
- Door thickness (1 3/8'' /35mm - 2 1/8'' / 55mm)
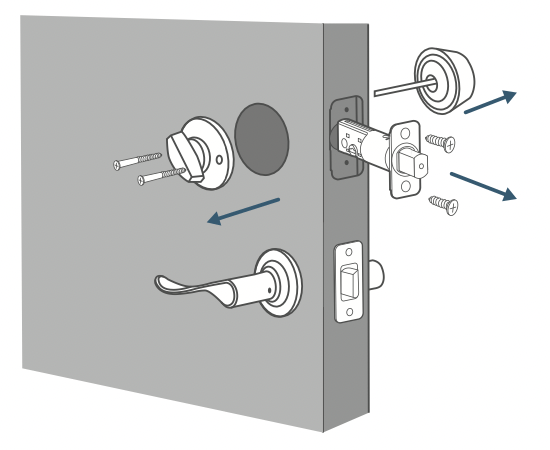
3. If you have an existing lock, remove it, including the bolt.
INSTALLING THE SMART LOCK TOUCH & WI-FI
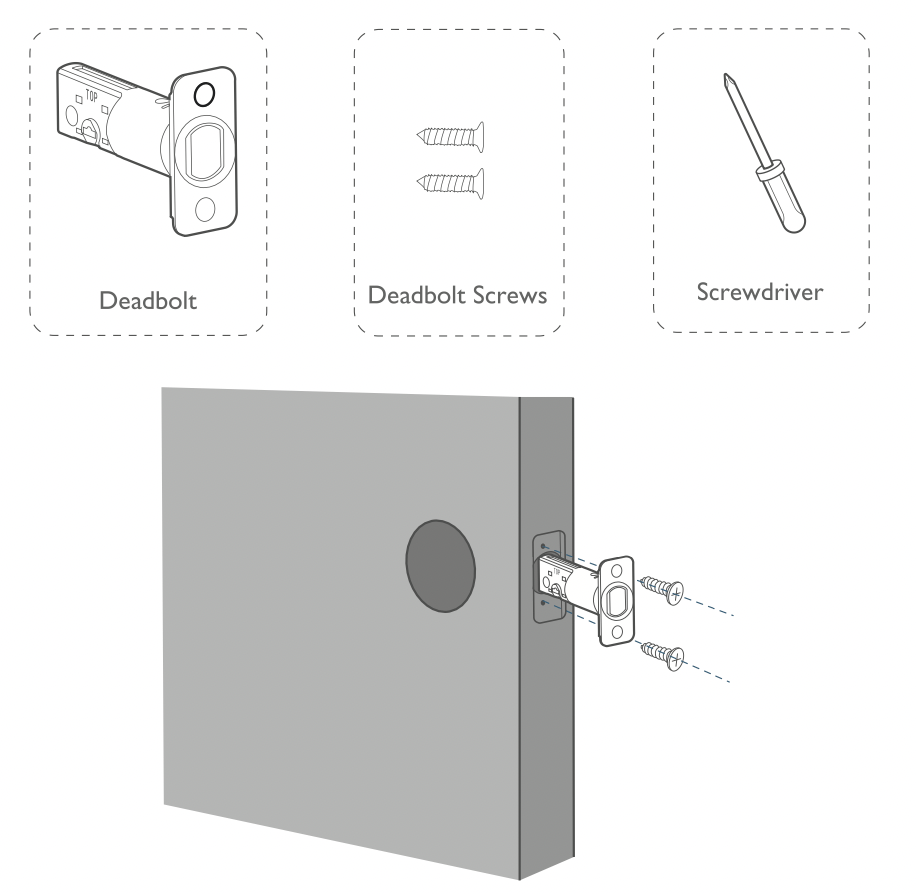
Step 1 : Install the Deadbolt
To install the deadbolt:
- Makesure your door's backset dimension: whether it is 2 3/4'' / 70 mm or 2 3/8'' / 60 mm.
- If your door's backset dimension is 2 3/8'' / 60 mm, use the provided deadbolt to install. If your door's backset is 2 3/4'' / 70 mm, turn the faceplate 180° and pull to extend simultaneously until the deadbolt locks in position as the illustration shows below.
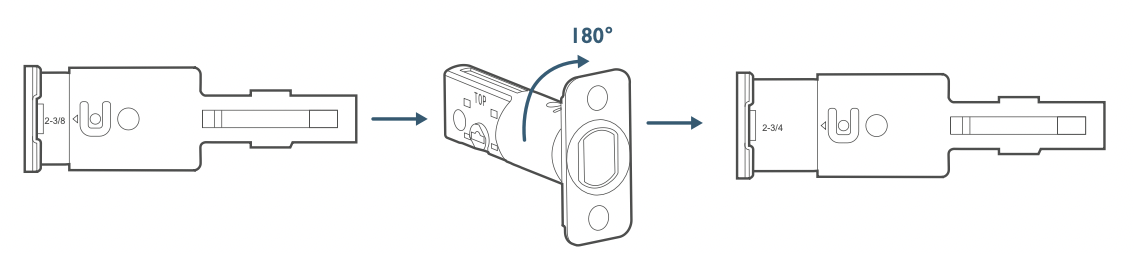
- Insert the deadbolt into the doorframe and makesure the word ''TOP"" faces up as indicated on the deadbolt.
- Screw into the doorframe with a screwdriver (not provide).
What is required: Deadbolt, Deadbolt Screws, Screwdriver (not provided)
Step 2 : Install the Strike Plate
If you have an existing strike plate installed, skip this step.
To install the strike plate:
- Align the strike plate with the center hole of the deadbolt.
- Secure the strike plate with strike screws. Make sure the plate is placed in the correct direction.
To enhance the security, you need to first install the strike reinforcer.
Attach the strike reinforcer on the doorframe and tighten the reinforcement screws with a screwdriver (not provided).
What is required: Strike Plate, Strike Screws, Strike Reinforcer (optional), Reinforcement Screws (optional), Screwdriver (not provided)
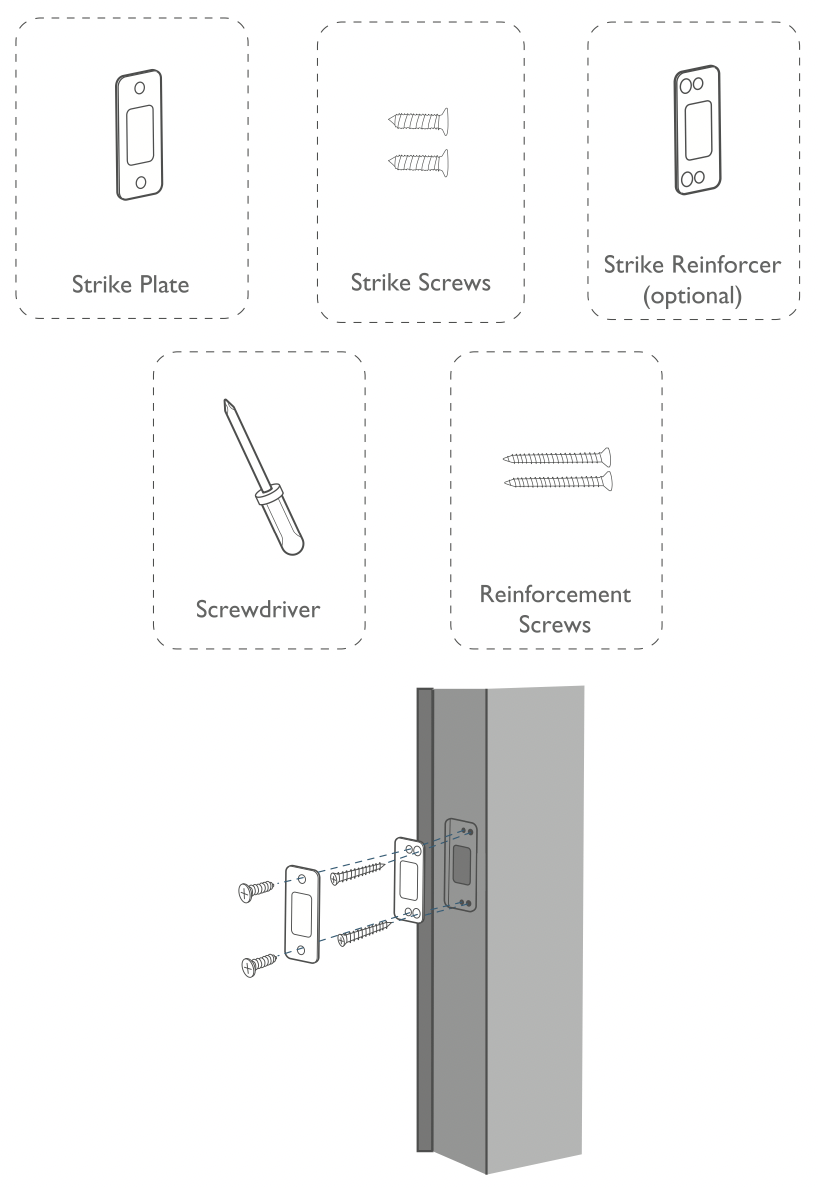
Note: This step is only necessary if you want to maintain BHMA Grade 2 security, or you can install strike plate directly.
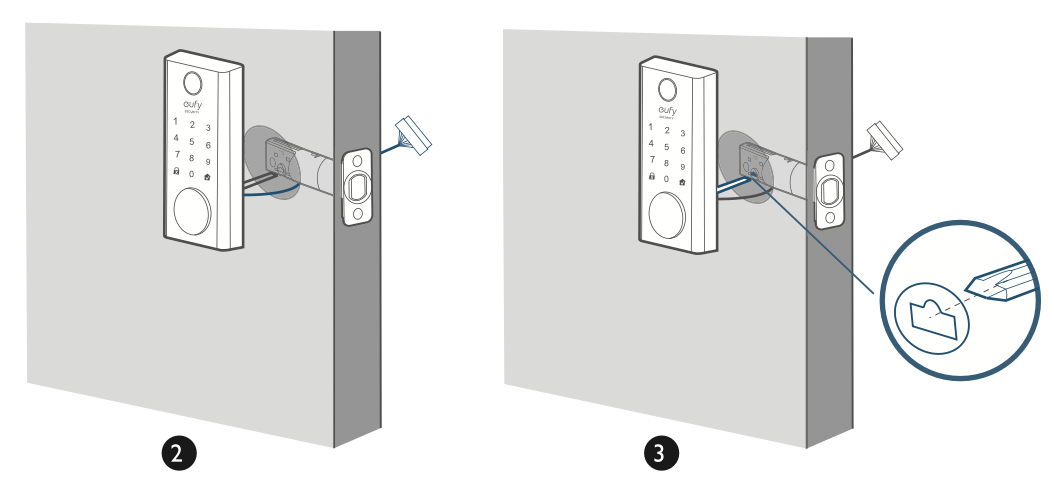
Step 3 : Install the Exterior Assembly
To install the exterior assembly into the doorframe:
- Measure your cross bore dimension and determine the installation steps accordingly.
If the diameter of your cross bore is 2 1/8'' / 54 mm, use the provided spacer to assist in installing the exterior assembly.
If you have a 1 1/2'' / 38 mm crossbore, remove the spacer.
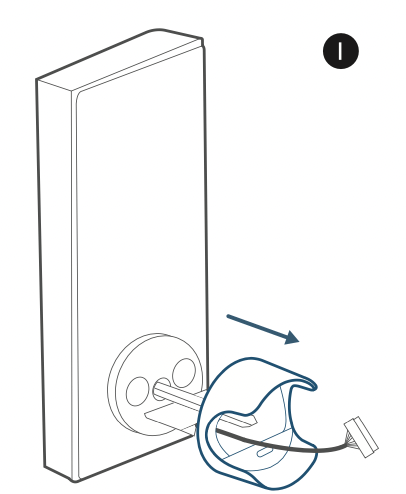
- Route the cable connected on the exterior assembly under the deadbolt.
- Align the tailpiece with the center hole of the deadbolt, and insert it into the center hole.
What is required: Exterior Assembly
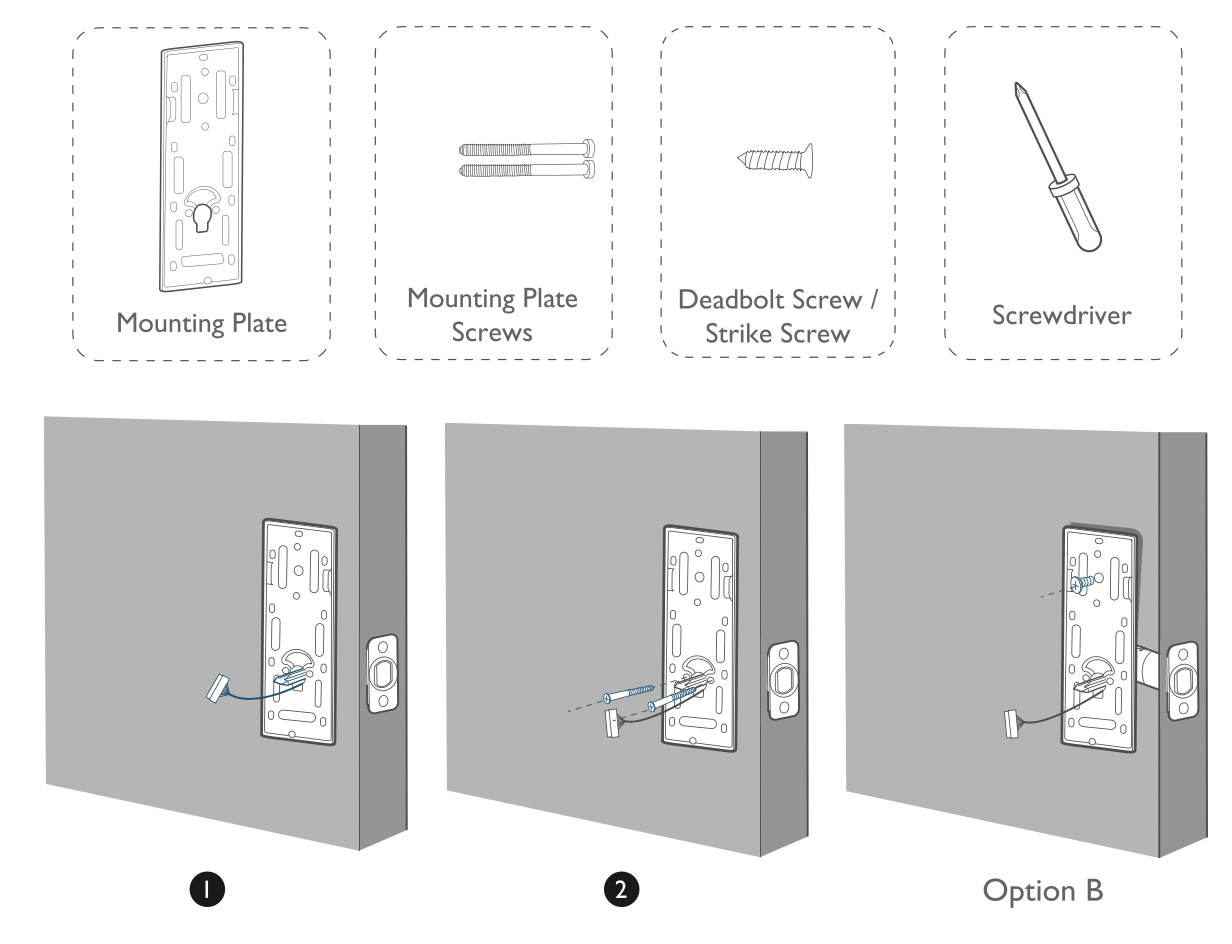
Step 4 : Install the Mounting Plate
- Route the cable through the mounting plate.
- Fix the mounting plate onto the interior doorframe using the mounting plate screws. Make sure the screws go through the holes of the deadbolt and the mounting plate, and lock into place.
Option A: If the mounting plate fits perfectly with the door, go to step 5.
Option B: If the mounting plate is not fastened tightly to the door, use an additional screw.
What is required: Mounting Plate, Mounting Plate Screws, Deadbolt Screw / Strike Screw, Screwdriver (not provided)
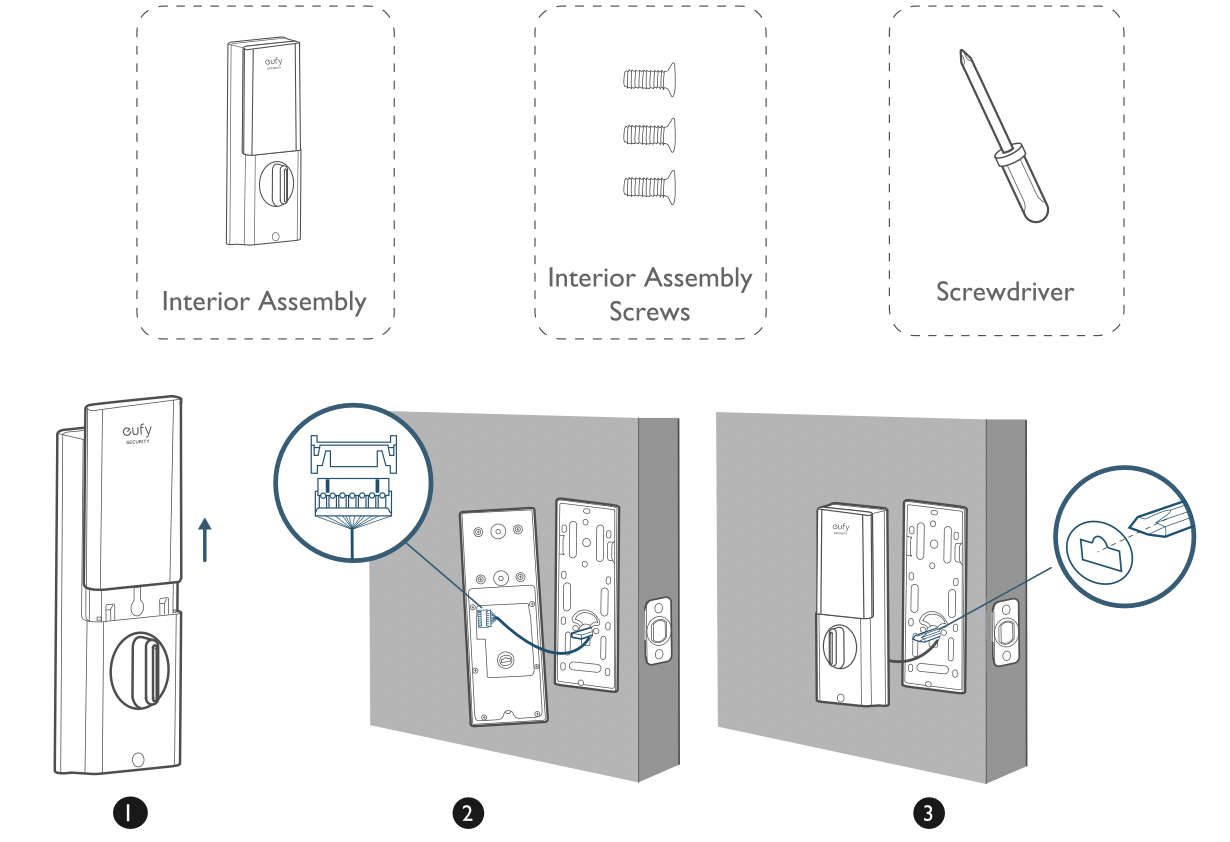
Step 5 : Install the Interior Assembly
To install the Interior Assembly:
- Remove the battery cover.
- Match the wire connector from the circuit board with the one from the interior assembly as illustrated. The wire connector can only be plugged into the socket in one way. Make sure you match the dot on the connector with the pin on the circuit board correctly.
- Align the tailpiece with the key cylinder.
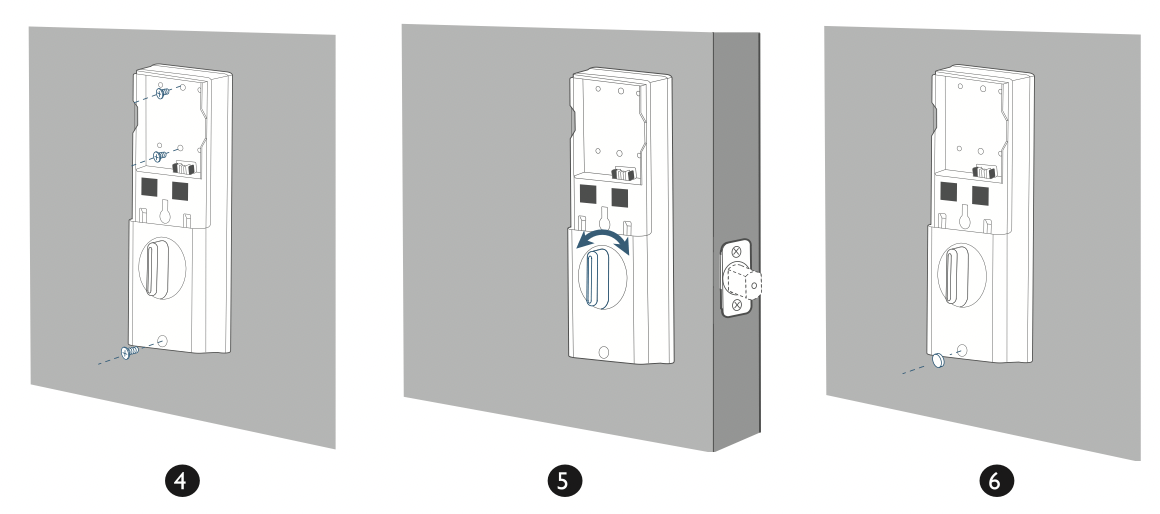
- Secure the provided screws into the interior assembly.
- Turn the thumbturn to check whether the deadbolt is retracted. If the deadbolt does not work smoothly, adjust the screws and install the mounting plate again.
- Use the plug to cover the screw hole at the bottom of the Smart Lock Touch & Wi-Fi.
What is required: Interior Assembly, Interior Assembly Screws, Screwsdriver (not provided)
Note: Check carefully whether the wire is stuck or tangled. If the wire is stuck, re-install the Interior Assembly.
Step 6 : Install the Battery
Align the pin connector on the battery with the pin as illustrated below and slide the battery into the battery compartment.
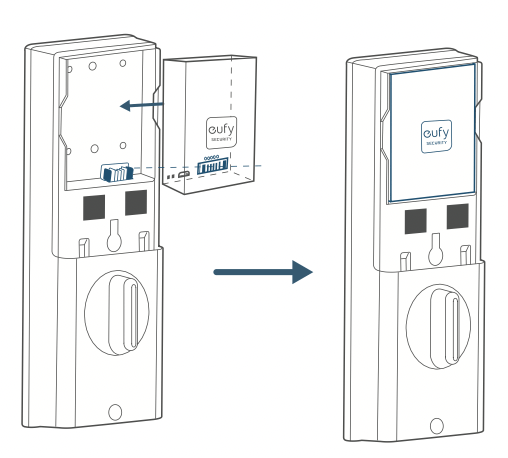
You are all set! Follow the in-app instructions to set up the Smart Lock Touch & Wi-Fi.
Note: Do not close the battery cover. This is to make sure you can scan the QR code in order to access information about Smart Lock Touch & Wi-Fi, as well as easily access the Setuo button.
SETTING UP THE SMART LOCK TOUCH & WI-FI
Pair Your Phone with Smart Lock Touch & Wi-Fi
Note: The lock will not lock automatically before the setup has completed. To avoid being locked outside, pair your phone with the Smart Lock Touch & Wi-Fi and set an access code for unlocking the door.
To pair your phone with Smart Lock Touch & Wi-Fi:
- Scan the QR code on the back of the Smart Lock Touch & Wi-Fi to get Bluetooth information of the Smart Lock Touch & Wi-Fi. Follow the on-screen instructions to complete the setup.
- Pair your phone with the Smart Lock Touch & Wi-Fi via Bluetooth. Your phone will search for Smart Lock Touch & Wi-Fi's Bluetooth and then connect.
Waiting to pair: The LED indicator flashes blue.
Paired: the LED indicator turns steady blue for 5 seconds.
Note:
- The user that is paired is the only administrator and can authorize other users to use the lock.
- Press and hold the Setup button again the lock will return to default settings. All the settings will be erased and need to be reset. DO NOT press and hold the button if unnecessary.
Calibrate Smart Lock Touch & Wi-Fi
Once the Smart Lock Touch & Wi-Fi is successfully paired with your phone, the eufy Security app will prompt you to calibrate the door lock.
Make sure you close the door before calibrating the Smart Lock Touch & Wi-Fi. When the door is closed, the door sensor will record the exact locked position so that the door will automatically lock if the door is properly closed.
To calibrate the Smart Lock Touch & Wi-Fi, follow the on-screen instructions to complete the process.
- Successfully calibrate: The
 button LED turns white for 2 seconds and then off. The voice prompt ''calibration complete'' can be heard.
- Fail to calibrate: The
 button and status LED turn solid red for 2 seconds and then off. The voice prompt ''The deadbolt is stuck. Please return to the installation, and try again.'' can be heard.
Note: If the eufy Security app fails to calibrate the lock, check whether the door has been installed correctly and try again.
Set Access Code
After the lock is calibrated, the eufy Security app will prompt you to name your Smart Lock Touch & Wi-Fi and set an access code. Follow the on-screen instructions to complete the process. The access code should be 4 to 8 characters.
Note: If you do not set the passcode and click ''Return'', a message ''initialization unsuccessful'' will appear. Click the card to enter the Smart Lock Touch & Wi-Fi page. The message ''Continue or remove the device'' will appear.
Set Scramble Passcode
A scramble passcode is a series of random numbers that you can input to prevent others from spying on your actual access code. It is ideal for those living in a conbo with neighbors passing by all the time.
To set a scramble passcode, go to Settings on the eufy Security app. The scramble passcode should be no more than 12 digits in total.
Register Your Fingerprint
After setting an access code, the eufy Security app will prompt you to register your fingerprint. The fingerprint light will breathe white.
- Register your fingerprint by placing it on the touch screen and check whether your fingerprint is valid. If yes, your fingerprint will be recorded. You must register your fingerprint 8 times. Each time you register a fingerprint successfully, the corresponding number will light on. For example, you successfully register fingerprints 8 times, the number 1 ~ 8 are lighted.
- If the app fails to record your fingerprint, the fingerprint breathing light will breathe red once and a prompt tone will be heard. Move your finger slightly and try again.
- After the fingerprint is successfully registered, the fingerprint breathing light will turn off.
Note:
- People aged over 70 and children under 5 are recomended to use the keypad to set access codes.
- It is recommended to use your thumb, index finger, or middle finger to register your fingerprint.
- You can skip this step during the initialization process and register fingerprint later.
Other Settings
The Smart Lock Touch & Wi-Fi supports many features that you can configure using the eufy Security app. The features are listed as follows:
- Add up to 100 users
- Set language: English
- Synchronoze time for lock with the time on your phone.
- Customize voice volume for the Smart Lock Touch & Wi-Fi
- Customize the time duration for automatic door-locking. You can set the countdown duration to be up to 3 minutes.
- Enable or disable sound effect.
- Automatically record door opening and locking log.
- Failsafe mode: After 5 consecutive failed attempts to register your fingerprint, the fingerprint scanner will be disabled, however, the access code can still be used.
- After 5 consecutive failed attempts to input the access code, neither access code nor the fingerprint scanner can be used.
- Check device information.
BASIC OPERATIONS
Unlock the Door
You can unlock the door using a valid access code, fingerprint, eufy Security app, or the provided key.
To unlock the door:
Option 1 : Use the fingerprint scanner
- Scan your fingerprint and wait until the fingerprint breathing light breathes blue once. The door will be unlocked within 1 second.
- If not, the light will breathe red once. Repeat the steps to unlock.
- If you fail to unlock the door after 5 attempts using the fingerprint scanner, the Smart Lock Touch & Wi-Fi will be locked. Use the access code instead to unlock.
Option 2 : Use the access code
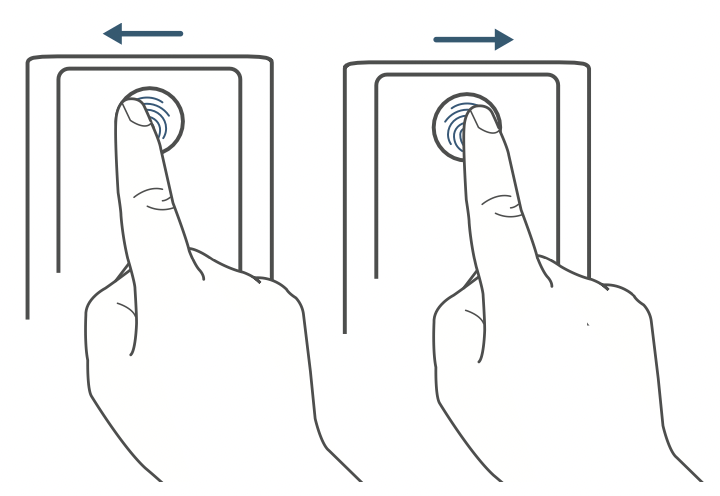
- Press any key or tap the touchscreen to wake up the keypad. the keypad will light on.
- Enter your access code. If the access code is correct, press the button. The door will unlock. If the access code is wrong, press and enter a new code.
Valid access code: The button turns solid white for 2 seconds.
Access code error: The error button blinks red for 2 seconds. A beep will be heard.
If you fail to unlock the door for 5 consecutive times using the access code, you can also follow the in-app instructions or use the provided key to unlock the door.
Option 3 : Use the eufy Security app
- Open the eufy Security app. The app will search for Smart Lock Touch & Wi-Fi Bluetooth and connect.
- Follow the on-screen instructions on the eufy Security app to unlock the door.
Option 4 : Use the provided key
If you fail to unlock the door after 5 consecutive times using the access code, use the provided key to unlock the door.
Lock the Door
There are several options to lock the door.
Option 1 : Use the fingerprint scanner
- Scan your fingerprint and wait until the fingerprint breathing light breathes blue once. The door will be locked within 1 second.
- If not, the light will breathe red once. Repeat the steps to unlock.
- If you fail to unlock the door after 5 attempts using the fingerprint scanner, the Smart Lock Touch & Wi-Fi will remain unlocked. Use the access code instead to lock the door.
Option 2 : Use the access code
- Press any key or tap the touchscreen to wake up the keypad. the keypad will light on.
- Enter your access code. If the access code is correct, press the button. The door will unlock. If the access code is wrong, press and enter a new code.
Valid access code: The button turns solid white for 2 seconds.
Access code error: The error button blinks red for 2 seconds. A beep will be heard.
Option 3 : Use the eufy Security app
- Open the eufy Security app. The app will search for Smart Lock Touch & Wi-Fi Bluetooth and connect.
- Follow the on-screen instructions on the eufy Security app to lock the door.
Option 4 : Use automatic lock
- On the eufy Security app, set the ''Automatic lock'' option on On, and set the time duration for the door to be locked.
- When the door is closed, the Smart Lock Touch & Wi-Fi will detect whether the door is locked. If not, the door will be locked automatically after the time duration you set.
Option 5 : One-touch lock
On the eufy Security app, the ''one-touch lock'' option is set to On by default. To use one-touch lock:
- Set the ''one-touch lock'' option to On.
- Press and hold the button to lock the door.
Charge Smart Lock Touch & Wi-Fi
To charge Smart Lock Touch & Wi-Fi:
- Take the battery out.
- Plug one end of a micro USB cable into the micro USB port of the battery and the other end to a charger. the red LED indicator will light up.
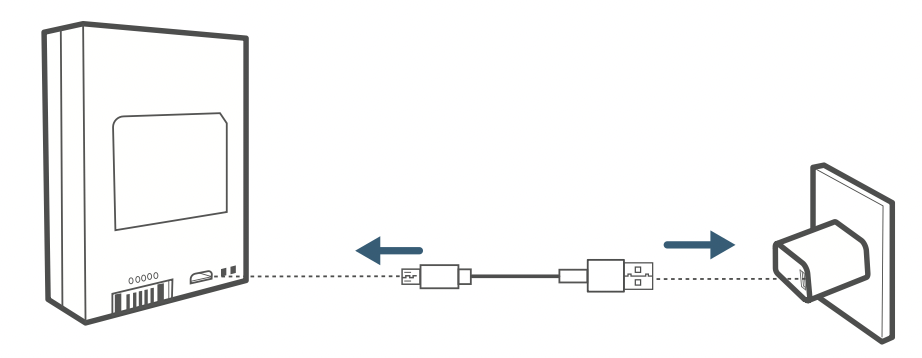
- After the battery is fully charged, the blue LED indicator will light up.
TROUBLESHOOTING
How can I unlock the door if the Smart Lock Touch & Wi-Fi doesn't work?
- Press the Reboot button on the bottom to restart the Smart Lock Touch & Wi-Fi.
- Use the provided key to unlock.
How can I unlock the door if the Smart Lock Touch & Wi-Fi's battery runs low?
- Follow the steps mentioned in the ''Charge Smart Lock Touch & Wi-Fi'' section to charge the battery.
- After the battery is fully charged, insert it into the battery compartment.
- Use the fingerprint scanner or access code to unlock.
How to delete the registered fingerprint and access code?
Open youe eufy Security app, and repeat steps mentioned in ''Pair Your Phone with the Smart Lock Touch & Wi-Fi'' to pair. Then you can delete the registered fingerprints and access code.
The Smart Lock Touch & Wi-Fi ringtone is too loud
Open the eufy Secutity app and pair your phone with your Smart Lock Touch & Wi-Fi. You can set the ringtone volume on the eufy Secutity app.
Why the Smart Lock Touch & Wi-Fi's battery drains so quickly?
- Make sure you use the standard battery.
- Check whether the Smart Lock Touch & Wi-Fi is installed properly.
- Check the whether the Smart Lock Touch & Wi-Fi can be locked or unlocked smoothly using the thumbturn; If not, detach and install the Smart Lock Touch & Wi-Fi again.
- Check whether water spills in the Interior Assembly. Exposure to water will drain the battery quickly.
- Contact Customer Service for technical support via eufy Security app or email.