Loading ...
Loading ...
Loading ...
7
INSTALL THE TRIM KIT FRAME
1. Position the assembled Trim Kit frame around the
oven.
2. Drill pilot holes using the drill (3/22).
3. Secure the Trim Kit by 4 long screws through the
trim kit into the cabinet by using a manual screw
driver.
IMPORTANT-
— Start all screws before tightening any one screw. Do
not overtighten screws since it can cause misalignment of
top/side strips.
DE68-03364A
49-40762-2
4
Installation Instructions
06-17 GEA
Printed in China
READ CAREFULLY. KEEP THESE INSTRUCTIONS.
8
REPLACE ANY LOOSE ITEMS
1. Your trim kit is now fully installed. Replace the
turntable and turntable support that was removed
from inside the microwave oven.
2. Keep these installation instructions and extra
screws for future reference and need. Do not place
them in the microwave oven.
3. Replace the house fuse, or close the circuit breaker
to restore power at the service panel.
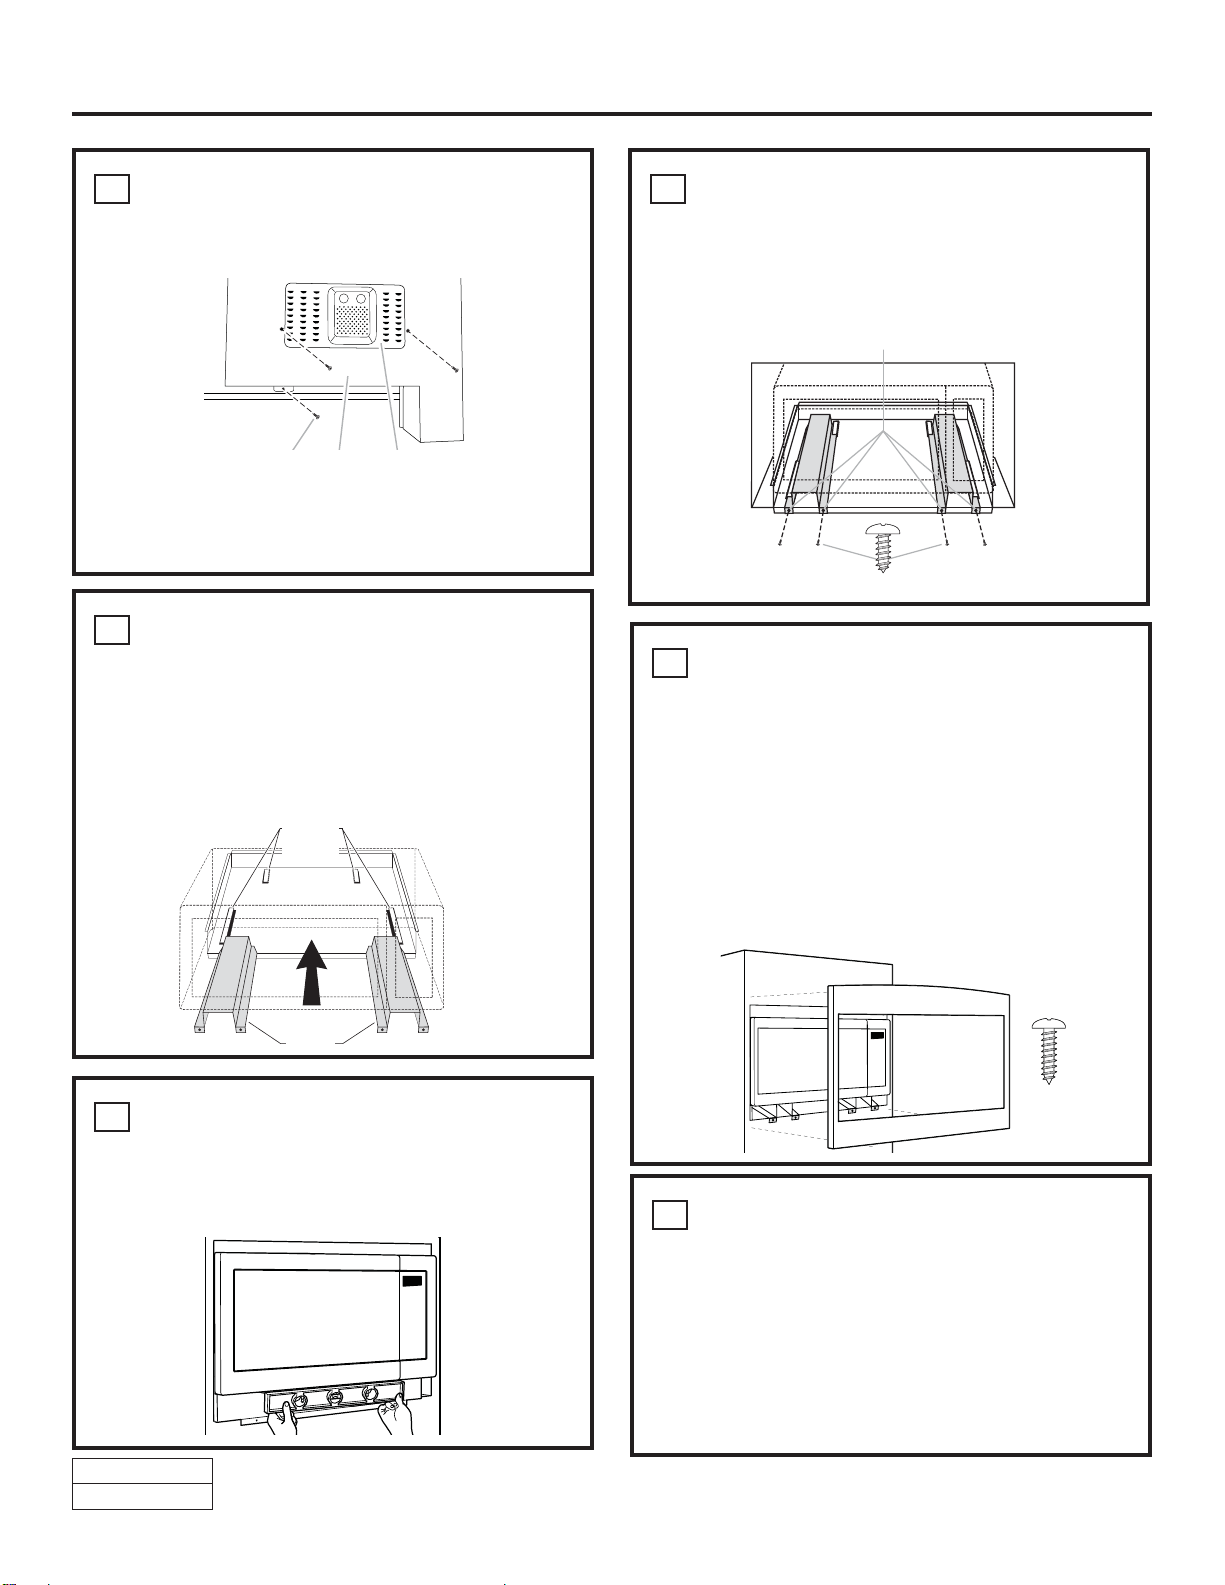
6
SECURE THE RAILS TO THE
CABINET
Ensure the Base Pan and Bottom Bracket front flanges
are tight against the cabinet, and that the screws holes
are aligned. Drive 4 short screws through the Base Pan
and Rails into the cabinet
Short Screw
Mounting Holes
4
INSTALL THE MICROWAVE OVEN
Plug the power cord into the wall receptacle. Slide the
microwave oven assembly gently into the cabinet, using
care not to pinch the power cord. Be sure to keep the
assembly centered as it slides back to where the tongue
of the rails goes through the slots on Base Plan. The top
edges of the Base Plan should now be centered right to
left in the opening. The Base should be tight against the
cabinet.
5
CHECK LEVELING
Check the leveling by placing a level at the front and
sides of the microwave. It may be necessary to add wood
shims under the base pan to level the microwave front-to-
back and side-to-side.
Rail
Guides
Rails
3
INSTALL THE REAR DUCT
(continued)
6. Use 3 short screws to secure back of rear duct to the
back of microwave oven, as shown.
A. Short screws (3)
B. Rear duct
C. Back of microwave oven
A
B
C
Long Screw
Loading ...
Loading ...
Loading ...