Loading ...
Loading ...
Loading ...
10
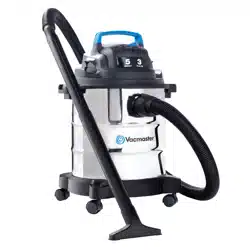
WARNING: DO NOT PLUG IN POWER CORD TO POWER OUTLET. MAKE SURE PLUG IS
DISCONNECTED BEFORE CHANGING AND CLEANING FILTERS.
1. Verify that the power cord is disconnected from the outlet. (fig.1)
2. Disconnect the hose from the vacuum, turning large end in counter clockwise direction. (fig.2)
3. Undo the latches and remove the power head from the container. (fig.3)
4. Clear all dirt or debris from the container and hose. (fig.4)
5. Check the hose, attachments, and power cord to verify that they have not been damaged.
IMPORTANT! Clean or change the cartridge filter regularly for best performance. ALWAYS USE
CARTRIDGE FILTER FOR DRY VACUUMING. If the machine is used with out the cartridge filter, the
motor will burn out and the warranty will be voided. Always keep spare filters on-hand.
NOTICE! The filters included are made of high quality materials designed to stop small dust particles. The
cartridge filter should be used for dry pick-up only. A dry cartridge filter is necessary to pick up dust. If the
cartridge filter is wet, it will clog quickly and be very difficult to clean. Handle the filter carefully when
removing it for cleaning and replacing it. Check the filters for tears or small holes, a small hole can let dust
pass through and out of the cleaner. Do not use a filter with holes or tears, replace it immediately.
WARNING! ALWAYS DISCONNECT THE PLUG FROM THE POWER OUTLET BEFORE REMOVING
THE POWER HEAD FROM CONTAINER.
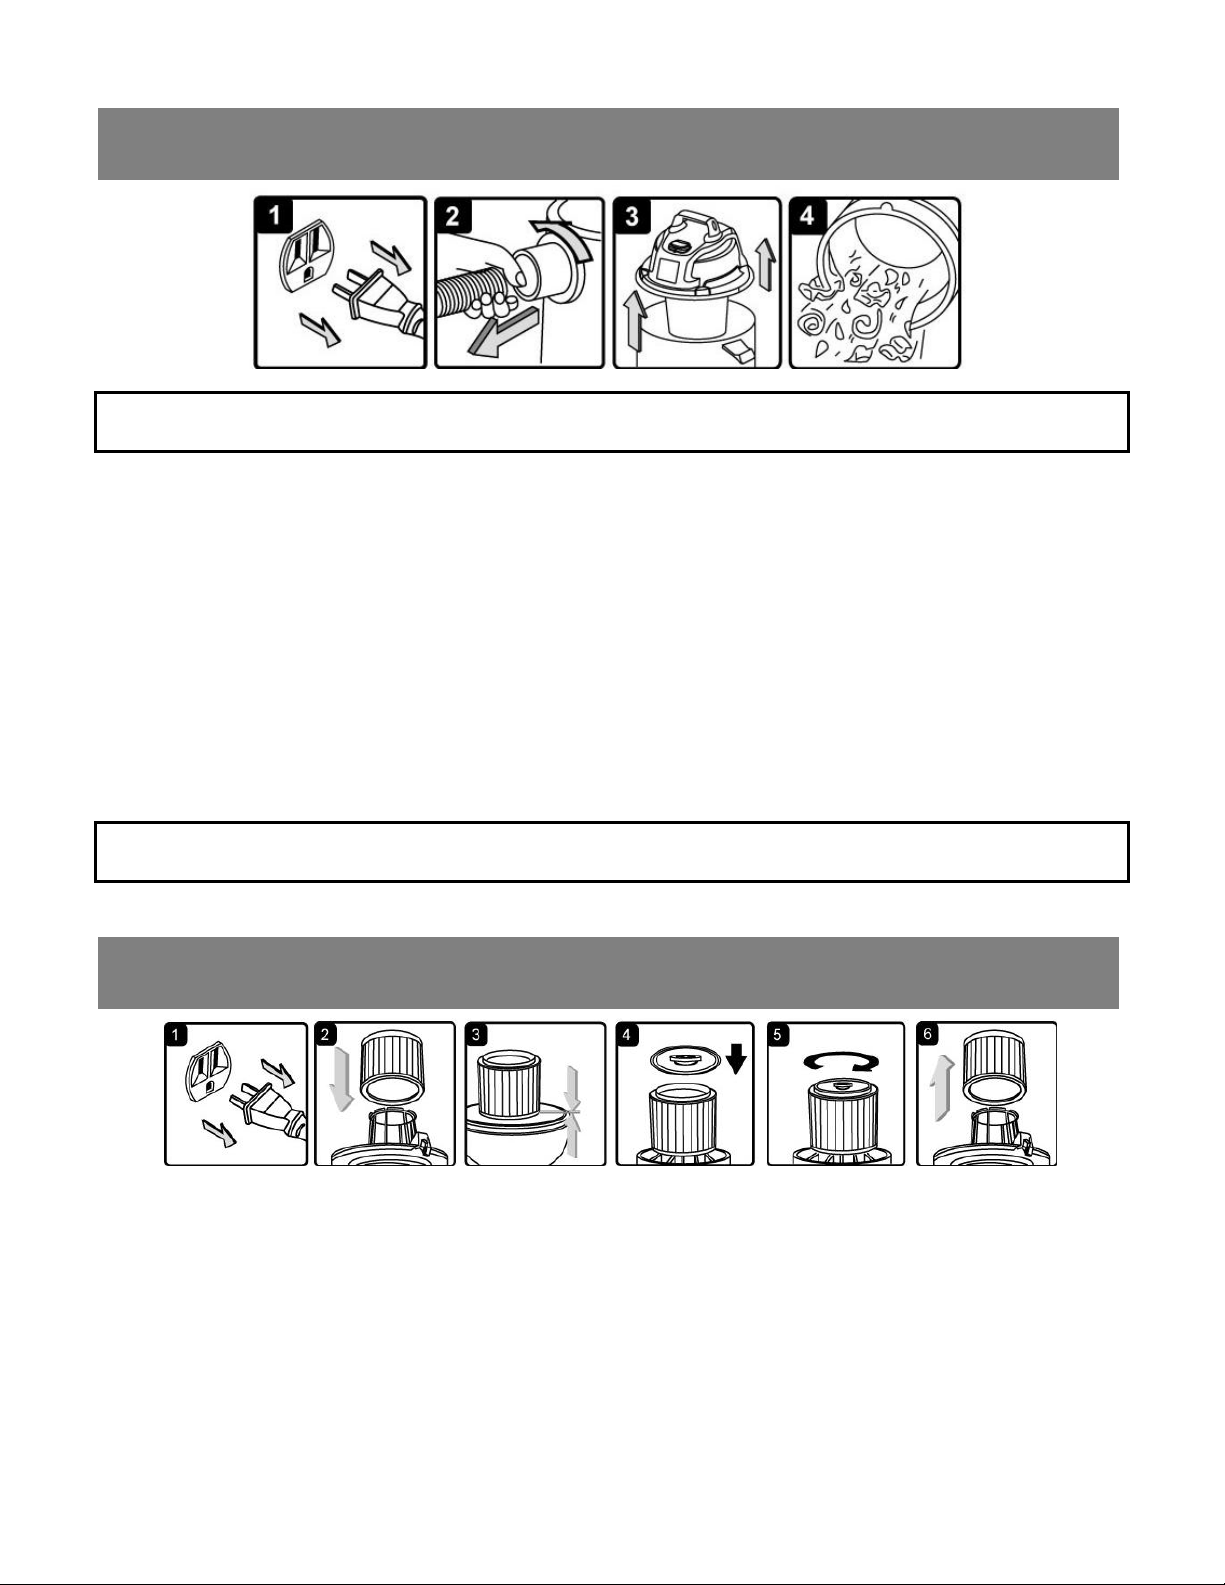
Installing Cartridge Filter
1. Verify that the power cord is disconnected from the outlet. (fig.1)
2. Remove power head and place in upside down position.
3. Install the cartridge filter over the filter cage with the flat end of the filter towards the vacuum power head.
Carefully push filter in until it stops against the power head. (fig.2 & 3)
4. Place filter retainer on top of cartridge filter over the raised lip and tighten down by turning retainer
clockwise, do not over tighten. (fig. 4 & 5)
Removing and Cleaning Cartridge Filter
1. Unlock and remove the filter retainer by tuning retainer handle counter clockwise.
2. Carefully hold and pull the cartridge filter up for removal. (fig.6)
MAINTENANCE
INSTALLING & CLEANING CARTRIDGE FILTERS
Loading ...
Loading ...