Loading ...
Loading ...
Loading ...
08 GB
1-
2-
3-
4-
5-
6-
7-
8-
9-
10-
11-
12-
13-
14-
15-
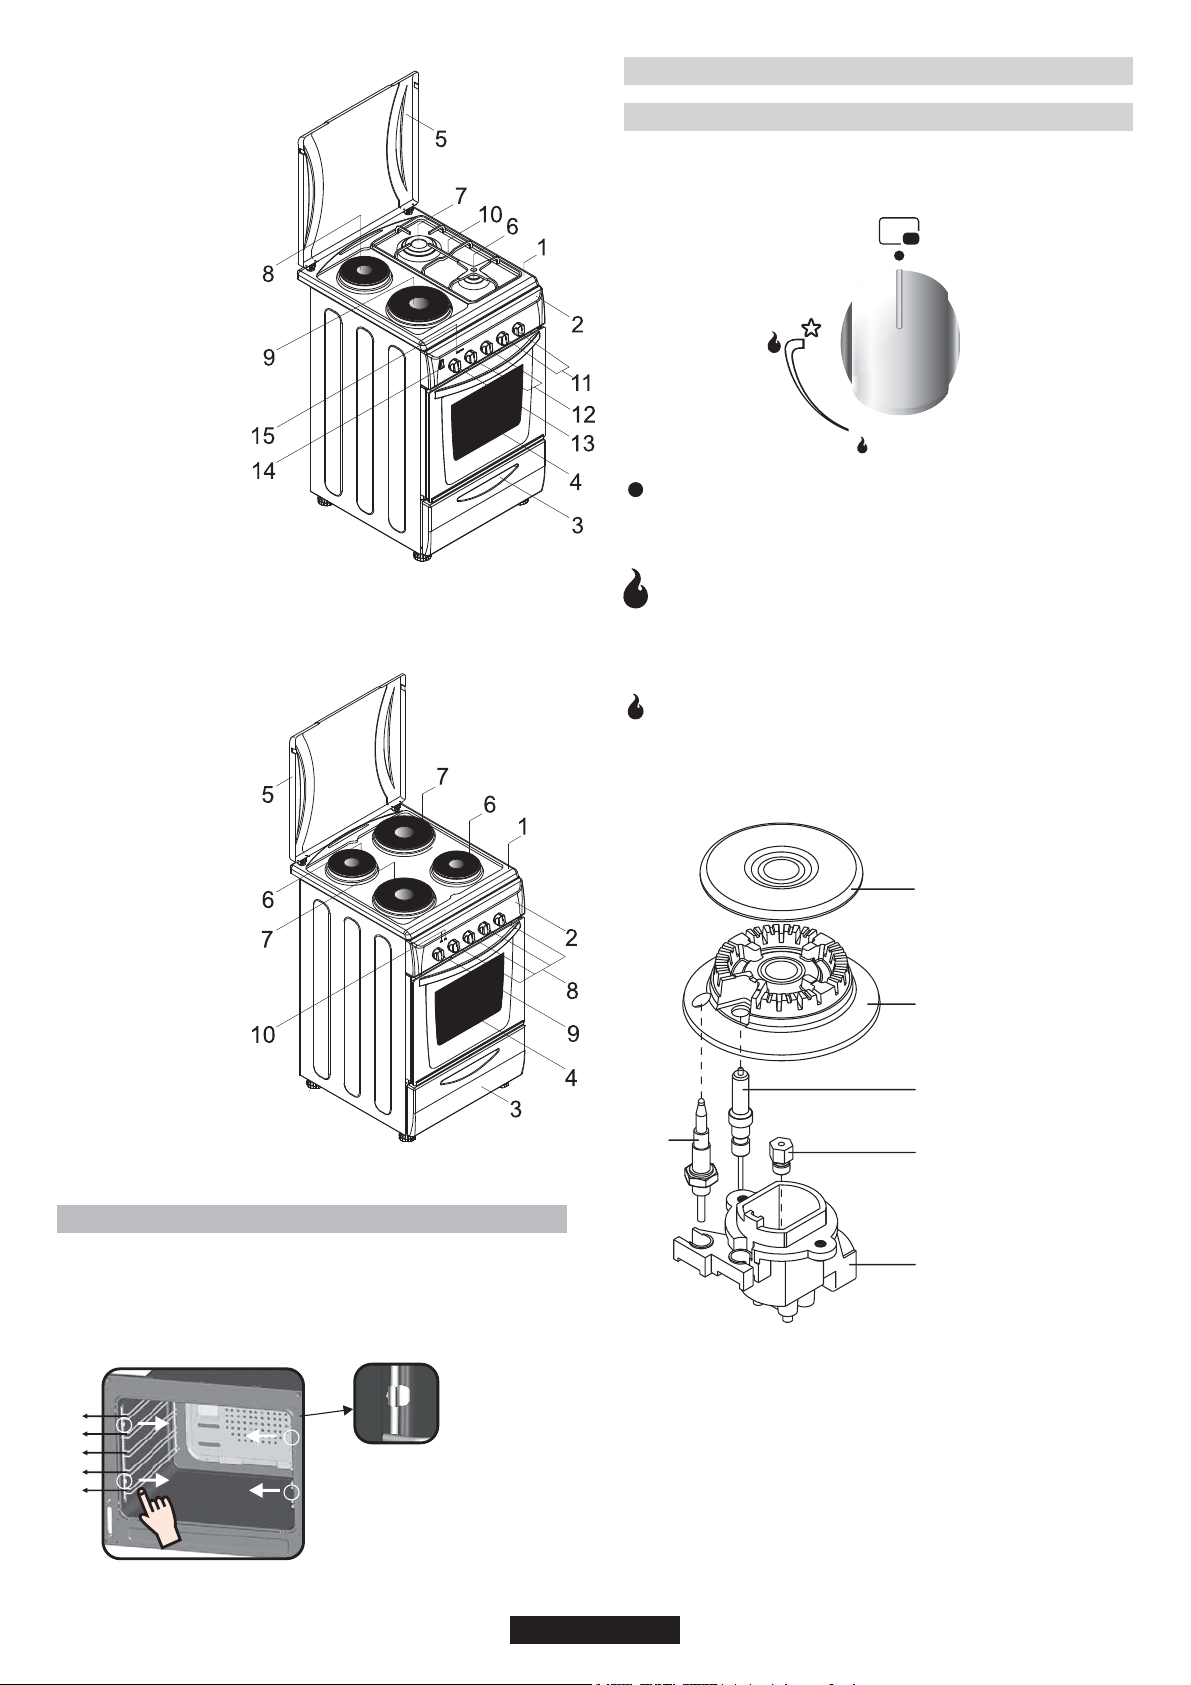
Cook top
Control panel
Drawer
Oven door (Front door)
Metallic top lid or Glass top lid
Auxilary burner
Rapid burner
Hot plate
Hot plate
Right grate
Burners control knobs
Hot plates control knobs
Thermostat oven knob
Ignition button or fan button
Signal lamp
1-
2-
3-
4-
5-
6-
7-
8-
9-
10-
Cook top
Control panel
Drawer
Oven door (Front door)
Metallic top lid or Glass top lid
Hot plate
Hot plate
Hot plate control knobs
Thermostat oven knob
Signal lamp
3. USE OF COOKTOP BURNERS
The knobs which control the burners are positioned on the control
panel.
Off Position
When the knob is turned so that the 'dot' symbol faces towards
the panel, it is in the Off position and the gas valve is closed and
the flame will go out.
Maximum Gas Flow
Press the burner knob and turn it to the left till the 'dot' symbol
faces towards the large flame symbol.
The flame is on full at this position.
In this position, the gas valve is completely open.
Minimum Gas Flow
The flame can be decreased by turning the knob so that the 'dot'
symbol faces towards the small flame symbol. The valve will be
partially open and the burner will then be on low.
3.1. USE OF COOKTOP GAS BURNERS
Figure 7
A - Burner Lid
B - Burner
C - Electrode
D - Injector ( Jet )
E - Burner body
F - Safety device
A
B
C
D
E
F
Figure 8
Ignition of the Burners
Cooktop Gas Burners
The burner must be ignited before a pan is placed over it.
For models with automatic ignition, the 'spark' button must be
pressed.
Press the knob controlling the burner you want to ignite and then turn it
left to the big flame symbol. Press the ignition button. On models with
ignition-thru knobs, press and turn the knob controlling the burner you
want to ignite as far as the star symbol; the electrode will be
automatically activated. All the electrodes will be activated
automatically and the burner to which gas is supplied (that relative to
the knob pressed) will ignite.
REMOVING AND CLEANING WIRE RACKS
1- Remove the wire racks by pulling them in the direction of the arrows
(see below)
2- To clean the wire racks either put them in the dishwasher or use a
wet sponge, ensuring that they are dried afterwards.
3- After the cleaning process install the wire racks in reverse order.
5
4
3
2
1
Loading ...
Loading ...
Loading ...