Loading ...
Loading ...
Loading ...
45
US
Getting Started
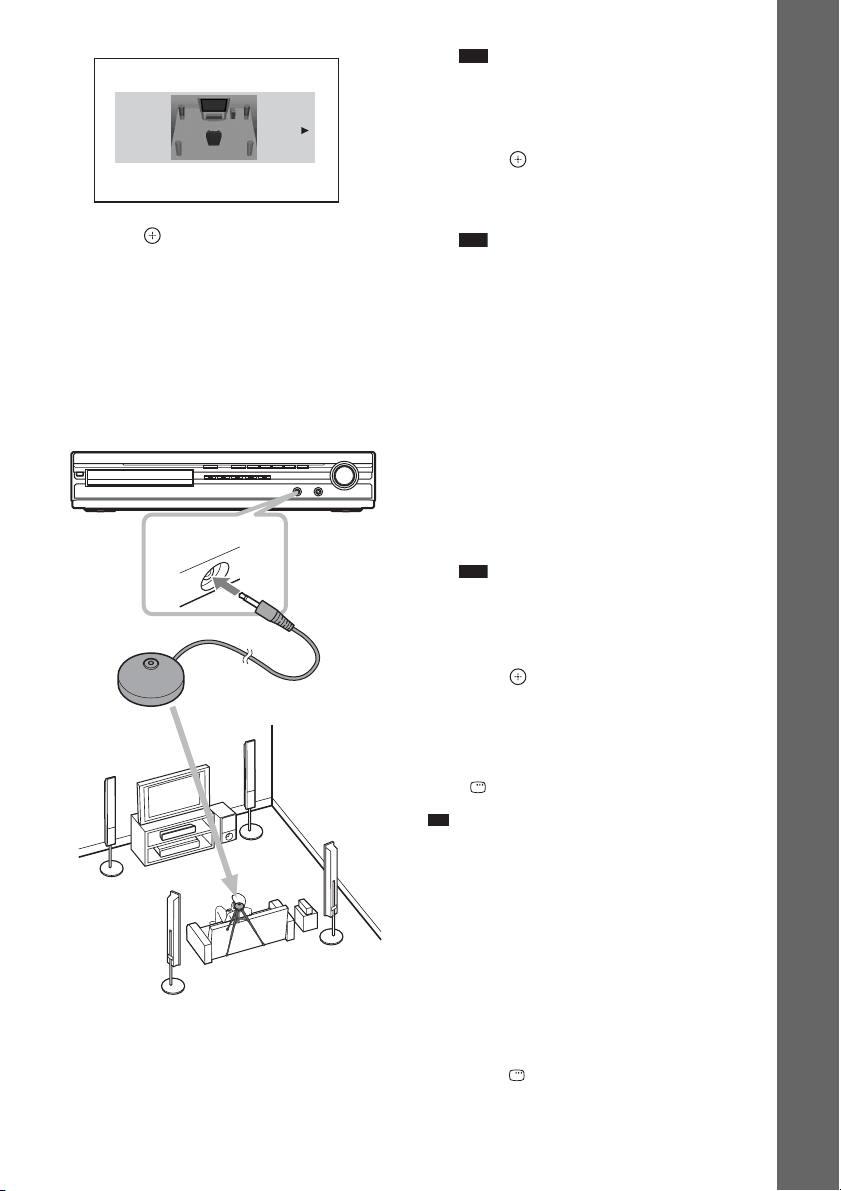
10 Press .
11 Connect the calibration mic to the
A.CAL MIC jack on the front panel.
Set up the calibration mic at the ear level
using a tripod, etc. (not supplied). The front
of each speaker should face the calibration
mic, and there should be no obstruction
between the speakers and the calibration
mic.
12 Press C/c to select [YES].
Note
• Make sure that the headphones are not
connected to the unit or surround amplifier. You
cannot operate following Steps with the
headphones connected.
13Press .
[AUTO CALIBRATION] starts.
Be quiet during the measurement.
Note
• Loud test sound is output when [AUTO
CALIBRATION] starts. You cannot turn the
volume down. Give consideration to children
and neighbors.
• Before [AUTO CALIBRATION], install the
surround amplifier in the appropriate location. If
you install the surround amplifier in an improper
location, such as another room, proper
measurement will not be obtained.
• Avoid being in the measurement area and
making noise during the measurement (which
takes about 1 minute), as it may interfere with
measurement.
14Unplug the calibration mic and press C/
c to select [YES].
Note
• The environment of the room in which the
system is installed may affect measurements.
• If measurement fails, follow the message then
retry [AUTO CALIBRATION].
15Press .
Quick Setup is finished. All connections
and setup operations are complete.
To quit the Quick Setup
Press DISPLAY in any Step.
Ti
p
• If you change the position of the speakers, reset the
speaker settings. See “Getting Optimal Surround
Sound for a Room” (page 90) and “Calibrating the
Appropriate Settings Automatically” (page 91).
• If you want to change any of the settings, see “Using
the Setup Display” (page 69).
To recall the Quick Setup display
1 Press FUNCTION +/– repeatedly until
“DVD” appears in the front panel
display.
2 Press DISPLAY while the system is
in stop mode.
SPEAKER FORMATION
STANDARD
AUDIO IN / A.CAL MIC
Calibration mic
E.g., DAV-HDX975WF
Loading ...
Loading ...
Loading ...