Loading ...
5. Pull the 4-wire ice maker harness out from behind the back of
the freezer as far as possible, and hang it over the edge of the
cutout.
NOTE: Do not remove any other wiring.
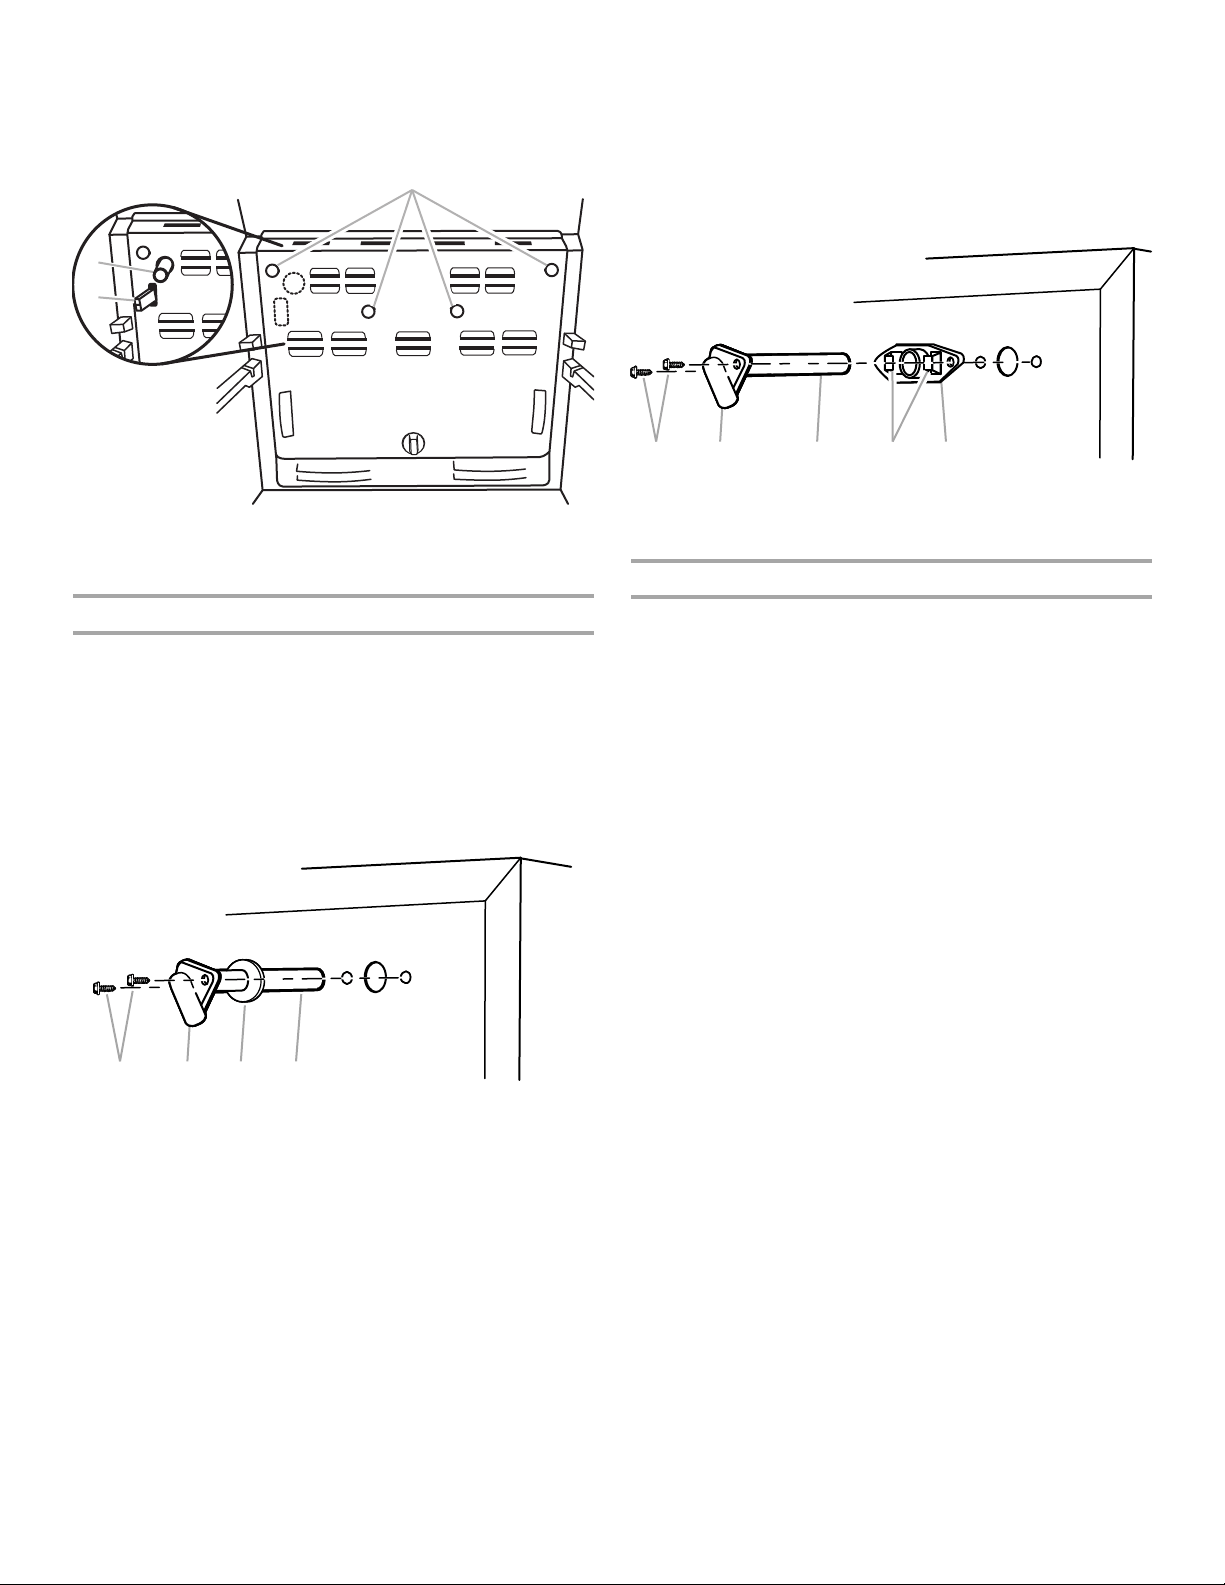
Install the Fill Tube
14 to 18 Cubic Foot Top Freezer and Bottom Freezer and
11 Cubic Foot (Style 3 - Evaporator Cover) Models
1. Locate the fill tube and the round foam gasket from the ice
maker kit. Slide the gasket over the end of the fill tube.
NOTE: The gasket may already be installed on the fill tube.
2. With the spout facing downward, insert the other end of the fill
tube into the hole in the back of the freezer.
3. Using two ¹⁄₂" hex head sheet metal screws, fasten the fill tube
to the freezer.
11 Cubic Foot Top Freezer (Style 1 and Style 2) Models
1. Insert the bracket fill tube into the holes in the back of the
freezer compartment.
2. Insert the fill tube into the hole in the bracket fill tube. Twist the
fill tube until the spout is locked into place between the ribs of
the bracket fill tube.
3. Using two ¹⁄₂" hex head sheet metal screws, fasten the
bracket fill tube to the back of the freezer.
Replace the Cover
Style 1 - Open Top Ice Maker Fill Tube with Wiring Cover
■ Do not replace the cover.
Style 2 - Flat Wiring Cover
■ Thread the wiring harness through the slot and place the
cover over the fill tube.
■ Hook the tab in the side of the cover into the slot in the back
of the freezer. Using the hex screw removed earlier, fasten the
cover to the freezer.
Style 3 - Evaporator Cover Only
■ Thread the wiring harness through the cutout and place the
evaporator cover over the fill tube.
■ Using the screws and plastic plugs removed earlier, fasten the
cover to the freezer.
A. Plastic plugs and screws
B. Fill tube
C. Wire harness
A. Hex head sheet metal screws
B. Spout
C. Foam gasket
D. Fill tube
A
B
C
B C DA
A. Hex head sheet metal screws
B. Spout
C. Fill tube
D. Ribs
E. Bracket fill tube
B C EDA
W10519544A
®
/™ ©2013 Whirlpool. All rights reserved.
2/13
Printed in Mexico