
Loading ...
CXS-GT3516F (US,ES) 4-198-063-11 (1)
×
2
×
2
Mounting/Montaje
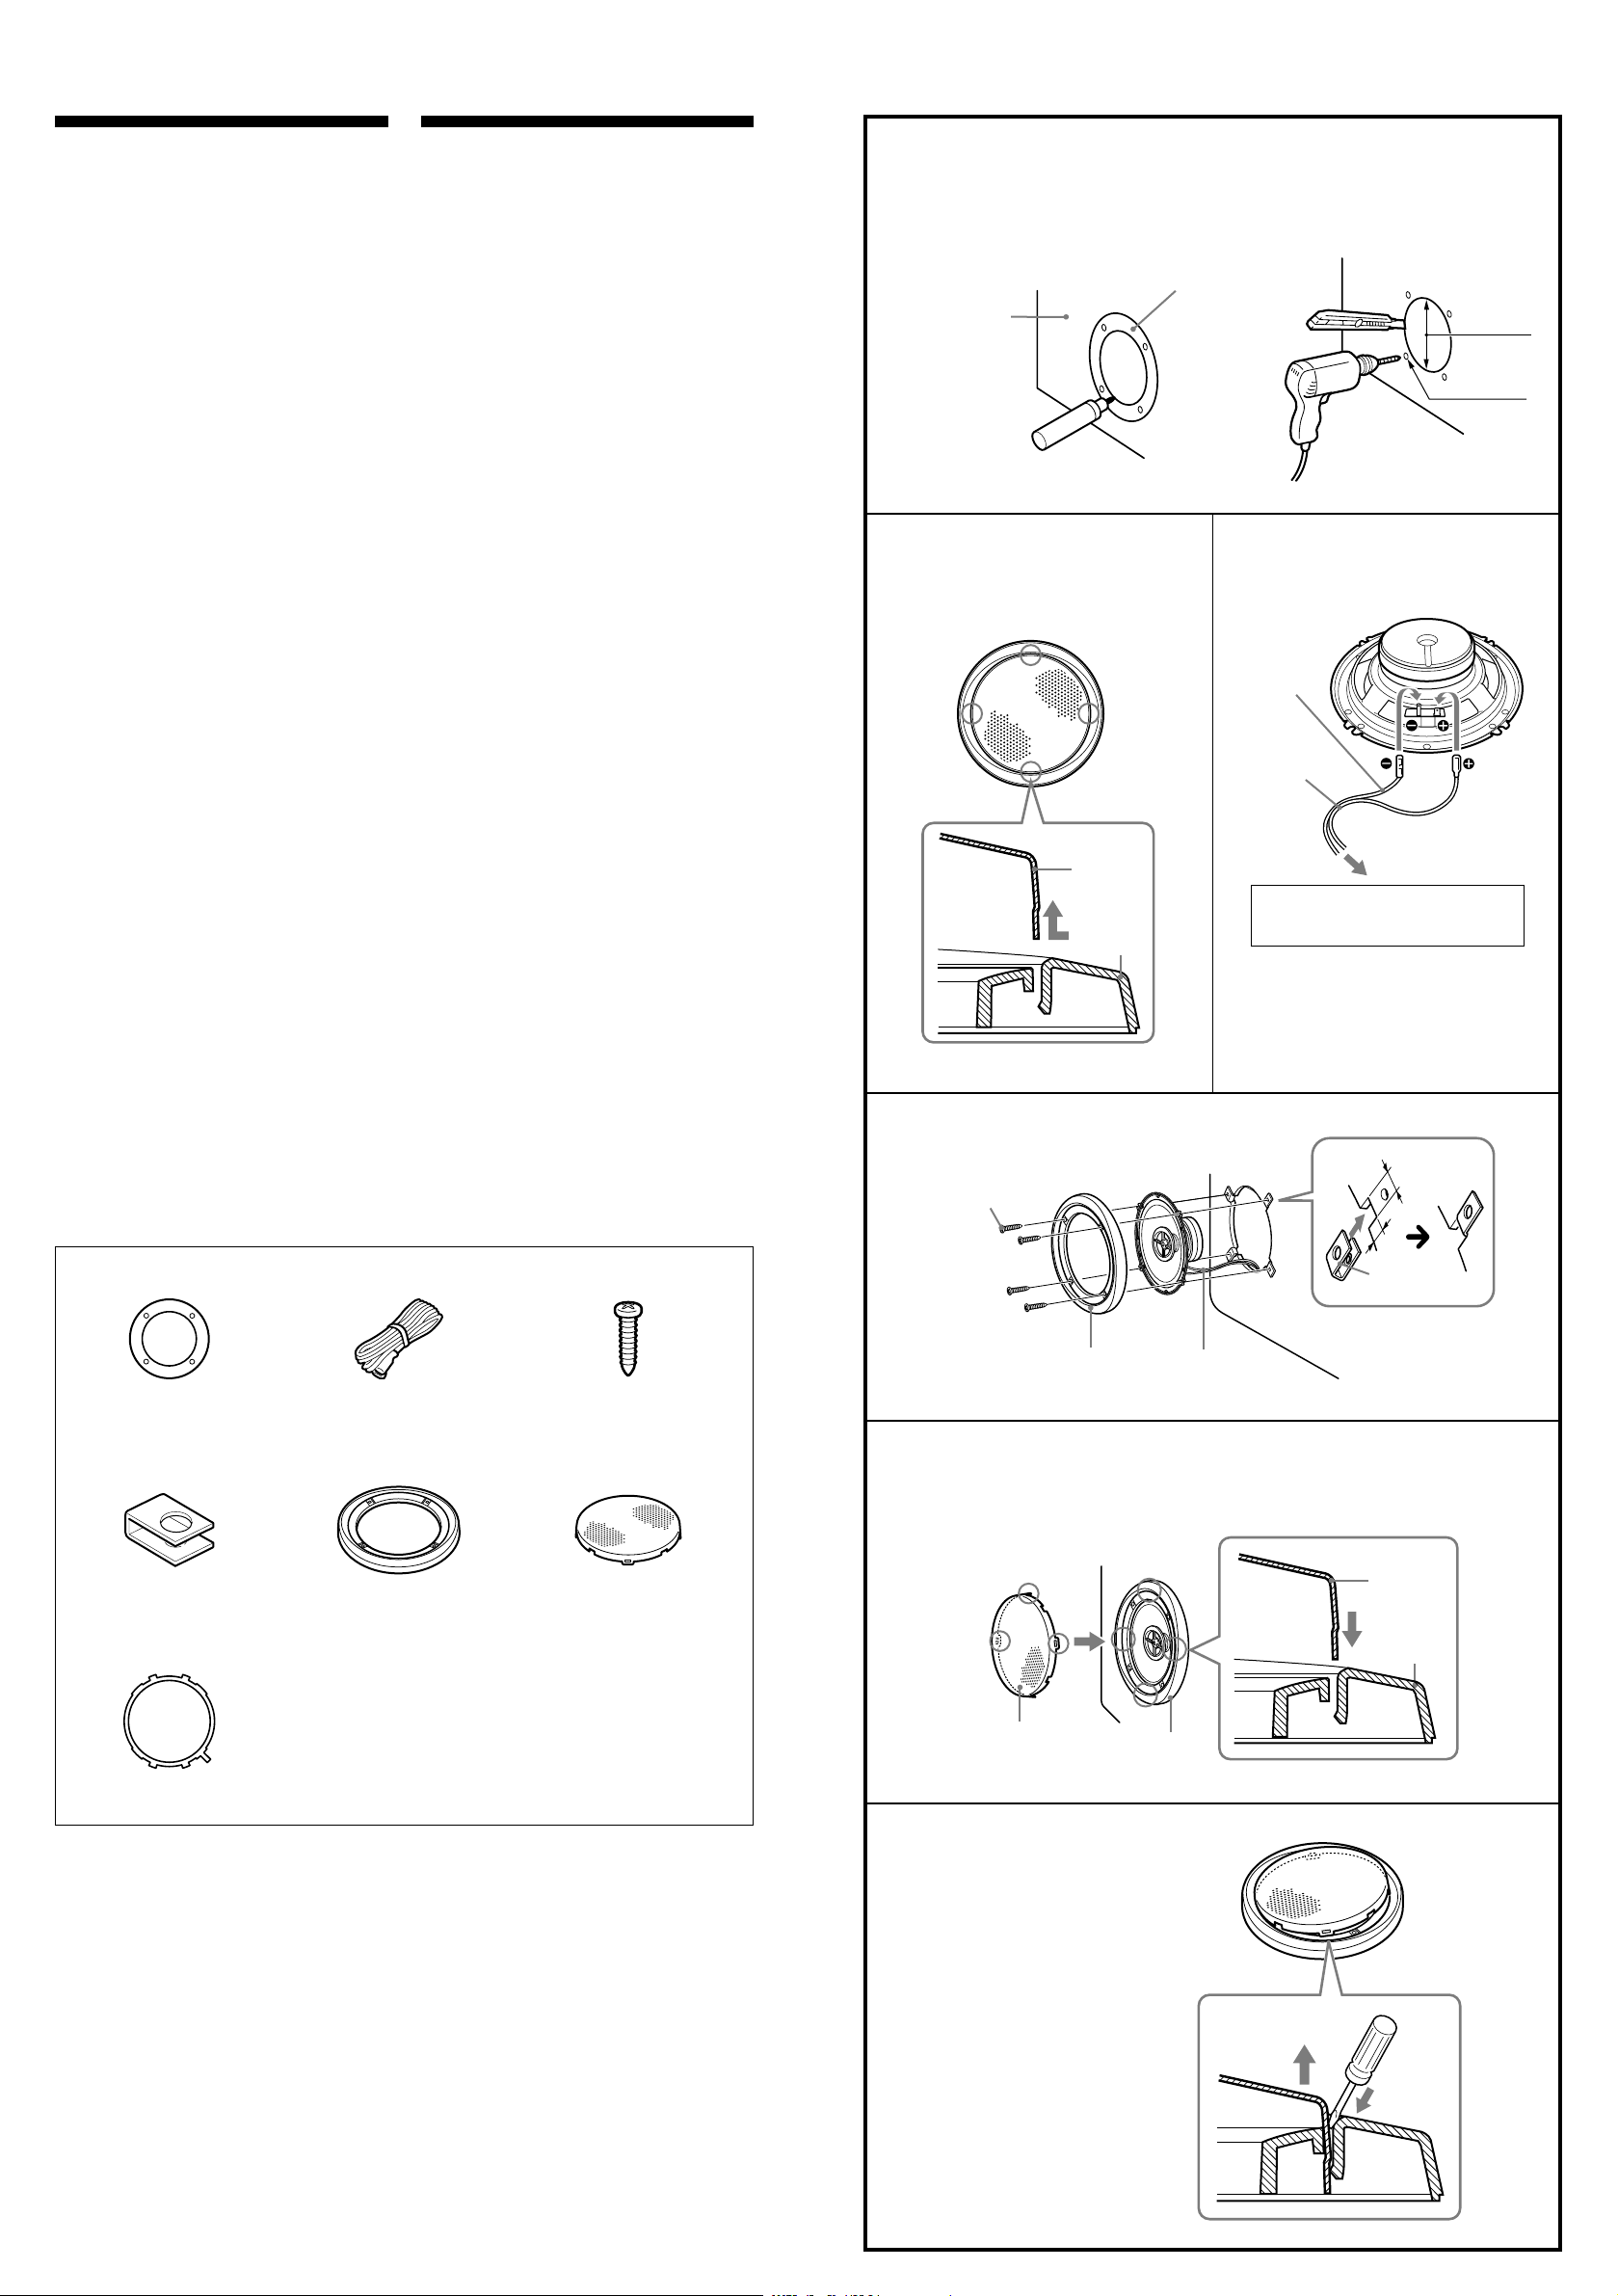
Mounting from the car interior/
Montaje desde el interior del automóvil
1
Mark the 4 bolt holes and make them 3.3 mm
*
in diameter.
Marque los orificios de los 4 pernos y hágalos de 3,3 mm
*
de diámetro.
*
When using
: ø 5 mm
*
Si utiliza
: ø 5 mm
ø 3.3 mm
*
ø 126 mm
Striped cord
Cable rayado
Press and insert the edges of the grille net.
Presione e inserte los extremos de la red de la rejilla.
*
White cord — Left speaker
Grey cord — Right speaker
*
Cable blanco — Altavoz izquierdo
Cable gris — Altavoz derecho
×
8
Door panel
Panel de la puerta
ø 4
×
30
Parts list/Lista de componentes
2 m
Before Mounting
A depth of at least 44 mm is required for flush
mounting. Measure the depth of the area where
you are to mount the speaker, and ensure that the
speaker is not obstructing any other components of
the car. Keep the following in mind when choosing
a mounting location:
• Make sure that nothing is obstructing around
the mounting location of the door (front or rear)
where you are to mount the speaker.
• A hole for mounting may already be cut out of
the inner panel of the door (front or rear). In this
case, you need to modify the board only.
• If you are to mount this speaker system in the
door (front or rear), make sure that the speaker
terminals, frame or magnet do not interfere with
any inner parts, such as the window mechanism
in the door (when you open or close the
window), etc.
Also make sure that the speaker grille does not
touch any inner fittings, such as the window
cranks, door handles, arm rests, door pockets,
lamps or seats etc.
×
8
×
2
Remove the grille net.
Extraiga la red de la rejilla.
1 mm
13 mm
How to remove the grille net.
Cómo extraer la red de la rejilla.
Antes del montaje
Para montar el altavoz de modo que quede
empotrado en la ubicación de montaje se requiere
una profundidad mínima de 44 mm. Mida la
profundidad del área donde desee montar el
altavoz y asegúrese de que no obstruya ningún
otro componente del automóvil. Cuando elija la
ubicación de montaje, recuerde lo siguiente:
• Asegúrese de que no haya ningún objeto
cerca de la puerta (delantera o trasera) donde
desea montar el altavoz que pueda impedir su
instalación.
• Es posible que en el panel interno de la puerta
(delantera o trasera) ya exista un orificio para
montar el altavoz. En este caso, sólo deberá
modificar el tablero.
• Si desea montar este sistema de altavoces en la
puerta (delantera o trasera), asegúrese de que
los terminales, el marco o el imán del altavoz no
interfieran con los componentes internos como,
por ejemplo, el mecanismo de la ventanilla de la
puerta (al subir o bajar la ventanilla), etc.
Asegúrese también de que la rejilla del altavoz
no esté en contacto con accesorios internos
como, por ejemplo, los picaportes de las
ventanillas y las puertas, los reposabrazos, los
compartimentos para guardar objetos situados en
las puertas, las luces o los asientos, etc.
*
×
2
* This part is not necessary for mounting, and can be disposed of.
* Este componente no es necesario para el montaje, por lo que puede
desecharse.
2 3
4
5
*
To speaker cord of a car.
Al cable del altavoz de un automóvil.