Loading ...
Loading ...
Loading ...

9
Installation
HANDLE BAR
To install the handle, you will need a Phillips head screwdriver.
1.Open the door.
2.Locate the two screw holes on the inside of the door (they may be par-
tially obscured by the door seal so you may need to remove the door
seal).
3.Insert the screws into the screw holes until they stick out of the front
of the door.
4.Line up the holes in the handle with the screws and give each screw
about 2-4 full turns into the handle bar.
5.Now the turn the screws in all the way, and your handles are installed.
6. Replace seal into door frame.
INSTALLATION OF YOUR APPLIANCE
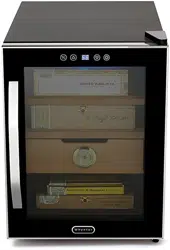
The appliance is designed for a free standing installation.
WARNING: Do not store or install the appliance outdoors.
CAUTION: This appliance is designed for designed to storing and aging cigars . Do not store perishable
food, medicine or other medical products.
Place your appliance on a hard and level floor that is strong enough to support it when it is fully loaded.
To level your appliance, adjust the leveling legs at the bottom of the appliance if needed.
When positioning the appliance, ensure that there is at least a 6” clearance at the sides and a 6” clearance
at the back. This will allow for adequate ventilation of any heat generated by appliance.
We do not recommend installing the appliance on carpet.
Do not install the appliance near an oven or other heating source. Direct sunlight may affect the acrylic
coating and heat sources may increase electrical consumption. For best performance, do not install the ap-
pliance behind a cabinet door or block the base grille. Extreme cold ambient temperatures may also cause
the appliance not to perform properly.
Avoid locating the appliance in area that may be exposed to excessive moisture.
Plug in the appliance into an exclusive, grounded wall power outlet. Do not under any circumstances cut or
remove the third (ground) prong from the power cord. Any questions concerning power and/or grounding
should be directed toward a qualified electrician or an authorized service center.
ELECTRICAL CONNECTION
This appliance requires a standard 115/120 Volt AC ~/60Hz electrical ground outlet with three-prong. Have the
wall outlet and circuit checked by a qualified electrician to make sure the outlet is properly grounded. The cord
should be secured behind the appliance and not left exposed or dangling to prevent accidental injury.
The appliance should always be plugged into its own individual electrical outlet which has a voltage rating that
matches the rating label on the appliance. This provides the best performance and also prevent overloading
house wiring circuits that could cause a fire hazard from overheated. Never unplug the appliance by pulling the
power cord. Always grip the plug firmly and pull straight out from the receptacle. Repair or replace immediately
all power cords that have become frayed or otherwise damaged. Do not use a cord that shows cracks or abra-
sion damage along its length or at either end. When moving the appliance, be careful not to damage the power
cord.
EXTENSION CORD
Because of potential safety hazards, it is strongly recommended that you do not use an extension cord with
this appliance. However, if you must use an extension cord, it is absolutely necessary that it be a UL/CUL-
Listed, 3-wire grounding type appliance extension cord having a grounding type plug and outlet and that the
electrical rating of the cord be 115 volts and at least 10 amperes.
SCREWS
DOOR
SEAL
HANDLE
BAR
DOOR
Loading ...
Loading ...
Loading ...
