User Manual Air Purifier
PARTS NAME
Front / Rear
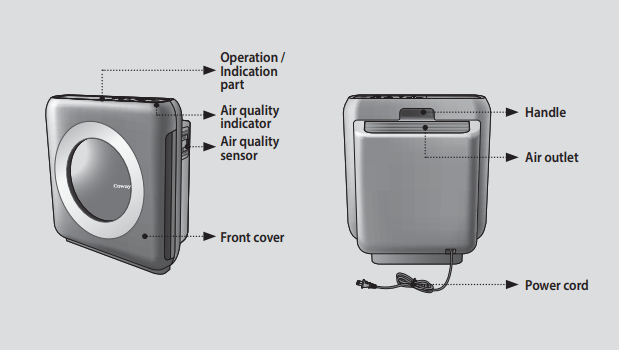
Operation / Indication part
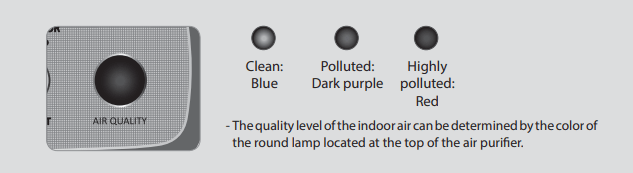
Air quality indicator
BEFORE USE
PLEASE CHECK BEFORE USE!

FILTER INSTALLATION
TIPS:
- Make sure to remove each filter's plastic bag before installing filters.
- The product is for household use. Use the product indoors only.
- When the product is not in use. remove the power plug from the electric outlet.
- When installing filters. check that the front side of filters is in the correct direction.
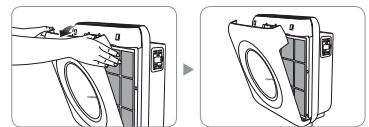
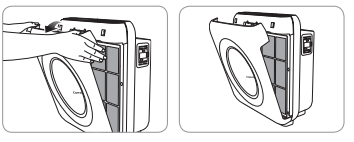
1. Open the front cover.
Open the front cover by pulling the upper part of it.
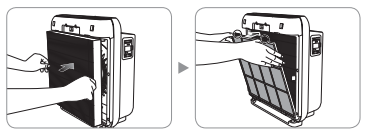
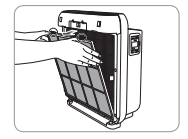
2. Take out filters and remove the plastic bag.
Remove the plastic packing of the filters and install the filters by proper order.
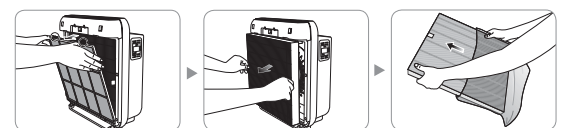
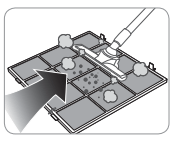
3. Install the filters as following order: Pre-filter Deodorization filter
 True HEPA filter
When you install Pre-filter, make sure to push the grip to install it firmly.
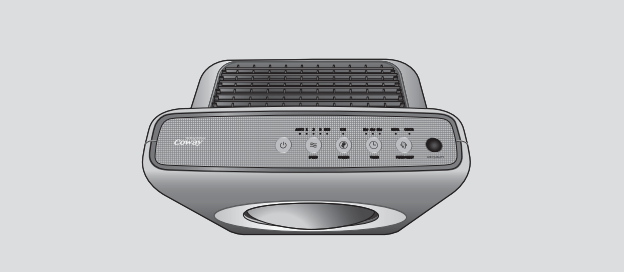
INDICATION PART
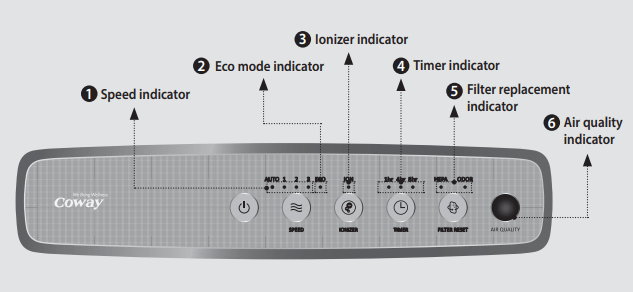
1. Speed indicator
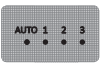
It shows the current fan speed. Each indicator is turned on as per its airflow speed.
2. Eco mode indicator
It turns on when Eco mode is activated.
3. Ionizer indicator
It shows whether the ionizer is turned on or off.
4. Timer indicator
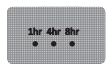
It shows the current time setting for air purification. Each indicator is turned on as per its set timer.
5. Filter replacement indicator

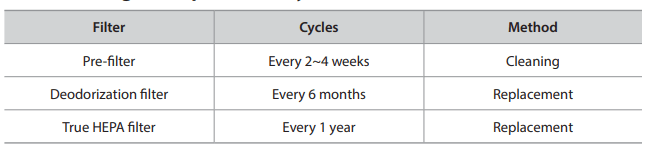
Replace the filter when this indicator is on. Refer to filter replacement cycle for each other.
6. Air quality indicator
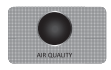
It displays the current pollution level of the room.
OPERATION PART

1. Power Button
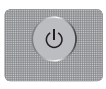
Use this button to turn the air purifier on or off.
2. Speed Button
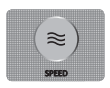
Use this button to adjust the fan speed.
3. Ionizer button

It shows whether the ionizer is turned on or off.
4. Timer Button
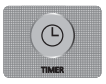
Use this button to turn off the air purifier after a predetermined period of time. Available timer settings are 1H, 4H and 8H.
5. Filter Reset Button
When the filter replacement indicator
Is turned on. replace the concerned filter and press the RESET button.
HOW TO USE
TIPS:
- Before operating the product, connect the power plug to the electric outlet.
- When the air purifier is turned on, it automatically operates in auto mode.
Manual & Auto mode
Press the power button and then select the speed of the fan by pressing the speed button.

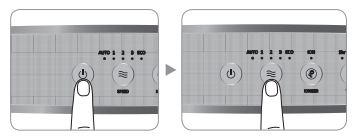
To select the auto mode
Press the speed button to activate Eco mode.
Repeat pressing the button until the Eco mode indicator is on.
Automatically optimizes the speed setting 1 through 3 based on the level of indoor air quality detected by dust sensor.
This mode is recommended for general users.
When no pollution is detected for 30 minutes. the fan will automatically stop to save energy consumption.
So this special feature will help cut down electricity cost.
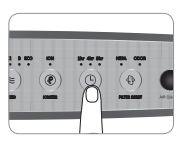
Timer activation/deactivation
The Timer feature instructs the air purifier to automatically power off after 1. 4. or 8 hours.
* To deactivate the timer, press and hold the Timer button until the indicator is no longer lit.
* 
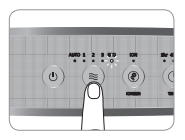
ADJUST AIR QUALITY SENSOR
When the product is shipped out. the air quality sensor is set to standard sensitivity. Ifthe pollution level stays at the highest level after 2 hours of operation or stays at the lowest level for more than 1 hour when the air does not seem clean. users can adjust the sensitivity of the air quality sensor as follows.
1. While the air purifier is on, press the airflow speed button and ionizer button for 2 seconds.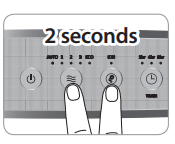
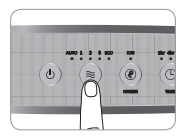
2. The speed indicator will flash at 1.0 second intervals with beep. The speed indicator blinks to show the sensor sensitivity. 
3. Adjust the sensitivity by pressing the speed button. The speed indicator blinks to show the sensor sensitivity 
4.Press the airflow speed button and ionizer button for 2 seconds. The air purifier will then resume normal operations. 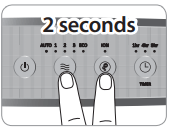
CLEANING METHOD
TIPS:
- Always unplug the air purifier before cleaning the product.
- Do not use detergents that contain organic solvents (solvent. thinner. etc). leach. chlorine. or abrasives
- Do not put the air purifier in water or spray water directly on it.
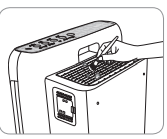
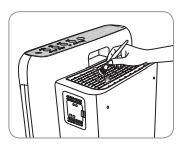
Cleaning the air quality sensor (every 2 months)
1. Open the air quality sensor cover on the right-hand side of the product. Clean the air inlet and outlet vent and then the air quality sensor with a soft brush or vacuum cleaner.
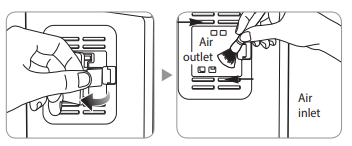
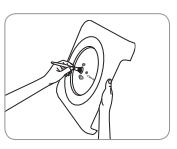
2. Wet a cotton swab lightly and clean the lens, dust inlet, and dust outlet. Clean them with a dry cotton swab to remove remaining moisture.
- Without regular cleaning. the performance of the air quality sensor deteriorates.
- The cleaning cycle differs depending on the operation environment. When using the product in a dusty environment. dean the sensor more often.
Cleaning the air inlet and outlet (every 2 months)
Clean the air inlet and outlet with a soft brush.
- Exercise caution not to have dust fall inside the air purifier.
- If covered in dust. run the air purifier in manual mode for 10 minutes to blow the dust off the vent. You may then continue with normal use.
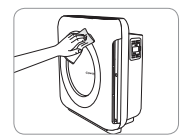
Cleaning the front cover
Separate the front cover from the product and remove the dust attached to the surface with a soft dry brush or cloth.
* Use lightly wet cloth if the contamination is serious but do not use abrasives.
Cleaning the product body (every 2 ~ 4 weeks)
Use dry. soft cloth to clean the product.
* Use lightly wet cloth if the contamination is serious but do not use abrasives.
TIPS:
- Always unplug the product before cleaning the filter.
- The pre-filter is reusable by removing dust or cleaning it with water.
- If the pre-filter is not cleaned for along time. the product performance may deteriorate.
- Deodorization filter and True HEPA filter cannot be cleaned and reused. Never clean them with water.
Cleaning the pre-filter (every 2 ~ 4 weeks)
1. Open the front cover by pulling out the top part of it.
2. Press down on the top clip of the pre-filter and pull it out.
* To prevent dust from falling off. emove the filter carefully without exerting ashock.
3. Clean the pre-filer with a vacuum cleaner or with water depending on the level of contamination.
4. Install the pre-filter after removing the moisture completely.
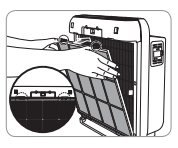
Fit the front cover back to the product.
* When refitting the pre-filter to the product. ftit in the hook correctly.
FILTER REPLACEMENT
TIPS:
- Check that the front side of filters are in the correct direction.
- To maintain optimal performance of the product, use original Coway filters.
- Always unplug the air purifier before replacing filters.
Filter cleaning and replacement cycles
Resetting the filter replacement indicator
1. Reset indicator blinks when the filter needs to be replaced. 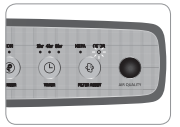
2. Odor LED : Deodorization Filter
HEPA LED : True HEPA filter
3. The pollution level indicator will not turn on if the filter replacement indicator is activated.
4. After replacing filter. push the Reset button for 2 seconds. 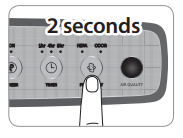
Forcible reset mode
When you have replaced a filter before the filter replacement cycle is reached. you can forcibly reset the filter replacement cycle back to the factory default setting.
1. When the reset function is not activated. press and hold the reset button for 2 seconds.
2. Press the reset button to select the desired filter to forcibly reset.
Press once: Odor LED (Deodorization Filter)
Press twice: HEPA LED (True HEPA Filter)
3. After you select the filter to reset, press and hold the reset button for 2 seconds. And then. the accumulated time in electronic time counter is erased.
* If there is no input for 5 seconds in forcible reset mode. the reset mode is canceled.
TROUBLESHOOTING
1. No air is blowing.
- Is the power cord connected ?
- Connect the power cord to an electric outlet for 120 V~. 60 Hz.
- Is the display part all turned off?
- Press the power button and then select the desired function
- Isn't the power gone out?
- Use the air purifier after the power comes back on.
- Is the front cover closed ?
- Close the front cover properly.
2. The airflow speed does not change.
- Isn't it in manual ?
- Set the desired operating mode.
3. The airflow speed is significantly weaker than before.
- Isn't the filter cleaning or replacement time passed ?
- Check the filter cleaning and replacement cycles and then clean/ replace the filter(s) if necessary.
4. A bad smell comes out of the air outlet.
- Isn't the filter cleaning or replacement time passed ?
- Check the filter cleaning and replacement cycles and then clean/ replace the filter(s) if necessary.
5. The color of the pollution level indicator always stays the same.
- Isn't there dust on the pollution sensor's lens ?
- Clean the lens of the pollution sensor.
- Does the pollution level keep indicating a high level ?
- Adjust the sensitivity of the pollution sensor to Insensitive or standard.
- Does the pollution level keep indicating a low level ?
- Adjust the sensitivity of the pollution sensor to sensitive or standard.
6. When other functional problems are detected.
- Check the symptoms, unplug the product, and ask service center.
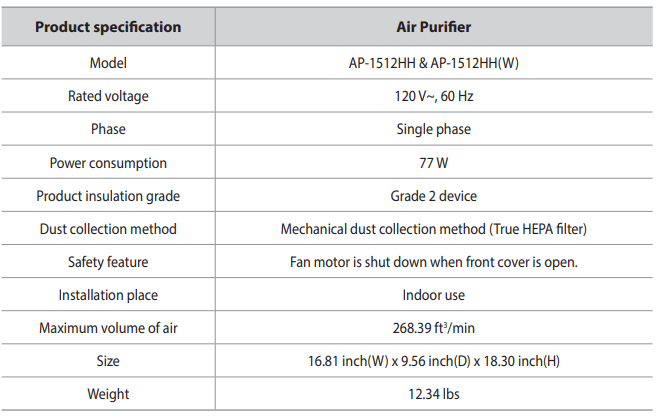
PRODUCT SPECIFICATION