1. USB INPUT 2. HDMI 1 / ARC 3. HEADPHONE PORT 4. RJ45 (ETHERNET) 5. OPTICAL 6. USB INPUT 7. HDMI 3 8. HDMI 2 9. VIDEO 10. AUDIO L & R 11. ANTENNA (RF)
USB connection
Insert a USB storage device into the USB port to record, playback of video/music/photo.
REMOTE CONTROL
1. POWER: Turn the TV on/off. 2. INPUT: Open Input menu (DTV, HDMI1, HDMI2, etc) 3. : Open Netflix 4. : Open YouTube 5. : Start recording DTV Channel (must have USB drive inserted) 6. STOP: Stop multimedia playback, Recording and Timeshift mode 7. MUTE: Turn the sound on or off 8. REWIND: Rewind playback in multimedia/timeshift mode 9. FASTFORWARD: Fastforward playback in multimedia/timeshift mode 10. PLAY/PAUSE: Play/Pause playback in multimedia/timeshift mode 11. TEXT: Teletext Mode 12. GUIDE: Display electronic TV guide in DTV mode 13. ASPECT: Adjust Aspect ratio of the TV 14. ARROWS: Navigate on-screen menu, OK to confirm selection 15. RETURN: Return to previous menu 16. HOME: Open Android TV home page 17. MENU: Open or close on-screen menu 18. : Start a voice search or speak to Google Assistant 19. VOLUME: Increase or decrease TV volume 20. CHANNEL: Next or previous TV channel 21. NUMBERS: Direct access to desired channels 22. INFO: Display channel information 23. : Jumps to last viewed channel 24. : Operations according to the prompt within menu or while watching TV.
Using the Remote Control
Do not mix old and new batteries in the remote
Do not use different types of battery
If you do not intend to use the unit for a long time, please remove batteries from the remote to avoid accident.
Keep batteries away from children and pets.
Never throw batteries into a fire.
Do not drop, or impact the remote control as it void warranty immediately.
The remote control operate at a range of 5 to 6M effectively
Do not expose the remote control sensor to a bright light.
INITIAL SETUP
For the first initial setup, on screen setup wizard will guide you through setting up your TV.
Please follow according to onscreen guide to setup your TV correctly.
Be sure to follow the below prompts to pair your Bluetooth remote control. After the pairing is successful, you can now operate the TV.
Use the buttons to select system language, then press OK/SELECT to confirm.
Iif you just want to use your TV normally, please select “SKIP”
To connect your Android Smartphone to your TV, Select “Continue”.
Press to select your Wi-Fi you wish to connect to, enter the password and then confirm to connect.
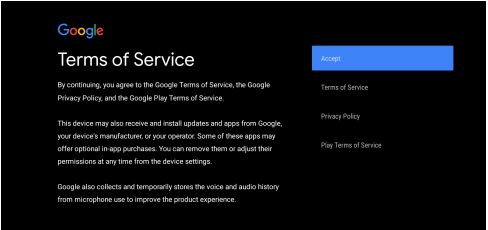
By accepting the Google Terms of Service to improve the product experience, Select “ACCEPT” to proceed with this condition.
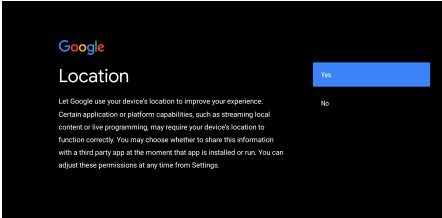
Select “YES” if you want your location identified on your ANDROID TV. (Note: Select “YES” if you want google to inform you on weather more accurately based on location).
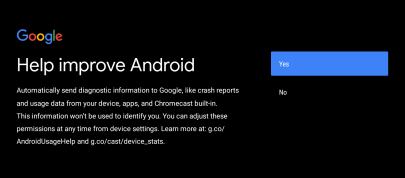
By Agreeing and selecting “YES”, you agree to automatically send diagnostic information to Google to help improve your Google experience.
Informational screens will now appear, you can scroll through steps by press “RIGHT” directional button to continue.
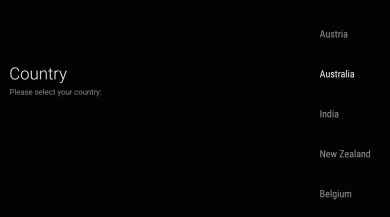
Select the country you are using the device in with the directional buttons.
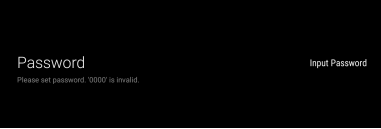
Used to set a password of your TV for security purposes.
NOTE: make sure to save the password, as you can then refer to password when required.
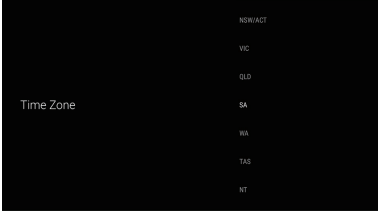
Select the TimeZone you are using the device in with the directional buttons.
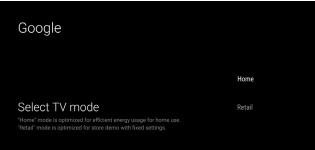
Please be sure in this step, select “HOME” if you are using this TV for use at home.
Make sure to confirm once you have selected “HOME”.
Let this device be detected as a Google Cast device and allow Google Assistant and other services to wake this device up to respond to Cast commands, even when on standby and the screen is off.
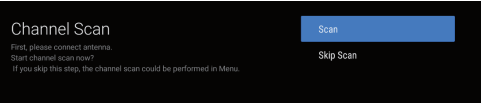
Make sure to select “SCAN” to auto tune your TV to search for local DTV channels.
NOTE: Please make sure Antenna (RF) cable is plugged into the ANT IN port located on back of TV. (refer to page 11 TV ports - #10).
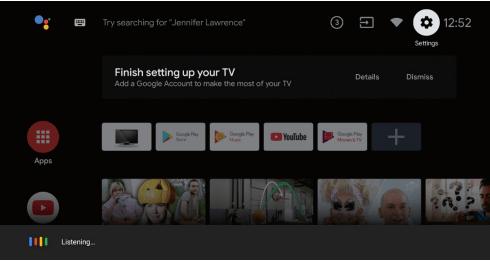
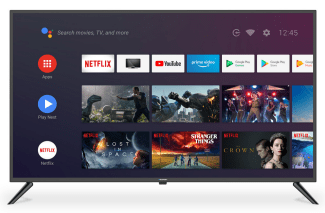
ANDROID TV - HOME SCREEN
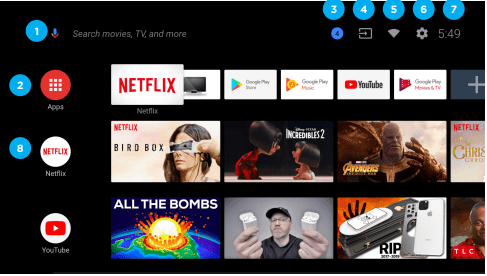
Once you have completed initial setup, you will now enter the ANDROID TV home screen.
Open Google Assitant to start a voice search.
Selected the Multi-dot red circle to have access to all your applications. Pre-installed applications are available for you in this row, select “Google Play Store” If you wish to search and download additional apps optmised for Android TV.
NOTIFICATION: here will display all notifications relating to anything on your ANDROID TV.
INPUTS: Select this if you want to adjust your TV Input, Example: DTV, HDMI 1, HDMI 2.
NETWORK: This will display what network connectivity, Wi-Fi or ETHERNET.
SETTINGS: Select this if you want to access TV settings.
TIME: Displaying current time.
Each row past this point will display recommended content from the apps you already have installed.
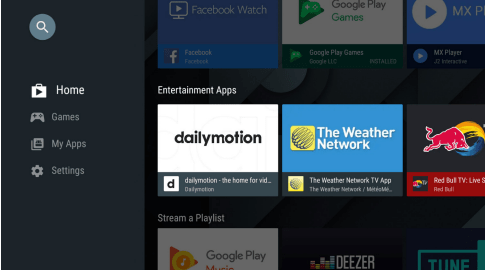
GOOGLE PLAY STORE
Once you have signed in, you will be brought to the below page, scroll through the list of applications available for download OR go to the search button, and search via entering Text or speaking to Google Assistant via your remote control.
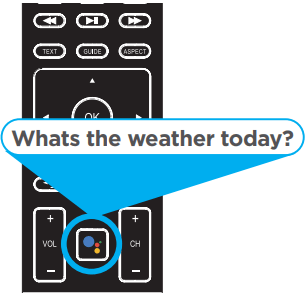
GOOGLE ASSISTANT
You now have access to Google Assistant via the (#1 on page 20) or by pressing (Google Assistant) button on your remote control to commence.
Allow for the voice box to appear at the bottom of your TV screen, stating: “Listening” then speak clearly towards the top of your remote control for Google Assistant to hear you. Once Google Assistant understands, what you have requested will be actioned.
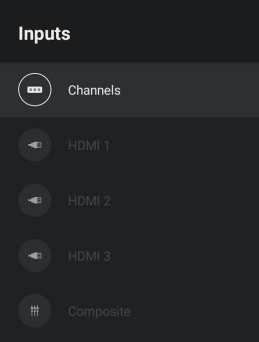
INPUT MENU
To access INPUT menu, either select INPUT (#4 on page 20) via the HOME screen or press the SOURCE button on your remote control to have quick access to INPUT menu.
The options that are AVAILABLE will be highlighted, PORTS that are not in use, you will not be able to access.
SETTINGS
To access SETTINGS menu, select SETTINGS (#6 on page 20) via the HOME screen
NETWORK & INTERNET
To access NETWORK menu, select WIFI icon (#5 on page 20) via the HOME screen or go into Settings (#6 on page 20) menu and go down and select Network & Internet.
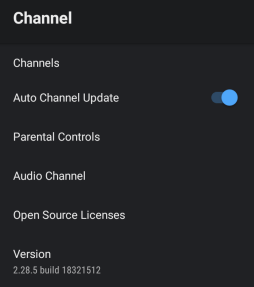
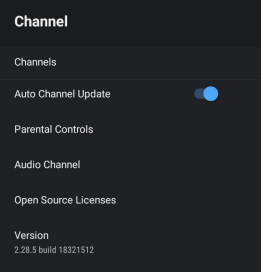
CHANNEL MENU
To access CHANNEL menu, select SETTING icon (#6 on page 20) via the HOME screen.
Then go down and select “CHANNEL”.
Channels
Display the scan sub-menu based on different channel installatino modes.
Antenna - Set the signal type to antenna, when set to antenna the TV can now receive digital broadcasting signals.
Auto Update Channel - Enable or disable, allows your TV to automatically update if any changes made to scanned DTV channels.
DEVICE PREFERENCES
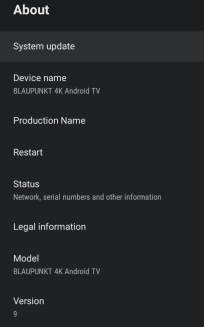
ABOUT
To access ABOUT menu, select SETTING icon (#6 on page 20) via the HOME screen. Then go down and select “ABOUT”.
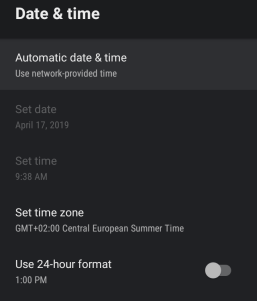
TIME
To access DATE & TIME menu, select SETTING icon (#6 on page 20) via the HOME screen. Then go down and select “DATE & TIME”.
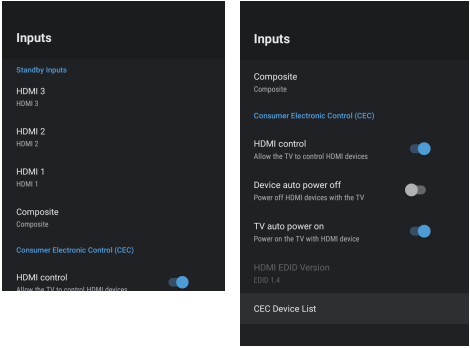
INPUT SETTINGS MENU
To access INPUT SETTINGS menu,
Select SETTING icon (#6 on page 20) via the HOME screen.
Select “Device Preferences”
Then go down and select “INPUTS”.
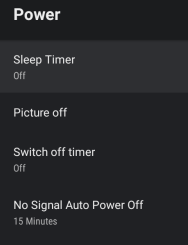
POWER SETTINGS MENU
To access POWER SETTINGS menu,
Select SETTING icon (6) via the HOME screen.
Select “Device Preferences”
Then go down and select “POWER”.
Sleep Timer - Options of Off, 10 mins, 20 mins, 30 mins, 40 mins, 50 mins, 60 mins, 90 mins and 120 mins to auto turn off your TV.
Picture Off - Turn off your display (recommended not to select this option.
No Signal Auto Power Off - Turns your TV off if no signal is detected.
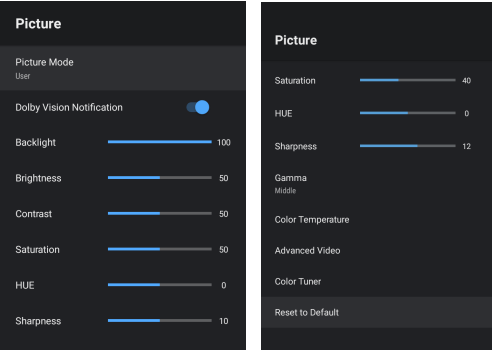
PICTURE SETTINGS MENU
To access PICTURE SETTINGS menu,
Select SETTING icon (6) via the HOME screen.
Select “Device Preferences”
Then go down and select “PICTURE”.
Picture Mode - Options to choose from - Standard, Vivid, Sport, Movie, Game, Energy Saving, User.
HDR - The default setting for HDR is ON this will allow you to enjoy the full effects of HDR (High Dynamic Range).
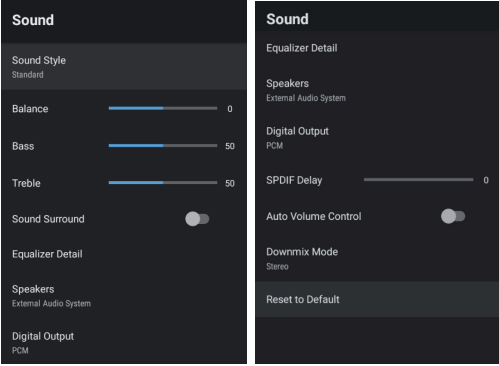
SOUND SETTINGS MENU
To access SOUND SETTINGS menu,
Select SETTING icon (6) via the HOME screen.
Select “Device Preferences”
Then go down and select “SOUND”.
Sound Style - Options to choose from - Standard, Vivid, Sports, Movie, Music, News, User.
Speakers - TV Speakers or External Speaker (This will force the TV to output sound through the chosen option).
Digital Output - Auto, Bypass, PCM, Dolby Digital Plus, Dolby Digital. (It is recommended to select AUTO, as this will automatically detect quality of sound being procued by content).
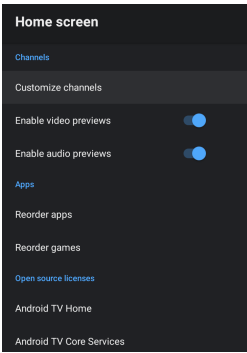
HOME SCREEN
To access HOME SCREEN menu,
select SETTING icon (#6 on page 20) via the HOME screen.
Select “Device Preferences”
Then go down and select “HOME SCREEN”.
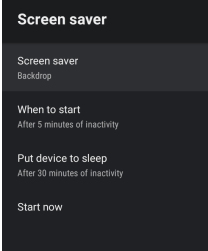
SCREEN SAVER
To access SCREEN SAVER menu,
select SETTING icon (#6 on page 20) via the HOME screen.
Select “Device Preferences”
Then go down and select “SCREENSAVER”.
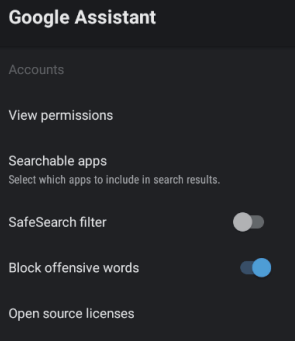
GOOGLE ASSISTANT
To access GOOGLE ASSISTANT menu,
Select SETTING icon (#6 on page 20) via the HOME screen.
Select “Device Preferences”
Then go down and select “GOOGLE ASSISTANT”.
Accounts will only be accessible if you have connected a Gmail account via the “Google Play Store”. A Gmail account is needed in order to download and install applications via the “Google Play Store”.
PARENTAL CONTROL
To access PARENTAL CONTROL menu,
Select SETTING icon (#6 on page 20) via the HOME screen.
Select “Device Preferences”
Then go down and select “CHANNEL”.
Select “Parental Control”
From here you have the option to select and create a new password to lock the channels you want to lock.
Note: please make sure to store/save password somewhere you can access at a later date. Forgetting password, you may need to factory reset TV to use again.
Channels Blocked - Block specific channels to restrict use.
Program Restrictions - You can restrict specific programs on a TV channel can be blocked
Inputs Blocked - Block a TV port input to restrict use.
Change PIN - Change existing PIN selected when first entering this menu.
FAQS
GENERAL PROBLEMS WITH TV SET
Symptoms
Items to Check and Actions to Follow
"Ghost" or double image
• This may be caused by obstruction to the antenna due to high rise buildings or hills. Using a highly directional antenna may improve the picture.
No power
• Check if the TV's AC power cord is plugged into the outlet. • Unplug the TV, wait for 60 seconds. Then reinsert plug into the outlet and turn on the TV again.
No picture
• Check antenna connections at the rear of the TV to see if it is properly connected to the TV. • Possible broadcast station trouble. Try another channel. • Adjust the contrast and brightness settings. • Check the Closed Captions control. Some TEXT modes could block the screen.
Good picture but no sound
• Increase the volume level by pressing the VOL+ button on the remote control or on the TV side control panel. • Press the MUTE button on the remote control to ensure mute is off.
Good sound but poor color
• Adjust the contrast, color and brightness settings.
Poor picture
• Poor picture quality may occur when an activated S-VHS camera or camcorder is connected to your TV and other peripherals at the same time. Switch off one of the peripherals.
Snowy picture and noise
• Check the antenna connection.
Horizontal dotted line
• This may be caused by electrical interference (e.g. hair dryer, nearby neon lights, etc.) Turn off the equipment.
Television not responding to remote control
• Check whether the batteries are working. Replace if necessary. • Clean the remote control sensor lens on the TV. • You can still use the buttons on the side of your TV.
Pixels (dots) that are always dark or always lit
• Your TV is precision-manufactured using an extremely high level of technology. However, sometimes pixels may not display correctly. These types of occurrences are inherent to this type of product and do not constitute a defective product.


 : Open Netflix
 : Open YouTube
 : Start recording DTV Channel (must have USB drive inserted)
 : Start a voice search or speak to Google Assistant
 : Jumps to last viewed channel
 : Operations according to the prompt within menu or while watching TV.
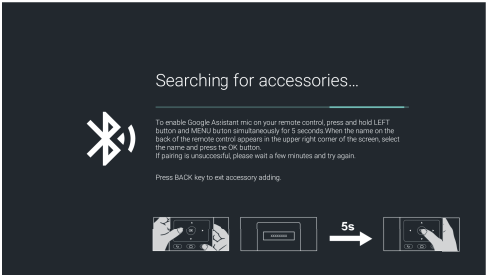
 buttons to select system language, then press OK/SELECT to confirm.
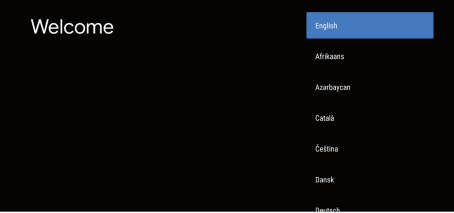


 (Google Assistant) button on your remote control to commence.