Reader™ User Guide
Print
Search
Getting started
Basic Operations
Adding/Getting Content
Browsing Content Lists
Reading
Organizing
Other Applications
Settings
Other Information
Contents list
Top page
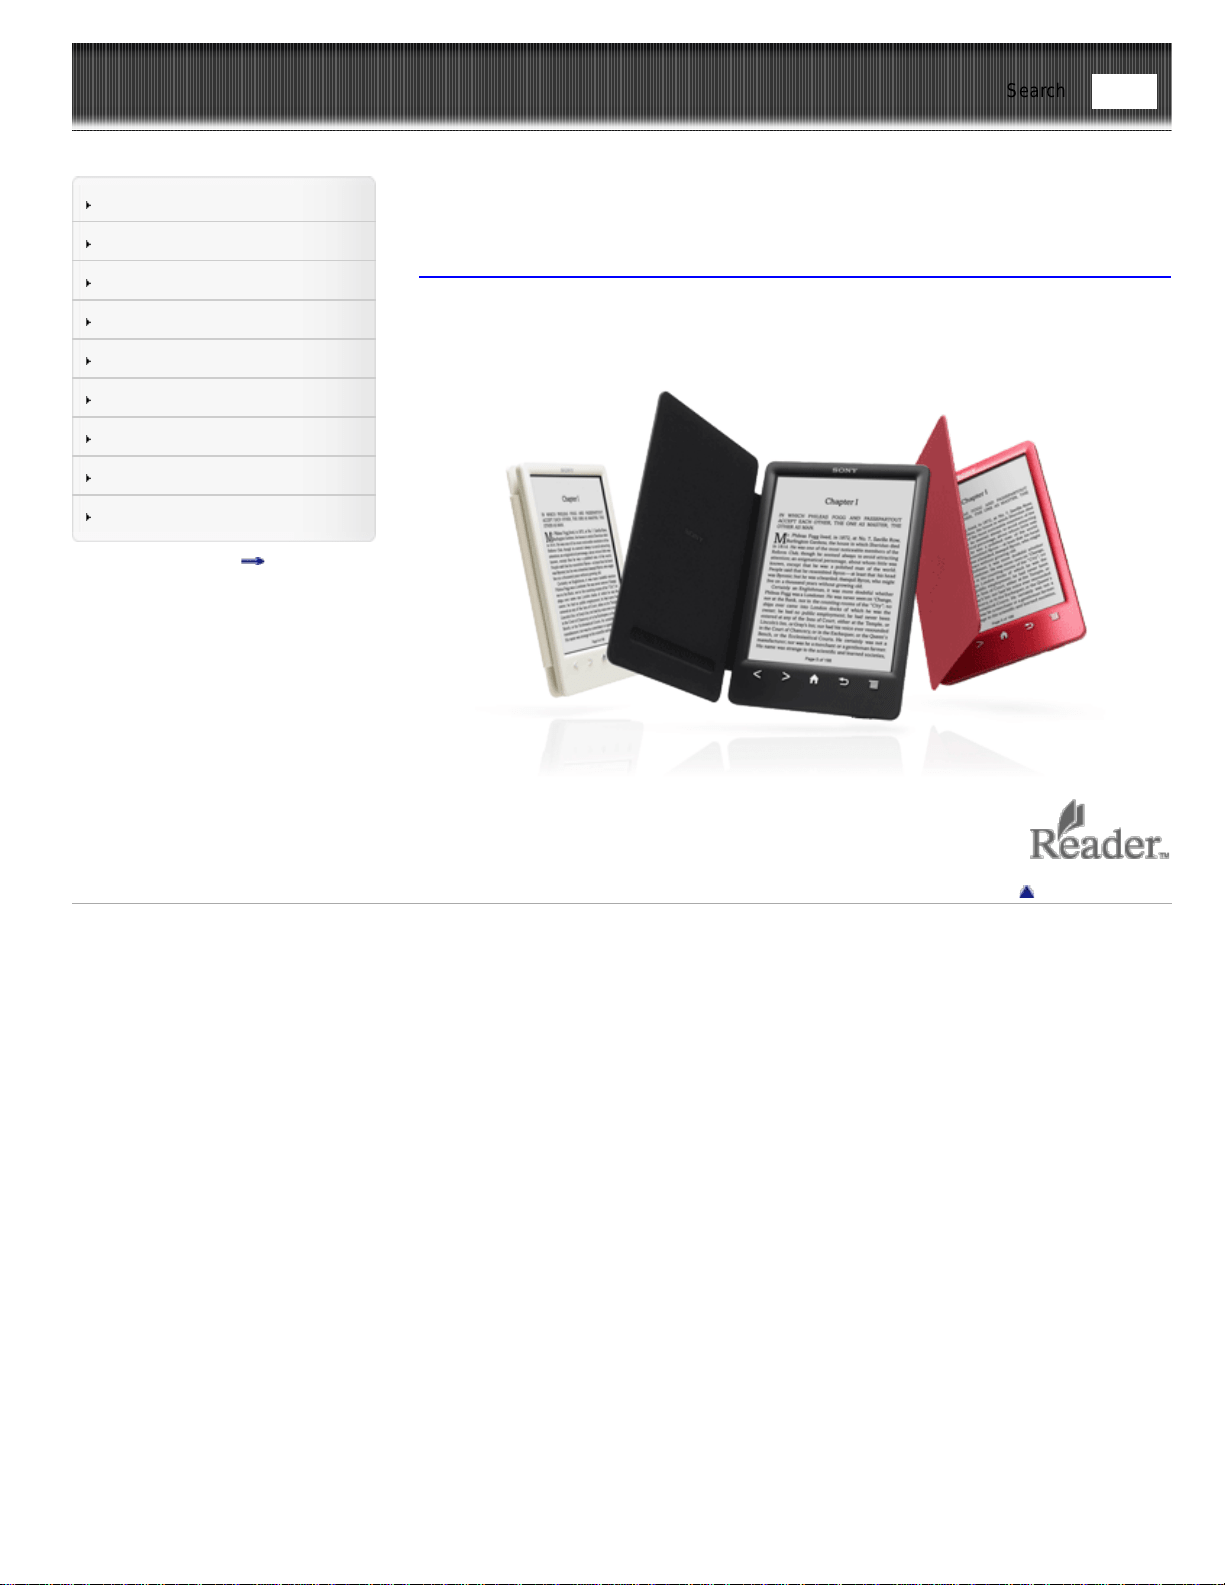
PRS-T3 Series
User Guide
Use this manual if you encounter any problems, or have any questions about your
Reader™.
Go to page top
Copyright 2013 Sony Corporation
Find
Reader™ User Guide
Print
Search
Getting started
Basic Operations
Adding/Getting Content
Browsing Content Lists
Reading
Organizing
Other Applications
Settings
Other Information
Contents list
Top page > Getting started
Getting started
Welcome!
About your Reader™
Reader Features and Functions
Wireless Connectivity
Join a Wi-Fi® Network
Battery
Charging the Reader
Maximizing Battery Life
Installing Reader application (Reader for PC/Mac)
Installing Reader application (Reader for PC/Mac)
Turning the Power On/Off
Turning the Power On/Off
Parts and Controls
Overview
Buttons
Removing/attaching the Standard Cover (PRS-T3)
Removing/attaching the Back Panel (PRS-T3S*)
microSD Card Slot
Go to page top
Copyright 2013 Sony Corporation
Find
Reader™ User Guide
Print
Search
Getting started
Basic Operations
Adding/Getting Content
Browsing Content Lists
Reading
Organizing
Other Applications
Settings
Other Information
Contents list
Top page > Basic Operations
Basic Operations
[Home] Screen
Applications and the [Home] Screen
Touchscreen Operations
On-Screen Keyboard
Go to page top
Copyright 2013 Sony Corporation
Find
Reader™ User Guide
Print
Search
Getting started
Basic Operations
Adding/Getting Content
Browsing Content Lists
Reading
Organizing
Other Applications
Settings
Other Information
Contents list
Top page > Adding/Getting Content
Adding/Getting Content
Adding Content
Adding Content
Buying eBooks and Periodicals* at Reader Store*
Go to page top
Copyright 2013 Sony Corporation
Find
Reader™ User Guide
Print
Search
Getting started
Basic Operations
Adding/Getting Content
Browsing Content Lists
Reading
Organizing
Other Applications
Settings
Other Information
Contents list
Top page > Browsing Content Lists
Browsing Content Lists
Content Lists
Browsing Content List Pages
Browsing in Thumbnail View and List View
Using the Page Jump Panel in Content List Pages
Finding Content with a Keyword
Posting Book information to Facebook
Tools
Using (Menu) Items
Go to page top
Copyright 2013 Sony Corporation
Find
Reader™ User Guide
Print
Search
Getting started
Basic Operations
Adding/Getting Content
Browsing Content Lists
Reading
Organizing
Other Applications
Settings
Other Information
Contents list
Top page > Reading
Reading
Reading eBooks
Opening a Book
Page Navigation
Appearance
Annotations
Uploading Highlighted Words on a Page to Evernote
Posting Highlighted Words on a Page to Facebook
Using the Dictionary
Finding Keywords in a Book
Changing Book Page Settings
Using (Menu) Items
Reading Periodicals
Opening a Periodical Issue*
Managing Periodicals*
Page Navigation
Go to page top
Copyright 2013 Sony Corporation
Find

Reader™ User Guide
Print
Search
Getting started
Basic Operations
Adding/Getting Content
Browsing Content Lists
Reading
Organizing
Other Applications
Settings
Other Information
Contents list
Top page > Organizing
Organizing
Organizing Your Content
Deleting a Single Item
Deleting Multiple Items at Once
Protecting a Single Item
Protecting Multiple Items at Once
Using Collections
Creating a Collection
Adding Items to a Collection
Removing Items from a Collection
Renaming a Collection
Deleting a Collection
Posting a Collection to Facebook
Using (Menu) Items
Go to page top
Copyright 2013 Sony Corporation
Find
Reader™ User Guide
Print
Search
Getting started
Basic Operations
Adding/Getting Content
Browsing Content Lists
Reading
Organizing
Other Applications
Settings
Other Information
Contents list
Top page > Other Applications
Other Applications
Public Libraries
Borrowing eBooks from Public Libraries*
Web Browsing
Browsing the Web
Browsing Tools
Downloads
Multiple Windows
Bookmarks and History
Uploading an Address of a Website to Evernote
Browser Settings
Using (Menu) Items
All Notes
Finding Annotations Across All Books and Periodicals
Uploading Annotations Across All Books and Periodicals to Evernote
Posting Annotations Across All Books and Periodicals to Facebook
Dictionary
Using the Dictionary
Changing the Dictionary
Listing Previously Looked-up Words
Using (Menu) Items
Handwriting
Creating a Drawing
Editing an Existing Drawing
Deleting/Protecting a Drawing
Capturing a Screenshot
Using (Menu) Items
Text Memo
Creating a Text Memo
Editing an Existing Memo
Deleting/Protecting a Memo
Using (Menu) Items
Pictures
Viewing Pictures
Changing the Orientation
Zooming in on a Picture
Viewing Pictures in a Slideshow
Uploading a Picture to Evernote
Find

Reader™ User Guide
Print
Search
Getting started
Basic Operations
Adding/Getting Content
Browsing Content Lists
Reading
Organizing
Other Applications
Settings
Other Information
Contents list
Top page
> Settings
Settings
Changing the Settings
Changing the Settings
General Settings
Wireless Network Settings
Application Preferences
Date and Time Settings
System Management
Initialization
About
Device Shutdown
Go to page top
Copyright 2013 Sony Corporation
Find

Reader™ User Guide
Print
Search
Getting started
Basic Operations
Adding/Getting Content
Browsing Content Lists
Reading
Organizing
Other Applications
Settings
Other Information
Contents list
Top page > Other Information
Other Information
Troubleshooting
Troubleshooting Tips
Support PC Web Site
Reader Device
Wireless Connectivity
Reading Books and Periodicals
Viewing Pictures
Connecting to your Computer
microSD Card
Precautions
Safety Information
Applications on the Reader
About Pre-installed Sample Content
Reader Disposal Reference
Additional Information for Customers in the US/Canada
Notes on microSD Cards
Legal Notice
Legal Notice
Appendix
Specifications
Supported File Types
System Requirements
Go to page top
Copyright 2013 Sony Corporation
Find
Reader™ User Guide
Print
Search
Getting started
Basic Operations
Adding/Getting Content
Browsing Content Lists
Reading
Organizing
Other Applications
Settings
Other Information
Contents list
Top page > Contents list
Contents list
Getting started
Welcome!
About your Reader™
Reader Features and Functions
Wireless Connectivity
Join a Wi-Fi® Network
Battery
Charging the Reader
Maximizing Battery Life
Installing Reader application (Reader for PC/Mac)
Installing Reader application (Reader for PC/Mac)
Turning the Power On/Off
Turning the Power On/Off
Parts and Controls
Overview
Buttons
Removing/attaching the Standard Cover (PRS-T3)
Removing/attaching the Back Panel (PRS-T3S*)
microSD Card Slot
Go to page top
Basic Operations
[Home] Screen
Applications and the [Home] Screen
Touchscreen Operations
On-Screen Keyboard
Go to page top
Adding/Getting Content
Adding Content
Adding Content
Buying eBooks and Periodicals* at Reader Store*
Go to page top
Browsing Content Lists
Content Lists
Find

Browsing Content List Pages
Browsing in Thumbnail View and List View
Using the Page Jump Panel in Content List Pages
Finding Content with a Keyword
Posting Book information to Facebook
Tools
Using (Menu) Items
Go to page top
Reading
Reading eBooks
Opening a Book
Page Navigation
Appearance
Annotations
Uploading Highlighted Words on a Page to Evernote
Posting Highlighted Words on a Page to Facebook
Using the Dictionary
Finding Keywords in a Book
Changing Book Page Settings
Using (Menu) Items
Reading Periodicals
Opening a Periodical Issue*
Managing Periodicals*
Page Navigation
Go to page top
Organizing
Organizing Your Content
Deleting a Single Item
Deleting Multiple Items at Once
Protecting a Single Item
Protecting Multiple Items at Once
Using Collections
Creating a Collection
Adding Items to a Collection
Removing Items from a Collection
Renaming a Collection
Deleting a Collection
Posting a Collection to Facebook
Using (Menu) Items
Go to page top
Other Applications
Public Libraries

Borrowing eBooks from Public Libraries*
Web Browsing
Browsing the Web
Browsing Tools
Downloads
Multiple Windows
Bookmarks and History
Uploading an Address of a Website to Evernote
Browser Settings
Using (Menu) Items
All Notes
Finding Annotations Across All Books and Periodicals
Uploading Annotations Across All Books and Periodicals to Evernote
Posting Annotations Across All Books and Periodicals to Facebook
Dictionary
Using the Dictionary
Changing the Dictionary
Listing Previously Looked-up Words
Using (Menu) Items
Handwriting
Creating a Drawing
Editing an Existing Drawing
Deleting/Protecting a Drawing
Capturing a Screenshot
Using (Menu) Items
Text Memo
Creating a Text Memo
Editing an Existing Memo
Deleting/Protecting a Memo
Using (Menu) Items
Pictures
Viewing Pictures
Changing the Orientation
Zooming in on a Picture
Viewing Pictures in a Slideshow
Uploading a Picture to Evernote
Deleting Pictures
Using (Menu) Items
Evernote
Using Evernote
Creating a new account
Sign in to Evernote
Evernote Settings
Synchronizing in the Evernote list page

Facebook
Using Facebook
Log In to Facebook
Go to page top
Settings
Changing the Settings
Changing the Settings
General Settings
Wireless Network Settings
Application Preferences
Date and Time Settings
System Management
Initialization
About
Device Shutdown
Go to page top
Other Information
Troubleshooting
Troubleshooting Tips
Support PC Web Site
Reader Device
Wireless Connectivity
Reading Books and Periodicals
Viewing Pictures
Connecting to your Computer
microSD Card
Precautions
Safety Information
Applications on the Reader
About Pre-installed Sample Content
Reader Disposal Reference
Additional Information for Customers in the US/Canada
Notes on microSD Cards
Legal Notice
Legal Notice
Appendix
Specifications
Supported File Types
System Requirements
Go to page top
Copyright 2013 Sony Corporation
Reader™ User Guide
Print
Search
Getting started
Basic Operations
Adding/Getting Content
Browsing Content Lists
Reading
Organizing
Other Applications
Settings
Other Information
Contents list
Top page > Getting started > Welcome! > About your Reader™
About your Reader™
Enjoy the most natural and intuitive reading experience Sony has to offer. This is e-
reading.
Unplug and unwind. Wi-Fi
®
functionality lets you download eBooks and periodicals
directly via your Reader™.
Superior touchscreen. Bookmark, highlight and take notes on the high-contrast e-
paper screen. Read clearly under direct sunlight.
Zoom. Easily adjust the font size, or zoom into images for a closer look.
Dictionary and Wikipedia
®
. Simply tap and hold a word to look up its definition,
translate it or learn more from the Wikipedia Web site.
You can also:
Personalize the standby screen with either your favorite pictures or the cover of the
last-read book.
Create your own collections and organize your eBooks by bestsellers, favorites,
genre and more.
About this guide
Please read the Quick Start Guide and Important Product Information in this package to
help you get started.
This User Guide describes key features of your Reader. You can also find this guide in
[Books] on your Reader. You can find the User Guide in your language at the support
PC Web site.
USA:
http://www.sony.com/readersupport
Canada:
http://www.sony.ca/readersupport
Europe:
http://support.sony-europe.com/eBook/PRS
Australia:
http://www.sony.com.au/support
New Zealand:
http://www.sony.co.nz/support
Note
Screenshots in the User Guide may depict screens different from your Reader.
Searching for a specific topic in this User Guide
Use the [Table of Contents] feature of your Reader to search for topics, and then tap a
topic to jump to it.
While viewing this User Guide on your Reader, press the
(Menu) button tap
[Navigate Page]
[Table of Contents] to view the Table of Contents.
You can also tap the page number at the bottom of the screen
tap [Table of
Contents].
Jumping to a linked section in this User Guide
Tap the link to a chapter or section indicated with a highlight to open the page.
To return to the page you were previously viewing, while viewing a book or periodical,
tap
after tapping a link.
To hide the
/ icons, press the (Back) button.
Changing the font size
Find

Reader™ User Guide
Print
Search
Getting started
Basic Operations
Adding/Getting Content
Browsing Content Lists
Reading
Organizing
Other Applications
Settings
Other Information
Contents list
Top page > Getting started > Welcome! > Reader Features and Functions
Reader Features and Functions
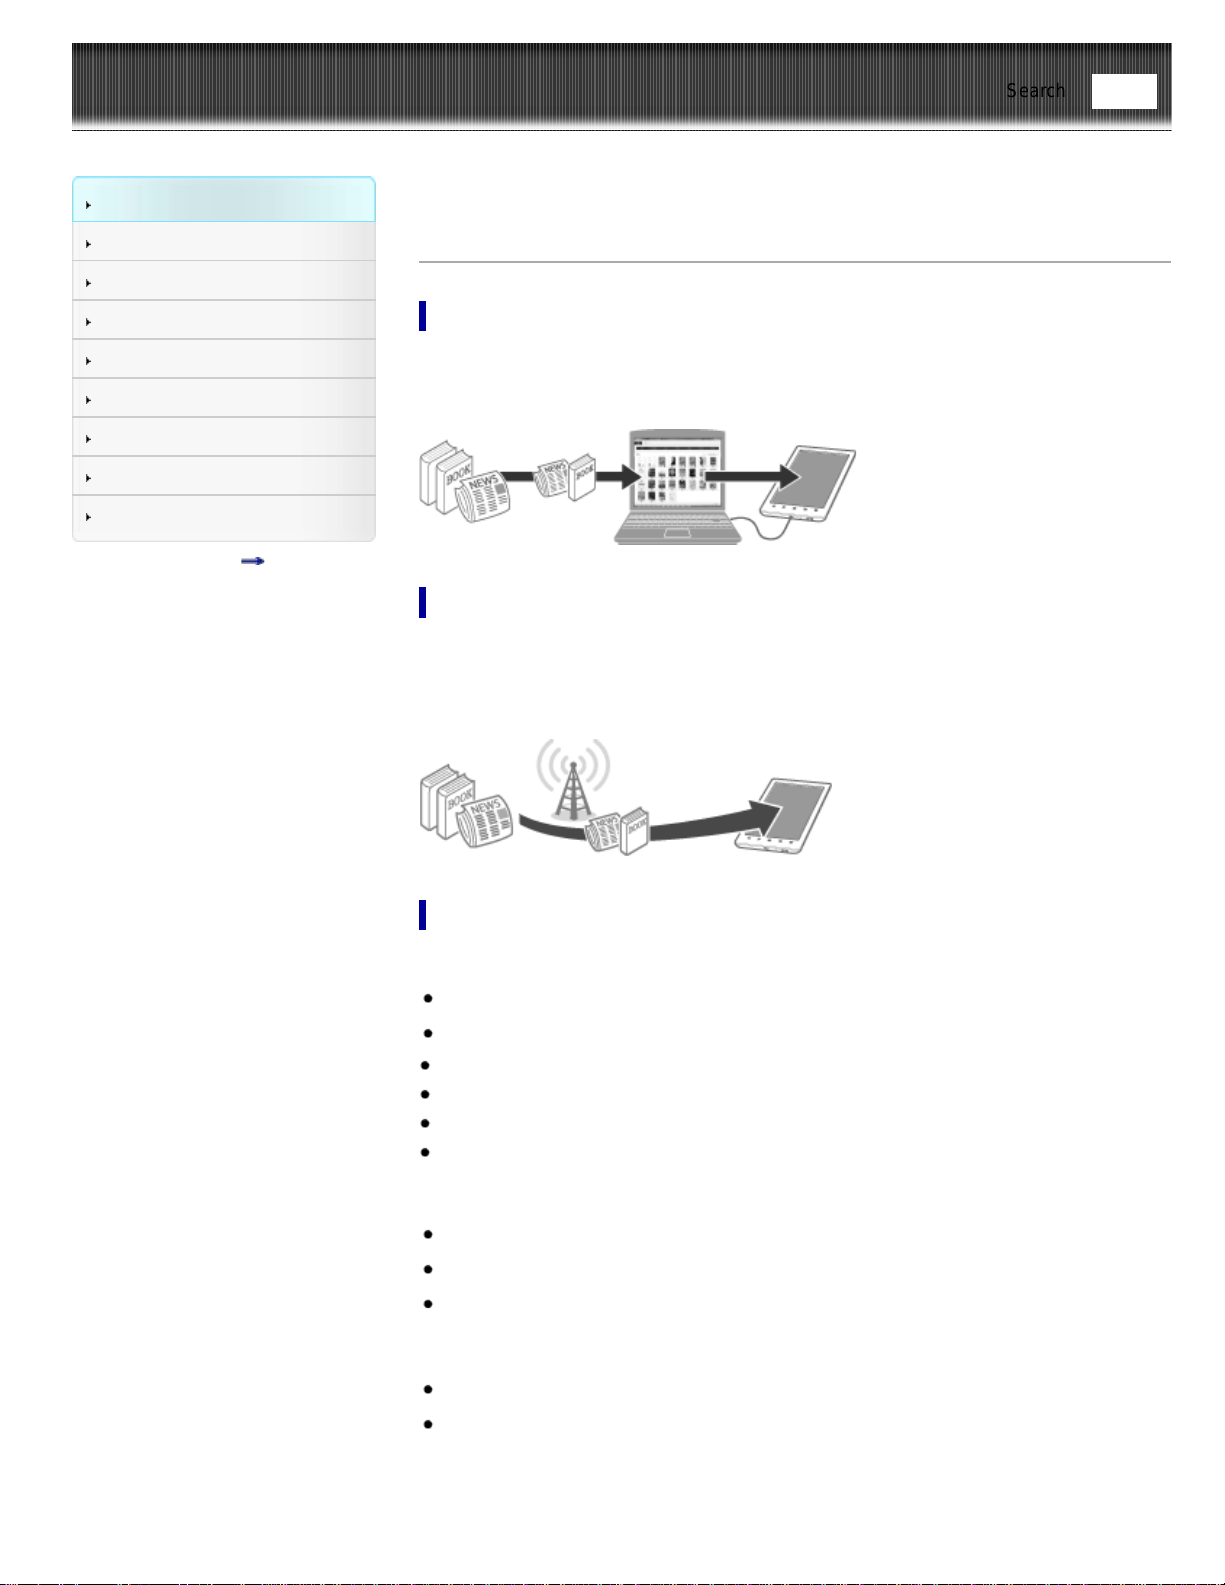
Transferring content from your computer
To enjoy eBooks and pictures on the Reader, download the Reader application to
transfer them from your computer to the Reader. See Details. You can also use the
Reader application to backup and manage the content on the Reader.
Shopping for eBooks at Reader™ Store
Visit Reader Store and find eBooks that you are interested in from a large variety of
titles and genres. The [Reader Store] application may be found on the [Home] screen.
The initial setup of the country/region of the Reader will determine if Reader Store is
available in your area. See Details.
Useful features
Wi-Fi network access Details
Access Reader Store Details
Wikipedia Details
Use the Web browser for internet access Details
Check out eBooks from public libraries for reading on the Reader Details
Use Evernote Details
Use Facebook Details
Annotation Details
Add bookmarks Details
Highlight words Details
Handwrite notes on a page Details
Resize
Adjust font size Details
Change the page view mode Details
Zoom in Details
Adjust content view Details
Find

Search
Find notes Details
Find pages with a keyword Details
Search content via keyword Details
Jump to pages Details
Dictionary Details
Look up words while reading Details
Look up words in a dictionary Details
List previously looked-up words Details
Read periodicals Details
Collections Details
Supplementary applications
Handwriting Details
Text memo Details
Picture viewer Details
Evernote Details
Facebook Details
Go to page top
Copyright 2013 Sony Corporation
Reader™ User Guide
Print
Search
Getting started
Basic Operations
Adding/Getting Content
Browsing Content Lists
Reading
Organizing
Other Applications
Settings
Other Information
Contents list
Top page > Getting started > Wireless Connectivity > Join a Wi-Fi® Network
Join a Wi-Fi
®
Network
To shop at Reader Store or connect to the internet wirelessly, set up a wireless (Wi-
Fi
®
) internet connection with the following steps.
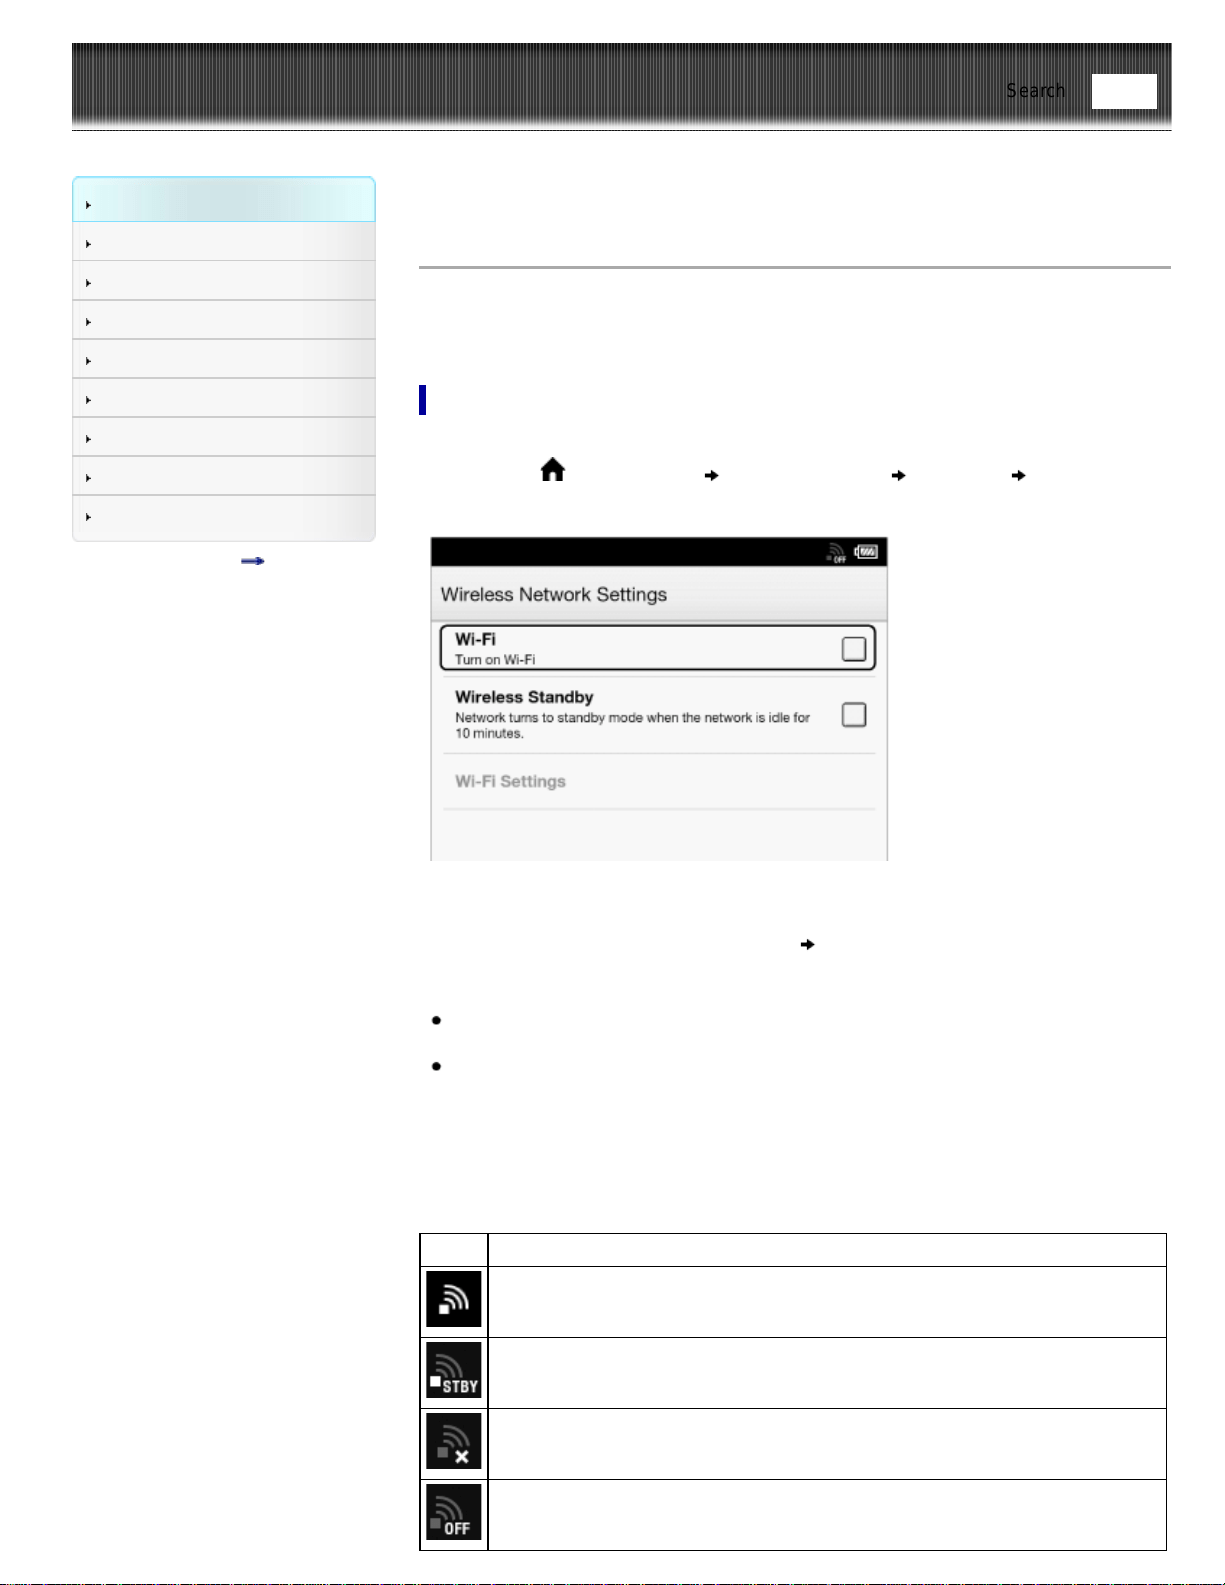
Preparing to set up a Wi-Fi connection
Before connecting to an access point, turn on [Wi-Fi] on the Reader.
1. Press the
(Home) button tap [Applications] [Settings] [Wireless
Network Settings].
2. Check the check box to the right of [Wi-Fi] to turn on the Wi-Fi network.
A check indicates that [Wi-Fi] is turned on. Wi-Fi is turned off by default.
Alternatively, you can tap the status bar
[Wi-Fi]. See Details.
Tip
Turn off [Wi-Fi] when it is not in use in order to extend the battery life of the
Reader.
Turn on [Wireless Standby] when you want to extend the battery life. See Details.
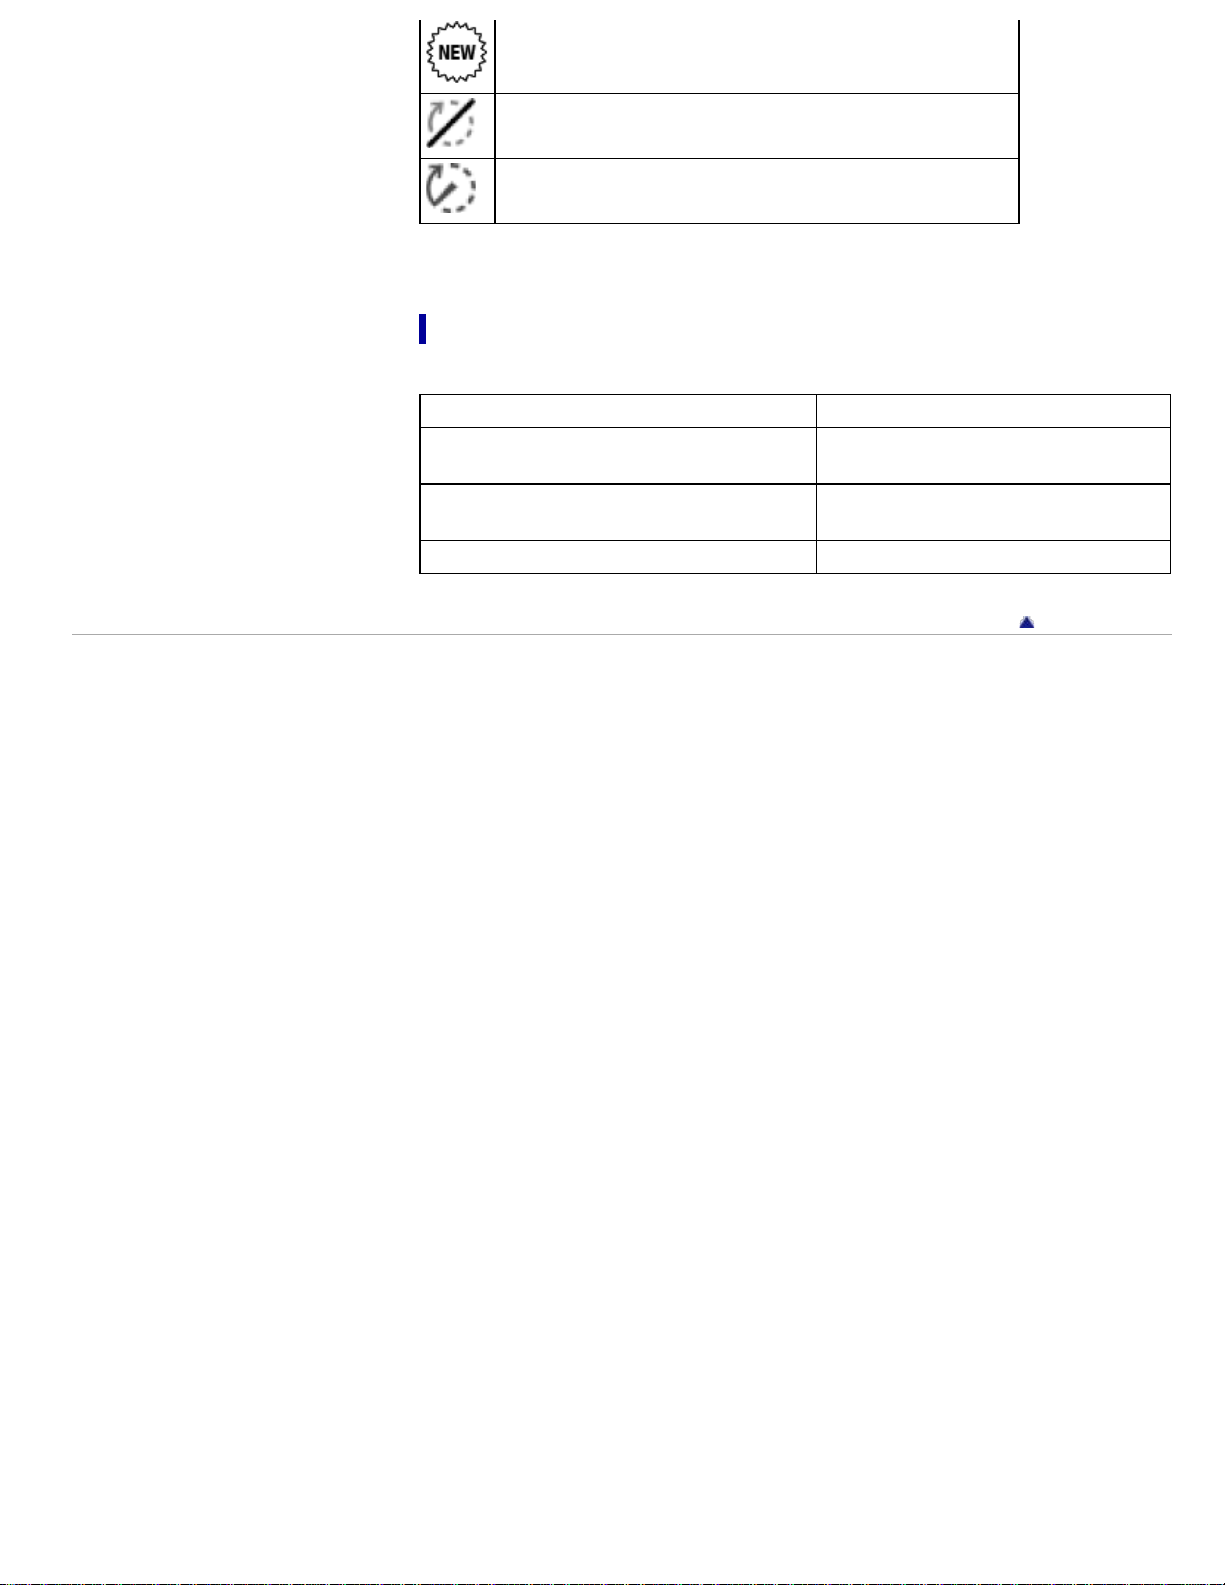
Wi-Fi status icons
The following icons in the status bar indicate the status of the Wi-Fi connection.
Icon Status
Wi-Fi is activated. The number of bars indicates the Wi-Fi signal strength.
The Wi-Fi network feature of the Reader is in standby mode. See Details.
There is no Wi-Fi access point. In this state, you cannot access Reader Store.
The [Wi-Fi] setting is turned off.
Find
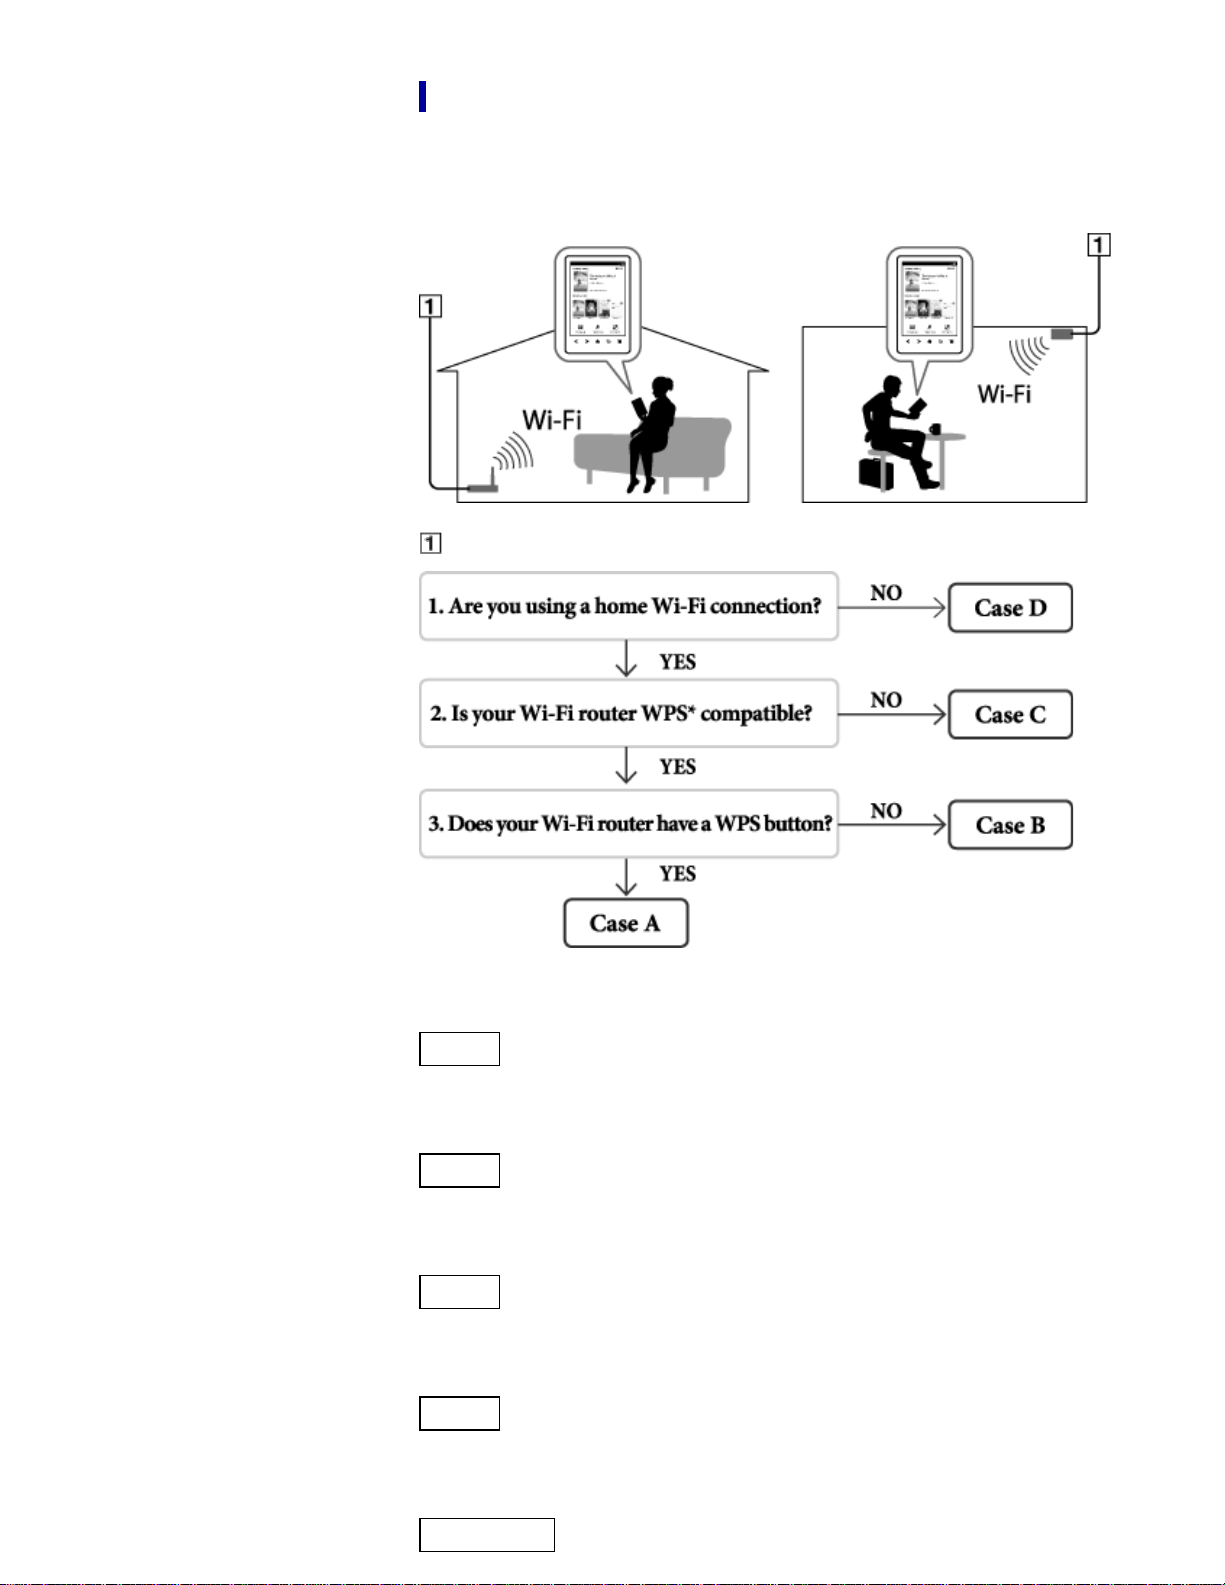
Choosing a connection type
Depending on your Wi-Fi environment, connect to an access point via one of the
following methods.
The following questions will determine the most suitable case for setting the Reader’s
Wi-Fi network connection.
Internet
*WPS: Wi-Fi Protected Setup
Case A
A WPS-compatible Wi-Fi router with WPS button Details
Case B
A WPS-compatible Wi-Fi router with PIN input Details
Case C
Connecting to a Wi-Fi router without WPS support Details
Case D
Connecting to an available Wi-Fi network Details
Manual setup
Set up a Wi-Fi network connection manually; connect to an access point for which the
SSID is set to be invisible. See Details.
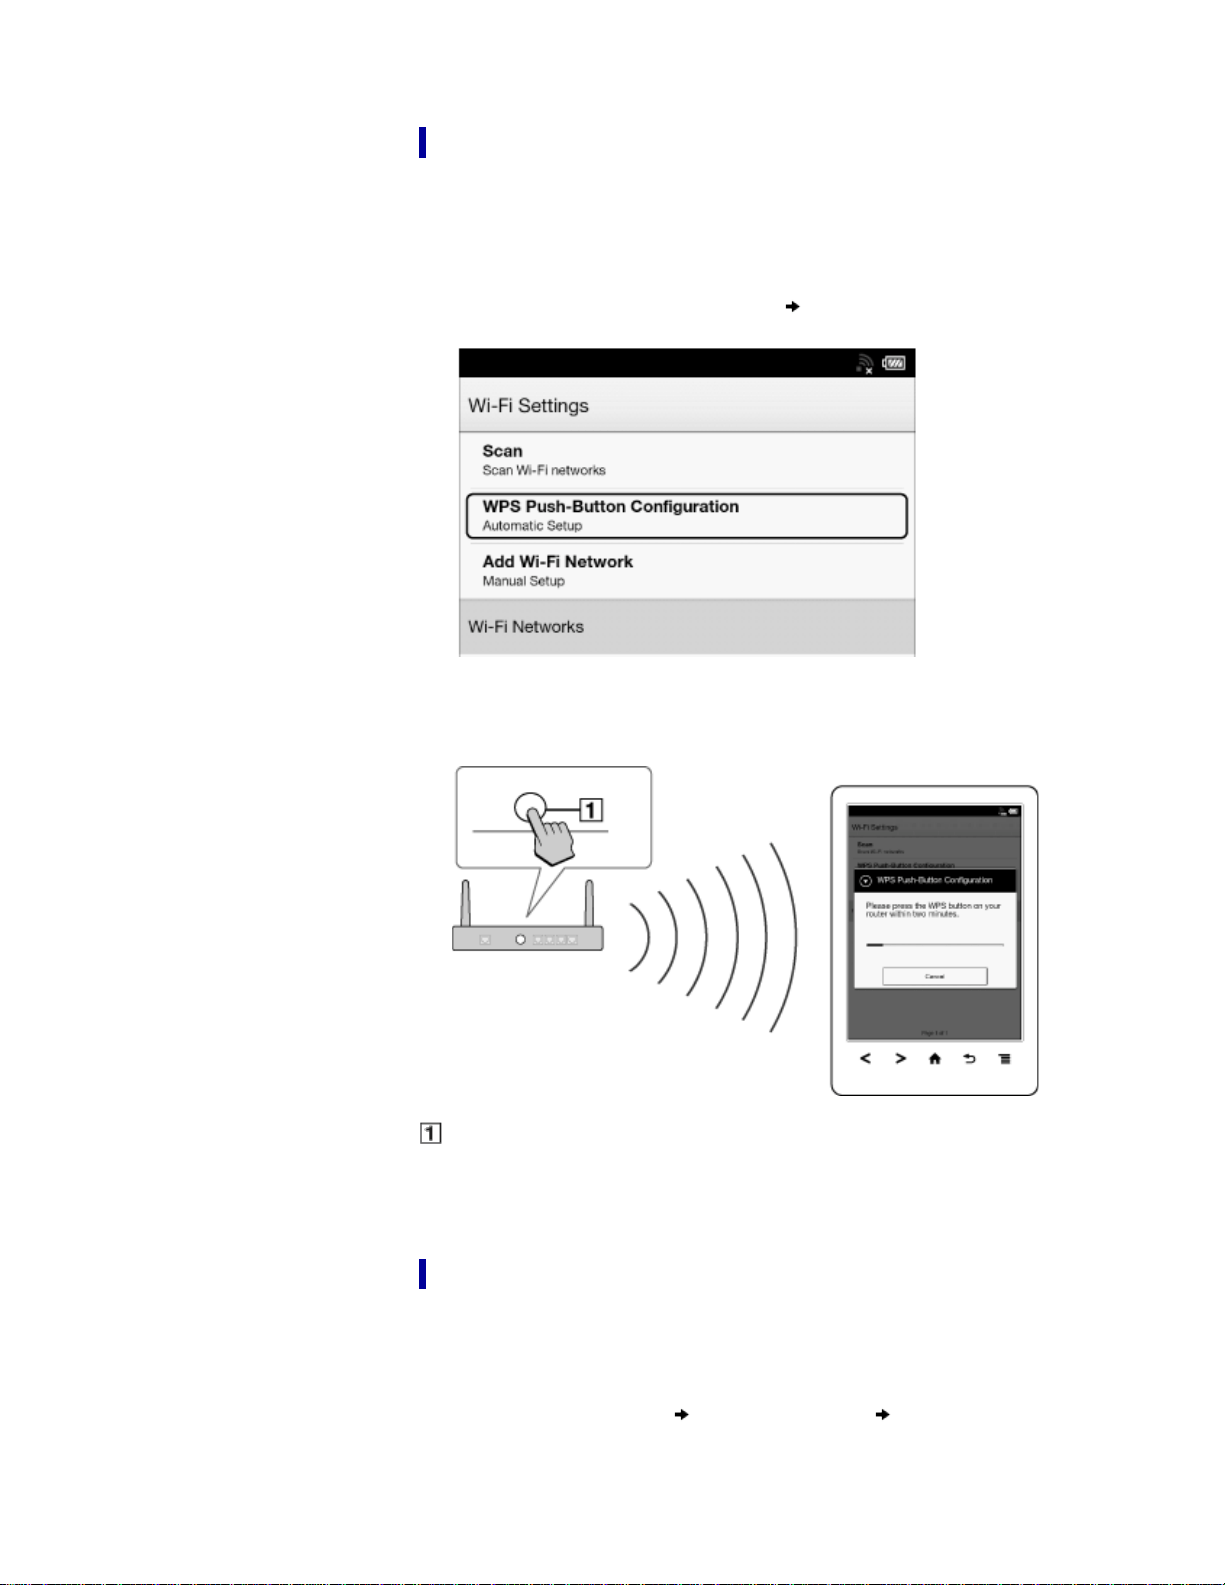
Case A: A WPS-compatible Wi-Fi router with WPS button
The Reader is compatible with WPS (Wi-Fi Protected Setup), which lets you easily
make a Wi-Fi connection using the “WPS” or “Connect” button on your WPS-compatible
Wi-Fi router. Make sure to turn on [Wi-Fi] and tap [Wi-Fi Settings] on the [Wireless
Network Settings] screen. Alternatively, you can turn on [Wi-Fi] by tapping the status bar
and tapping [Wi-Fi Settings].
1. Tap [WPS Push-Button Configuration]
[Start].
2. On your Wi-Fi router, press the “WPS” or “Connect” button within 2 minutes.*
The Reader automatically attempts to establish a Wi-Fi connection.
* The name of the button on your Wi-Fi router may vary.
“WPS” or “Connect” button
3. After the Reader screen shows the setup completion, tap [OK].
The wireless connection status is displayed in the status bar. See Details.
For more technical notes, see Details.
Case B: A WPS-compatible Wi-Fi router with PIN input
If your WPS-compatible Wi-Fi router does not support push-button configuration,
connect by using a PIN (Personal Identification Number). Make sure to turn on [Wi-Fi]
and tap [Wi-Fi Settings] on the [Wireless Network Settings] screen. Alternatively, you
can turn on [Wi-Fi] by tapping the status bar and tapping [Wi-Fi Settings].
1. Tap [Add Wi-Fi Network]
[WPS PIN Method] [Start].
A PIN will be shown on the screen of the Reader.
Enter the PIN into your Wi-Fi router. Refer to your Wi-Fi router’s instruction manual
for further details.
2. After entering the PIN, tap [OK] on the Reader.
After a moment, the Reader connects to the wireless network automatically.
The wireless connection status is displayed in the status bar. See Details.
For more technical notes, see Details.
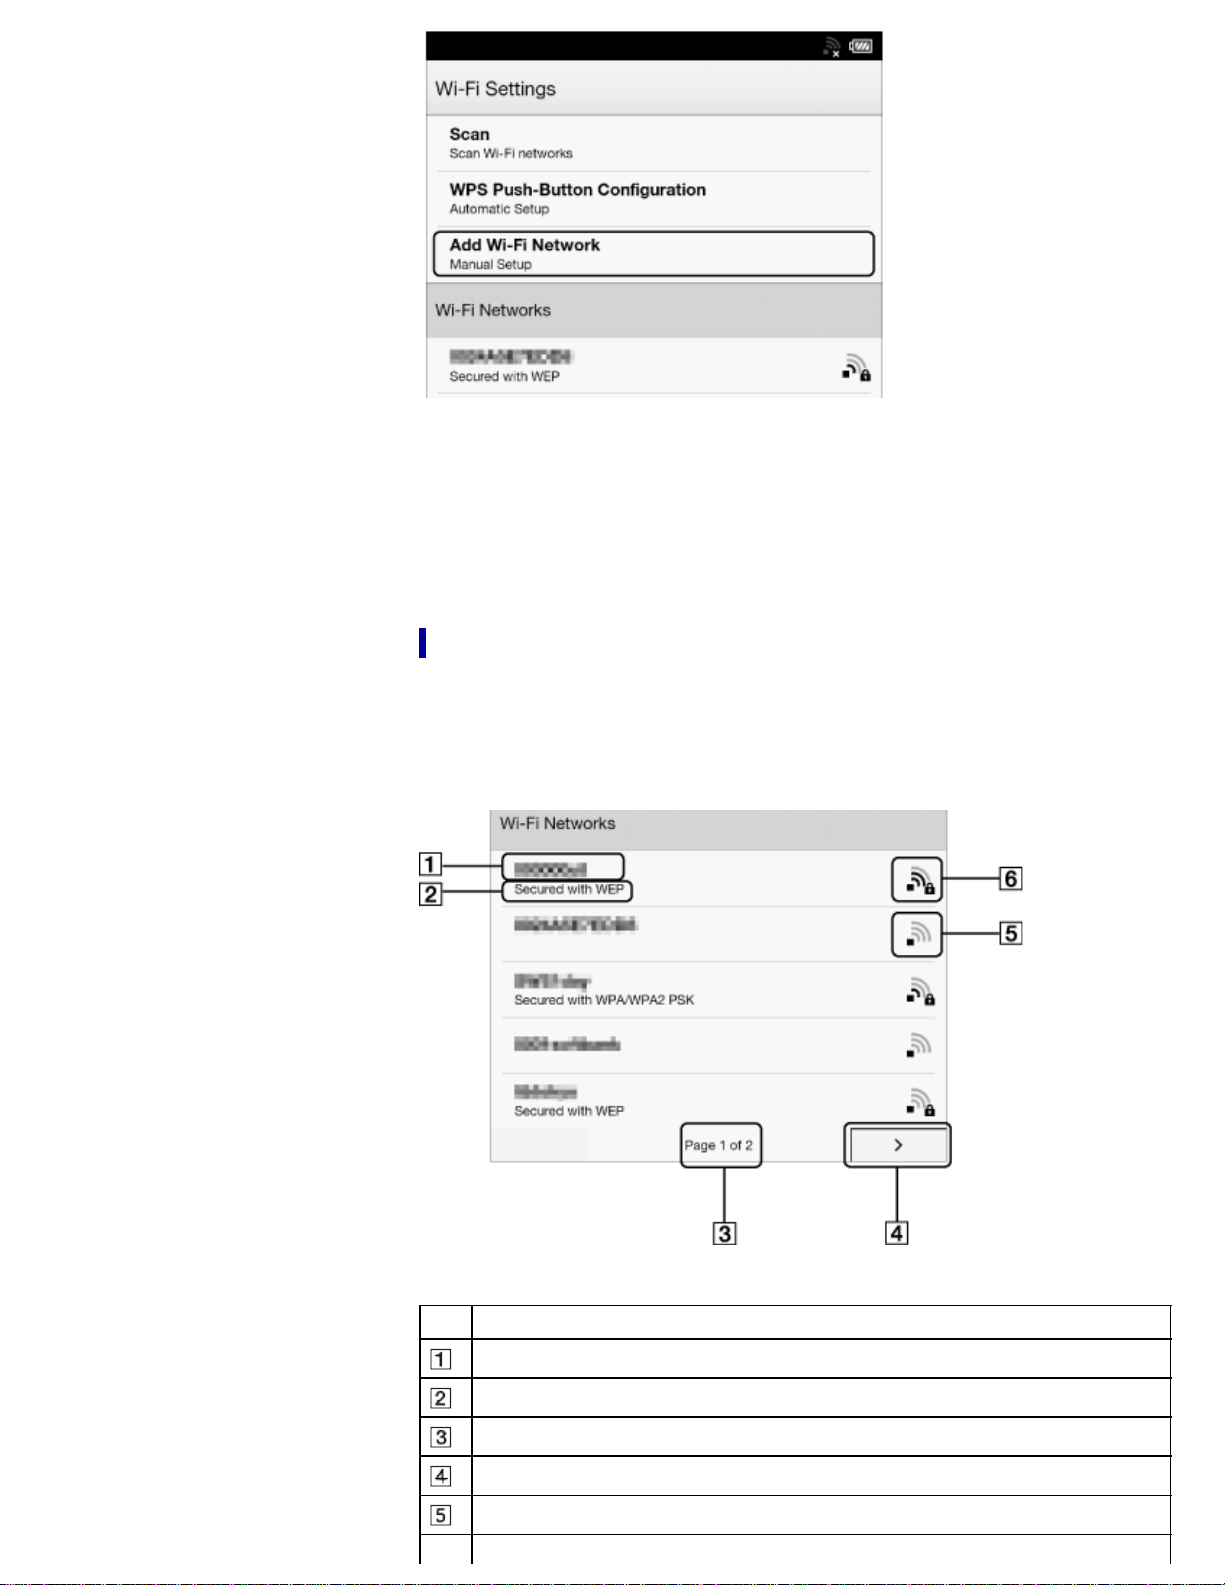
Case C: Connecting to a Wi-Fi router without WPS support
Make sure to turn on [Wi-Fi] and tap [Wi-Fi Settings] on the [Wireless Network Settings]
screen. Alternatively, you can turn on [Wi-Fi] by tapping the status bar and tapping [Wi-
Fi Settings].
1. Tap [Scan].
The available access points are listed under [Wi-Fi Networks].
Item Description
Network SSID
Security type
Page indicator
Page turn icon
Wi-Fi is activated and the Reader detects an unsecured network.
Wi-Fi is activated and the Reader detects a secured network. The Wi-Fi router
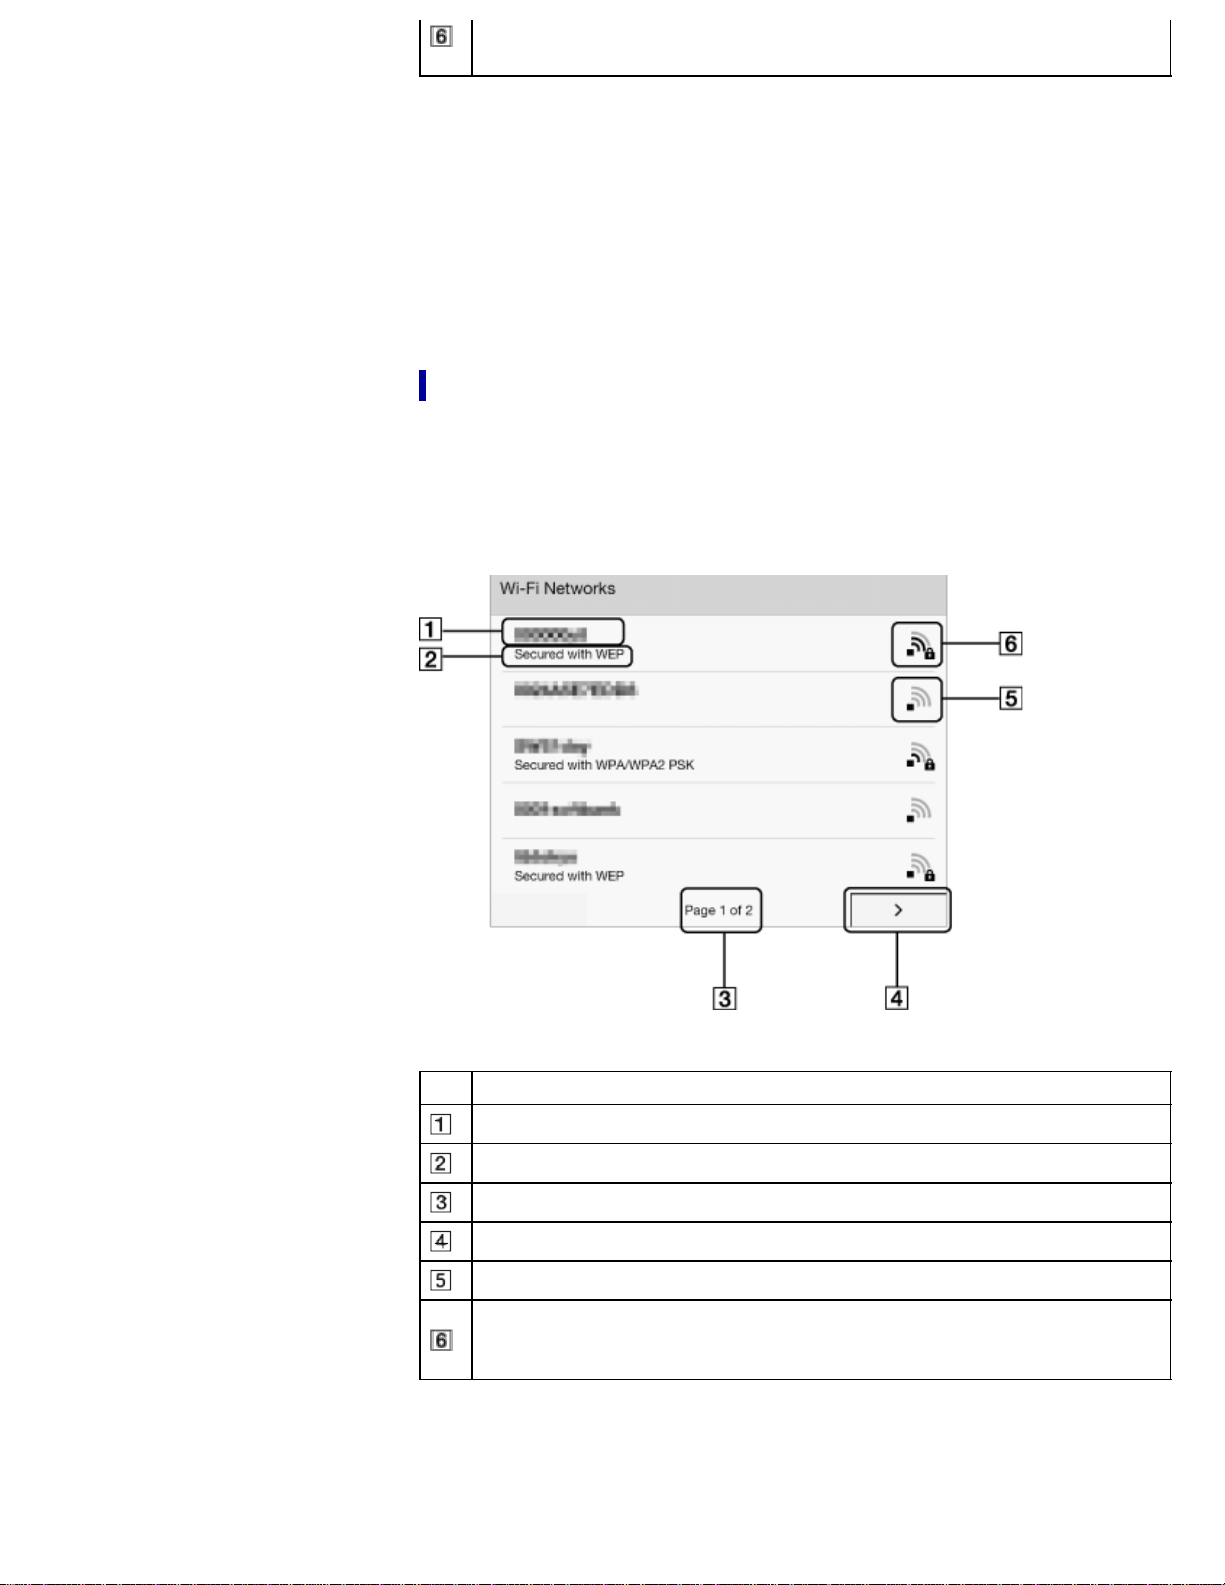
to which you want to connect requires a password. A password may also be
called a WEP key/WPA key/encryption key/network key, etc.
2. Tap your Wi-Fi router’s SSID (Service Set Identifier) in the [Wi-Fi Networks] list. For
details on determining your Wi-Fi router’s SSID, refer to your Wi-Fi router’s
instruction manual.
3. If prompted for a password, tap the input area and type in the password using the
on-screen keyboard.
4. Tap [Connect].
The Reader connects to the Wi-Fi network.
The wireless connection status is displayed in the status bar. See Details.
For more technical notes, see Details.
Case D: Connecting to an available Wi-Fi network
Some public wireless access points, or “hotspots”, are open and you can simply connect
to them. Make sure to turn on [Wi-Fi] and tap [Wi-Fi Settings] on the [Wireless Network
Settings] screen. Alternatively, you can turn on [Wi-Fi] by tapping the status bar and
tapping [Wi-Fi Settings].
1. Tap [Scan].
The available access points are listed under [Wi-Fi Networks].
Item Description
Network SSID
Security type
Page indicator
Page turn icon
Wi-Fi is activated and the Reader detects an unsecured network.
Wi-Fi is activated and the Reader detects a secured network. The Wi-Fi router
to which you want to connect requires a password. A password may also be
called a WEP key/WPA key/encryption key/network key, etc.
2. Tap your Wi-Fi router’s SSID (Service Set Identifier) in the [Wi-Fi Networks] list.
3. If prompted for a password, tap the input area and type in the password using the
on-screen keyboard.
4. Tap [Connect].
The wireless connection status is displayed in the status bar.
5. The [Browser] application may start automatically to connect to a public access
point. Otherwise, start the [Browser] application manually; press the (Home)
button, tap [Applications]
[Browser].
6. The browser screen may show further information about completing the connection.
Follow any instruction(s) where applicable.
For more technical notes, see Details.
Manually setting a Wi-Fi connection
You can set up a Wi-Fi network connection manually by inputting the required
information for connection. Make sure to turn on [Wi-Fi] and tap [Wi-Fi Settings] on the
[Wireless Network Settings] screen. Alternatively, you can turn on [Wi-Fi] by tapping the
status bar and tapping [Wi-Fi Settings].
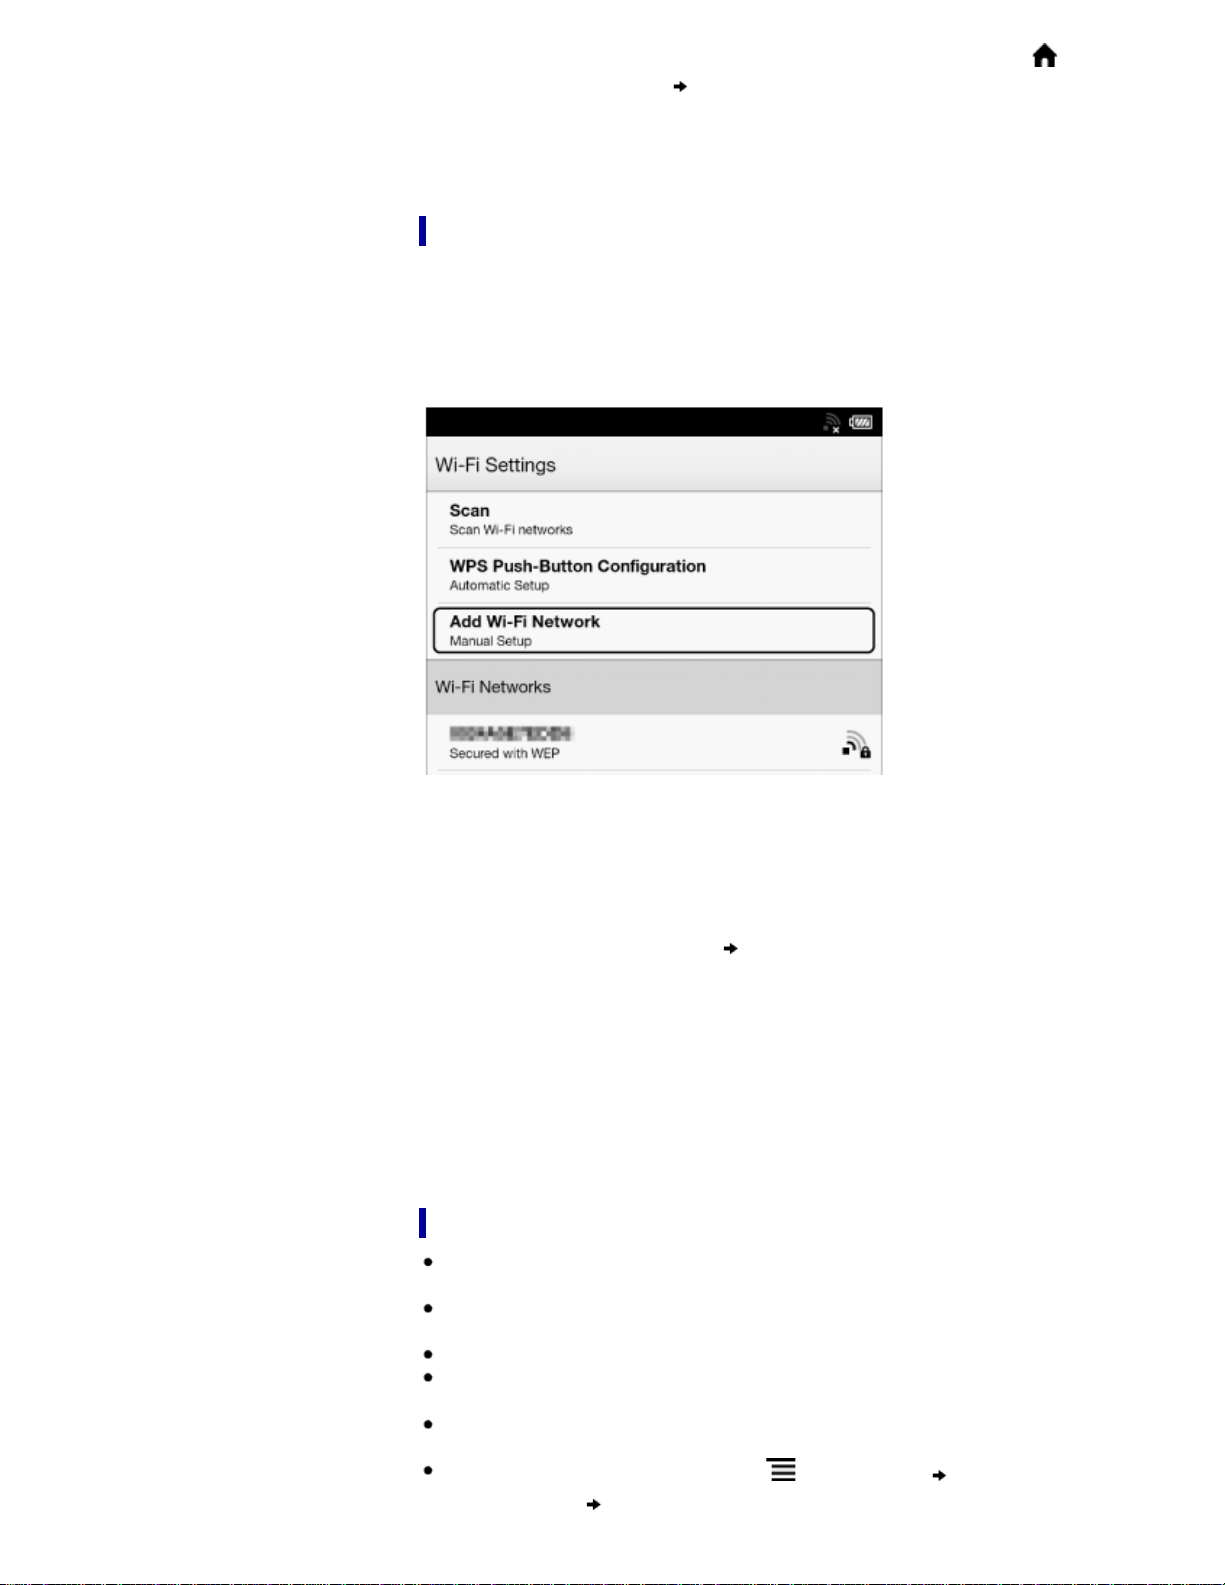
1. Tap [Add Wi-Fi Network].
2. Tap [Manual Registration].
3. Tap the [SSID] input area and type in using the on-screen keyboard.
4. Tap the [Security Method] menu (the default value is [Open]), and then tap the
supported security type.
5. Tap the [Password] input area and type in your password using the on-screen
keyboard, and then tap [Done]
[Save].
6. Tap the saved network SSID in the [Wi-Fi Networks] list on the [Wi-Fi Settings]
screen.
7. If prompted for a password, tap the input area and type in the password using the
on-screen keyboard.
8. Tap [Connect].
The Reader connects to the Wi-Fi network.
The Wi-Fi connection status is displayed in the status bar. See Details.
For more technical notes, see Details.
General notes on Wi-Fi connectivity
Tap and hold a network SSID in the [Wi-Fi Networks] list to display the access
point’s status and related information.
Before connecting to a wireless network, check all requirements, user name and/or
password details with the internet/Wi-Fi service provider.
You can configure up to 20 Wi-Fi network connections.
The Reader does not support certain custom Wi-Fi network security systems. For
details, contact the internet/Wi-Fi service provider.
If you edit the password of a Wi-Fi network to which you are currently connected, the
Reader will attempt to reconnect to the Wi-Fi network using the new password.
To use a static IP address, press the
(Menu) button tap [Advanced] in the
[Wi-Fi Settings]
tap [Use Static IP]. Do not change this setting unless instructed
to by a network administrator, as the Wi-Fi network connection may not be
established correctly.

If an access point’s SSID (Service Set Identifier) is private, enter Wi-Fi connection
information manually.
The access point may filter access by MAC address. Check the MAC address by
pressing the
(Home) button tap [Applications] [Settings] [About]
[Device Information], then register the MAC address with the access point to
establish a Wi-Fi connection.
When you are connected to a Wi-Fi network, you can also display speed, security
and other Wi-Fi network details by pressing the
(Menu) button and tapping
[Connection Information] in the [Wi-Fi Settings] screen.
An access point, once configured, can be connected to again simply by tapping it in
the [Wi-Fi Networks] list and tapping [Connect].
Go to page top
Copyright 2013 Sony Corporation
Reader™ User Guide
Print
Search
Getting started
Basic Operations
Adding/Getting Content
Browsing Content Lists
Reading
Organizing
Other Applications
Settings
Other Information
Contents list
Top page > Getting started > Battery > Charging the Reader
Charging the Reader
The charge/battery status icon at the right side of the status bar shows the battery level.
See Details.
If it is low, choose one of the methods in the following sections to charge the Reader.
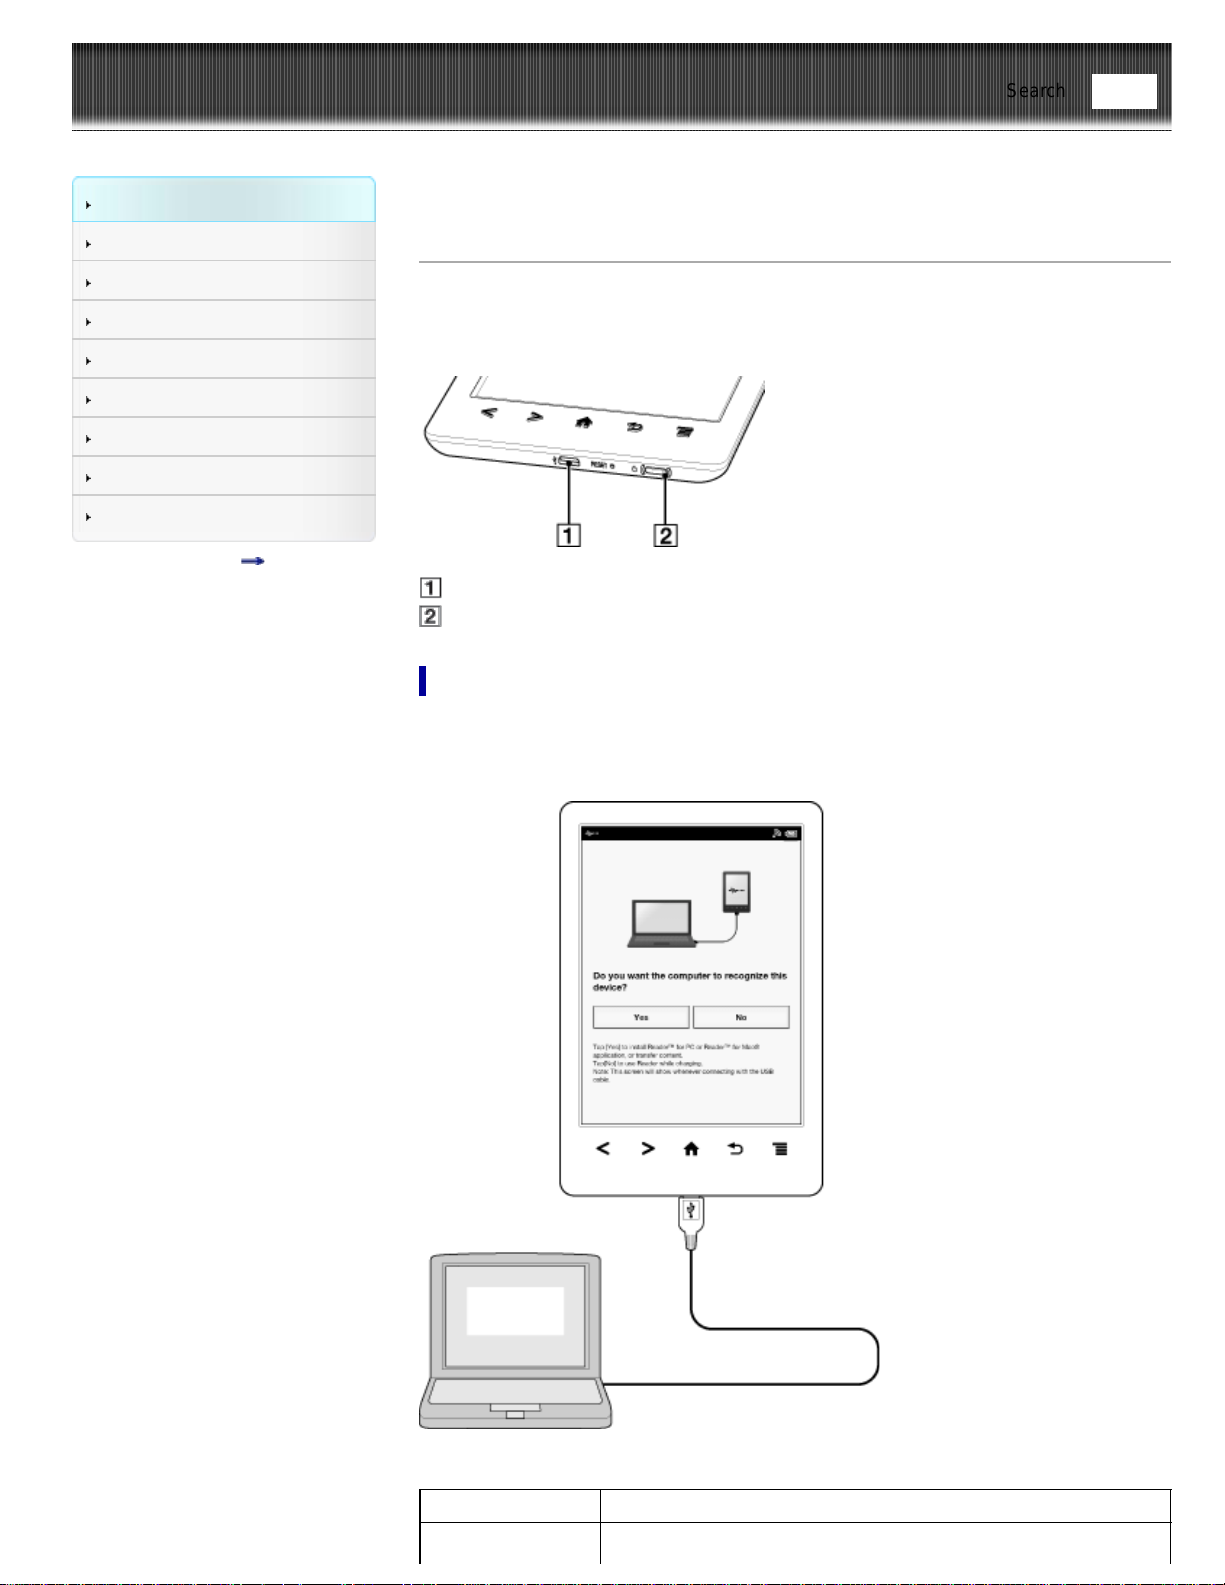
Micro USB connector
Charge indicator
Charging via your computer
1. Power on your computer.
2. Connect the Reader to your computer with the supplied USB cable.
Wait until the below screen is displayed.
To Description
Tap [Yes] to install the Reader application, or transfer files from
Find
Install the Reader
application, or
transfer data
your computer to the Reader while charging. The Reader cannot
be operated during transfer.
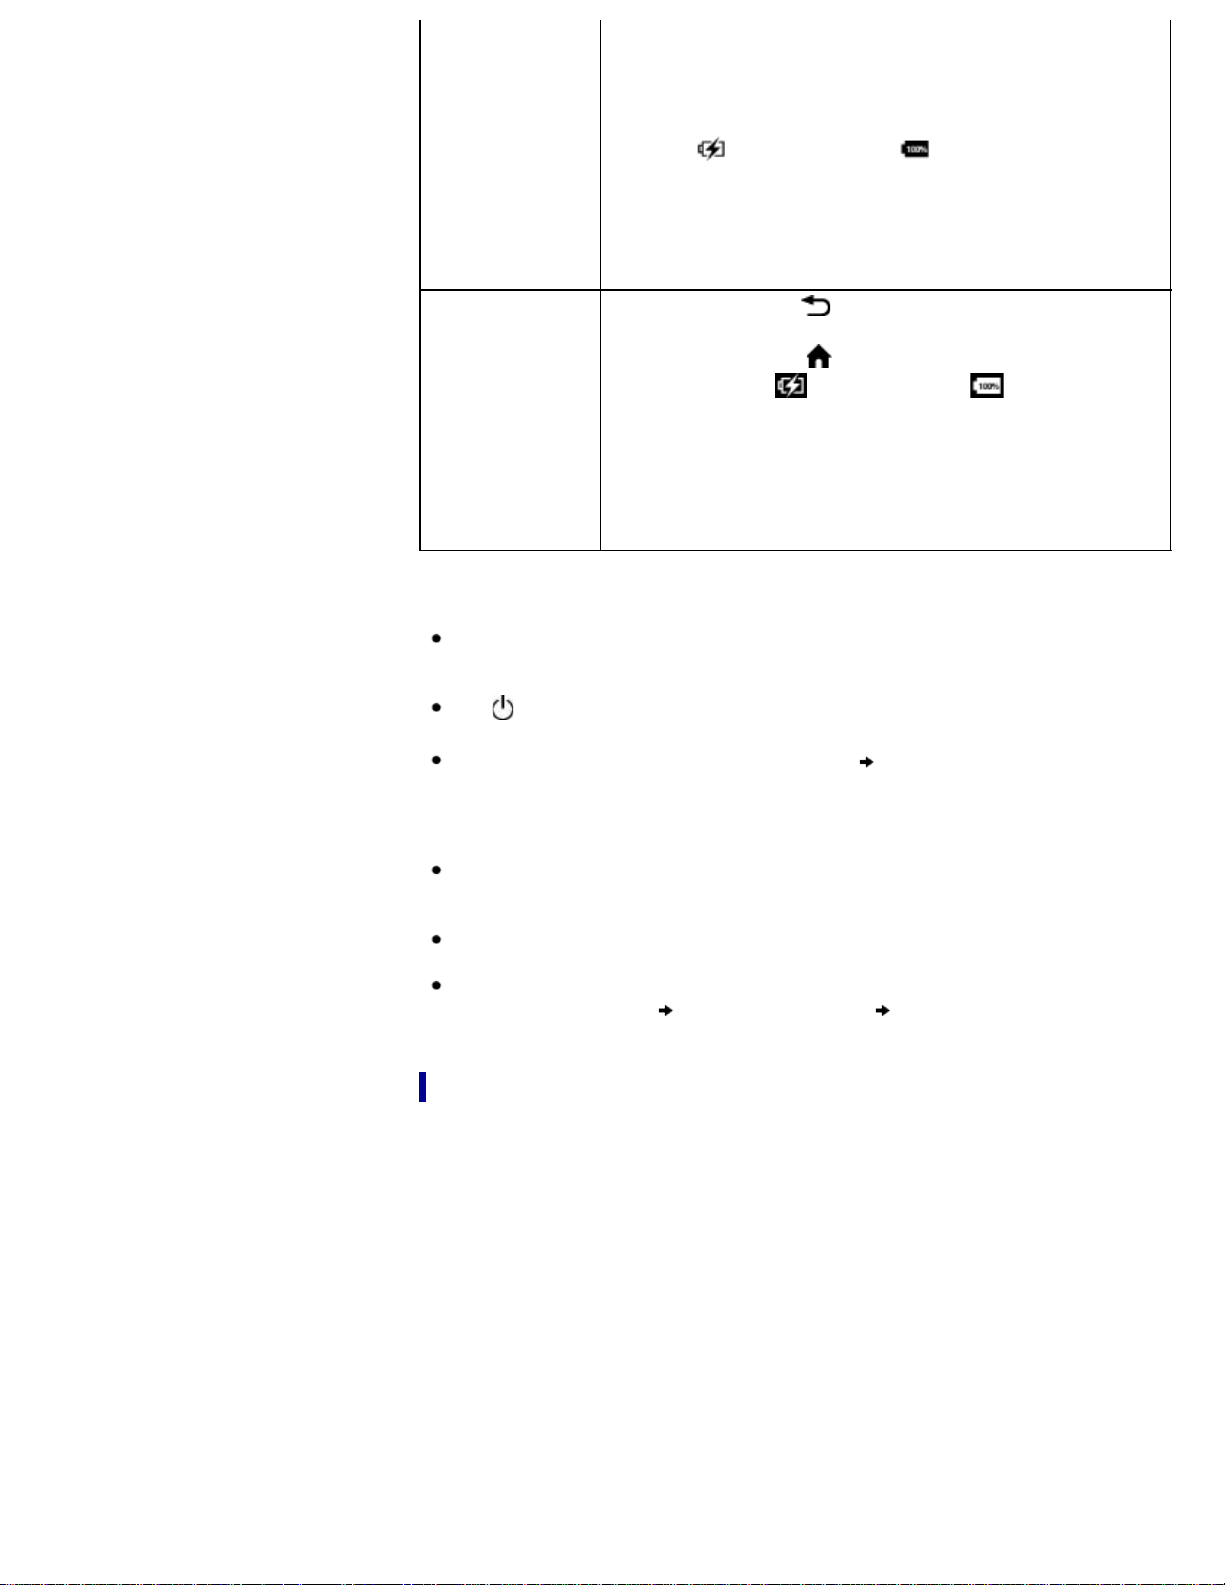
After the USB storage screen is displayed on the Reader, it is
detected on your computer, and the “READER” and “SETUP”
drives appear on your computer.
When the
icon* turns into the icon, charging is complete.
When charging is complete, disconnect the USB cable from the
Reader and your computer.
After a short time, the [Home] screen will appear.
* This icon is only displayed when the Reader is in data transfer
mode.
Charge the
Reader
Tap [No], or press the
(Back) button, to return to the previous
screen.
Alternatively, press the
(Home) button. The [Home] screen
appears. When the
icon turns into the icon, charging is
complete.
In this mode, the Reader is not detected by your computer*.
When charging is complete, disconnect the USB cable from the
Reader and your computer.
* This situation may vary, depending on the settings of your
computer.
Note
Your computer must be turned on to charge the Reader. The Reader will not be
charged if your computer enters sleep mode or standby mode. Keep your computer
turned on with a stable and continuous power supply while charging the Reader.
The
(Power) button cannot be used when the Reader is connected to your
computer and charging.
If you turn off the Reader by tapping [Settings]
[Device Shutdown] while in
charging mode, the Reader will stop charging.
Tip
You can also charge the Reader using the AC Adapter (PRSA-AC10/PRSA-AC1A,
sold separately). This method of charging will take approximately 2 hours to fully
charge the battery.
If the battery is depleted, charging the Reader with the AC adapter for 3 minutes
will provide enough battery power to read up to approximately 600 pages.
To change from charge mode to data transfer mode, tap the status bar to display
the notification window
tap [USB connected] [Yes].
Charge/Battery status icon
The charge/battery status icon shows the charging status or approximate remaining
charge of the battery.
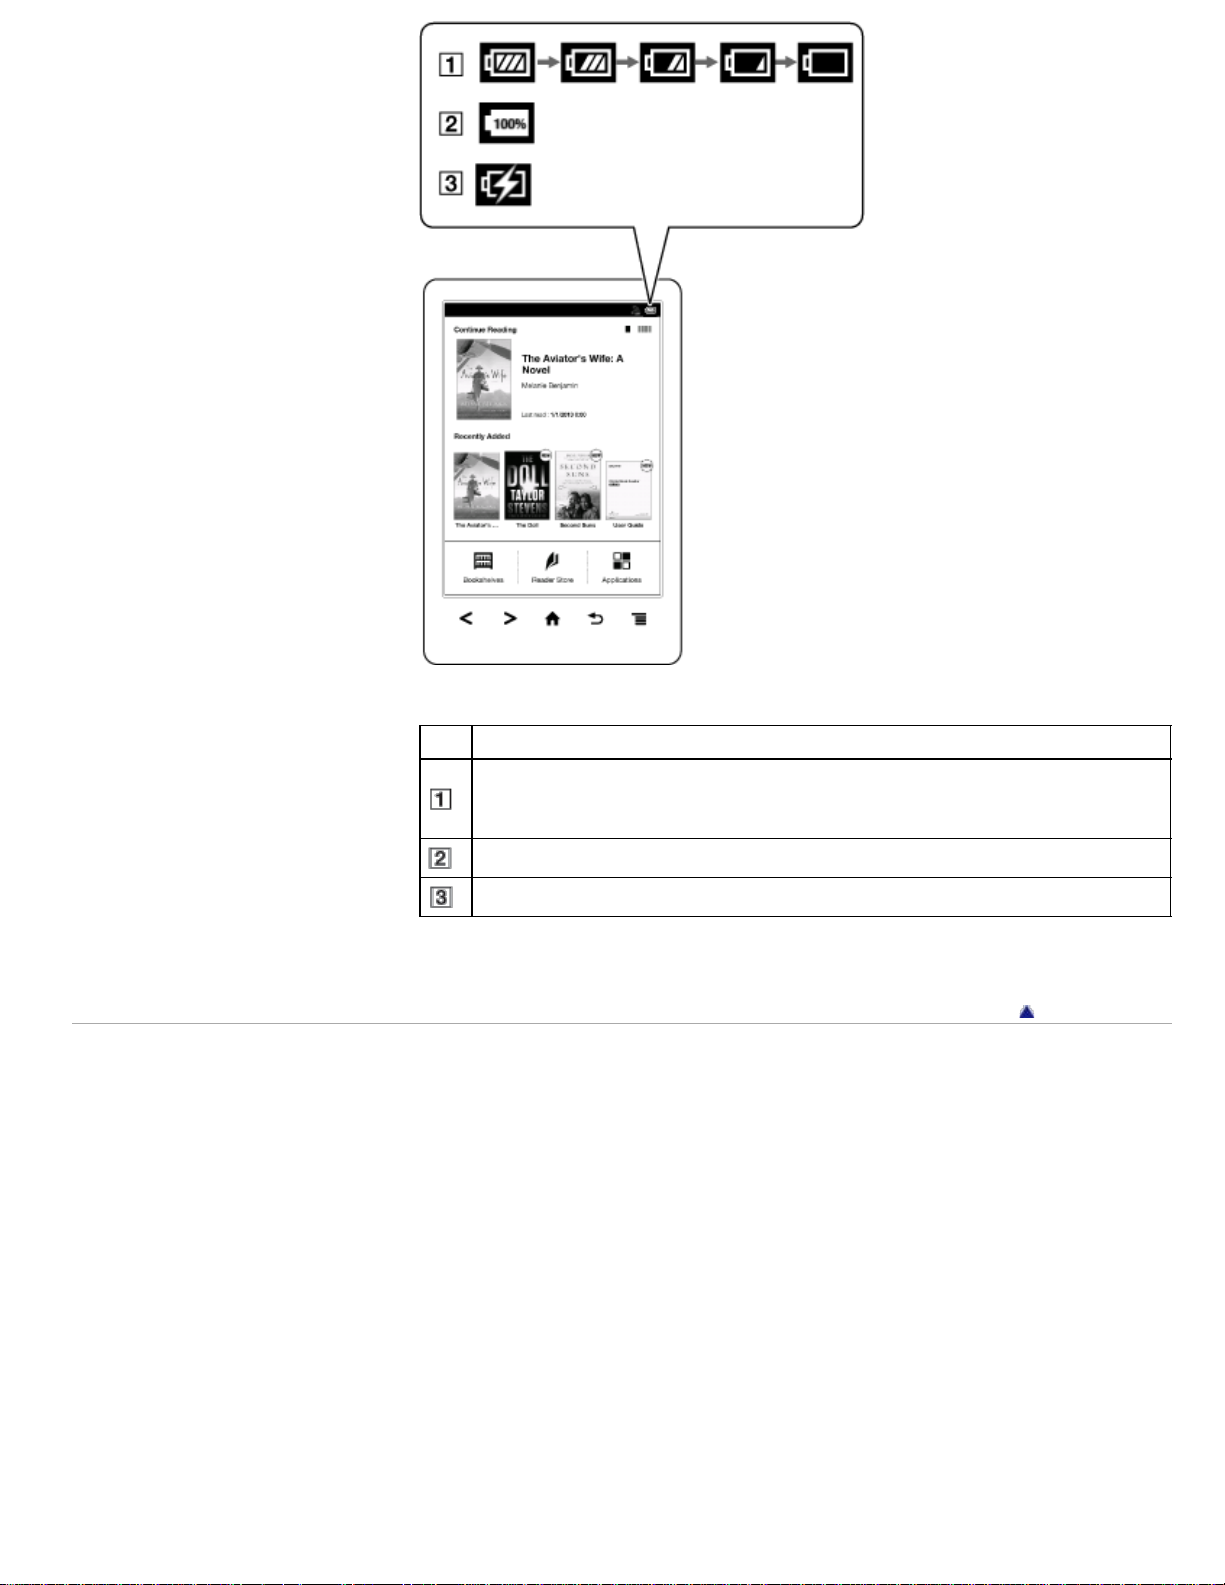
Icon Description
Four bars indicate a fully charged or almost-fully charged battery. The number
of bars decreases with the battery’s charge. Zero bars indicate that the battery
has almost no remaining charge.
The battery is fully charged.
The battery is charging.
Go to page top
Copyright 2013 Sony Corporation
Reader™ User Guide
Print
Search
Getting started
Basic Operations
Adding/Getting Content
Browsing Content Lists
Reading
Organizing
Other Applications
Settings
Other Information
Contents list
Top page > Getting started > Battery > Maximizing Battery Life
Maximizing Battery Life
There are many ways to conserve battery power. To extend battery life:
If you have no plans to use the Reader, completely power off the Reader.
Do not leave the Reader with the battery depleted for a prolonged period of time.
Battery capacity may be affected.
Use and store the Reader at room temperature, or within the recommended
temperature range of 5°C to 35°C (41°F to 95°F).
Turn off Wi-Fi when no wireless communication is necessary.
Turn on [Wireless Standby] when you want to extend the battery life.
Power-consuming operations
The following may require more power than normal reading operations.
Wi-Fi communications
Constantly updating the [Wi-Fi Networks] list
Displaying graphic-intensive books, periodicals, files or Web sites
Displaying a slideshow with a short interval setting
Using a microSD card
Frequent insertion and removal of a microSD card
Having a large volume of content stored on a microSD card
Annotations, keyword searches and dictionary searches
The Wi-Fi network feature of the Reader is not in standby mode.
Go to page top
Copyright 2013 Sony Corporation
Find
Reader™ User Guide
Print
Search
Getting started
Basic Operations
Adding/Getting Content
Browsing Content Lists
Reading
Organizing
Other Applications
Settings
Other Information
Contents list
Top page > Getting started > Installing Reader application (Reader for
PC/Mac) > Installing Reader application (Reader for PC/Mac)
Installing Reader application (Reader for PC/Mac)
1. Turn on your computer, connect your computer to the internet, and then connect the
Reader to your computer using the supplied USB cable.
Make sure you have administrator access to your computer.
2. When [Do you want the computer to recognize this device?] appears, tap [Yes]. See
Details.
3. To install on Windows computers:
From your computer, click on the “Start” menu
“Computer” or “My Computer”
double-click the “SETUP” drive double-click “Setup Reader for PC”.
To install on Mac computers:
When the Reader is connected to your Mac, the “SETUP” and “READER” drives will
appear on the desktop. Double-click the “SETUP” drive
double-click “Setup
Reader for Mac”.
4. Follow the on-screen instructions to complete the installation of the Reader
application.
For details on purchasing content via Reader Store, transferring content to the
Reader and syncing, refer to the [Help] menu of the Reader application.
5. When transfer is complete, click “Disconnect” on the Reader application, and then
disconnect the USB cable from the Reader. After a short time, the [Home] screen
will appear.
Content will be sent to its corresponding application based on the file format of the
content.
Personal documents other than pictures files will be sent to the [Books] application.
Tip
When you transfer data to the microSD card, insert the microSD card to the Reader
in Step 2.
For details on the system requirements for the Reader application, see Details.
For details on supported file formats, see Details.
Go to page top
Copyright 2013 Sony Corporation
Find

Reader™ User Guide
Print
Search
Getting started
Basic Operations
Adding/Getting Content
Browsing Content Lists
Reading
Organizing
Other Applications
Settings
Other Information
Contents list
Top page > Getting started > Turning the Power On/Off > Turning the Power On/Off
Turning the Power On/Off
(Power) button
Charge indicator
Turning on the power
1. Press the (Power) button.
If the battery is completely depleted, power will not be supplied to the
(Power)
button, and you may not be able to turn on the Reader. In this case, the Charge
indicator may blink red 3 times. Connect the Reader to your computer via the
supplied USB cable; the Reader will automatically turn on immediately. Wait until the
Reader turns on before trying to operate it.
Shutting down/turning off the power completely
1. Press and hold the (Power) button for about 3 seconds.
2. Tap [Yes] to turn off the Reader.
Completely turning off the Reader can preserve battery power longer than sleep
mode when you are not using the Reader for a prolonged period of time.
The same operation can be done via [Settings].
1. Press the
(Home) button tap [Applications] [Settings] [Device
Shutdown]
[Yes].
Sleep mode
To save battery life and prevent unintentional operation of the touchscreen, set the
Reader to sleep mode by pressing the
(Power) button. The standby screen appears.
You can personalize the standby screen. See Details.
To wake the Reader, press the
(Power) button again.
Tip
The Reader can also be set to sleep mode by closing the Standard Cover or Cover
with Light (sold separately).
Automatic power-saving modes
The Reader will enter sleep mode after 10 minutes of inactivity. After 3 days in sleep
mode, the Reader will shut down/power off automatically. The automatic power-saving
modes cannot be turned off.
Tip
The Reader will not enter sleep mode if you tap the screen at least once every 10
minutes.
Find

Reader™ User Guide
Print
Search
Getting started
Basic Operations
Adding/Getting Content
Browsing Content Lists
Reading
Organizing
Other Applications
Settings
Other Information
Contents list
Top page > Getting started > Parts and Controls > Overview
Overview
This section describes the features and controls of the Reader.
Touchscreen
(Menu) button
(Back) button
(Home) button
< > (Page turn) buttons
Find
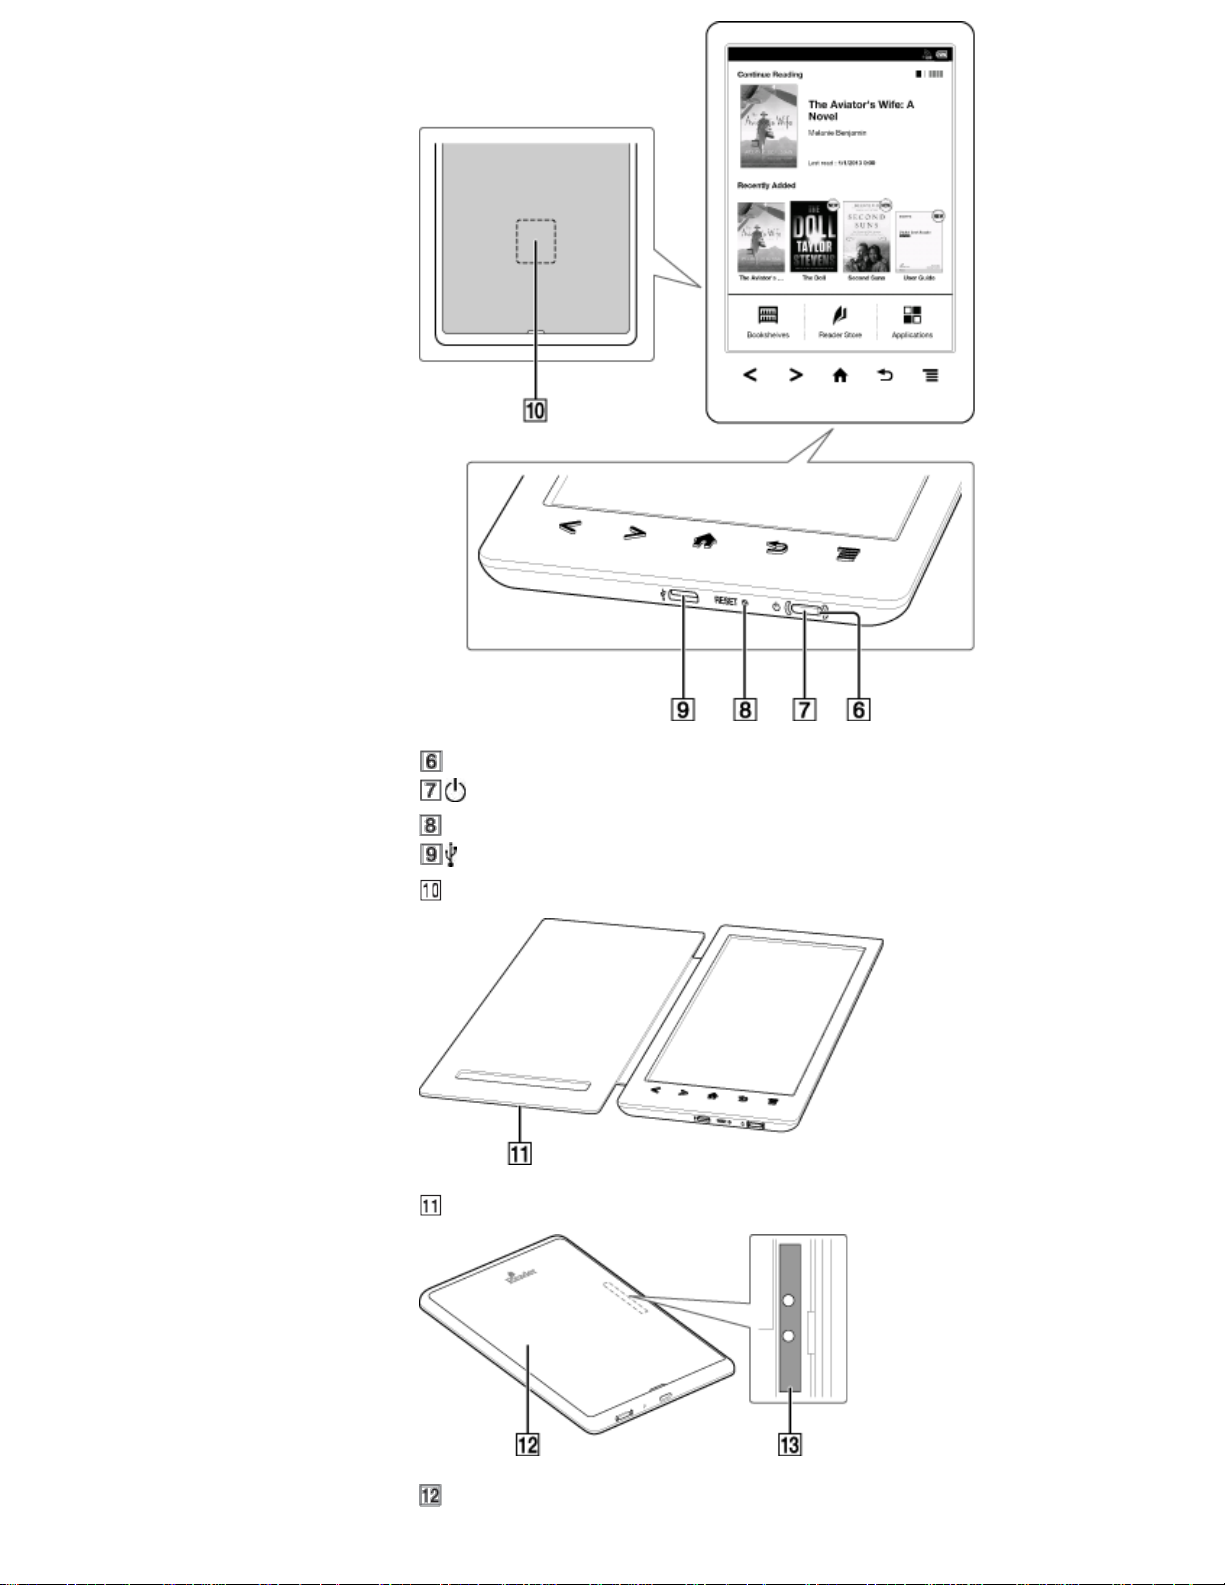
Charge indicator
(Power) button
RESET button
Micro USB connector
microSD card slot
Standard Cover (PRS-T3)
Back Panel (PRS-T3S*)
* Limited edition only.

Reader™ User Guide
Print
Search
Getting started
Basic Operations
Adding/Getting Content
Browsing Content Lists
Reading
Organizing
Other Applications
Settings
Other Information
Contents list
Top page > Getting started > Parts and Controls > Buttons
Buttons
(Power)
Turns the Reader on/off, and sets it to sleep mode. See Details.
< > (Page turn)
When reading a book or periodical: Press either button to turn the page back or forward,
respectively. Press and hold either button to turn pages continuously.
When using the Web browser: Press either button to scroll the page up or down,
respectively.
(Home)
Displays the [Home] screen.
(Back)
Returns to the previous screen, or returns to the content list from a book. Also closes
the on-screen keyboard or a dialog box/navigation bar/tool bar.
(Menu)
Displays the available option items.
Go to page top
Copyright 2013 Sony Corporation
Find
Reader™ User Guide
Print
Search
Getting started
Basic Operations
Adding/Getting Content
Browsing Content Lists
Reading
Organizing
Other Applications
Settings
Other Information
Contents list
Top page > Getting started > Parts and Controls > Removing/attaching the Standard
Cover (PRS-T3)
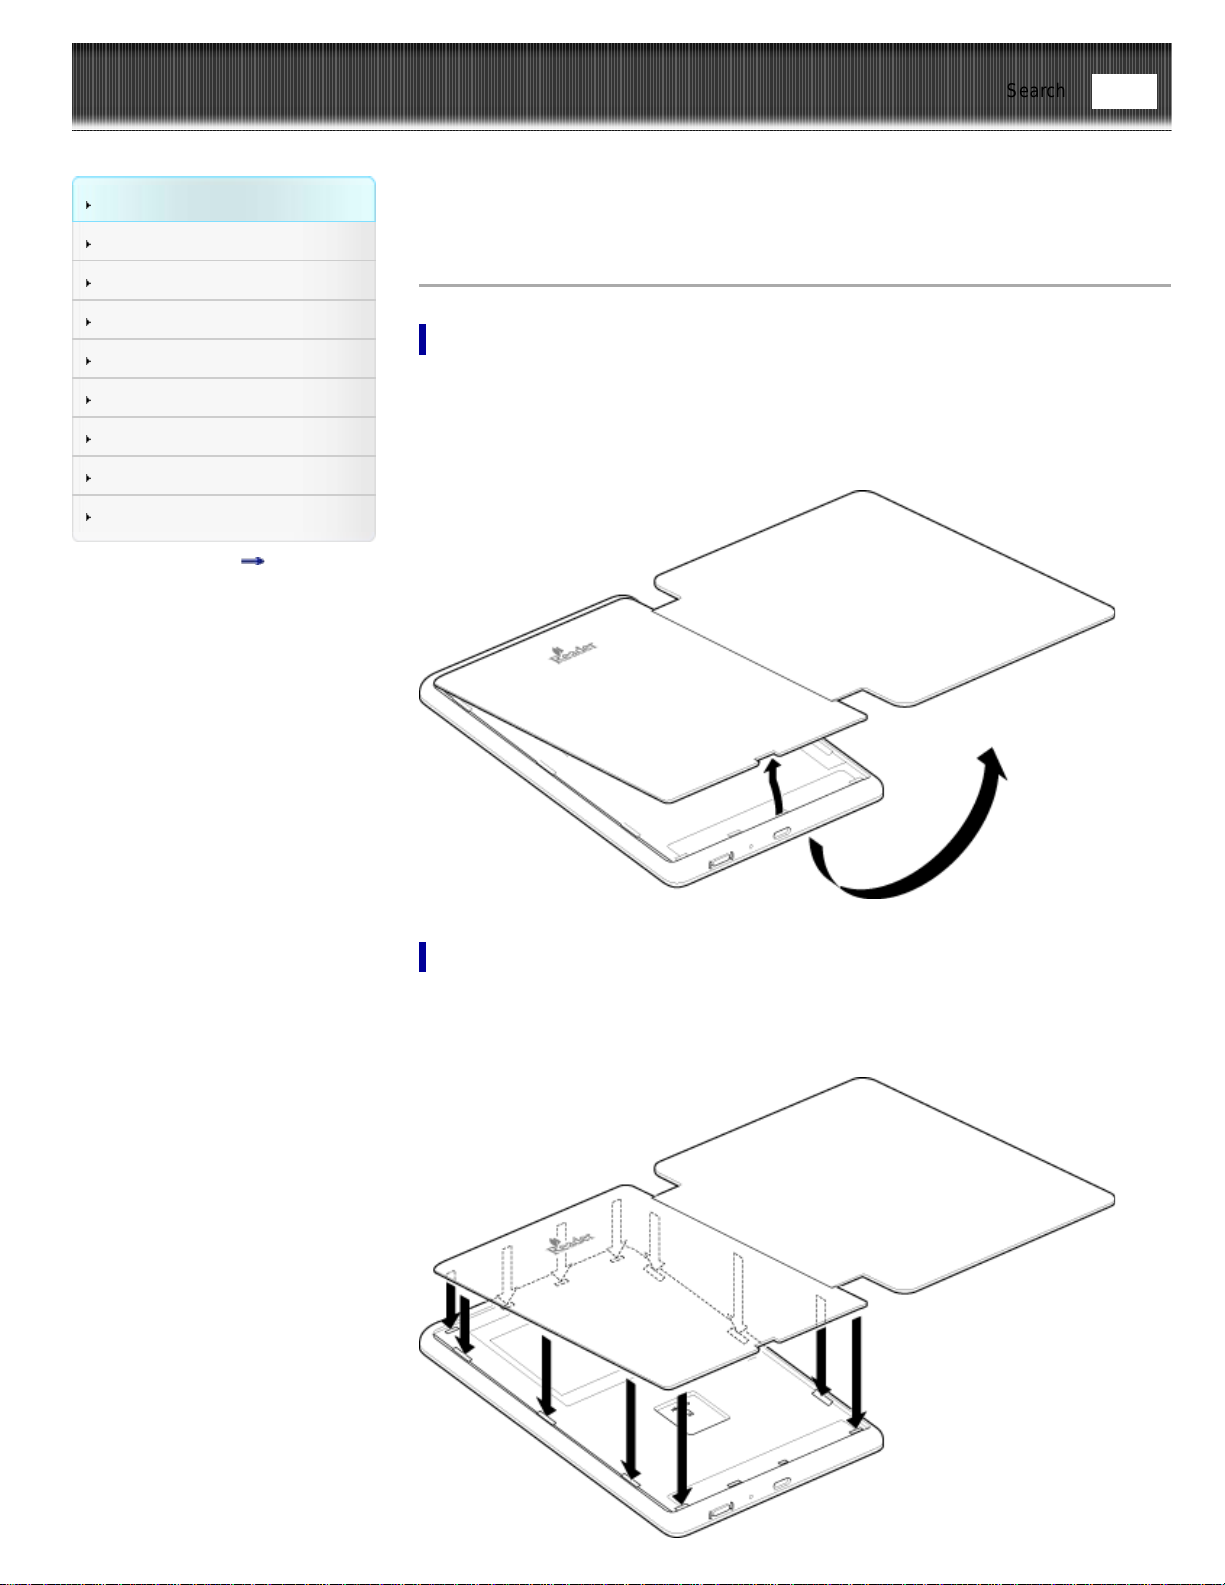
Removing/attaching the Standard Cover (PRS-T3)
Removing the Standard Cover
1. Open the Standard Cover and turn over the Reader.
2. Hold the Reader firmly with one hand.
3. Place your fingernail or a pointed object into the slot on the bottom edge, then
carefully lift and remove the Standard Cover.
Attaching the Standard Cover
1. Insert the top four tabs of the Standard Cover into the upper holes of the Reader.
2. Insert all the tabs in their holes (indicated by arrows), and push down the Standard
Cover firmly.
Find

Reader™ User Guide
Print
Search
Getting started
Basic Operations
Adding/Getting Content
Browsing Content Lists
Reading
Organizing
Other Applications
Settings
Other Information
Contents list
Top page > Getting started > Parts and Controls > Removing/attaching the Back Panel
(PRS-T3S*)
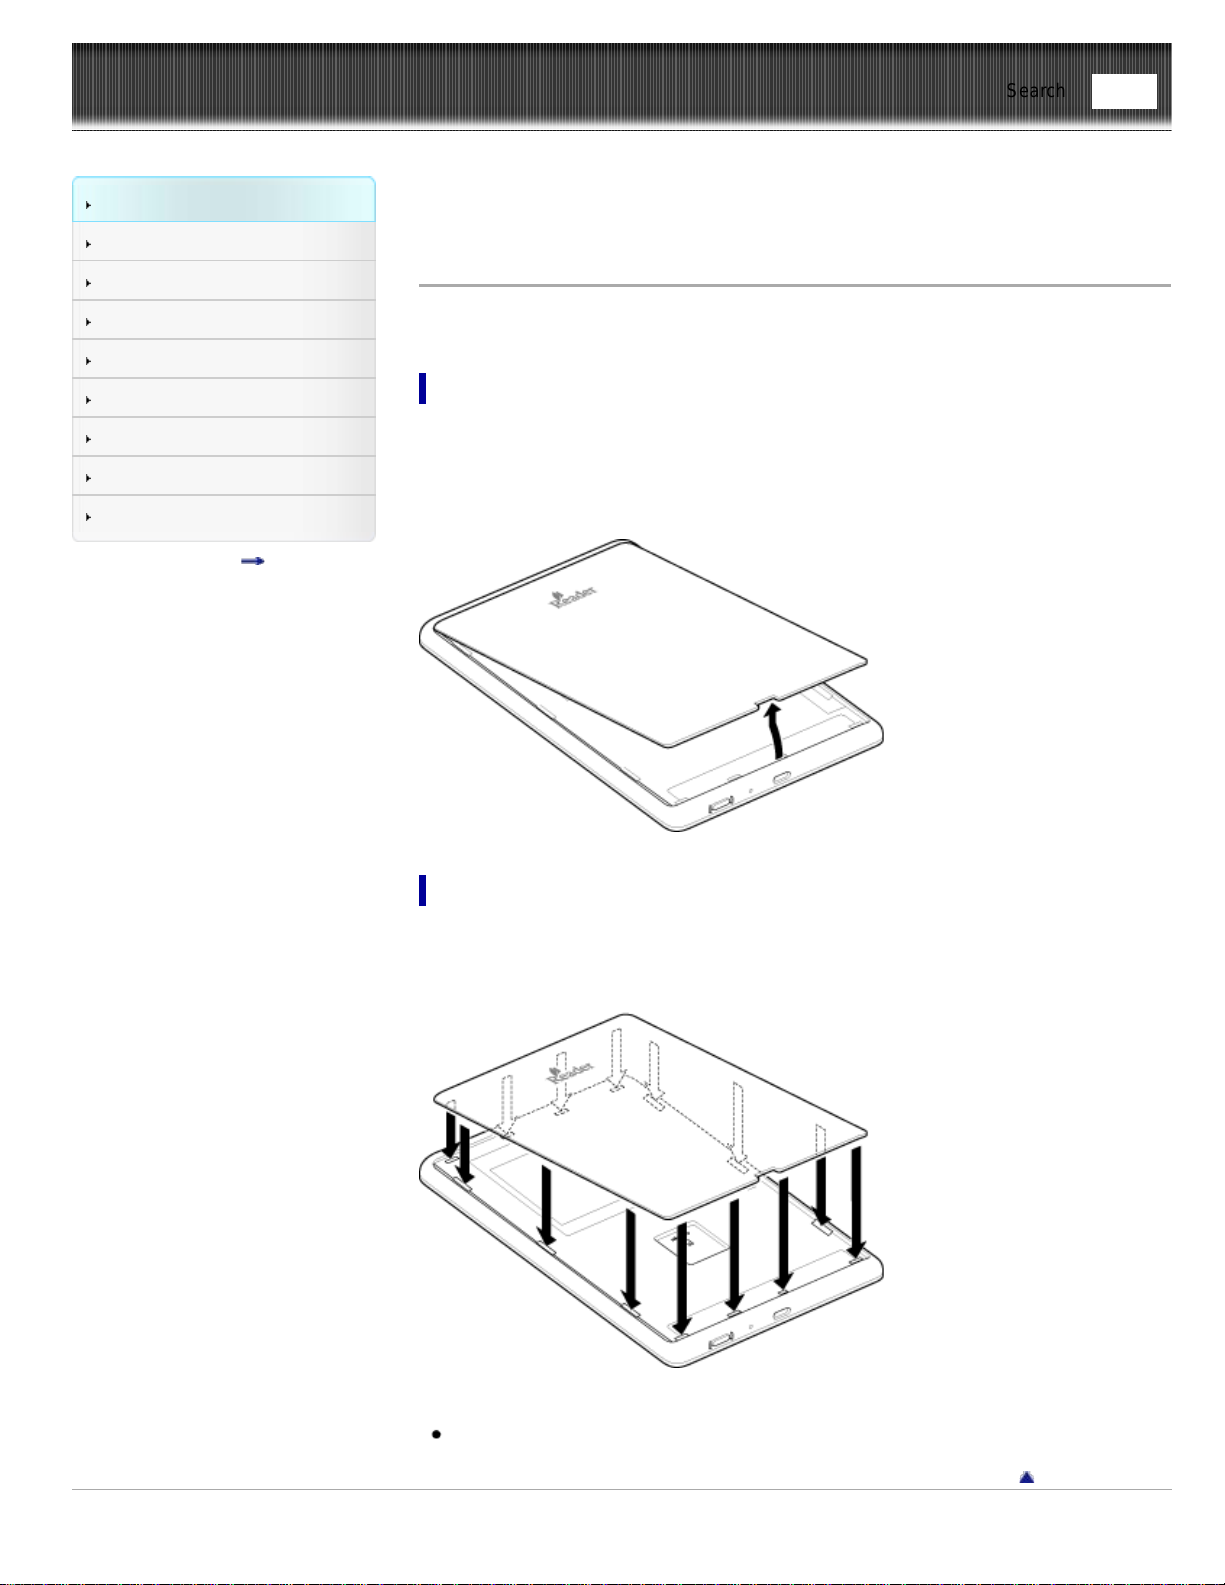
Removing/attaching the Back Panel (PRS-T3S*)
* Limited edition only.
Removing the Back Panel
1. Turn over the Reader.
2. Hold the Reader firmly with one hand.
3. Place you fingernail or a pointed object into the slot on the bottom edge, then
carefully lift and remove the Back Panel.
Attaching the Back Panel
1. Insert the top four tabs of the Back Panel into the upper holes of the Reader.
2. Insert all the tabs in their holes (indicated by arrows), and push down the Back
Panel firmly.
Note
Do not remove the label on the battery.
Go to page top
Copyright 2013 Sony Corporation
Find
Reader™ User Guide
Print
Search
Getting started
Basic Operations
Adding/Getting Content
Browsing Content Lists
Reading
Organizing
Other Applications
Settings
Other Information
Contents list
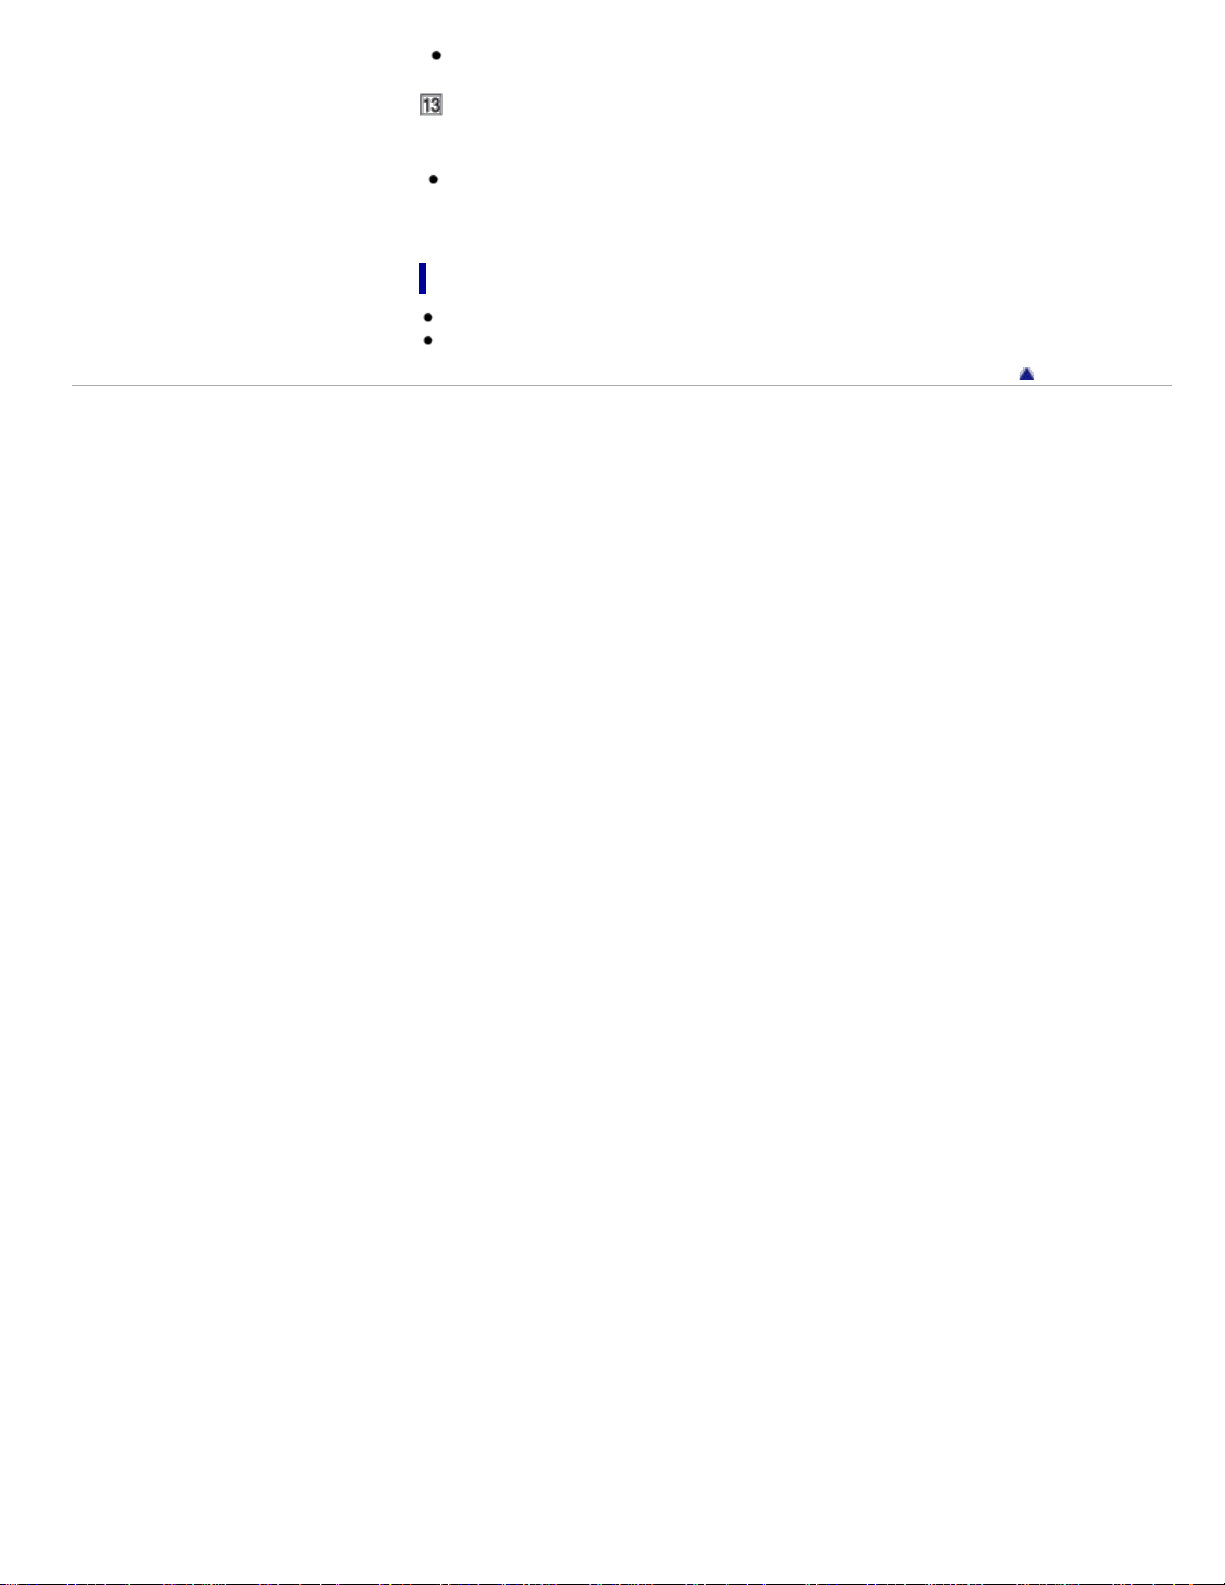
Top page > Getting started > Parts and Controls > microSD Card Slot
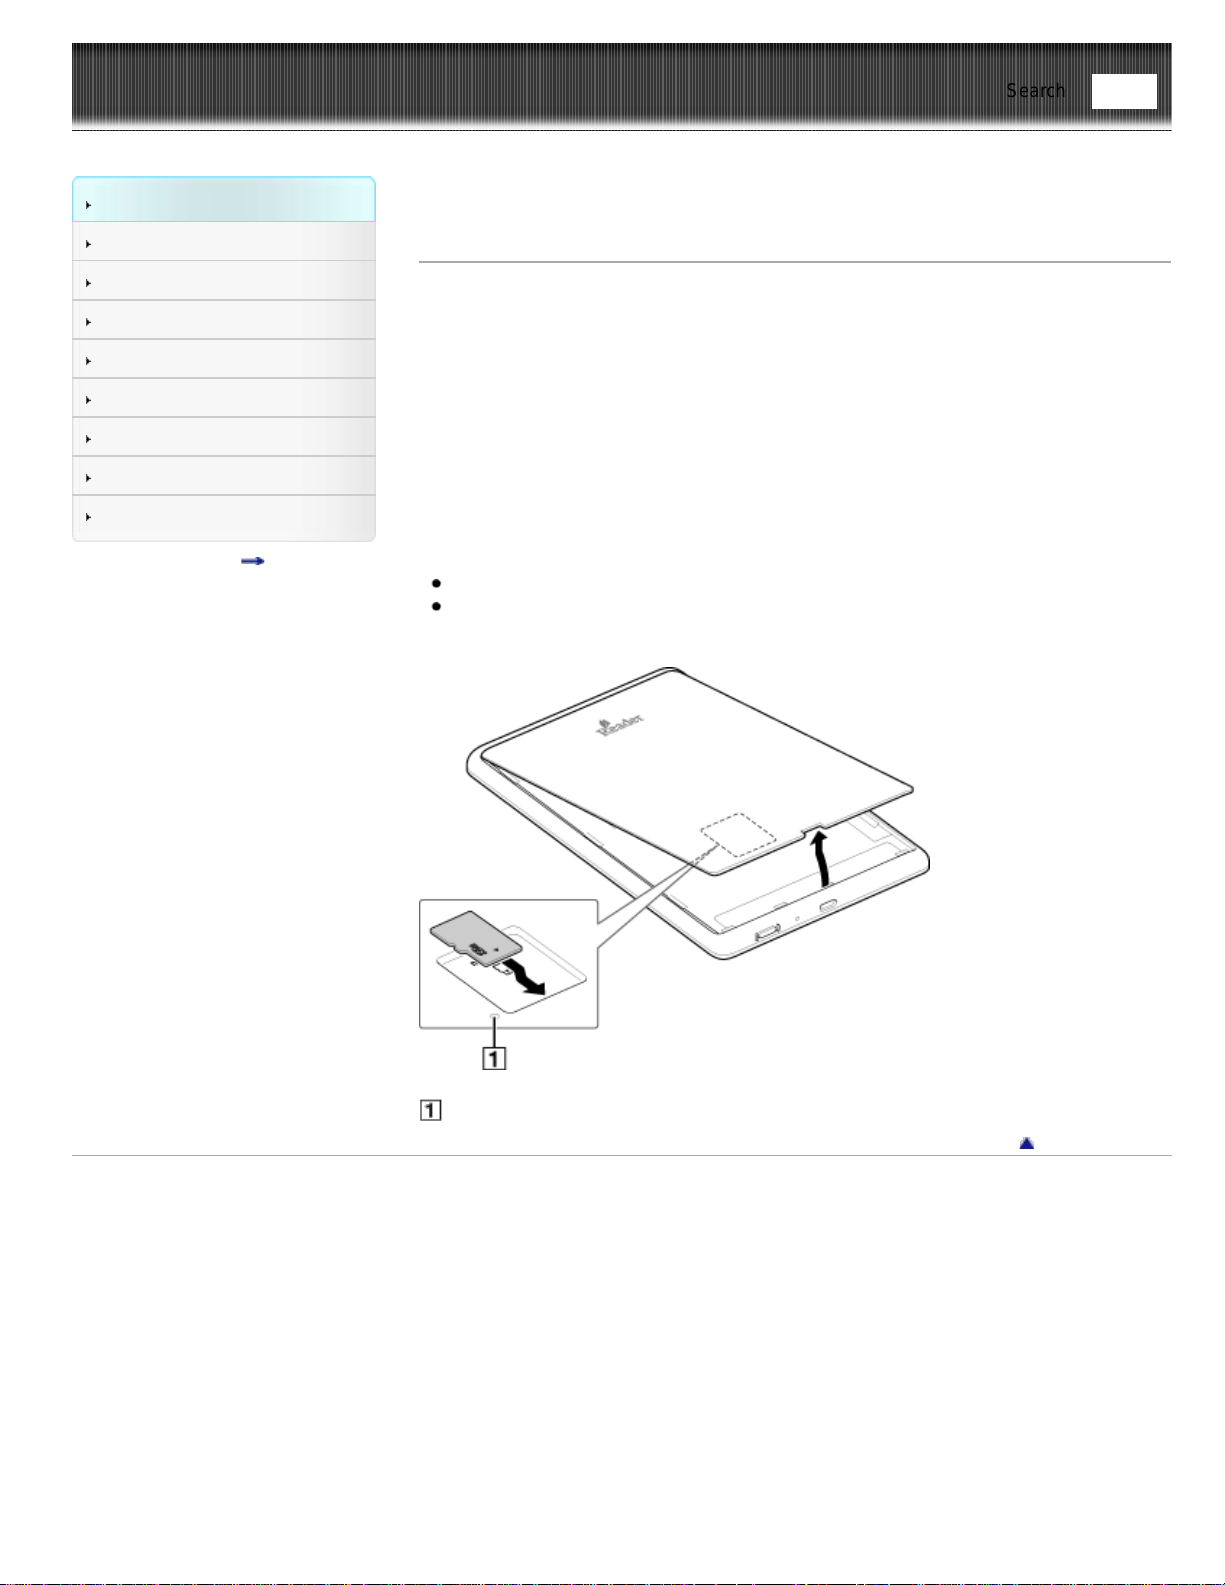
microSD Card Slot
The microSD card slot is located on the back of the Reader.
1. Remove the Standard Cover (PRS-T3) or Back Panel (PRS-T3S*).
2. Hold the microSD card with its contacts facing down and the arrow pointing toward
the microSD card slot, then insert it until it clicks into place.
The access indicator lights up in orange while the Reader is accessing the microSD
card.
3. Attach the Standard Cover (PRS-T3) or Back Panel (PRS-T3S*).
* Limited edition only.
You can format the microSD card if necessary. See Details.
Note
Do not remove the microSD card while the access indicator is lit.
Push in the microSD card once, carefully slide the card out with your fingertip, then
release.
Access indicator
Go to page top
Copyright 2013 Sony Corporation
Find

Reader™ User Guide
Print
Search
Getting started
Basic Operations
Adding/Getting Content
Browsing Content Lists
Reading
Organizing
Other Applications
Settings
Other Information
Contents list
Top page > Basic Operations > [Home] Screen > Applications and the [Home] Screen
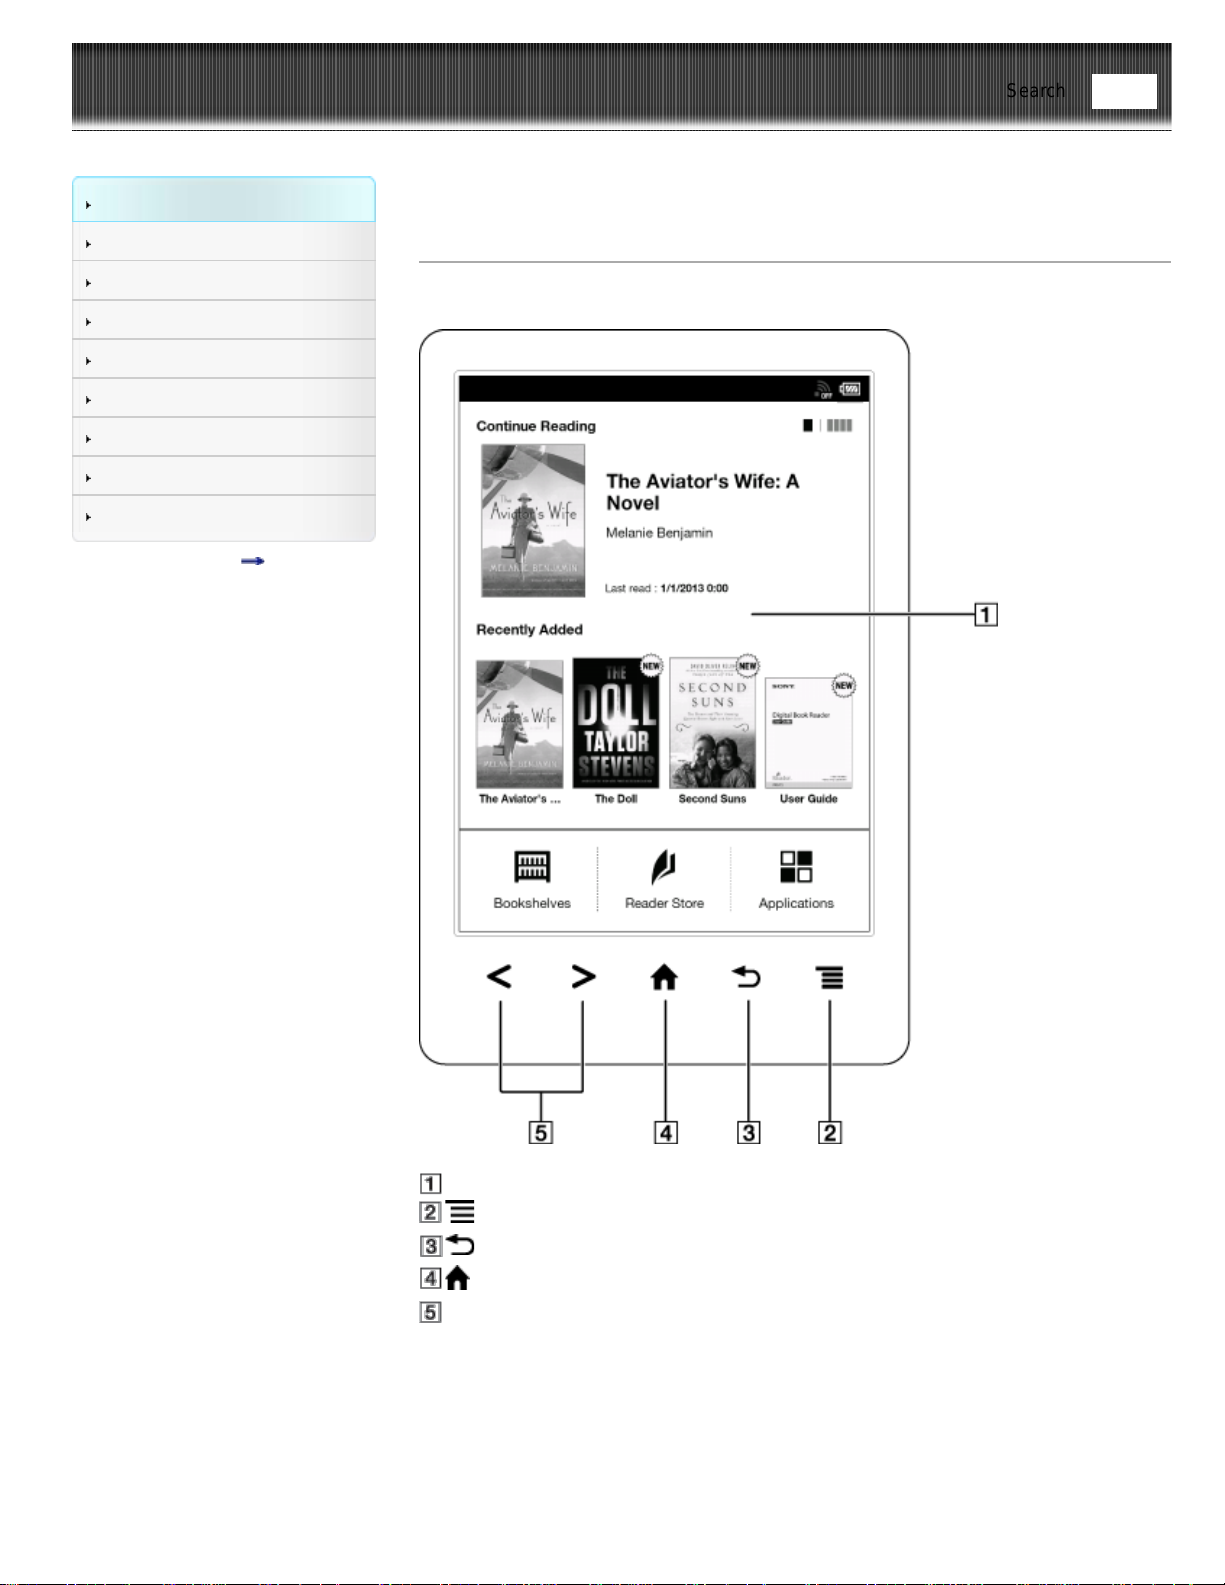
Applications and the [Home] Screen
Press the (Home) button to display the [Home] screen. The [Home] screen has the
following applications.
The displayed icons may vary depending on the country/region setting.
Status bar
Last read item
Tap
to show the four most recently read books/periodicals. Tap to show the
previous screen.
Recently added books/periodicals
Applications
Depending on the country/region selection up to four application icons will be
displayed.
The [Applications] screen appears when you tap [Applications] on the [Home] screen.
Status bar
Find
Applications
Tip
The most recent item that you opened is shown under [Continue Reading] on the
[Home] screen. Tap it to continue reading where you previously left off.
The four most recently read books/periodicals are shown by changing the [Continue
Reading] on the [Home] screen.
The four most recent books/periodicals that have been added to the Reader are
displayed under [Recently Added] on the [Home] screen. Tap one to start reading it.
When you tap a tab for Reader Store recommendation(s), the top three
recommended books/periodicals from Reader Store will be shown under the tab.
Check the button to hide the recommendation(s).
Reader Store recommendation feature is available in certain countries/regions only.
Please visit your local Reader Store web page for more information. Features
described in this section only appears on your Reader if your local Reader Store
supports them.
Application Description
[Bookshelves]
Tap [Bookshelves] to show the [Books] content list by factory default.
Alternatively, tap the top-left corner of the screen or press
(Menu)
button
[Choose Bookshelf] to show the following pop-up menu.
[Books]
[Collections]
[Purchased Content]*
[Evernote]
* If you have not logged in to Reader Store yet, [Purchased Content] is
not shown. The [Purchased Content] function only appears on your
Reader if your local Reader Store supports the feature.
[Reader
Store]*
Enters Reader Store. You can find featured titles, bestsellers, new
arrivals and more. See Details.
[More
Content]*
Open the Web browser and show the [More Content] page.
[Applications] Lists the applications.
[Browser] Launches the Web browser. See Details.
[Public
Library]*
Helps you find public libraries where you can borrow eBooks for the
Reader. See Details.
[Periodicals]*
Lists all the periodicals in the Reader and, if inserted, the microSD
card. See Details.
[All Notes]
Lists the bookmarks/annotations made on the books and periodicals.
See Details.
[Dictionary] Allows you to look up a word in the dictionary. See Details.
[Handwriting] Allows you to use a drawing pad for drawing. See Details.
[Text Memo] Allows you to use a notepad for typing memos. See Details.
[Pictures]
Shows pictures in the Reader and, if inserted, the microSD card. See
Details.
[Settings] Displays the items for setting the Reader. See Details.
[Evernote
Setup]
Sign in to upload your highlights, pictures and handwritten notes to
Evernote cloud. See Details.
[Facebook
Setup]
Log in or Log out to post book information, favourite passages and
collections with your comments to Facebook. See Details.
* The availability of these applications varies depending on the country/region setting.
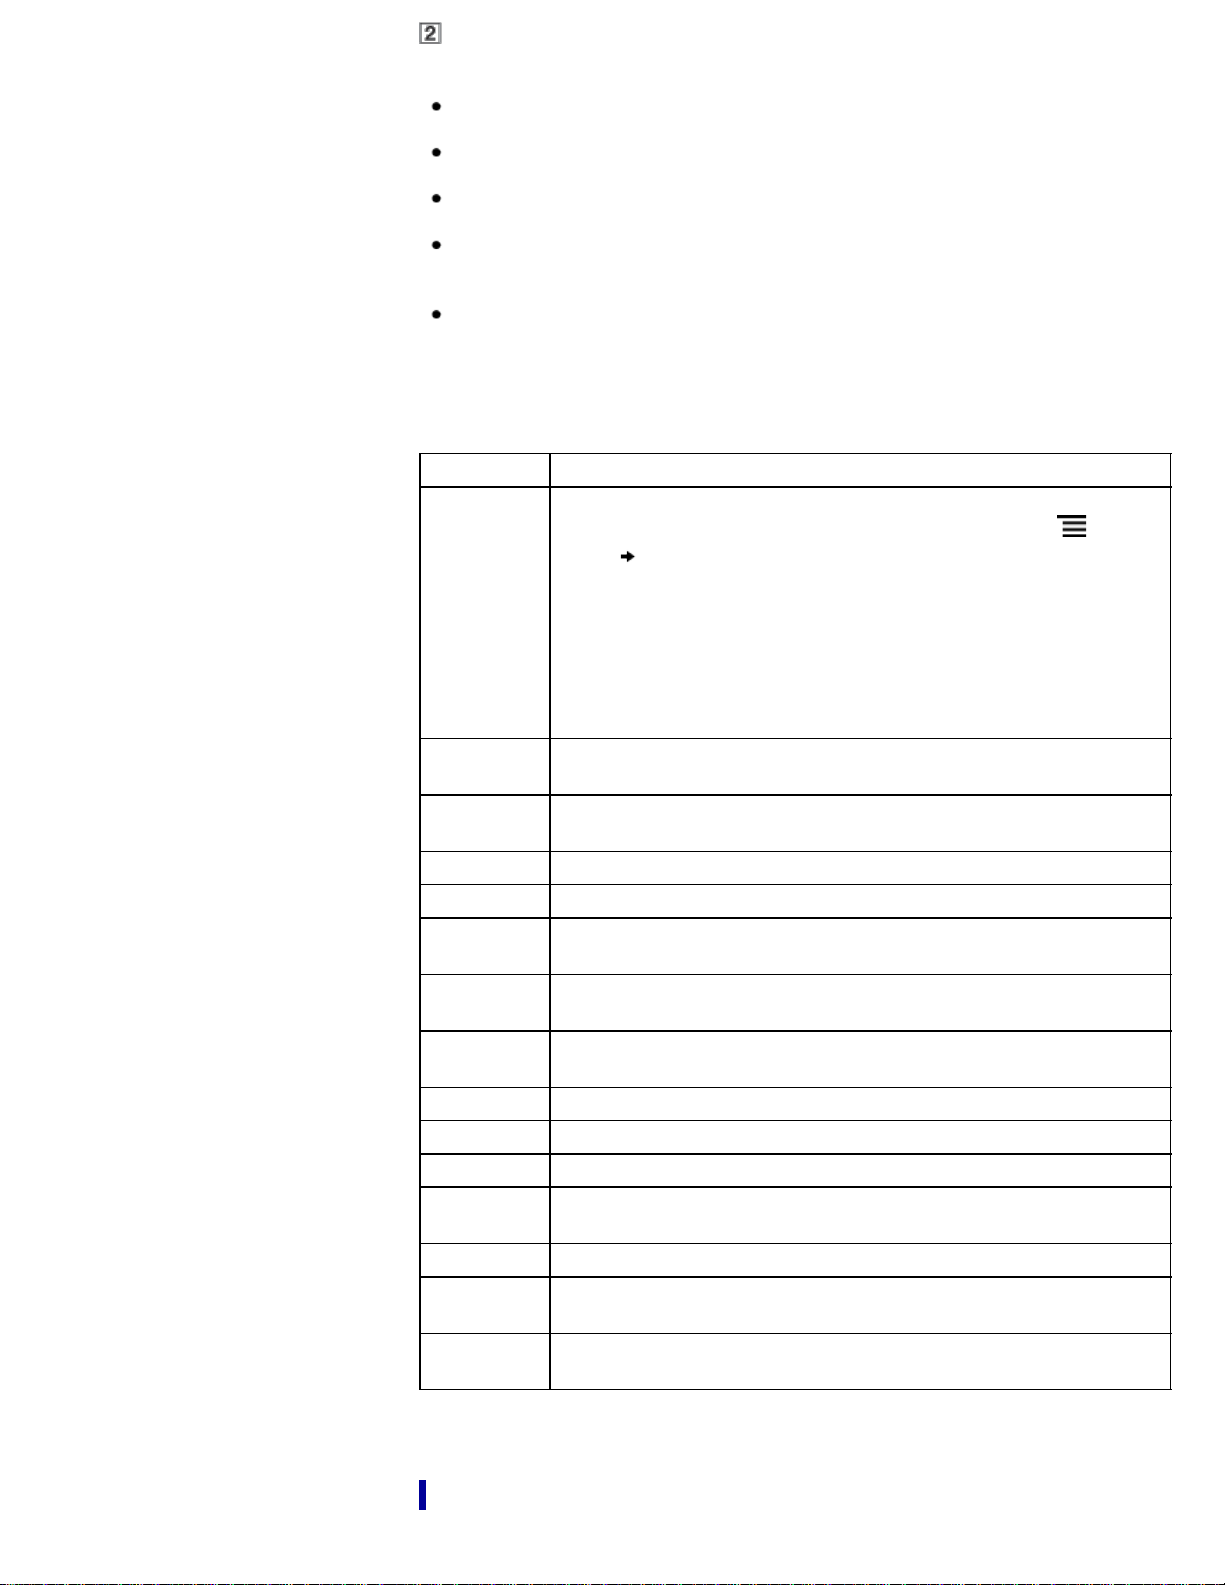
Status bar
The status bar shows the current status of the Reader, such as Wi-Fi status, the battery
level and the status of downloading files from Reader Store.
The following items are displayed in the status bar.
Icon Indication
Connected via the USB cable.
Connecting to a network.
A download is in progress. When multiple downloads are in progress, the
number of downloads is displayed next to this icon.
This icon is also shown when downloading the firmware update.
A download has completed.
If downloading fails, the
(Fail) icon is displayed.
The icon disappears when you open the notification window and tap [Clear], or
when you tap the downloaded items in the [Notification] list.
This icon is also shown when firmware download is complete.
Evernote synchronizing in progress.
Evernote synchronizing completed.
If synchronizing fails, the
(Fail) icon will be displayed. The icon
disappears when you open the notification window and tap [Clear], or when
you tap a synchronized item in the [Notification] list.
The icon appears when Evernote synchronizing stops.
Updating database.
Wi-Fi network signal strength. See Details.
Current battery level. See Details.
The icon appears when new firmware is found.
Note
Depending on the situation, not all icons will be displayed at once.
Tip
When you press the
(Menu) button from the [Home] screen, the time is
displayed at the left side of the status bar for approximately 5 seconds.
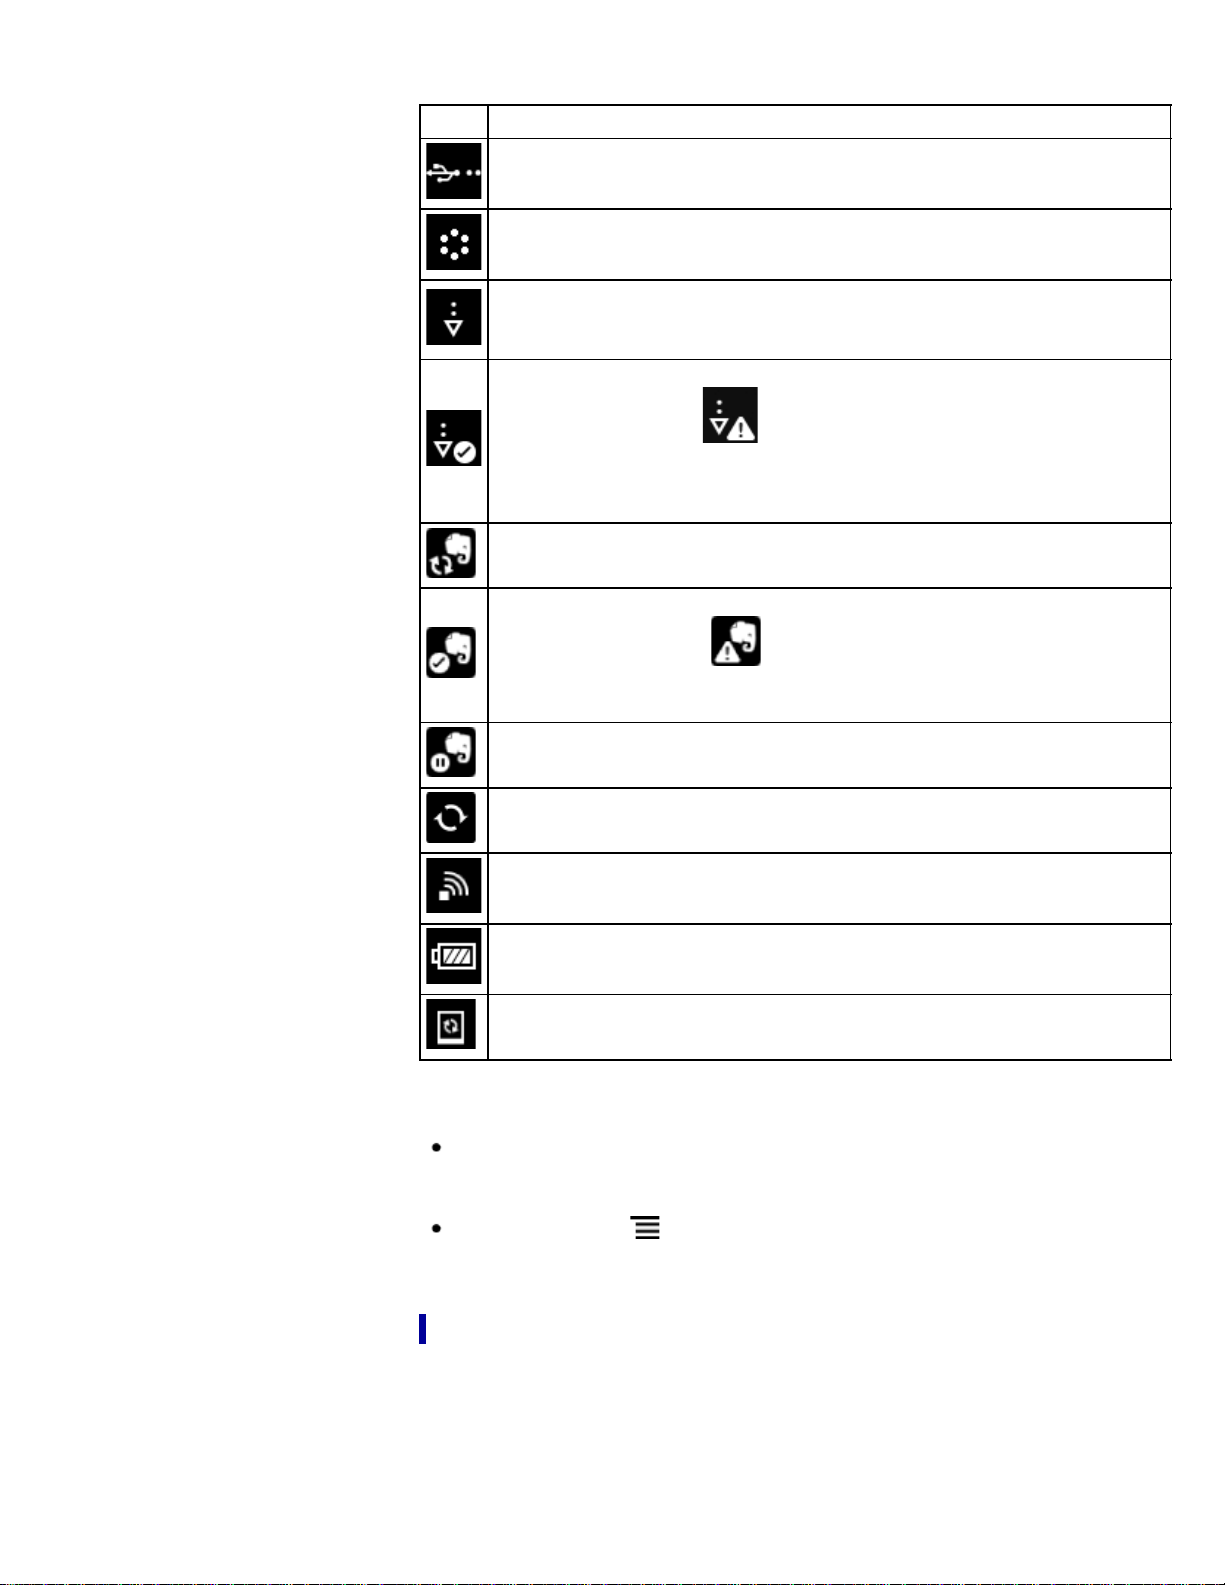
Notification window
Tapping on the status bar reveals the notification window, which contains network-
related items and other current operations.
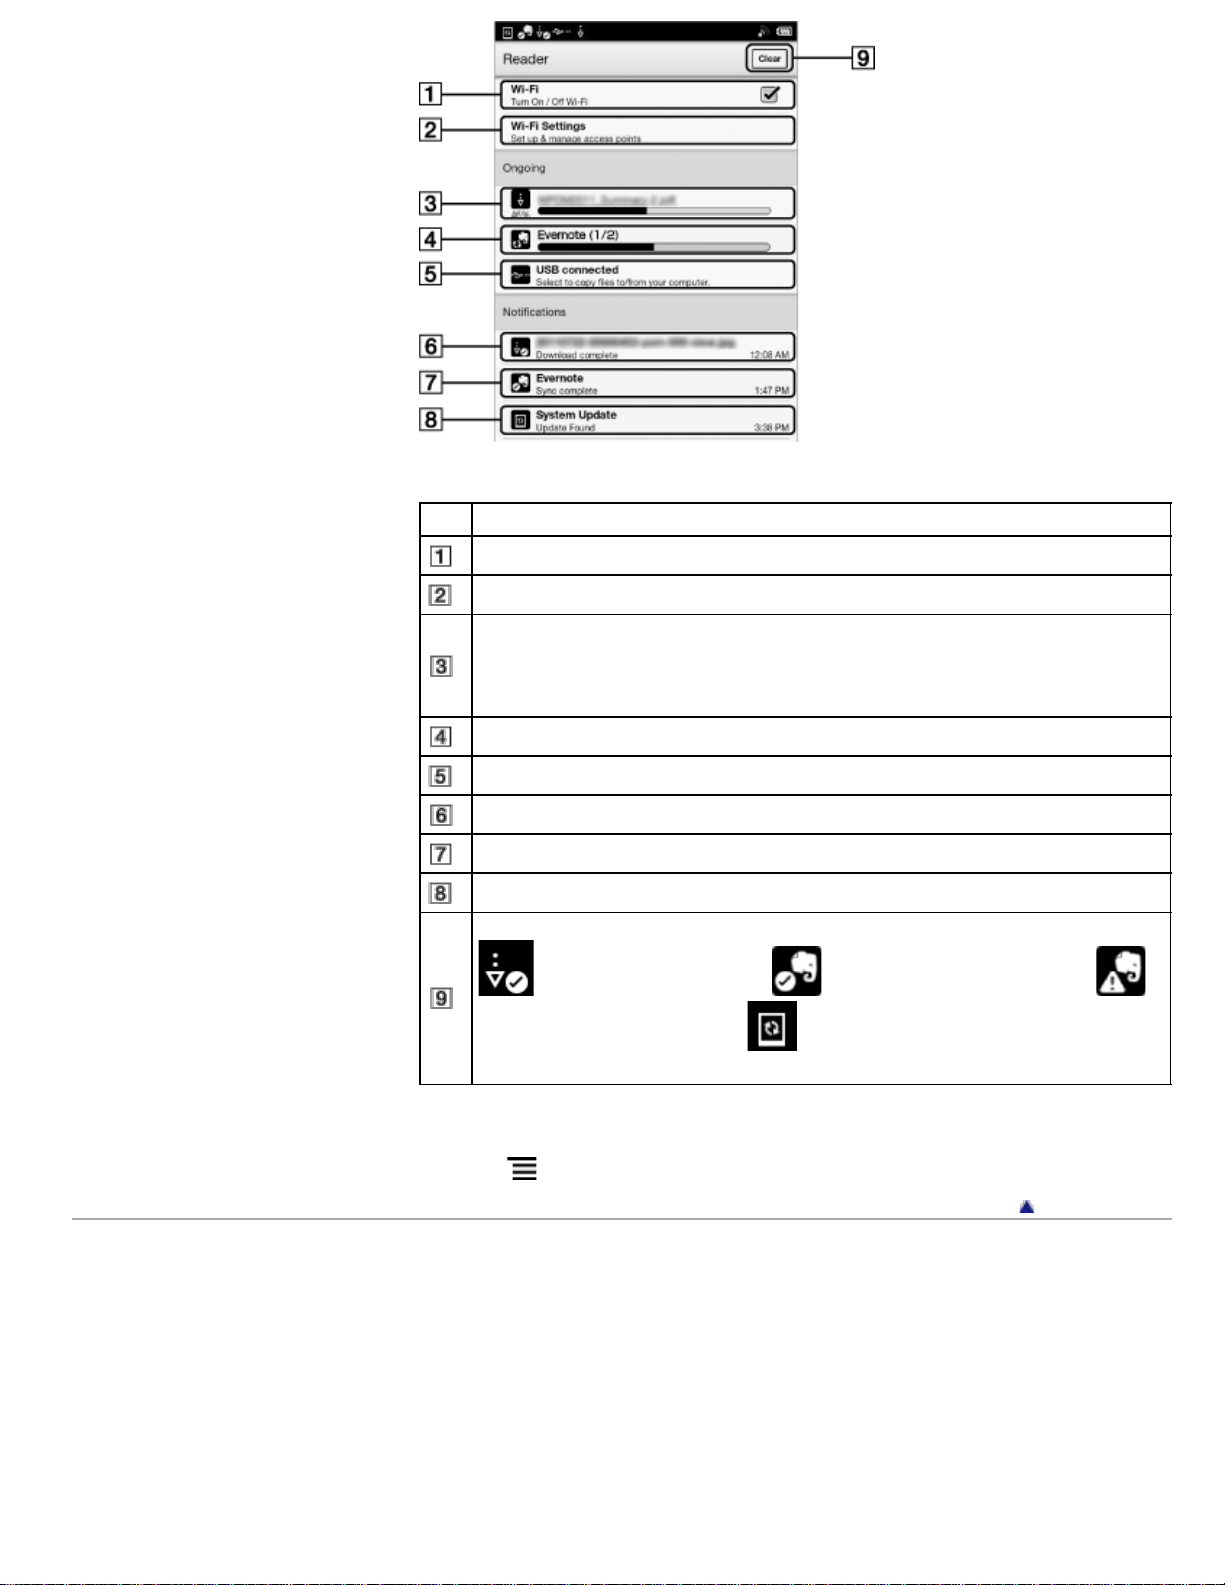
Item Description
Turn [Wi-Fi] on/off. See Details.
Go to the [Wi-Fi Settings] screen. See Details.
Displays the status of items that are downloading from Reader Store or the
Web.
The progress bar indicates how long an item download will take from Reader
Store or the Web.
Displayed when Evernote synchronizing is in progress.
Enter data transfer mode. See Details.
An item that has been downloaded. Tap to open the item.
Item with which Evernote synchronizing has completed. Tap to open.
Displayed when new firmware is found.
Displayed when notifications are displayed. Tap to clear the notification list. The
(Download complete) icon, (Evernote sync complete) icon,
(Evernote sync failed) icon and (New firmware is found) icon also
disappear from the status bar.
Depending on the status of the Reader, other items may also appear in the notification
window.
Press the
(Menu) button to close the notification window.
Go to page top
Copyright 2013 Sony Corporation
Reader™ User Guide
Print
Search
Getting started
Basic Operations
Adding/Getting Content
Browsing Content Lists
Reading
Organizing
Other Applications
Settings
Other Information
Contents list
Top page > Basic Operations > [Home] Screen > Touchscreen Operations
Touchscreen Operations
The touchscreen recognizes the following gestures.
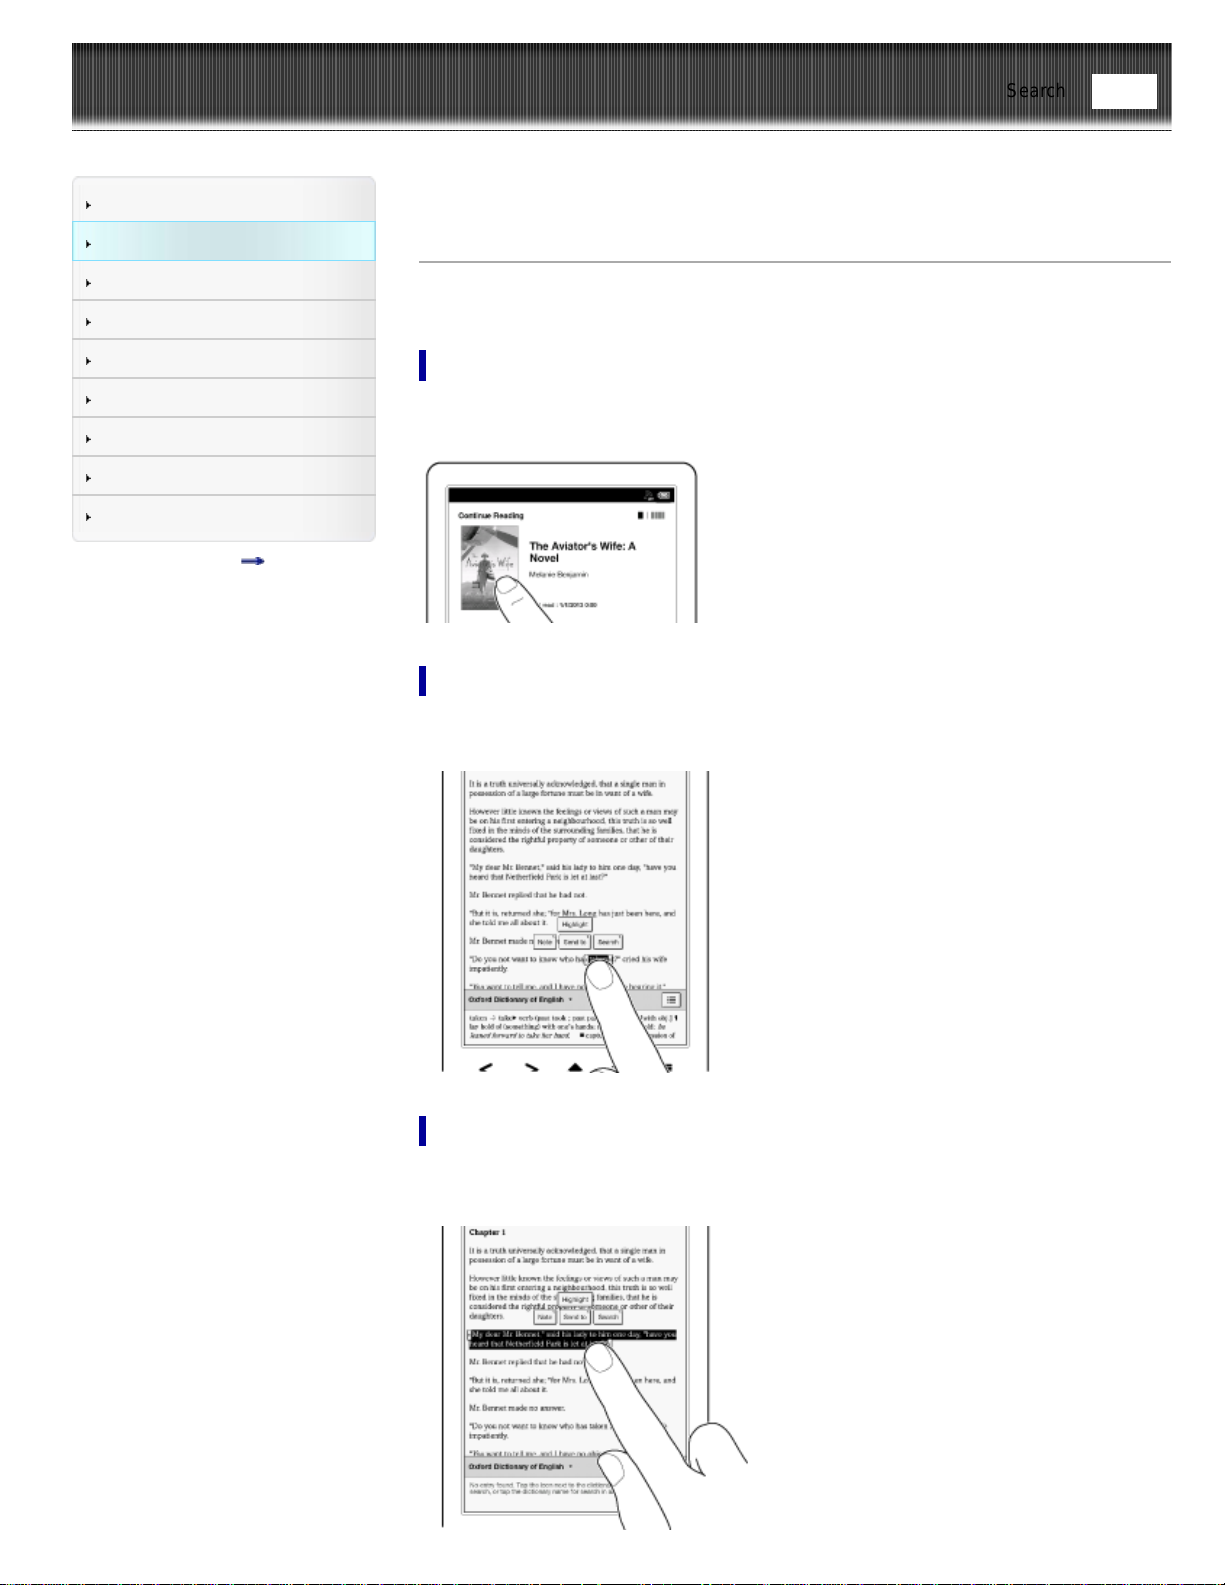
Tap
Tap an icon, a button or a menu item and raise your finger quickly to select or perform
an action.
Tap and hold
Tap and hold your finger to select a word and display a pop-up menu for further
operations.
Tap, hold and drag
Touch and hold your finger to the display and drag your finger; you can select a group
of text and display a pop-up menu for further operations.
Find
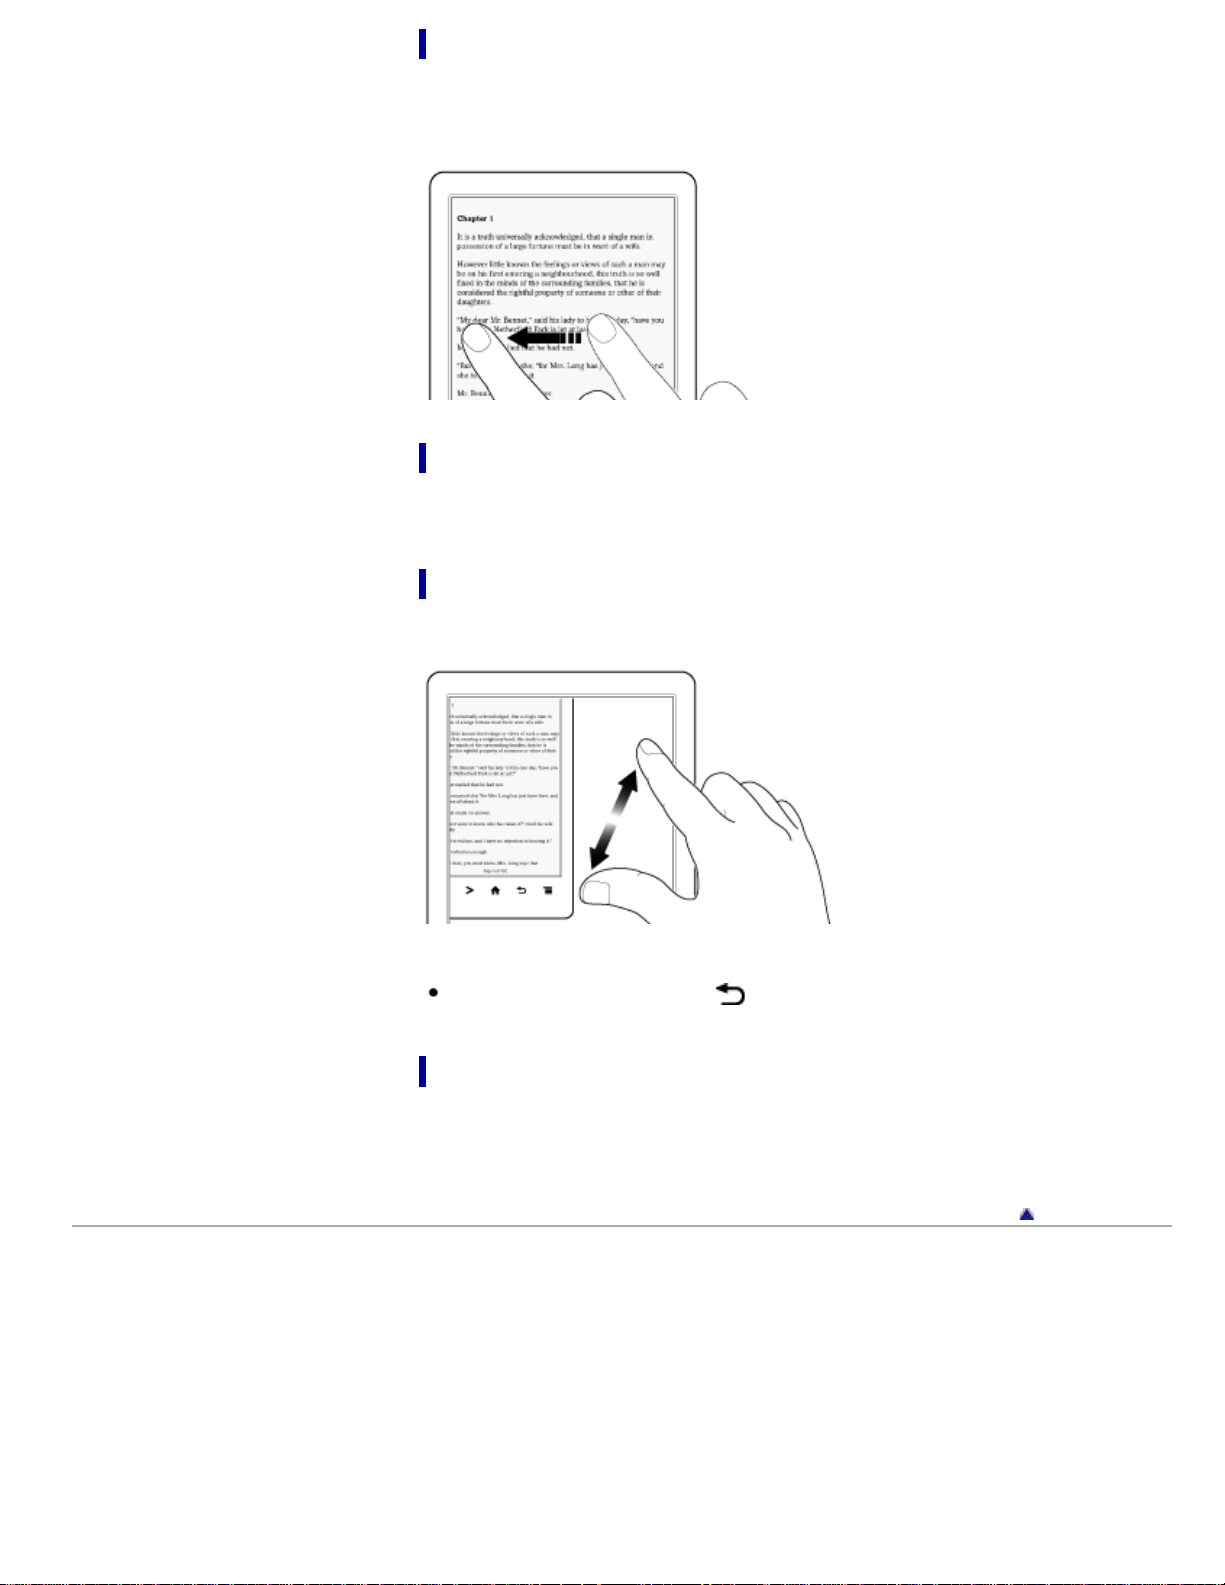
Swipe
Slide your finger gently and swiftly on the touchscreen to turn the page; you can turn the
page forward by swiping to the left, or backward by swiping to the right. You can also
navigate pages of content lists.
Swipe and hold
To turn multiple pages continuously, swipe and hold your finger on the screen. Release
your finger to stop.
Pinch
Pinch your fingers in or out to zoom in or out of the current page or image.
Note
To exit zoom mode, press the
(Back) button.
Drag
Touch and drag your finger to reposition a zoomed-in page or image. The page or
image is repositioned after you release your finger.
Go to page top
Copyright 2013 Sony Corporation
Reader™ User Guide
Print
Search
Getting started
Basic Operations
Adding/Getting Content
Browsing Content Lists
Reading
Organizing
Other Applications
Settings
Other Information
Contents list
Top page > Basic Operations > [Home] Screen > On-Screen Keyboard
On-Screen Keyboard
The on-screen keyboard is used when you need to type. If the keyboard does not
automatically appear, tap the input area on the screen.
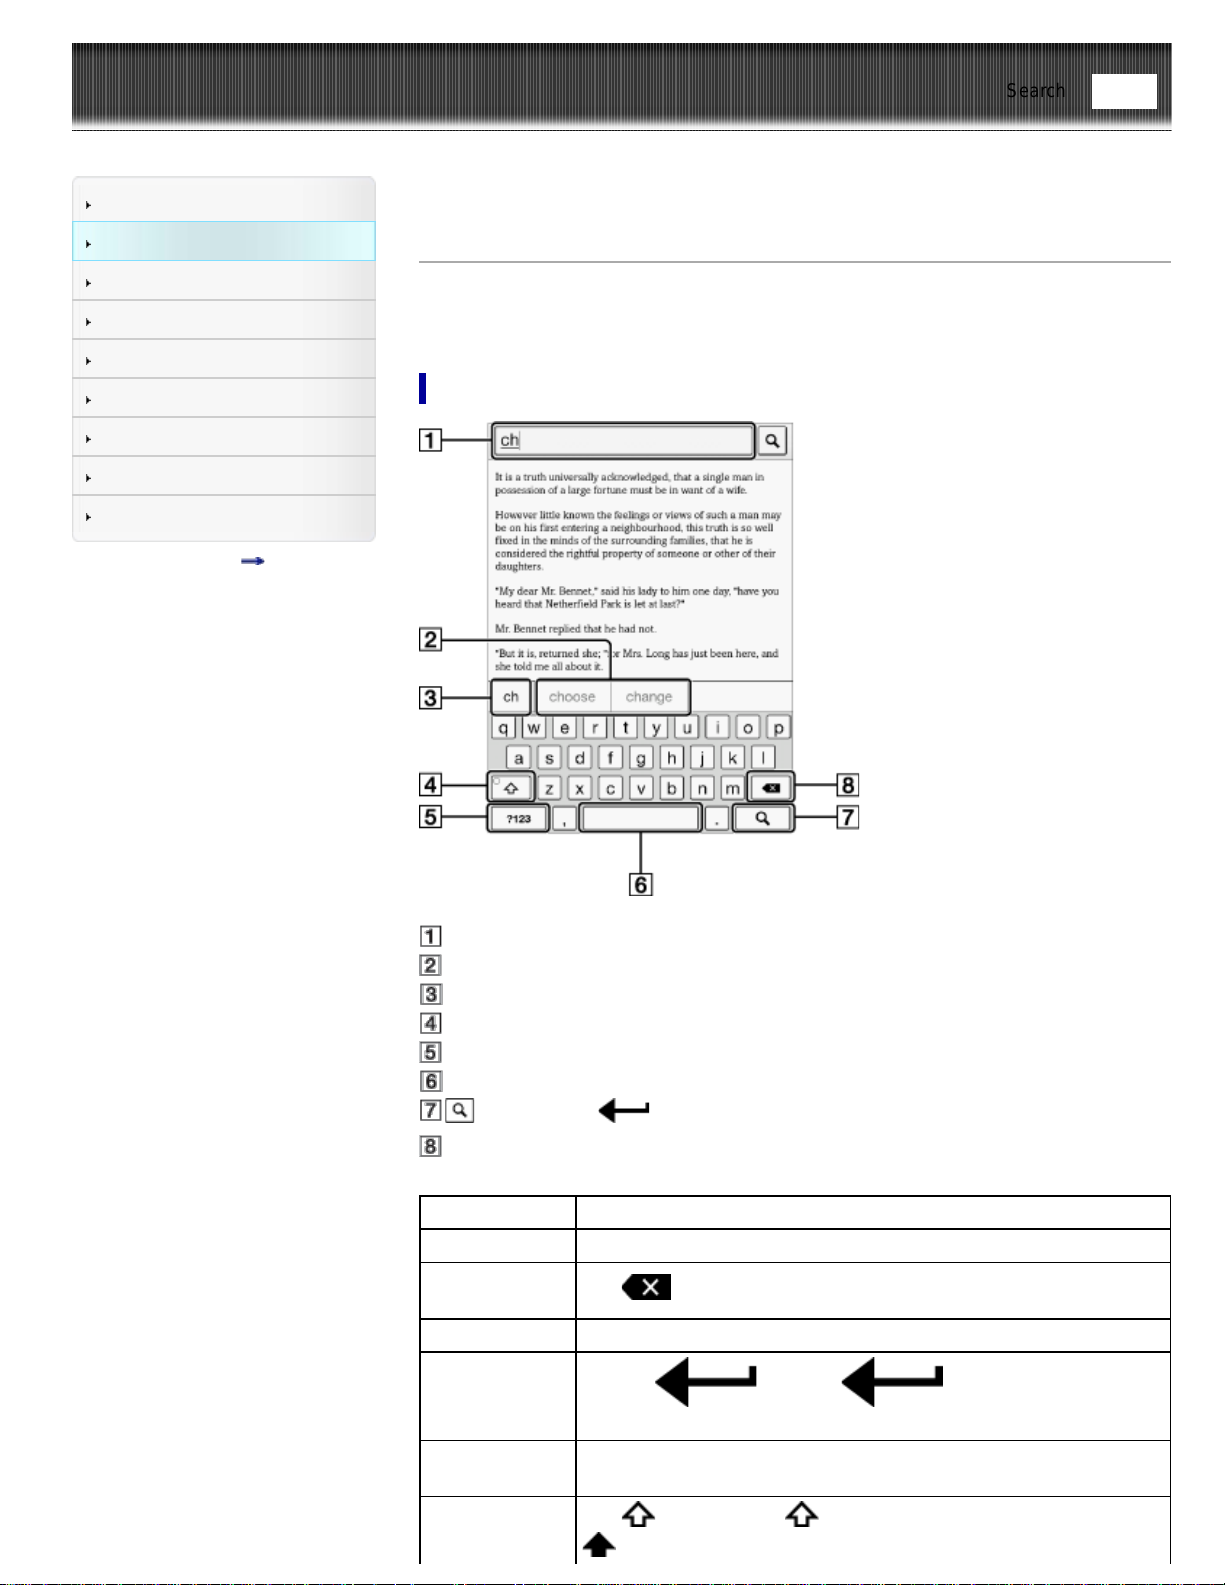
On-screen keyboard layout
Input area
Keyboard history
Current word input box
Shift key/[ALT]
[?123]/[ABC]
Space
(Search icon)/ (Line feed icon)/[Go]
Backspace
To Do this
Input text Tap the input area.
Delete a
character
Tap
.
Finish typing Tap [Go]/[Done].
Insert line feed
Tap the
key. The key is enabled only
when multi-line input is available.
Switch the
keyboard type
Tap [?123] to display the symbol keyboard. Tap [ALT] to switch to
additional characters. Tap [ABC] to return to the alphabetical keys.
Capitalize a
single letter
Tap
. Tap and hold to activate caps lock. To cancel, tap
again.
Find
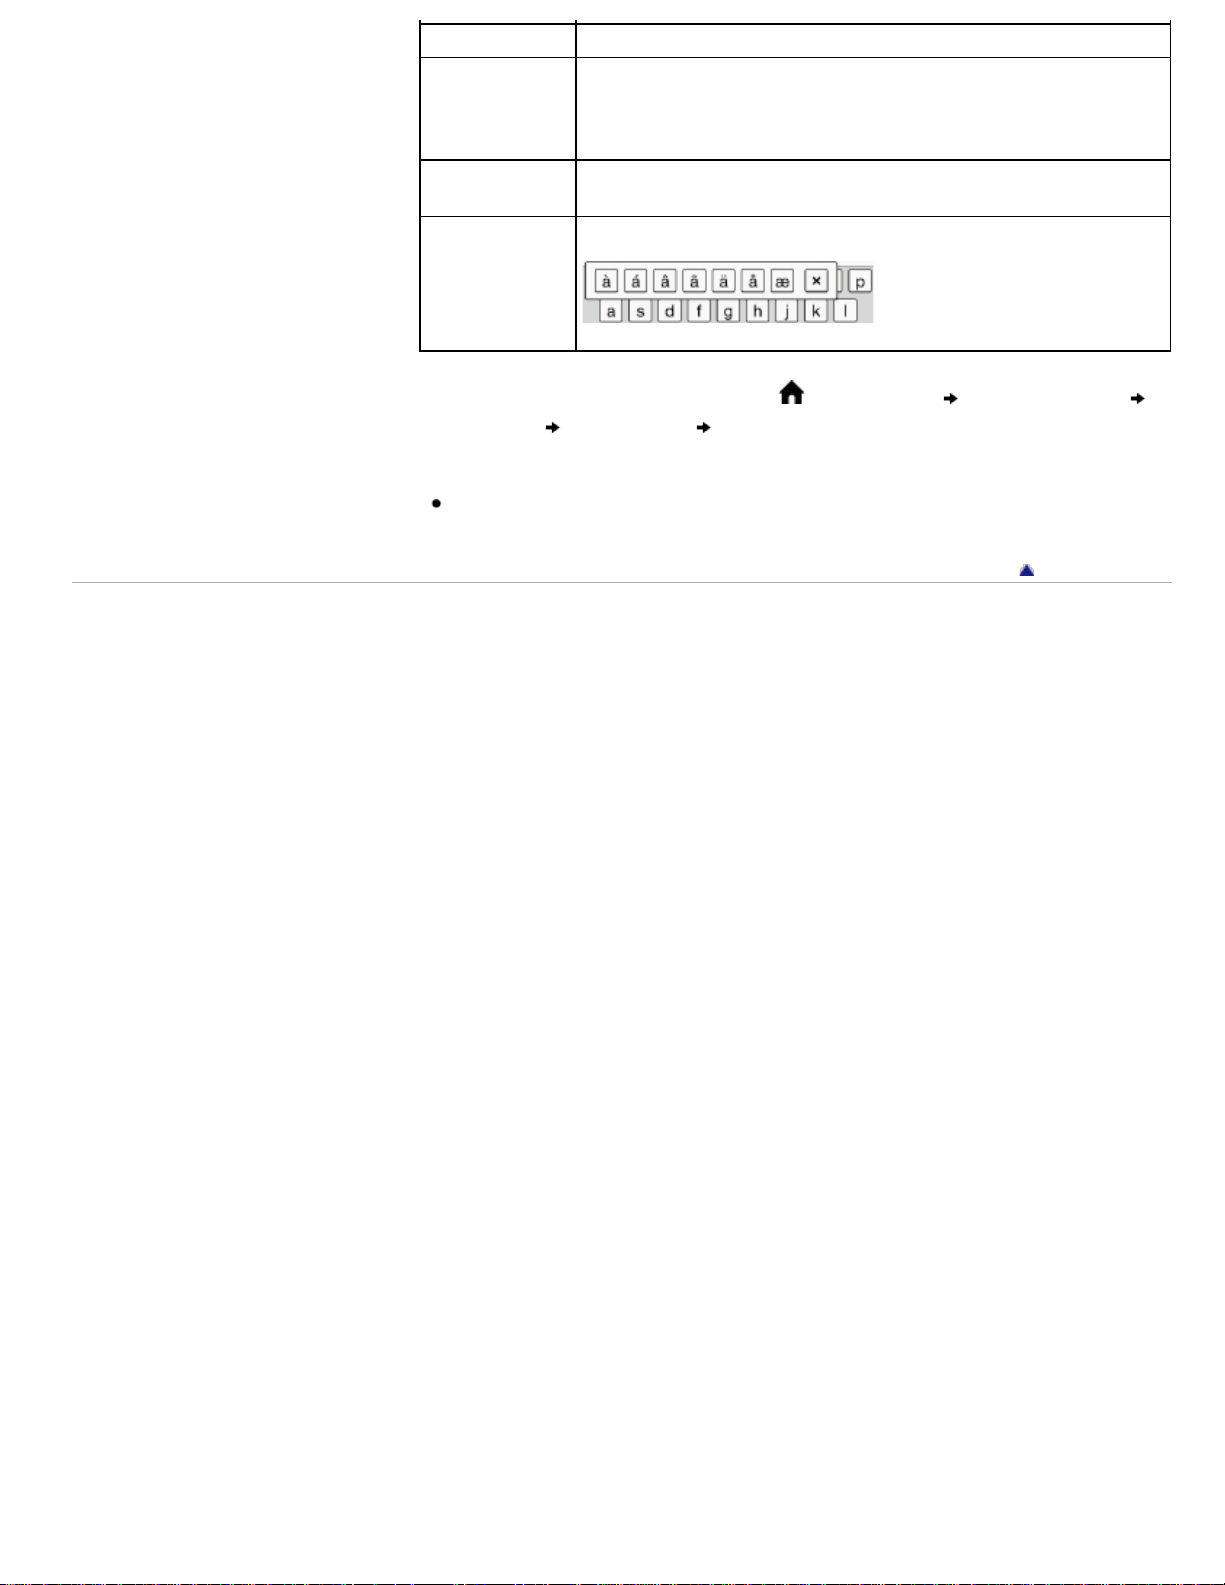
Enter a space Tap the space key.
Enter a
previously
registered word
A list of words you registered to the keyboard history* displayed next
to the current word input box. Tap the desired word to enter it.
Tap and hold the current word input box to register the word in it to
the keyboard history. (The word must consist of at least 3 letters.)
Move the cursor
in the input area
Tap the location to which you want to move the cursor.
Type extended
characters
Tap and hold a key and choose one from the keys.
* To clear the keyboard history, press the (Home) button tap [Applications]
[Settings] [Initialization] [Clear Keyboard History].
Note
The available types of keyboards and input methods differ depending on the
application.
Go to page top
Copyright 2013 Sony Corporation
Reader™ User Guide
Print
Search
Getting started
Basic Operations
Adding/Getting Content
Browsing Content Lists
Reading
Organizing
Other Applications
Settings
Other Information
Contents list
Top page > Adding/Getting Content > Adding Content > Adding Content
Adding Content
Transferring content via the Reader application (Reader for
PC/Mac)
You can use the Reader application to transfer eBooks and pictures to the Reader. You
will need to install the Reader application and organize content on your computer in
advance. You can also backup the contents on the Reader to the Reader application.
Transferring content via drag-and-drop
You can directly transfer content by drag-and-drop to your computer.
1. Connect the Reader to your computer using the supplied USB cable.
Make sure the Reader is in a state that can transfer data. See Details.
2. For Windows users, click on the “Start” menu
“Computer” or “My Computer”
double-click the “READER” drive, and then drag and drop your data onto the
“READER” drive.
For Mac users, double-click the “READER” drive, and then drag and drop your data
onto the “READER” drive.
3. When transfer is complete, use the safely remove hardware function of your
computer before disconnecting the USB cable from the Reader and your computer.
Content will be sent to its corresponding application based on the file format of the
content.
Personal documents other than pictures files will be sent to the [Books] application.
Note
Content transferred via drag-and-drop may not be displayable on the Reader, or
thumbnails of the content may not be properly displayed on the Reader. Sony
recommends that you transfer data via the Reader application.
Do not delete any system default folders created by the Reader on the “READER”
drive, the “SETUP” drive or the microSD card.
If you disconnect the USB cable while data is being transferred, data corruption
may occur. To disconnect the Reader or the microSD card when the Reader is
connected to your computer, make sure to use the safely remove hardware function
of your computer, and then disconnect the USB cable.
Do not format the Reader or your microSD card via your computer. If you have
formatted the Reader or microSD card on your computer, the Reader may not be
able to display transferred content. In this case, use the Reader’s [Format Memory]
function to reformat the Reader and your microSD card. See Details.
Tip
When you transfer data to the microSD card, insert the microSD card to the Reader
in Step 1, and drag-and-drop to the microSD (removable disk) drive in Step 2
above.
For details on the system requirements for the Reader application, see Details.
For details on supported file formats, see Details.
Go to page top
Copyright 2013 Sony Corporation
Find
Reader™ User Guide
Print
Search
Getting started
Basic Operations
Adding/Getting Content
Browsing Content Lists
Reading
Organizing
Other Applications
Settings
Other Information
Contents list
Top page > Adding/Getting Content > Adding Content > Buying eBooks and
Periodicals* at Reader Store*
Buying eBooks and Periodicals* at Reader Store*
* Available in certain countries/regions only. Please visit your local Reader Store web
page for more information. Features described in this section only appear on your
Reader if your local Reader Store supports them.
Before starting
1. Configure Wi-Fi settings of the Reader to access Reader Store. See Details.
2. Press the
(Home) button tap [Reader Store].
Creating a Reader Store account
In order to purchase and download eBooks or periodicals, you need to create an
account at Reader Store.
Tap the input area and enter your information using the on-screen keyboard. Unless
being asked to create an Adobe ID and password, your Reader Store ID (your e-mail
address) and password become your Adobe ID and password. Changing your Reader
Store password will not automatically change the password of your Adobe ID. Following
on-screen instructions, the Reader will be authorized to view purchased contents after
being downloaded.
Buying eBooks and periodicals
Following steps will guide you to sign in the Reader Store and purchase contents with
your Reader.
1. Sign in to your account.
If you do not have an account, create one by following Reader Store instructions.
If you already have a Reader Store account, sign in via your e-mail address and
password.
You may be asked to enter your Adobe ID and password when necessary.
2. Select or search for the title you wish to purchase.
Follow Reader Store instructions to complete your purchase. Depending on your
regional Reader Store, you may be instructed to tap ‘Download’ link to begin
downloading. Otherwise, downloading will start.
About auto delivery
Once you have subscribed to newspapers/magazines at Reader Store, newly published
issues will be delivered to the Reader automatically. To ensure this process, confirm the
following:
A Wi-Fi network connection is available. See Details.
When a new issue is delivered to the Reader, it will be displayed under [Recently
Added] on the [Home] screen. You can also find the issue from the [Periodicals] list.
Note
If you miss any new issues while a wireless network is unavailable, download them
by going to [My Account] at Reader Store, where previous issues are available.
The Wi-Fi network features (including the auto delivery feature) become unavailable
while the Reader is connected to your computer via USB and is in data transfer
mode.
Find
Reader Store notifications
You will automatically receive updates—like book and periodical recommendations,
special promotions and exclusive offers—from the Reader Store on the [Home] screen.
To ensure this process, confirm the following:
A Wi-Fi network connection is available. See Details.
Note
To turn [Reader Store Notifications] [On] or [Off], tap [Settings]
[General
Settings]
[Reader Store Notifications].
When you close the [Reader Store Notifications] window, your current
recommendations will not be displayed the next time you go to the [Home] screen.
However, the window will be displayed again when Reader Store sends you new
recommendations.
Navigating Reader Store
To return to the previous page of Reader Store, press the (Back) button. (The < >
(Page turn) buttons and the zoom in function are disabled.)
Pressing the
(Menu) button allows you to display the options items for navigation.
Navigation
method
Description
[Store Home] Goes to the top page of Reader Store.
[My Account] Views your purchase history and re-download purchased content.
[Refresh /
Stop]
Updates the content displayed on the Reader Store page, or stops
loading the page.
[Forward] Advances to a previously viewed page.
[Continue
Reading]
Closes the [Reader Store] application and returns to the last read
page of your last read book.
[More] Displays more option items.
[Help and
Support]
Jumps to the FAQ page of Reader Store.
[Legal
Information]
Displays legal information about Reader Store.
Checking downloaded content
When downloading content from Reader Store, you can check the download progress in
the status bar and by tapping it to display the notification window. See Details.
When you exit Reader Store, your four most recent purchases are displayed under
[Recently Added] on the [Home] screen. You can check the purchased content in
[Bookshelves]
[Purchased Content].
When you are subscribing to newspapers and magazines, all content is stored in the
[Periodicals] application.
Browsing the Purchased History
You can check the purchased books/periodicals from Reader Store.
1. Tap [Bookshelves].
2. Tap [Books]. Alternatively, press
(Menu) button [Choose Bookshelf].
The pop-up menu opens.
3. Tap [Purchased Content].
Contents purchased from Reader Store are displayed.
Tip

In addition to checking eBooks downloaded from Reader Store, you can also check
for purchased eBooks yet to be downloaded. If you have not logged in to Reader
Store yet, [Purchased Content] in the pop-up menu is not shown.
You can also post the downloaded books/periodicals information to Facebook. To
post the downloaded books/periodicals information, tap and hold the title of
books/periodicals
[Post to Facebook].
Accessing Reader Store from your computer
In addition to shopping at Reader Store from your computer, you can transfer eBooks
from your computer to the Reader using the Reader application. Install either Reader™
for PC or Reader™ for Mac
®
by launching the corresponding installer on the Reader.
See Details.
Go to page top
Copyright 2013 Sony Corporation
Reader™ User Guide
Print
Search
Getting started
Basic Operations
Adding/Getting Content
Browsing Content Lists
Reading
Organizing
Other Applications
Settings
Other Information
Contents list
Top page > Browsing Content Lists > Content Lists > Browsing Content List Pages
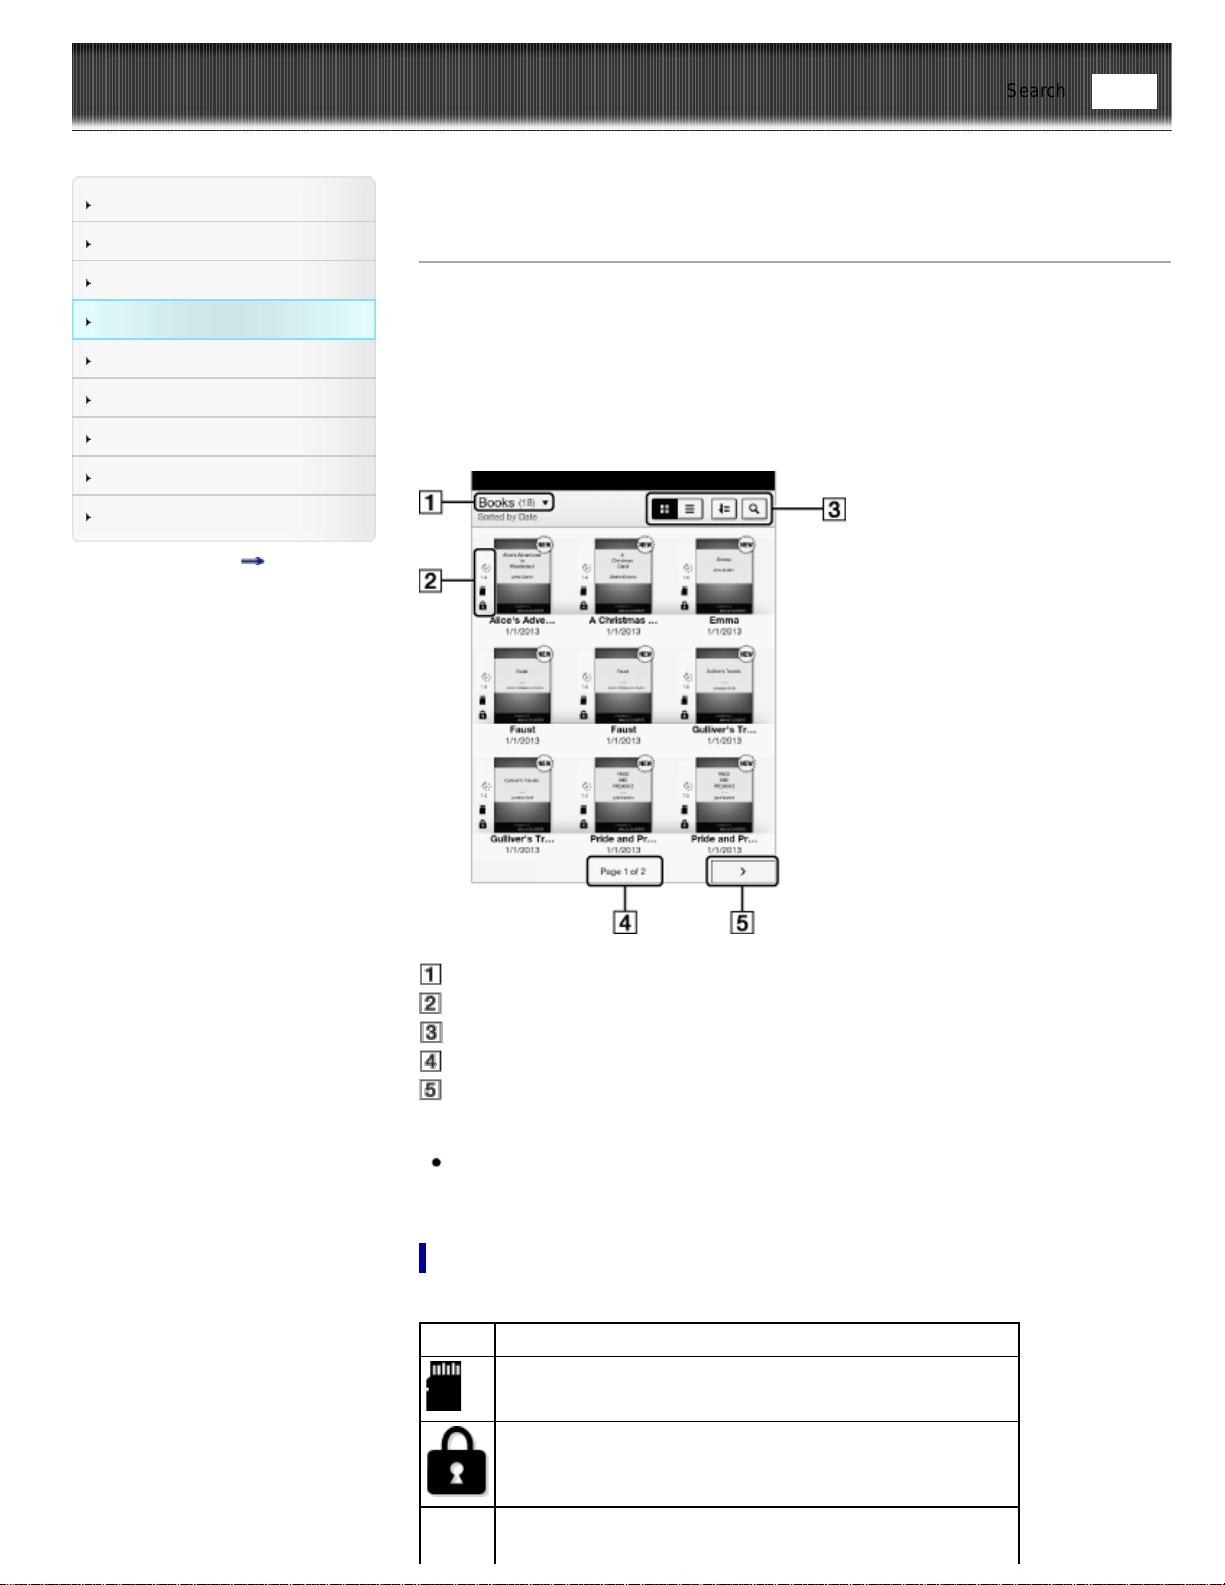
Browsing Content List Pages
The Reader organizes content by content type and file format using applications. For
example, eBooks or your personal documents (such as PDF files or text files) are stored
in the [Books] application, newspapers/magazines in the [Periodicals]* application and
pictures in the [Pictures] application, etc.
* Available in certain countries/regions only.
Content list pages allow you to sort content, as well as search content on the Reader.
The following instructions use the [Books] application as an example.
Tap to choose the bookshelf
Status icons
Tool icons Details
Page indicator
Page navigation icon
Tip
Depending on the application, several tools are available for content list pages. See
Details.
Status icons
Icon Description
The item is stored on the microSD card.
The item is protected from deletion. See Details.
The item has not been opened.*
Find
The item has expired.* See Details.
The item expires in the given number of days.* See Details.
* This icon is displayed for books/periodicals only.
Navigation
Navigation method Description
Page indicator
Display the page jump panel. See
Details.
Page navigation icon or the < (Previous)
button
View the previous page or item.
Page navigation icon or the > (Next) button View the next page or item.
Go to page top
Copyright 2013 Sony Corporation
Reader™ User Guide
Print
Search
Getting started
Basic Operations
Adding/Getting Content
Browsing Content Lists
Reading
Organizing
Other Applications
Settings
Other Information
Contents list
Top page > Browsing Content Lists > Content Lists > Browsing in Thumbnail View and
List View
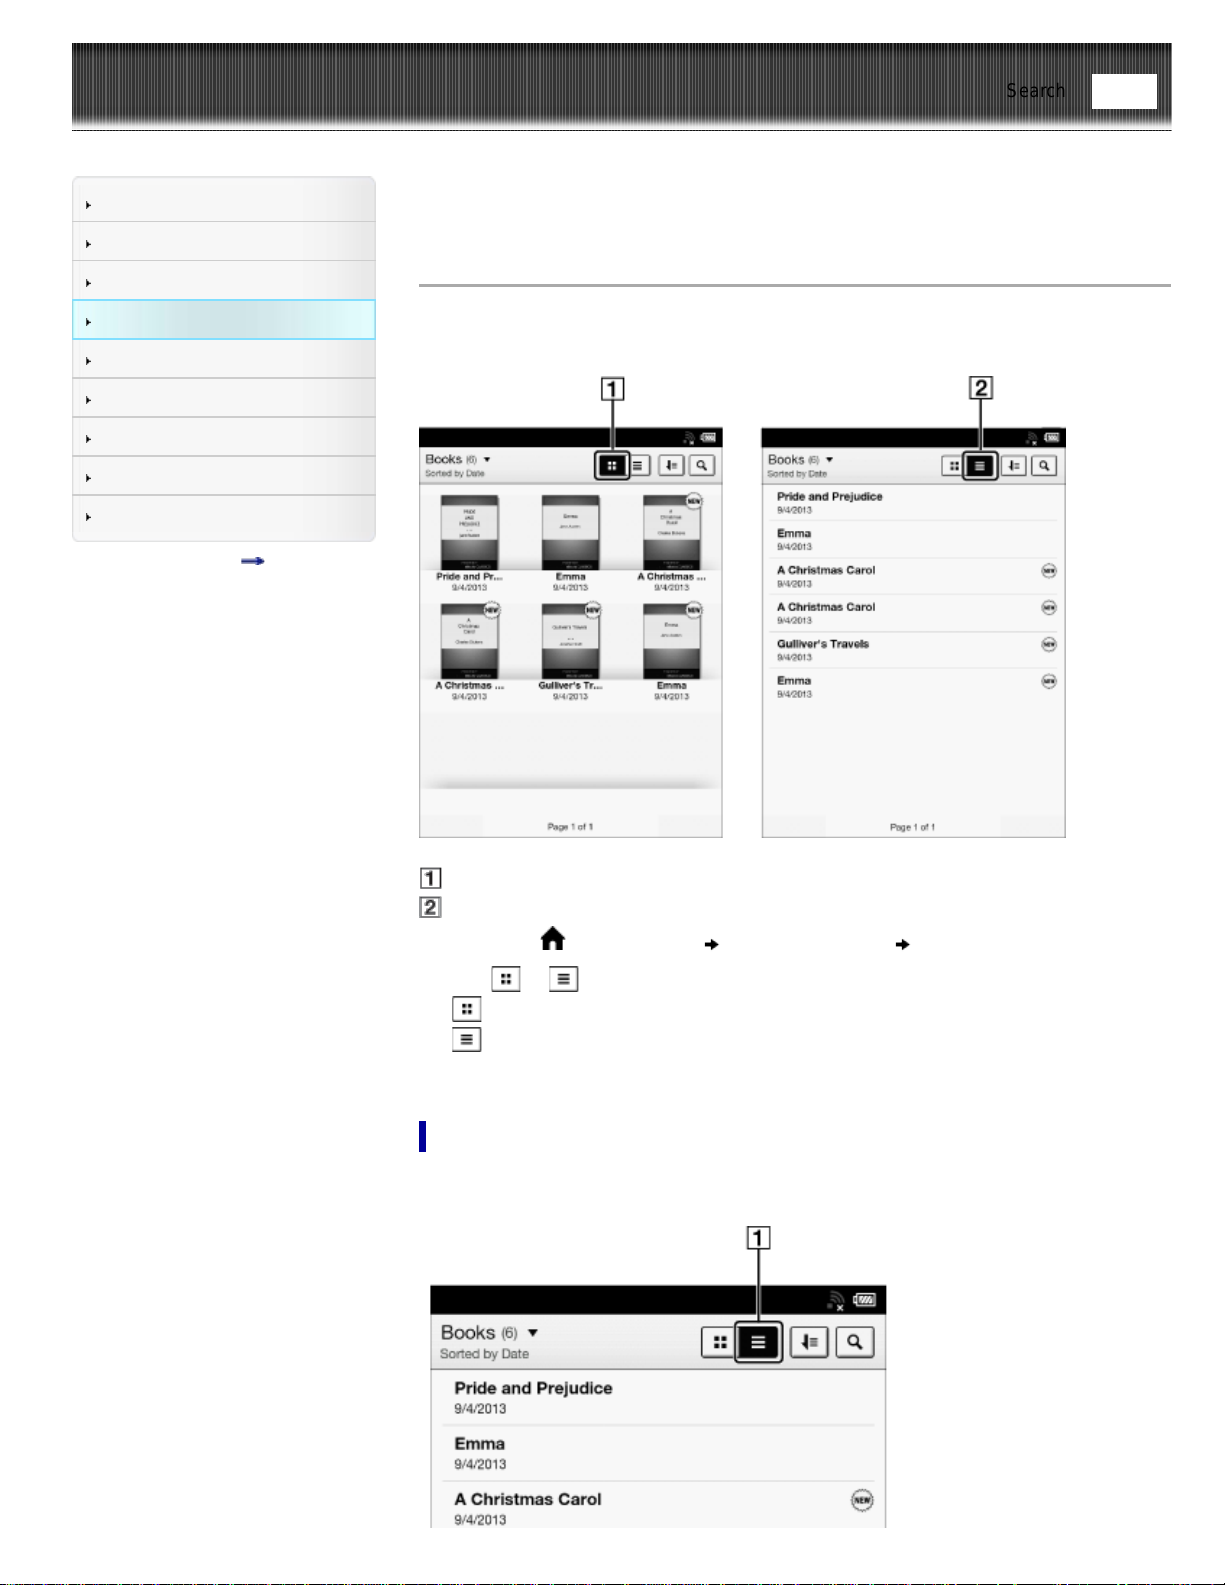
Browsing in Thumbnail View and List View
Content can be displayed as individual thumbnails or in a list.
The following instructions use the [Books] application as an example.
Thumbnail view icon
List view icon
1. Press the
(Home) button tap [Bookshelves] [Books].
2. Tap
or .*
displays thumbnails of content.
displays a list of content.
* Some applications only allow list view.
Adjusting the title view
The titles of some books/periodicals may be cut off if they are too long. To avoid this,
you can set the Reader to display titles across two lines instead of one line.
Find
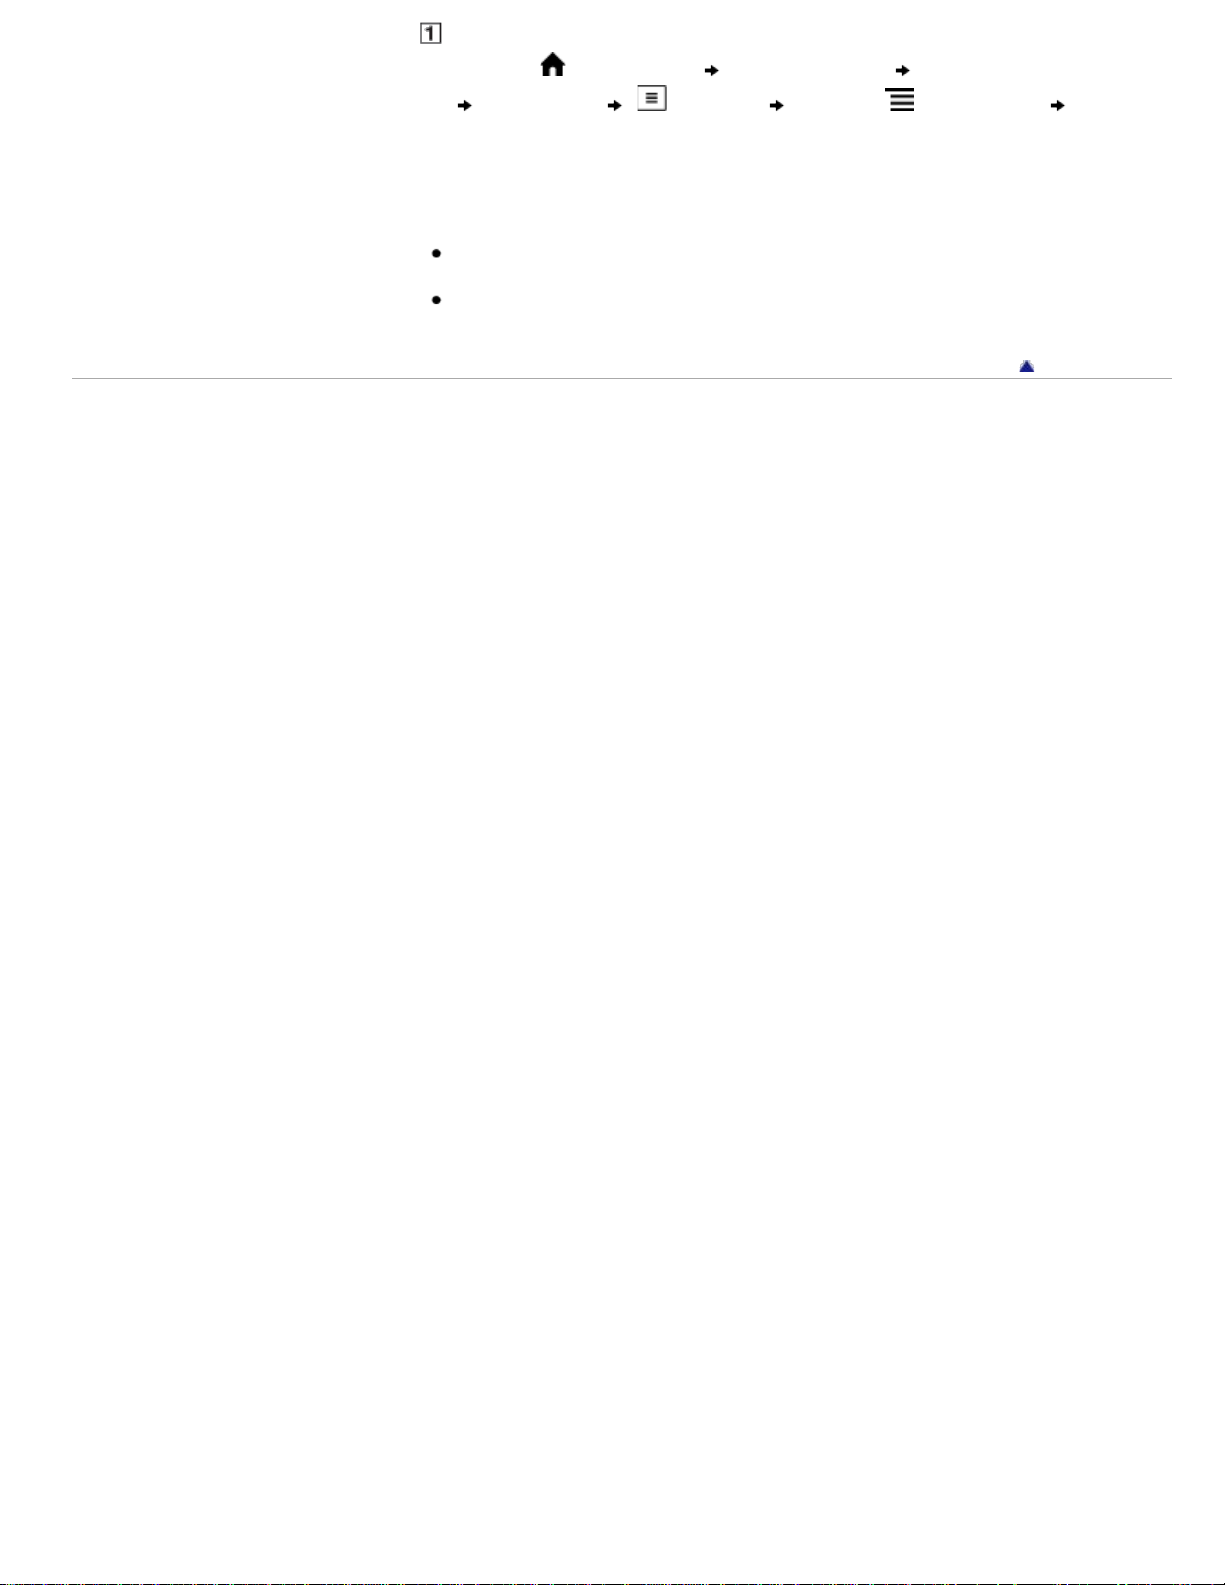
List view
1. Press the (Home) button tap [Bookshelves] [Books], or tap [Applications]
[Periodicals]* (List view) press the (Menu) button tap [Title
(2 Line View)].
* Available in certain countries/regions only.
Titles are displayed on two lines.
Tip
When you tap [Bookshelves], any previously displayed content from [Books],
[Collections], [Purchased Content] and [Evernote] will be shown.
The [Purchased Content] function only appears on your Reader if your local Reader
Store supports the feature
Go to page top
Copyright 2013 Sony Corporation
Reader™ User Guide
Print
Search
Getting started
Basic Operations
Adding/Getting Content
Browsing Content Lists
Reading
Organizing
Other Applications
Settings
Other Information
Contents list
Top page > Browsing Content Lists > Content Lists > Using the Page Jump Panel in
Content List Pages
Using the Page Jump Panel in Content List Pages
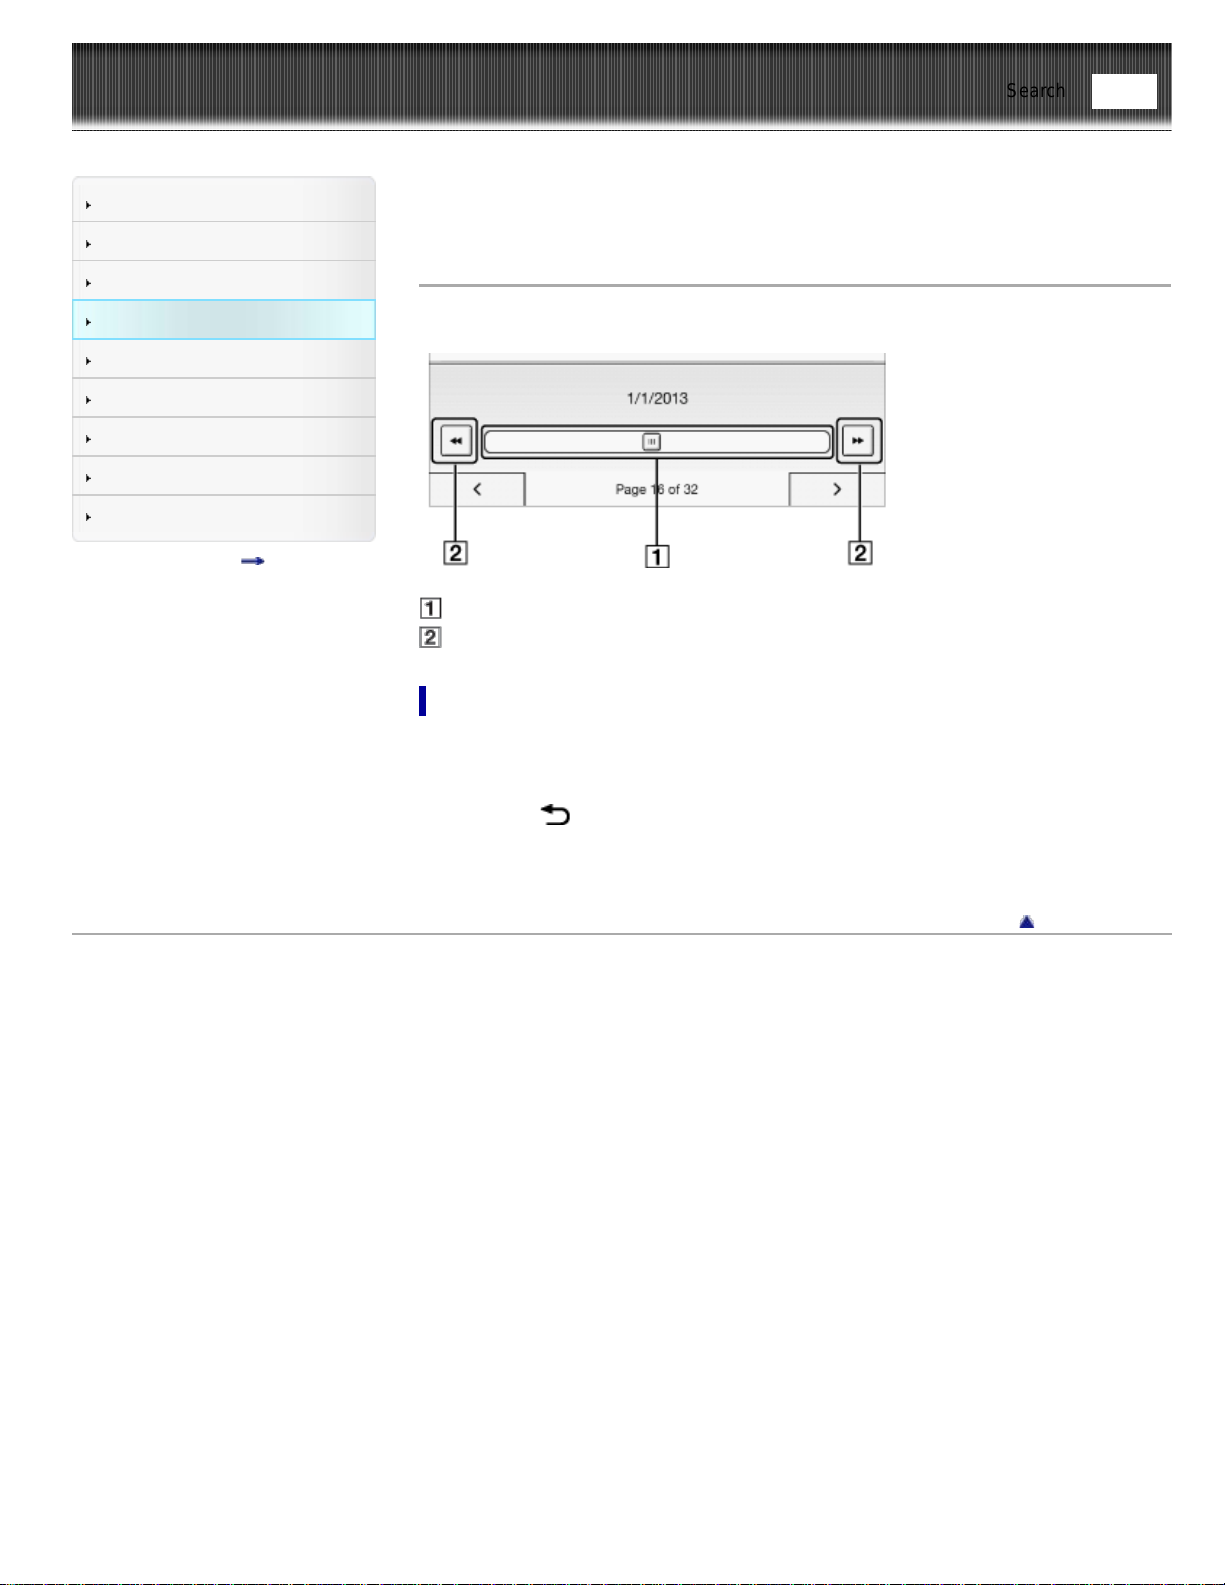
Content list pages can be turned conveniently via the page jump panel.
Page jump bar
Page skip icon
To use the page jump bar
1. When viewing a content list page, tap the page indicator at the bottom of the
screen.
2. Tap and slide the bar left or right to navigate back or forward.
Press the
(Back) button to hide the page jump panel.
Skipping 10 pages at a time
When the page jump bar is displayed, tap << or >> (Page skip) to skip back 10 pages
or skip forward 10 pages at a time.
Go to page top
Copyright 2013 Sony Corporation
Find
Reader™ User Guide
Print
Search
Getting started
Basic Operations
Adding/Getting Content
Browsing Content Lists
Reading
Organizing
Other Applications
Settings
Other Information
Contents list
Top page > Browsing Content Lists > Content Lists > Finding Content with a Keyword
Finding Content with a Keyword
You can find a specific item quickly with a keyword search.
You can locate a book or author of a book on the Reader via the [Books] application, or
search for annotations via the [All Notes] application, etc.
The following instructions use the [Books] application as an example.
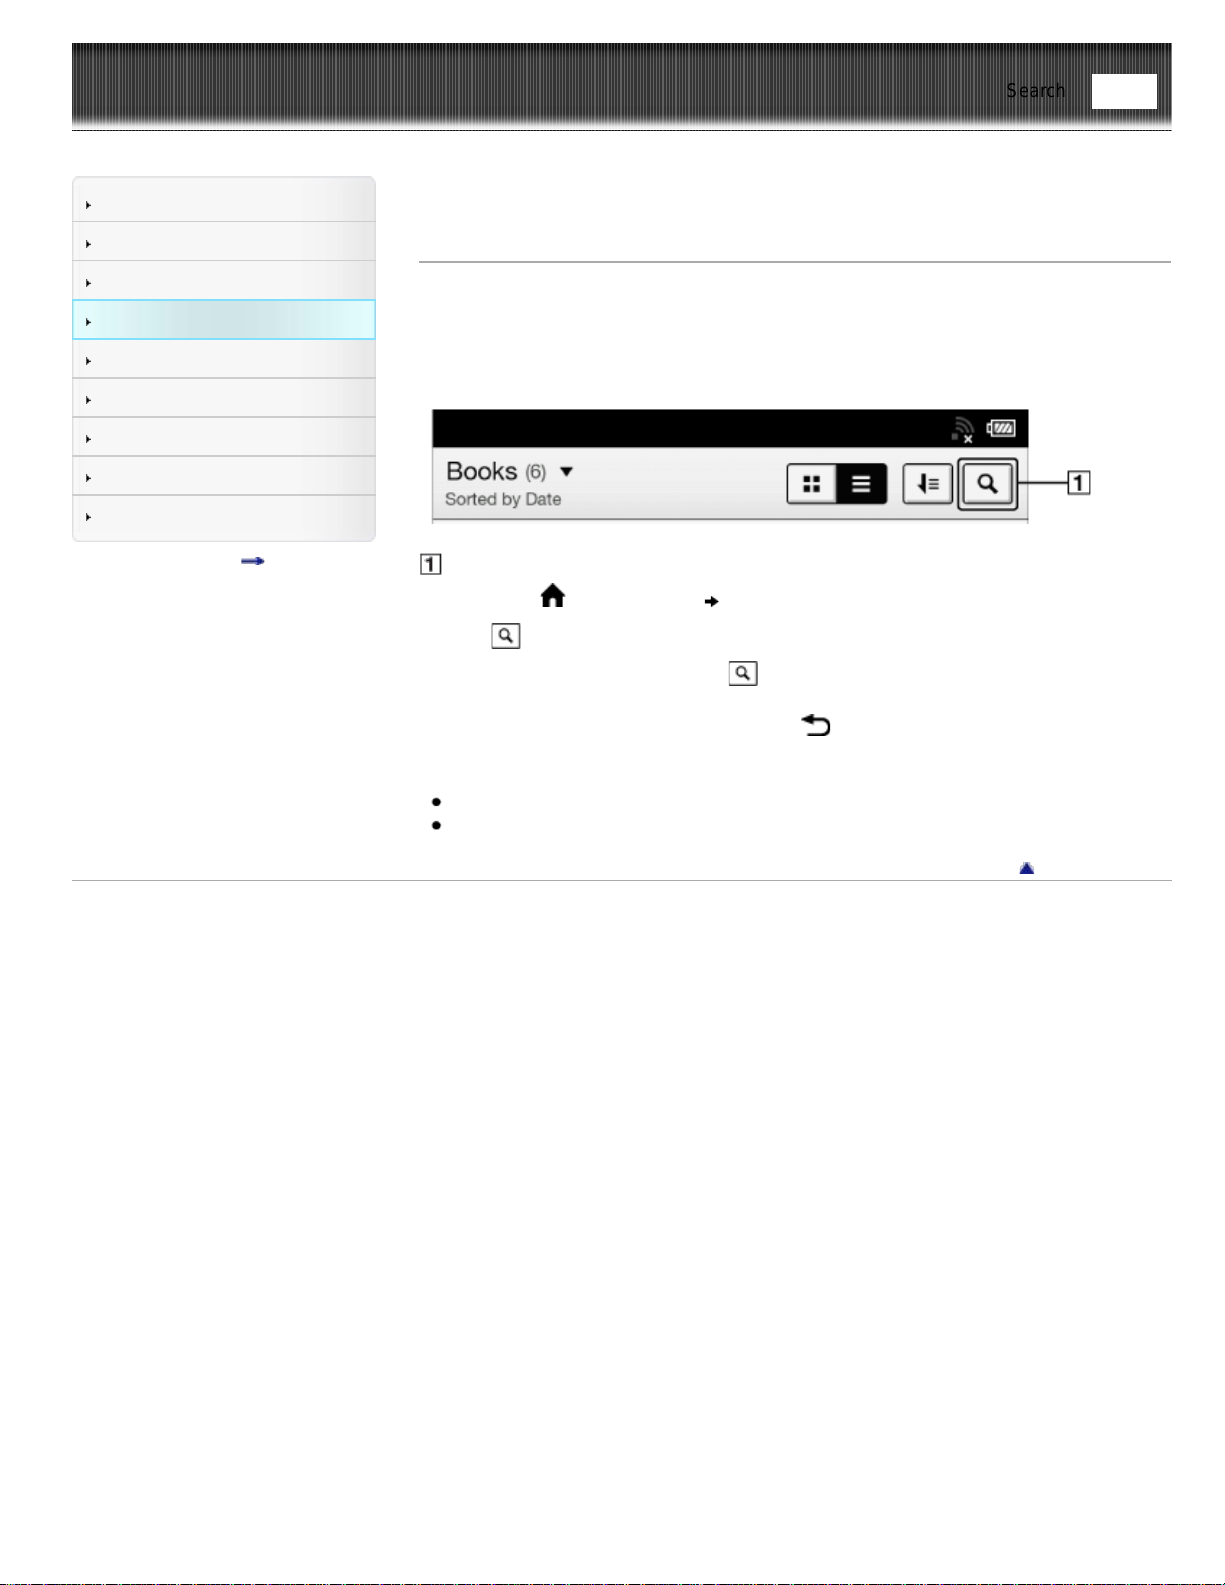
Search icon
1. Press the
(Home) button tap [Bookshelves].
2. Tap
; the keyword input area and the on-screen keyboard appear.
3. Input a search keyword and tap
.
The view shows only the items that satisfy the search criteria.
To exit the search result view, press the
(Back) button.
Note
Some applications do not support keyword searching.
The available search target varies among content types.
Go to page top
Copyright 2013 Sony Corporation
Find
Reader™ User Guide
Print
Search
Getting started
Basic Operations
Adding/Getting Content
Browsing Content Lists
Reading
Organizing
Other Applications
Settings
Other Information
Contents list
Top page > Browsing Content Lists > Content Lists > Posting Book information to
Facebook
Posting Book information to Facebook
You can post the book title and author information to Facebook.
1. Press the
(Home) button tap [Bookshelves] tap and hold the book that
you wish to post.
2. Tap [Post to Facebook].
The selected book information is posted to Facebook.
Note
Before posting to Facebook, you need to log in. Press the
(Home) button
tap [Applications] [Facebook Setup].
Go to page top
Copyright 2013 Sony Corporation
Find
Reader™ User Guide
Print
Search
Getting started
Basic Operations
Adding/Getting Content
Browsing Content Lists
Reading
Organizing
Other Applications
Settings
Other Information
Contents list
Top page > Browsing Content Lists > Content Lists > Tools
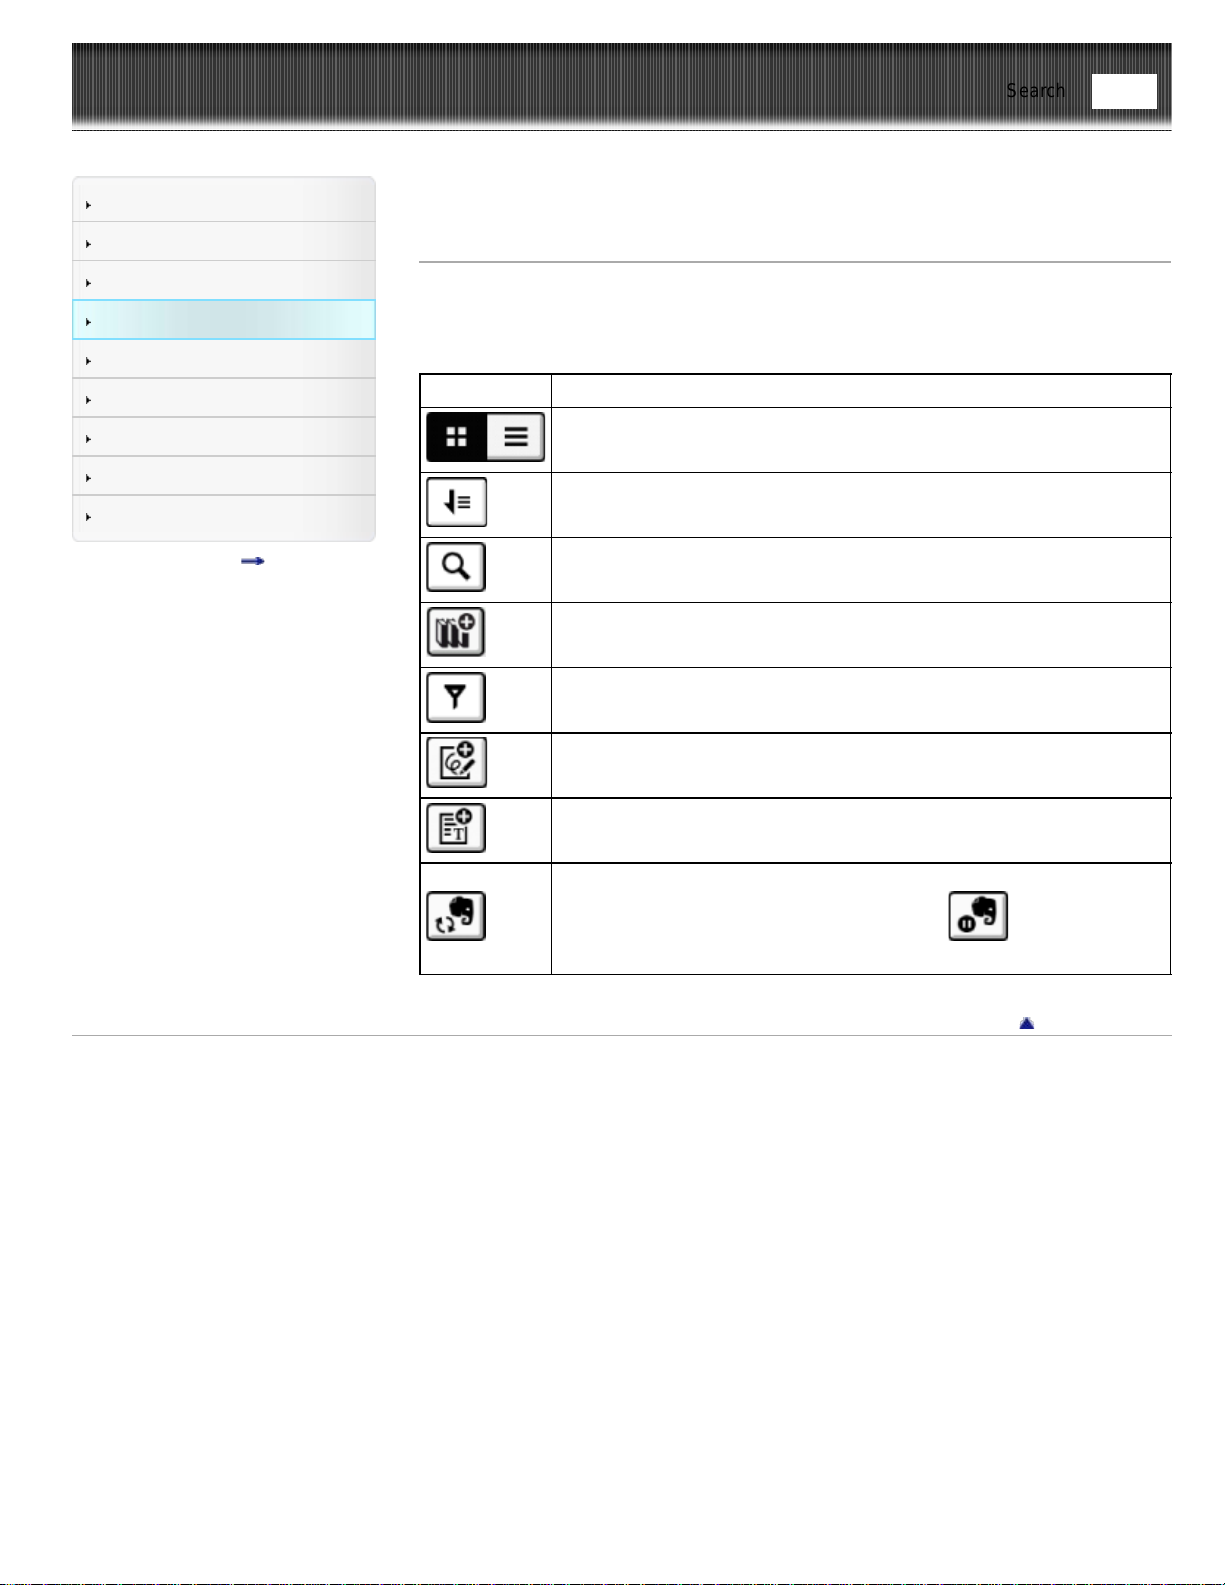
Tools
Below is a list of the tools available on each application’s content list page.
Not all tools are available in each application.
Tool icon Description
Changes the view between the thumbnail view and the list view. See
Details.
Changes the sort order.
Finds content with a keyword. See Details.
Creates a new collection.
Specifies the notes type to view in the list.
Creates a new drawing.
Creates a new memo.
Synchronizing with Evernote. See Details.
During syncronization, the icon will change to
(tap to stop
syncronization).
Go to page top
Copyright 2013 Sony Corporation
Find
Reader™ User Guide
Print
Search
Getting started
Basic Operations
Adding/Getting Content
Browsing Content Lists
Reading
Organizing
Other Applications
Settings
Other Information
Contents list
Top page > Browsing Content Lists > Content Lists > Using (Menu) Items
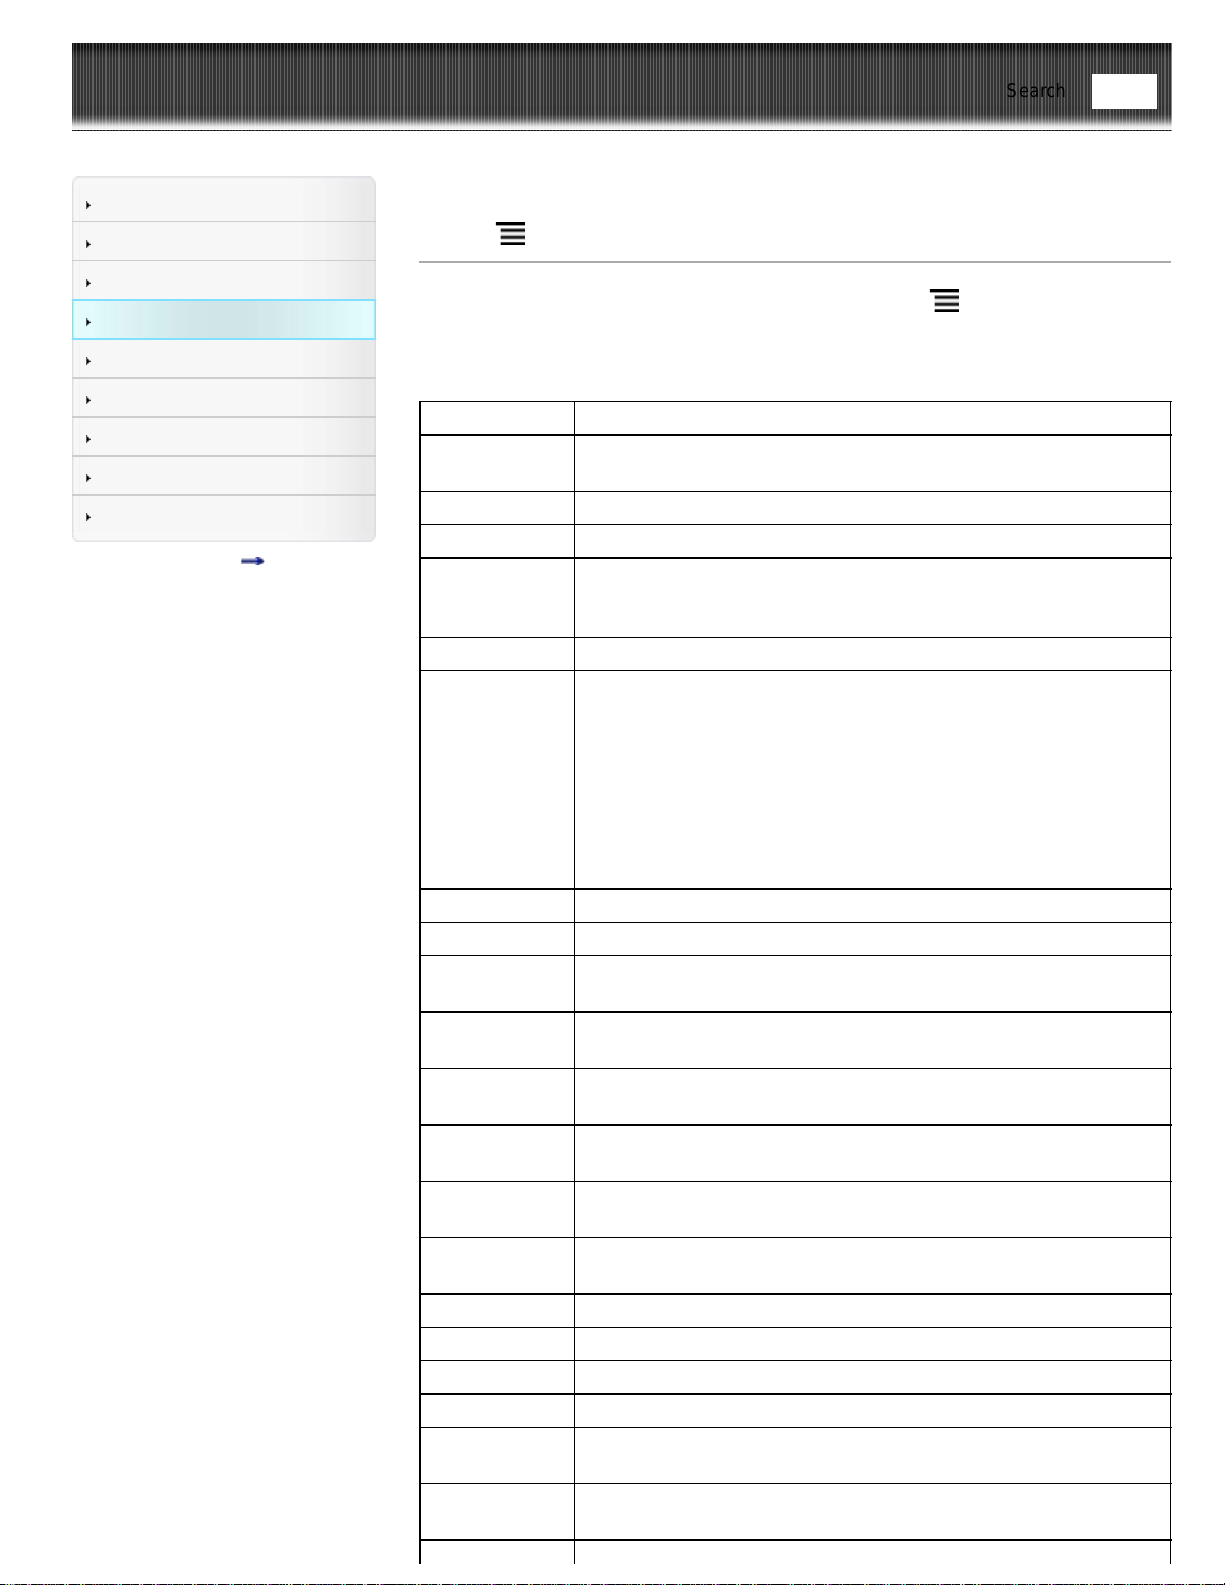
Using (Menu) Items
Below is a list of option items available when you press the (Menu) button on each
application’s content list page.
Not all options are available in each application.
Option Description
[Add to
Collection]
Adds one or more books to a collection. See Details.
[Delete Books] Deletes one or more books from the Reader. See Details.
[Protect Books] Protects one or more books from deletion. See Details.
[Title (1 Line
View)]/[Title (2
Line View)]
Displays the full title string without truncating it. See Details.
[Return Books] Shows how to return a public library eBook. See Details.
[Choose
Bookshelf]
Open the pop-up menu and you can choose from following
submenu.
[Books] Displays the book.
[Collections] Displays the collections.
[Purchased Content]* Displays the purchased eBooks.
[Evernote] Displays items downloaded from Evernote.
* Available in certain countries/regions only. The [Purchased
Content] function only appears on your Reader if your local Reader
Store supports the feature.
[Delete Issues] Deletes one or more issues from the Reader. See Details.
[Protect Issues] Protects one or more issues from deletion. See Details.
[Manage
Subscription]
Manages the number of the issues that you want to store. See
Details.
[Move to
Collection]
Moves one or more books to a collection.
[Remove
Content]
Removes items from a collection that you have created. See Details.
[Rename
Collection]
Renames a collection. See Details.
[Post to
Facebook]
Posts a book collection information. See Details.
[Organize to
Collection]
Moves one or more items of [Default Collection] to other collections
created by the user. See Details.
[Sync] Synchronizing with Evernote. See Details.
[Delete Notes] Deletes one or more notes.
[Delete Memos] Deletes one or more text memos. See Details.
[Protect Memos] Protects one or more text memos. See Details.
[Delete
Drawings]
Deletes one or more drawings. See Details.
[Protect
Drawings]
Protects one or more text memos/drawings. See Details.
Find

Reader™ User Guide
Print
Search
Getting started
Basic Operations
Adding/Getting Content
Browsing Content Lists
Reading
Organizing
Other Applications
Settings
Other Information
Contents list
Top page > Reading > Reading eBooks > Opening a Book
Opening a Book
1. Press the (Home) button tap [Bookshelves].
The [Books] content list opens. See Details.
2. Tap a book.
The book opens.
You can also open a book by tapping and holding the book you want to open.
To navigate within a book, see Details.
Tip
When [Collections], [Purchased Content]* or [Evernote] appears, tap the top-left
corner of the screen to show [Books]. Alternatively, press the
(Menu) button
tap [Choose Bookshelf] to show [Books].
* Available in certain countries/regions only. The [Choose Bookshelf] function only
appears on your Reader if your local Reader Store supports the feature.
Go to page top
Copyright 2013 Sony Corporation
Find
Reader™ User Guide
Print
Search
Getting started
Basic Operations
Adding/Getting Content
Browsing Content Lists
Reading
Organizing
Other Applications
Settings
Other Information
Contents list
Top page > Reading > Reading eBooks > Page Navigation
Page Navigation
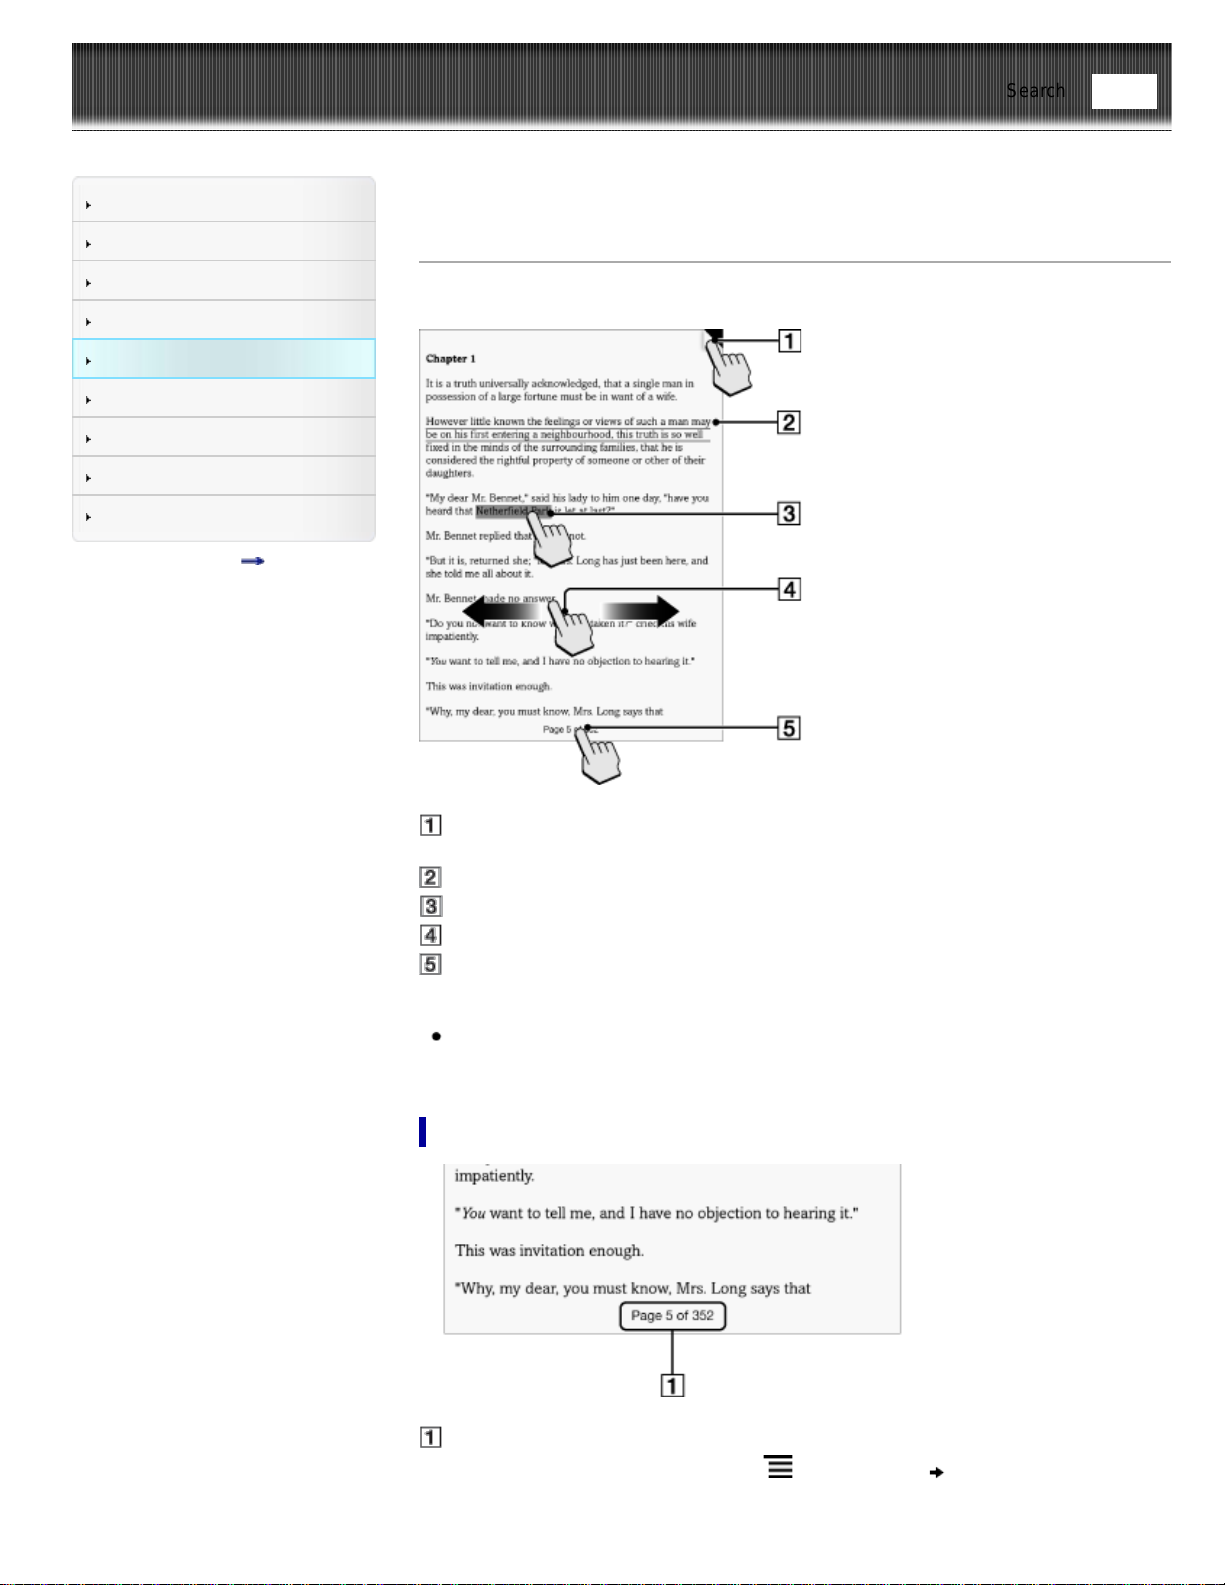
There are several ways to navigate through books.
Tap to add a bookmark Details
Tap and hold to add a note
Draw a handwritten note Details
Tap and hold to open option items Details
Swipe the screen to turn the page
Tap to open the page navigation panel.
Tip
If you select the [Refresh Display] checkbox from [Application Preferences], the
display refreshes at each page turn. See Details.
Using the page navigation panel
Page indicator
1. Tap the page indicator, or press the
(Menu) button tap [Navigate Page] to
open the page navigation panel.
Using the paging bar
Find
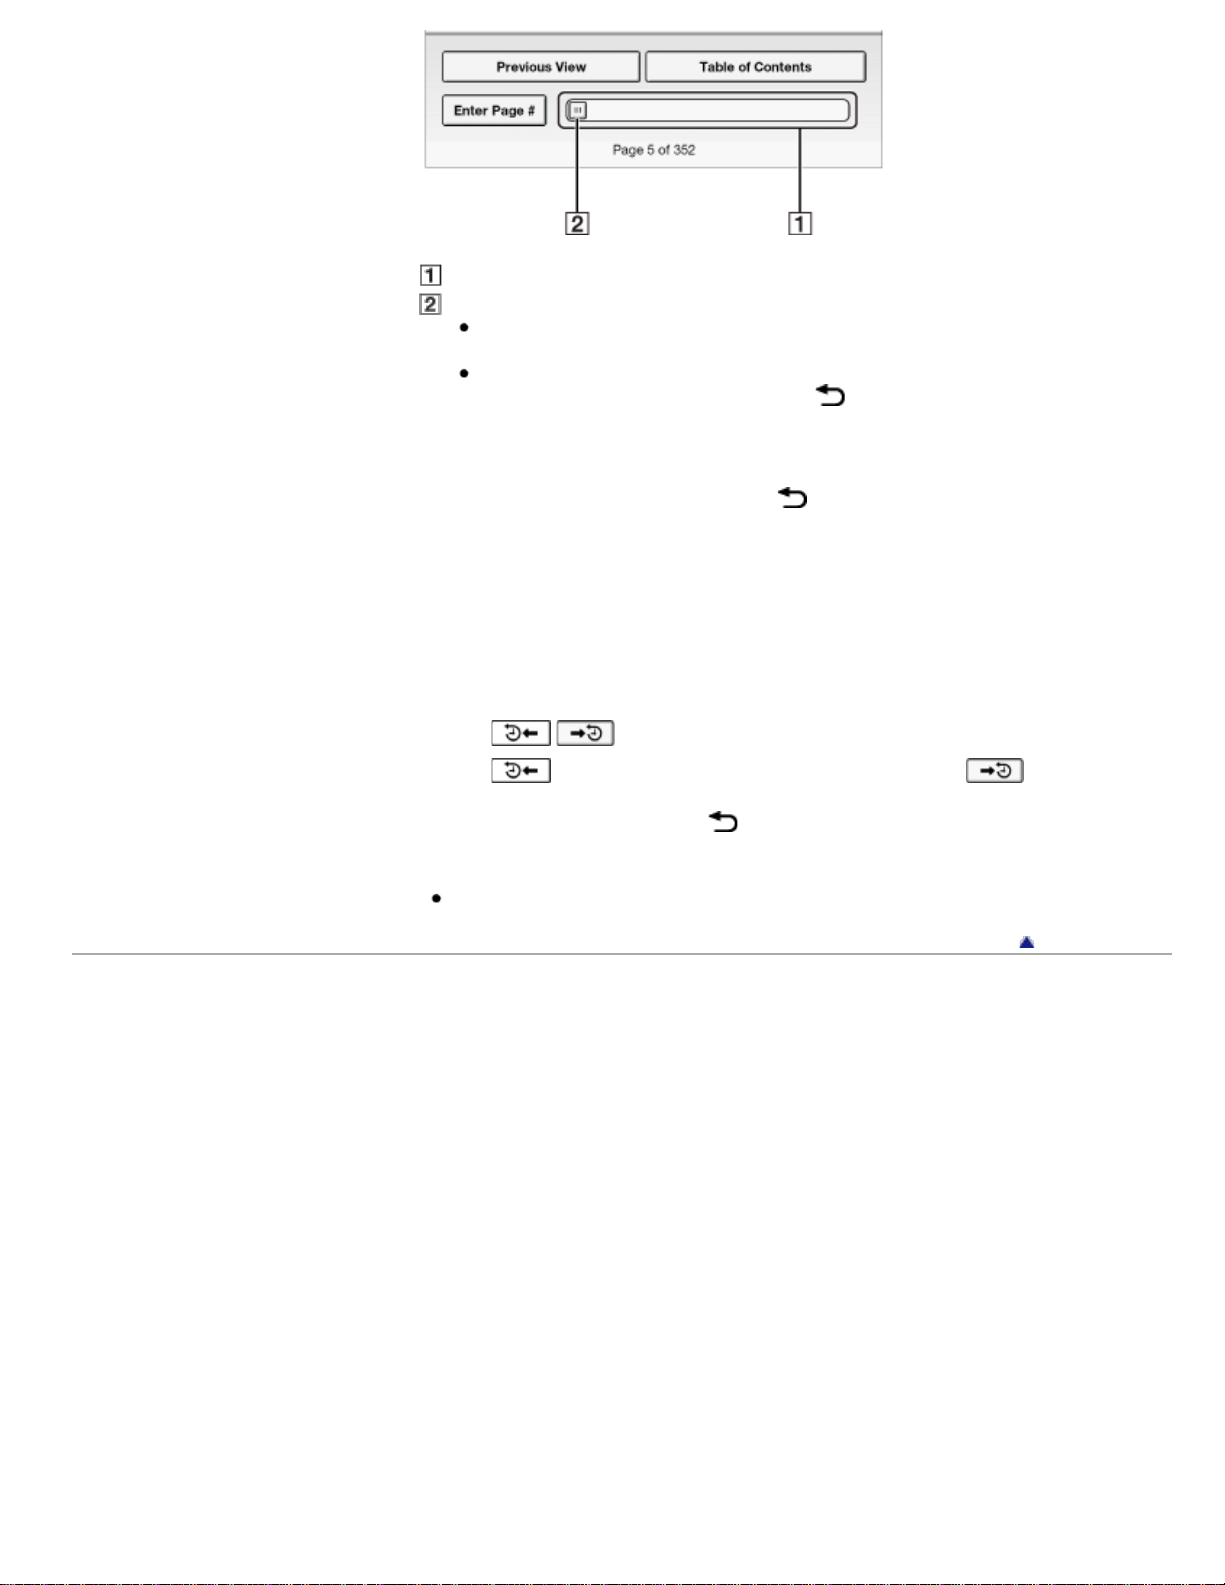
Paging bar
Slider
Tap on a point on the paging bar to jump to a page that corresponds with that
point.
Tap and drag the slider.
To close the page navigation panel, press the
(Back) button.
Using [Table of Contents]
1. Tap [Table of Contents].
To return to the book page, press the
(Back) button.
2. Tap to open the selected chapter or section.
Using [Enter Page #]
1. Tap [Enter Page #] to enter the page number with the on-screen numeric keyboard,
and tap [OK].
Jumping to viewed pages
1. Tap [Previous View].
The
/ (Page history) icons are displayed.
2. Tap
to go backward in the page display history. Tap to go forward in
the page display history.
To cancel page history, press the
(Back) button.
Tip
This is the same operation for when you tap on a highlighted link.
Go to page top
Copyright 2013 Sony Corporation
Reader™ User Guide
Print
Search
Getting started
Basic Operations
Adding/Getting Content
Browsing Content Lists
Reading
Organizing
Other Applications
Settings
Other Information
Contents list
Top page > Reading > Reading eBooks > Appearance
Appearance
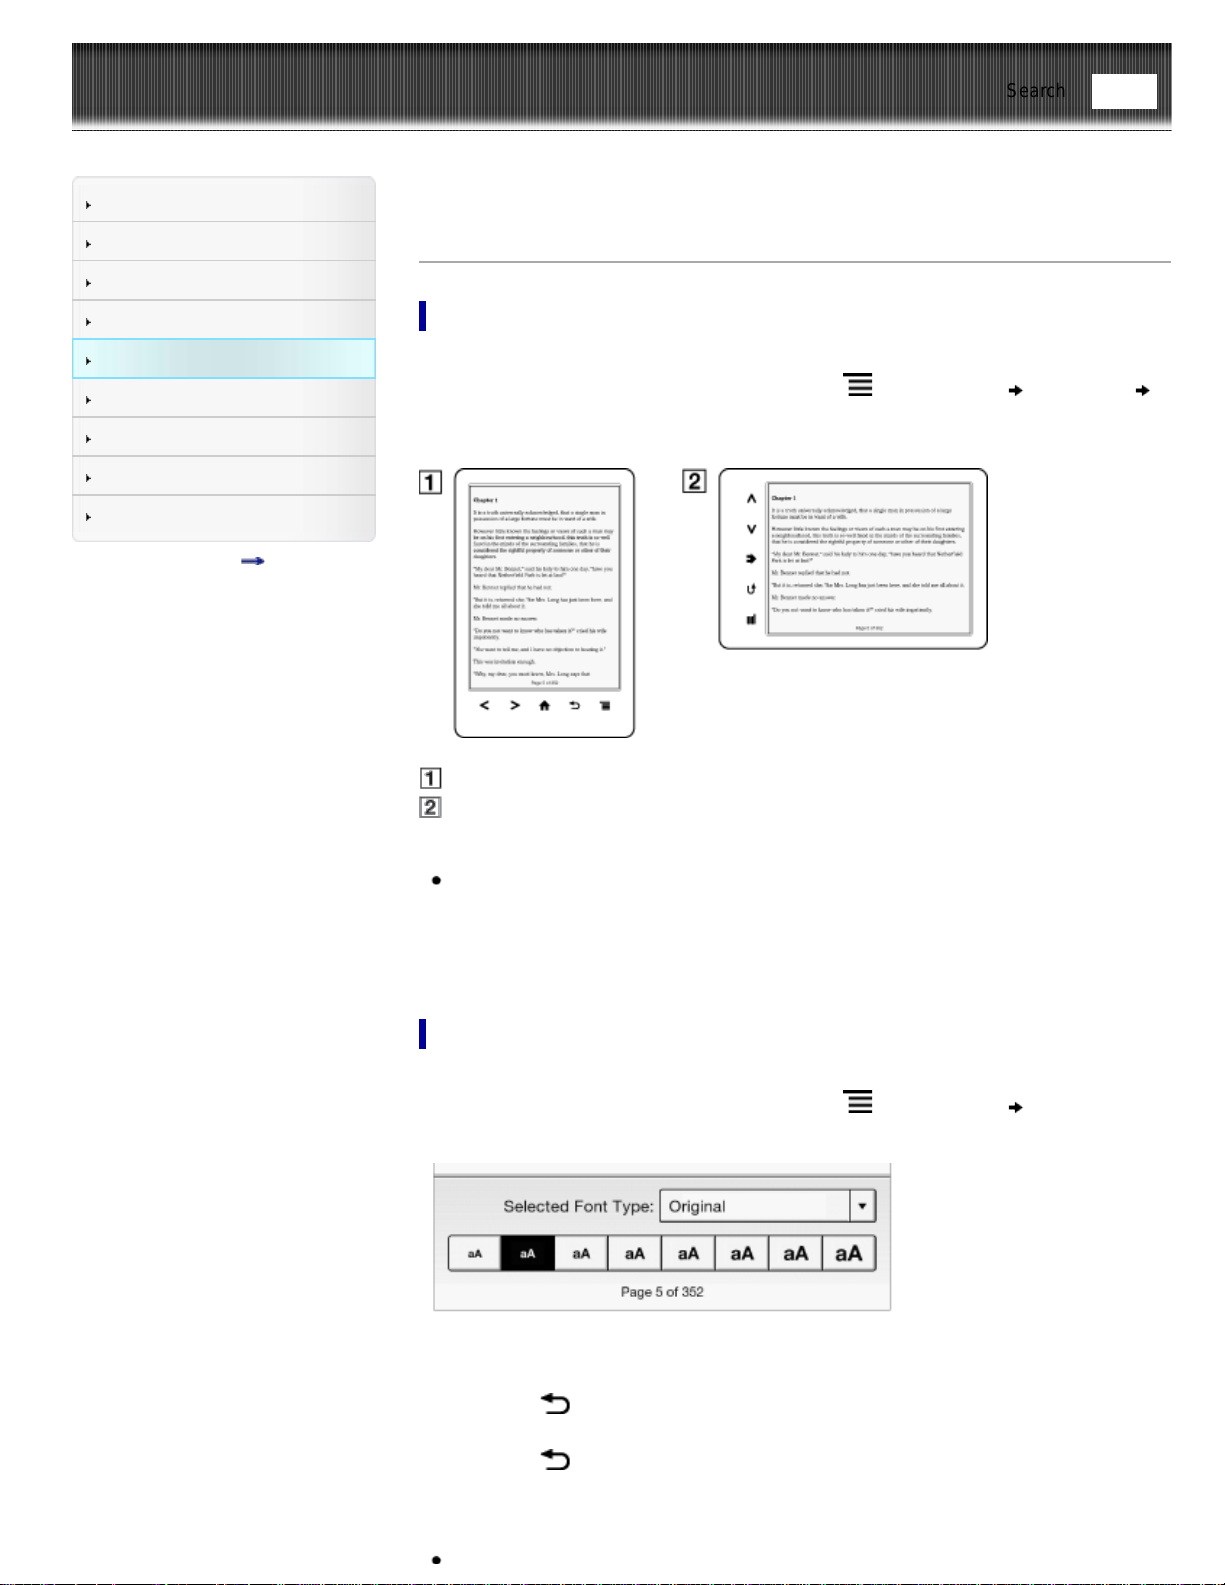
Changing the orientation
You can view books or periodicals in either portrait or landscape mode.
1. When viewing a book or periodical, press the
(Menu) button tap [More]
[Orientation].
The screen orientation changes.
Portrait mode
Landscape mode
Note
The orientation can be changed for the [Books], [Periodicals]*, [Browser] and
[Pictures] applications. Changing the orientation in one application does not affect
the orientation setting of the other applications.
* Available in certain countries/regions only.
Changing the font and font size
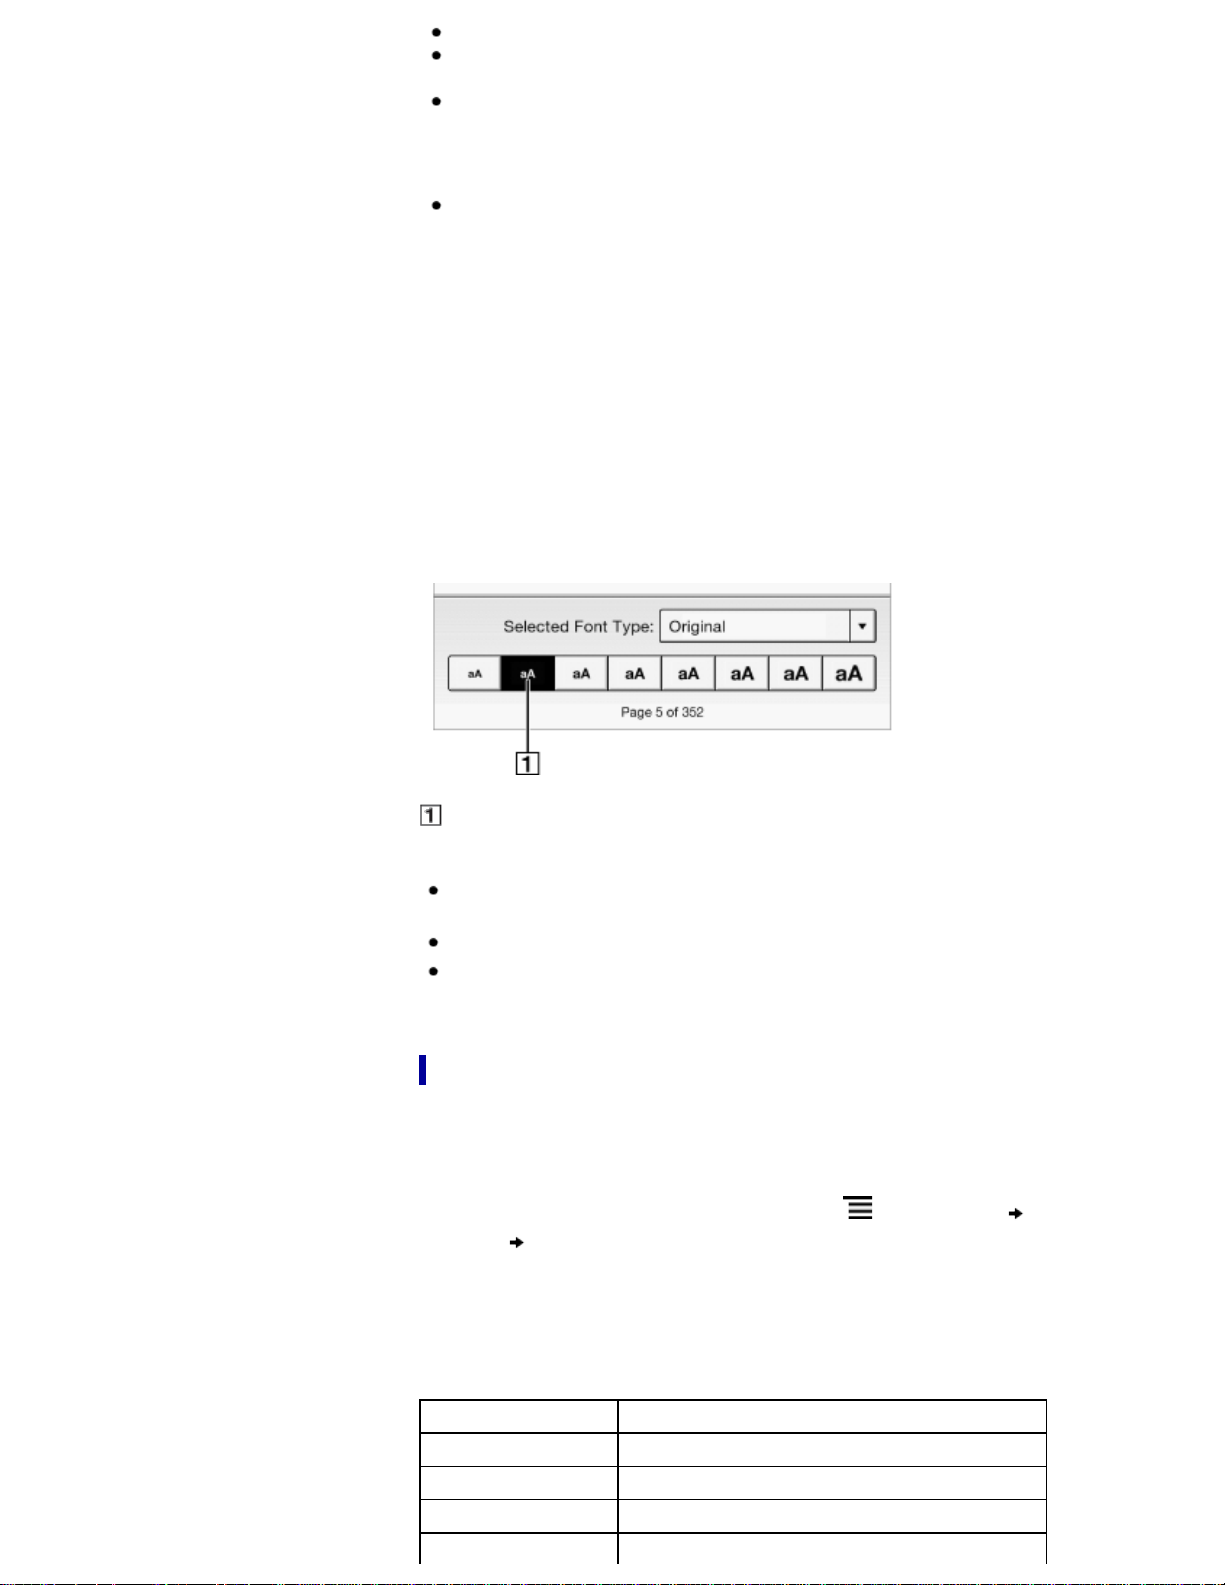
You can change the font and font size to your preference.
1. When viewing a book or periodical, press the
(Menu) button tap [Font].
The font bar is displayed.
2. To change the font size, tap on one of the font size icons. The book or periodical
will be updated to apply the specified font size.
Press the
(Back) button when done.
3. To change the font, tap [Original] and select from one of the fonts in the list.
Press the
(Back) button when done.
The book or periodical will be updated to apply the specified font and font size.
Note
Find
The font size and font of some content with embedded fonts may not change.
When you select other than the [Original] font, performance may be slightly lower
when opening books or turning pages.
When you select other than the [Original] font, boldface/italics/italicized boldface
may not be displayed correctly.
Tip
You can change the default font for all content in the [Books] and [Periodicals]*
applications. See Details.
* Available in certain countries/regions only.
About PDF files
The Reader provides the ability to display most text-based PDF files in several font
sizes. Documents are displayed in the default font position with their original layouts.
Due to the complex nature of PDF files, in certain situations when you change the font
size, only text will appear. This is because some tables and graphics may be
reformatted and altered during the reflow process.
Also, in cases where PDF files are created using image data only, there is no text to
reflow or resize.
In these cases, if retaining the original layout of a PDF file is required, Sony
recommends that you view the PDF file at its original font size.
To display the original layout
Note
If you modified the default font size with [Font Size Preference] under [Settings],
return it to its original layout to view PDF files normally.
To view the document in a different size, use the zoom in function.
When you view PDF files in other than their original layout, some functions such as
highlighting or searching may not work correctly.
Changing the page mode
You can change the page viewing style for PDF files. This is convenient for viewing
pages with text arranged in columns.
This mode remains active as you continue reading. The setting applies only to the
currently open book.
1. When viewing a book or periodical, press the
(Menu) button tap [Customize
View]
[Page Mode].
The [Page Mode] screen appears.
2. Choose from one of the following options.
Option Description
[Original] Set to the default view.
[2-Column Split] Splits the page into two columns and two rows.
[3-Column Split] Splits the page into three columns and two rows.
[Fit Landscape Width] Displays the page fit to landscape view.
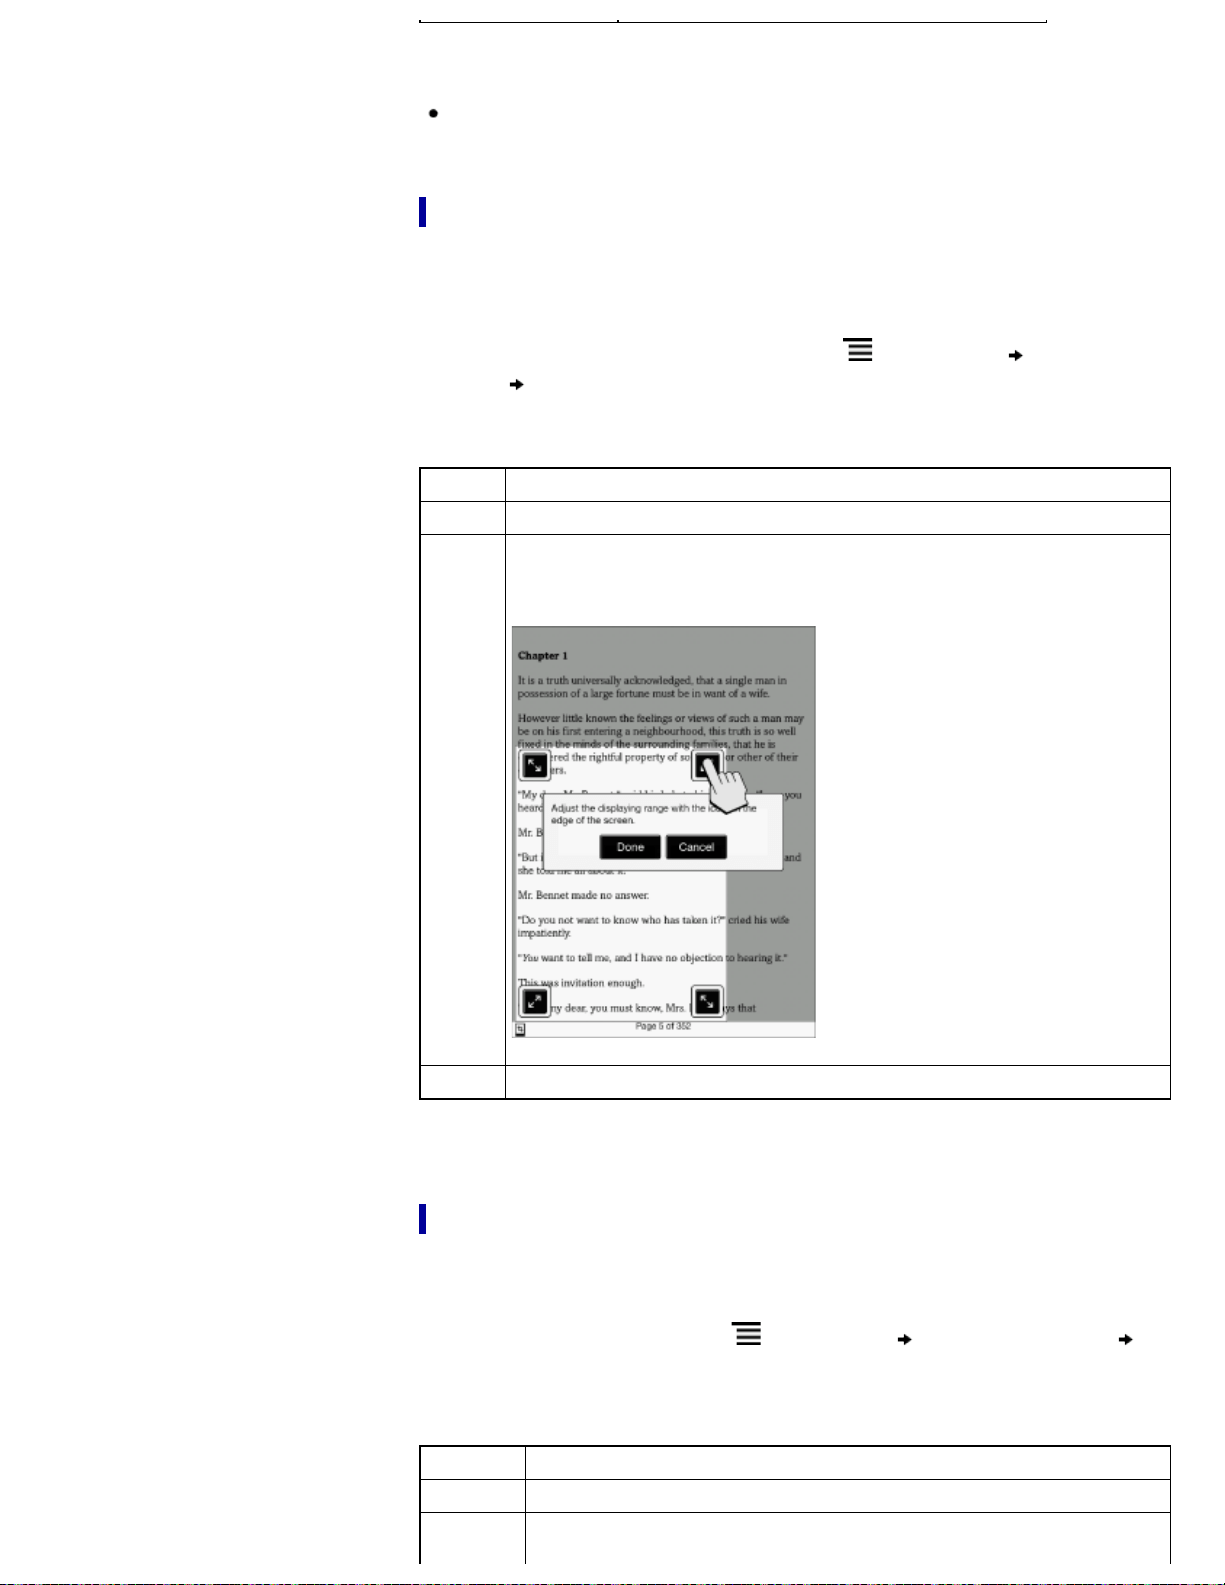
Note
In order to attach a handwritten note, the page mode needs to be restored to
[Original].
Cropping a page
You can crop the page margins to create a wider viewing area. This is convenient for
viewing pages that have large margins.
This mode remains active as you continue reading. The setting applies only to the
currently open book.
1. When viewing a book or periodical, press the
(Menu) button tap [Customize
View]
[Crop Page].
2. Choose from one of the following options.
Option Description
[Uncrop] Disables cropping.
[Manual]
Allows you to adjust the crop area manually by dragging arrows at the
corners. Tap [Done] to set the area, or tap [Cancel] to cancel editing the
crop area.
[Auto] Automatically crops the margins of a document.
Adjusting the brightness and contrast
A page that is hard to read, such as a scanned or color-converted document, can be
made more readable by adjusting the brightness and contrast. This mode remains active
as you continue reading. The setting applies only to the currently open book.
1. When viewing a book, press the
(Menu) button tap [Customize View]
[Adjust View].
2. Choose from one of the following options.
Option Description
[Original] Displays the page in the original quality.
[Saturated]
Improves readability by emphasizing contrast.
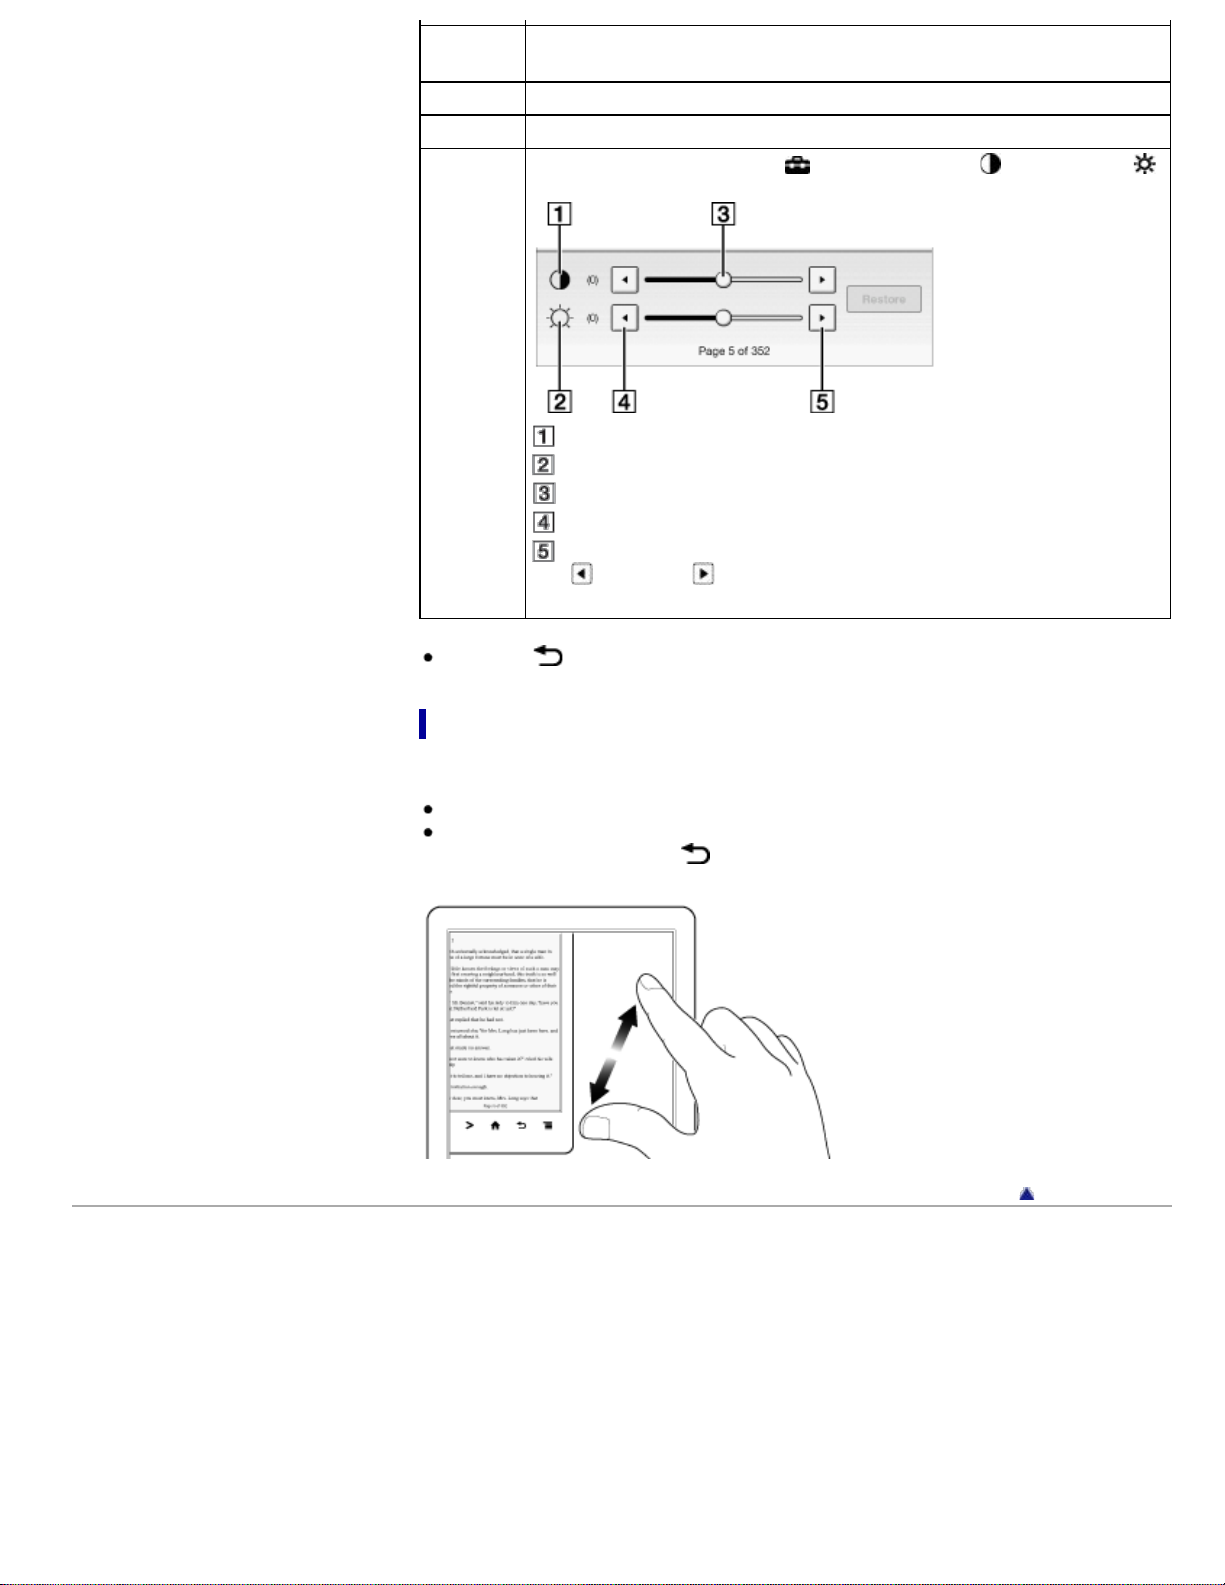
[Details]
Backlight compensation; brings up details in a dark area.
[Brighter] Increases the brightness.
[Darker] Decreases the brightness.
[Custom]
Create a custom setting. Tap
(Settings) to adjust (Contrast) and
(Brightness).
Contrast
Brightness
Slider
Lower
Higher
Tap
(Lower) or (Higher), or tap on the slider.
Tap [Restore] to revert to the previously saved custom settings.
Press the
(Back) button when done.
Zooming in
Use the zoom function when you want to temporarily zoom in on part of a page.
The viewer shows the zoom bar and viewing position indicator while in zoom mode.
Pinch out to zoom in.
Pinch in to zoom out.
To exit zoom mode, press the
(Back) button.
Go to page top
Copyright 2013 Sony Corporation
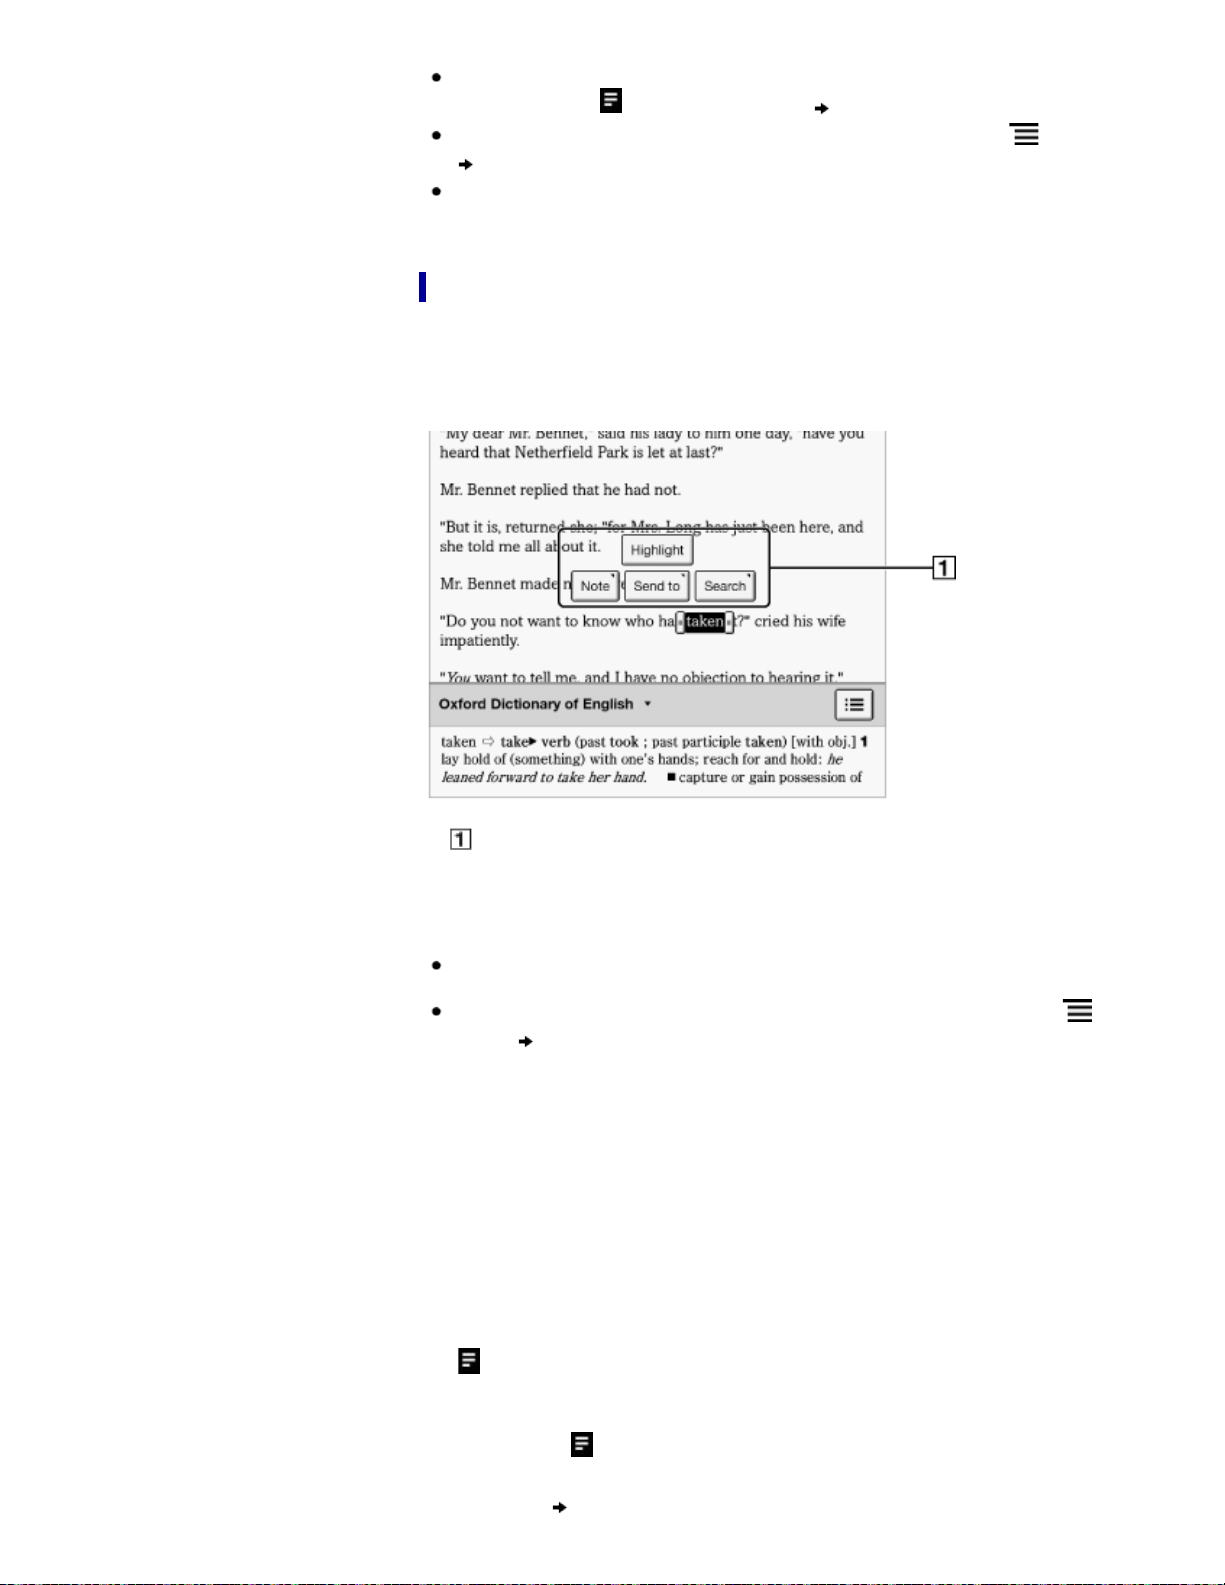
Tip
This will remove the bookmark and any note attached to it. To delete only a note,
tap and hold the
icon and tap [Delete] [Yes].
To delete all bookmarks in the current book/periodical, press the
(Menu) button
tap [Notes]. See Details.
To delete annotations across all books and periodicals, use the [All Notes]
application. See Details.
Highlighting words on a page
You can highlight words and take notes.
1. Tap and hold the first word and drag across to the last word of the section you
would like to highlight.
The pop-up menu appears.
Pop-up menu
2. Tap [Highlight].
The selected words are now highlighted.
Tip
To search, sort and view all annotations across all books and periodicals, use the
[All Notes] application. See Details.
To search annotations for the currently open book/periodical, press the
(Menu)
button
tap [Notes]. See Details.
Adding text notes or handwritten notes to a highlight
1. Tap and hold a highlighted word.
The pop-up menu appears.
2. Select [Note].
3. Select from [by Keyboard] and [by Drawing].
Create a note.
For a text note, see Details.
For a handwritten note, see Details.
4. Tap [Save].
To cancel adding notes, tap [Cancel].
The
icon appears at the beginning of the highlight, indicating that a note is attached.
Editing notes on a highlight
1. Tap and hold at the beginning of the highlight.
The pop-up menu appears.
2. Tap [Note]
[Edit].
The on-screen keyboard or the drawing pad opens.
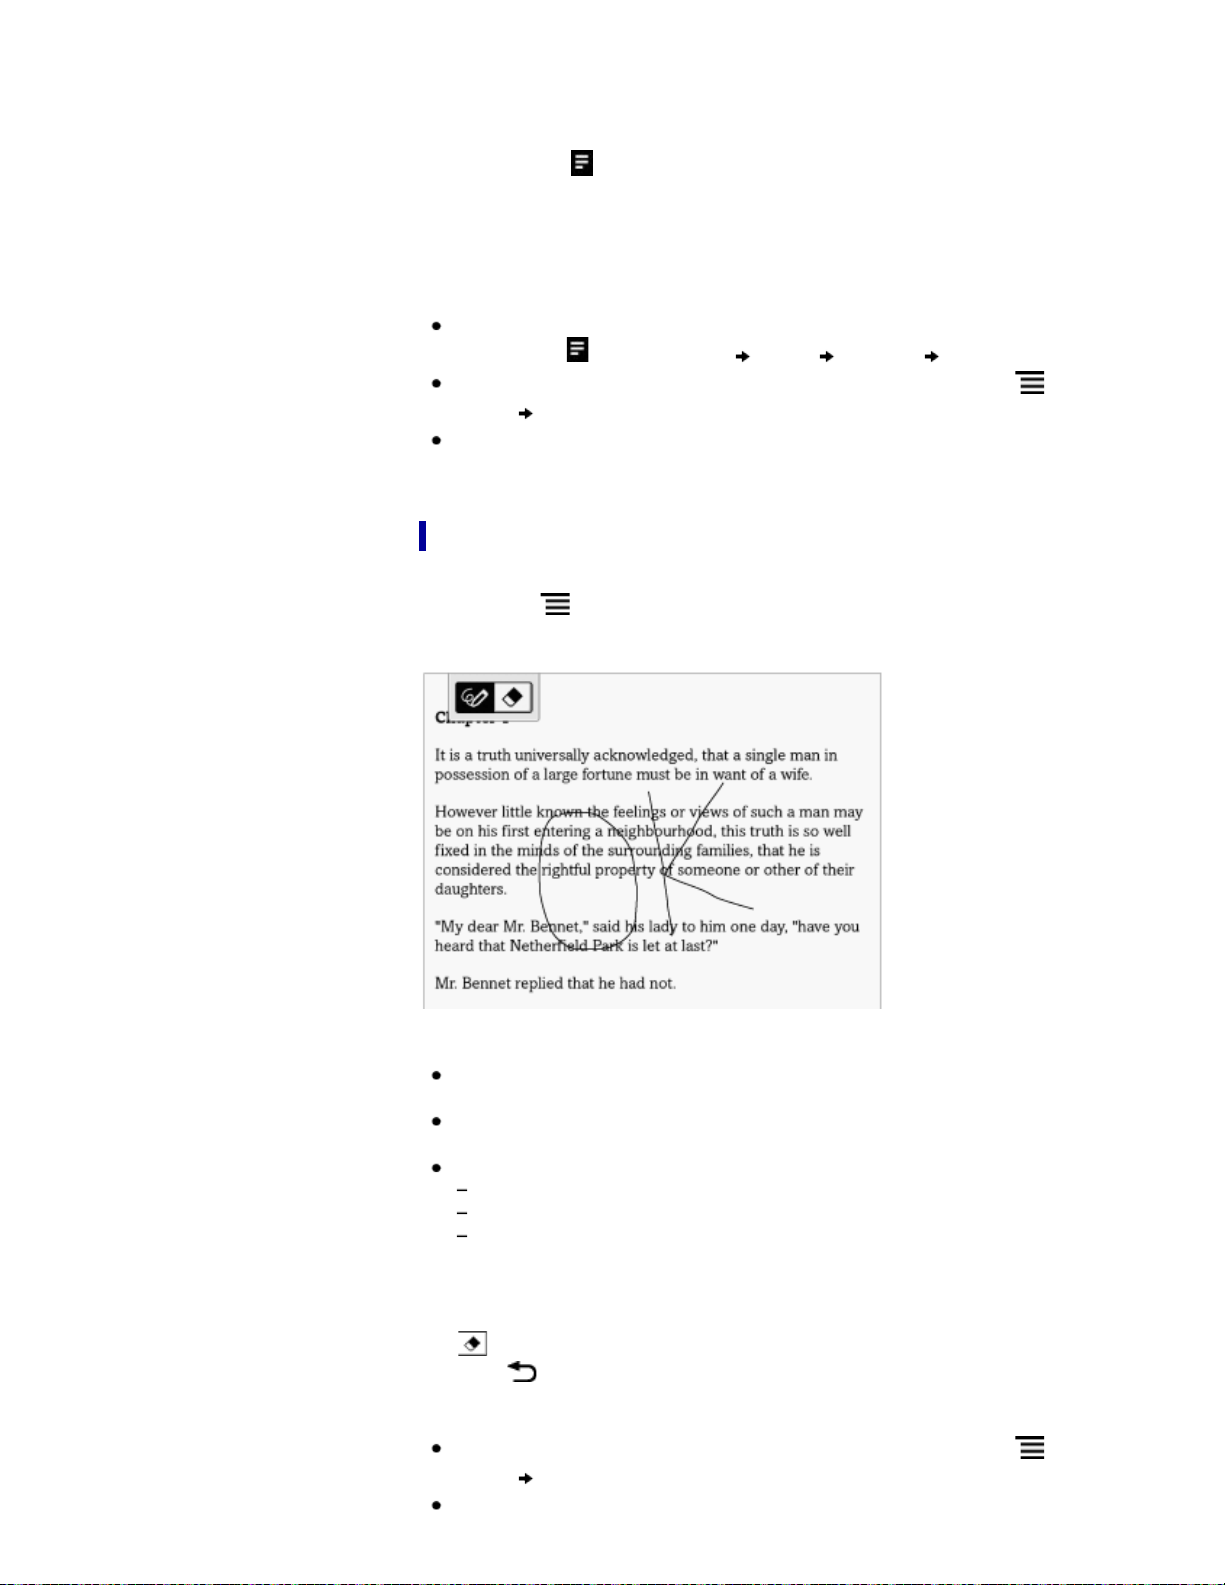
3. Edit the note.
4. Tap [Save].
The notepad or the drawing pad closes, returning to the viewer.
Removing highlights
1. Tap and hold at the beginning of the highlight.
The pop-up menu appears.
2. Tap [Remove Highlight].
3. Tap [Yes] when prompted.
Tip
This will remove the highlight and any note attached to it. To delete only a note, tap
and hold the
icon, tap [Note] [Edit] [Delete] [Yes].
To delete all annotations in the current book/periodical, press the
(Menu)
button
tap [Notes]. See Details.
To delete annotations across all books and periodicals, use the [All Notes]
application. See Details.
Handwriting a note on a page
You can use your finger and draw directly on a page.
1. Press the
(Menu) button.
2. Tap [Handwriting] and use your finger to draw a line.
Note
While writing, make sure that you are not touching another area on the
touchscreen; this could affect the notes that you write with your finger.
To ensure that your notes are correctly saved, do not handwrite notes too close to
the edge of the touchscreen.
If you experience difficulties when handwriting or drawing on the Reader:
avoid applying excessive pressure to the touchscreen.
try not to handwrite or draw too quickly.
this functionality is not designed for very detailed drawings or for writing small
characters.
To delete a drawn line
Tap (Erase) and drag across the drawn line.
Press the
(Back) button when you are done to continue reading.
Tip
To delete all annotations in the current book/periodical, press the
(Menu)
button
tap [Notes]. See Details.
To delete annotations across all books and periodicals, use the [All Notes]
application. See Details.

Hiding annotations
You can set the viewer to show or hide the annotations that you have made to the
book. This is convenient for when a highlight overlaps with a link.
1. Press the
(Menu) button.
The option items appear.
2. Tap [More].
3. Tap [Settings].
4. Tap [Show Notes].
Check the checkbox to show annotations.
Uncheck it to hide annotations.
5. Press the
(Back) button when done.
Synchronizing reading-related information
The [Page Sync] function only appears on your Reader if your local Reader Store
supports the feature which synchronizes bookmarks, highlighted passages and your last
read page across compatible Reader devices and applications.
To turn on the [Page Sync] feature, confirm the following:
Log in to the Reader Store.
[Page Sync] in [Application Preferences] is set to [On]. See Details.
A wireless network is available. See Details.
To retrieve the latest reading-related information to your compatible reading device
While viewing a page, press the
(Menu) button tap [Page Sync].
Tip
Compatible reading devices are updated with the latest bookmarks, typed notes and
your current page when the Reader enters sleep mode.
Note
Handwritten notes and text notes attached to bookmarks or highlights cannot be
synchronized.
This function is available only with contents purchased at Reader Store supporting
this feature.
However, if information is synchronized to the Reader from a compatible device, existing
handwritten notes and text notes in the Reader will not be overwritten.
Finding annotations within a book or periodical
You can search and view all annotations (bookmarks/highlights/handwritten notes) in
the currently open book or periodical.
To search, sort and view all annotations across all books and periodicals, use the [All
Notes] application. See Details.
1. Press the
(Menu) button tap [Notes].
The annotations in the book/periodical are listed.
Press the
(Back) button to return to the book.

Note icons
Filter note type
Search icon
Headline (the highlighted text, the text note, the beginning text of the bookmarked
page, or the beginning text of the page with the handwritten note)
Page number of the note
Press the
(Back) button to return to the book.
2. Tap a note in the list.
The page containing the selected note is displayed.
Note icons
Bookmark only
Bookmark with text notes
Bookmark with handwritten notes
Handwritten note on a page
Highlight only
Highlight with text notes
Highlight with handwritten notes
Filtering
1. Tap (Filter) tap one of the annotation types.
Annotations of the type that you select are shown.
Searching for notes via keyword
You can perform a search for all or one of the specific note types.
The search target changes depending on the type of annotation that is being searched.
Item type Target
For [Bookmark]
Bookmarks only: The first 100 characters of bookmarked pages
are searched.
Bookmark text notes: Entire text notes are searched.
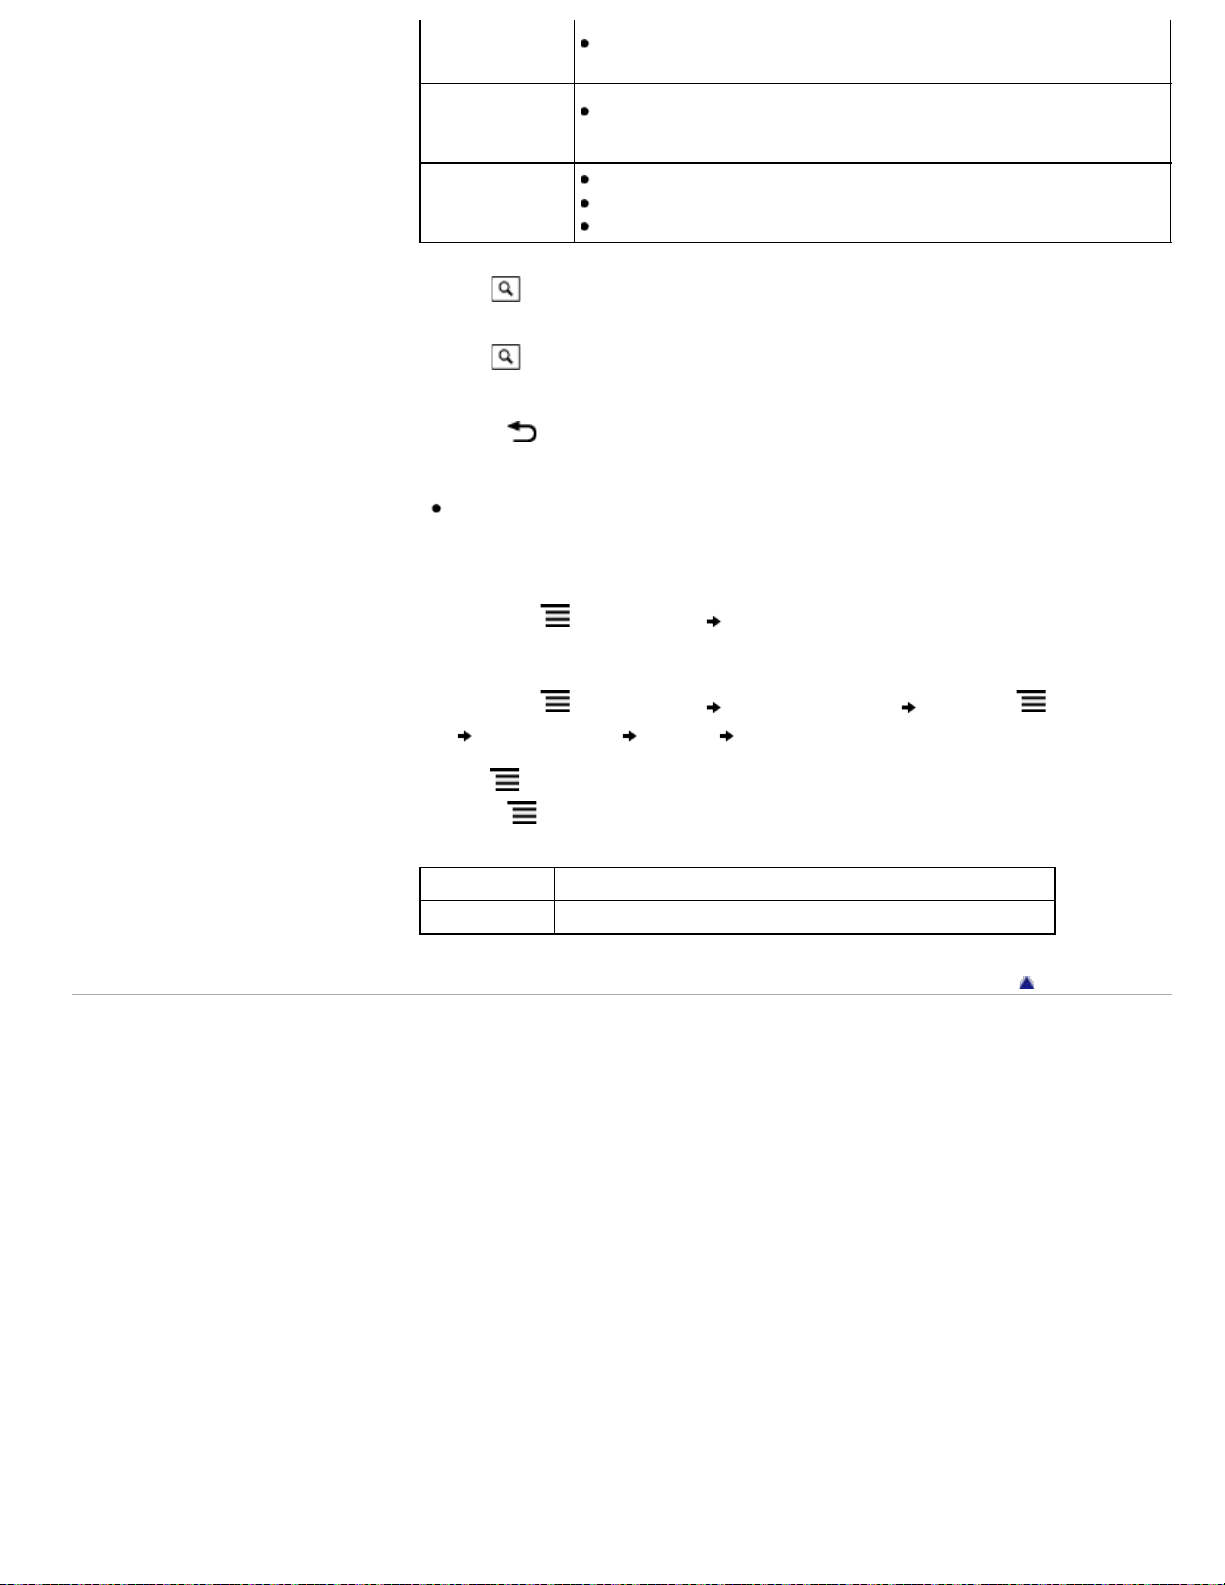
items
Bookmark handwritten notes: The first 100 characters of
bookmarked pages are searched.
For
[Handwriting]
items
The first 100 characters of pages with handwriting on them are
searched.
For [Highlight]
items
Highlights only: The highlighted words are searched.
Highlight text notes: Entire text notes are searched.
Highlight handwritten notes: The highlighted words are searched.
1. Tap
(Search).
2. Type a search keyword using the on-screen keyboard.
3. Tap
(Search) next to the search box.
The [Search Results] view is shown.
The view shows notes that satisfy the search criteria.
Press the
(Back) button to return to the [Notes] list.
Note
If you apply a filter before searching, the search will be performed only on the
filtered items.
To delete annotations
1. Press the (Menu) button tap [Delete Notes]. See Details.
To delete all annotations
1. Press the (Menu) button tap [Delete Notes] press the (Menu) button
tap [Select All] [Done] [Yes].
Using (Menu) Items
Press the (Menu) button from the [Notes]/[All Notes] list to select an option.
Option Description
[Delete Notes] Deletes one or more notes from the Reader. See Details.
Go to page top
Copyright 2013 Sony Corporation
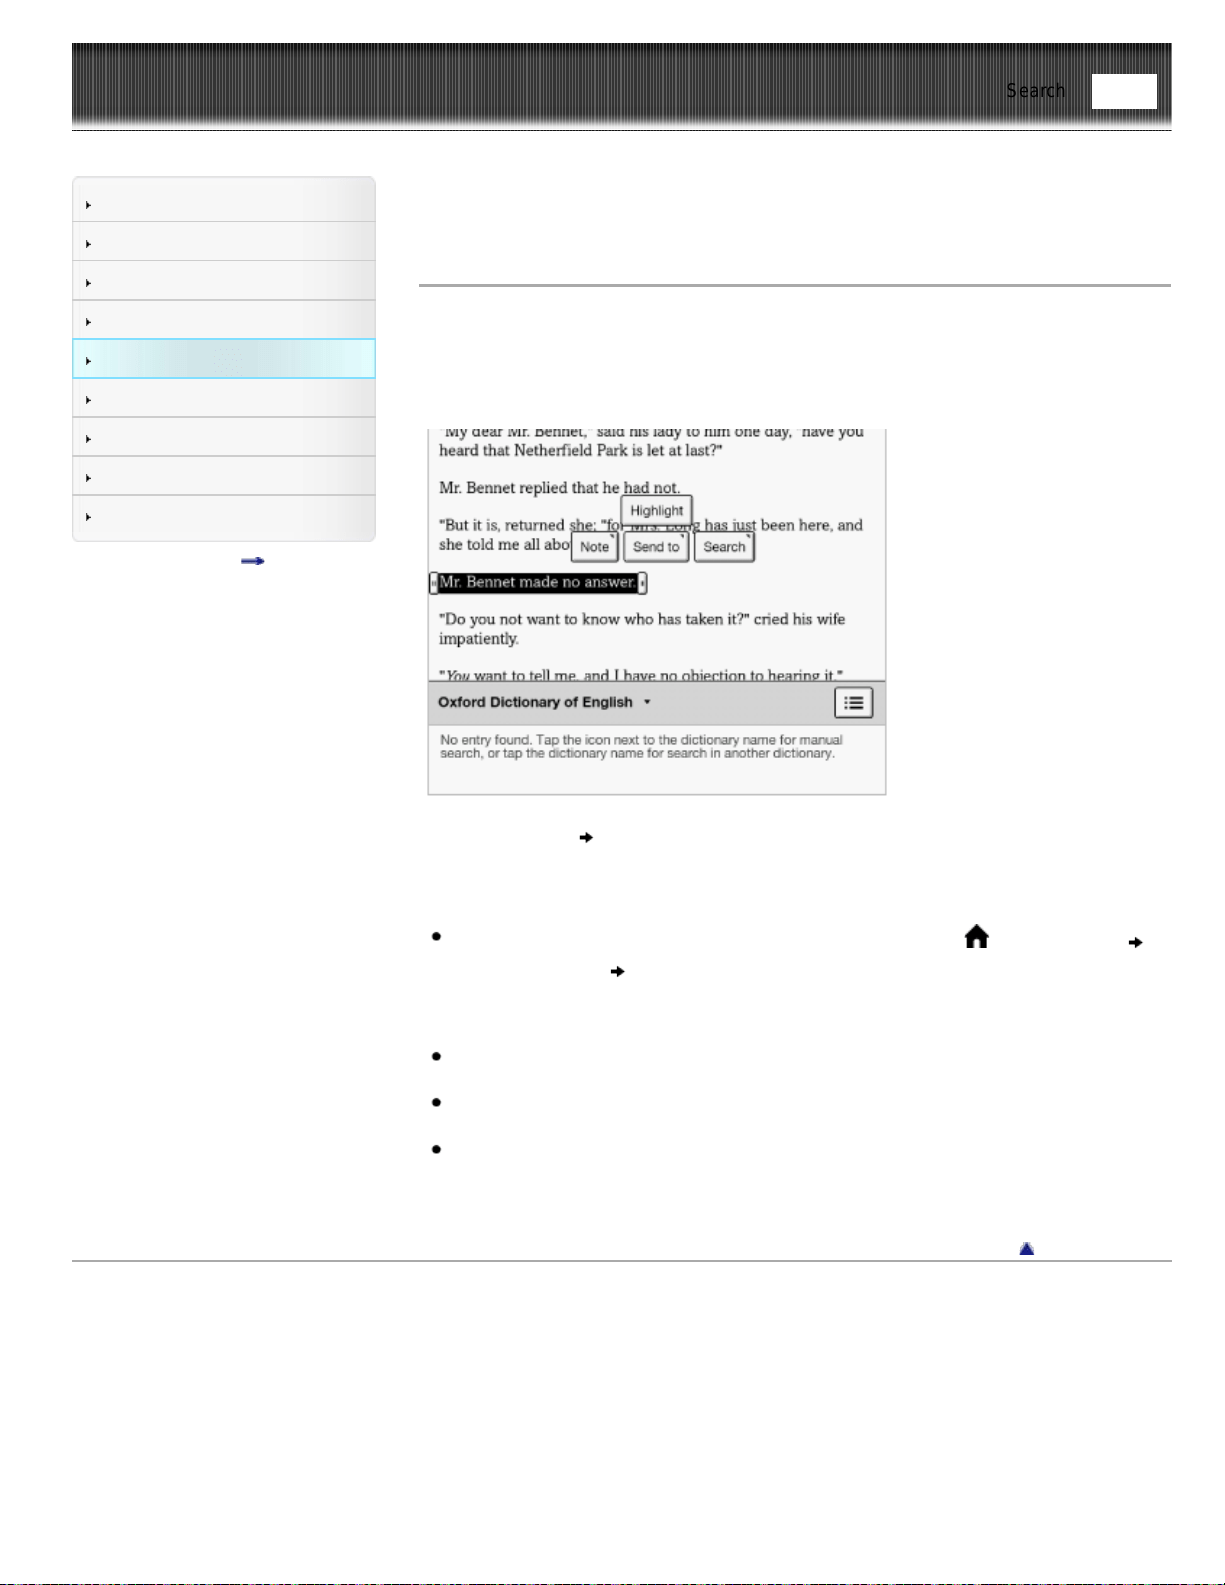
Reader™ User Guide
Print
Search
Getting started
Basic Operations
Adding/Getting Content
Browsing Content Lists
Reading
Organizing
Other Applications
Settings
Other Information
Contents list
Top page > Reading > Reading eBooks > Uploading Highlighted Words on a Page to
Evernote
Uploading Highlighted Words on a Page to Evernote
You can upload highlighted words and take notes to Evernote.
1. Tap and hold the first word and drag to the last word of the section you would like
to upload.
The pop-up menu appears.
2. Tap [Send to] [Evernote]
The selected words are now uploaded.
Note
Before uploading to Evernote, you need to log in. Press the
(Home) button
tap [Applications] [Evernote Setup].
Tip
Before you upload the highlighted words, you can also upload with your memo in
the preview screen.
If the highlighted words are attached with text notes or handwritten notes, you can
upload those, too.
Items that were purchased from Reader Store or eBook store may not upload
depending on country/region.
Go to page top
Copyright 2013 Sony Corporation
Find
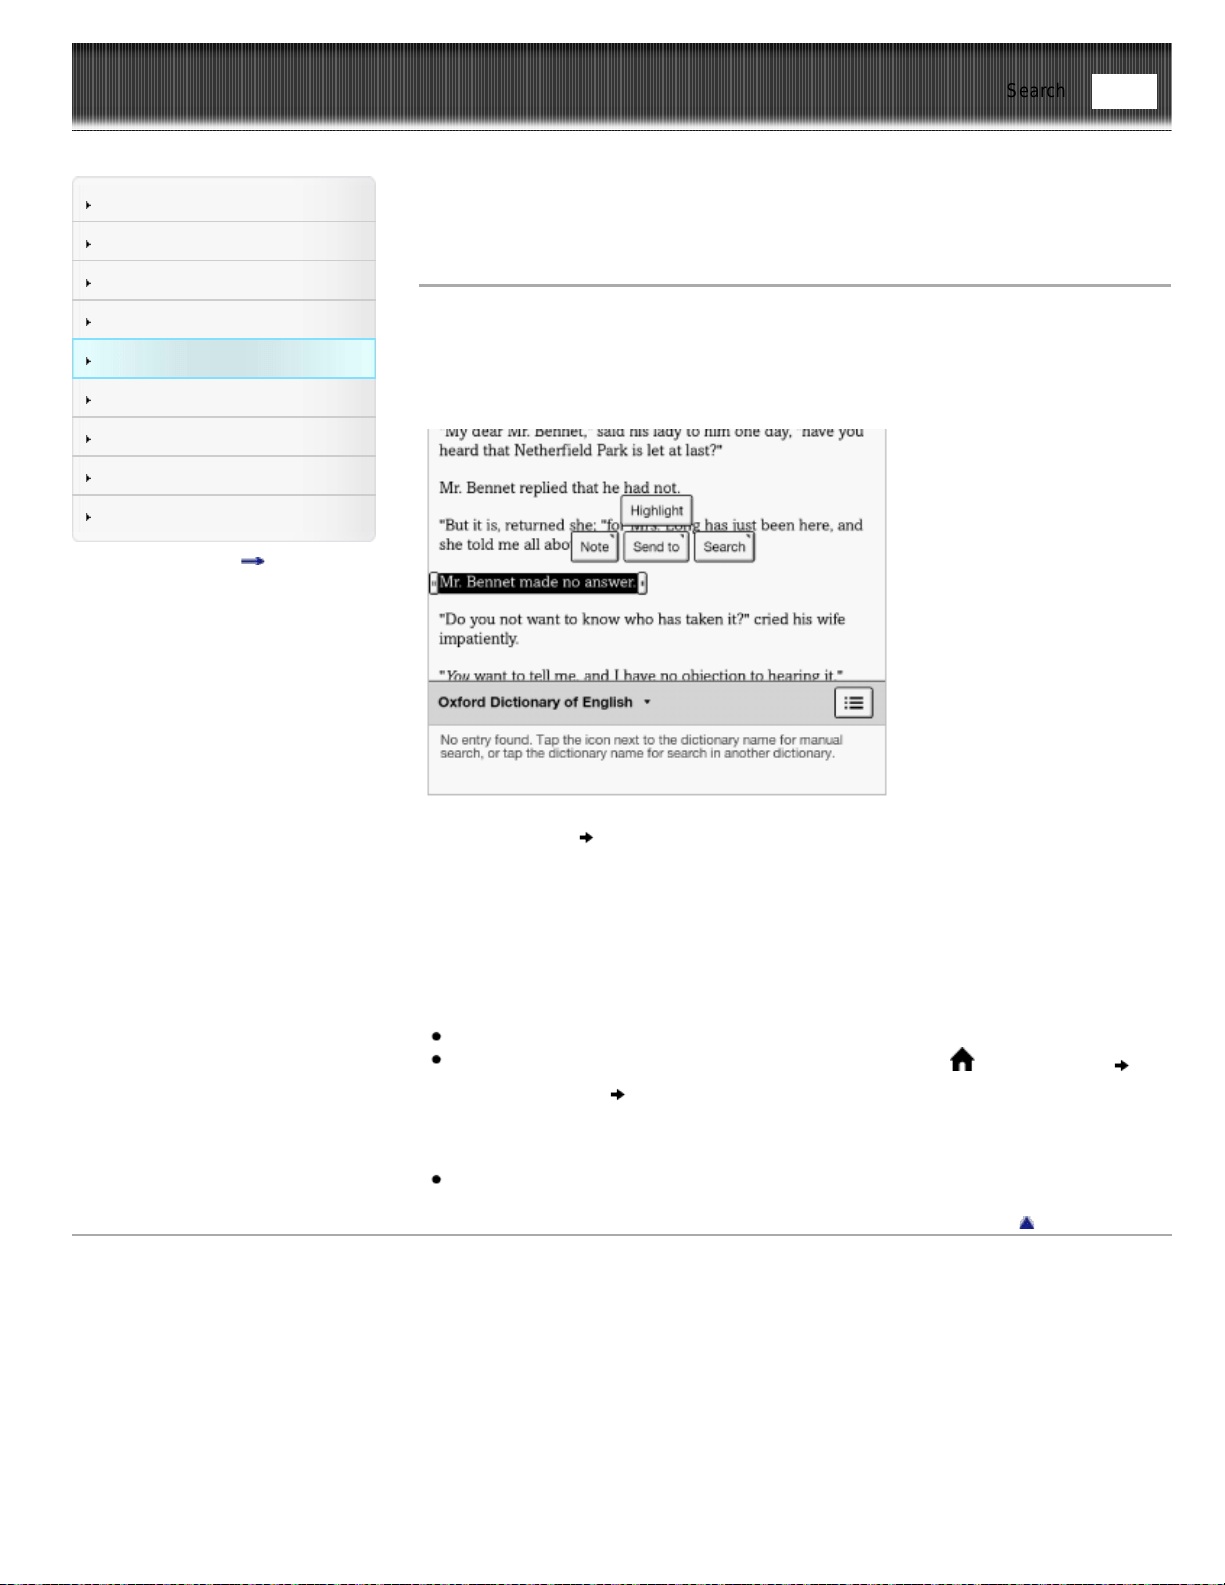
Reader™ User Guide
Print
Search
Getting started
Basic Operations
Adding/Getting Content
Browsing Content Lists
Reading
Organizing
Other Applications
Settings
Other Information
Contents list
Top page > Reading > Reading eBooks > Posting Highlighted Words on a Page to
Facebook
Posting Highlighted Words on a Page to Facebook
You can post highlighted words to Facebook.
1. Tap and hold the first word and drag to the last word of the section you would like
to post.
The pop-up menu appears.
2. Tap [Send to] [Facebook].
The dialog box appears.
You can confirm the highlighted words, and enter your comment in the preview
screen before posting.
3. Tap [Post].
The selected words are now posted.
Note
Selected items may not be posted where a limitation is applied.
Before posting to Facebook, you need to log in. Press the
(Home) button
tap [Applications] [Facebook Setup].
Tip
Highlighted words may be posted up to 140 characters.
Go to page top
Copyright 2013 Sony Corporation
Find
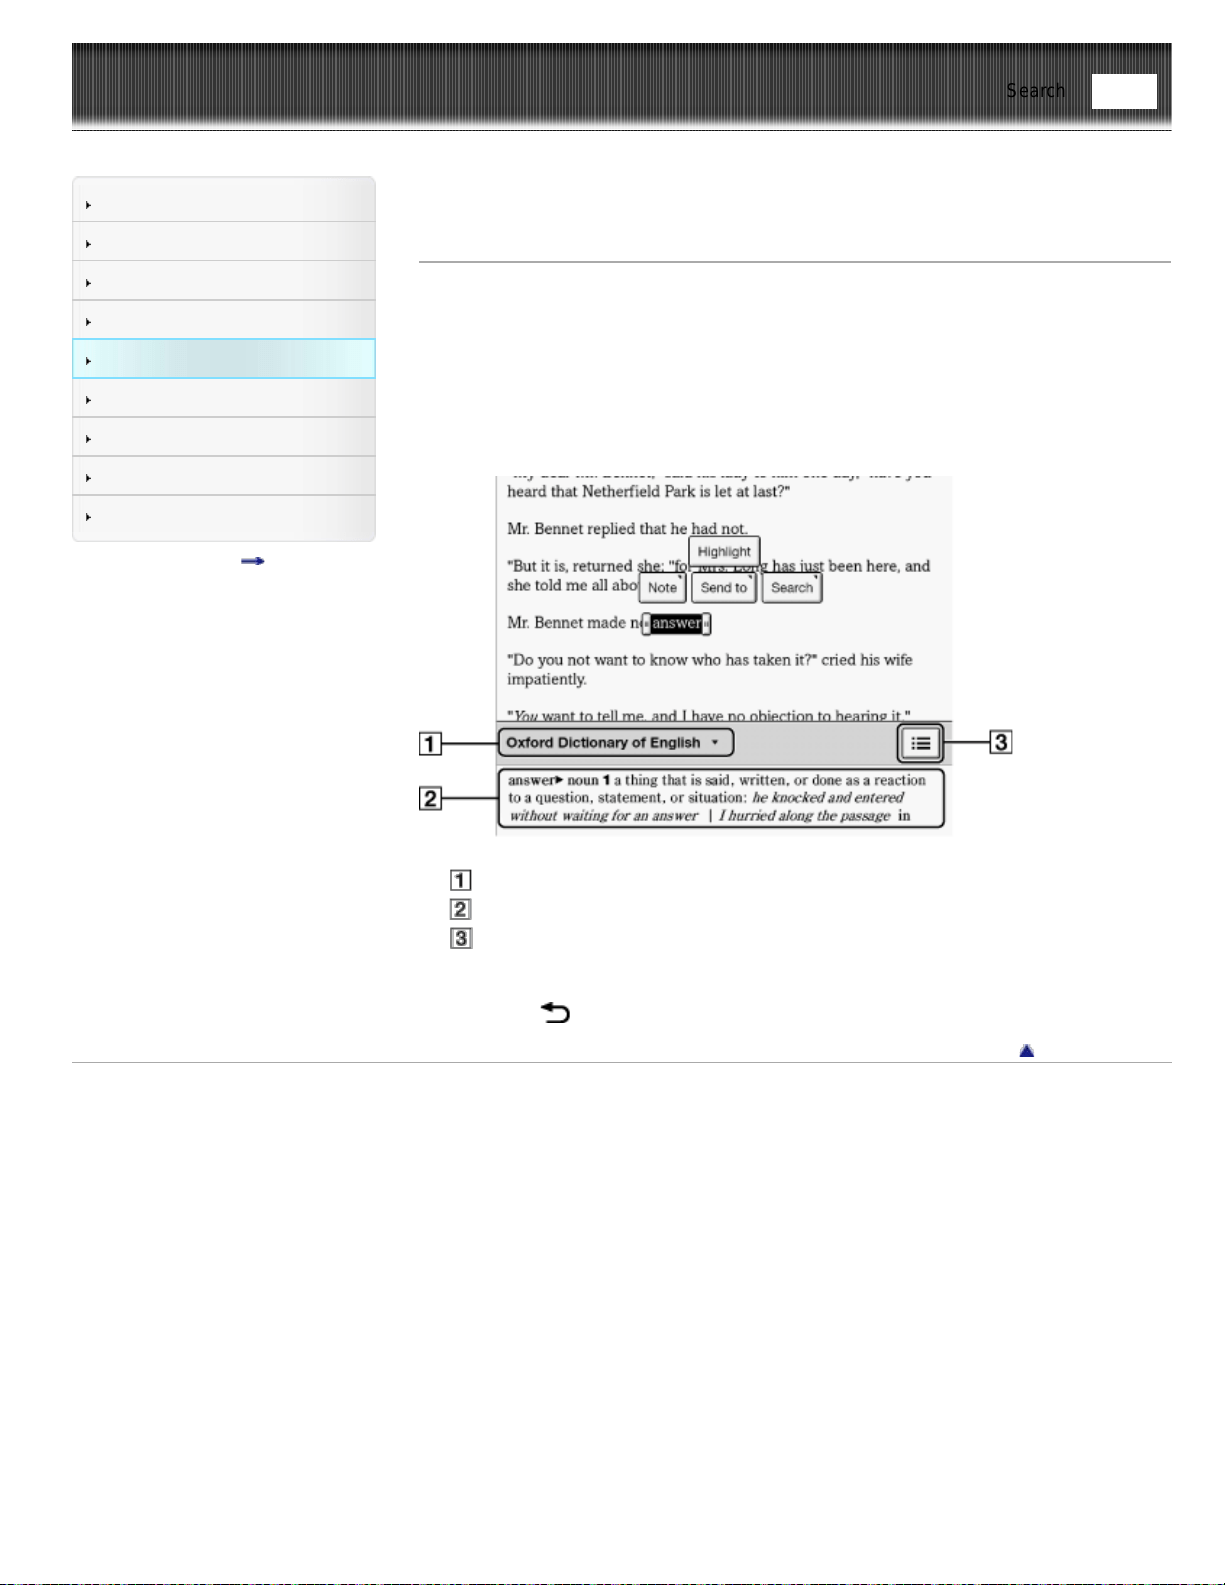
Reader™ User Guide
Print
Search
Getting started
Basic Operations
Adding/Getting Content
Browsing Content Lists
Reading
Organizing
Other Applications
Settings
Other Information
Contents list
Top page > Reading > Reading eBooks > Using the Dictionary
Using the Dictionary
The Reader has built-in dictionaries to assist you with looking up the definition of a word
on a page.
You can choose one of several bilingual dictionaries to use. See Details.
Only the dictionaries included on the Reader can be used. New dictionaries cannot be
installed or added.
1. Tap and hold a word on a page.
The dictionary panel is displayed at the bottom.
Title of the current dictionary. Tap to change the dictionary.
Definition area. Tap to open the dictionary viewer. See Details.
Tap to display a list of candidate words. See Details.
2. Tap the definition area. The definition is displayed in the dictionary viewer.
To go to the next page, either swipe or press the < or > (Page turn) buttons.
Press the
(Back) button to return to the book page.
Go to page top
Copyright 2013 Sony Corporation
Find
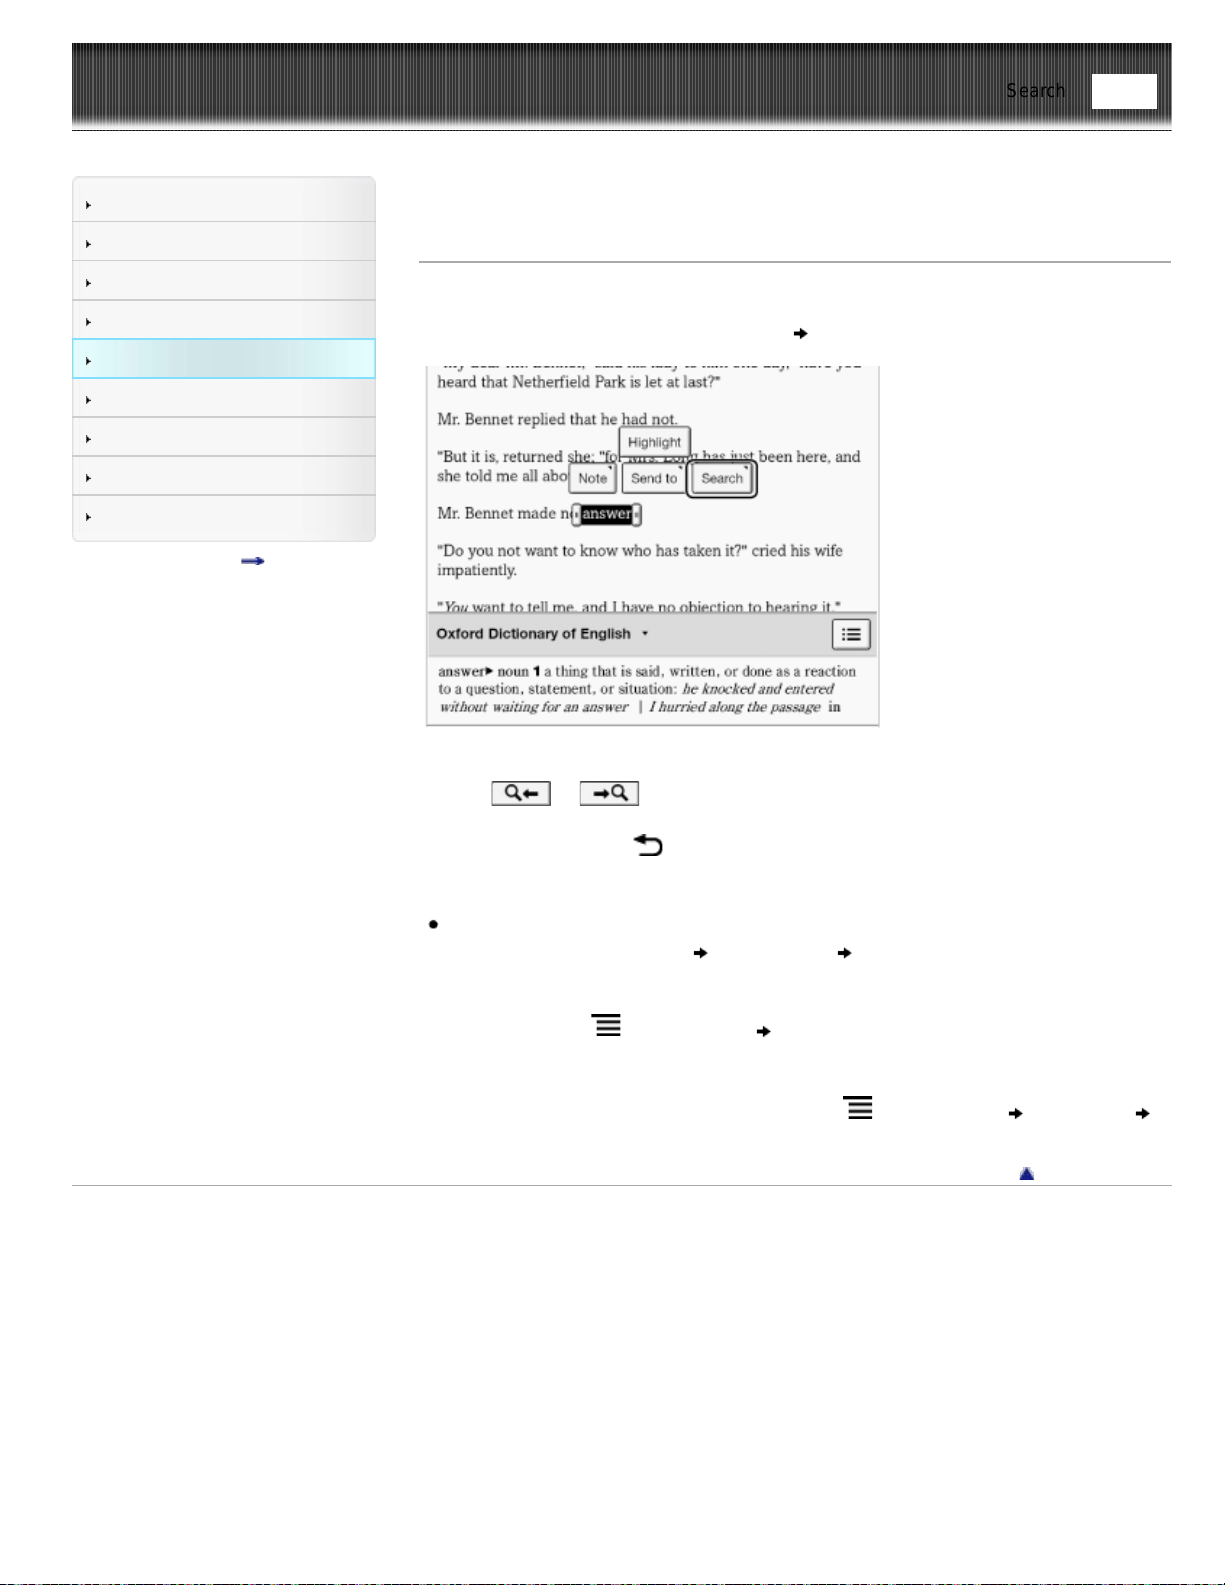
Reader™ User Guide
Print
Search
Getting started
Basic Operations
Adding/Getting Content
Browsing Content Lists
Reading
Organizing
Other Applications
Settings
Other Information
Contents list
Top page > Reading > Reading eBooks > Finding Keywords in a Book
Finding Keywords in a Book
You can find pages that contain specific words using a keyword search.
1. Tap and hold a word, and tap [Search]
[in This Book] in the pop-up menu.
2. A page that includes the keyword for which you searched is displayed.
Tap
or to display to the previous/next page that contains the selected
keyword.
To cancel, press the
(Back) button.
Tip
You can find the definition of a word and more at the Wikipedia and Google Web
sites. Tap and hold a word
tap [Search] [Wikipedia] or [Google]. The
[Browser] application will open to the Wikipedia or Google Web site and search for
the word. (A Wi-Fi network connection is necessary. See Details.) To return to the
book, press the
(Menu) button tap [Continue Reading].
You can also directly enter the keyword for a search.
1. When viewing a book or periodical, press the
(Menu) button tap [More]
[Search], and enter the keyword using the on-screen keyboard.
Go to page top
Copyright 2013 Sony Corporation
Find
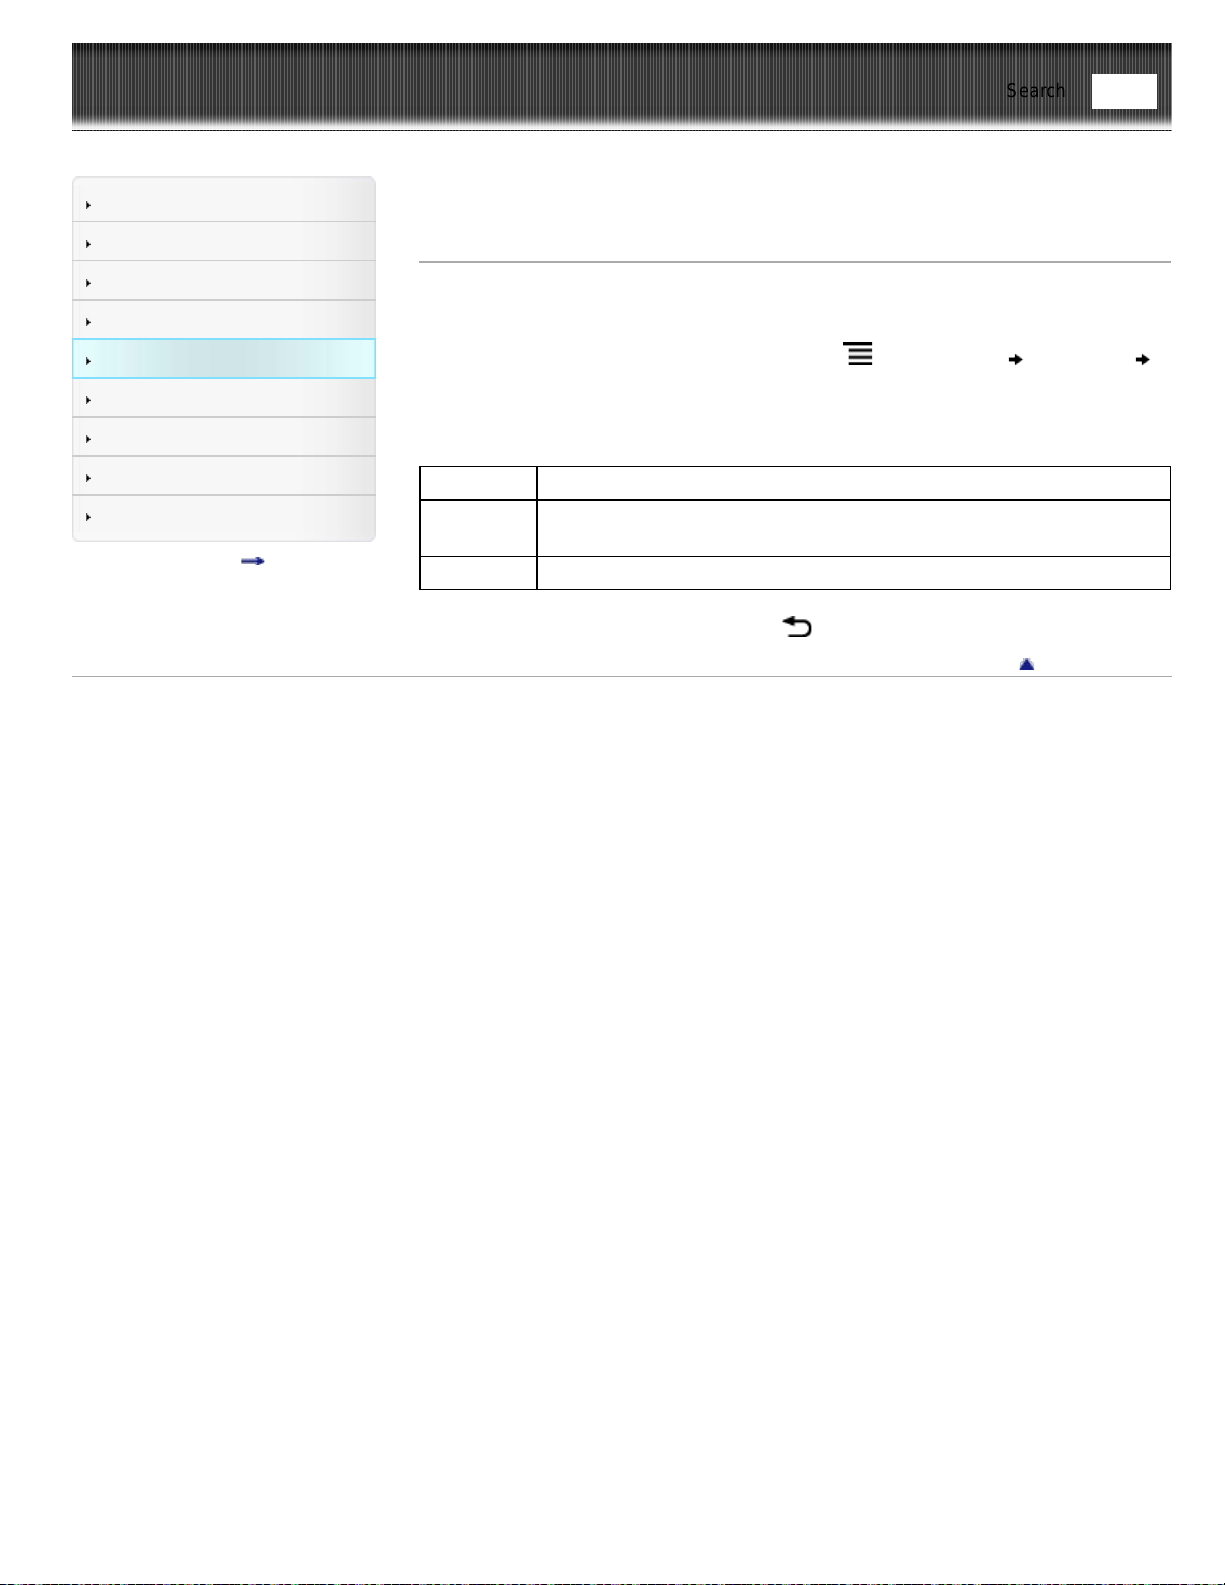
Reader™ User Guide
Print
Search
Getting started
Basic Operations
Adding/Getting Content
Browsing Content Lists
Reading
Organizing
Other Applications
Settings
Other Information
Contents list
Top page > Reading > Reading eBooks > Changing Book Page Settings
Changing Book Page Settings
The following settings are available for the current book or periodical issue you are
reading.
1. When viewing a book or periodical, press the
(Menu) button tap [More]
[Settings].
2. Choose from one of the following options.
Option Description
[Show
Notes]
This is convenient when notes are obscuring your view of the text. See
Details.
[Info] Information for the book or periodical that is currently open is displayed.
To return to the book/periodical, press the
(Back) button.
Go to page top
Copyright 2013 Sony Corporation
Find
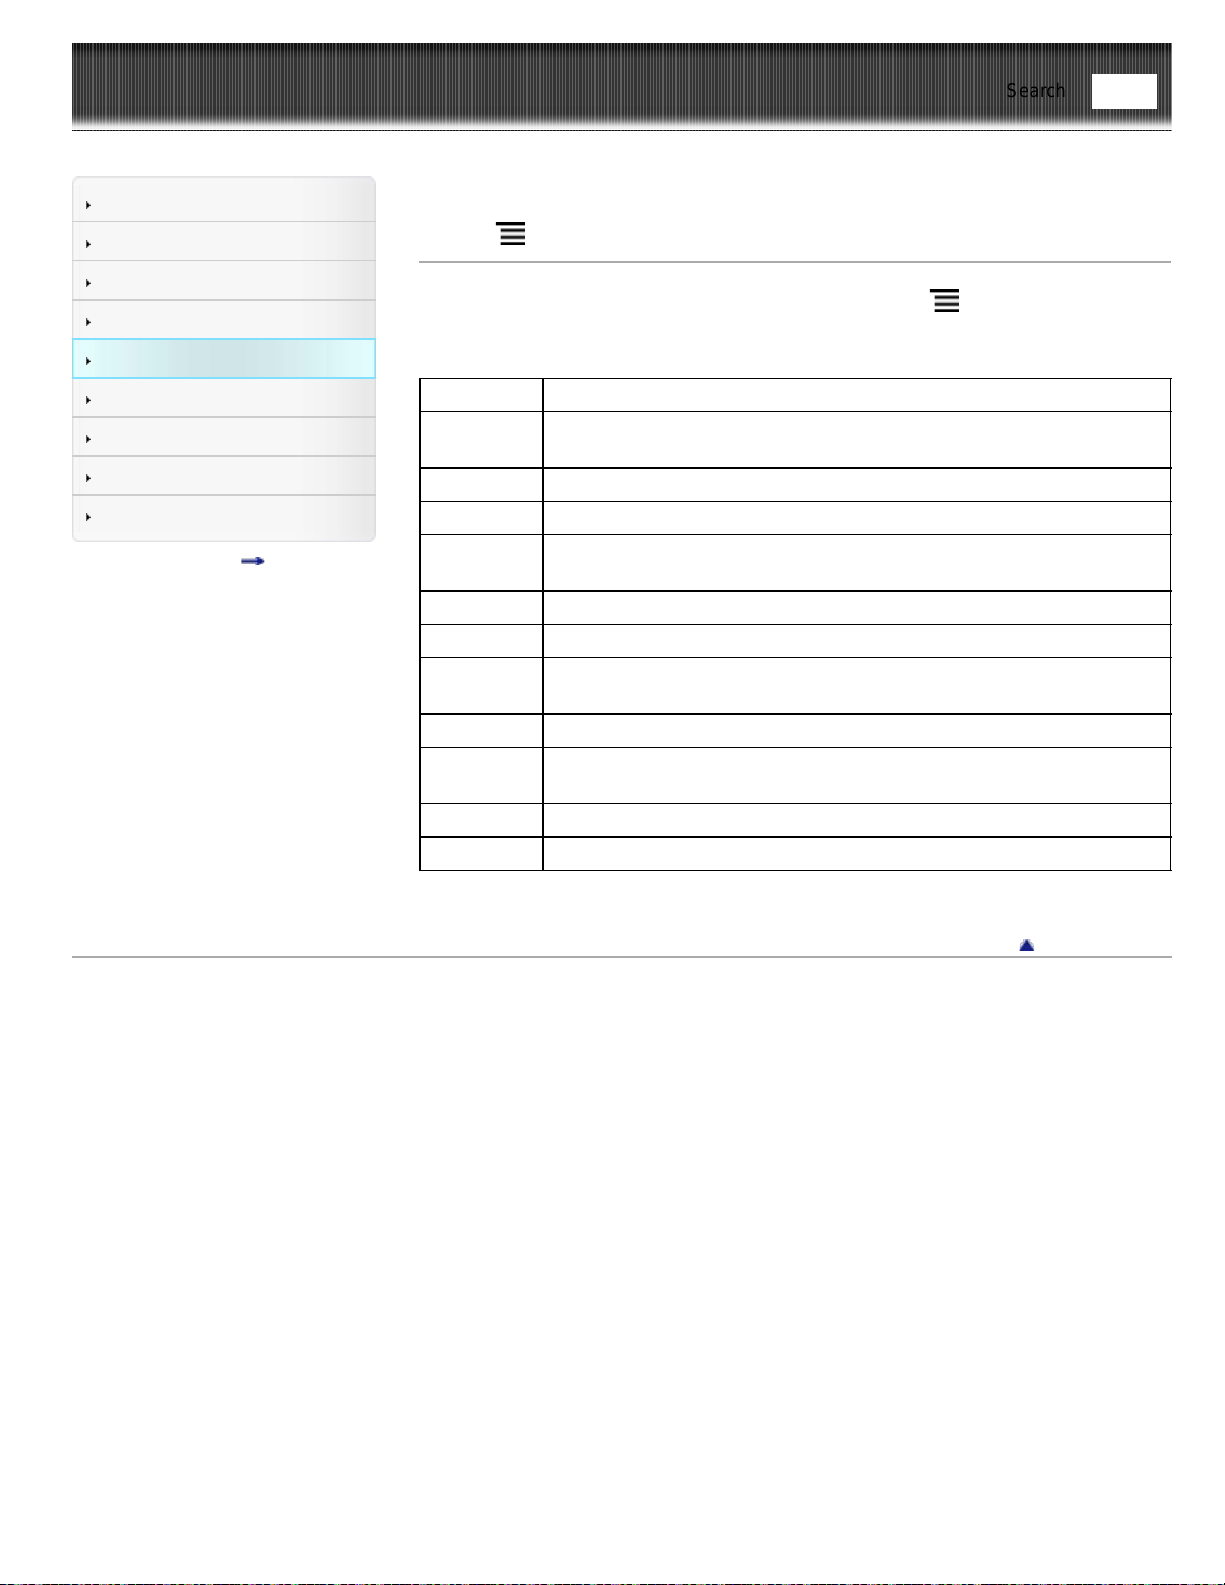
Reader™ User Guide
Print
Search
Getting started
Basic Operations
Adding/Getting Content
Browsing Content Lists
Reading
Organizing
Other Applications
Settings
Other Information
Contents list
Top page > Reading > Reading eBooks > Using (Menu) Items
Using (Menu) Items
Below is a list of option items available when you press the (Menu) button from the
book/periodical viewer.
Option Description
[Navigate
Page]
Selects a method for navigating through a book. See Details.
[Notes] Displays a list of annotations in the book. See Details.
[Font] Changes the font and font size. See Details.
[Customize
View]
Adjusts the page mode (see Details), crops the page margins (see
Details) or adjusts the brightness (see Details).
[Handwriting] Allows you to draw on a page. See Details.
[More] Displays more option items.
[Page Sync]*
Sets synchronization of bookmarks, highlights and your current page
across your compatible reading devices, like handhelds. See Details.
[Search] Finds pages with a keyword. See Details.
[Post to
Facebook]
Post the highlighted text with your comments. See Details.
[Orientation] Changes to portrait or landscape mode. See Details.
[Settings] Changes book settings. See Details.
* Available in certain countries/regions only.
Go to page top
Copyright 2013 Sony Corporation
Find
Reader™ User Guide
Print
Search
Getting started
Basic Operations
Adding/Getting Content
Browsing Content Lists
Reading
Organizing
Other Applications
Settings
Other Information
Contents list
Top page > Reading > Reading Periodicals > Opening a Periodical Issue*
Opening a Periodical Issue*
* Available in certain countries/regions only.
Newspapers and magazines that you have purchased at Reader Store are downloaded
to [Periodicals] on the [Home] screen.
1. Press the
(Home) button tap [Applications] [Periodicals].
The periodicals content list opens.
2. Tap a periodical title.
The issues list opens.
3. Tap an issue.
The issue opens.
4. Use the navigation bar as you read. See Details.
To browse the periodicals and issue content list, see Details.
When viewing the periodicals and issues content lists, you can use option items by
pressing the
(Menu) button. See Details.
Go to page top
Copyright 2013 Sony Corporation
Find
Reader™ User Guide
Print
Search
Getting started
Basic Operations
Adding/Getting Content
Browsing Content Lists
Reading
Organizing
Other Applications
Settings
Other Information
Contents list
Top page > Reading > Reading Periodicals > Managing Periodicals*
Managing Periodicals*
* Available in certain countries/regions only.
In the issue list, you can keep only recent issues and delete previous issues
automatically.
1. Press the
(Home) button tap [Applications] [Periodicals] tap a
periodical.
2. Press
(Menu) button tap [Manage Subscription].
The management dialog appears.
3. Tap the desired setting
[Save].
Tip
If the number of issues on the Reader is larger than the number of issues that you
set to be stored, [Are you sure you want to delete the extra issue(s) now?] appears.
If you want to delete these extra issues immediately, tap [Yes].
If you have issues that you do not want to delete, protect them using [Protect
Issues] from the list of option items. See Details.
Note
The [Manage Subscription] issue number setting applies to the combined number of
issues on the Reader’s internal memory and the microSD card.
Go to page top
Copyright 2013 Sony Corporation
Find
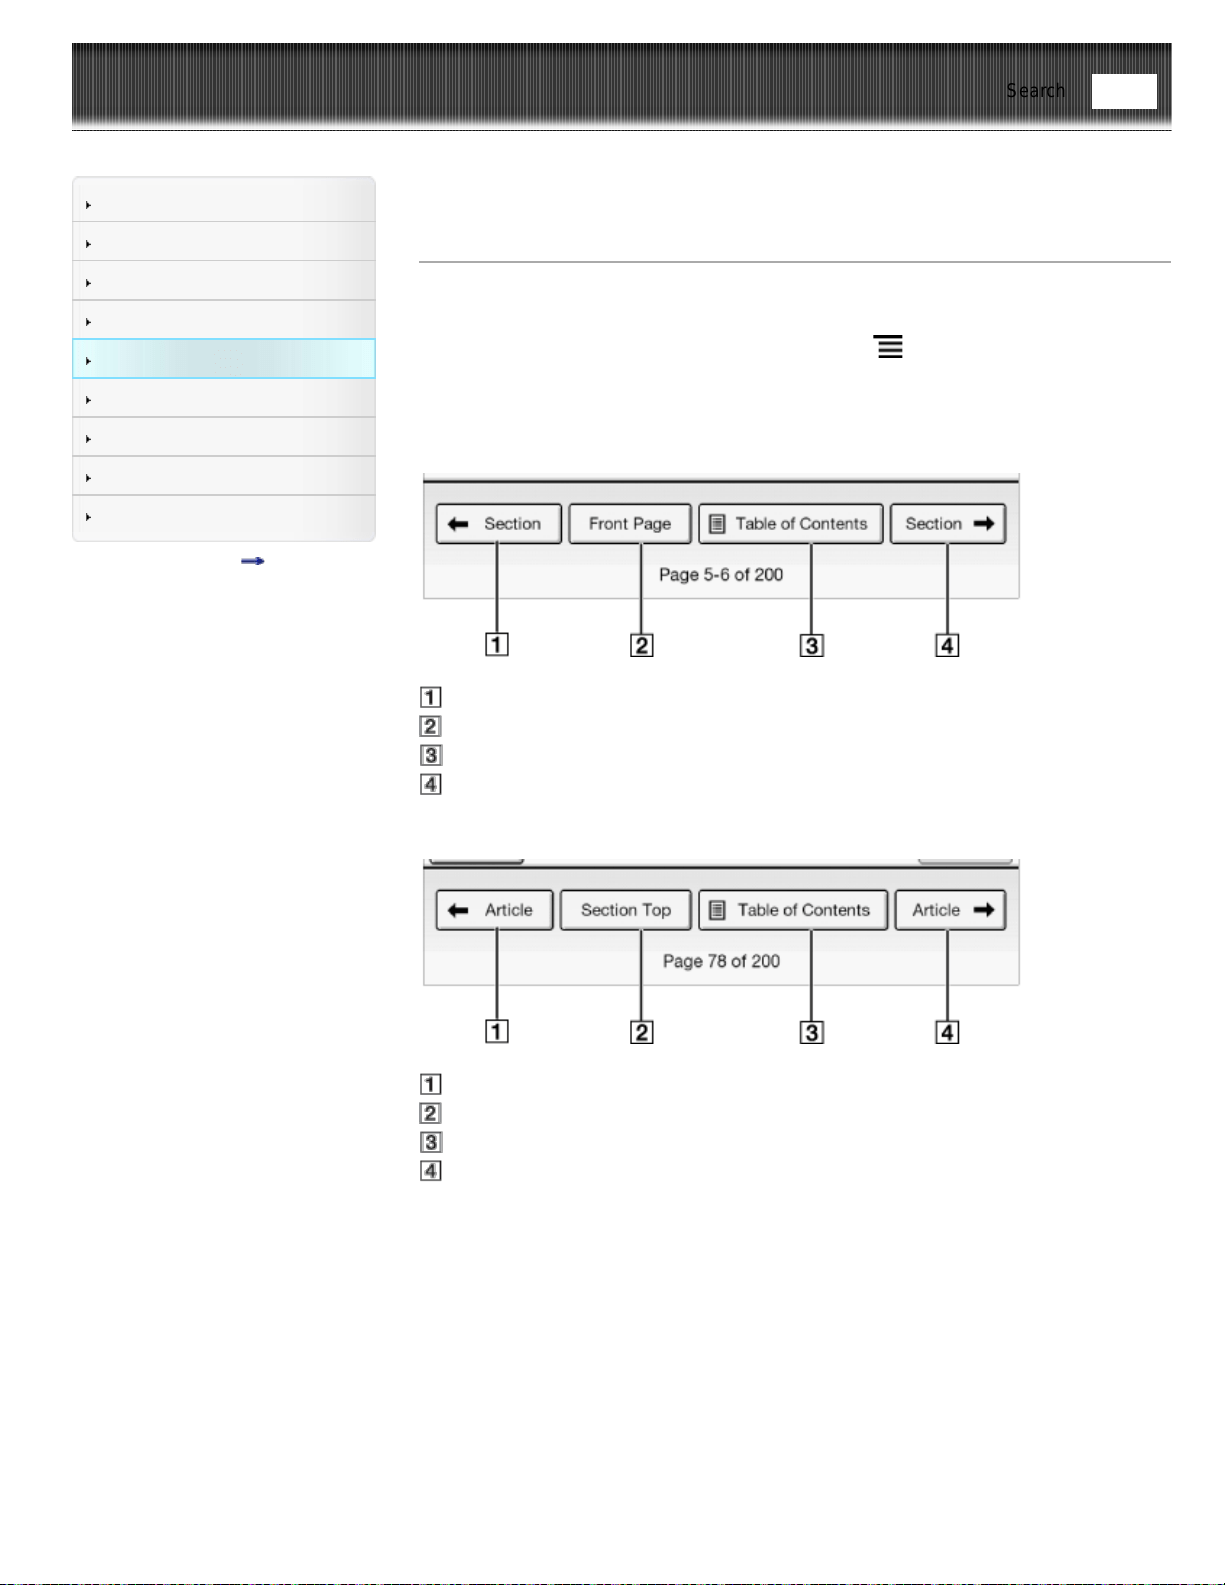
Reader™ User Guide
Print
Search
Getting started
Basic Operations
Adding/Getting Content
Browsing Content Lists
Reading
Organizing
Other Applications
Settings
Other Information
Contents list
Top page > Reading > Reading Periodicals > Page Navigation
Page Navigation
You can add bookmarks and notes to a page in the same manner as books. See
Details.
For the option items that appear when you press the
(Menu) button, see Details.
Periodicals also feature the navigation bar, which helps redirect you to sections of a
periodical.
Navigation items for a section
Previous section
Return to the first page
Table of Contents
Next section
Navigation items for an article
Previous article
Return to the first page of the section
Table of Contents
Next article
Appearance
See Details.
Annotations
See Details.
Using the Dictionary
See Details.
Finding Pages with a Keyword
See Details.
Changing Periodical Page Settings
Find

Reader™ User Guide
Print
Search
Getting started
Basic Operations
Adding/Getting Content
Browsing Content Lists
Reading
Organizing
Other Applications
Settings
Other Information
Contents list
Top page > Organizing > Organizing Your Content > Deleting a Single Item
Deleting a Single Item
You can delete individual items.
The following instructions use the [Books] application as an example; this feature is also
available in other applications.
1. Press the
(Home) button tap [Bookshelves].
2. Tap and hold an item.
The option items appear.
3. Tap [Delete].
4. Tap [Yes] when prompted.
The item is deleted from the Reader.
Note
If [Books] is not shown, press the
(Menu) button tap [Choose Bookshelf] to
show [Books].
Depending on the application, it may not be possible to delete certain files.
Sony recommends that you create a backup of the contents of the Reader using
the Reader application before deleting an item.
Go to page top
Copyright 2013 Sony Corporation
Find
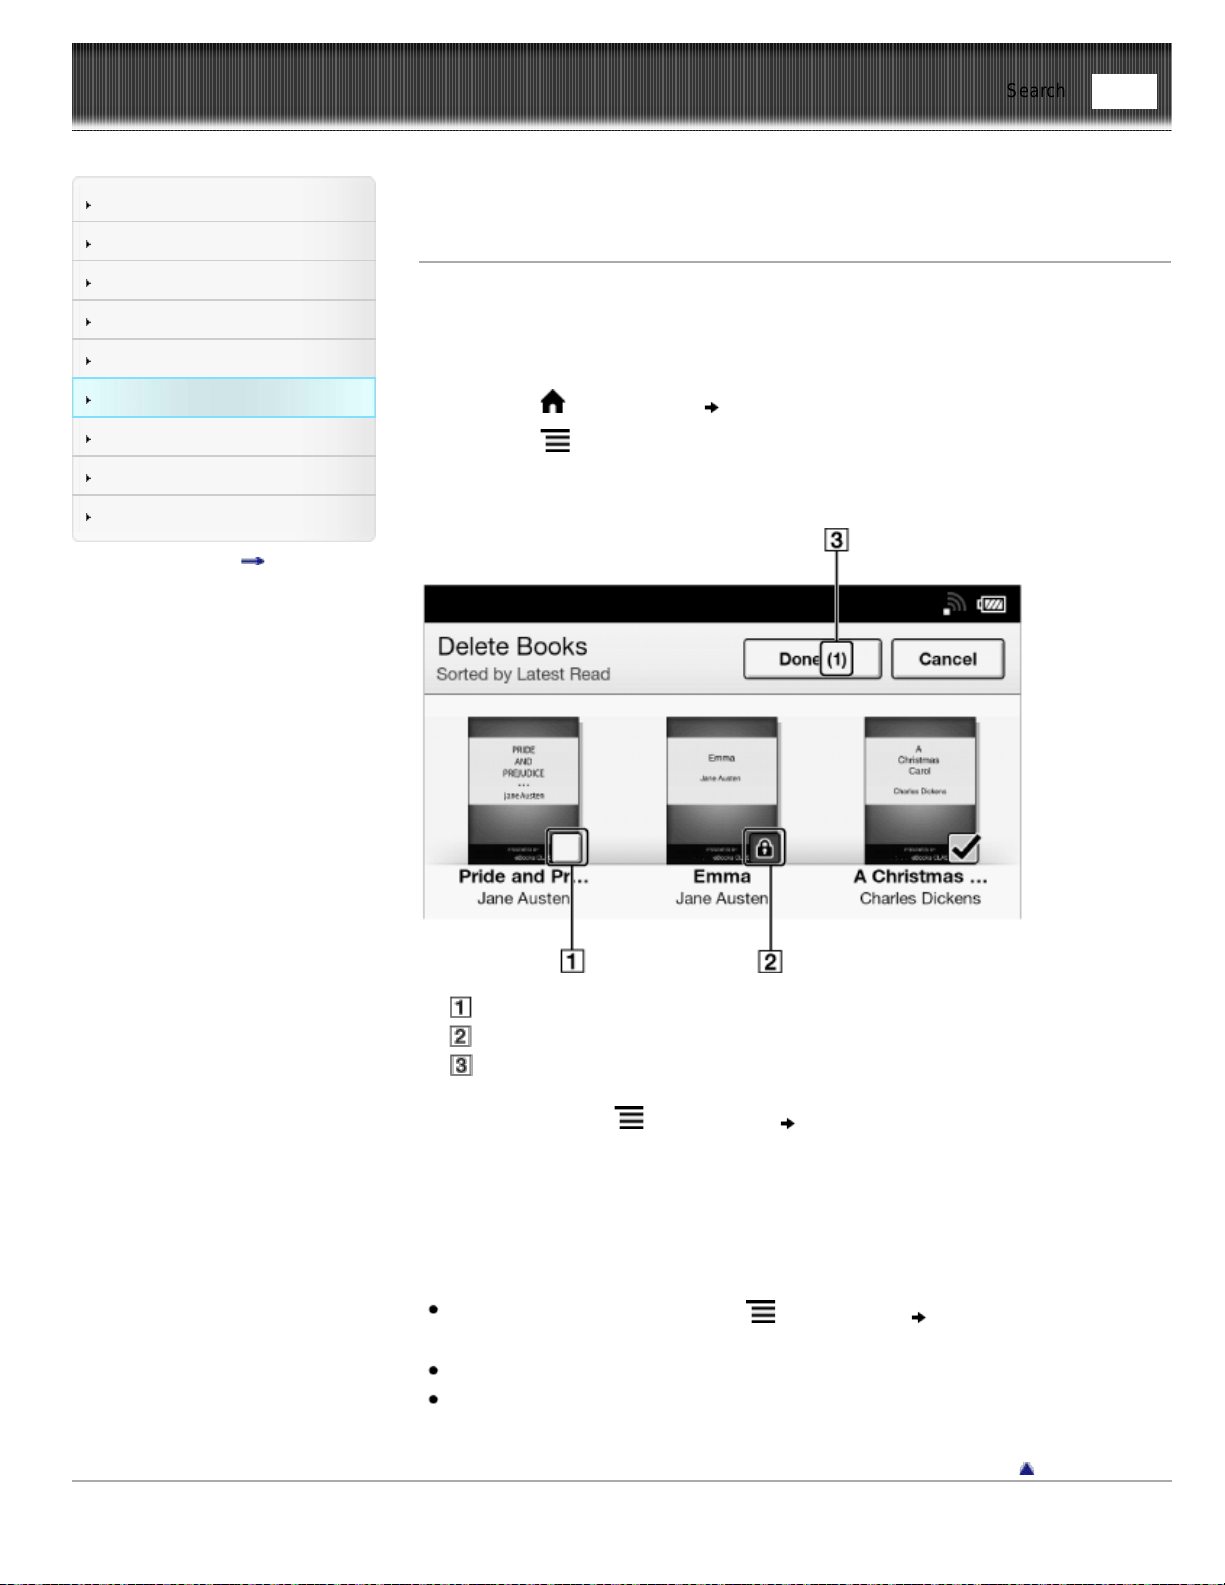
Reader™ User Guide
Print
Search
Getting started
Basic Operations
Adding/Getting Content
Browsing Content Lists
Reading
Organizing
Other Applications
Settings
Other Information
Contents list
Top page > Organizing > Organizing Your Content > Deleting Multiple Items at Once
Deleting Multiple Items at Once
You can delete multiple items at once. This is convenient for clearing up space on the
Reader.
The following instructions use the [Books] application as an example; this feature is also
available in other applications.
1. Press the
(Home) button tap [Bookshelves].
2. Press the
(Menu) button.
3. Tap [Delete Books].
Boxes appear next to the thumbnails or list entries.
Box
Protect icon
Selected number of items
4. Tap to check the items to delete.
You can press the
(Menu) button tap [Select All] if you wish to delete all
items.
5. Tap [Done].
6. Tap [Yes] when prompted.
The selected items are deleted from the Reader.
Note
If [Books] is not shown, press the
(Menu) button tap [Choose Bookshelf] to
show [Books].
Depending on the application, it may not be possible to delete certain files.
Sony recommends that you create a backup of your files using the Reader
application.
Go to page top
Copyright 2013 Sony Corporation
Find

Reader™ User Guide
Print
Search
Getting started
Basic Operations
Adding/Getting Content
Browsing Content Lists
Reading
Organizing
Other Applications
Settings
Other Information
Contents list
Top page > Organizing > Organizing Your Content > Protecting a Single Item
Protecting a Single Item
You can protect an item so that you will not delete it accidentally.
The following instructions use the [Books] application as an example; this feature is also
available in other applications.
1. Press the
(Home) button tap [Bookshelves].
2. Tap and hold an item.
The option items appear.
3. Tap [Protect].
You can remove the protection from the item in the same manner. Tap [Unprotect] in
Step 3 above.
Note
If [Books] is not shown, press the
(Menu) button tap [Choose Bookshelf] to
show [Books].
This protection feature works only on the Reader. Protected content may still be
deleted via your computer.
Go to page top
Copyright 2013 Sony Corporation
Find
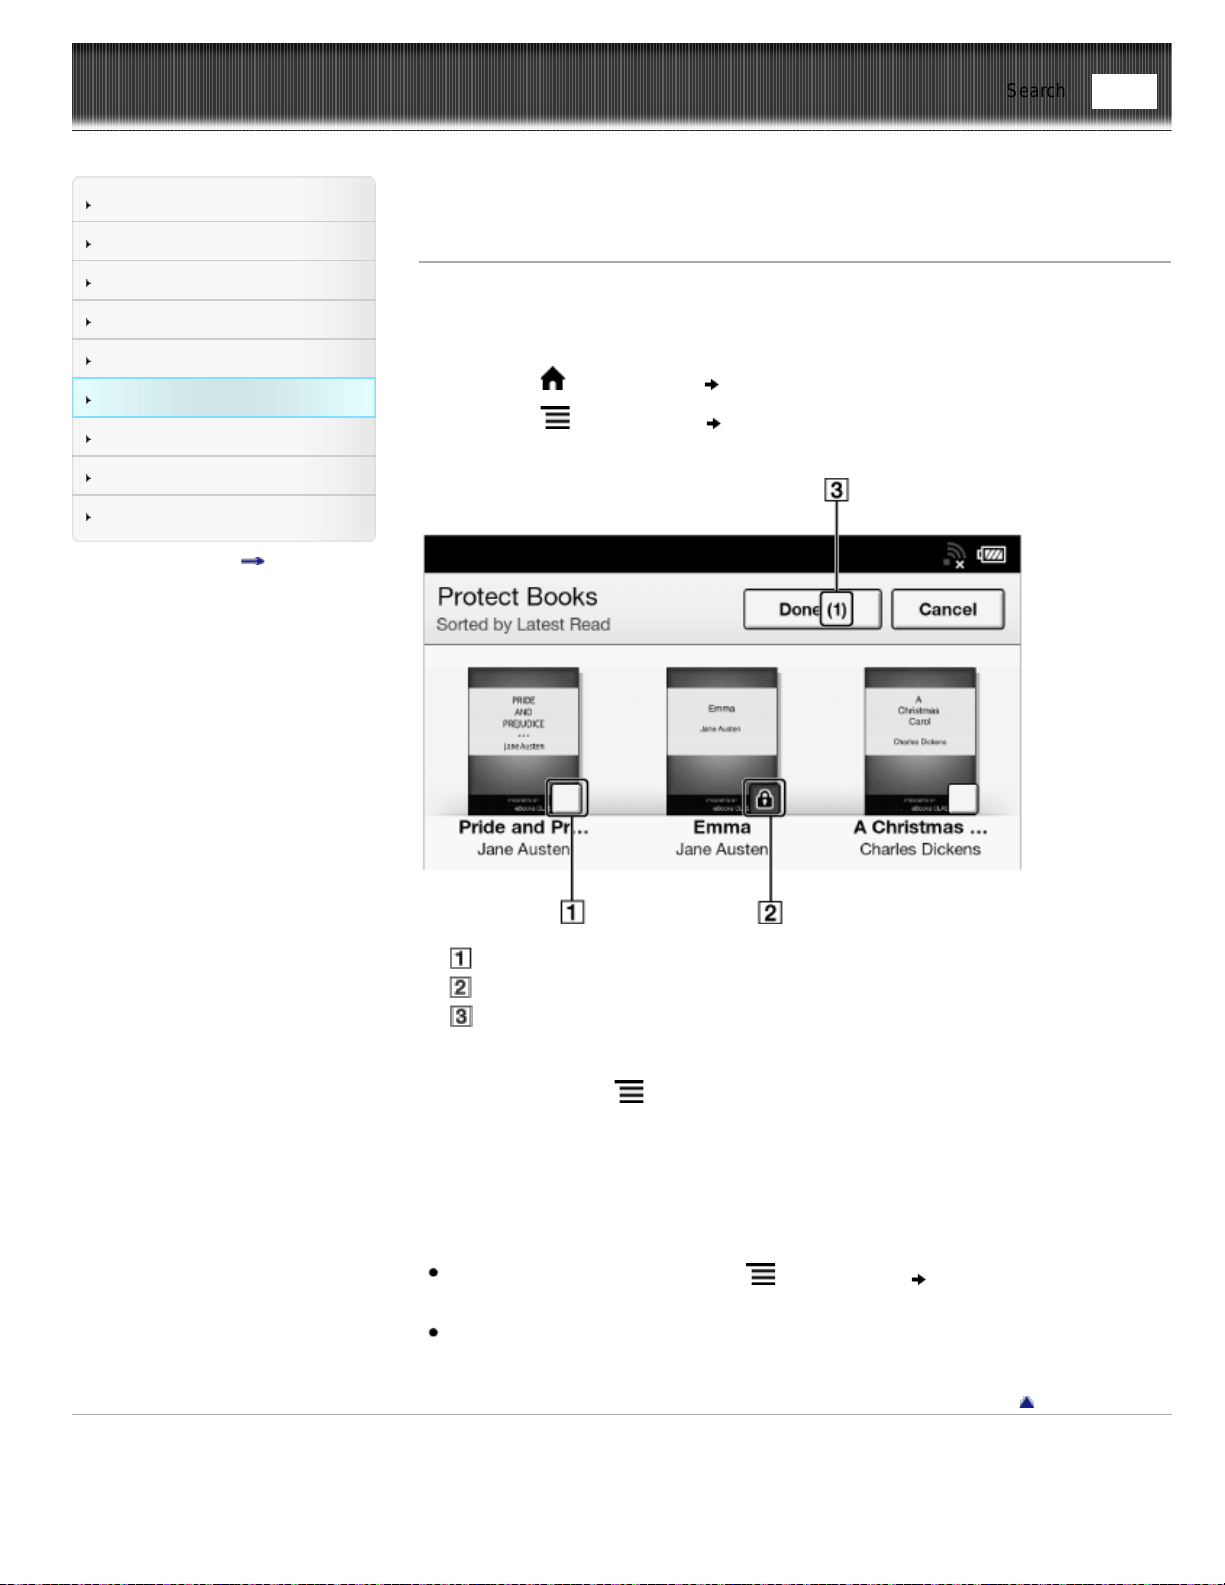
Reader™ User Guide
Print
Search
Getting started
Basic Operations
Adding/Getting Content
Browsing Content Lists
Reading
Organizing
Other Applications
Settings
Other Information
Contents list
Top page > Organizing > Organizing Your Content > Protecting Multiple Items at Once
Protecting Multiple Items at Once
You can protect one or more items at once.
The following instructions use the [Books] application as an example; this feature is also
available in other applications.
1. Press the
(Home) button tap [Bookshelves].
2. Press the
(Menu) button tap [Protect Books].
Boxes appear next to the thumbnails or list entries.
Box
Protect icon
Selected number of items
3. Tap the box of the item to be protected.
Selected items are indicated with a protect icon.
You can press the
(Menu) button and tap [Select All] if you wish to protect all
items.
4. Tap [Done].
The protect icon appears next to the protected items. You can remove protection in Step
3 above by tapping items with the protect icon.
Note
If [Books] is not shown, press the
(Menu) button tap [Choose Bookshelf] to
show [Books].
The protection feature works only on the Reader. Protected content may still be
deleted via your computer.
Go to page top
Copyright 2013 Sony Corporation
Find
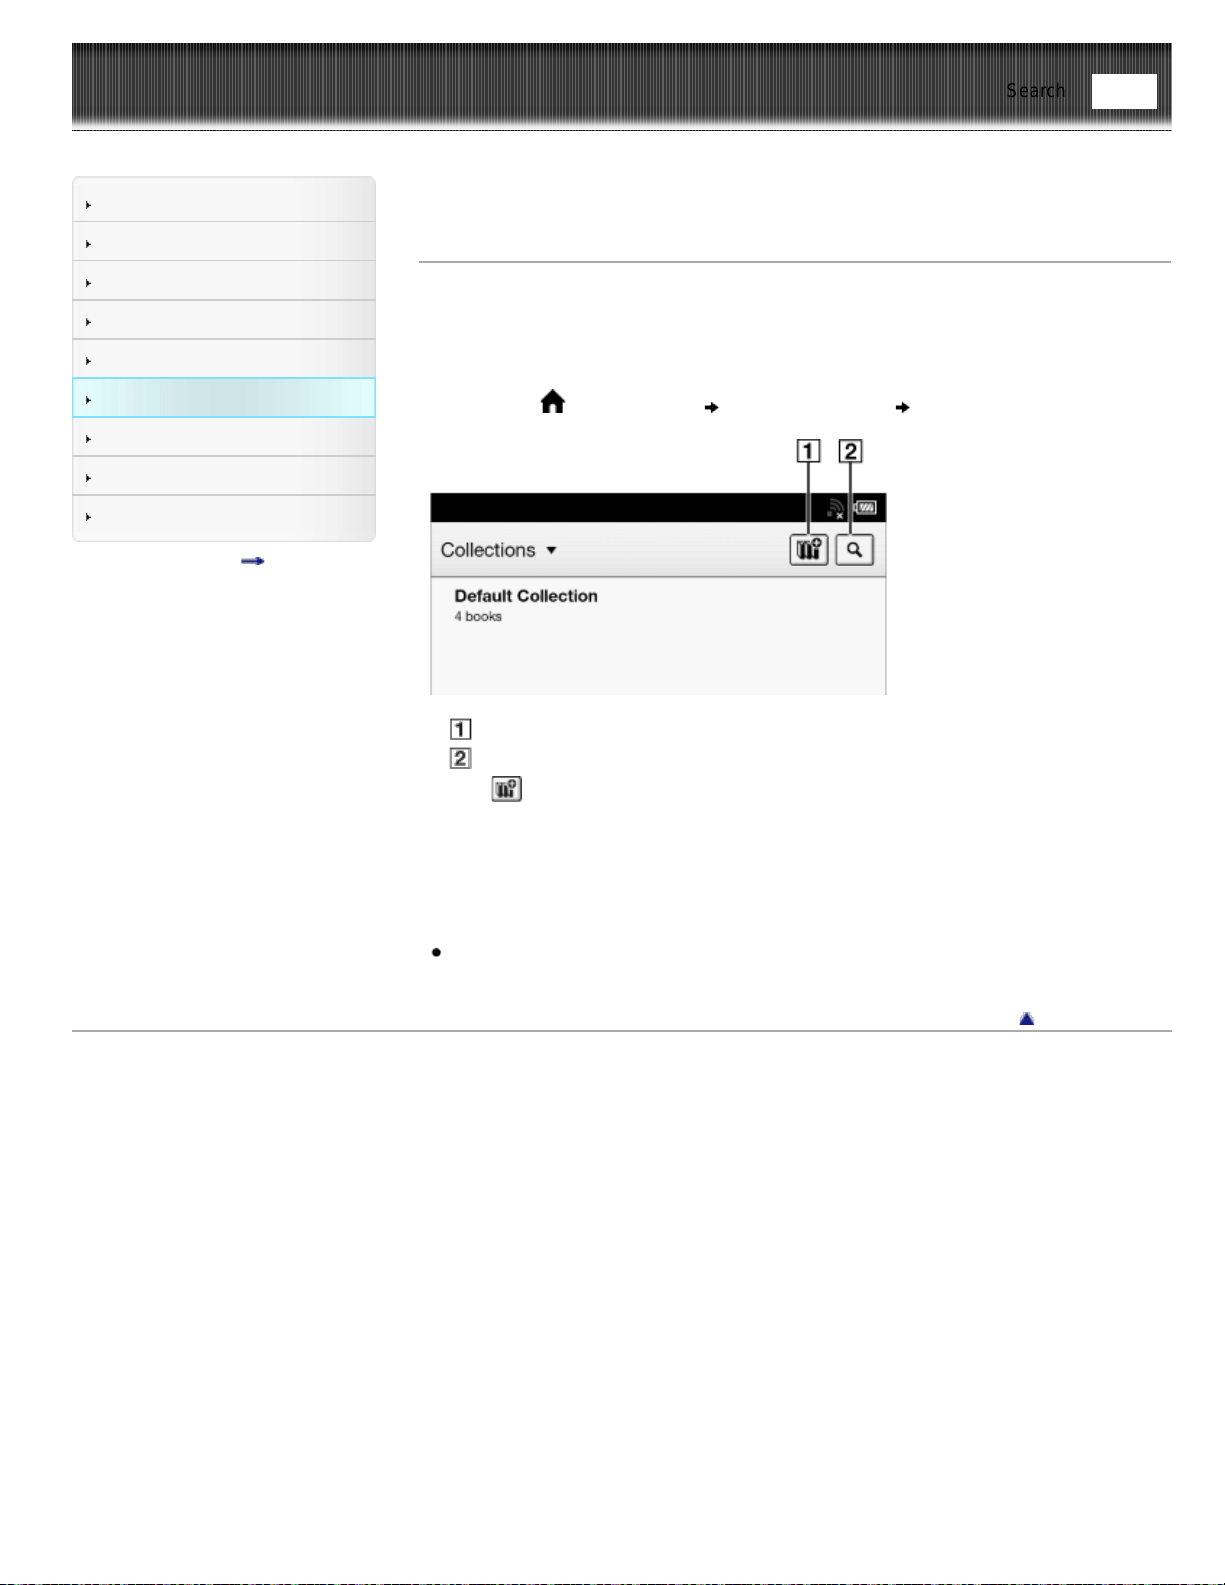
Reader™ User Guide
Print
Search
Getting started
Basic Operations
Adding/Getting Content
Browsing Content Lists
Reading
Organizing
Other Applications
Settings
Other Information
Contents list
Top page > Organizing > Using Collections > Creating a Collection
Creating a Collection
A collection is a custom set of books and other items that you create from items on the
Reader. It is a unique and convenient way to organize your items.
You can organize and personalize your content by creating collections by subject matter,
date, genre or anything that best suits your purpose.
1. Press the
(Home) button tap [Bookshelves] [Collections].
Create a new collection
Search by collection name
2. Tap
.
3. Enter a collection name using the on-screen keyboard and tap [OK].
4. Select the location to store the collection.
A new collection is added to the [Collections] list.
Tip
You can also create and sync collections with the Reader application. For details,
refer to the [Help] menu of the Reader application.
Go to page top
Copyright 2013 Sony Corporation
Find
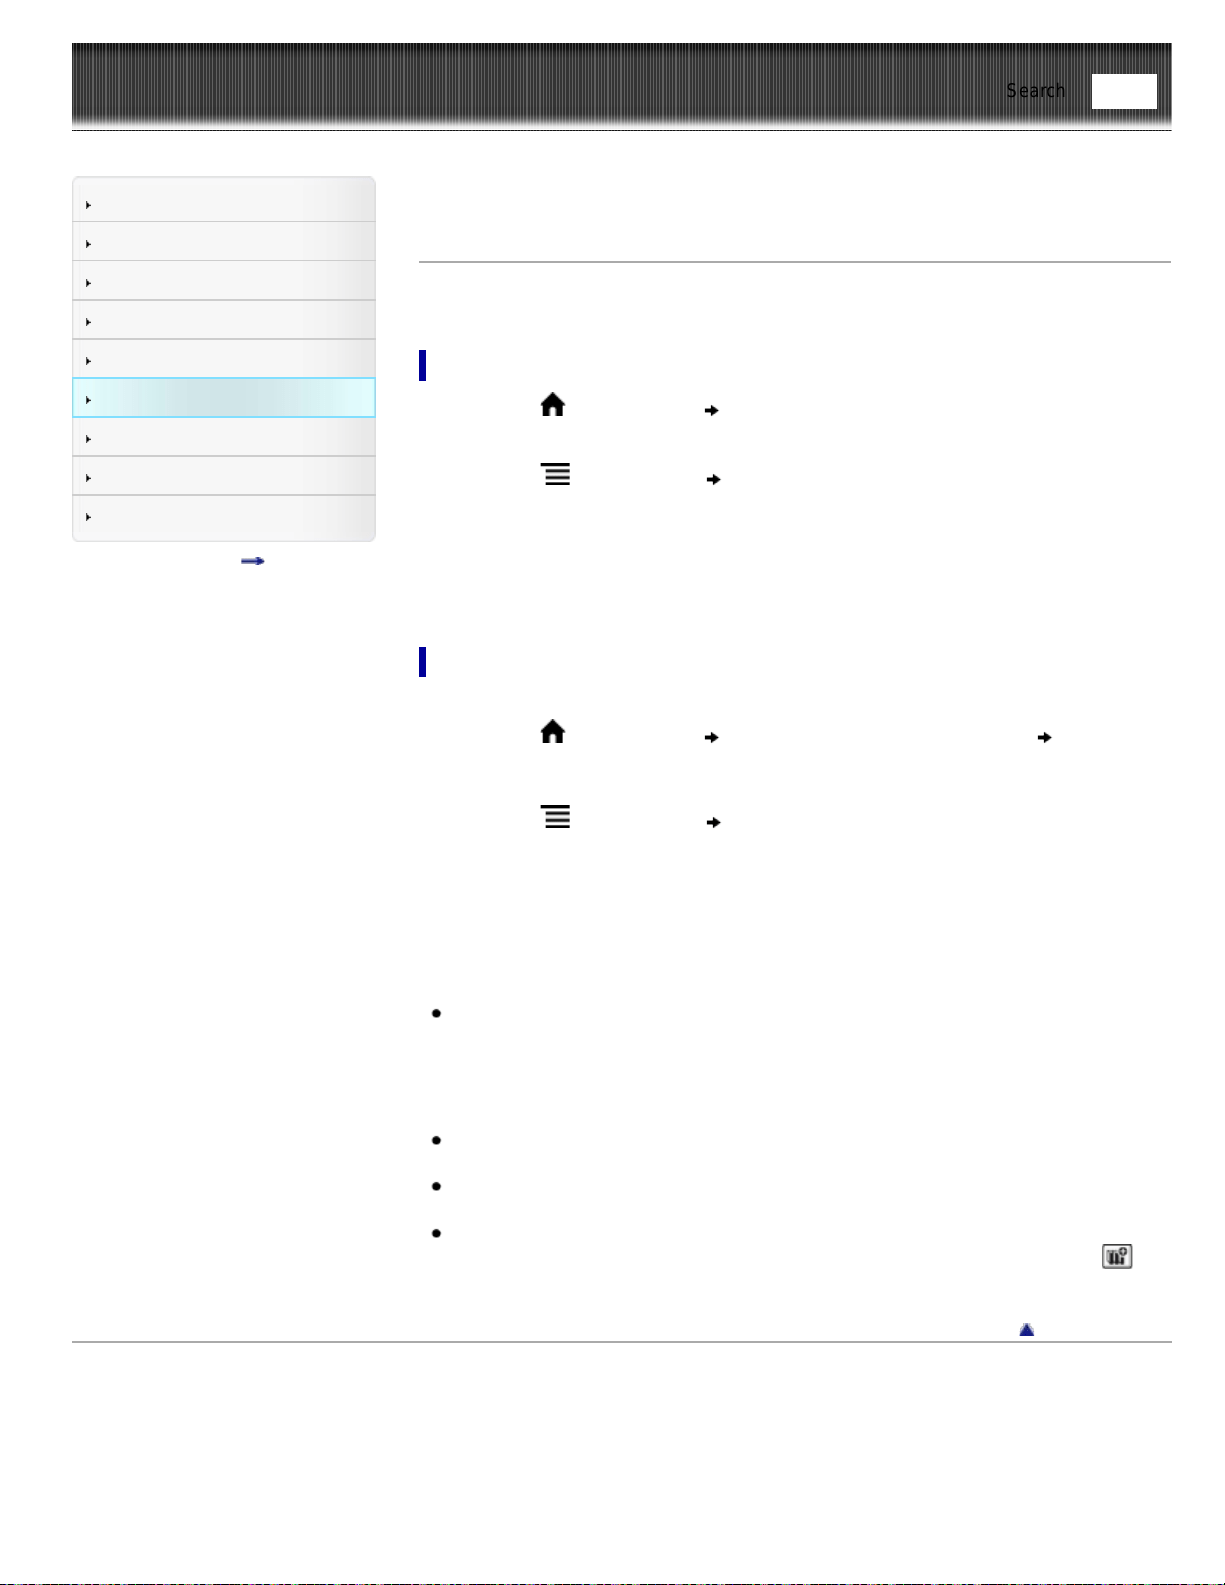
Reader™ User Guide
Print
Search
Getting started
Basic Operations
Adding/Getting Content
Browsing Content Lists
Reading
Organizing
Other Applications
Settings
Other Information
Contents list
Top page > Organizing > Using Collections > Adding Items to a Collection
Adding Items to a Collection
You can add items to existing collections.
From the [Collections] application
1. Press the (Home) button tap [Bookshelves].
2. Tap [Default Collection].
3. Press the
(Menu) button tap [Organize to Collection].
4. Select the collection that you wish to move.
5. Select one or more books from the list.
Selected items are indicated with check marks.
6. Tap [Done].
From the [Books] and [Periodicals]* applications
* Available in certain countries/regions only.
1. Press the
(Home) button tap [Bookshelves] or [Applications]
[Periodicals].
For periodicals, tap the periodical title to view its issues list.
2. Press the
(Menu) button tap [Add to Collection].
3. Tap a collection that you have created that appears in the list.
4. Select one or more books or periodical issues that you wish to add.
Selected items are indicated with a check.
5. Tap [Done].
Note
A collection and its items must be stored in the same location. For example, if the
book/periodical is stored on the Reader’s internal memory, you may not add items
stored on a microSD card to the collection.
Tip
Any books that have not been added to a collection are contained in [Default
Collection].
When you add a book/periodical to a collection, it is moved from [Default
Collection].
When moving an item from [Organize to Collection] or [Add to Collection], you can
create a new collection to move the item to. To create a new collection, tap
in
the upper-right corner of the screen.
Go to page top
Copyright 2013 Sony Corporation
Find
Reader™ User Guide
Print
Search
Getting started
Basic Operations
Adding/Getting Content
Browsing Content Lists
Reading
Organizing
Other Applications
Settings
Other Information
Contents list
Top page > Organizing > Using Collections > Removing Items from a Collection
Removing Items from a Collection
You can remove one or more items from a collection that you have created.
1. Press the
(Home) button tap [Bookshelves] tap a collection that you
have created
press the (Menu) button tap [Remove Content].
You can also tap and hold an item
tap [Remove].
2. Tap one or more items.
Selected items are indicated with a check.
3. Tap [Done].
4. Tap [Yes] when prompted.
The selected item(s) will be removed from the collection.
Note
If you have deleted an item from [Books] or [Periodicals]*, it will be automatically
removed from all of the collections with which it was associated.
Removing items from a collection does not delete them from the Reader or their
stored locations.
If you remove an item from a collection that does not exist in other collections, its
original will be moved back to the [Default Collection] in the Reader. If you remove
an item that exists in another collection(s), it will remain in the other collection(s),
and not be moved back to the [Default Collection].
* Available in certain countries/regions only.
Tip
You can remove all items at once. After completing Step 1 above, press the
(Menu) button [Select All].
Go to page top
Copyright 2013 Sony Corporation
Find
Reader™ User Guide
Print
Search
Getting started
Basic Operations
Adding/Getting Content
Browsing Content Lists
Reading
Organizing
Other Applications
Settings
Other Information
Contents list
Top page > Organizing > Using Collections > Renaming a Collection
Renaming a Collection
You can change the name of a collection.
1. Press the
(Home) button tap [Bookshelves] tap a collection that you
have created
press the (Menu) button tap [Rename Collection].
You can also tap and hold a collection that you have created
tap [Rename].
2. Enter a new name for the collection using the on-screen keyboard.
3. Tap [OK].
Go to page top
Copyright 2013 Sony Corporation
Find

Reader™ User Guide
Print
Search
Getting started
Basic Operations
Adding/Getting Content
Browsing Content Lists
Reading
Organizing
Other Applications
Settings
Other Information
Contents list
Top page > Organizing > Using Collections > Deleting a Collection
Deleting a Collection
You can delete a collection that you have created.
1. Press the
(Home) button tap [Bookshelves] press the (Menu) button
tap [Delete Collections].
You can also tap and hold a collection that you have created
tap [Delete].
2. Tap the collection to be deleted.
Selected items are indicated with a check.
3. Tap [Done].
4. Tap [Yes] when prompted.
The selected item(s) will be removed from the collection.
Note
Deleting a collection does not delete content from the Reader or their stored
locations.
Go to page top
Copyright 2013 Sony Corporation
Find
Reader™ User Guide
Print
Search
Getting started
Basic Operations
Adding/Getting Content
Browsing Content Lists
Reading
Organizing
Other Applications
Settings
Other Information
Contents list
Top page > Organizing > Using Collections > Posting a Collection to Facebook
Posting a Collection to Facebook
You can post your book collection information to Facebook.
1. Press the
(Home) button tap [Bookshelves] tap the collection that you
have created
press the (Menu) button tap [Post to Facebook].
The collection information is posted to Facebook.
Note
Before posting to Facebook, you need to log in. Press the
(Home) button
tap [Applications] [Facebook Setup].
Go to page top
Copyright 2013 Sony Corporation
Find
Reader™ User Guide
Print
Search
Getting started
Basic Operations
Adding/Getting Content
Browsing Content Lists
Reading
Organizing
Other Applications
Settings
Other Information
Contents list
Top page > Organizing > Using Collections > Using (Menu) Items
Using (Menu) Items
Below is a list of option items available when you press the (Menu) button from a
collection list.
Option Description
[Delete
Collections]
Deletes collections that you created. See Details.
[Choose
Bookshelf]
Shows the following pop-up menu. Alternatively, tap the title or press
(Menu) button [Choose Bookshelf].
[Books]
[Collections]
[Purchased Content]*
[Evernote]
* If you have not logged in to Reader Store yet, [Purchased Content] is not shown.
Available in certain countries/regions only. The [Purchased Content] function only
appears on your Reader if your local Reader Store supports the feature.
Go to page top
Copyright 2013 Sony Corporation
Find
Reader™ User Guide
Print
Search
Getting started
Basic Operations
Adding/Getting Content
Browsing Content Lists
Reading
Organizing
Other Applications
Settings
Other Information
Contents list
Top page > Other Applications > Public Libraries > Borrowing eBooks from Public
Libraries*
Borrowing eBooks from Public Libraries*
* Available in certain countries/regions only.
Many public libraries (available in certain countries/regions only) offer digital library
services so that you can borrow eBooks for the Reader with your library card.* You can
download them directly to the Reader.
* Using public library services requires a library card. For details, contact your local
library.
Locating your public library
1. Configure Wi-Fi settings of the Reader to access your public library. See Details.
2. Press the
(Home) button tap [Applications] [Public Library].
Follow the directions on the screen to use public library services.
For using the browser, see Details. For using the browser option items, see Details.
Borrowing eBooks
1. Find what you wish to borrow via the public library Web site.
2. Follow the site instructions and download the book. You can check the downloading
progress in the status bar and by tapping it to display the notification window. See
Details.
You may be asked to specify the lending period.
Once the title has downloaded, it will be stored in the [Books] application.
You can check the loan periods for borrowed eBooks by viewing the icons in the
[Books] content list. See Details.
Returning eBooks
1. Configure Wi-Fi settings of the Reader to access your public library. See Details.
2. Press the
(Home) button tap [Bookshelves] [Books] press the
(Menu) button tap [Return Books].
3. Tap the book you want to return. A check mark appears next to the selected book.
You can select multiple books.
4. Tap [Done]
[Yes].
You can check the returning progress in the status bar and by tapping it to display
the notification window. See Details.
The selected books are returned.
Note
If you reach the limit for borrowed eBooks, the public library may prevent you from
borrowing more until you return some of the eBooks you have borrowed.
Some public libraries may allow you to return eBooks early.
Go to page top
Copyright 2013 Sony Corporation
Find
Reader™ User Guide
Print
Search
Getting started
Basic Operations
Adding/Getting Content
Browsing Content Lists
Reading
Organizing
Other Applications
Settings
Other Information
Contents list
Top page > Other Applications > Web Browsing > Browsing the Web
Browsing the Web
The Reader has a Web browser that enables you to visit Web sites and download files
and images directly to the Reader, saved under [Books] and [Pictures] applications.
1. Make sure that Wi-Fi is set up and turned on.
2. Press the
(Home) button tap [Applications] [Browser].
3. Navigate to a Web site.
Tap
(Bookmarks) tap one of the bookmarks.
Tap the URL box and type the URL address using the on-screen keyboard, and
tap [Go].
4. Browse the Web site.
Press the < (Previous) button to scroll up.
Press the > (Next) button to scroll down.
Tap and drag to move the view area.
Press the
(Back) button to go back to the previous Web page.
Note
You must agree to the terms and conditions before using [Browser]. Please read
the terms and conditions carefully. When you tap [Accept], [Browser] opens.
Tip
You can press the
(Menu) button tap [Continue Reading] to return to the
last read page of your last read book.
Go to page top
Copyright 2013 Sony Corporation
Find
Reader™ User Guide
Print
Search
Getting started
Basic Operations
Adding/Getting Content
Browsing Content Lists
Reading
Organizing
Other Applications
Settings
Other Information
Contents list
Top page > Other Applications > Web Browsing > Browsing Tools
Browsing Tools
Zooming in
While in zoom mode, the zoom bar is shown at the bottom-right of the screen.
Pinch out to zoom in.
Pinch in to zoom out.
Double-tap to fit the page to the window size.
To exit zoom mode, press the
(Back) button.
Capturing a screenshot
You can capture the current page as a screenshot.
1. When viewing a Web page, press the
(Menu) button tap [More]
[Capture Screenshot] [OK].
Screenshots are stored in the [Pictures] application. See Details.
Go to page top
Copyright 2013 Sony Corporation
Find
Reader™ User Guide
Print
Search
Getting started
Basic Operations
Adding/Getting Content
Browsing Content Lists
Reading
Organizing
Other Applications
Settings
Other Information
Contents list
Top page > Other Applications > Web Browsing > Downloads
Downloads
When you click a download link, the item will be downloaded onto the Reader.*
You can view the download history by pressing the
(Menu) button tap [More]
[Downloads].
* Only supported file types can be downloaded. For supported file types, see Details.
Downloading a linked file
You can download a file behind a link without opening it in the browser window.
1. Tap and hold the link
tap [Save Link].
2. Tap [Yes] when prompted.
Depending on the Web site, a file may begin downloading once you tap the download
icon.
The downloaded file can be found in the [Books] application.
Downloading an image
You can download an image displayed in the browser window.
1. Tap and hold the image
tap [Save Image].
2. Tap [Yes] when prompted.
Viewing download progress
You can view items that you are currently downloading or have recently downloaded.
1. When an item is downloading, an icon indicating that the download is in progress
appears in the status bar.
Tap the status bar to open the notification window. See Details.
Items that you are currently downloading are listed under [Ongoing].
Recent items that have been downloaded and recent items which were not
downloaded successfully are listed under [Notification].
2. Press the
(Back) button to return to the Web page.
Cancelling a download
You can cancel a download that is currently in progress.
1. When viewing a Web page, press the
(Menu) button tap [More]
[Downloads].
You can also tap the status bar
tap the item currently downloading under
[Ongoing].
The download history opens.
2. Tap and hold an item
tap [Cancel Download], or press the (Menu) button
tap [Cancel Download].
To return to the Web page, press the
(Back) button.
Opening a downloaded file/image
You can view the files downloaded from a Web site. Downloaded files are stored in
[Books] or, [Pictures] depending on the file type.
Find
1. When viewing a Web page, press the (Menu) button tap [More]
[Downloads].
You can also tap the status bar
tap the item currently downloading under
[Notification].
2. Tap a downloaded file, or tap and hold an item
tap [Open].
The Reader opens the file in the appropriate application.
To return to the Web page, press the
(Back) button.
Deleting a downloaded file
You can delete downloaded files.
1. When viewing a Web page, press the
(Menu) button tap [More]
[Downloads].
2. Tap and hold an item
tap [Delete].
The file is deleted from the Reader.
Depending on the file type, files can also be deleted from their respective applications.
Go to page top
Copyright 2013 Sony Corporation
Reader™ User Guide
Print
Search
Getting started
Basic Operations
Adding/Getting Content
Browsing Content Lists
Reading
Organizing
Other Applications
Settings
Other Information
Contents list
Top page > Other Applications > Web Browsing > Multiple Windows
Multiple Windows
Opening a new window
1. When viewing a Web page, press the (Menu) button [More] [Windows]
[New Window].
A maximum of 3 windows can be open at one time. If [New Window] is not
displayed, tap [Close] in the Window list.
Opening a link in a new window
Instead of the current window, you can open a link in a new window so that you can
keep the current window open.
1. Tap and hold a link
tap [Open in New Window].
The link opens in a new window.
A maximum of 3 windows can be open at one time. After the third window is opened,
[Open in New Window] is not displayed.
Changing the browser window in view
When you have more than one browser window open, you can change the window in
view.
1. When viewing a Web page, press the
(Menu) button tap [More]
[Windows].
2. Select another browser window.
Closing a browser window
You can close browser windows.
1. When viewing a Web page, press the
(Menu) button tap [More]
[Windows].
2. Tap [Close].
The window is closed.
Note
If there is only one browser window open and you tap [Close], the browser home
page is automatically opened.
Go to page top
Copyright 2013 Sony Corporation
Find
Reader™ User Guide
Print
Search
Getting started
Basic Operations
Adding/Getting Content
Browsing Content Lists
Reading
Organizing
Other Applications
Settings
Other Information
Contents list
Top page > Other Applications > Web Browsing > Bookmarks and History
Bookmarks and History
Bookmarking a Web site
You can bookmark your favorite Web sites so that you can return to them quickly.
1. Visit the Web site that you wish to bookmark.
2. Add the current site to the bookmarks as follows:
Tap
next to the URL box tap [Add bookmark...].
3. Optionally, edit the bookmark name by tapping the text input area under [Name] and
using the on-screen keyboard. See Details.
4. Tap [OK].
The current Web page is now added to the bookmark list.
Opening a bookmarked Web site
You can quickly return to your favorite Web sites using bookmarks.
1. When viewing a Web page, tap next to the URL box.
The bookmark list opens.
2. Tap the bookmark to open it.
Editing a bookmark
You can change a bookmark name or the address (URL) if necessary.
1. When viewing a Web page, tap next to the URL box.
The bookmark list opens.
2. Tap and hold the bookmark that you wish to edit
tap [Edit Bookmark].
3. Edit the bookmark name/location by tapping the text input area under
[Name]/[Location] and using the on-screen keyboard.
4. Tap [OK].
To return to the Web page you were browsing, press the
(Back) button.
Deleting bookmarks
You can remove bookmarks from the bookmark list to keep only the ones you need.
1. When viewing a Web page, tap
next to the URL box.
The bookmark list opens.
2. Tap and hold the bookmark that you wish to remove from the list
tap [Delete
Bookmark].
3. Tap [OK] when prompted.
The bookmark is removed from the list.
To return to the Web page you were browsing, press the
(Back) button.
Opening a previously visited Web site
You can view a list of Web sites that you have previously visited.
1. When viewing a Web page, tap next to the URL box.
2. Tap [History].
Find

A list of sites that you have previously visited opens.
3. Tap an item to open it in the browser.
Deleting browsing history items
You can remove entries from the browsing history.
1. When viewing a Web page, tap
next to the URL box.
2. Tap [History].
A list of sites that you have previously visited opens.
3. Tap and hold the entry that you wish to remove from the list
tap [Remove from
History].
4. Press the
(Back) button to return to the Web page you were browsing.
Tip
You can delete all browsing history items by pressing the
(Menu) button
tapping [Clear History] in Step 2.
Go to page top
Copyright 2013 Sony Corporation

Reader™ User Guide
Print
Search
Getting started
Basic Operations
Adding/Getting Content
Browsing Content Lists
Reading
Organizing
Other Applications
Settings
Other Information
Contents list
Top page > Other Applications > Web Browsing > Uploading an Address of a Website
to Evernote
Uploading an Address of a Website to Evernote
You can upload the address of your favorite Websites to Evernote.
1. Visit the Web site that you wish to upload the address of.
2. Press the
(Menu) button tap [More] [Upload to Evernote].
The Website address is uploaded to Evernote.
Note
Before uploading to Evernote, you need to log in. Press the
(Home) button
tap [Applications] [Evernote Setup].
Go to page top
Copyright 2013 Sony Corporation
Find
Reader™ User Guide
Print
Search
Getting started
Basic Operations
Adding/Getting Content
Browsing Content Lists
Reading
Organizing
Other Applications
Settings
Other Information
Contents list
Top page > Other Applications > Web Browsing > Browser Settings
Browser Settings
You can change the following browser settings to your preference. When viewing a Web
page, press the
(Menu) button and tap [More] [Settings] to change the settings.
Setting Description
[Default Zoom] The default zoom ratio. Set to “Medium” by default.
[Open Pages in
Overview]
Opens the page scaled to the window size. Enabled by default.
[Text Encoding]
Set to “Unicode (UTF-8)” by default. The browser supports the
following encodings:
Latin-1 (ISO-8859-1)
Unicode (UTF-8)
[Block Pop-up
Windows]
Blocks pop-up windows. Enabled by default.
[Load Images] Loads images on a Web page. Enabled by default.
[Auto-fit Pages] Formats Web pages to the window size. Enabled by default.
[Enable
JavaScript]
Enables JavaScript. Enabled by default.
[Set Home
Page]
Sets the default Web page to display. You can set the currently
opened Web page as your home page.
[Page
Information]
Displays the details of a Web page.
[Clear Cache] Empties the cache.
[Clear History] Deletes the browsing history.
[Accept cookies] Accepts cookies from Web sites. Enabled by default.
[Clear All Cookie
Data]
Removes all cookies.
[Remember
Form Data]
Allows the browser to remember the form history. Enabled by
default.
[Clear Form
Data]
Empties the search and form history.
[Remember
Passwords]
Allows the browser to remember some entered passwords. Enabled
by default.
[Clear
Passwords]
Deletes the passwords saved by the browser.
[Reset to
Default]
Restores the default settings, and deletes all browser data.
[Legal
Information]
Displays the terms and conditions of use of the browser.
To return to the Web page you were browsing, press the
(Back) button.
Go to page top
Copyright 2013 Sony Corporation
Find
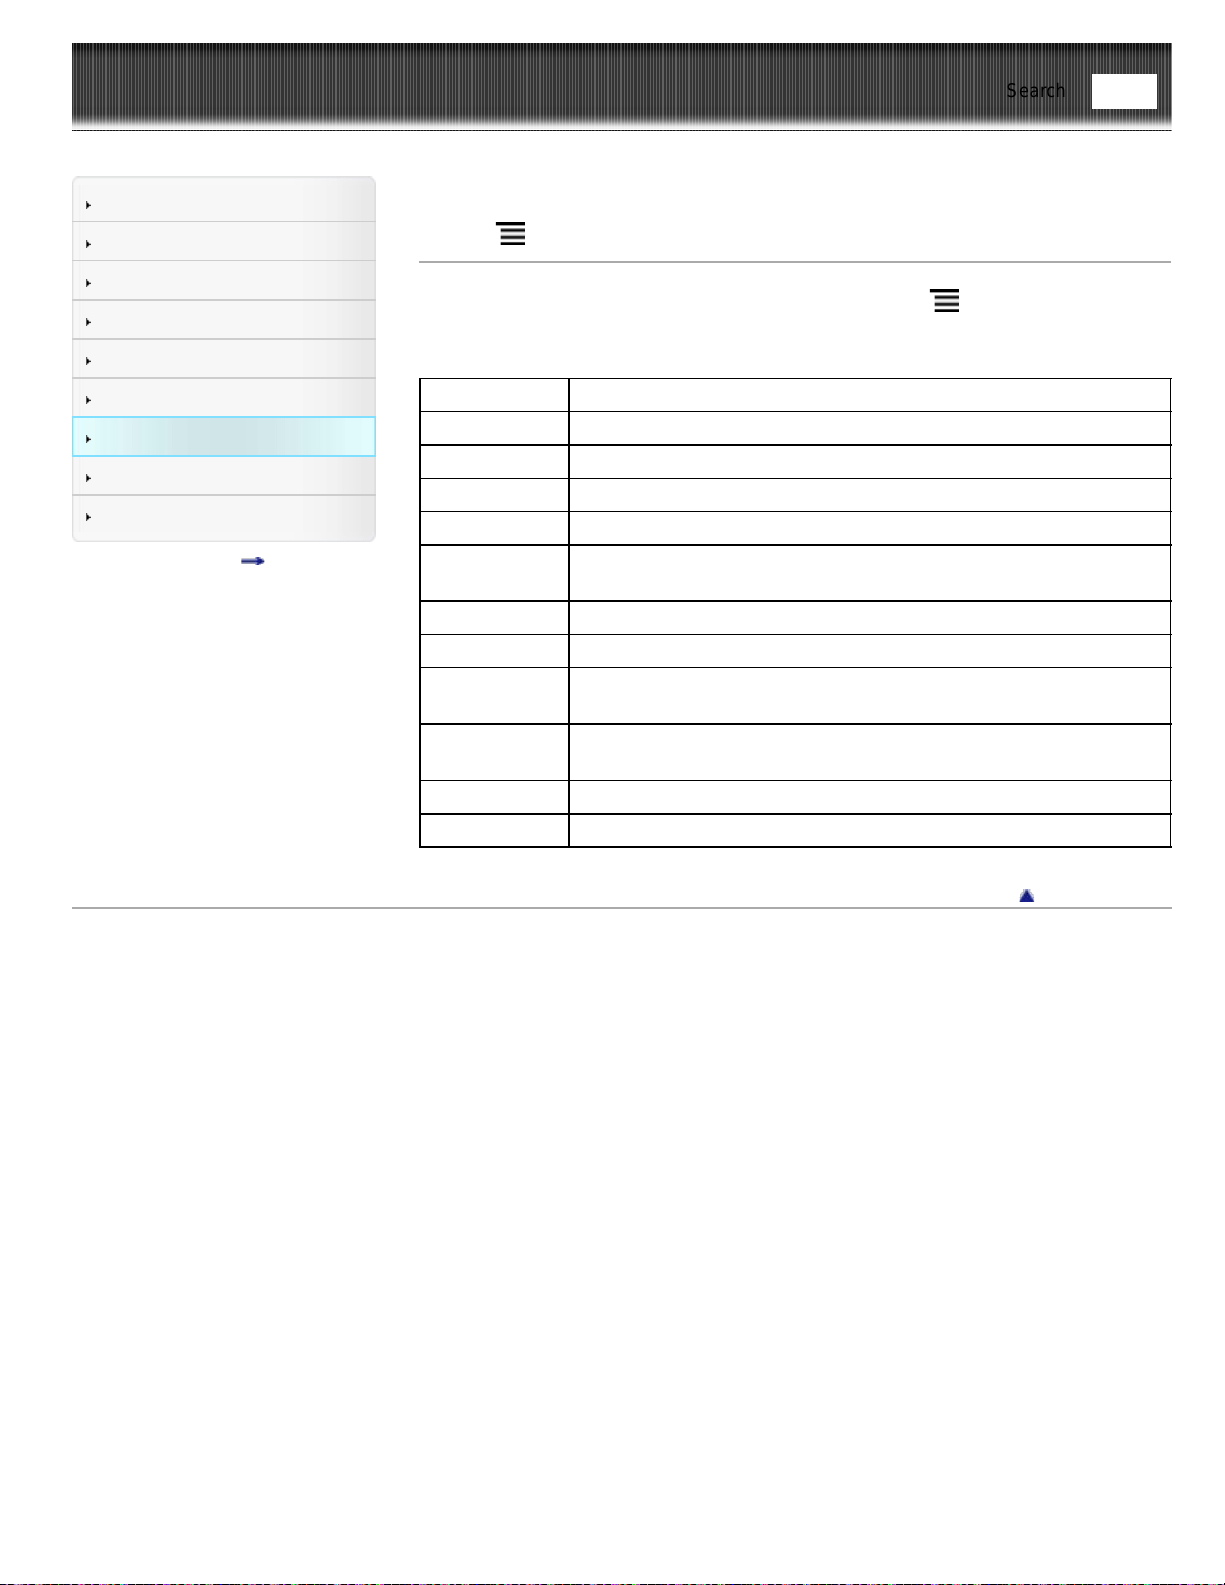
Reader™ User Guide
Print
Search
Getting started
Basic Operations
Adding/Getting Content
Browsing Content Lists
Reading
Organizing
Other Applications
Settings
Other Information
Contents list
Top page > Other Applications > Web Browsing > Using (Menu) Items
Using (Menu) Items
Below is a list of option items available when you press the (Menu) button from a
browser window.
Option Description
[Browse Home] Displays the home page. See Details.
[Refresh] Updates the content displayed on the Web page.
[Forward] Advances to a previously viewed page.
[Orientation] Changes to portrait or landscape mode.
[Continue
Reading]
Closes the [Browser] application and returns to the last read page of
your last read book.
[More] Displays more option items.
[Windows] Opens the window list. See Details.
[Upload to
Evernote]
Uploads the addresses of your favourite websites.
[Capture
Screenshot]
Captures a screenshot of the current Web page. See Details.
[Downloads] Opens the download history. See Details.
[Settings] Changes browser settings. See Details.
Go to page top
Copyright 2013 Sony Corporation
Find
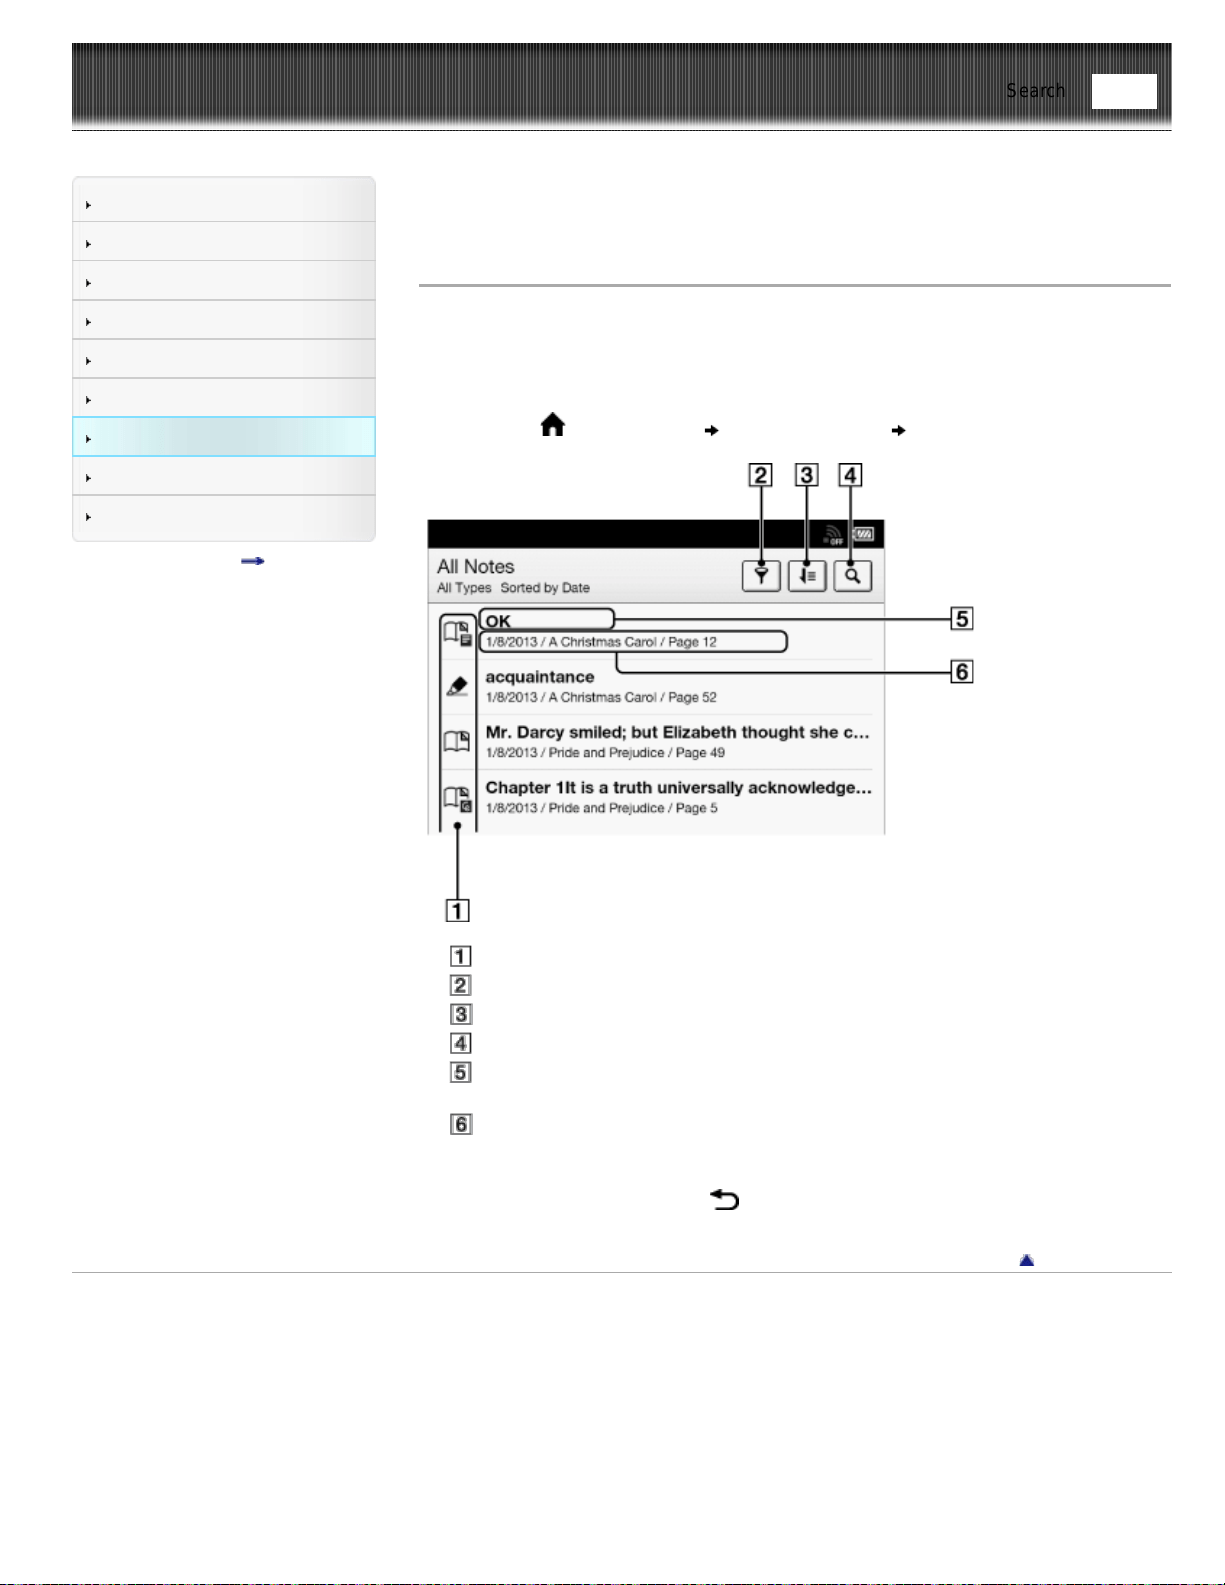
Reader™ User Guide
Print
Search
Getting started
Basic Operations
Adding/Getting Content
Browsing Content Lists
Reading
Organizing
Other Applications
Settings
Other Information
Contents list
Top page > Other Applications > All Notes > Finding Annotations Across All Books and
Periodicals
Finding Annotations Across All Books and Periodicals
You can use [All Notes] to find annotations across all books and periodicals. The
application stores all annotations including bookmarks, highlights and drawings that you
have added on pages. Tap an item in the list to jump to the page on which that
annotation is located.
1. Press the
(Home) button tap [Applications] [All Notes].
Note icons Details
Filter note type Details
Sort icon; sort by date, title or file name
Search icon Details
Headline (the highlighted text, the text note, the beginning text of the bookmarked
page, or the beginning text of the page with the handwritten note)
Annotation creation date, book/periodical title, page number
2. Tap a note in the list.
The page containing the selected note is displayed.
To return to [All Notes], press the
(Back) button.
To delete annotations, see Details.
Go to page top
Copyright 2013 Sony Corporation
Find
Reader™ User Guide
Print
Search
Getting started
Basic Operations
Adding/Getting Content
Browsing Content Lists
Reading
Organizing
Other Applications
Settings
Other Information
Contents list
Top page > Other Applications > All Notes > Uploading Annotations Across All Books
and Periodicals to Evernote
Uploading Annotations Across All Books and Periodicals to
Evernote
1. Press the (Home) button tap [Applications] [All Notes] tap and hold
the note that you wish to upload in the list.
2. Tap [Upload to Evernote].
The note is uploaded to Evernote.
Note
Before uploading to Evernote, you need to log in. Press the
(Home) button
tap [Applications] [Evernote Setup].
Go to page top
Copyright 2013 Sony Corporation
Find

Reader™ User Guide
Print
Search
Getting started
Basic Operations
Adding/Getting Content
Browsing Content Lists
Reading
Organizing
Other Applications
Settings
Other Information
Contents list
Top page > Other Applications > All Notes > Posting Annotations Across All Books and
Periodicals to Facebook
Posting Annotations Across All Books and Periodicals to
Facebook
1. Press the (Home) button tap [Applications] [All Notes] tap and hold
the note that you wish to post.
2. Tap [Post to Facebook].
The note is posted to Facebook.
Note
Before posting to Facebook, you need to log in. Press the
(Home) button
tap [Applications] [Facebook Setup].
Go to page top
Copyright 2013 Sony Corporation
Find
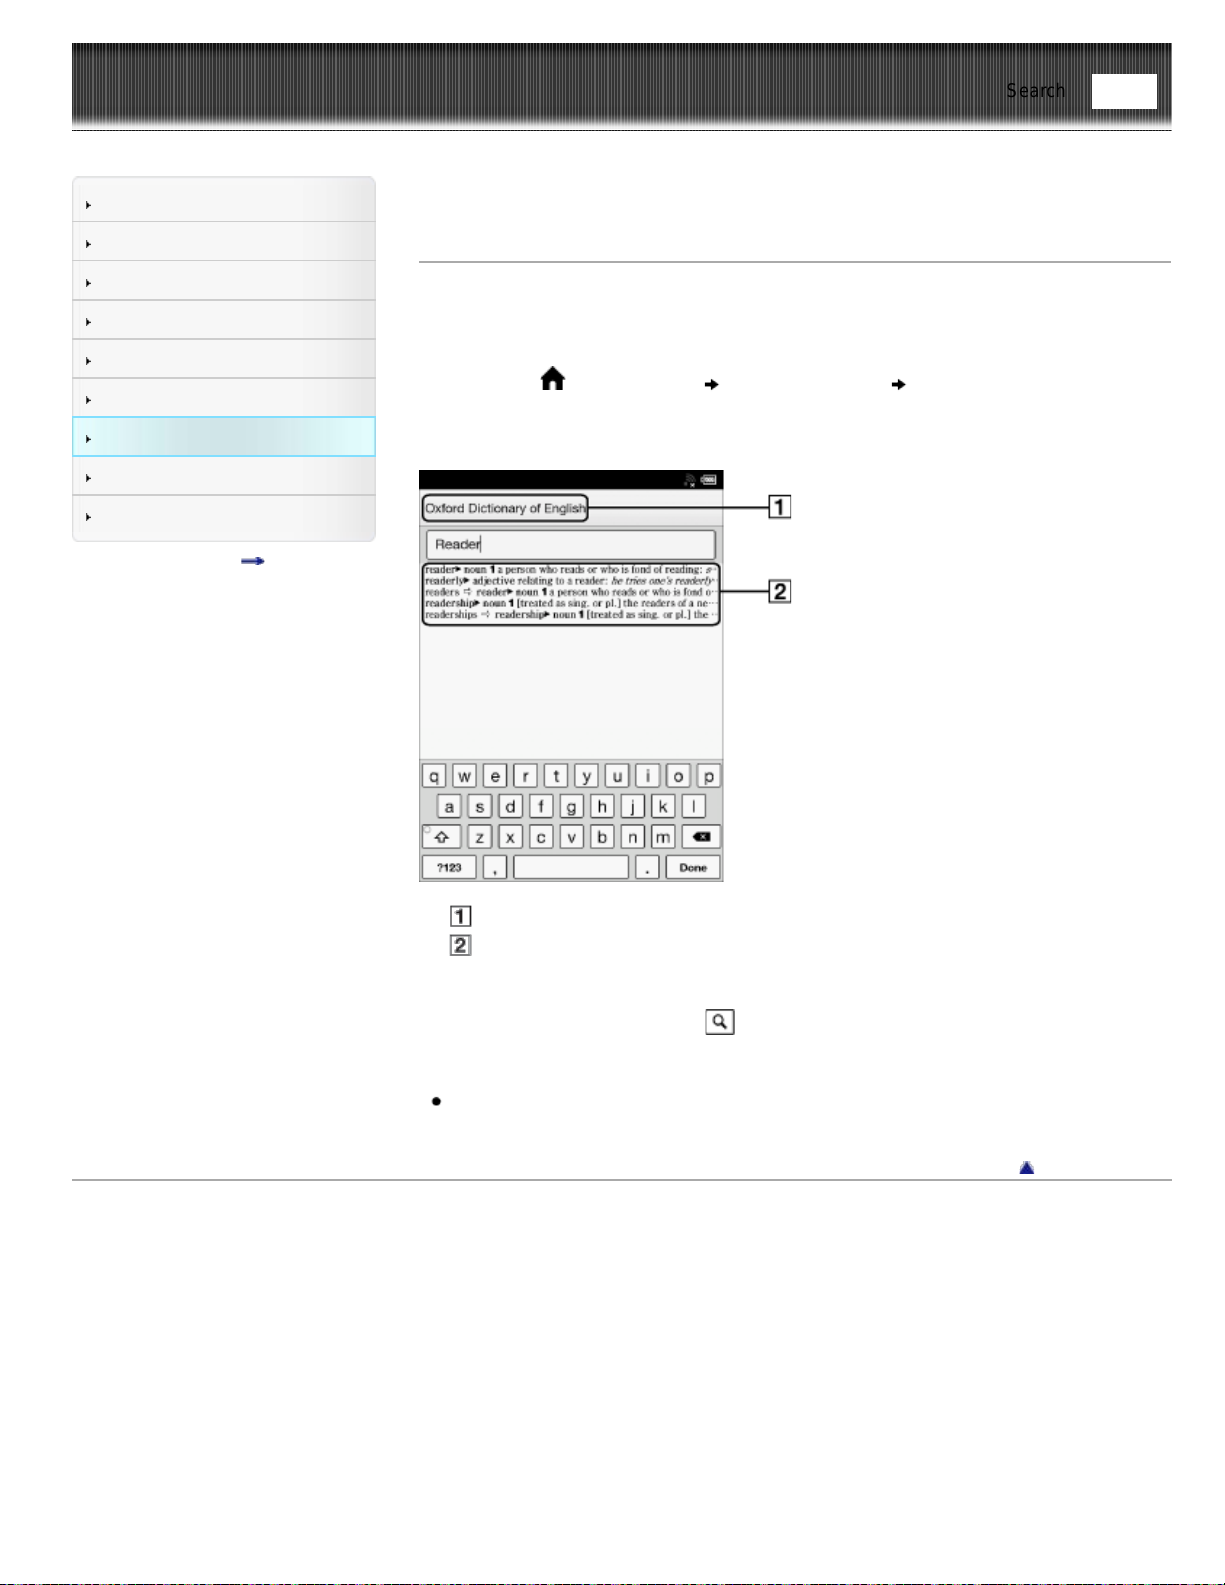
Reader™ User Guide
Print
Search
Getting started
Basic Operations
Adding/Getting Content
Browsing Content Lists
Reading
Organizing
Other Applications
Settings
Other Information
Contents list
Top page > Other Applications > Dictionary > Using the Dictionary
Using the Dictionary
You can choose one of several embedded dictionaries to use.
Only the dictionaries included on the Reader can be used. New dictionaries cannot be
installed or added.
1. Press the
(Home) button tap [Applications] [Dictionary].
2. Type a word that you wish to look up by using the on-screen keyboard.
The list of candidate words is displayed.
Title of the current dictionary
List of candidate words
3. Tap one of the candidate words.
The definition is displayed in the dictionary viewer.
To look up another word, tap
(Search) in the dictionary viewer.
Tip
In the dictionary viewer, tap and hold another word to look that word up in the
dictionary.
Go to page top
Copyright 2013 Sony Corporation
Find

Reader™ User Guide
Print
Search
Getting started
Basic Operations
Adding/Getting Content
Browsing Content Lists
Reading
Organizing
Other Applications
Settings
Other Information
Contents list
Top page > Other Applications > Dictionary > Changing the Dictionary
Changing the Dictionary
You can choose a different dictionary.
The dictionary can also be changed as you look up a word.
1. Press the
(Menu) button tap [Change Dictionary].
2. Tap one of the dictionaries.
3. The dictionary is changed, and the list of candidate words or the dictionary viewer
for the dictionary to which you changed is displayed.
When you change the dictionary in the [Dictionary] application, the dictionary used
when you look up a word in the [Books] and [Periodicals]* applications also
changes.
* Available in certain countries/regions only.
Go to page top
Copyright 2013 Sony Corporation
Find
Reader™ User Guide
Print
Search
Getting started
Basic Operations
Adding/Getting Content
Browsing Content Lists
Reading
Organizing
Other Applications
Settings
Other Information
Contents list
Top page > Other Applications > Dictionary > Listing Previously Looked-up Words
Listing Previously Looked-up Words
You can view a list of words that you have previously looked up in the selected
dictionary.
1. When a dictionary is open, press the
(Menu) button tap [Word Logs:
Dictionary].
A list of words that you have previously looked up opens.
2. Tap a word to look it up in the dictionary.
Deleting items in the look-up history
You can delete words that you have previously looked up.
1. Press the
(Menu) button tap [Delete Word Logs].
2. Tap the items that you want to delete.
A check appears next to selected items.
3. Tap [Done]
[Yes].
To return to the dictionary viewer, press the
(Back) button.
Go to page top
Copyright 2013 Sony Corporation
Find
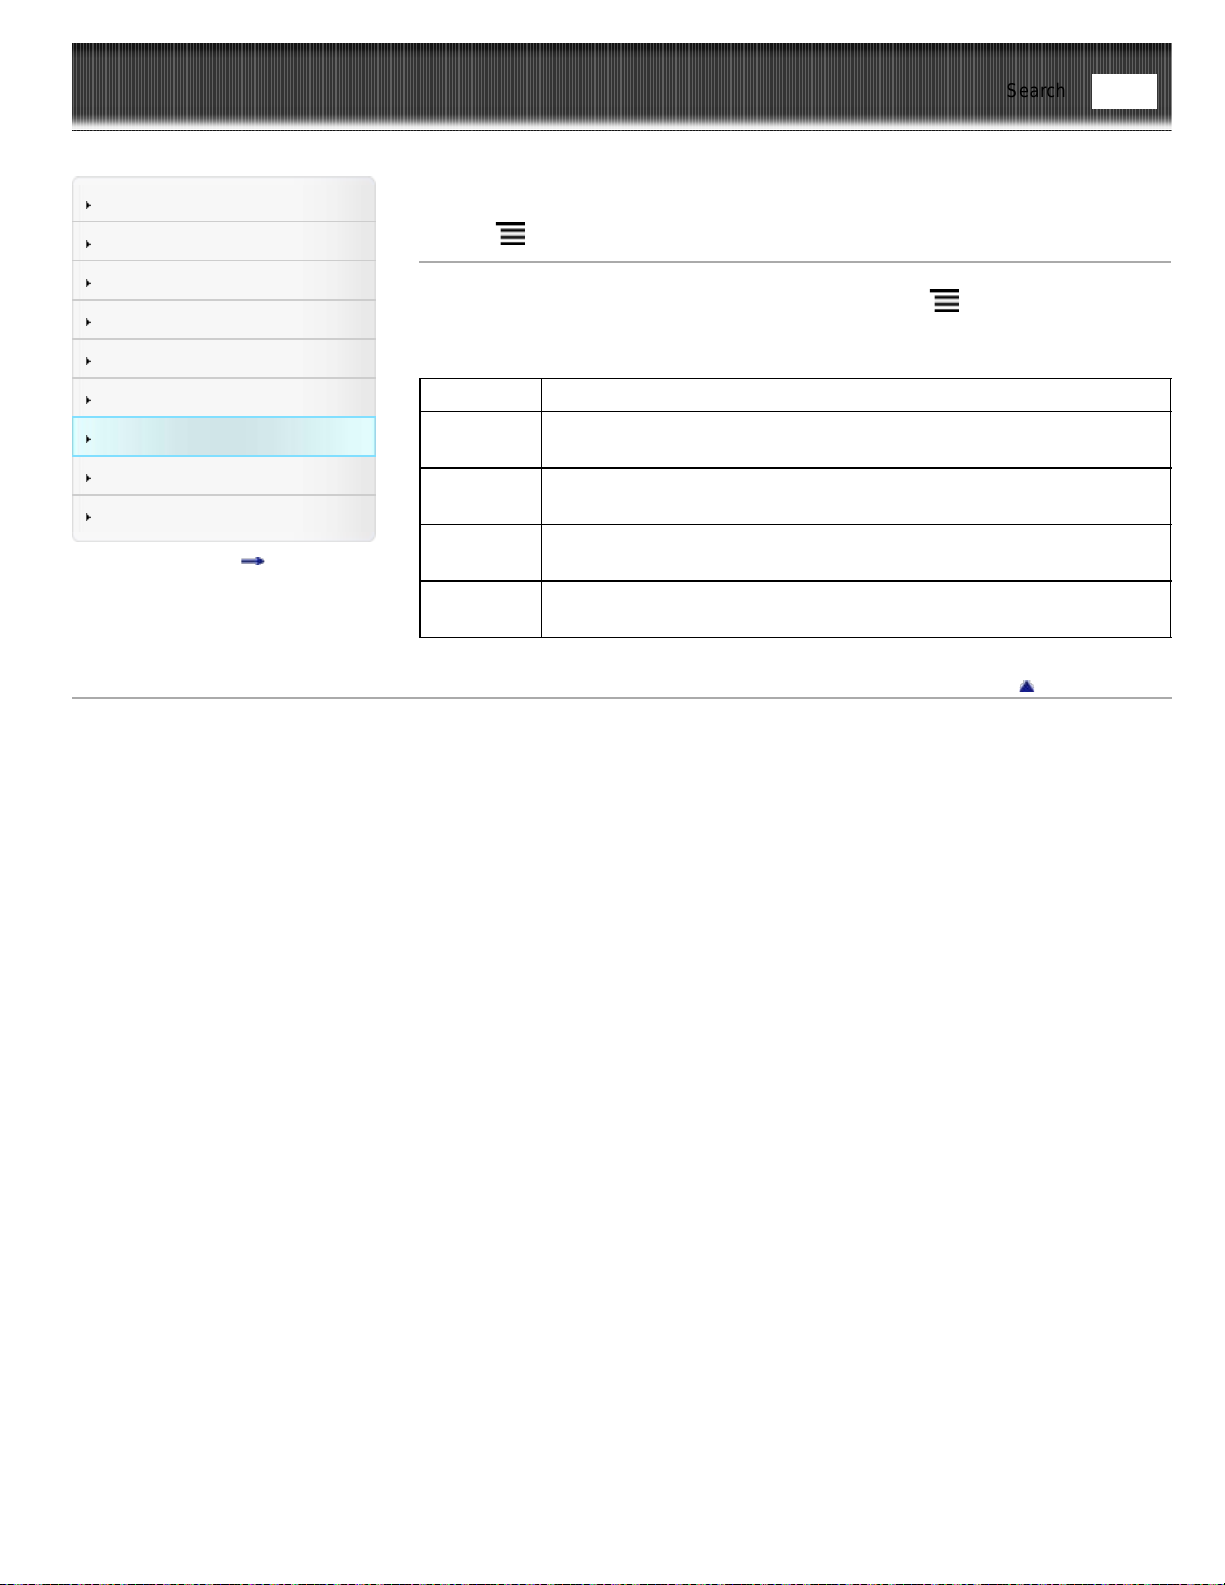
Reader™ User Guide
Print
Search
Getting started
Basic Operations
Adding/Getting Content
Browsing Content Lists
Reading
Organizing
Other Applications
Settings
Other Information
Contents list
Top page > Other Applications > Dictionary > Using (Menu) Items
Using (Menu) Items
Below is a list of option items available when you press the (Menu) button from the
dictionary viewer.
Option Description
[Previous
View]
Opens a previously looked-up word in the dictionary viewer after you
have looked up another word from the dictionary viewer.
[Change
Dictionary]
Changes to another dictionary and searches again.
[Font]
Changes the font size of the candidate words list and the definition
viewer.
[Word Logs:
Dictionary]
Displays a list of previously looked-up words. See Details.
Go to page top
Copyright 2013 Sony Corporation
Find
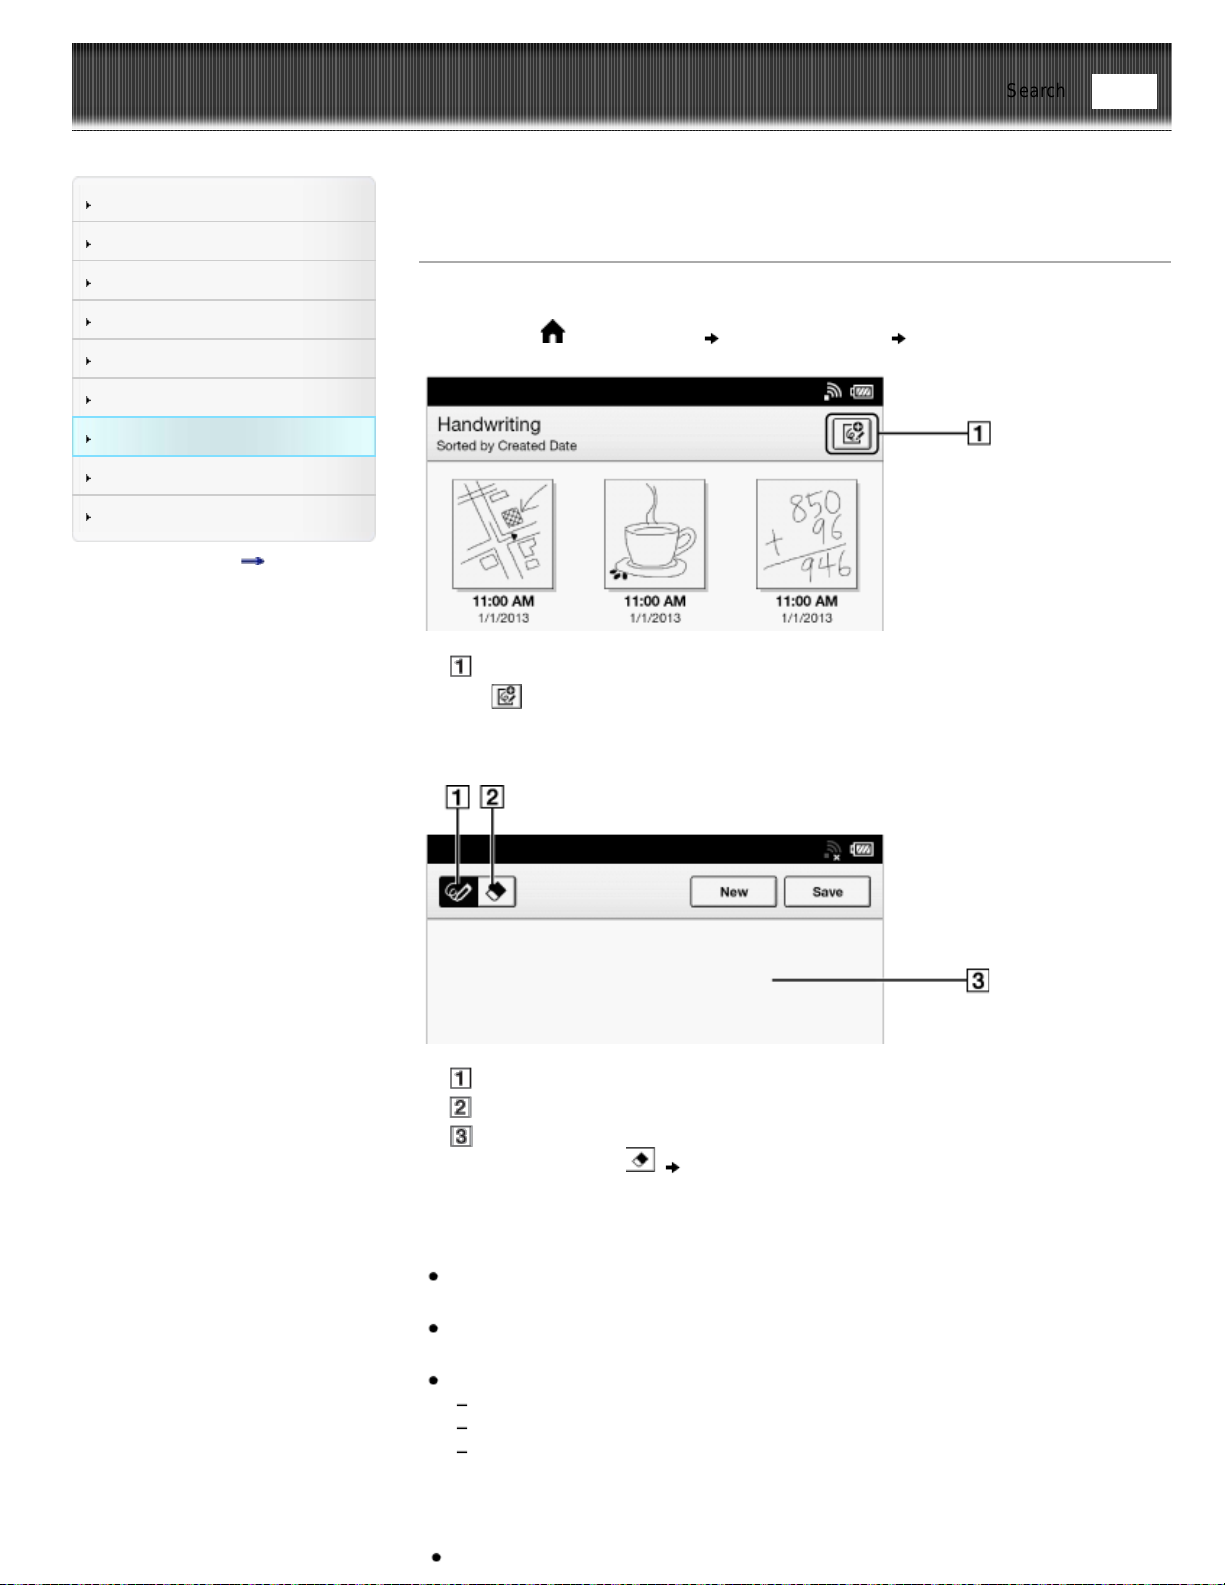
Reader™ User Guide
Print
Search
Getting started
Basic Operations
Adding/Getting Content
Browsing Content Lists
Reading
Organizing
Other Applications
Settings
Other Information
Contents list
Top page > Other Applications > Handwriting > Creating a Drawing
Creating a Drawing
You can use the [Handwriting] application to create a drawing.
1. Press the
(Home) button tap [Applications] [Handwriting].
Create a new drawing.
2. Tap at the upper-right corner of the screen.
The canvas opens.
3. Draw in the drawing area with your finger.
Pencil tool
Eraser tool
Drawing area
To erase a line, tap
tap or stroke a part of the line.
4. Tap [Save].
Note
While writing, make sure that you are not touching another area on the screen. This
could affect the notes that you write.
To ensure that your notes are correctly saved, do not draw too close to the edge of
the canvas.
If you experience difficulties when drawing on the Reader:
avoid applying excessive pressure to the screen.
try not to draw too quickly.
this functionality is not designed for very detailed drawings or for writing small
characters.
Tip
Find

Reader™ User Guide
Print
Search
Getting started
Basic Operations
Adding/Getting Content
Browsing Content Lists
Reading
Organizing
Other Applications
Settings
Other Information
Contents list
Top page > Other Applications > Handwriting > Editing an Existing Drawing
Editing an Existing Drawing
1. Press the (Home) button tap [Applications] [Handwriting] tap the
drawing that you wish to edit.
2. Edit the drawing.
You can use your finger.
To erase a line, tap
(Erase) tap or stroke a part of the line.
3. Tap [Save].
Tip
If you tap [New] while creating a drawing, the current drawing is saved, and a new
canvas opens.
These drawings will be saved only in the internal memory.
To delete the currently viewed drawing, press the
(Menu) button tap
[Delete Drawing]
[Yes].
Go to page top
Copyright 2013 Sony Corporation
Find

Reader™ User Guide
Print
Search
Getting started
Basic Operations
Adding/Getting Content
Browsing Content Lists
Reading
Organizing
Other Applications
Settings
Other Information
Contents list
Top page > Other Applications > Handwriting > Deleting/Protecting a Drawing
Deleting/Protecting a Drawing
You can delete or protect drawings.
1. Press the
(Home) button tap [Applications] [Handwriting].
2. Press the
(Menu) button tap [Delete Drawings] or [Protect Drawings].
To delete drawings, see Details.
You can also delete a drawing after step 1 by tapping and holding it. See Details.
To protect drawings, see Details.
You can also protect a drawing after step 1 by tapping and holding it. See Details.
Go to page top
Copyright 2013 Sony Corporation
Find

Reader™ User Guide
Print
Search
Getting started
Basic Operations
Adding/Getting Content
Browsing Content Lists
Reading
Organizing
Other Applications
Settings
Other Information
Contents list
Top page > Other Applications > Handwriting > Capturing a Screenshot
Capturing a Screenshot
The Reader allows you to capture a screenshot of a drawing and store the image as a
picture file.
1. Press the
(Home) button tap [Applications] [Handwriting] tap a
drawing.
2. Press the
(Menu) button tap [Capture Screenshot] [OK].
You can view your captured screenshots by the [Pictures] application.
Go to page top
Copyright 2013 Sony Corporation
Find

Reader™ User Guide
Print
Search
Getting started
Basic Operations
Adding/Getting Content
Browsing Content Lists
Reading
Organizing
Other Applications
Settings
Other Information
Contents list
Top page > Other Applications > Handwriting > Using (Menu) Items
Using (Menu) Items
Below is a list of option items available when you press the (Menu) button from the
[Handwriting] content list.
Option Description
[Delete Drawings] Deletes one or more drawings from the Reader. See Details.
[Protect Drawings] Protects one or more drawings from deletion. See Details.
Go to page top
Copyright 2013 Sony Corporation
Find
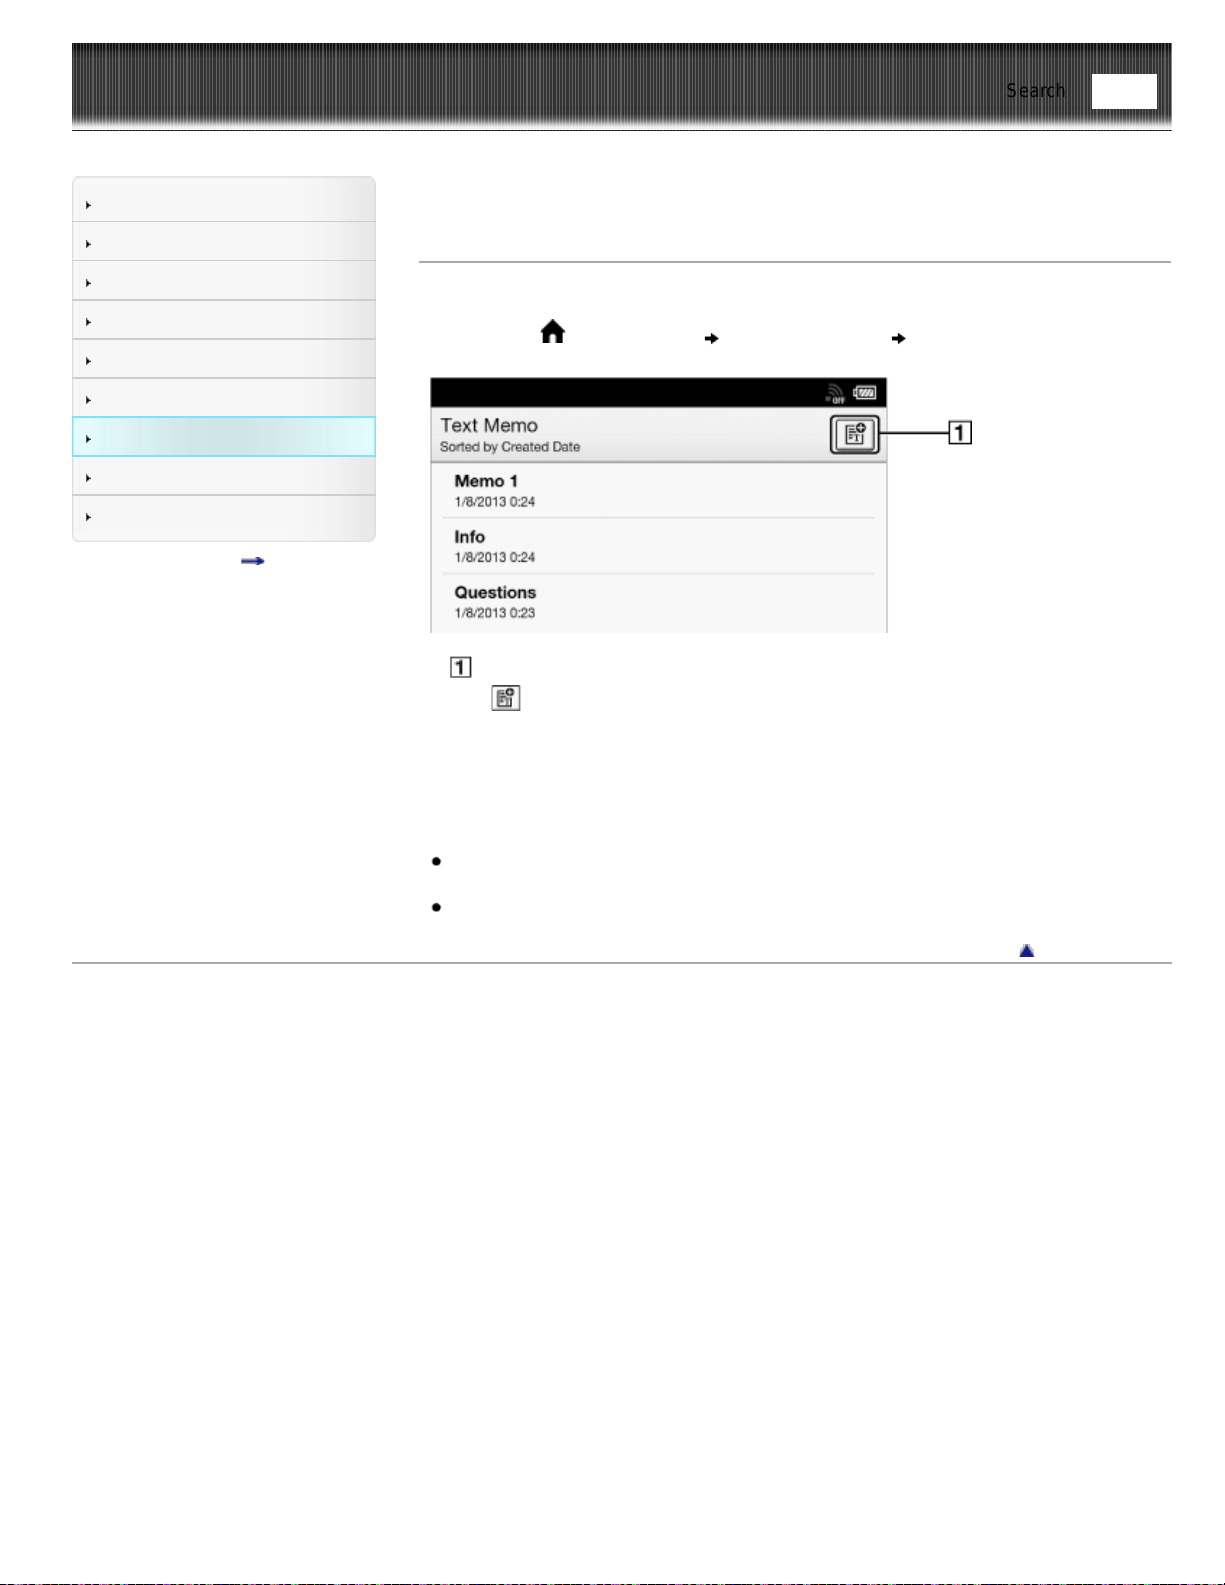
Reader™ User Guide
Print
Search
Getting started
Basic Operations
Adding/Getting Content
Browsing Content Lists
Reading
Organizing
Other Applications
Settings
Other Information
Contents list
Top page > Other Applications > Text Memo > Creating a Text Memo
Creating a Text Memo
You can use the [Text Memo] application to create a memo.
1. Press the
(Home) button tap [Applications] [Text Memo].
Create a new memo.
2. Tap at the upper-right corner of the screen.
A notepad opens.
3. Type a memo using the on-screen keyboard.
4. Tap [Save].
Tip
If you tap [New] while creating a memo, the current memo is saved, and a new
notepad opens.
Newly created memos will be saved only in the internal memory.
Go to page top
Copyright 2013 Sony Corporation
Find

Reader™ User Guide
Print
Search
Getting started
Basic Operations
Adding/Getting Content
Browsing Content Lists
Reading
Organizing
Other Applications
Settings
Other Information
Contents list
Top page > Other Applications > Text Memo > Editing an Existing Memo
Editing an Existing Memo
1. Press the (Home) button tap [Applications] [Text Memo] tap the
memo that you wish to edit.
2. Tap [Edit].
The on-screen keyboard opens.
Edit the memo using the on-screen keyboard.
3. Tap [Save].
Tip
If you tap [New] while creating a memo, the current memo is saved, and a new
notepad opens.
Newly created memos will be saved only in the internal memory.
To delete the currently viewed memo, press the
(Menu) button tap [Delete
Memo]
[Yes].
Go to page top
Copyright 2013 Sony Corporation
Find
Reader™ User Guide
Print
Search
Getting started
Basic Operations
Adding/Getting Content
Browsing Content Lists
Reading
Organizing
Other Applications
Settings
Other Information
Contents list
Top page > Other Applications > Text Memo > Using (Menu) Items
Using (Menu) Items
Below is a list of option items available when you press the (Menu) button from the
[Text Memo] content list.
Option Description
[Delete Memos] Deletes one or more text memos from the Reader. See Details.
[Protect Memos] Protects one or more text memos from deletion. See Details.
Go to page top
Copyright 2013 Sony Corporation
Find
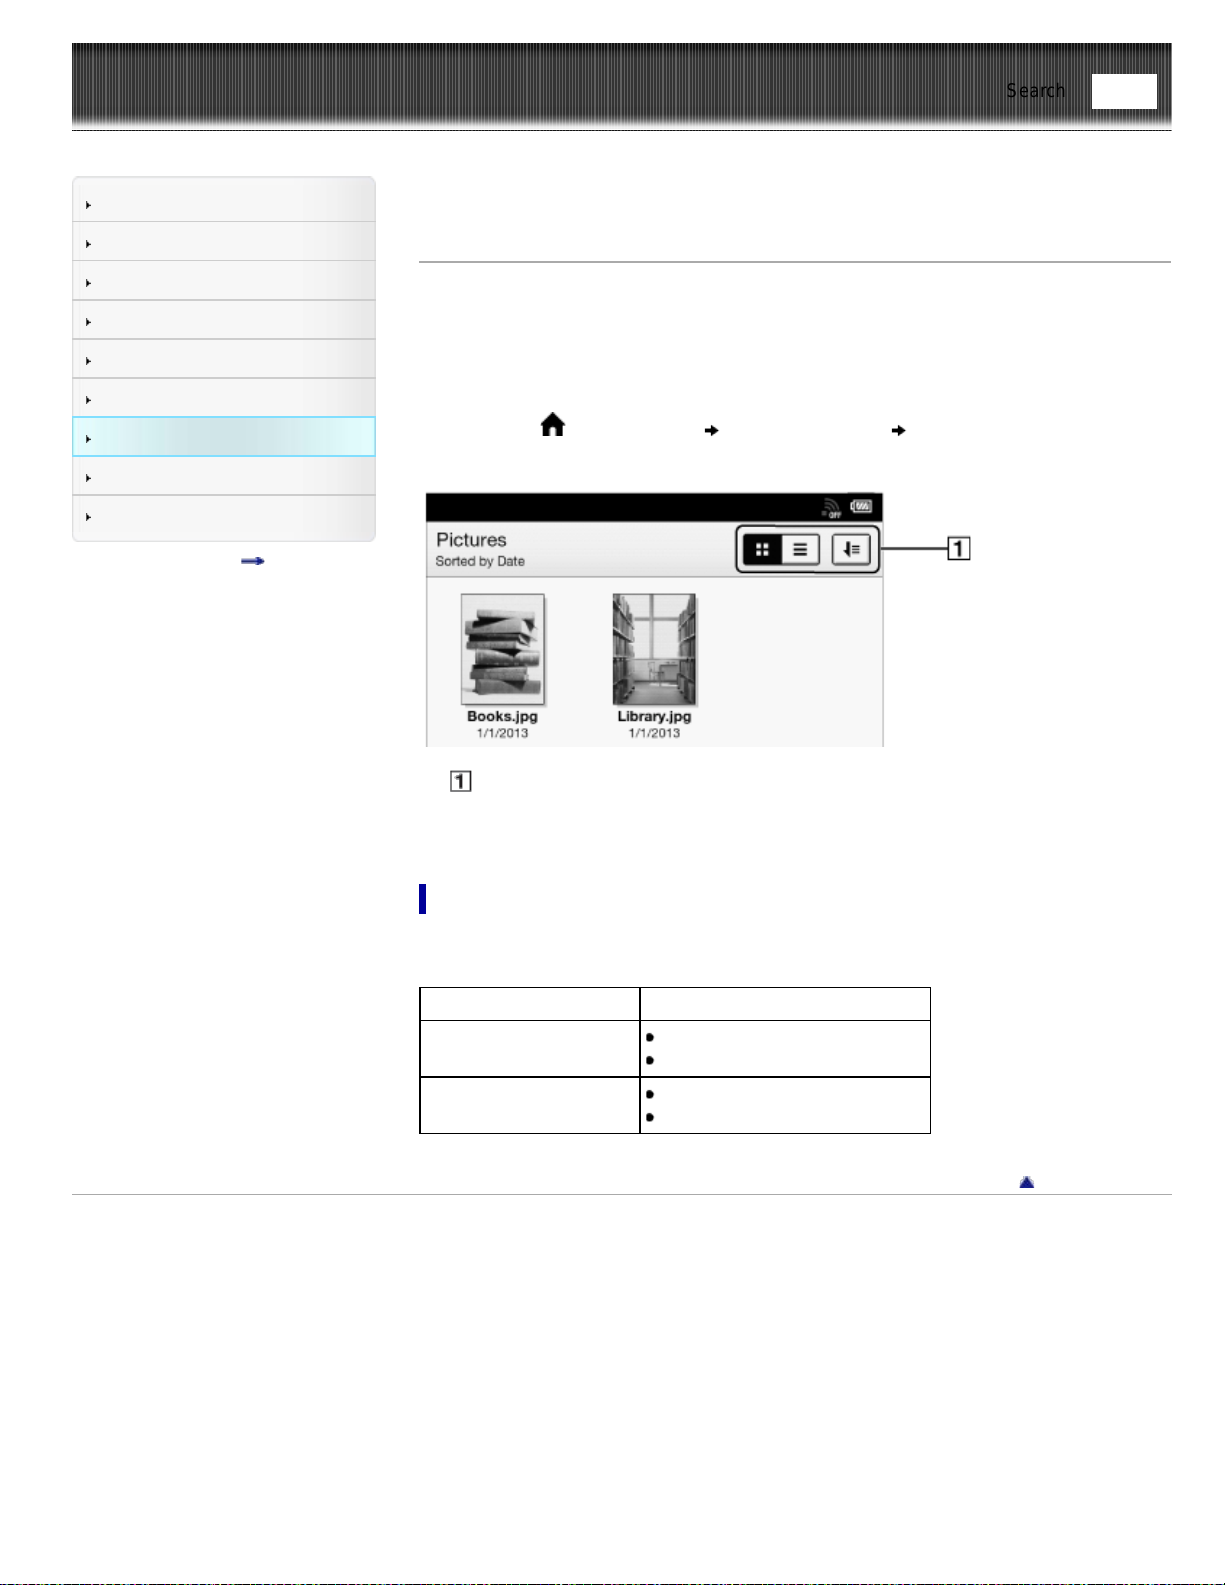
Reader™ User Guide
Print
Search
Getting started
Basic Operations
Adding/Getting Content
Browsing Content Lists
Reading
Organizing
Other Applications
Settings
Other Information
Contents list
Top page > Other Applications > Pictures > Viewing Pictures
Viewing Pictures
You can use the [Pictures] application to view pictures one by one or as a slideshow.
You can also select the picture of your choice for the Reader’s standby screen.
For details on setting pictures to the standby screen, see Details.
For details on transferring pictures to the Reader, see Details.
For details on supported file types, see Details.
1. Press the
(Home) button tap [Applications] [Pictures].
To browse the pictures list, see Details.
Tool icons Details
2. Tap a picture.
The picture viewer opens.
Picture viewer navigation
Perform the following operations with a picture open.
To Do this
Go to the next page
Press the > (Next) button.
Swipe left.
Go to the previous page
Press the < (Previous) button.
Swipe right.
Go to page top
Copyright 2013 Sony Corporation
Find
Reader™ User Guide
Print
Search
Getting started
Basic Operations
Adding/Getting Content
Browsing Content Lists
Reading
Organizing
Other Applications
Settings
Other Information
Contents list
Top page > Other Applications > Pictures > Changing the Orientation
Changing the Orientation
You can adjust the view to either portrait or landscape.
1. Press the
(Home) button tap [Applications] [Pictures].
2. Tap a picture
press the (Menu) button tap [Orientation].
The orientation switches between landscape and portrait mode.
Pictures are shown in the orientation that you have specified.
Go to page top
Copyright 2013 Sony Corporation
Find
Reader™ User Guide
Print
Search
Getting started
Basic Operations
Adding/Getting Content
Browsing Content Lists
Reading
Organizing
Other Applications
Settings
Other Information
Contents list
Top page > Other Applications > Pictures > Viewing Pictures in a Slideshow
Viewing Pictures in a Slideshow
The slideshow displays pictures one by one in the current sort order. You can also
specify the display interval.
1. Press the
(Home) button tap [Applications] [Pictures].
2. Tap a picture
press the (Menu) button tap [Slideshow].
The slideshow starts from the current picture.
To stop the slideshow and return to the viewer
Press the (Back) button.
Tap on the picture.
To change the slideshow interval
1. Press the (Home) button tap [Applications] [Pictures].
2. Tap a picture
press the (Menu) button tap [Settings] [Slide
Duration]. Choose from one of the following displayed items.
3. Press the
(Back) button to return to the picture viewer.
The selected interval is now applied when you start a slideshow.
Tip
You can also change the slideshow interval from the [Settings] application. See
Details.
Go to page top
Copyright 2013 Sony Corporation
Find

Reader™ User Guide
Print
Search
Getting started
Basic Operations
Adding/Getting Content
Browsing Content Lists
Reading
Organizing
Other Applications
Settings
Other Information
Contents list
Top page > Other Applications > Pictures > Uploading a Picture to Evernote
Uploading a Picture to Evernote
1. Press the (Home) button tap [Applications] [Pictures].
2. Tap and hold a picture.
The pop-up menu appears.
3. Tap [Upload to Evernote].
The picture is uploaded to Evernote.
Note
Before uploading to Evernote, you need to log in by [Home]
[Applications]
[Evernote Setup].
Tip
You can also upload the selected picture by pressing the
(Menu) button tap
[Upload to Evernote].
Go to page top
Copyright 2013 Sony Corporation
Find

Reader™ User Guide
Print
Search
Getting started
Basic Operations
Adding/Getting Content
Browsing Content Lists
Reading
Organizing
Other Applications
Settings
Other Information
Contents list
Top page > Other Applications > Pictures > Deleting Pictures
Deleting Pictures
You can delete one or more pictures.
1. Press the
(Home) button tap [Applications] [Pictures].
2. Press the
(Menu) button tap [Delete Pictures].
To delete pictures, see Details.
You can also delete a picture by tapping and holding it. See Details.
Go to page top
Copyright 2013 Sony Corporation
Find

Reader™ User Guide
Print
Search
Getting started
Basic Operations
Adding/Getting Content
Browsing Content Lists
Reading
Organizing
Other Applications
Settings
Other Information
Contents list
Top page > Other Applications > Pictures > Using (Menu) Items
Using (Menu) Items
Below is a list of option items available when you press the (Menu) button from the
[Pictures] content list.
Option Description
[Delete Pictures] Deletes one or more pictures from the Reader. See Details.
[Settings] Changes the slideshow interval. See Details.
Go to page top
Copyright 2013 Sony Corporation
Find

Reader™ User Guide
Print
Search
Getting started
Basic Operations
Adding/Getting Content
Browsing Content Lists
Reading
Organizing
Other Applications
Settings
Other Information
Contents list
Top page > Other Applications > Evernote > Using Evernote
Using Evernote
You can download notes from a dedicated Evernote Notebook and view them in ePub
format on the Reader. You can also upload highlighted words, pictures and written notes
to Evernote.
To upload highlighted words on a page, see Details.
To upload a picture, see Details.
To upload annotations for all books and periodicals, see Details.
To upload an address of a website, see Details.
Note
You need to create an Evernote account in order to use Evernote. Refer to the
Evernote website. Evernote account creation is also possible with the Reader when
connected to a Wi-Fi network.
Notes created by Evernote Clearly™ and mainly text based notes are best viewed.
Some notes may not be displayed correctly due to ePub conversion.
Any binary file(s) attached to an Evernote note will be excluded after ePub
conversion.
An Evernote note of a picture size no larger than 1,200 × 1,600 pixels (width ×
height) will be displayed correctly.
Highlighted words may be uploaded up to 140 characters where a limitation is
applied.
Go to page top
Copyright 2013 Sony Corporation
Find
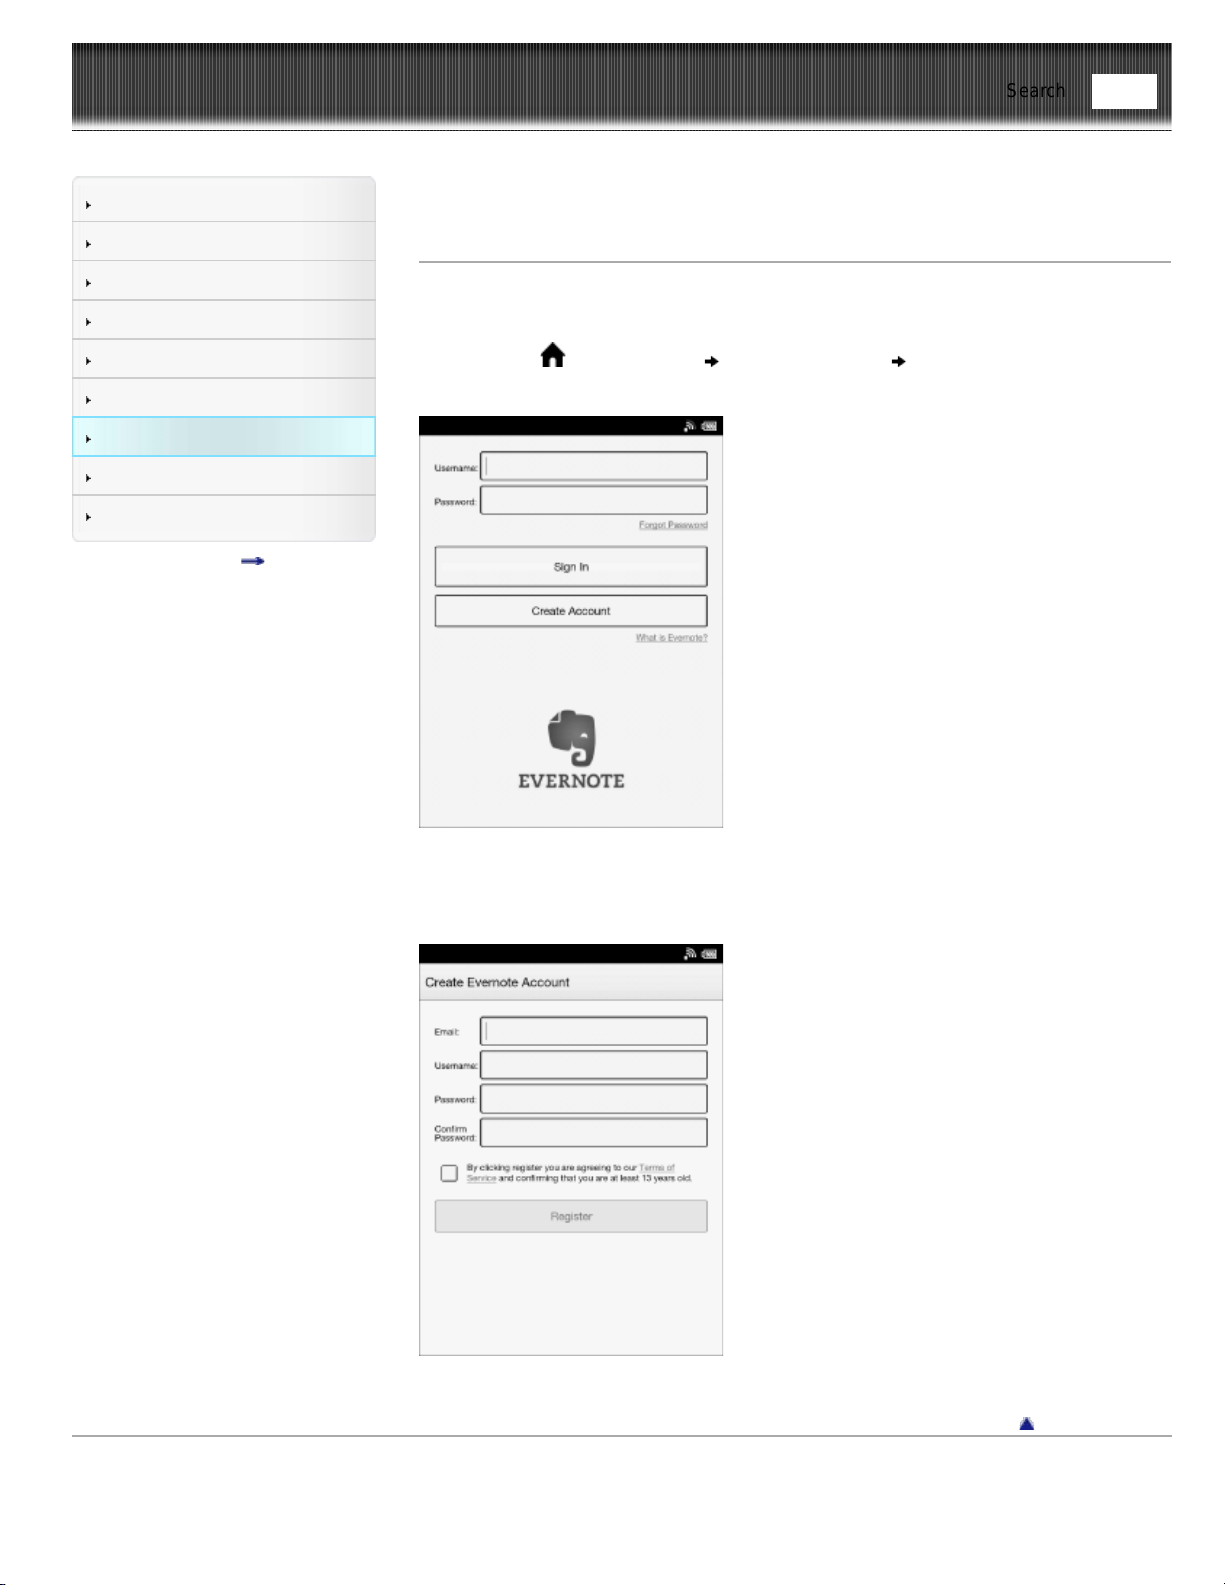
Reader™ User Guide
Print
Search
Getting started
Basic Operations
Adding/Getting Content
Browsing Content Lists
Reading
Organizing
Other Applications
Settings
Other Information
Contents list
Top page > Other Applications > Evernote > Creating a new account
Creating a new account
If you have not created an Evernote account yet, you will need to, in order to get
started.
1. Press the
(Home) button tap [Applications] [Evernote Setup].
An Evernote settings screen for signing in appears.
2. Tap [Create Account].
3. Tap the input area and type the email address, username and password using the
on-screen keyboard.
4. Tap [Register].
Go to page top
Copyright 2013 Sony Corporation
Find
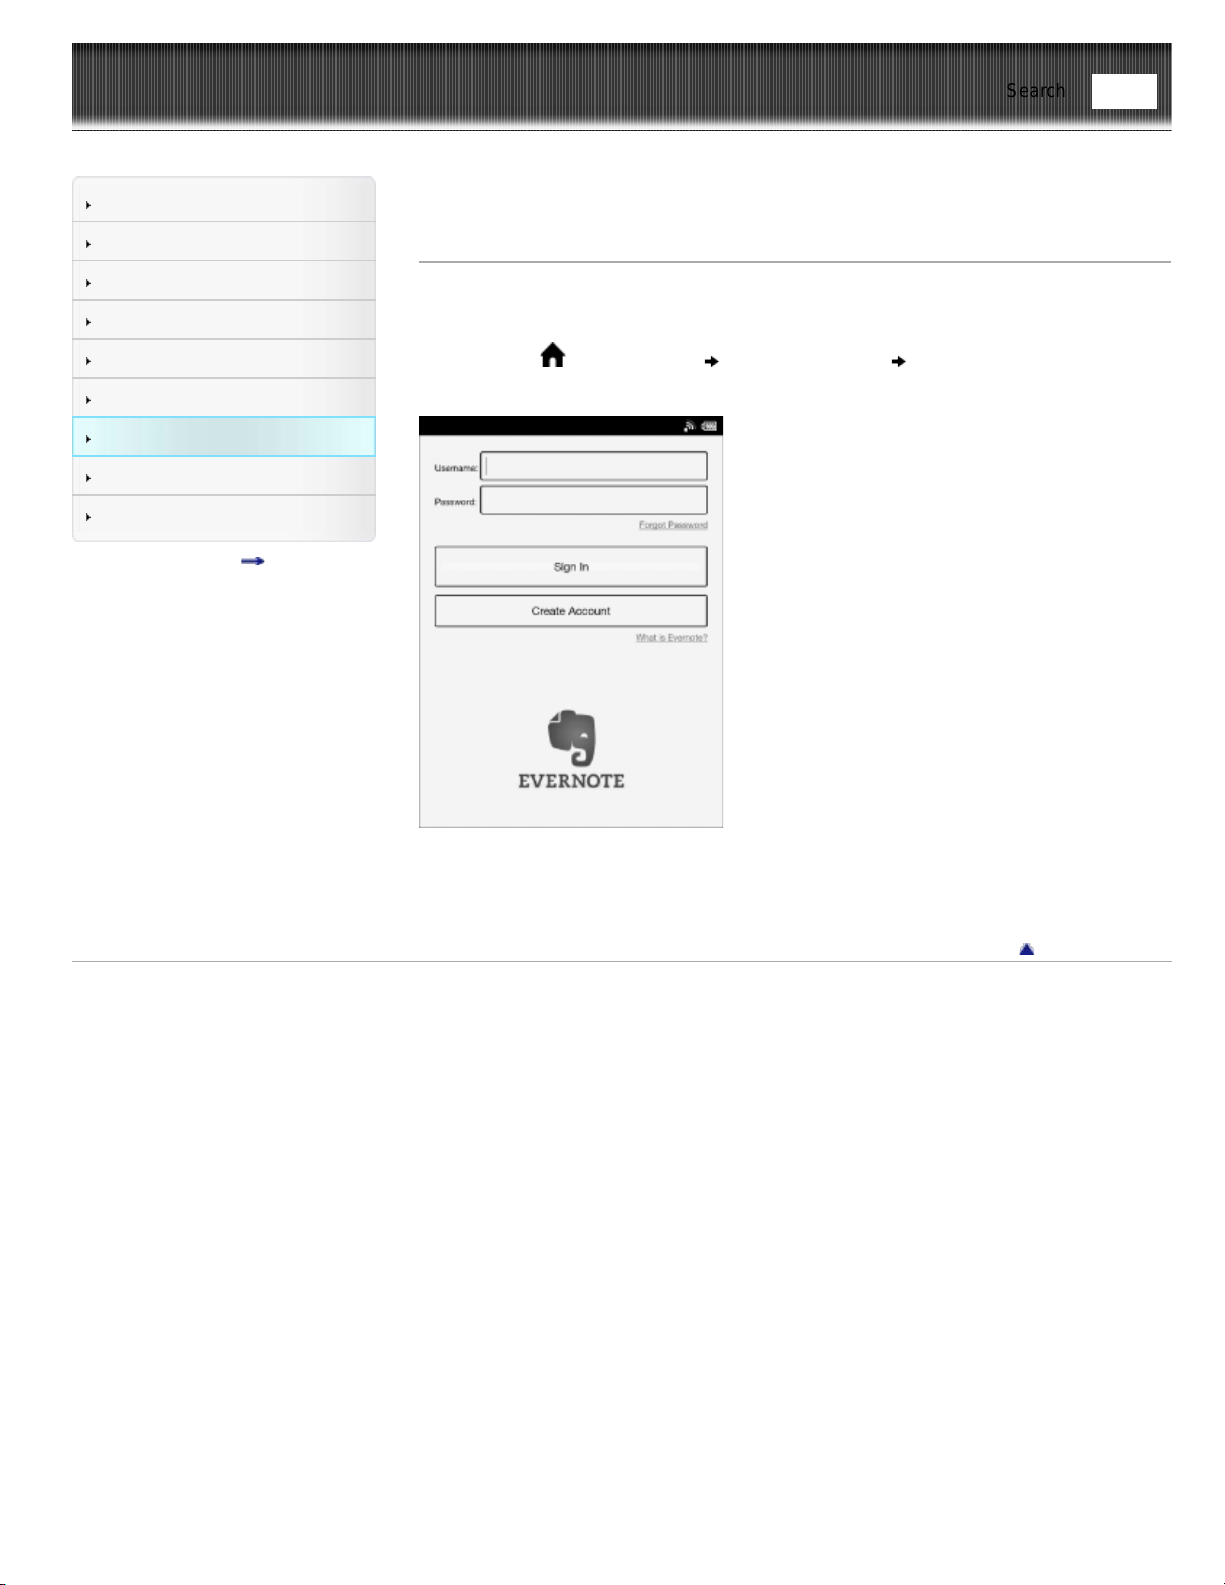
Reader™ User Guide
Print
Search
Getting started
Basic Operations
Adding/Getting Content
Browsing Content Lists
Reading
Organizing
Other Applications
Settings
Other Information
Contents list
Top page > Other Applications > Evernote > Sign in to Evernote
Sign in to Evernote
If you have an Evernote account, you can use it by typing your username and
password.
1. Press the
(Home) button tap [Applications] [Evernote Setup].
An Evernote settings screen for signing in appears.
2. Type your username and password using the on-screen keyboard.
3. Tap [Sign In].
An Evernote settings for configuration appears.
Go to page top
Copyright 2013 Sony Corporation
Find
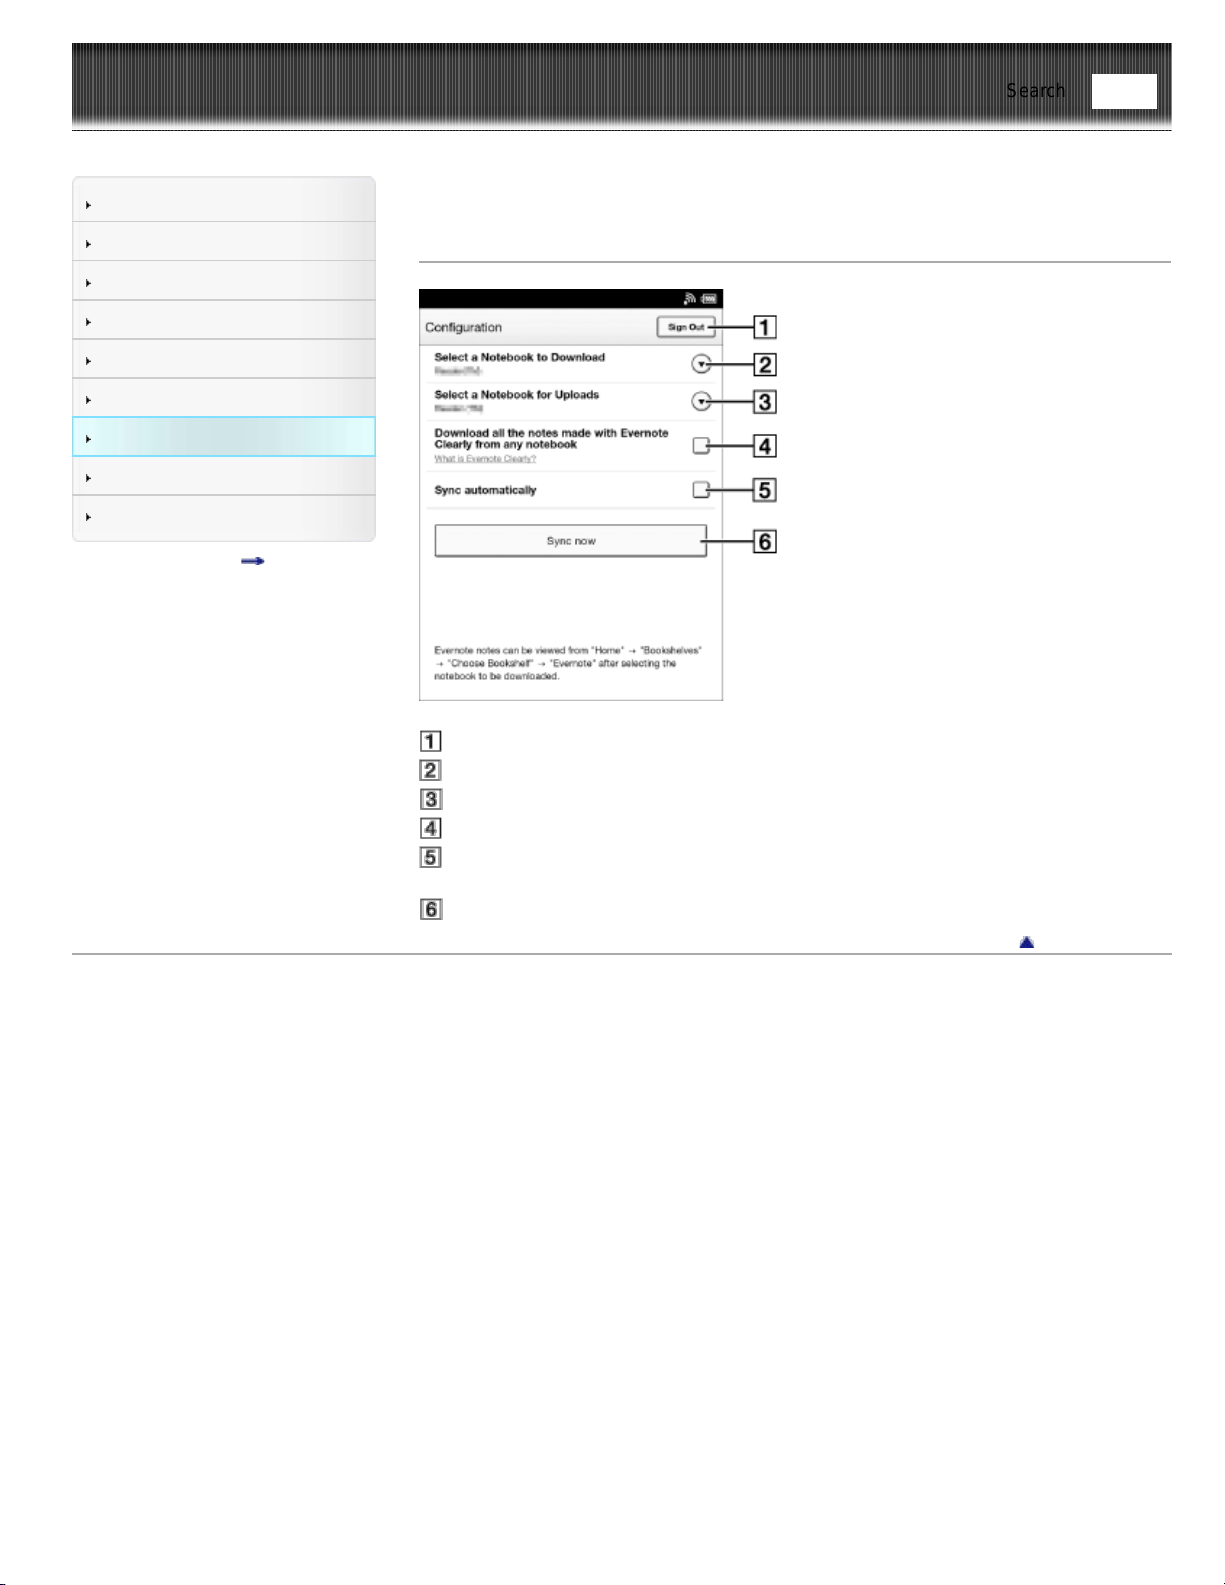
Reader™ User Guide
Print
Search
Getting started
Basic Operations
Adding/Getting Content
Browsing Content Lists
Reading
Organizing
Other Applications
Settings
Other Information
Contents list
Top page > Other Applications > Evernote > Evernote Settings
Evernote Settings
Sign out from Evernote.
Select the notebook to be downloaded from Evernote to the Reader.
Select the notebook to be uploaded from the Reader to Evernote.
Check this box to download notes created with Evernote Clearly to the Reader.
Check this box to synchronize notebooks on the Reader with Evernote, when the
Reader is restarted.
Synchronize notebooks and update.
Go to page top
Copyright 2013 Sony Corporation
Find

Reader™ User Guide
Print
Search
Getting started
Basic Operations
Adding/Getting Content
Browsing Content Lists
Reading
Organizing
Other Applications
Settings
Other Information
Contents list
Top page > Other Applications > Evernote > Synchronizing in the Evernote list page
Synchronizing in the Evernote list page
You can synchronize notebooks easily in the Evernote list page.
1. Make sure that Wi-Fi is set up and turned on.
2. Press the
(Home) button tap [Bookshelves] [Evernote].
3. Tap
at the top of the screen.
Synchronization with Evernote starts.
Note
If you delete Evernote cloud content that has been synchronized, the same content
on the Reader is also deleted.
Tip
When [Books], [Collections] or [Purchased Content]* appears, tap the top-left corner
of the screen to show [Evernote]. Alternatively, press the
(Menu) button, then
tap [Choose Bookshelf] to show [Evernote].
* Available in certain countries/regions only. The [Purchased Content] function only
appears on your Reader if your local Reader Store supports the feature.
Go to page top
Copyright 2013 Sony Corporation
Find
Reader™ User Guide
Print
Search
Getting started
Basic Operations
Adding/Getting Content
Browsing Content Lists
Reading
Organizing
Other Applications
Settings
Other Information
Contents list
Top page > Other Applications > Facebook > Using Facebook
Using Facebook
You can post book information, such as title, author and publisher (when available), and
your favourite passages with your comments to Facebook.
You can also post a list of your book collection with your comments .
These posted items can then be viewed on Facebook.
To post highlighted words on a page, see Details.
To post a book information, see Details.
To post annotations for all books and periodicals, see Details.
To post a collection, see Details.
To post downloaded books/periodicals from the Reader Store, see Details.
Note
You need to create a Facebook account in order to use Facebook. Refer to the
Facebook website.
Highlighted words may be posted up to 140 characters.
Go to page top
Copyright 2013 Sony Corporation
Find
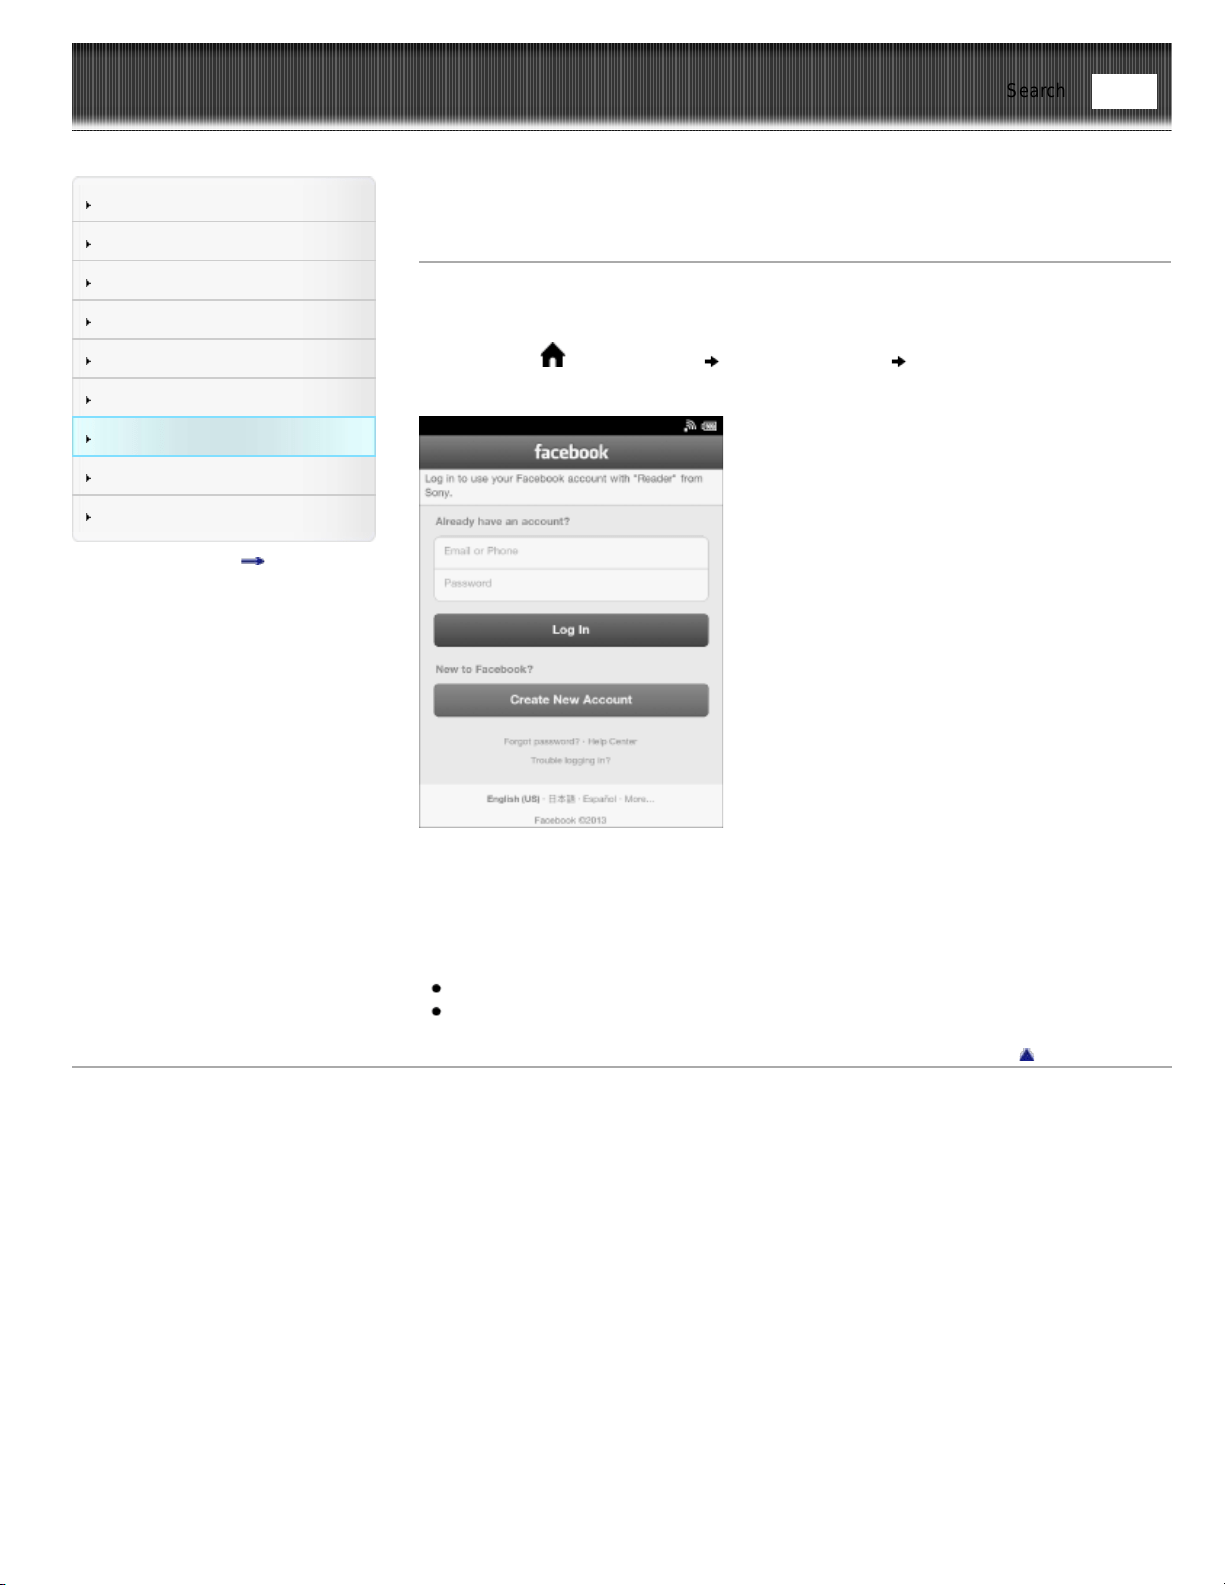
Reader™ User Guide
Print
Search
Getting started
Basic Operations
Adding/Getting Content
Browsing Content Lists
Reading
Organizing
Other Applications
Settings
Other Information
Contents list
Top page > Other Applications > Facebook > Log In to Facebook
Log In to Facebook
After you have created your account, type in your email address and Facebook
password.
1. Press the
(Home) button tap [Applications] [Facebook Setup].
The web browser opens.
2. Type your email address and Facebook password using the on-screen keyboard.
If a screen for authorization appears, confirm your acceptance.
3. Tap Log In button on the web page.
Note
Before posting to Facebook, you need to log in by this screen.
Actual screen images may vary.
Go to page top
Copyright 2013 Sony Corporation
Find
Reader™ User Guide
Print
Search
Getting started
Basic Operations
Adding/Getting Content
Browsing Content Lists
Reading
Organizing
Other Applications
Settings
Other Information
Contents list
Top page > Settings > Changing the Settings > Changing the Settings
Changing the Settings
The [Settings] application allows you to personalize the Reader, set the date and time,
configure the Wi-Fi connection, and change the standby screen and other Reader
settings.
Go to page top
Copyright 2013 Sony Corporation
Find
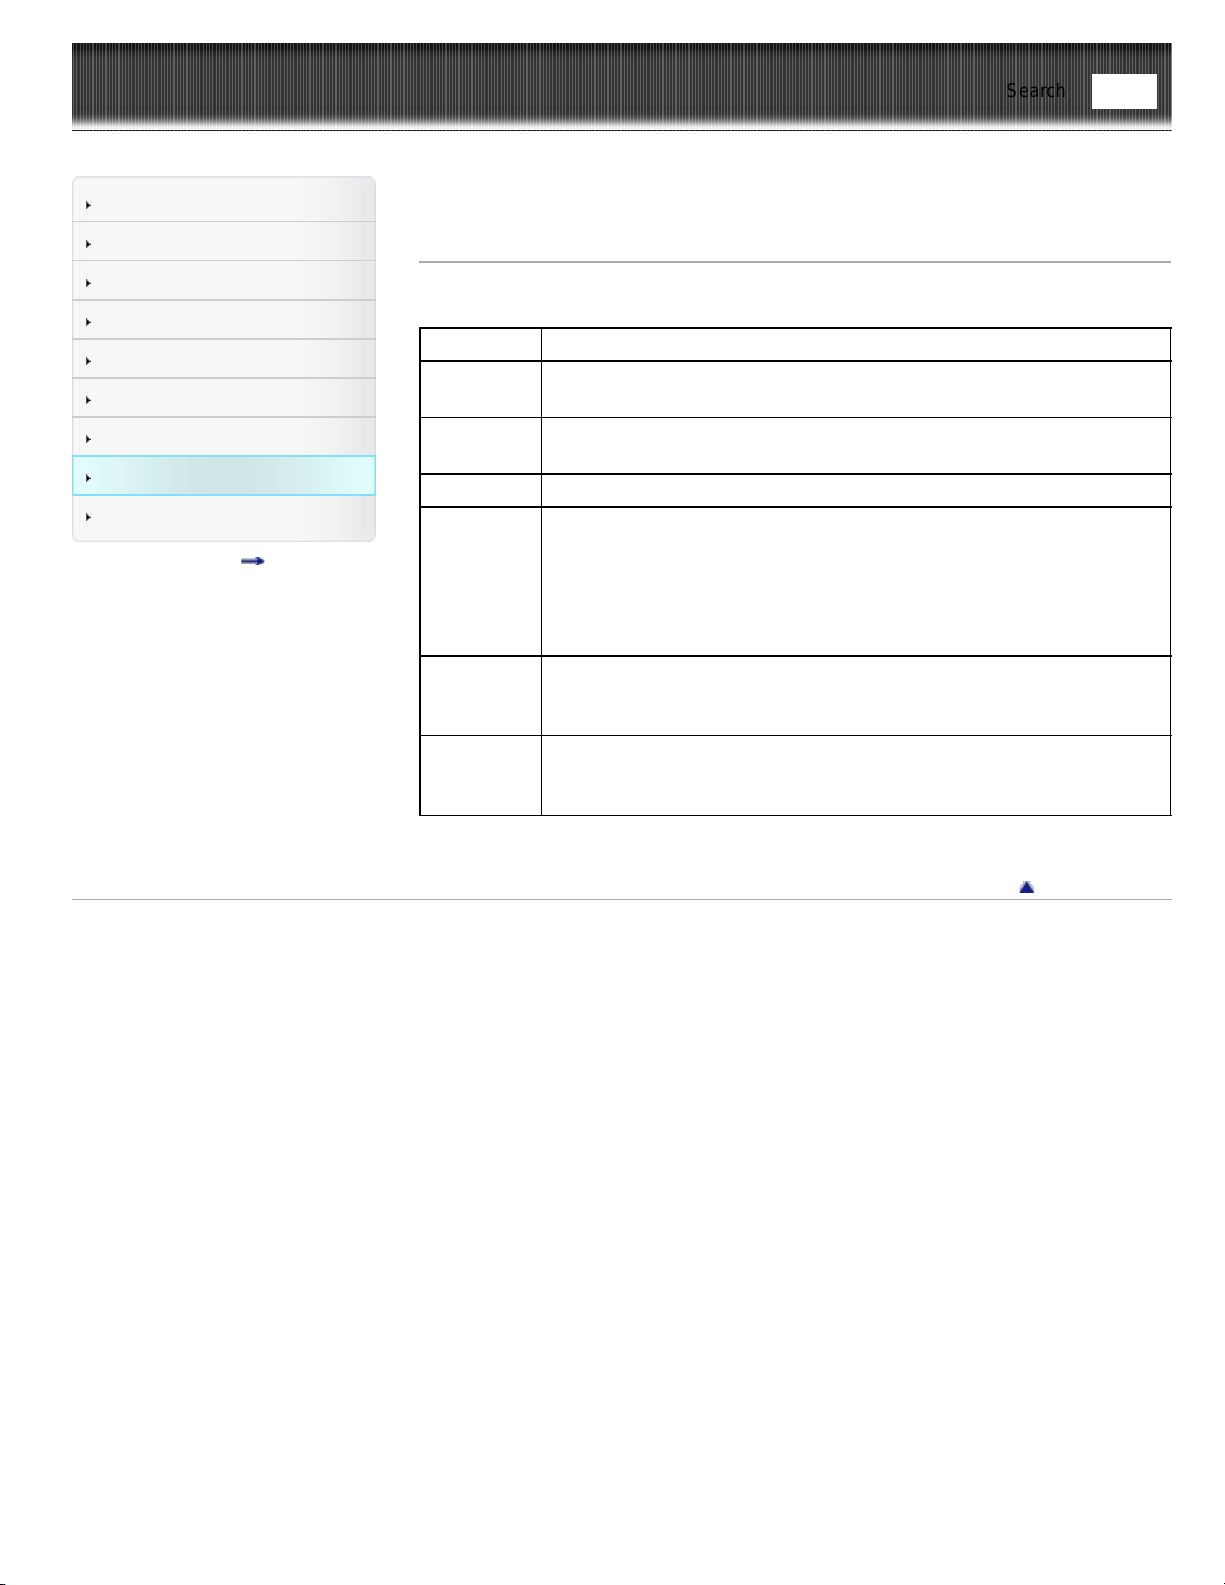
Reader™ User Guide
Print
Search
Getting started
Basic Operations
Adding/Getting Content
Browsing Content Lists
Reading
Organizing
Other Applications
Settings
Other Information
Contents list
Top page > Settings > Changing the Settings > General Settings
General Settings
Setting Description
[Page Turn
Preference]
Sets the swipe direction for turning pages.
[Menu
Language]
Sets the menu language.
[Keyboard] Sets the on-screen keyboard layout.
[Country /
Region]
Sets the country/region.
Depending on the country that you select, applications on the [Home]
screen may vary.
Reader Store varies depending on the country/region that you select.
You will need to register an account for each region in order to use
Reader Store in multiple regions.
[Preferred
eBook
Shop]*
Selects a preferred eBook store to be shown at the Home menu.
[Reader
Store
Notifications]
Allows the Reader to display recommendations from the Reader Store.
See Details.
* Appears if only Germany is selected in the [Country / Region].
Go to page top
Copyright 2013 Sony Corporation
Find
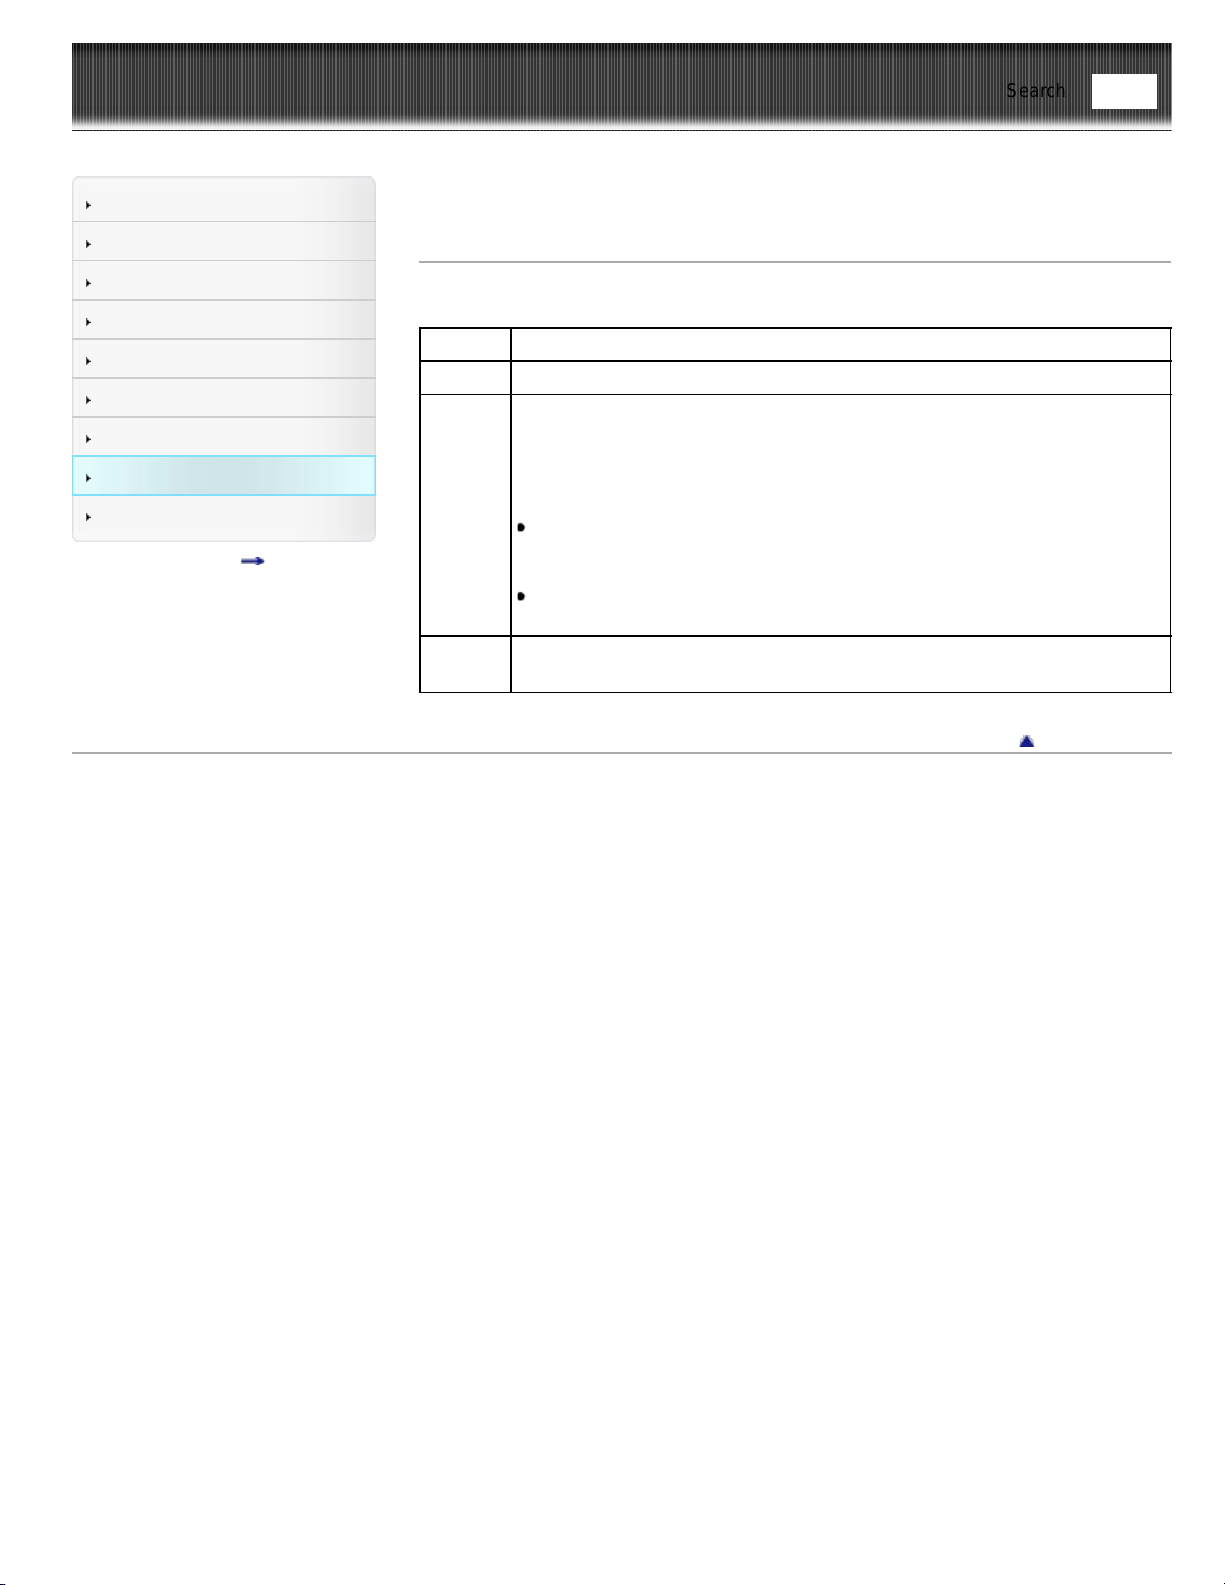
Reader™ User Guide
Print
Search
Getting started
Basic Operations
Adding/Getting Content
Browsing Content Lists
Reading
Organizing
Other Applications
Settings
Other Information
Contents list
Top page > Settings > Changing the Settings > Wireless Network Settings
Wireless Network Settings
Setting Description
[Wi-Fi] Turns Wi-Fi on/off. See Details.
[Wireless
Standby]
Wireless standby helps avoid unnecessary battery consumption caused by
wireless communication. If you do not perform any wireless operations for
more than 10 minutes, the wireless feature automatically enters standby
mode.
Note
Accessing Reader Store and the [Browser] application from wireless
standby mode takes more time than accessing when the Reader is
connected to the wireless network.
If you deactivate wireless standby, the Reader retains a wireless
connection at all times, resulting in higher battery consumption.
[Wi-Fi
Settings]
Wi-Fi settings enable the Reader to use local Wi-Fi networks to connect to
the Internet. See Details.
Go to page top
Copyright 2013 Sony Corporation
Find
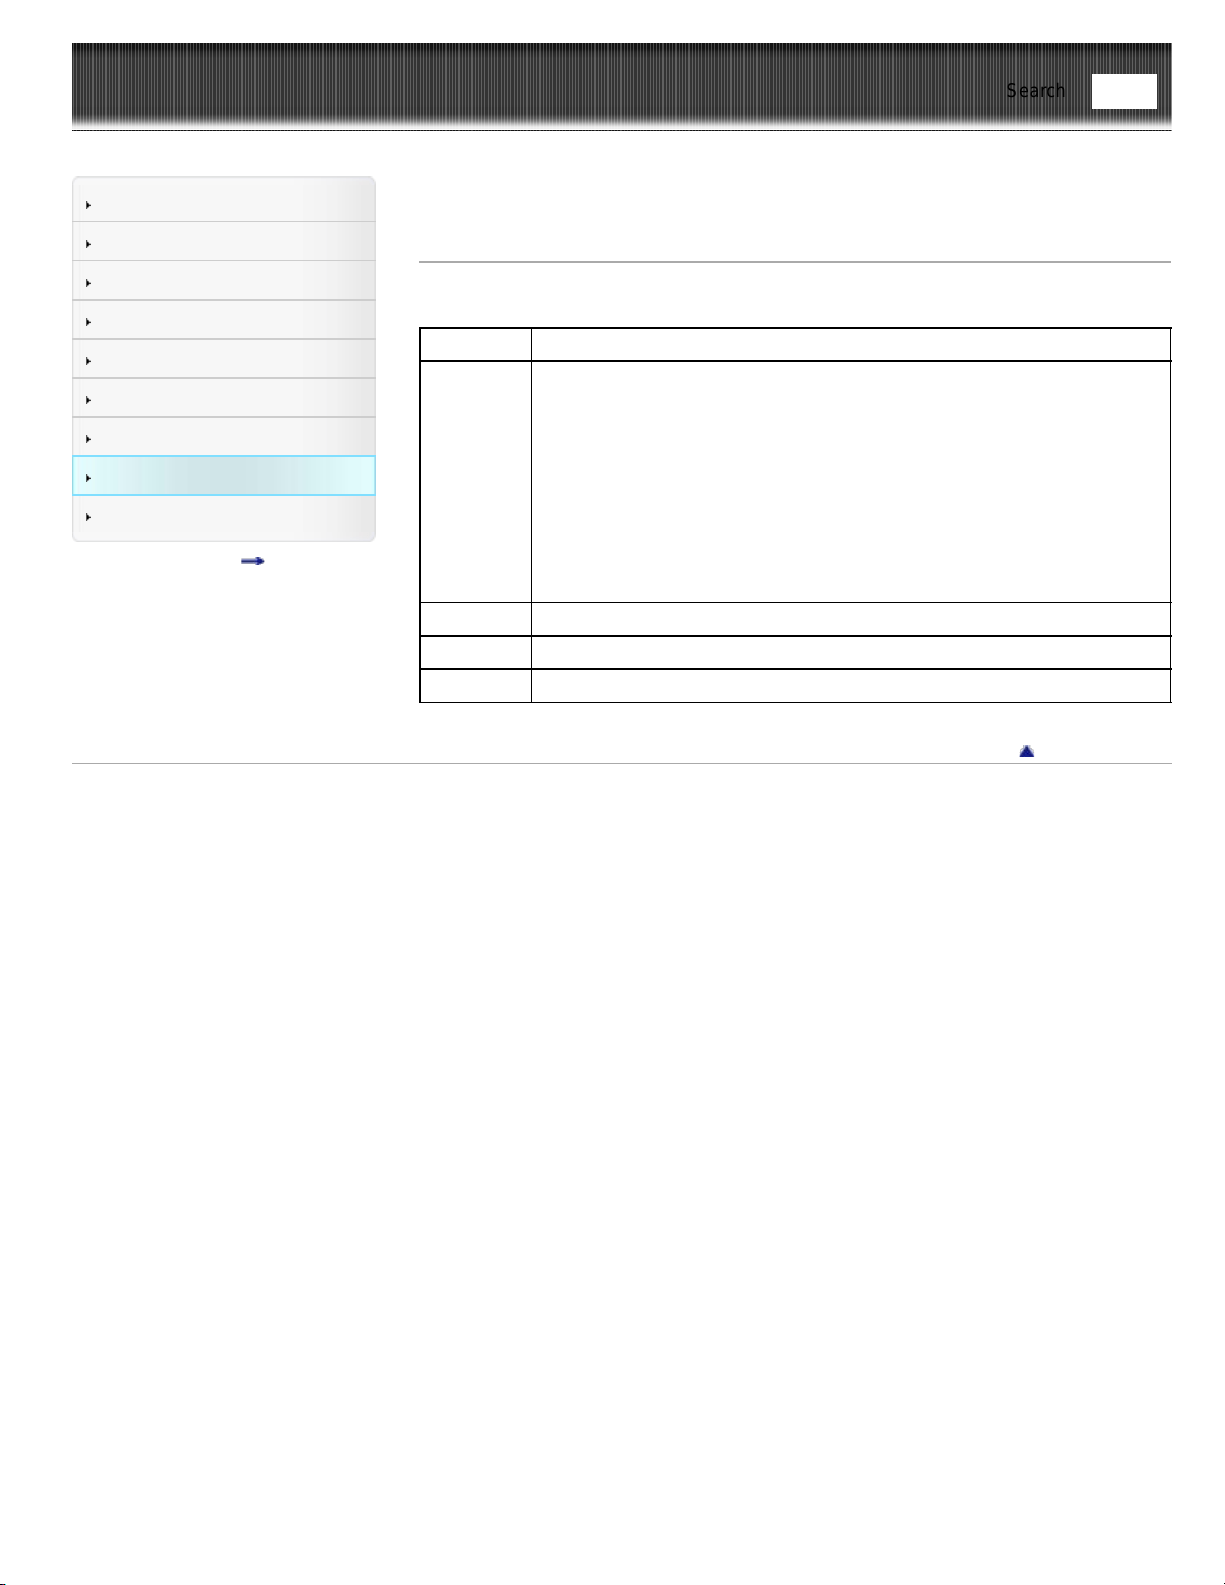
Reader™ User Guide
Print
Search
Getting started
Basic Operations
Adding/Getting Content
Browsing Content Lists
Reading
Organizing
Other Applications
Settings
Other Information
Contents list
Top page > Settings > Changing the Settings > Application Preferences
Application Preferences
Setting Description
[Books /
Periodicals]
Sets preferences for all books/periodicals. You can adjust the default font
size.
[Refresh Display]: Refreshes the display at each page turn*.
* Even if the [Refresh Display] check box is not selected, the screen may
still flicker, to prevent after-image.
[Page Sync]*: Sets page synchronization of page position, bookmarks
and highlights.
* Available in certain countries/regions only. The [Page Sync] function
only appears on your Reader if your local Reader Store supports the
feature.
[Dictionary] Specifies the default dictionary.
[Picture] Sets the slideshow interval.
[Browser] Sets the browser preferences.
Go to page top
Copyright 2013 Sony Corporation
Find
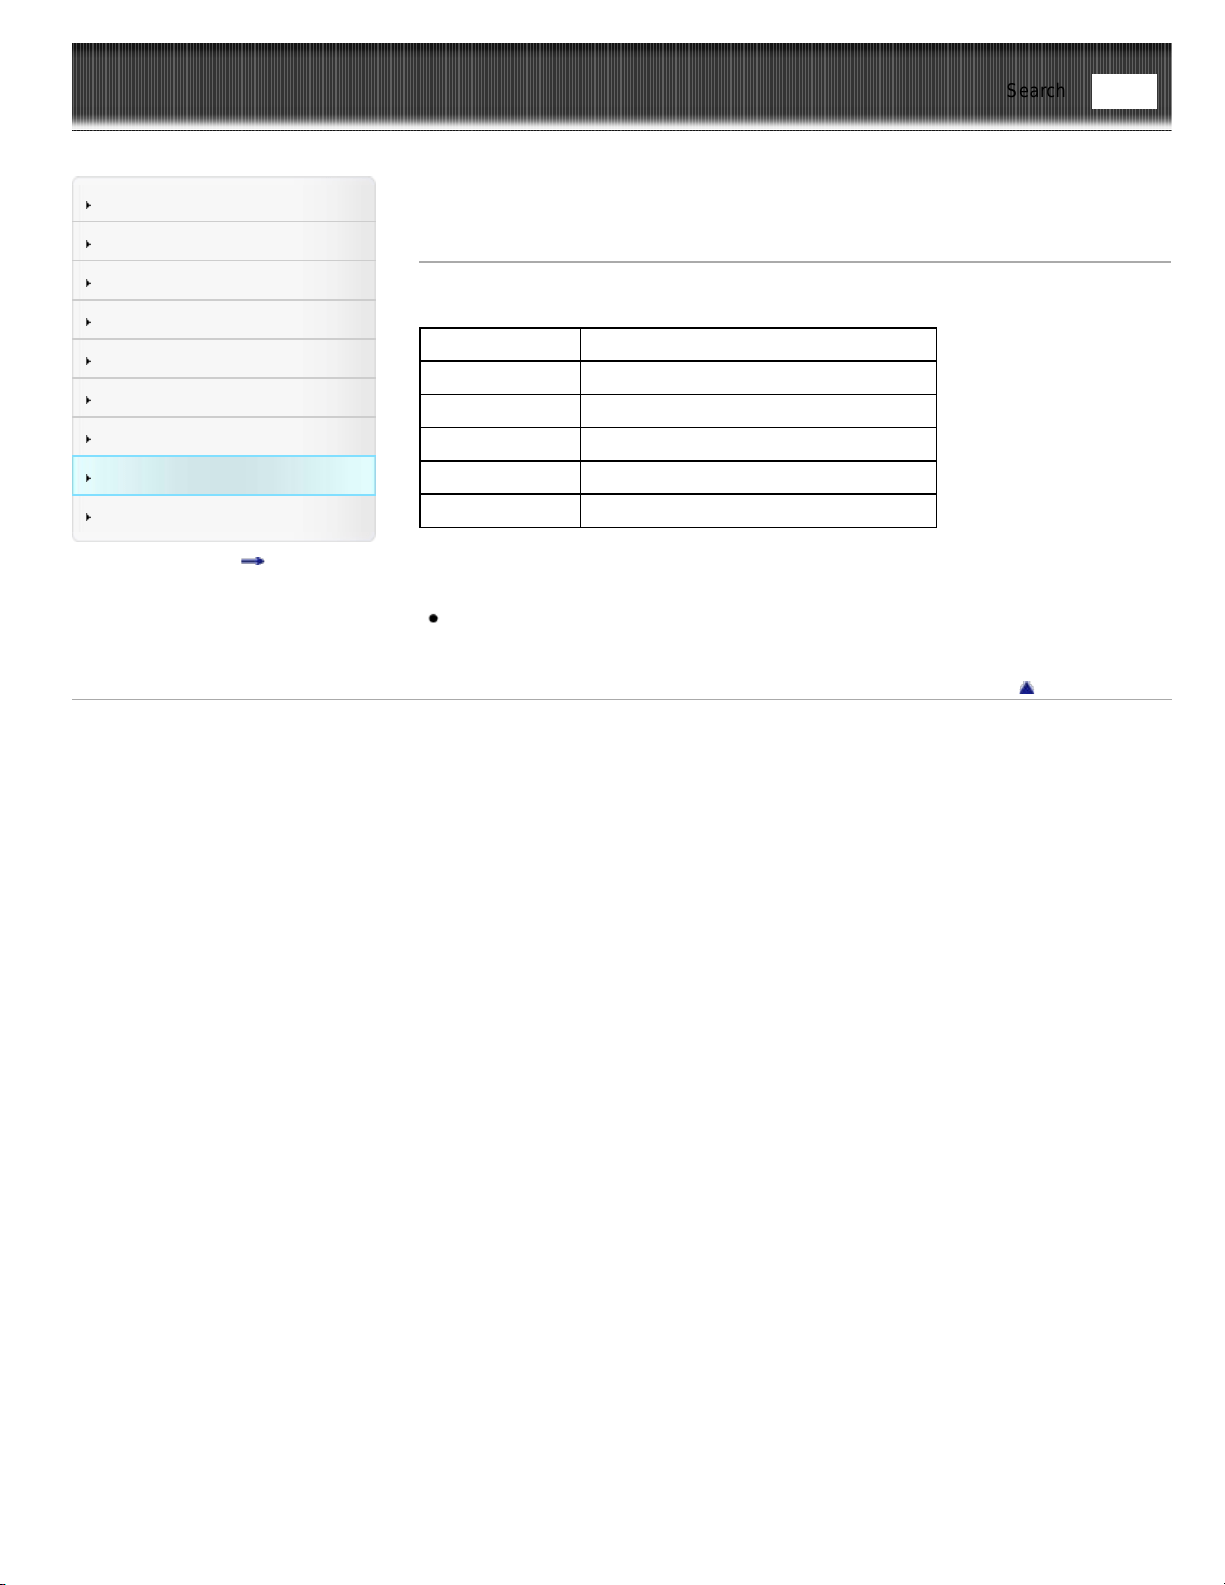
Reader™ User Guide
Print
Search
Getting started
Basic Operations
Adding/Getting Content
Browsing Content Lists
Reading
Organizing
Other Applications
Settings
Other Information
Contents list
Top page > Settings > Changing the Settings > Date and Time Settings
Date and Time Settings
Setting Description
[Date] Sets the date.
[Time] Sets the time.
[Date Format] Sets the date format.
[24-Hour Format] Check to display time in 24 hour-format.
[Time Zone] Sets the time zone.
Tip
When you start the Reader application and connect the Reader to your computer,
the Reader’s time setting is updated to match your computer’s time.
Go to page top
Copyright 2013 Sony Corporation
Find
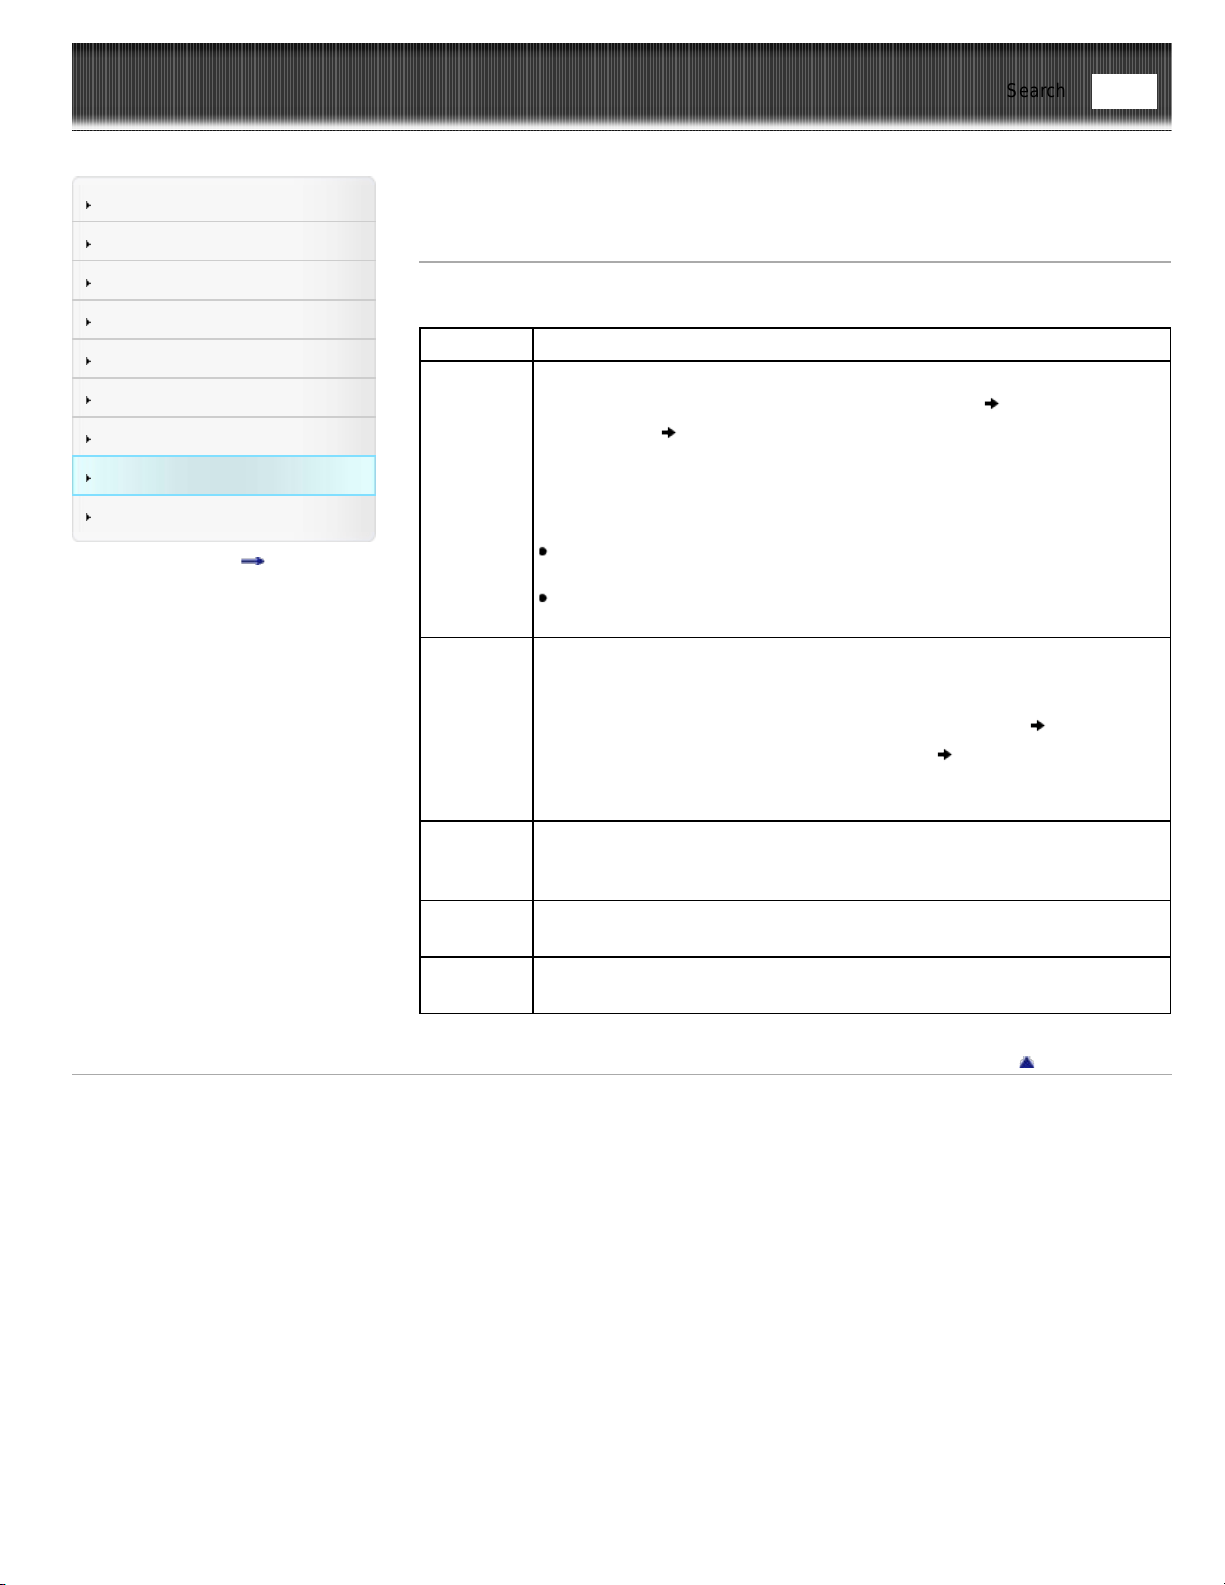
Reader™ User Guide
Print
Search
Getting started
Basic Operations
Adding/Getting Content
Browsing Content Lists
Reading
Organizing
Other Applications
Settings
Other Information
Contents list
Top page > Settings > Changing the Settings > System Management
System Management
Setting Description
[Device
Lock]
Sets a 4-digit PIN for the Reader to prevent unauthorized use.
To set [Device Lock] to [On], input your 4-digit PIN
tap [Continue] to
enter it again
tap [OK]. When [Device Lock] is set to [On], you must
unlock the Reader with the 4-digit PIN when waking up the Reader from
sleep mode, or when turning on the power.
To set [Device Lock] to [Off], input your 4-digit PIN and tap [Continue].
Note
Sony recommends that you make a note of your 4-digit PIN and keep
it in a safe place separate from the Reader.
If you forget your 4-digit PIN, contact Sony Customer Support. Note
that in unlocking your device, all content on it will be erased.
[Standby
Screen]
Sets standby screen preferences.
[Type of Image]: You can select whether to display the cover of the last
read book or pictures from the [Pictures] application. When you select
[Selected Pictures], continue by tapping [Select Pictures]
tap to add a
check next to the pictures you want to display
tap [Done].
[Show Message]: You can select whether to display a message about
waking up the Reader from sleep mode on the standby screen.
[Download
Destination]
Sets the destination for content downloaded from Reader Store or files
downloaded from the browser. Select between [Internal Memory] and [SD
Card].
[Check for
Updates]
Check the update information.
[Demo
Mode]
Sets the Reader to the Demo Mode.
To enter the Demo Mode, check the checkbox next to [Demo Mode].
Go to page top
Copyright 2013 Sony Corporation
Find
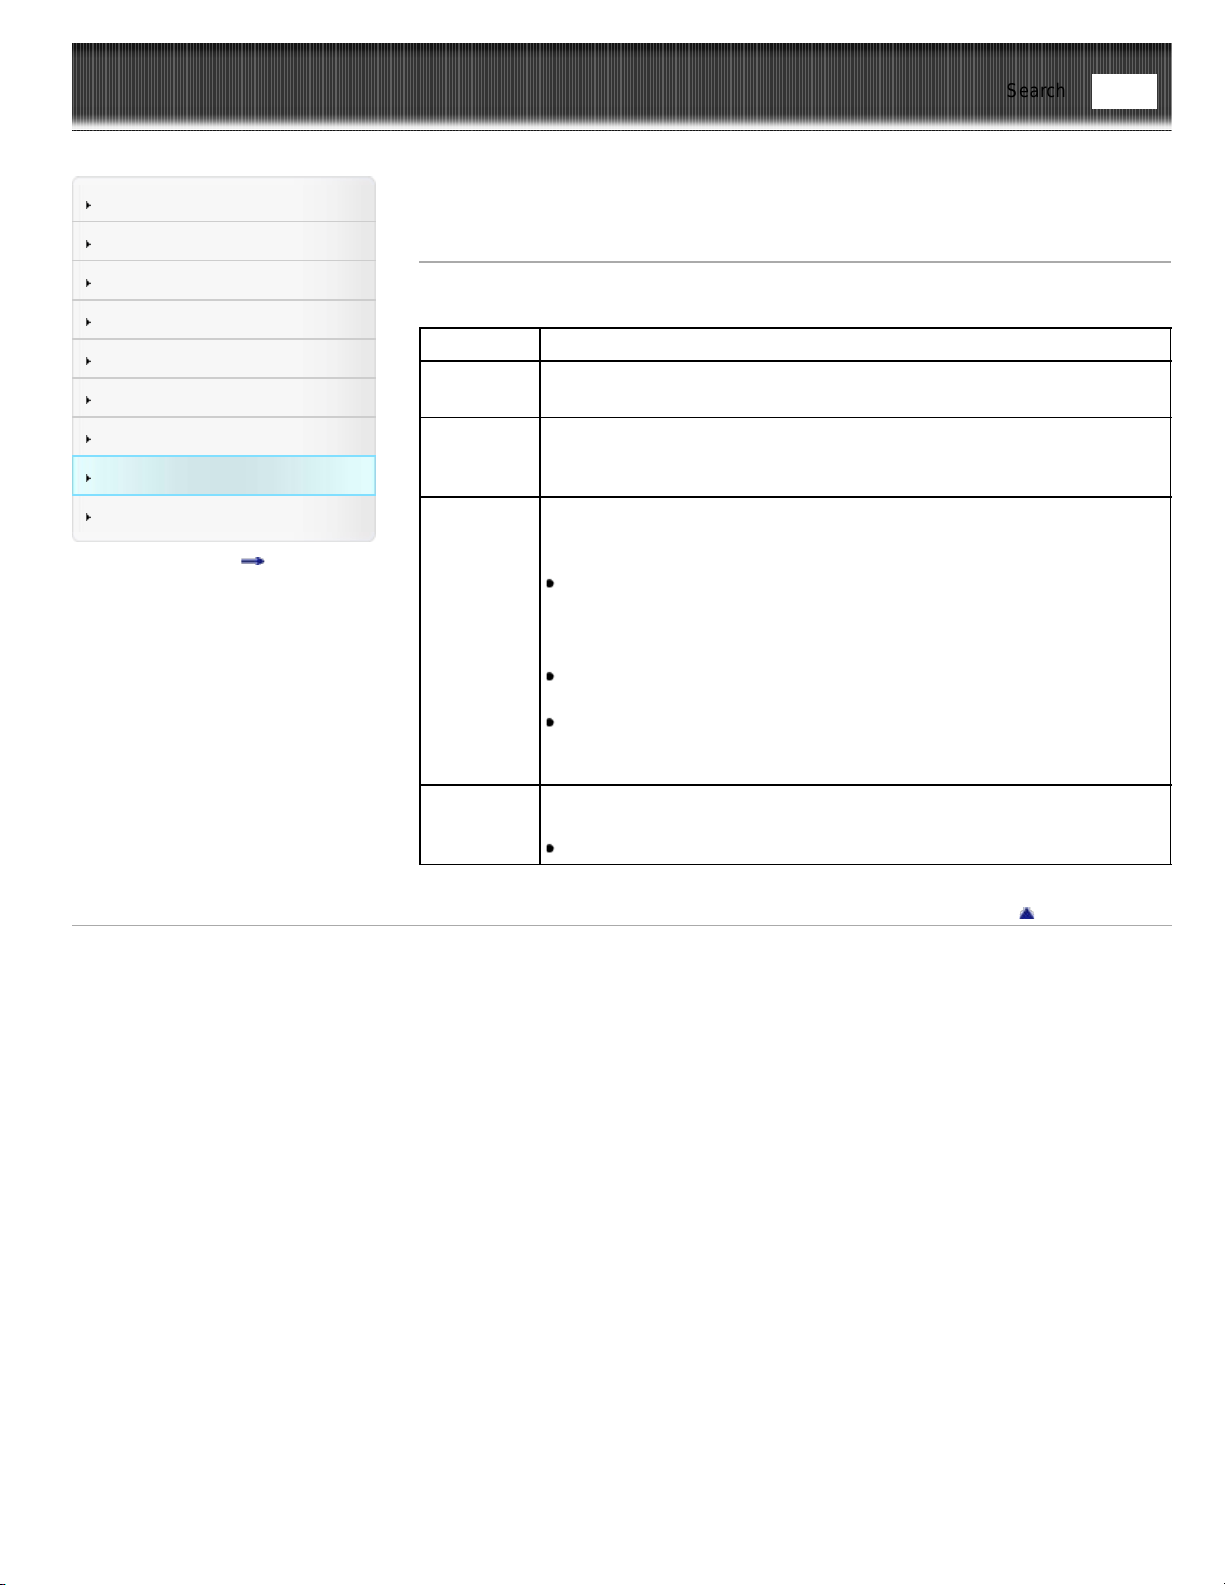
Reader™ User Guide
Print
Search
Getting started
Basic Operations
Adding/Getting Content
Browsing Content Lists
Reading
Organizing
Other Applications
Settings
Other Information
Contents list
Top page > Settings > Changing the Settings > Initialization
Initialization
Setting Description
[Restore
Defaults]
Restores the default Reader settings.
[Clear
Keyboard
History]
Deletes words registered to the on-screen keyboard history.
[Format
Memory]
Allows you to format the Reader’s internal memory and the microSD
card.
Note
If you have formatted the Reader or microSD card on your computer,
the Reader may not be able to display transferred content. In this
case, use the Reader’s [Format Memory] function to reformat the
Reader and your microSD card.
When either memory is formatted, content download stops.
Tip
Before formatting, make sure to backup data you wish to keep to your
computer via the Reader application. Note that protected content will
also be deleted when you format it.
[Deauthorize
for Adobe
DRM]
Deauthorizes the Reader for Adobe DRM (Digital Rights Management).
Tip
This menu is shown when the Reader is authorized for Adobe DRM.
Go to page top
Copyright 2013 Sony Corporation
Find
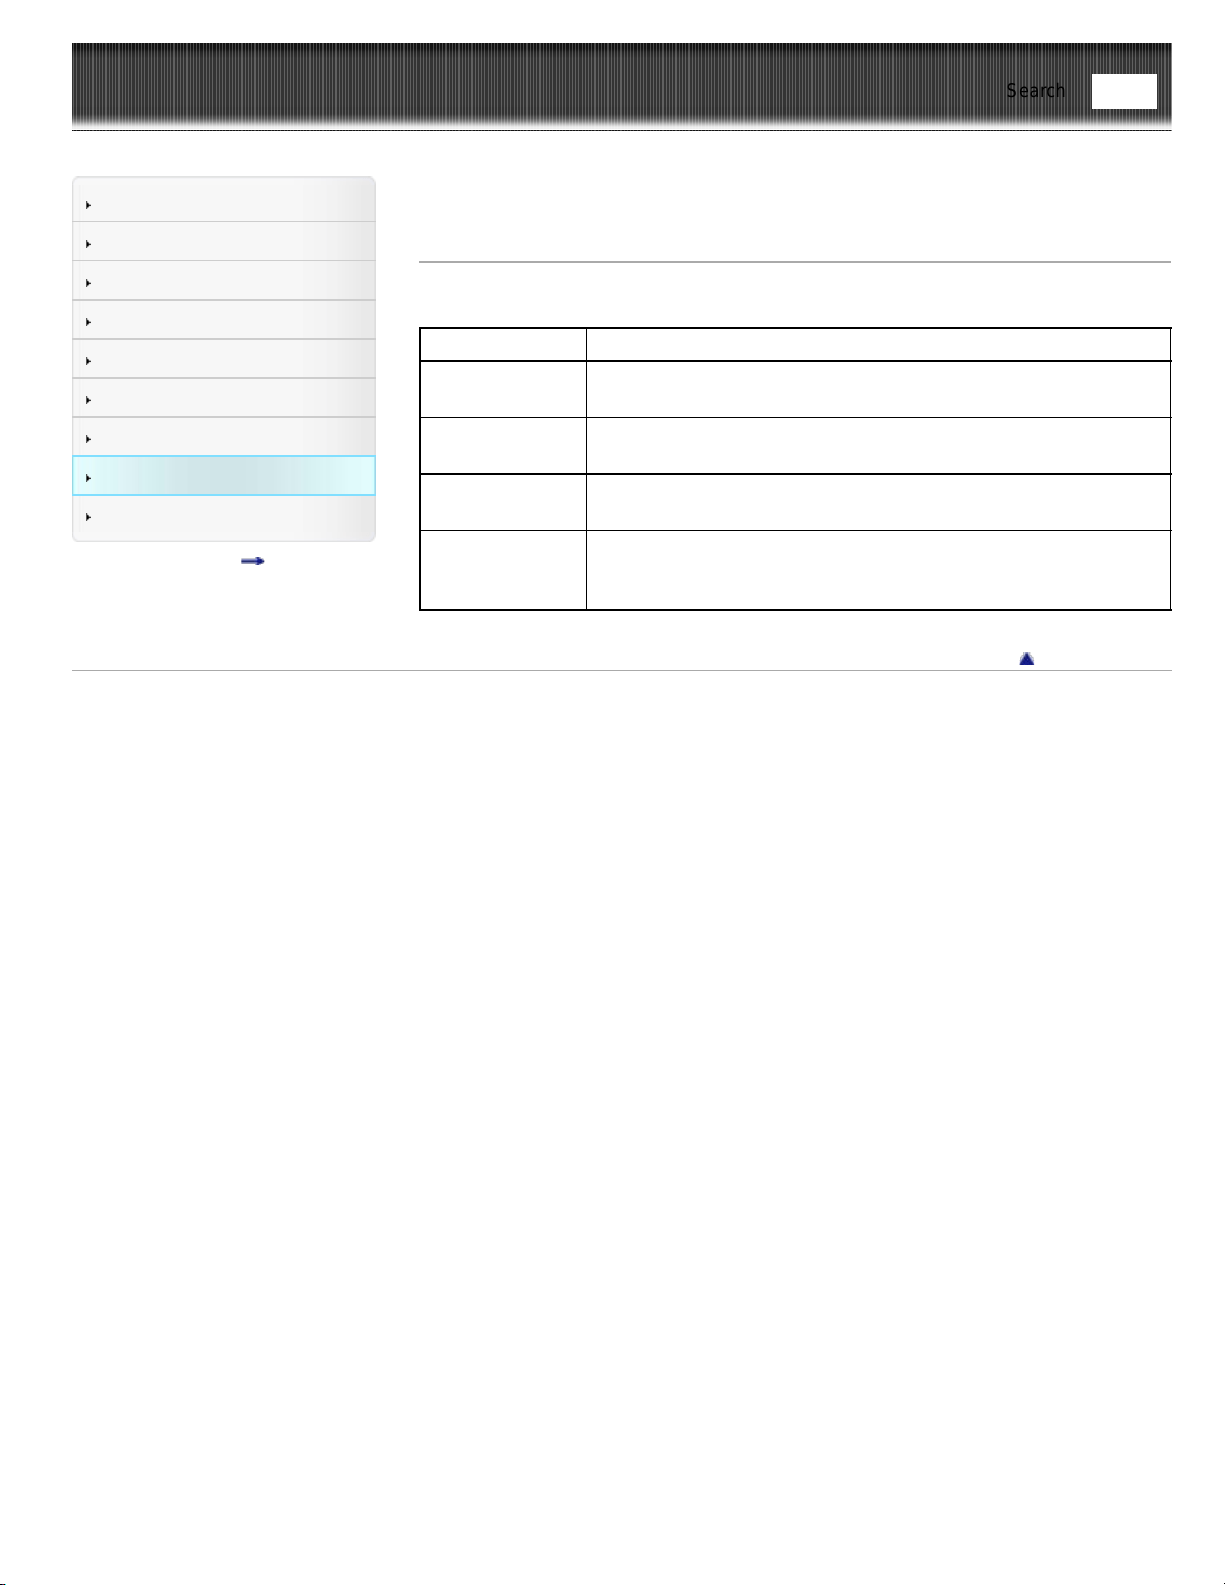
Reader™ User Guide
Print
Search
Getting started
Basic Operations
Adding/Getting Content
Browsing Content Lists
Reading
Organizing
Other Applications
Settings
Other Information
Contents list
Top page > Settings > Changing the Settings
> About
About
Setting Description
[Device
Information]
Displays the device details including the memory capacity, Adobe
DRM authorization and MAC address in use.
[Legal
Information]
Displays trademark and copyright information.
[Regulatory
Information]
Displays the C-Tick mark.
[End User
License
Agreement]
Displays the terms and conditions on use of the Reader.
Go to page top
Copyright 2013 Sony Corporation
Find
Reader™ User Guide
Print
Search
Getting started
Basic Operations
Adding/Getting Content
Browsing Content Lists
Reading
Organizing
Other Applications
Settings
Other Information
Contents list
Top page > Settings > Changing the Settings > Device Shutdown
Device Shutdown
Enables you to shut down (turn off) the Reader, instead of leaving it in sleep mode.
Go to page top
Copyright 2013 Sony Corporation
Find
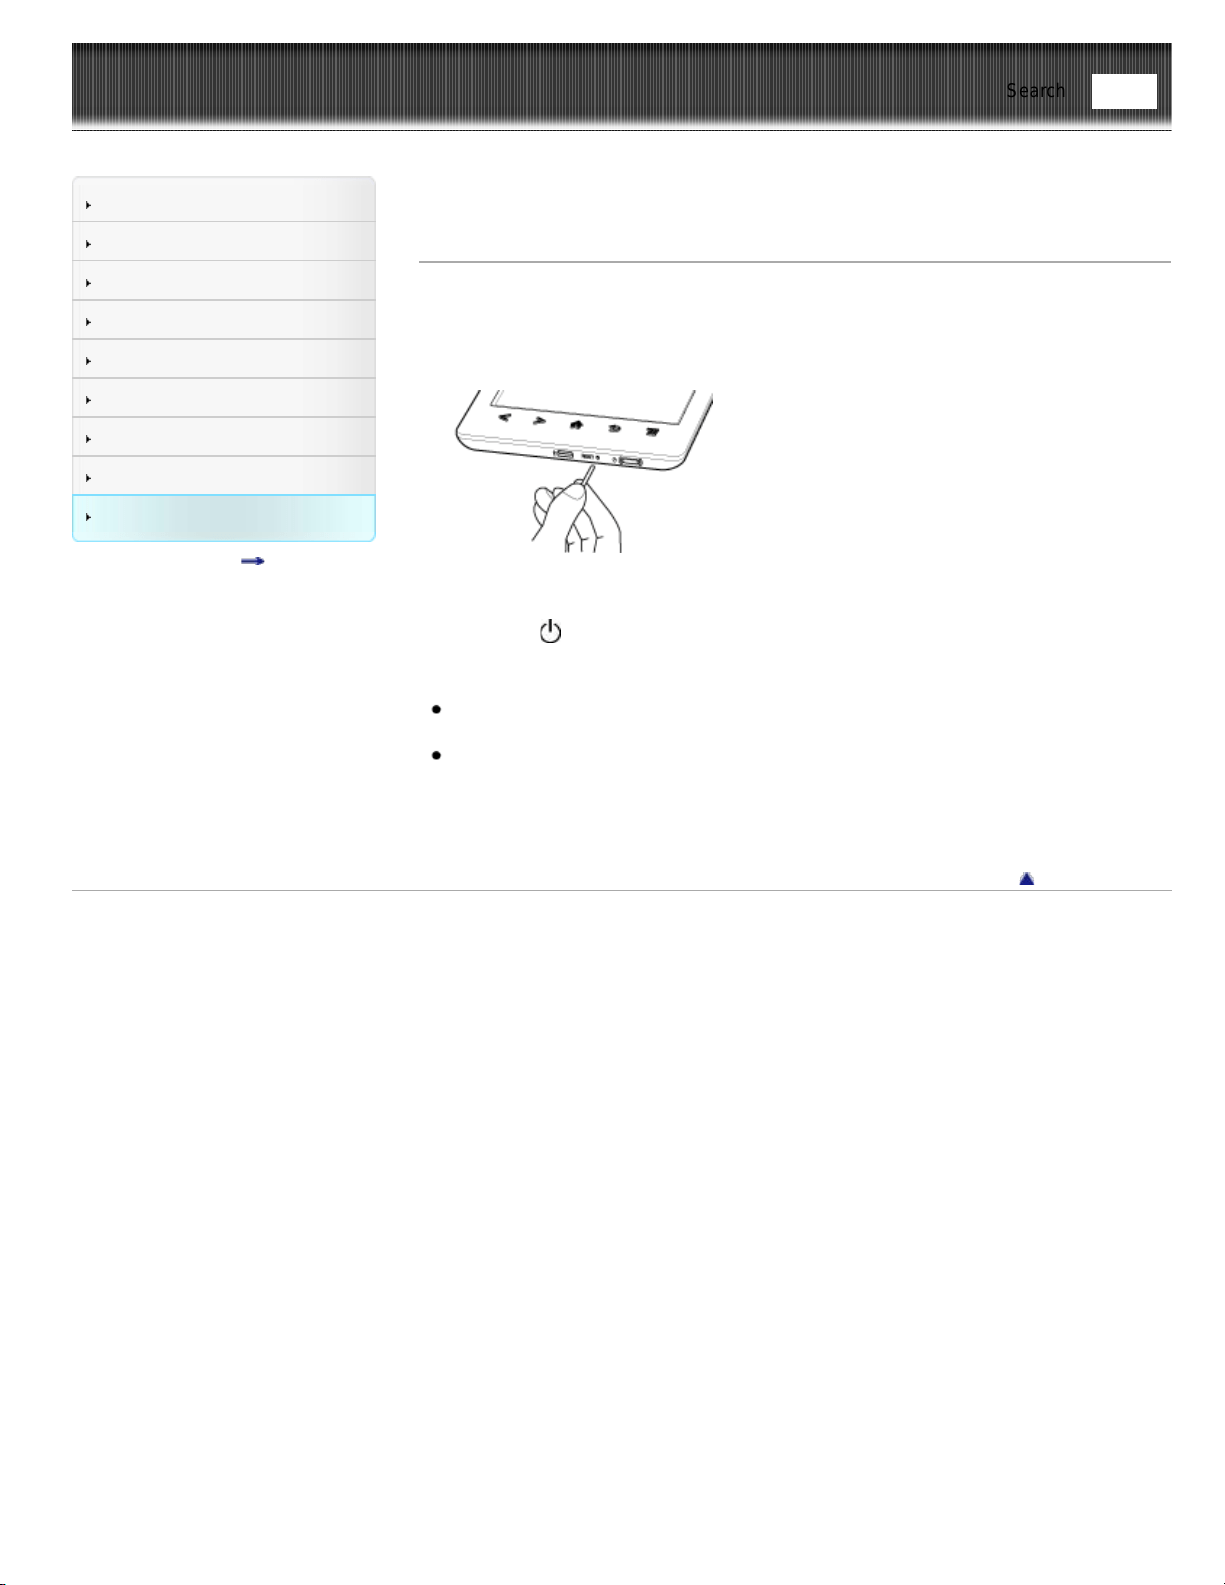
Reader™ User Guide
Print
Search
Getting started
Basic Operations
Adding/Getting Content
Browsing Content Lists
Reading
Organizing
Other Applications
Settings
Other Information
Contents list
Top page > Other Information > Troubleshooting > Troubleshooting Tips
Troubleshooting Tips
Troubleshooting tips may help you quickly resolve technical issues.
1. Charge the Reader completely.
2. Reset the Reader.
Press the RESET button with a small pin or clip.
The screen will freeze; the Reader will not restart automatically.
Press the
(Power) button, and the startup screen appears.
Note
The bookmarks, highlights, handwritten notes or the setting information may be
deleted by resetting.
Do not push the RESET button with a breakable point, such as the graphite of a
mechanical pencil. It can cause the RESET button to be blocked.
3. Comprehensive support and troubleshooting information is available at the support
PC Web site. See Details.
Go to page top
Copyright 2013 Sony Corporation
Find
Reader™ User Guide
Print
Search
Getting started
Basic Operations
Adding/Getting Content
Browsing Content Lists
Reading
Organizing
Other Applications
Settings
Other Information
Contents list
Top page > Other Information > Troubleshooting > Support PC Web Site
Support PC Web Site
For comprehensive support and troubleshooting information, visit the support PC Web
site.
Support PC Web
USA:
http://www.sony.com/readersupport
Canada:
http://www.sony.ca/readersupport
Europe:
http://support.sony-europe.com/eBook/PRS
Australia:
http://www.sony.com.au/support
New Zealand:
http://www.sony.co.nz/support
Warranty Information
Australia:
http://www.sony.com.au/warranty
New Zealand:
http://www.sony.co.nz/section/warrantyinfo
Go to page top
Copyright 2013 Sony Corporation
Find
Reader™ User Guide
Print
Search
Getting started
Basic Operations
Adding/Getting Content
Browsing Content Lists
Reading
Organizing
Other Applications
Settings
Other Information
Contents list
Top page > Other Information > Troubleshooting > Reader Device
Reader Device
Power On/Off
The Reader cannot turn on.
The Reader cannot be operated if connected to your computer and set to data
transfer mode. Use the safely remove hardware function of your computer, and then
disconnect the USB cable from the Reader.
Moisture condensation may have occurred. Wait for a few hours and then turn on the
Reader.
If the battery is completely depleted, power will not be supplied to the
(Power)
button, and you may not be able to turn on the Reader. In this case, connect the
Reader to your computer via the supplied USB cable; the Reader will turn on
immediately. If the Reader does not turn on, press the
(Power) button. If the
Charge indicator blinks red 3 times, disconnect the USB cable from the Reader, then
reconnect approximately 5 minutes later.
The Reader cannot turn off or enter sleep mode.
If the Reader screen freezes and stops responding, the (Power) button will also
not work. In this case, reset the Reader. See Details.
The Reader automatically enters sleep mode or turns off.
To conserve the battery’s charge, the Reader includes automatic power saving
modes. The Reader will enter sleep mode after 10 minutes of inactivity. After 3 days*
in sleep mode, the Reader will shut down/power off automatically.
* If the battery’s charge is low, the Reader may automatically turn off within 3 days.
However, when viewing a slideshow, this feature does not work. The automatic
power saving modes cannot be turned off.
Battery
Cannot charge the Reader.
If you use other than the supplied USB cable to charge the Reader, it may not
charge correctly. To charge the Reader, use only the supplied USB cable and,
optionally, the AC Adapter (PRSA-AC10/PRSA-AC1A, sold separately). See Details.
If you are charging from the USB port on your computer, make sure that the Reader
is connected directly to the USB port with the supplied USB cable. Do not use a USB
hub.
The battery has not been given enough time to fully charge. Charge the Reader until
the
icon changes to the icon. (The charge icon does not indicate the
remaining battery power while charging.)
Your computer must be turned on to charge the Reader. The Reader will not be
charged if your computer enters sleep mode or standby mode. Keep your computer
turned on with a stable and continuous power supply while charging the Reader.
Find
If your computer enters sleep mode while the Reader is connected and charging, the
Reader battery’s charge will gradually drain, the Reader will shut down and the
Reader’s battery will not charge. In this case, disconnect the USB cable from the
Reader, wake the computer from sleep mode, and then reconnect the USB cable to
the Reader.
Your computer may not be supplying sufficient power. If you connect the Reader to
your laptop computer, maintain a stable and continuous power supply to the laptop
computer while charging the Reader.
If the ambient temperature is too cold or too hot for the Reader to charge, adjust the
room temperature to between 5°C (41°F) and 35°C (95°F), disconnect and reconnect
the USB cable.
Battery life seems short.
The Reader may not have been charged fully. Make sure that you charge the Reader
until
changes to .
The operating temperature is below 5°C (41°F). This is due to the battery
characteristics and not a malfunction.
The Reader requires power while in sleep mode. If you are not planning to use the
Reader, turn it off instead of leaving it in sleep mode.
If you are not browsing on the Web, exit [Browser] by pressing the
(Home)
button.
The Reader battery gradually discharges when not in use for a prolonged period of
time. Before turning on the Reader after a prolonged period of disuse, charge the
Reader again.
If you are not using wireless communications, turn off Wi-Fi. See Details.
If you are charging the Reader by data transfer mode and the computer enters sleep
mode or standby mode, the Reader will be unable to charge, and the battery may
drain. When charging the Reader, confirm that your computer is on, and completely
charge the Reader before using it. See Details.
Touchscreen
The Reader does not wake up or start immediately.
In cold temperatures, the touchscreen may respond slower than usual. This is due to
the touchscreen characteristics and is not a malfunction.
After resetting or turning off the Reader, it may take time for the startup screen to
appear.
The screen does not respond.
Reset the Reader. See Details.
The screen responds slowly.
If the touchscreen becomes dirty, it may not function correctly. Clean the touchscreen
with a soft cloth, such as a cleaning cloth for eyeglasses.
In cold temperatures, the touchscreen may respond slower than usual. Turn off the
Reader and leave it for a few hours until it adjusts to the ambient temperature.
Go to page top
Copyright 2013 Sony Corporation
Reader™ User Guide
Print
Search
Getting started
Basic Operations
Adding/Getting Content
Browsing Content Lists
Reading
Organizing
Other Applications
Settings
Other Information
Contents list
Top page > Other Information > Troubleshooting > Wireless Connectivity
Wireless Connectivity
Reader Store
Reader Store provides comprehensive support information. For Reader Store support,
press the
(Home) menu tap the [Reader Store] application press the
(Menu) button tap [Help and Support].
Cannot connect to the store.
The Wi-Fi network connection may have been interrupted. Make sure that Wi-Fi is
turned on and set up correctly, check the signal strength of the access point and try
again. See Details.
Cannot find the purchased eBooks or periodicals.
eBooks are downloaded to the [Books] application, and newspapers/magazines are
downloaded to the [Periodicals]* application. Tap on the status bar to open the
notification window, and check under [Notification] to check your downloaded items.
See Details.
* Available in certain countries/regions only.
Wi-Fi connection
The Reader does not connect to the Wi-Fi network.
The network feature could not be turned on because the remaining battery power is
too low. Charge the Reader for a few minutes, and then try again.
Make sure that Wi-Fi is turned on and check the signal strength of the access point.
Scan the available access points in the vicinity and select a new one.
Make sure that the security method (WEP/WPA), the static IP address and the proxy
settings are correct.
The access point is using an unsupported security method or encryption key.
Public Wi-Fi networks may require a user ID and password. In this case, you must
enter a correct user ID and password to establish a network connection.
The access point has the MAC address filter enabled. To check the MAC address,
press the
(Home) button tap [Applications] [Settings] [About]
[Device Information]. Make sure that this MAC address is accepted by the access
point.
The Wi-Fi network settings of the access point are not correct. Adjust the settings as
described in the manuals that came with the access point and in any information
provided by the network administrator.
The Reader is too far from the access point. Move the Reader closer to the access
point and scan again.
Obstacles such as walls, metal or concrete between the Reader and an access point
may adversely affect the connection. Try moving the Reader to a different location
and scan again.
Find
There is other equipment nearby using the 2.4 GHz frequency band (such as a
cordless phone, a microwave oven, or Bluetooth computer equipment). Move the
equipment away or turn it off.
The Wi-Fi network service is temporarily not available or degraded. Check with the
network administrator for the status.
Cannot find the access point in the Wi-Fi networks list.
The access point you want to use is set to not broadcast its SSID to users. In this
case, the access point may not be shown on the Wi-Fi network list. Tap [Add Wi-Fi
Network] and enter the SSID manually. See Details.
Browser
The Web page is not displayed properly.
The Wi-Fi network connection may have been interrupted. Make sure that Wi-Fi is
turned on and set up correctly, check the signal strength of the access point, and
then refresh the Web page.
Due to the vast range of standards and technologies used to design Web pages, it is
not possible to guarantee that all pages will be displayed correctly.
When you pinch in/out to zoom in/out a web page, the screen may be too light to
read. This is not a malfunction.
Cannot change the font size.
The font size does not change if it is specified by the Web page. You can use the
zoom feature to enlarge the page display.
When you pinch in/out to zoom in/out a web page, the screen may be too light to
read. This is not a malfunction.
Go to page top
Copyright 2013 Sony Corporation

Reader™ User Guide
Print
Search
Getting started
Basic Operations
Adding/Getting Content
Browsing Content Lists
Reading
Organizing
Other Applications
Settings
Other Information
Contents list
Top page > Other Information > Troubleshooting > Reading Books and Periodicals
Reading Books and Periodicals
Cannot open a book.
The book may have expired. Check the expiration for the borrowed book.
You must be the account holder who purchased the book to read it.
A book protected by Adobe digital rights management requires entering
corresponding Adobe ID and password to authorize your Reader. (A maximum of ten
IDs can be saved on the Reader.) For US/Canada, Reader Store sign-in screen will
appear if the Reader has not been authorized yet.
The book or the periodical issue may be in an unsupported file type. For details on
supported file types, see Details.
“Continue Reading” does not work, or the bookmark is missing.
If the file status has changed (such as in the following cases), data under [Continue
Reading] or notes may be deleted.
A text/PDF file is edited.
A book purchased with an authorized Reader is read on another deauthorized
Reader by memory card transfer.
Cannot find content on the Reader.
If you have formatted the Reader on your computer, the Reader may not be able to
display transferred content. In this case, use the Reader’s [Format Memory] function
to reformat the Reader. See Details.
Although protected on the Reader, books and periodicals may be deleted if you sync
the Reader after they have been deleted from the Reader application.
If you delete or modify folders or files in the “database” folder on your computer,
content or notes may be deleted.
Go to page top
Copyright 2013 Sony Corporation
Find

Reader™ User Guide
Print
Search
Getting started
Basic Operations
Adding/Getting Content
Browsing Content Lists
Reading
Organizing
Other Applications
Settings
Other Information
Contents list
Top page > Other Information > Troubleshooting > Viewing Pictures
Viewing Pictures
Cannot view a picture.
The picture may be in an unsupported file type. For details on supported file types,
see Details.
If the size of a picture that you transferred with the Reader application is too large, a
thumbnail may not be created on the Reader and the picture may not be displayed
in the [Pictures] content list. In this case, delete the picture via the Reader
application.
Go to page top
Copyright 2013 Sony Corporation
Find

Reader™ User Guide
Print
Search
Getting started
Basic Operations
Adding/Getting Content
Browsing Content Lists
Reading
Organizing
Other Applications
Settings
Other Information
Contents list
Top page > Other Information > Troubleshooting > Connecting to your Computer
Connecting to your Computer
The computer does not detect the Reader.
After connecting the Reader to your computer via the USB cable, you must set the
Reader to data transfer mode. See Details.
It may take a while for the computer to detect the Reader.
Make sure that the Reader is connected directly to the USB port with the supplied
USB cable. Do not use a USB hub.
Try connecting to a different USB port on the computer.
Try disconnecting the Reader and connecting it again.
If none of the above solves the problem, reset the Reader. See Details.
Cannot sync content with the Reader.
The Reader may not have been authorized. Authorize the Reader first. For details,
refer to the [Help] menu of the Reader application.
There may not be enough space on the Reader or the memory card. Check [About]
for the amount of free space on internal memory. See Details. Delete some content,
or copy it to the Reader application to make some space on the Reader or the
memory card.
Go to page top
Copyright 2013 Sony Corporation
Find

Reader™ User Guide
Print
Search
Getting started
Basic Operations
Adding/Getting Content
Browsing Content Lists
Reading
Organizing
Other Applications
Settings
Other Information
Contents list
Top page > Other Information > Troubleshooting > microSD Card
microSD Card
The Reader does not detect the microSD card, or cannot open an item
stored on the microSD card.
If you have formatted the microSD card on the computer, the Reader may not be
able to display transferred content. Use the Reader to format the microSD card. See
Details.
It may take a while for the Reader to detect the microSD card and load all files
stored on it. Wait a little longer after inserting the microSD card to the card slot.
Make sure that the microSD card is supported by the Reader. See Details.
Make sure that the microSD card is inserted properly. See Details.
Make sure that the gold contact point of the microSD card and the card slot are
clean. If dirty or dusty, clean them carefully.
The Reader may not have been authorized. Authorize the Reader first. For details,
refer to the [Help] menu of the Reader application.
Data transferred via drag-and-drop may not be displayable on the Reader, or
thumbnails of the data may not be properly displayed on the Reader. Sony
recommends that you transfer data via the Reader application.
Cannot save the book or other items on the microSD card.
The Reader does not offer a feature that enables you to move files to or from the
microSD card. You need to use the Reader application to do so.
Cannot delete the book or other items from the microSD card.
You cannot delete the file if it is read-only. You must use the computer and remove
the read-only attribute from the file.
Go to page top
Copyright 2013 Sony Corporation
Find

Reader™ User Guide
Print
Search
Getting started
Basic Operations
Adding/Getting Content
Browsing Content Lists
Reading
Organizing
Other Applications
Settings
Other Information
Contents list
Top page > Other Information > Precautions > Safety Information
Safety Information
Protected content
Protected content is limited to personal use only. Use of the content beyond this limit
requires permission of the copyright holders.
Handling the Reader
In order to comply with FCC radio-frequency radiation exposure guidelines for an
uncontrolled exposure, this device and its antenna must not be co-located or
operating in conjunction with any other antenna or transmitter.
If the Reader causes interference to radio or television reception, turn the Reader off
and move it away from the radio or television.
Refrain from using the Reader according to the in-flight announcements during take
off or landing in an aircraft.
Do not drop, or put any heavy object on top of the Reader or apply a strong shock to
the Reader. It may cause a malfunction or damage.
Never subject the Reader to extremes of light, temperature, moisture or vibration.
Do not leave the Reader on an unstable surface.
If any object is placed on the touchscreen, it may cause a malfunction. When not in
use, leave the Reader in sleep mode, or turn it off.
When using the Reader internationally, it is your responsibility to ensure that the
Reader is used in compliance with the following specifications:
AC voltage
Wireless products regulations
Other safety regulations or requirements
Do not touch the terminals of the Reader with a finger or metallic object, as it may
cause malfunction.
Never leave the Reader exposed to high temperature, such as in a car parked in the
sun or under direct sunlight.
Avoiding water and moisture
Note that condensation may form temporarily in cases such as when the player is
moved quickly from a low-temperature environment to a high temperature
environment or used in a room that has a heater just turned on. Condensation
creates a phenomenon where moisture in the air adheres to surfaces such as metal
panels, etc., and then changes to liquid. If condensation forms in the Reader, leave it
turned off until the condensation disappears. If you use the Reader with
condensation present, a malfunction may result.
The Reader is not waterproof. Remember to follow the precautions below.
Be careful not to drop the Reader into a sink or other container filled with water.
Do not use the Reader in humid locations or bad weather, such as in the rain or
snow.
Do not get the Reader wet.
If you touch the Reader with wet hands, or put the Reader in a damp article of
clothing, the Reader may get wet and this may cause a malfunction.
Charging the Reader
Heat may build up in the Reader while charging, or if it is used for an extended
period of time.
Use the supplied USB cable or the optional AC adapter (PRSA-AC10/PRSA-AC1A,
Find
sold separately) only. Do not use other USB cable and AC Adapter.
Never wrap the Reader in anything when it is being charged. Heat build-up in the
Reader may cause malfunction or damage.
If the battery quickly runs out of power after being fully charged, it may be reaching
the end of its life and should be replaced. Consult Sony Support Center.
Wi-Fi connectivity
The Wireless LAN functionality has passed Wi-Fi certification and complies with the
interoperability specifications established by WFA (Wi-Fi Alliance).
Cleaning the Reader
Clean the Reader with a soft cloth, such as a cleaning cloth for eyeglasses. Make
sure that there is no dust or dirt on the soft cloth, as the Reader may be damaged.
Do not use any type of abrasive pad, scouring powder or solvent, such as alcohol or
benzene, as it may mar the finish of the case.
Be sure to keep the Reader away from water or spills.
Touchscreen
Do not apply excessive pressure to the touchscreen. The color or lighting may
become blurred or uneven, and the Reader may become damaged.
When using the Reader in a cold environment, thin lines may appear on the
touchscreen. This is not a malfunction.
The outside cover of the touchscreen is made of glass. This glass could break if the
Reader is dropped on a hard surface or receives a substantial impact. It could also
be damaged by scratching and abrasion while being carried in a bag. If you are
concerned about damages to the touchscreen, you can use a protective case (sold
separately).
Wireless feature
Turn off the wireless feature when you are in a location in which radio
communications are prohibited. When you are in such a location, you must obtain
permission from the appropriate authorities before enabling the wireless feature of
this device.
Turn off the wireless feature in health care facilities where any regulations posted in
such areas instruct you to do so. Hospitals or health care facilities may be using
equipment that could be effected by radio frequency (RF) energy which is generated
by wireless communication.
Do not use your Reader near medical equipment without first obtaining permission to
do so.
General notes on using the Wi-Fi (Wireless LAN) function.
In some countries or regions, use of Wi-Fi products may be restricted by the local
regulations (e.g. limited number of channels).
Go to page top
Copyright 2013 Sony Corporation
Reader™ User Guide
Print
Search
Getting started
Basic Operations
Adding/Getting Content
Browsing Content Lists
Reading
Organizing
Other Applications
Settings
Other Information
Contents list
Top page > Other Information > Precautions > Applications on the Reader
Applications on the Reader
Disclaimer: In no event will SONY be liable for any financial damage, or loss of profits,
including claims made by third parties, arising out of the use of the software supplied
with this Reader.
Copyright laws prohibit reproducing the software or the manual accompanying it in
whole or in part, or renting the software without the permission of the copyright
holder.
The software provided with this Reader cannot be used with equipment other than
that which is so designated.
Due to continued efforts to improve quality, software specifications may be changed
without notice.
Please note that, due to continued efforts to improve quality, software specifications
may be changed without notice.
Operation of this Reader with software other than that provided is not covered by the
warranty.
By updating the Reader device software, you can ensure your Reader has the latest
features. The latest software updates can be performed by going to the [Help] menu
of the Reader application and clicking [Check for Updates].
Depending on the types of the text and characters, the text shown on the Reader
may not be displayed properly. This is due to:
− The capacity of the Reader.
− The Reader is not functioning normally.
− Content information is written in the language or the character that is not
supported by the Reader.
The ability to display the languages on your Reader will depend on the OS installed
on your computer. For better results, please ensure that the installed OS is
compatible with the desired language you want to display.
− We do not guarantee all the languages will be able to be displayed properly on
your Reader.
− User-created characters and some special characters may not be displayed.
Go to page top
Copyright 2013 Sony Corporation
Find

Reader™ User Guide
Print
Search
Getting started
Basic Operations
Adding/Getting Content
Browsing Content Lists
Reading
Organizing
Other Applications
Settings
Other Information
Contents list
Top page > Other Information > Precautions > About Pre-installed Sample Content
About Pre-installed Sample Content
Sample content is pre-installed in the Reader so that you can try them out right away.
The pre-installed sample content is for the purpose of trial reading and viewing.
Note
You will not be able to restore the pre-loaded samples once you delete them from
the Reader. Sony does not supply any replacement samples.
Go to page top
Copyright 2013 Sony Corporation
Find
Reader™ User Guide
Print
Search
Getting started
Basic Operations
Adding/Getting Content
Browsing Content Lists
Reading
Organizing
Other Applications
Settings
Other Information
Contents list
Top page > Other Information > Precautions > Reader Disposal Reference
Reader Disposal Reference
The built-in rechargeable battery of the Reader is recyclable. Do not remove the battery
yourself; consult Sony Support Center.
For customers in the USA and Canada
RECYCLING LITHIUM-ION BATTERIES
Lithium-ion batteries are recyclable. You can help preserve our
environment by returning your used rechargeable batteries to
the collection and recycling location nearest you. For more
information regarding recycling of rechargeable batteries, call toll
free 1-800-822-8837, or visit http://www.call2recycle.org.
Caution: Do not handle damaged or leaking Lithium-ion
batteries
Disposal of Old Electrical & Electronic Equipment (Applicable in
the European Union and other European countries with separate
collection systems)
This symbol on the product or on its packaging indicates that this product shall not be
treated as household waste. Instead it shall be handed over to the applicable collection
point for the recycling of electrical and electronic equipment. By ensuring this product is
disposed of correctly, you will help prevent potential negative consequences for the
environment and human health, which could otherwise be caused by inappropriate
waste handling of this product. The recycling of materials will help to conserve natural
resources. For more detailed information about recycling of this product, please contact
your local Civic Office, your household waste disposal service or the shop where you
purchased the product.
Disposal of waste batteries (applicable in the European Union and
other European countries with separate collection systems)
This symbol on the battery or on the packaging indicates that the battery provided with
this product shall not be treated as household waste.
Find

On certain batteries this symbol might be used in combination with a chemical symbol.
The chemical symbols for mercury (Hg) or lead (Pb) are added if the battery contains
more than 0.0005% mercury or 0.004% lead.
By ensuring these batteries are disposed of correctly, you will help prevent potentially
negative consequences for the environment and human health which could otherwise be
caused by inappropriate waste handling of the battery. The recycling of the materials will
help to conserve natural resources.
In case of products that for safety, performance or data integrity reasons require a
permanent connection with an incorporated battery, this battery should be replaced by
qualified service staff only.
To ensure that the battery will be treated properly, hand over the product at end-of-life
to the applicable collection point for the recycling of electrical and electronic equipment.
For all other batteries, please view the section on how to remove the battery from the
product safely. Hand the battery over to the applicable collection point for the recycling
of waste batteries.
For more detailed information about recycling of this product or battery, please contact
your local Civic Office, your household waste disposal service or the shop where you
purchased the product.
Go to page top
Copyright 2013 Sony Corporation

Reader™ User Guide
Print
Search
Getting started
Basic Operations
Adding/Getting Content
Browsing Content Lists
Reading
Organizing
Other Applications
Settings
Other Information
Contents list
Top page > Other Information > Precautions > Additional Information for Customers in
the US/Canada
Additional Information for Customers in the US/Canada
The following FCC/IC statement applies only to the version of this model manufactured
for sale in the U.S.A. and Canada. Other versions may not comply with FCC/IC
technical regulations.
FCC Compliance Statement
NOTE:
This equipment has been tested and found to comply with the limits for a Class B digital
device, pursuant to Part 15 of the FCC Rules. These limits are designed to provide
reasonable protection against harmful interference in a residential installation. This
equipment generates, uses and can radiate radio frequency energy and, if not installed
and used in accordance with the instructions, may cause harmful interference to radio
communications.
However, there is no guarantee that interference will not occur in a particular
installation. If this equipment does cause harmful interference to radio or television
reception, which can be determined by turning the equipment off and on, the user is
encouraged to try to correct the interference by one or more of the following measures:
Reorient or relocate the receiving antenna.
Increase the separation between the equipment and receiver.
Connect the equipment into an outlet on a circuit different from that to which the
receiver is connected.
Consult the dealer or an experienced radio/TV technician for help.
You are cautioned that any changes or modifications not expressly approved in this
manual could void your authority to operate this equipment.
For customers in the USA and Canada
If you have any questions about this product:
Support PC Web
USA:
http://www.sony.com/readersupport
Canada:
http://www.sony.ca/readersupport
Declaration of Conformity
Trade Name: SONY
Model No.: PRS-T3/PRS-T3S
Responsible Party: Sony Electronics Inc.
Address: 16530 Via Esprillo, San Diego, CA 92127 U.S.A.
Telephone Number: 858-942-2230
This device complies with Part 15 of the FCC Rules.
Operation is subject to the following two conditions: (1) this device may not cause
harmful interference, and (2) this device must accept any interference received,
including interference that may cause undesired operation of the device.
This device complies with Industry Canada licence-exempt RSS standard(s).
Operation is subject to the following two conditions: (1) this device may not cause
interference, and (2) this device must accept any interference, including interference that
may cause undesired operation of the device.
FCC/IC Radiation Exposure Statement
Find

The available scientific evidence does not show that any health problems are associated
with using low power wireless devices. There is no proof, however, that these low power
wireless devices are absolutely safe. Low power Wireless devices emit low levels of
radio frequency energy (RF) in the microwave range while being used. Whereas high
levels of RF can produce health effects (by heating tissue), exposure of low-level RF
that does not produce heating effects causes no known adverse health effects. Many
studies of low-level RF exposures have not found any biological effects. Some studies
have suggested that some biological effects might occur, but such findings have not
been confirmed by additional research. PRS-T3/PRS-T3S has been tested and found to
comply with FCC/IC radiation exposure limits set forth for an uncontrolled environment
and meets the FCC radio frequency (RF) Exposure Guidelines in Supplement C to
OET65 and RSS-102 of the IC radio frequency (RF) Exposure rules. For models with
the battery pack installed, the FCC/IC ID label is located on the battery compartment
under the Back Panel of the Reader. This device and its antenna(s) must not be co-
located or operating with any other antenna or transmitter except Grant condition.
Go to page top
Copyright 2013 Sony Corporation
Reader™ User Guide
Print
Search
Getting started
Basic Operations
Adding/Getting Content
Browsing Content Lists
Reading
Organizing
Other Applications
Settings
Other Information
Contents list
Top page > Other Information > Precautions > Notes on microSD Cards
Notes on microSD Cards
SD cards are made to standards and are commonly used as storage media for portable
devices. microSD and microSDHC cards are members of the SD card family.
The Reader supports the following card types.
microSD and microSDHC cards
Up to 32 GB
microSD cards of up to 32 GB has been tested to work with the Reader; however, not
all microSD cards are guaranteed to work.
Precautions
Insert into the correct slot with the card’s label side up until it clicks into place.
To avoid a choking hazard, keep the microSD card out of the reach of children.
Do not touch the gold contact point of the microSD card.
Do not disassemble or modify a memory card.
Do not allow a memory card to get wet.
Avoid the following to prevent data damage. Sony does not provide any guarantee
for damaged data.
− Remove a memory card or turn off the Reader while reading or writing data.
− Operate the Reader in the location where static charge or electrical noise is
present.
Do not strike, bend, drop, disassemble, open, crush, deform, puncture, shred,
microwave, incinerate or paint the microSD card.
Do not use force, a thin stick or tweezers to remove the microSD card. If you cannot
remove the microSD card, contact customer support.
Do not remove the microSD card or turn off the Reader while data on the memory
card is being edited or accessed. Otherwise, edited data will not be saved.
Do not insert a deformed microSD card into the Reader.
If a memory card is formatted by your computer, it may become unusable on the
Reader and “Reader for PC/Mac”. When formatting a memory card, format it using
the Reader (see Details). If a format process is executed, all the files, even including
write-protected image files, will be deleted.
If you change or erase a folder name via computer, or move a file to a folder other
than “database”, there is a possibility that data recorded in a memory card might be
lost or become unreadable by this product.
You can use a microSD card (less than 2 GB) and microSDHC card (less than 32
GB), but CPRM (Content Protection for Recordable Media) is not supported.
microSDXC card is not supported.
FAT (File Allocation Table) is supported.
exFAT (Extended File Allocation Table) is not supported.
Formatting a microSD card
You can use the Reader to format a microSD card if necessary.
WARNING
Formatting the microSD card will delete all files stored on it. You can use the Reader
application to backup files. Files that you have set protection for via the Reader’s
applications will also be deleted.
1. Press the
(Home) button tap [Applications] [Settings] [Initialization]
[Format Memory] [SD Card].
2. Tap [Yes] when prompted.
To cancel, tap [No].
Find

Reader™ User Guide
Print
Search
Getting started
Basic Operations
Adding/Getting Content
Browsing Content Lists
Reading
Organizing
Other Applications
Settings
Other Information
Contents list
Top page > Other Information > Legal Notice > Legal Notice
Legal Notice
The contents of each book pre-loaded on this product are copyrighted works, edited
with the cooperation of the publisher.
Copyright laws prohibit copying the data of this product or the contents of this manual
(illustrations, related documents, etc.) in whole or in part without the permission of the
copyright holder. Additionally, use of the data of this product or the contents of this
manual is not allowed without Sony’s permission except for personal use.
Sony, the Sony logo, “Reader”, “BBeB” and their logos are either trademarks or
registered trademarks of Sony Corporation.
EPUB is a registered trademark of the IDPF.
Frutiger, Univers, Helvetica and Palatino are trademarks of Linotype Corp. registered
in the United States Patent and Trademark Office and may be registered in certain
jurisdictions in the name of Linotype Corp. or its licensee Linotype GmbH.
Bitstream is a registered trademark, and Dutch, Font Fusion, and Swiss are
trademarks, of Bitstream Inc.
Microsoft, Windows, Windows Vista and Windows Media are trademarks or registered
trademarks of Microsoft Corporation in the United States and / or other countries.
Macintosh and Mac OS are trademarks of Apple Inc., registered in the U.S. and
other countries.
This product includes software developed by the OpenSSL Project for use in the
OpenSSL Toolkit. (http://www.openssl.org/) Copyright© 1998-2011 The OpenSSL
Project. All rights reserved. This product includes cryptographic software written by
Eric Young ([email protected]). This product includes software written by Tim
Hudson ([email protected]). For details on OpenSSL License, refer to [End User
License Agreement] in [About] at [Settings] on the Reader.
Wi-Fi, the Wi-Fi CERTIFIED logo, WPA, WPA2 and Wi-Fi Protected Setup are
trademarks or registered trademarks of Wi-Fi Alliance.
Facebook is a trademark of Facebook, Inc.
EVERNOTE, Evernote Clearly, the Evernote elephant logo and REMEMBER
EVERYTHING are trademarks of Evernote Corporation, and used under licence.
Contains Reader® Mobile technology by Adobe Systems Incorporated.
Google is a trademark of Google Inc.
All other system names and product names appearing in this document are the
registered trademarks or trademarks of their respective owners. Further, the trademark
™ and registered trademark ® symbols are not indicated throughout this document.
Documentation © 2013 Sony Corporation
4-470-507-11(1)
Go to page top
Copyright 2013 Sony Corporation
Find
Reader™ User Guide
Print
Search
Getting started
Basic Operations
Adding/Getting Content
Browsing Content Lists
Reading
Organizing
Other Applications
Settings
Other Information
Contents list
Top page > Other Information > Appendix > Specifications
Specifications
Model name
PRS-T3/PRS-T3S
Power source
Built-in rechargeable battery: 3.7 V DC, 1000mAh
USB powered from a computer or the optional AC Adapter PRSA-AC10/PRSA-AC1A
(sold separately) via the supplied USB cable.
Battery life (continuous page turn)
Maximum Battery: Approximately 30,000 continuous page turns when reading only.*
* Measured using a text based content in ePub format and a fully charged battery,
consecutive page-turns at approximately one second per page under the
recommended operating temperature. Actual battery life may vary based on usage
patterns and individual device.
Charging time
Computer-based charging: Approximately 2.5 hours
AC Adapter PRSA-AC10/PRSA-AC1A (sold separately)-based charging: Approximately
2 hours
Internal memory capacity (for data storage)
Approximately 1.2GB after initial setting.
Depending on size of pre-loaded excerpts, available memory capacity may vary.
Operating/Charging temperature
5°C to 35°C (41°F to 95°F)
Dimensions (w/h/d)
PRS-T3: 109 × 160 × 11.3 mm (4 3/8 × 6 3/8 × 15/32 inches)
PRS-T3S: 107 × 160 × 8.8 mm (4 1/4 × 6 3/8 × 3/8 inches)
Mass
PRS-T3: 200 g (7.1 oz.)
PRS-T3S: 160 g (5.6 oz.)
Display
152.4 mm (6 inch) diagonal electrophoretic display
758 × 1024 pixels, 16-level grayscale
Wi-Fi
Find

Wireless standards: IEEE 802.11b/g/n compliant
Wireless security: WEP (Open System), WEP (Shared Key), WPA-PSK (TKIP), WPA-
PSK (AES), WPA2-PSK (TKIP), WPA2-PSK (AES)
Expansion slots
microSD card slot
See Details for supported card types and precautions.
Supplied items
USB cable × 1
Quick Start Guide
Go to page top
Copyright 2013 Sony Corporation
Reader™ User Guide
Print
Search
Getting started
Basic Operations
Adding/Getting Content
Browsing Content Lists
Reading
Organizing
Other Applications
Settings
Other Information
Contents list
Top page > Other Information > Appendix > Supported File Types
Supported File Types
The following files can be managed on the Reader application and transferred to the
Reader device.
However, depending on the file size and format, it may not be possible to
view/display/play some data.
Books
EPUB files (.epub)
EPUB (OPS version 2.0) supported.
PDF files (.pdf)
Support is based on the PDF 1.6 specification.
Text files (.txt)
Pictures
JPEG files (.jpg, .jpeg)
GIF files (.gif)
PNG files (.png)
BMP files (.bmp)
Note
If the size of a picture that you transferred with the Reader application is too large,
a thumbnail may not be created on the Reader and the picture may not be
displayed in the [Pictures] content list. In this case, delete the picture via the
Reader application.
For an animated GIF file, only the first frame will be shown.
Go to page top
Copyright 2013 Sony Corporation
Find
Reader™ User Guide
Print
Search
Getting started
Basic Operations
Adding/Getting Content
Browsing Content Lists
Reading
Organizing
Other Applications
Settings
Other Information
Contents list
Top page > Other Information > Appendix > System Requirements
System Requirements
The Reader application will work with the following operating systems.
Operating System Details
Microsoft Windows 8
(32/64-bit)
Windows 8
Windows 8 Pro
Microsoft Windows 7
(32/64-bit)
Windows 7 Starter with Service Pack 1 or later
Windows 7 Home Basic with Service Pack 1 or later
Windows 7 Home Premium with Service Pack 1 or later
Windows 7 Professional with Service Pack 1 or later
Windows 7 Ultimate with Service Pack 1 or later
Microsoft Windows Vista
(32/64-bit)
Windows Vista Home Basic with Service Pack 2 or later
Windows Vista Home Premium with Service Pack 2 or
later
Windows Vista Business with Service Pack 2 or later
Windows Vista Ultimate with Service Pack 2 or later
Microsoft Windows XP
(32-bit only)
Windows XP Home Edition with Service Pack 3 or later
Windows XP Professional with Service Pack 3 or later
Windows XP Media Center Edition 2004 & 2005 with
Service Pack 3 or later
Mac OS X 10.8 Mac OS X version 10.8.1 or later
Mac OS X 10.7 (64-bit
only)
Mac OS X version 10.7 or later
Mac OS X 10.6 (32/64-bit) Mac OS X version 10.6.6 or later
Mac OS X 10.5 (32-bit
only)
Mac OS X version 10.5.8
The Reader application also requires at minimum the following computing environment.
Requirement Details
CPU 1 GHz Intel processor
RAM 512 MB
Free space on hard disc 250 MB or more*
Screen 1,024 x 768 display resolution with 24-bit color
Network Broadband internet connection
* Depending on the content amount, more space may be required.
Note
The Reader application is not supported with the following:
An operating system other than those listed above
A personally built computer or operating system
A multi-boot environment
A multi-monitor environment
Go to page top
Copyright 2013 Sony Corporation
Find