
Loading ...
Loading ...
Loading ...
36
Network Setting Up
Network Setting Up
This projector provides the NETWORK function. When you start to use this function,
please consult your dealer for further information.
To start, connect the NETWORK port to a gateway device via a CAT-5 cable, then set up
the projector according to the Network environment in which you use it.
When your Network enables the DHCP function
You can set automatically, if you set the DHCP function to "TURN ON" using the NETWORK
menu. Please refer to the section "NETWORK Menu".
When your Network doesn’t support the DHCP function
or When you use a fixed address even if your Network can support the
DHCP function
Please set the IP Address, the Subnet Mask, the Default Gateway and the DHCP using
the NETWORK menu. At first, set the DHCP function to “TURN OFF”.
You can set them using a Web Browser (Internet Explorer 4.0 or higher) on the computer
connected to the Network.
Input the same IP address as set to the projector onto the Web Browser on the computer
connected to LAN.
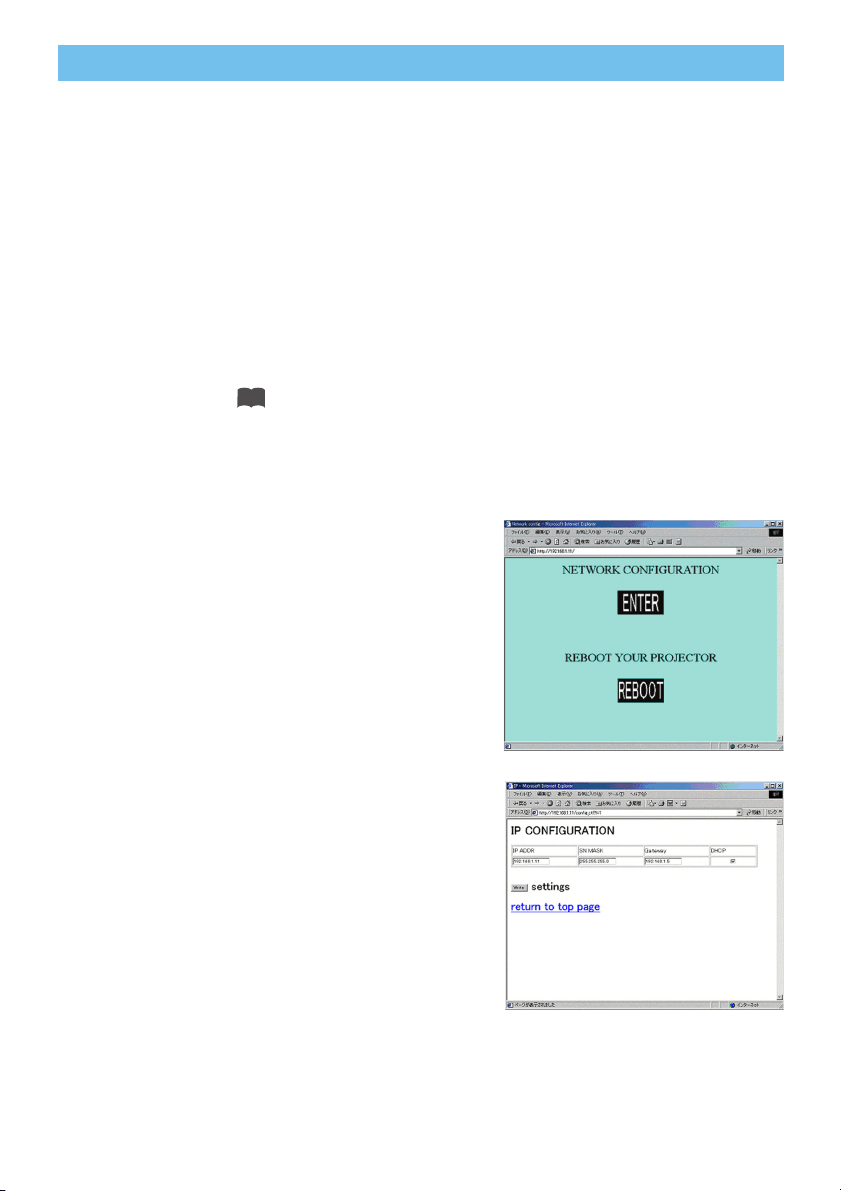
ex. Case of IP Address = 192.168.1.11
1) Input “http://192.168.1.11”.
2) Click “ENTER”.
3) Input the required data according to the screen.
4) Make sure of the input data, then click "Write".
memo These setting will be active after reboot. These
setting will be stored, and used when DHCP is OFF.
5) Click “Return to top page”.
6) Click “REBOOT” to complete this operation.
35
Loading ...
Loading ...
Loading ...