Loading ...
Loading ...
Loading ...
5
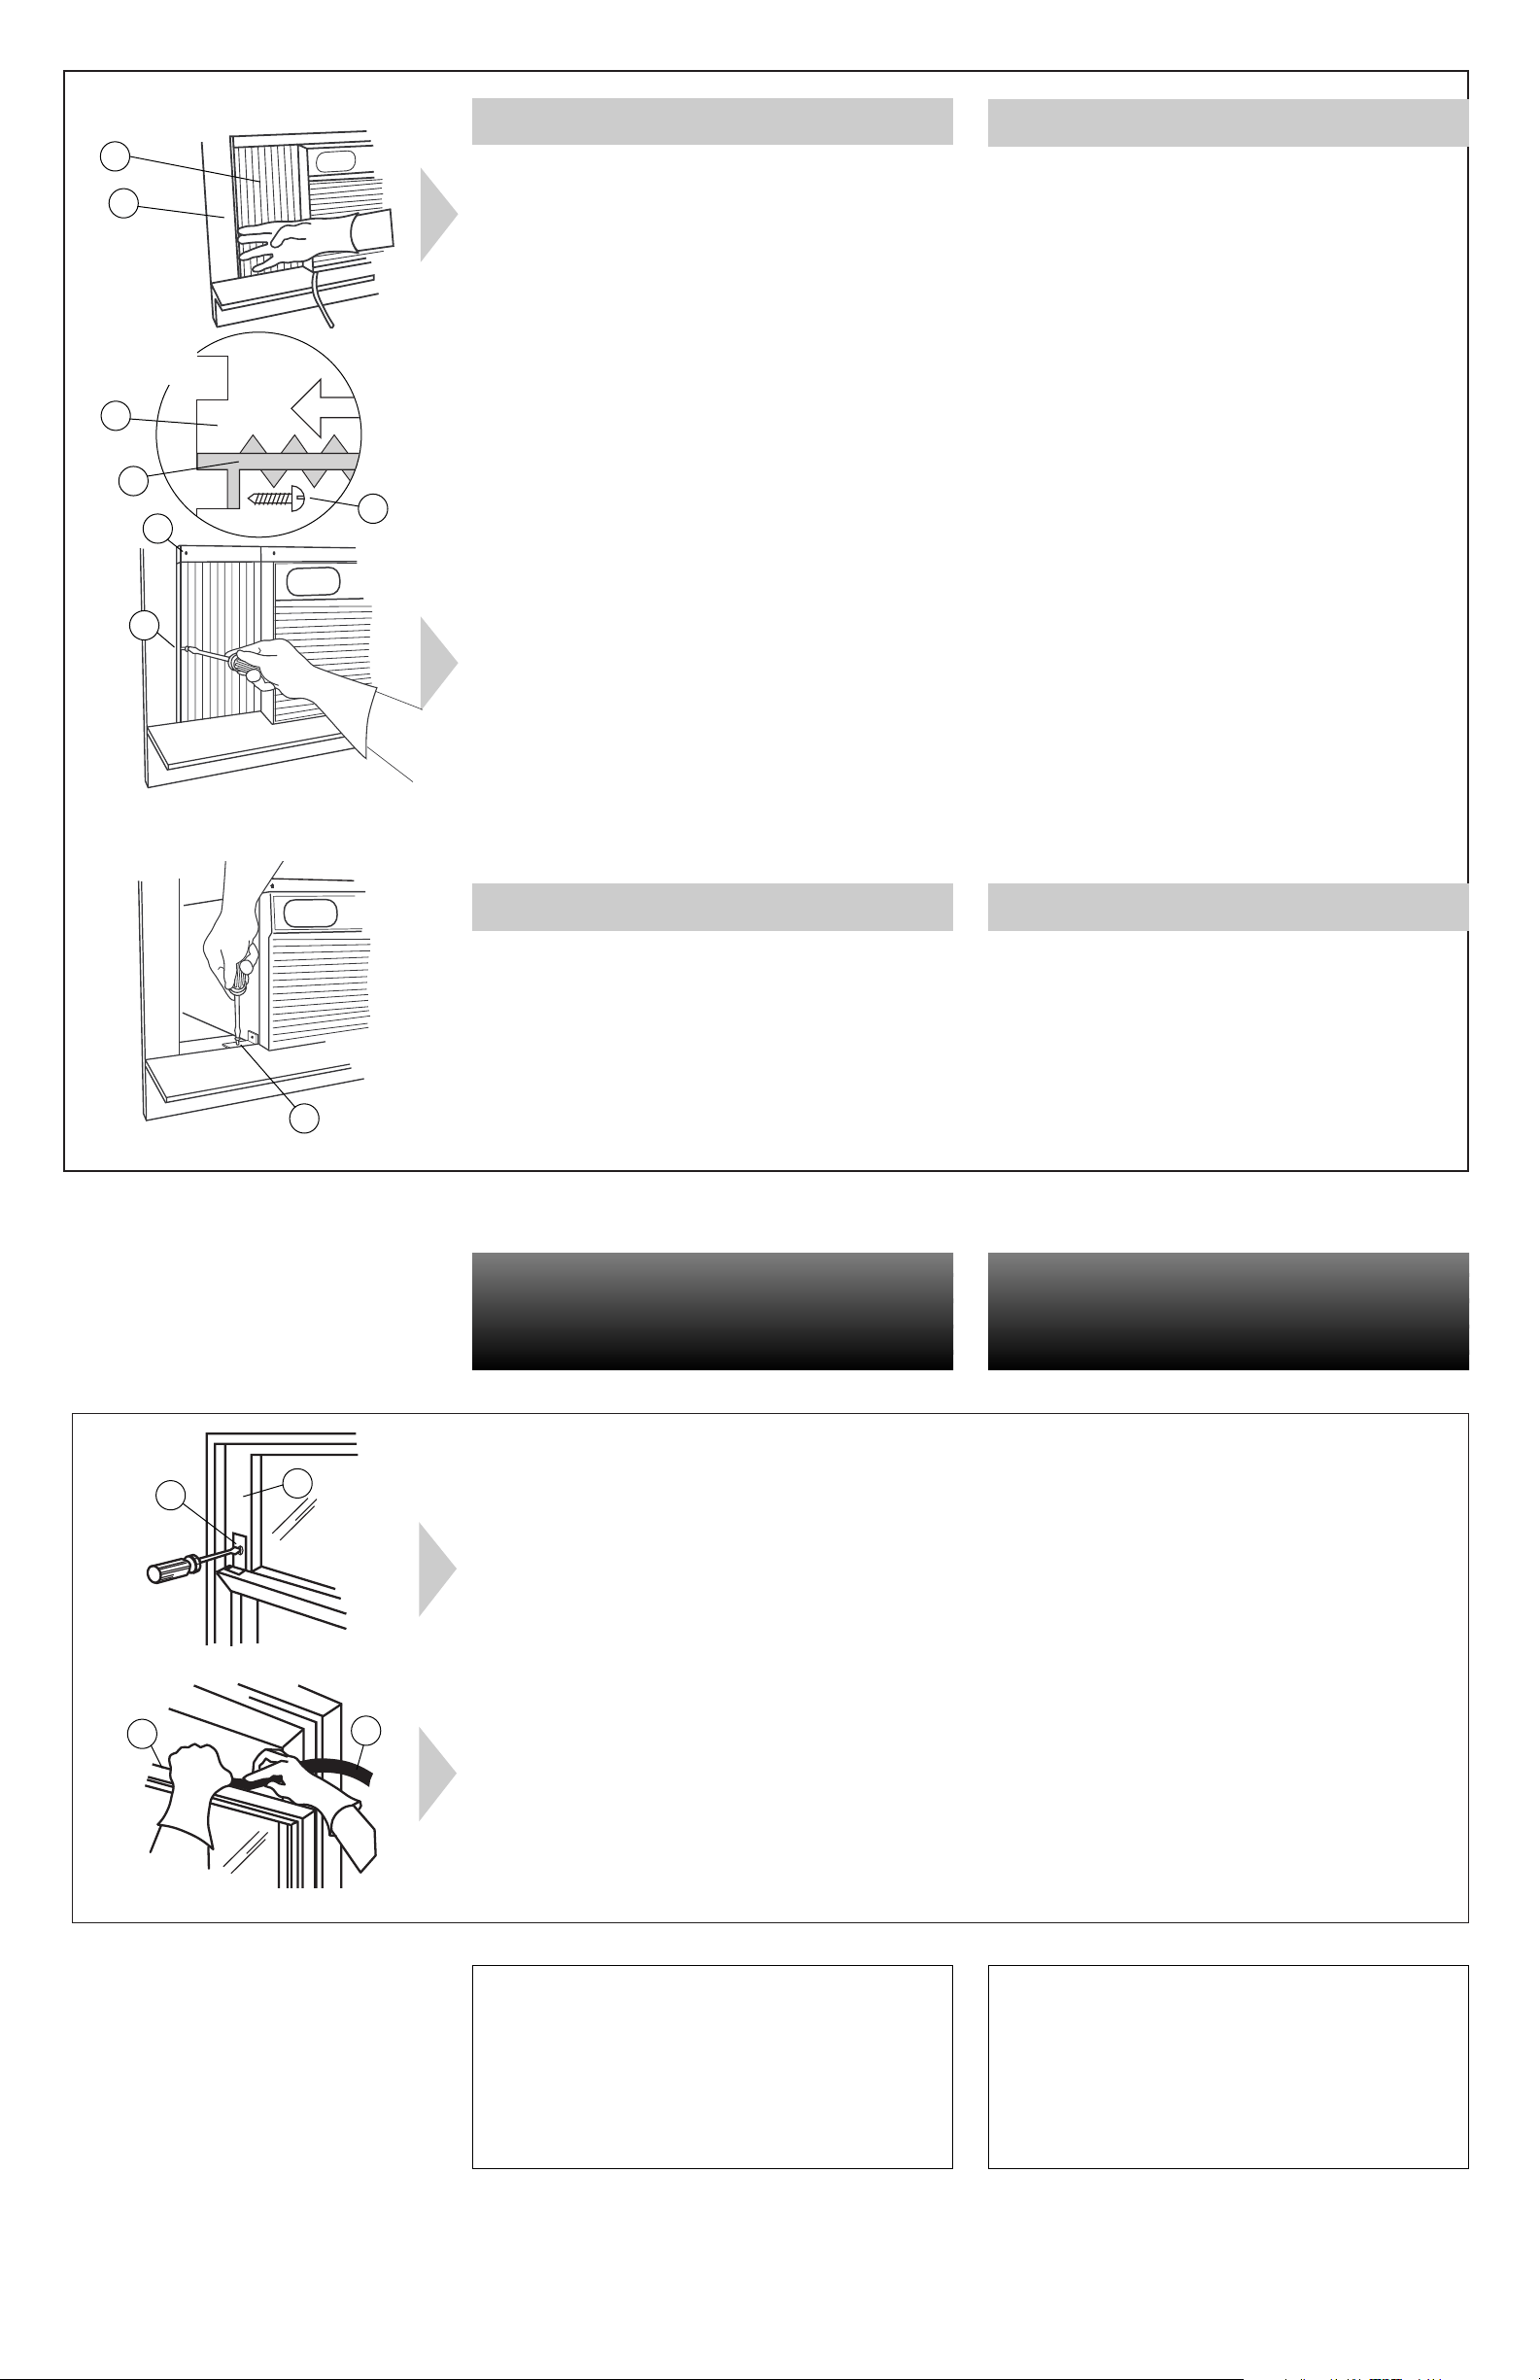
Completing installation
Para completar la
instalación
NOTE: Install window-lock bracket to prevent air conditioner from
falling out of window.
Place window-lock bracket (H) on top of lower window and against
upper window sash (I). Use a 3/32" drill bit to drill a starter hole
through the hole in the bracket. Attach window-lock bracket.
NOTA: Instale un soporte de seguridad para la ventana para evitar
que el acondicionador de aire se caiga de la ventana.
Coloque el soporte de seguridad para la ventana (H) en la parte
superior de la ventana inferior y contra el marco de la ventana
superior (I). Utilice una broca de barrena de 3/32" para perforar el
primer orificio a través del orificio en el soporte. Fije el soporte de
seguridad para la ventana.
J
K
H
I
Congratulations!
You have successfully installed your new air
conditioner. To get the most efficient use from your
new air conditioner, read the Use and Care Guide
section of this book.
¡Felicitaciones!
Usted ha instalado con éxito su nuevo
acondicionador de aire. Para obtener
el uso más eficiente de su nuevo acondicionador
de aire, lea la sección de Guía de Uso y Cuidado
de este folleto.
Insert foam seal (J) behind the top of the lower window sash (K) and
against the glass of the upper window.
Inserte el obturador del riel de la ventana (J) detrás de la parte
superior del marco de la ventana inferior (K) y contra el cristal de
la ventana superior.
Pull left curtain (D) out until it fits into the window channel (E).
Repeat with right curtain.
If your air conditioner does not have side curtains, fill spaces with a
suitable material.
Corra la cortina izquierda (D) hasta que encaje en el canal de la
ventana (E). Haga lo mismo con la cortina derecha.
Si su acondicionador de aire no tiene cortinas laterales, rellene los
espacios con material adecuado.
Top view
Vista superior
E
D
E
D
F
Insert one of the round-head screws (F) through left curtain and into
the window channel or through alternate hole (G) at the top of the
curtain and into the window channel to fasten the curtain to the
window. Repeat for right curtain.
Inserte uno de los tornillos de cabeza redonda (F) a través de la
cortina izquierda, en el canal de la ventana o a través de un orificio
alterno (G) en la parte superior de la cortina, en el canal de la
ventana para sujetar la cortina a la ventana. Haga lo mismo con la
cortina derecha.
F
F
G
For models with side curtains.
Para modelos con cortinas laterales.
For models without side curtains.
Using a 3/32" or smaller drill bit, drill a starter hole in the window sill
through the hole in the window-lock brackets.
Attach window-lock brackets to window sill with round-head screws
(F).
Para modelos sin cortinas laterales.
Utilizando una broca de barrena de 3/32” o más pequeña, haga un
orificio inicial en el umbral de la ventana a través del orificio en los
soportes de seguridad de la ventana.
Fije los soportes de seguridad de la ventana en el umbral de la ventana
con los tornillos de cabeza redonda (F).