V.K007A20160812
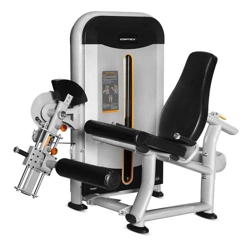
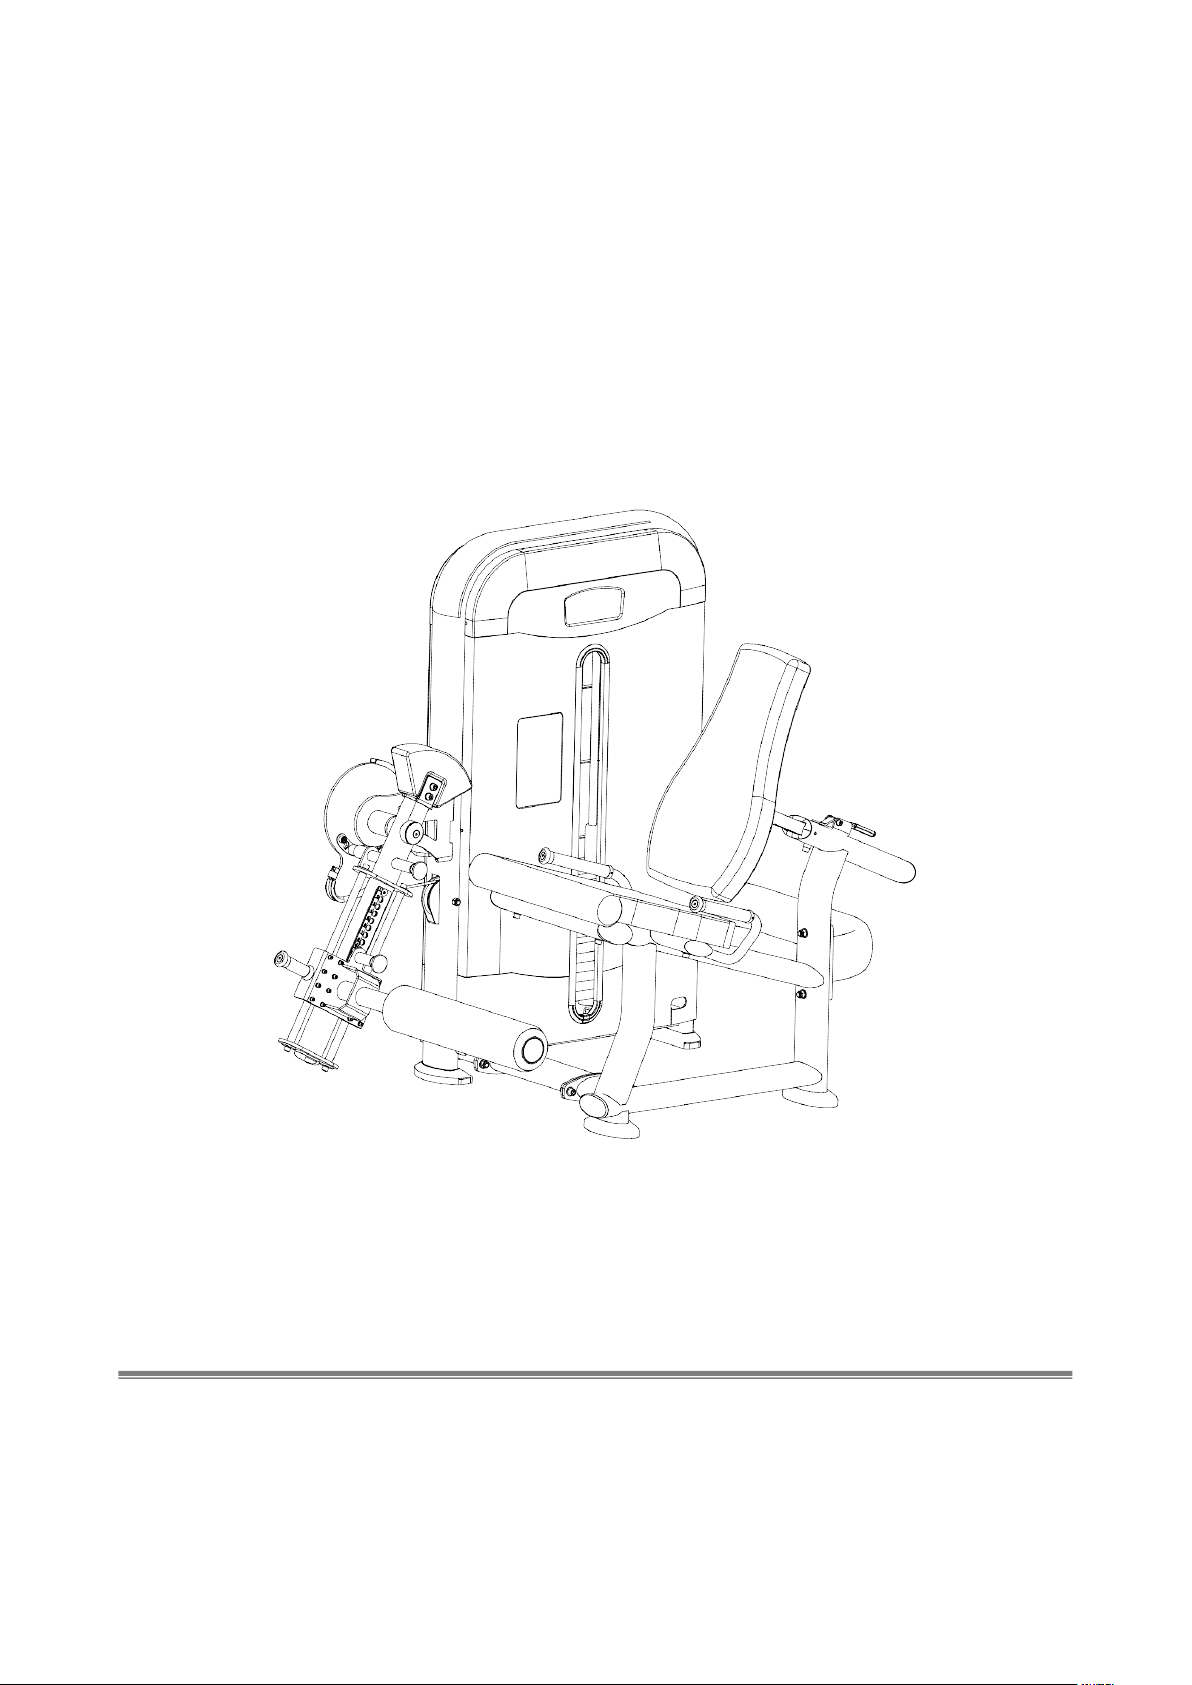
LGE-10 Seated Leg
Extension
OWNER’S MANUAL
IMPORTANT!
Please read all instructions carefully before using this product.
Retain this manual for future reference.
The specifications of this product may vary slightly from the illustrations and are subject to change
without notice.
- 1 -
WARNING, Safety & Maintenance
Be sure that all users carefully read and understand all
warning, safety and maintenance info on this Owner’s
Manual or labels on the machine before each use. Failure to
do so may result in death or serious injury.
It is imperative that you retain this Owner’s Manual and be
sure all warning labels are legible and intact.
If you have any questions about the operation, set up or
maintenance of this machine please contact the local
distributors or sales agents.
THERE IS A RISK ASSUMED BY INDIVIDUALS WHO USE THIS
TYPE OF EQUIPMENT.
TO MINIMIZE RISK, YOU MUST FOLLOW THESE RULES:
1. Inspect equipment before each workout. Check that all
nuts, bolts, screws, and pop pins are in place and fully
tightened. Also, before use, check cables for signs of wear.
Replace all worn parts immediately. Never use machine if
any parts are damaged or missing.
FAILURE TO FOLLOW THESE RULES MAY RESULT IN SERIOUS
INJURY.
2. Keep clear of the cables and all moving parts when the
machine is in use.
3. Always make sure all Snap Links are closed when doing
any cable/pulley/strap exercises.
4. Exercise with care. Perform your exercises at a smooth
moderate pace; never perform jerky or uncoordinated
movements that may cause injury.
5. It is recommended that you should workout with a
training partner.
6. Do not allow children or minors to play on or around this
equipment.
7. If unsure of proper use of equipment, call your local
distributor or agent.
8. WARNING: Consult your physician before starting your
exercise program. For your own safety, do not begin any
exercise program without proper instruction.
MAINTENANCE
SCHEDULE
Check the function and integrity of the
following components.
As noted, inspect equipment before
each workout. Replace all damaged,
broken or worn components
immediately.
D
A
I
L
Y
W
E
E
K
L
Y
Cables:
Check tension,
end fittings, and
coating
Check that
locking nut at
weight stack is
tight
√
√
Upholstery:
Wipe down and dry
Clean and
condition
√
√
Frame:
Wipe down and dry
Polish / Wax
√
√
Chrome:
Wipe down and dry
Polish /
Lubricate
√
√
Nuts/ Bolts/ Fasteners:
Tighten and/ or adjust as
needed
√
Guide Rods:
Lubricate and
clean
√
Linear
Rods:
Lubricate and
clean
√
Seat
Sleeves:
Lubricate and
clean
√
Adjustments/ Locking Pins/
Tightening Knobs
√
Weight Stack Pins
√
Warning Instruction Labels
√
Springs/ Pop Pins
√
Anti Skid Surfaces
√
Hand Grips/ Rollers
√

- 2 -
WARNING Safety and Maintenance of Cables
IMPORTANT: Cables are wear items. It is your responsibility to prevent unexpected breakage.
Cable inspection should be performed daily. Inspect all cables, the nylon coating on all cables, and the area near
the fitting at each end of each cable.
Replace any damaged or worn cable immediately. Do not allow the machine to be used until damaged or
worn cables are replaced. Using or allowing a machine to be used with a suspect cable can result in serious injury.
See Owner’s Manual for more information.
Important Safety Instructions
Before beginning any fitness program, you should obtain a complete physical examination from your physician.
WHEN USING EXERCISE EQUIPMENT, YOU SHOULD ALWAYS TAKE BASIC PRECAUTIONS,
INCLUDING
THE FOLLOWING:
Read all instructions before using the equipment. These instructions are written to ensure your safety
and to protect the unit.
Do not remove any safety labels from the machine.
MAX. USER WEIGHT: 180Kgs
Do not allow children on or near the equipment.
Use the equipment only for its intended purpose as described in this guide. Do not use accessory
attachments that are not recommended by the manufacturer. Such attachments might cause injuries.
Wear proper exercise clothing and shoes for your workout, no loose clothing.
Keep hands, limbs, loose clothing, and long hair well out of the way of all moving parts.
Use care when getting on or off the unit.
Do not overexert yourself or work to exhaustion.
If you feel any pain or abnormal symptoms, stop your workout immediately and consult your physician.
Never operate unit when it has been dropped or damaged. Return the equipment to a service center
for examination and repair.
Never drop or insert objects into any opening in the equipment.
Always check the unit and its cables before each use. Make sure that all fasteners and cables are
secure and in good working condition.
Do not use the equipment outdoors or near water.
Personal Safety During Assembly
Before beginning assembly, please take the time to read the instructions thoroughly.
Read each step in the assembly instructions and follow the steps in sequence. Do not skip ahead. If
you skip ahead, you may learn later that you have to disassemble components and that you may
have damaged the equipment.
Assemble and operate the equipment on a solid, level surface. Locate the unit a few feet from the
walls or furniture to provide easy access.
The machine is designed for your enjoyment. By following these precautions and using common sense,

- 3 -
you will have many safe and pleasurable hours of healthful exercise with your equipment.
After assembly, you should check all functions to ensure correct operation. If you experience problems,
first recheck the assembly instructions to locate any possible errors made during assembly. If you are
unable to correct the problem, call the dealer from whom you purchased the machine or call the
dealer nearest you.
Obtaining Service
Please use this Owner’s Manual to make sure that all parts have been included in your shipment.
Retain this Owner’s Manual for future reference.
PREPARATION
Thank you for purchasing this equipment. This machine is part of our line of quality strength
training machines, which lets you target specific muscle groups to achieve better muscle
tone and overall body conditioning. To maximize your use of the equipment please study this
Owner’s Manual thoroughly.
INSTALLATION Requirements
Follow these installation requirements when assembling:
Set up the machine on a solid, flat surface. A smooth, flat surface under the machine helps
keep it level. A level machine has fewer malfunctions.
Provide ample space around the machine. Open space around the machine allows for easier
access.
Insert all bolts in the same direction. For aesthetic purposes, insert all bolts in the same
direction unless specified (in text or illustrations) to do otherwise.
Leave room for adjustments. Tighten fasteners such as bolts, nuts, and screws so the unit is
stable, but leave room for adjustments. Do not fully tighten fasteners until instructed in the
assembly steps to do so.
ASSEMBLY Tips
Read all “Notes” on each page before beginning each step.
While you may be able to assemble the machine using the illustrations only, important safety
notes and other tips are included in the text.
Some pieces may have extra holes that you will not use. Use only those holes indicated in the
instructions and illustrations.
NOTE: With so many assembled parts, proper alignment and adjustment is critical. While
tightening the nuts and bolts, be sure to leave room for adjustments.
NOTE: The bottles that are marked “Poison” is your touch up paint. Keep away from
children.
CAUTION: Obtain assistance! If you feel like you can’t assemble the machine by yourself then
do not attempt to do so as this could result in injury. Review the installation requirements
before proceeding with the following steps.
- 4 -
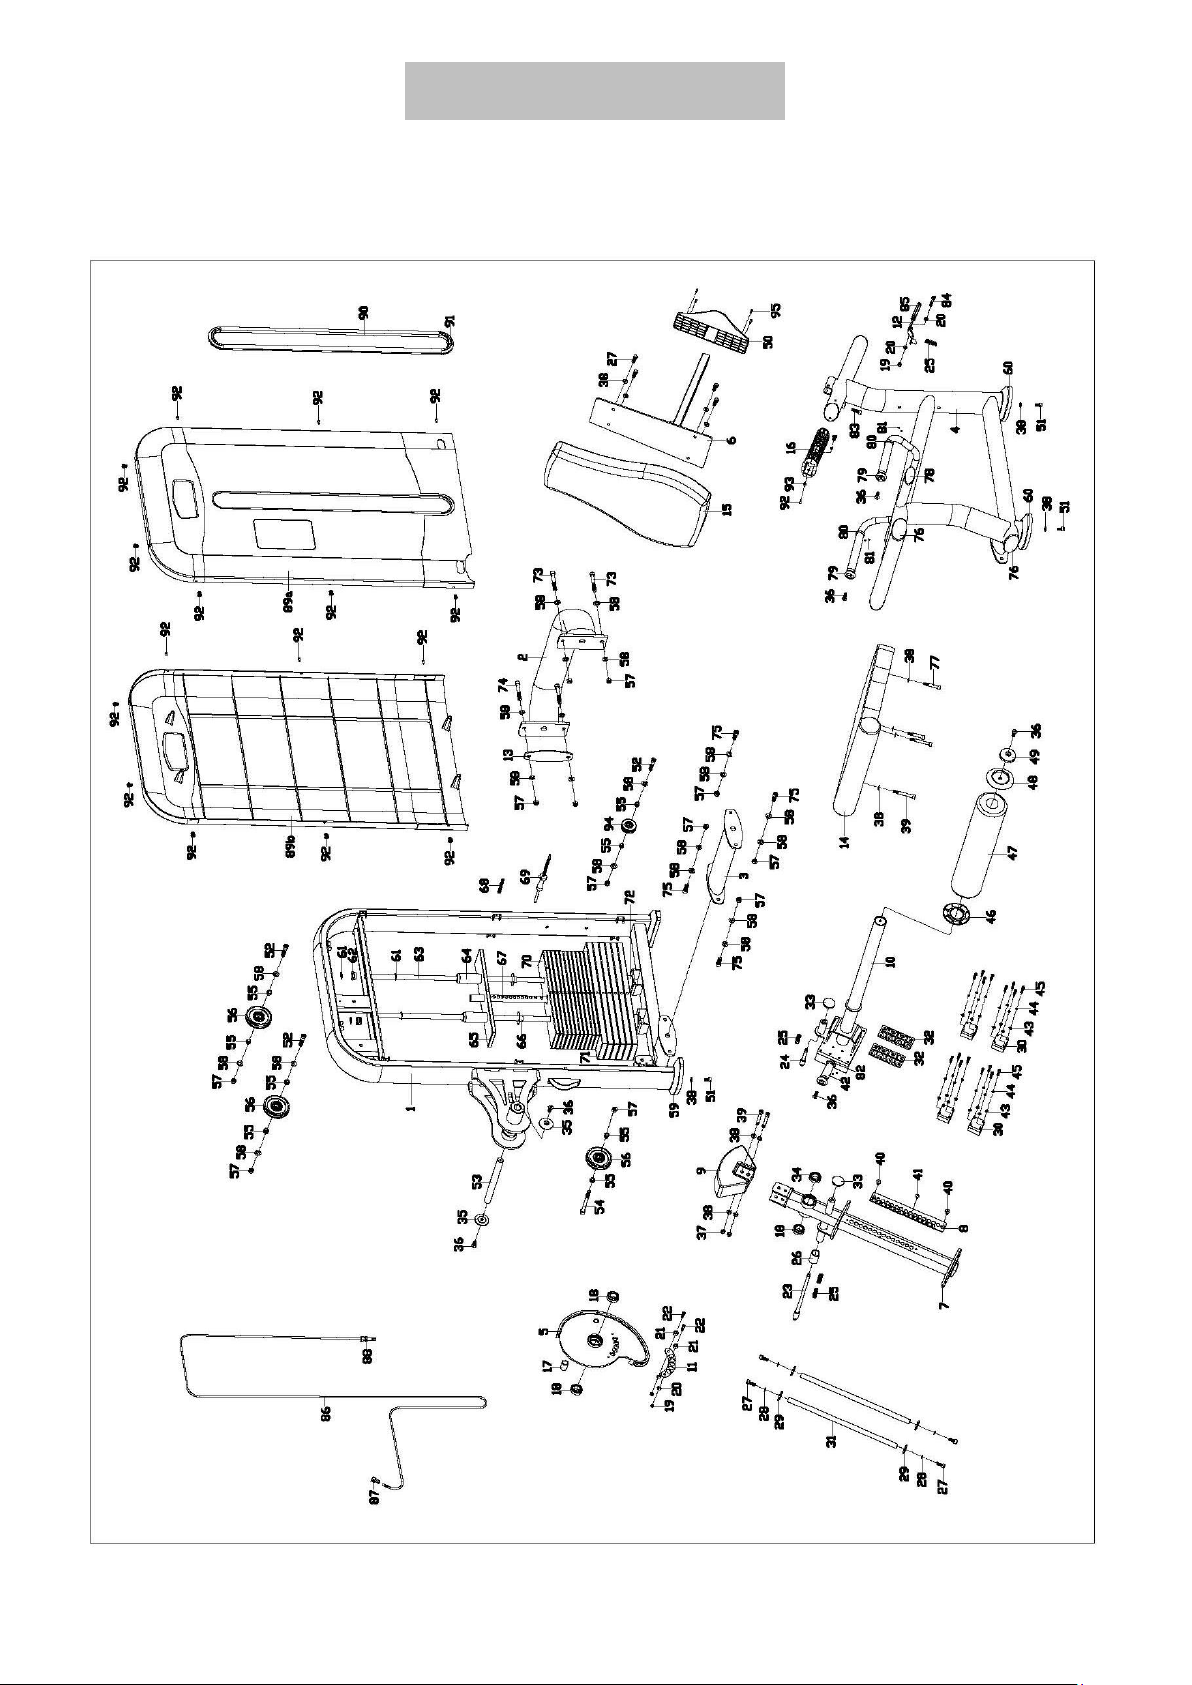
Exploded Drawing

- 5 -
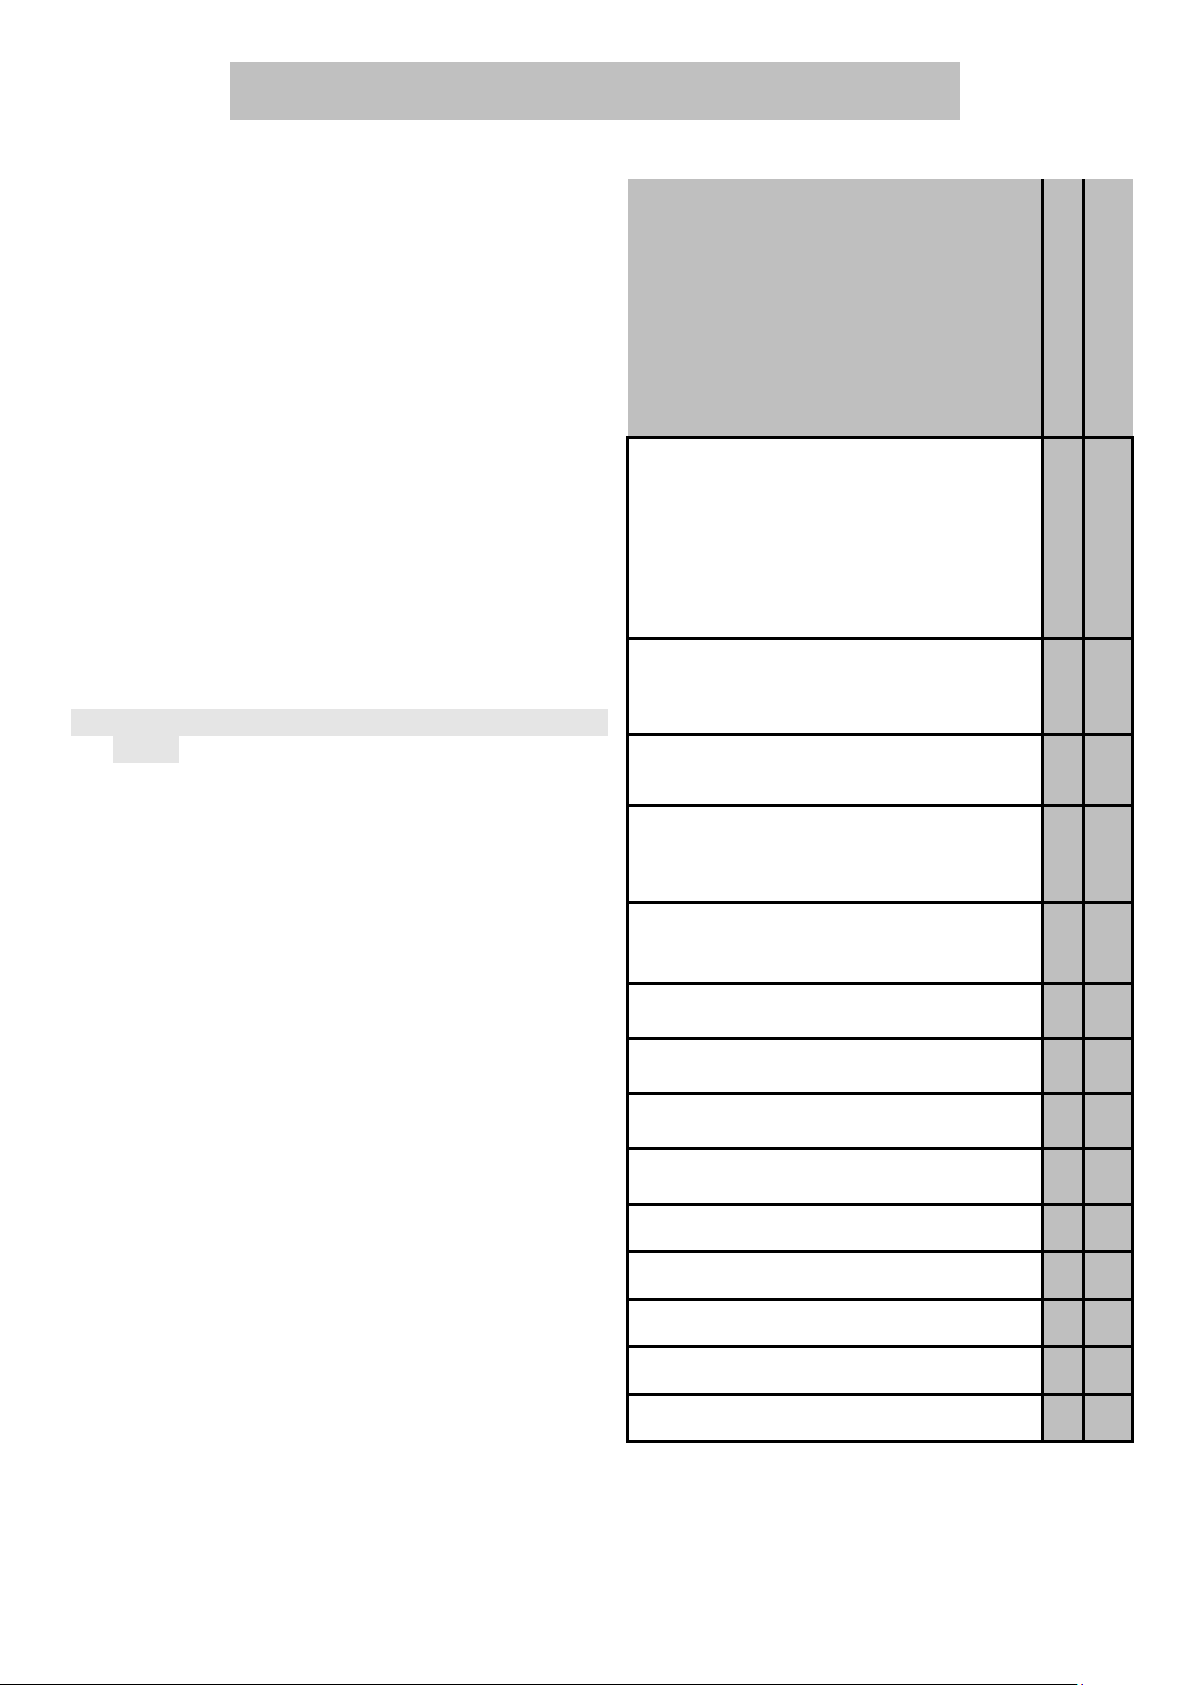
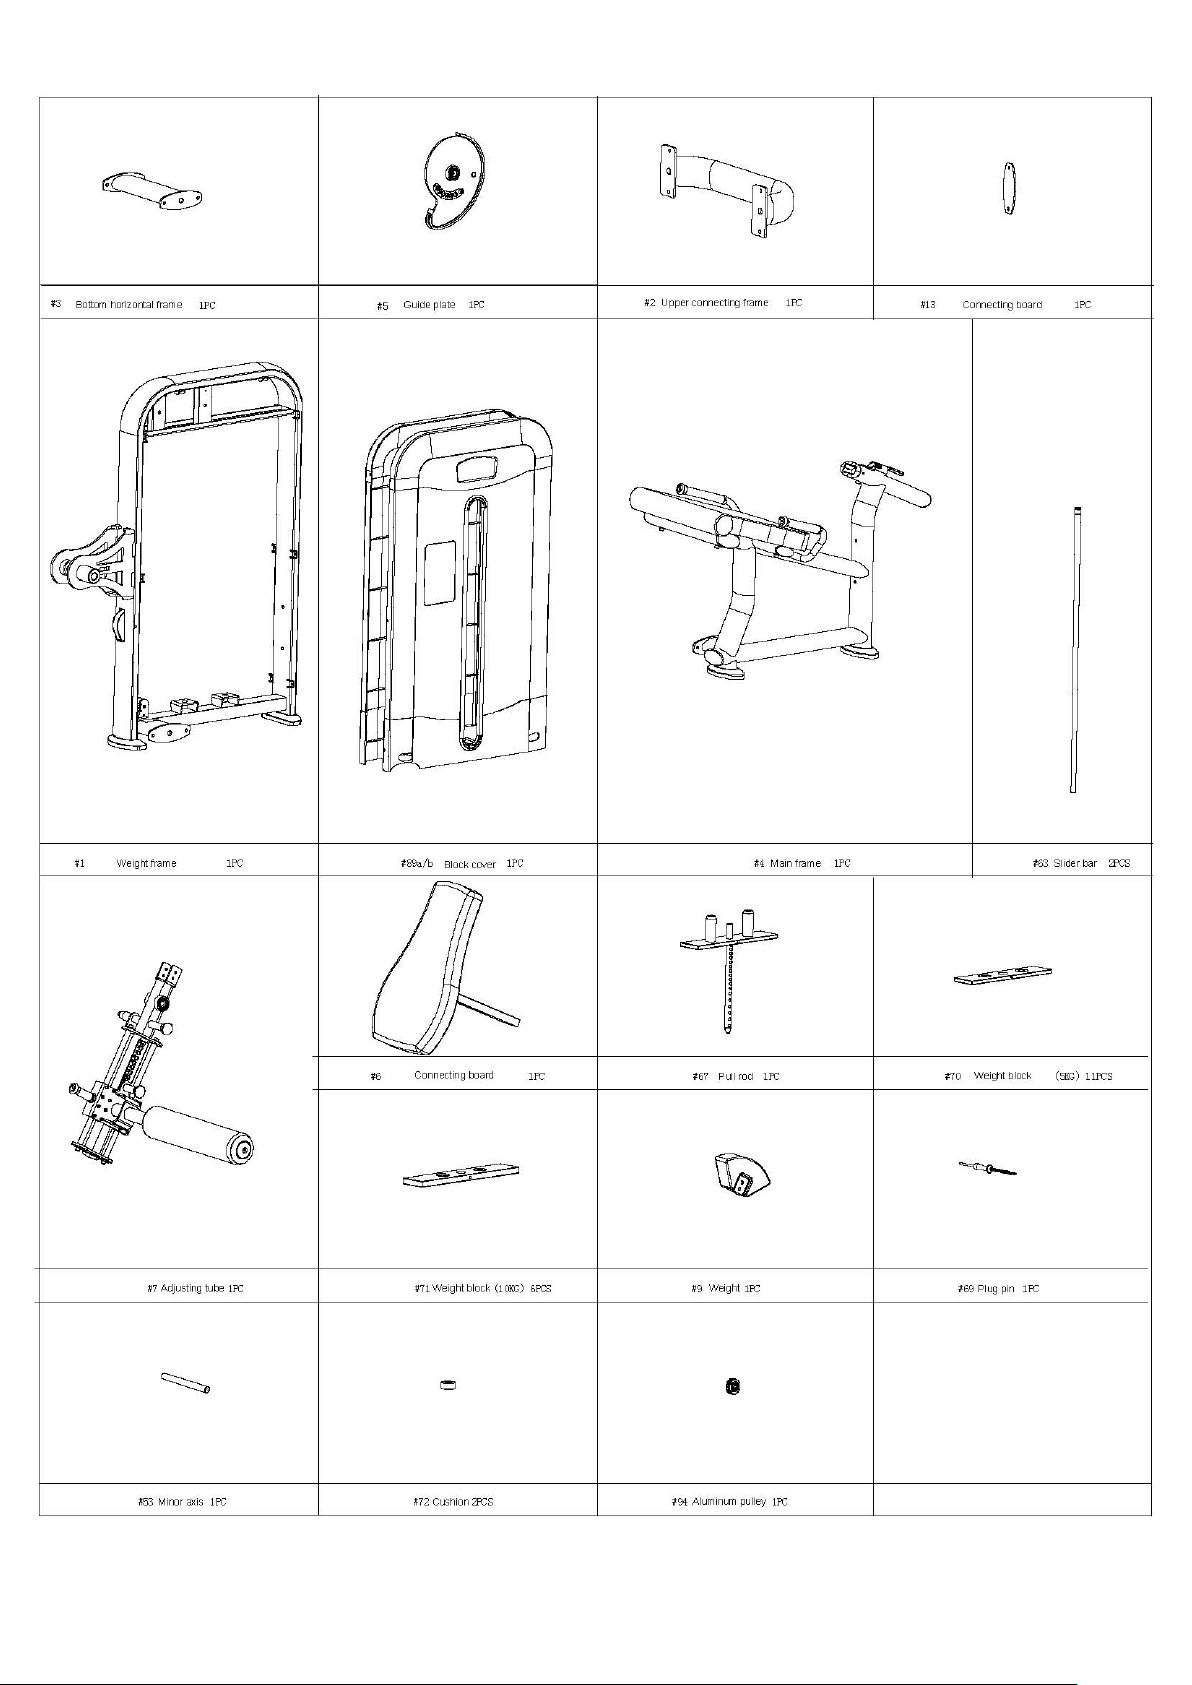
Parts list
NO.
DESCRIPTION
QTY
NO.
DESCRIPTION
QTY
1
Weight frame
1
49
End cap 2
1
2
Upper connecting frame
1
50
Connecting board cover
1
3
Bottom horizontal frame
1
51
Bolt M10*16
4
4
Main frame
1
52
Bolt M12*55
3
5
Guide plate
1
53
Minor axis
1
6
Connecting board
1
54
Bolt M12*130
1
7
Adjusting tube
1
55
Alloy cover
8
8
Limited board
1
56
Pulley
3
9
Weight
1
57
Nylon nut M12
12
10
Fixed plate
1
58
Flat washer
D13×2.5×Φ24
22
11
Limited plate for guide
board
1 59 End cap 2
12
Handle
1
60
Oval tube end cap
2
13
Connecting board
1
61
E snap ring
4
14
Seat rest
1
62
Stopple
2
15
Backrest
1
63
Slider bar
2
16
Bushing
2
64
Nylon axle
2
17
Rubber sleeve
1
65
Weight block (5KGS)
1
18
Bearing 6005-2RS
3
66
Nylon bushing
34
19
Nylon nut M8
3
67
Pull rod
1
20
Flat washer D8
4
68
Bolt M10*70
1
21
Cushion
2
69
Plug pin
1
22
Cross hear screw M8*20
2
70
Weight block (5KGS)
11
23
Plug pin 1
1
71
Weight block (10KGS)
6
24
Plug pin 2
1
72
Cushion
2
25
Spring
4
73
Bolt M12*90
2
26
Foam grip 3
1
74
Bolt M12*80
2
27
Bolt M10*25
8
75
Bolt M12*35
4
28
Spring washer D10
4
76
End cap
4
29
Flat washer D10
×
4
×Φ
40
4
77
Bolt M10*60
2
30
Bearing
4
78
End cap
2
31
Guide rail
2
79
Aluminum head
3
32
Base plate
2
80
Handlebar stopper
2
33
Aluminum head
2
81
Bolt M5*4
6
34
Bearing 6005-2RS
1
82
Aluminium spacer
1
35 End cap 1 2 83 Bolt M10*30 1
36
Bolt M10*25
6
84
Bolt M8*55
1
37
Nylon nut M10
2
85
Foam grip
1
38
Flat washer D10
16
86
Cable
1
39
Bolt M10*80
4
87
Fixed bush for cables
1
40
Bolt M8*12
2
88
Flag nut M12
1
41
Bolt M6*10
1
89a/b
Block cover
1p.r.
42
Foam grip 2
1
90
Adhesive tape
1

- 6 -
43
Flat washer D6
16
91
Snap joint
1
44
Spring washer D6
16
92
Bolt M6*12
18
45
Bolt M6*30
16
93
Hex nut M6
2
46
Foam inner cap
1
94
Aluminum pulley
1
47
Foam
1
95
Bolt M5*8
4
48
Foam outer cap
1
- 7 -

- 8 -
NOTE:
Most of the listed hardware has been packaged separately, but some of them have
been preinstalled in the identified assembly parts. In these instances, simply remove
and reinstall the hardware as assembly is required.
Please refer the individual steps for the installation and pay attention to the
preinstalled hardware.
- 9 -
ASSEMBLY INSTRUCTION
NOTE: It is well suggested that two or more people to assemble this machine to
avoid any possible injury.
Remove all the security tape and wrapping before the installation.
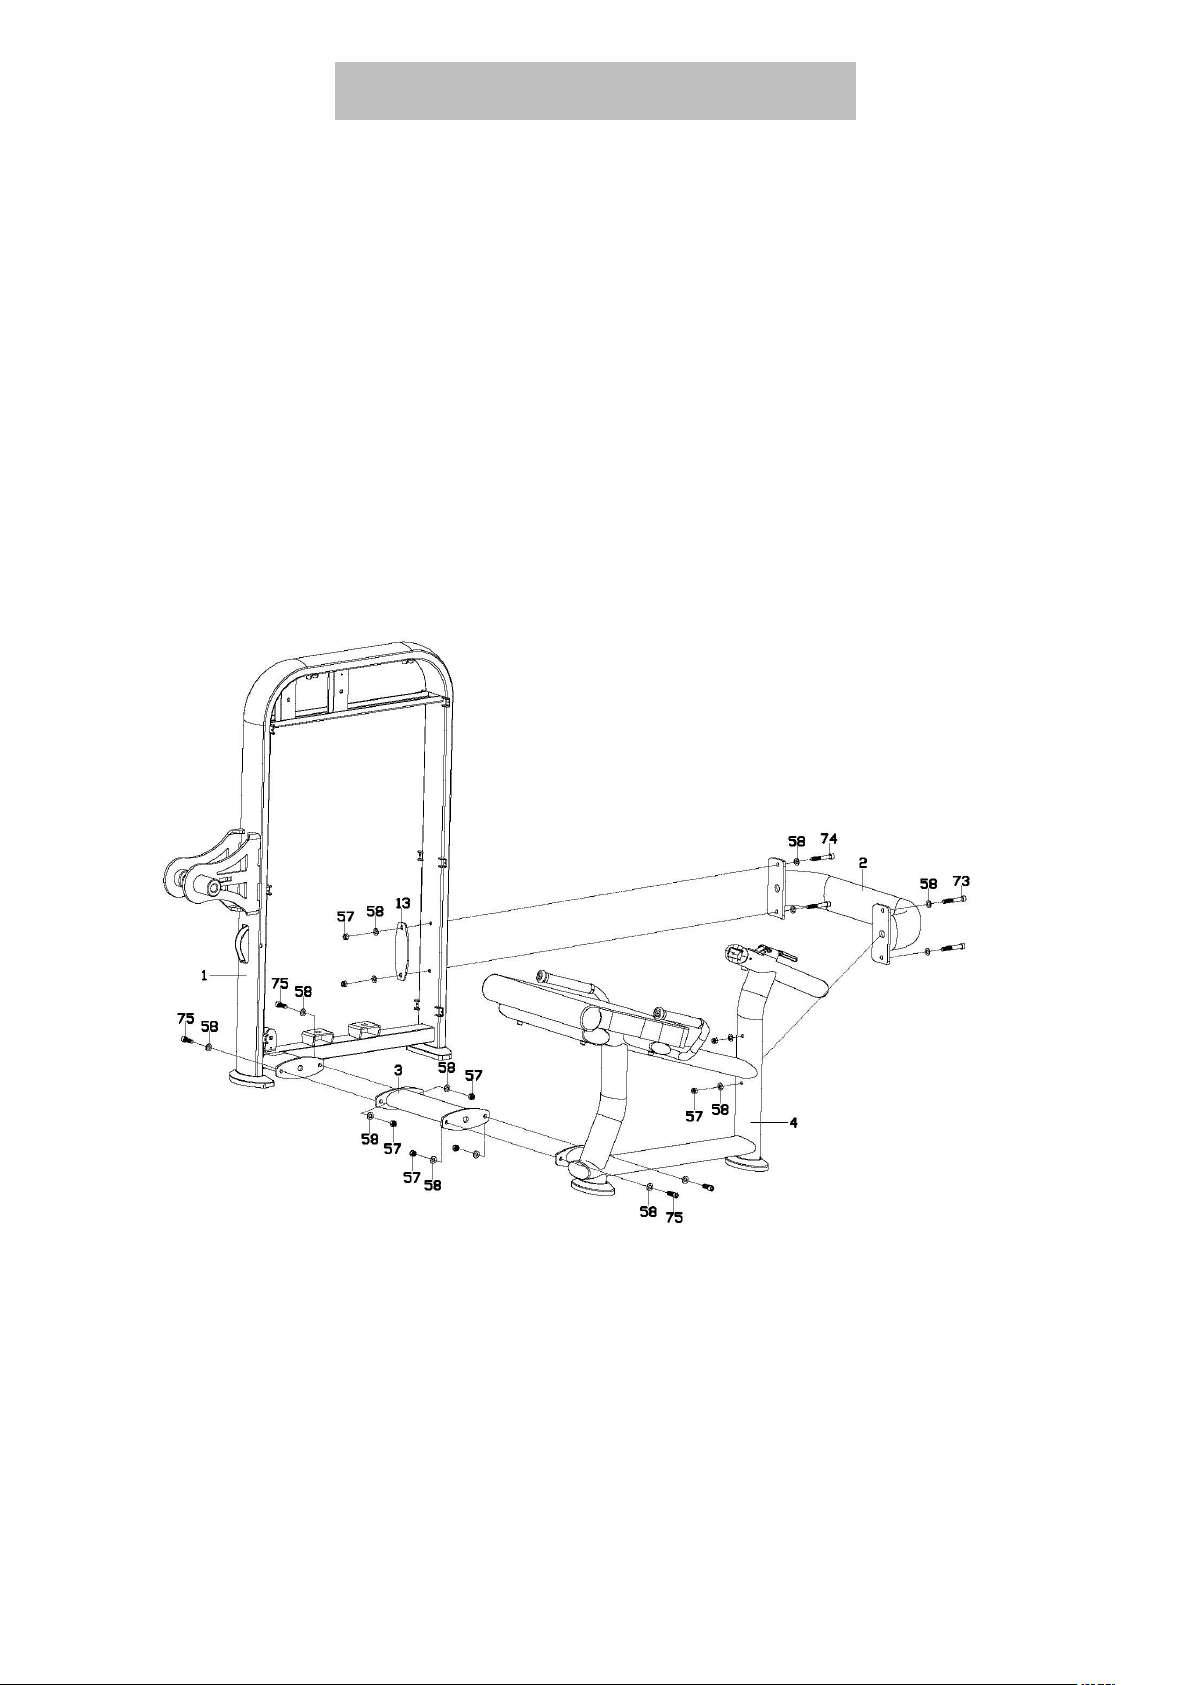
Step 1
1. Pre lock the Bottom horizontal frame (3) on the weight frame (1) and main frame (4) with Bolt
(75), Flat washer (58) and Nylon nut (57).
2. Pre lock the Upper connecting frame (2) on the main frame (4) with Bolt (73), Flat washer (58)
and Nylon nut (57).
3. Pre lock the Upper connecting frame (2) on the weight frame (1) with Bolt (74), Flat washer (58),
and Nylon nut (57).
4. Lock all the screws tightly.
- 10 -
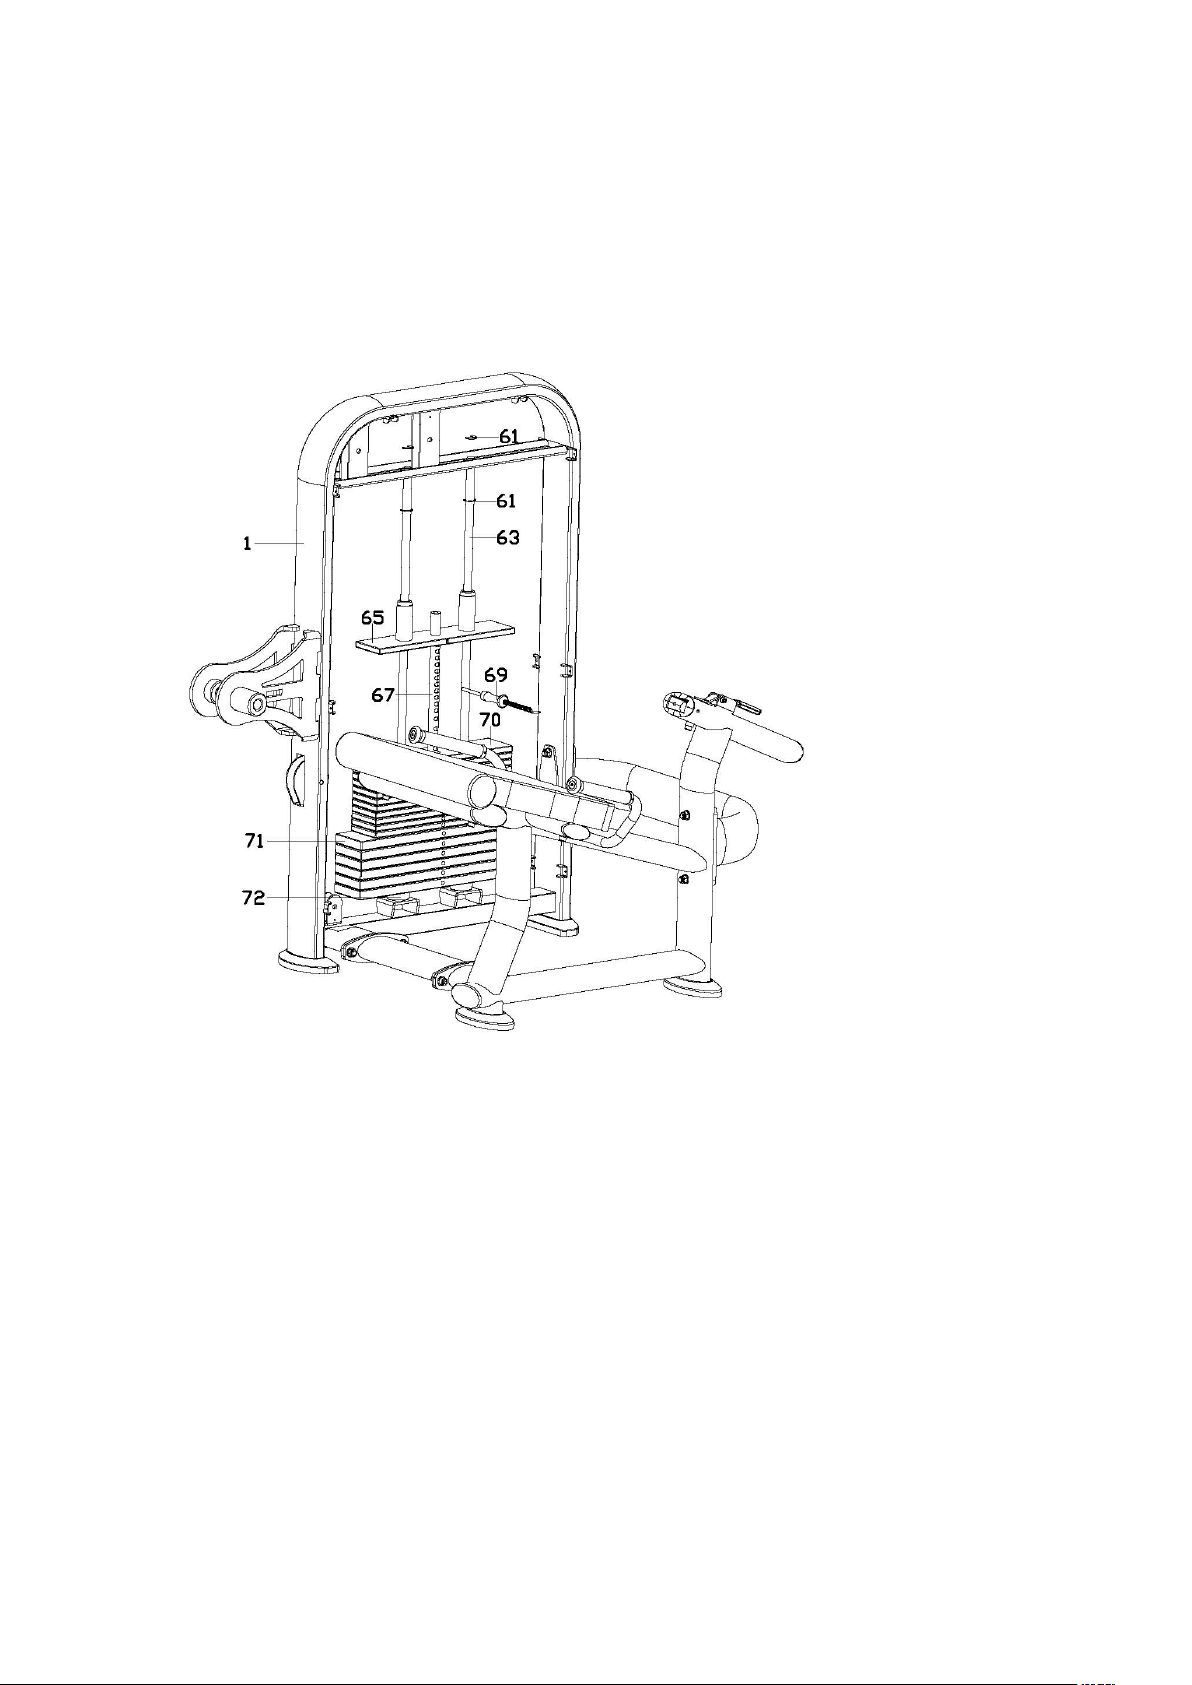
Step 2
1. Put the Cushion (72), Slider (63), Weight block(10kg) (71), Weight block(5kg) (70), and Guide
block (65) on the weight frame (1) in sequence.
2. Fixed the Slider (63) on the weight frame (1) with E snap ring (61).
3. With the sequence from small to big, from up to down, stick the weight notes on the Weight
block (5kg) (70) and Weight block(10kg) (71).
4. Pre insert the Magnetic cross pin with wire (69) into the weight blocks and Pull rod (67).
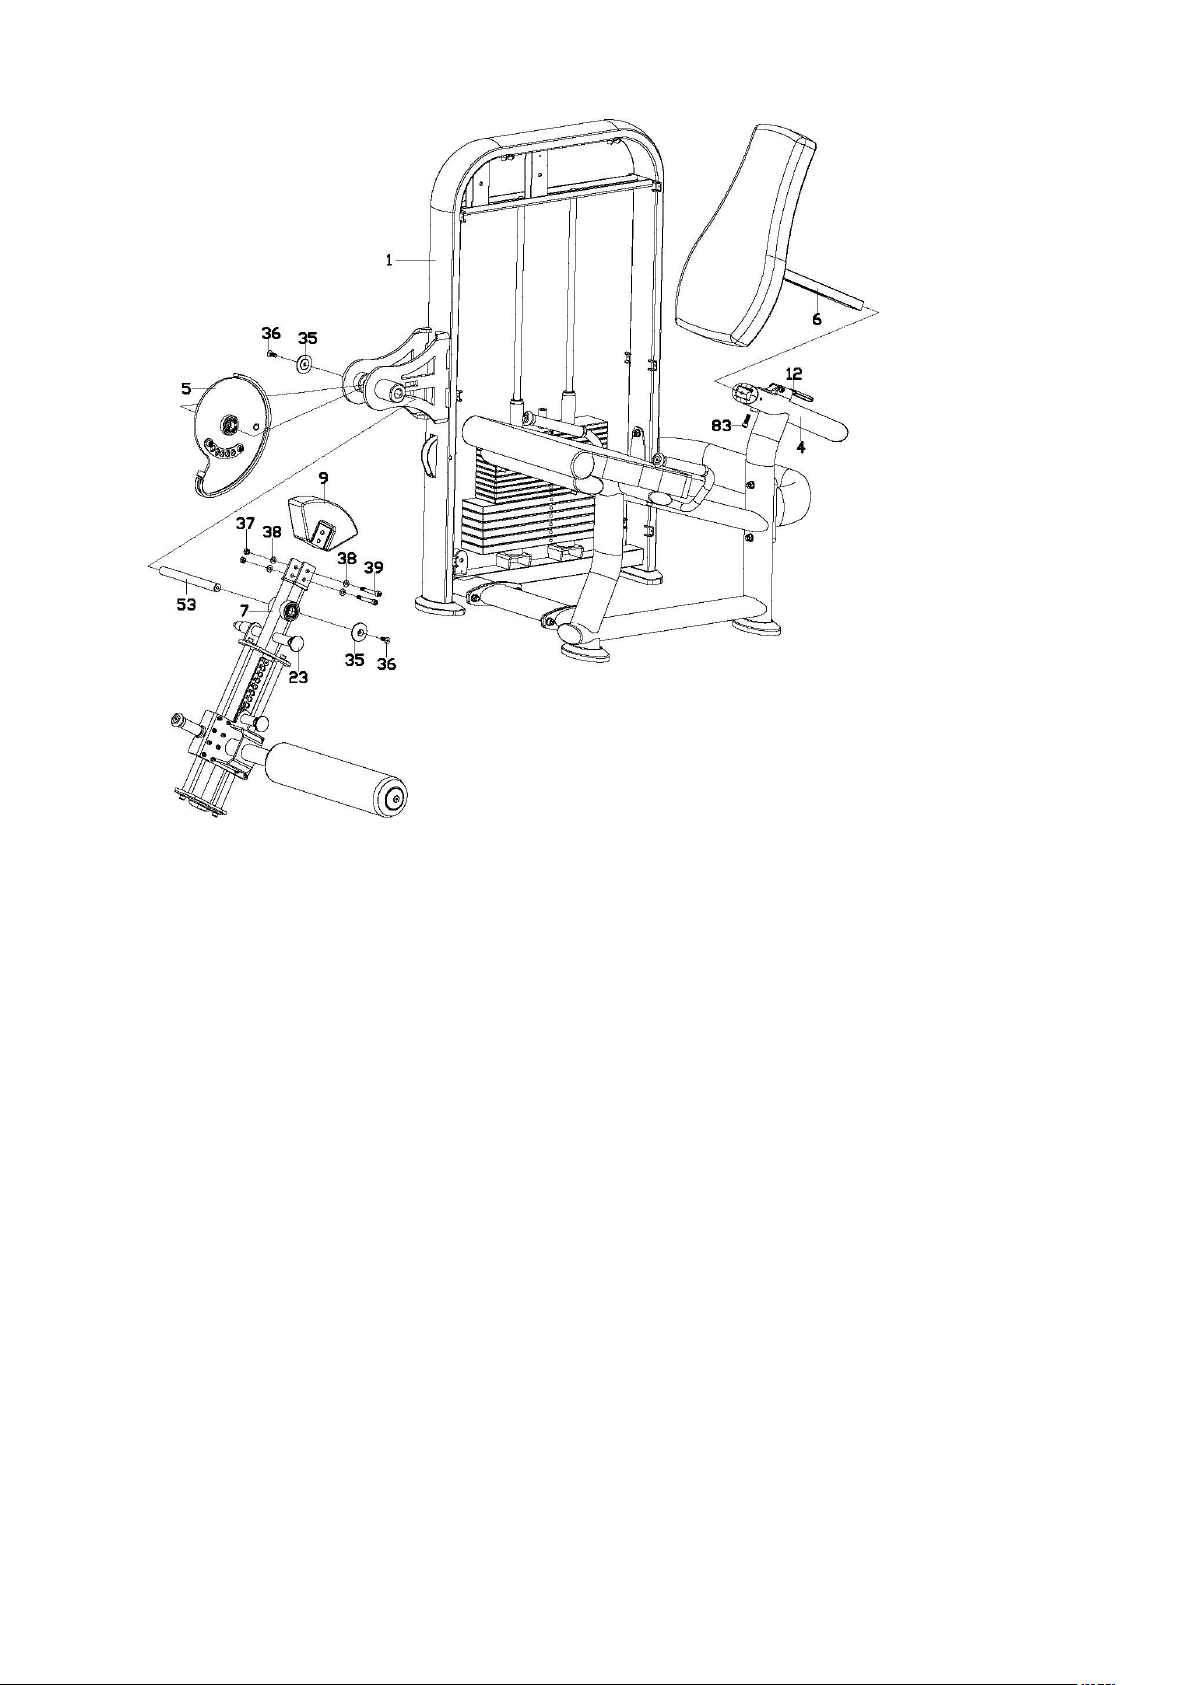
Step 3
1. Back out the Bolt (83), screw down the Handle (12), and insert Connecting board (6) into the
Main frame (4), and then lock the Bolt (83) into the Main frame (4).
2. Lock the Guide plate (5) and Adjusting tube (7) separately in the weight frame (1) with Bolt (36),
End cap (35) and Short bearing (53). when installing the Adjusting tube (7), need to pull up the Plig
pin 1(23), to match the hole of Guide plate (5).
3. Lock the Weight (9) tightly in the Adjusting tube (7) with Bolt (39), Flat washer (38) and Nylon
nut (37).
- 11 -
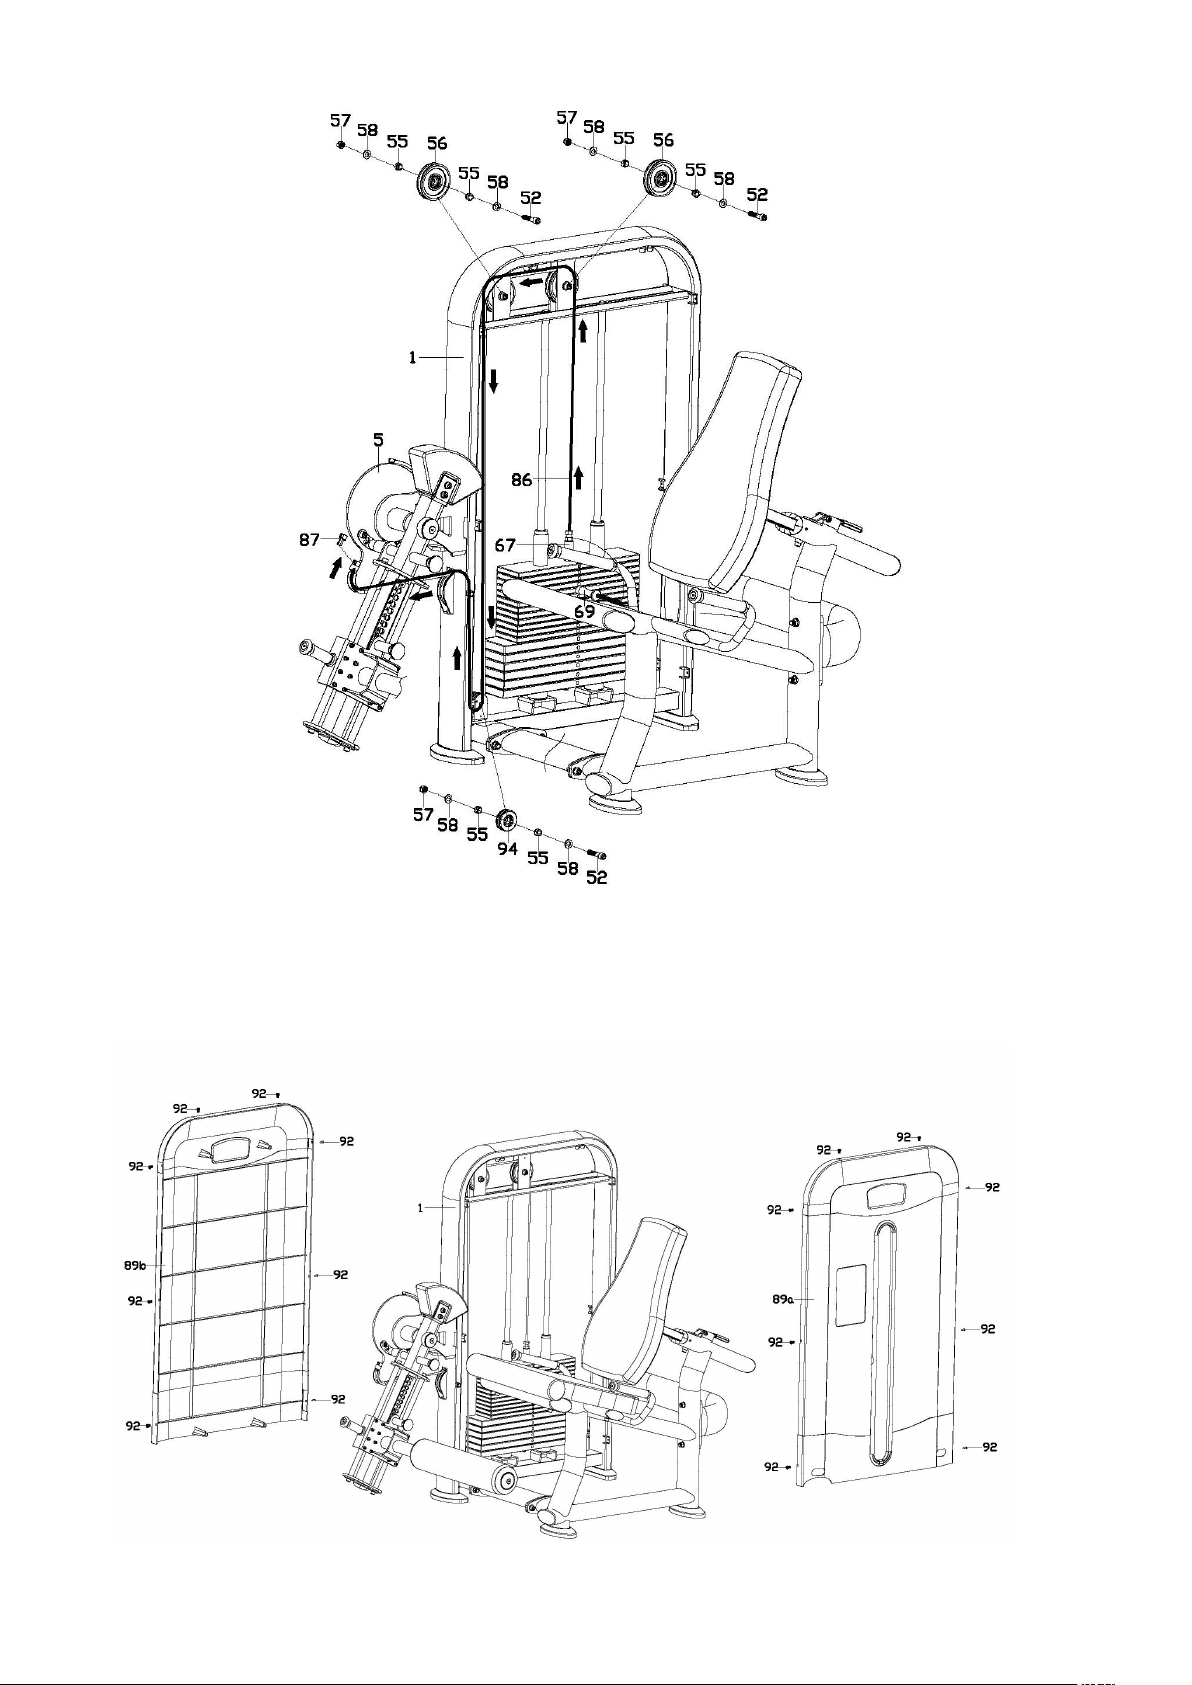
Step4
1. Take out the Pulley (56) preassembled on the weight frame (1).
2. Take the ball head of the cable (86), install following the arrow instruction.
3. Lock the Alloy cover (55) and Aluminum pulley (94) to the weight frame (1) with the bolt (52),
flat washer (58) and Nylon nut (57).
4. Fixed the ball head of the cable (86) on the Guide plate (5) with Fixed bush for cables (87).
5. Lock back the Pulley (56) to the weight frame (1).
6. Insert the Magnetic cross pin with wire (69) into the screw of cable (86), then tighten it on the
Pull rod (67).
- 12 -
Step 5
Lock the Front block cover (89a) and Rear block cover (89b) tightly in the weight frame (1) with
bolt (92).
- 13 -
WARM-UP and COOL-DOWN
Using your machine will provide you with several benefits. It will improve your physical fitness, tone
your muscles and in conjunction with a calorie-controlled diet, help you lose weight.
WARM-UP PHASE
The purpose of warming up is to prepare your body for exercise and to minimize injuries. Warm up
for two to five minutes before strength-training or aerobic exercising. Perform activities that raise
your heart rate and warm the working muscles. Activities may include brisk walking, jogging,
jumping jacks, jump rope, and running in place.
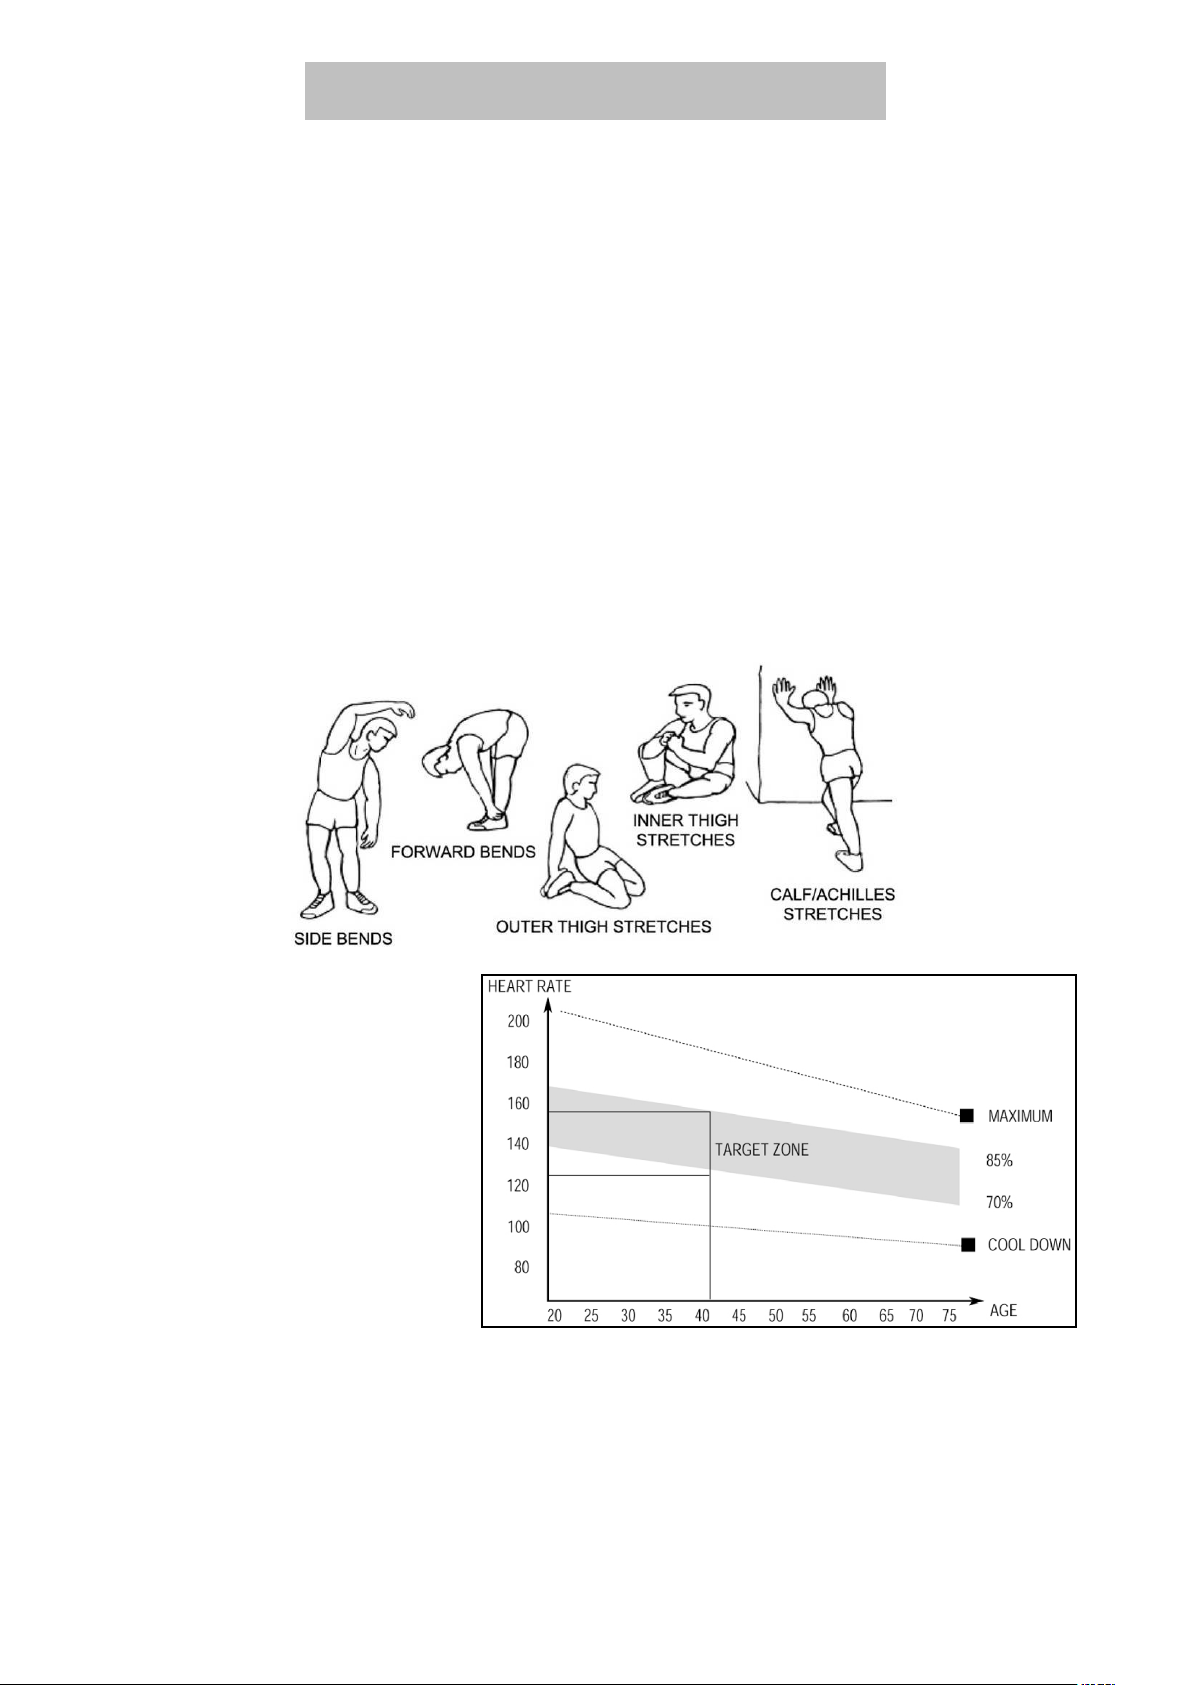
STRETCHING
Stretching while your muscles are warm after a proper warm-up and again after your strength or
aerobic training session is very important. Muscles stretch more easily at these times because of
their elevated temperature, which greatly reduces the risk of injury. Stretches should be held for 15
to 30 seconds.
DO NOT BOUNCE.
Remember always to check with your physician before starting any exercise program.
EXERCISE PHASE
This is the stage where you put the
effort in. After regular use, the
muscles in your legs will become
more flexible. Work at your own
pace and be sure to maintain a
steady tempo throughout. The rate
of work should be sufficient to raise
your heartbeat into the target zone
shown on the graph below.
COOL-DOWN PHASE
The purpose of cooling down is to return the body to its normal or near normal, resting state at the
end of each exercise session. A proper cool-down slowly lowers your heart rate and allows blood to
return to the heart.