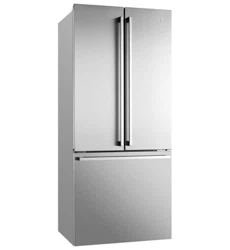
Electrolux EHE5107SA 510L 3 Door Fridge
Product's Documents
Below are documents related to this product, you can read online or download:
- Owner's manual - (English) Read Online | Download pdf

The electronic display panel consists of an LCD display with white backlighting and 6 touch buttons. When the power is first turned on, the display, with backlighting, will activate. If no buttons have been pressed and the fridge door is closed the backlighting will turn off after 30 seconds
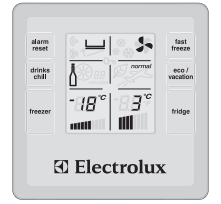
Controlling the temperature
We recommend that when you start your refrigerator for the first time, the temperature for the refrigerator is set to 3°C and the freezer to -18°C. If you want to change the temperature, follow the instructions below. Make only small adjustments and wait 24 hours to see if it’s correct. Checking the softness of ice cream is a good indication if your freezer is the right temperature, while feeling the coldness of water kept in the refrigerator is a good way of checking the temperature of the food compartment.
NOTE: When you set a temperature, you set an average temperature for the whole refrigerator cabinet. Temperatures inside each compartment may vary, depending on how much food you store and where you place it. High or low room temperature may also affect the actual temperature inside the refrigerator. If no button has been pressed for some time there may be a delay of up to 2 seconds before the display responds, this is normal and is a part of the display design to reduce the chance of accidental changes.
Changing the freezer temperature
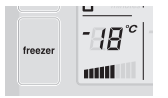
Press the freezer button to make the freezer colder in 1°C steps. Once the maximum of -23°C is reached, the display will return to -14°C with the next press of the button. The bar graph gets smaller with colder freezer settings.
Changing the refrigerator temperature
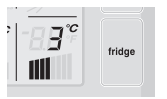
Press the fridge button to make the refrigerator colder in 1°C steps. Once 0°C is reached, the display will return to 7°C with the next button press. The bar graph gets smaller with colder refrigerator settings.
Fast freeze function
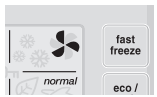
Use the fast freeze function when you add a large amount of food to the freezer compartment. This freezes the food quickly but does not affect the temperature in the refrigerator compartment. To use this function, press the fast freeze button once. An animated icon will light up. The fast freeze function will now operate for 90 minutes. If you want to turn the fast freeze function off before 90 minutes have passed, simply press the fast freeze button again. The icon will disappear and the freezer will return to normal operation.
Freezer temperature alarm
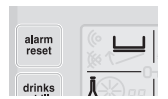
If the alarm sounds for no apparent reason, check whether anything is keeping the door open. If the freezer becomes too warm due to the freezer door being left open or warm food being placed too close to the temperature sensor, a buzzer will sound.
The icon adjacent to the alarm reset button, the freezer set temperature and bar graph will all flash, until the alarm reset button is pressed. Once pressed, the alarm disable icon adjacent to the alarm button will illuminate for 50 minutes, or until the temperature drops to an acceptable level. Make sure nothing is holding the freezer door open and move any warm food away from the temperature sensor. If the freezer is still too warm after 50 minutes, the alarm will sound again, indicating that something may be wrong with the refrigerator.
NOTE: The freezer temperature alarm can be reset for 12 hours by pressing the alarm reset button continuously for 10 seconds.
Door alarm
If the fridge door is left open for more than two minutes, the alarm will buzz and an arrow pointing to an open door will flash, along with the temperature setting and bar graph. If you want to leave the door open while you load the refrigerator, you can turn the alarm off for 8 minutes by pressing the alarm reset button
Child Lock
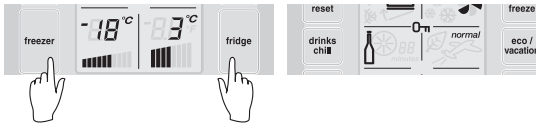
Press and hold the freezer and fridge buttons together to activate the child lock. This will disable the display to prevent accidental changes to settings. To turn the child lock off, press and hold the freezer and fridge buttons together.
Drinks chill timer
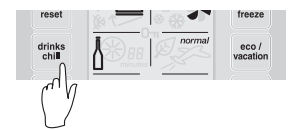
The drinks chill timer is used to quickly chill a bottle. Place the bottle in the freezer and the timer can be set for a minimum of 5 minutes to a maximum of 30 minutes. To set, simply press the drinks chill button repeatedly for the number of minutes (in 5-minute intervals). Once set, an animated icon appears beside the drinks chill button, with a timer that counts down one minute at a time.
You can change the time or turn the timer off even after the countdown has started. A buzzer will tell you when the time is finished and the icon will flash until the alarm reset button is pressed.
If your drink is not cold enough, reset the drinks chill function (remembering the drink is already partially chilled). Suggested chilling times:
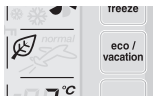
Energy efficiency
Your refrigerator has been designed to be energy-efficient and can operate in three modes: Normal, Eco and VacatiVacation.

Normal mode is used when the refrigerator door is often opened. It’s the default mode of your refrigerator.
Eco mode can be used if you don’t open your refrigerator door a lot. It is activated in one of two ways:
The leaf icon will appear on the electronic display when eco mode is on. If eco mode is activated automatically, the refrigerator will revert to normal mode once the refrigerator door is opened. If eco mode is entered manually, opening the door will not revert it back to normal mode. To exit eco mode, simply press the eco/ holiday button until the word “normal” is displayed. Use Eco mode when you’re not using the refrigerator all the time (eg. as a long-term storage refrigerator). If the door is going to be opened a lot, switch back to normal mode.
Remember, if eco mode is turned on manually, it won’t switch off automaticallomaticallomatically.

Use this button when you go on vacation or leave the house for long periods. The refrigerator minimises defrosting to save energy but maintains your temperature settings. To put the refrigerator into vacation mode, press the eco/vacation mode button until the aeroplane icon appears. The vacation mode will operate until the button is pressed again or the refrigerator door is opened.
NOTE: Opening the freezer drawer won’t effect the operation of either Eco or Vacation modes. Eco and Vacation Modes minimise defrosting to save energy, while maintaining your temperature settings.
Other special refrigerator features
This section tells you how to make the most of the many useful features – cleaning instructions
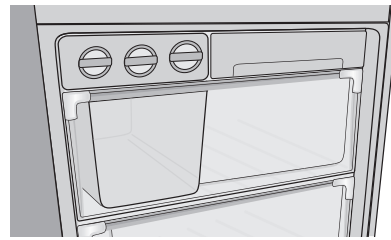
Crisper bin
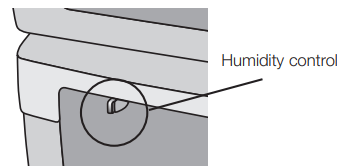
Use the crisper bin to store vegetables, fruit or smallgoods.
Change the humidity by sliding the humidity control.
Only store vegetables in the crisper bin and remember to set the humidity control to more humid (closed).
Store fruit and smallgoods in the crisper bin and remember to set the humidity control to less humid (open).
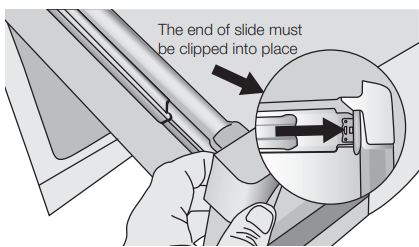
Remove the door bins, then remove the crisper bin(s) by pulling forward, then up and forward again, lifting the bin off the slides. Push the slides back into the refrigerator.
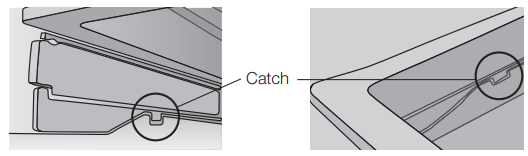
To refit crispers
Door storage bins
Door storage bins adjust to meet different storage needs. All the door bins are completely removable for cleaning. If you want to remove or adjust a bin, lift it over the support lugs on the inner door panel. To replace, push the bin down over the support lugs to lock it in place.
Dairy compartment
Use the dairy compartment to store foods like butter, margarine and cheeses. The compartment is slightly warmer than the rest of the refrigerator compartment, while the lid provides protection against odours.
Deli compartment
Use the deli compartment to store foods like smallgoods, fresh or cooked meat and cheese, or as an additional crisper. The deli compartment will reduce strong food odours from creeping into the rest of the refrigerator. To remove the deli compartment, pull it forward, then lift it up and pull it further forward.
Modular bottle caddy

The Modular bottle caddy is made of anodised aluminium. They are used to store various types of bottles like wine or beer. Bottles should be stored with the bottom end towards the back of the refrigerator. The fridge arrives with three combined caddies, but they can be separated if desired.
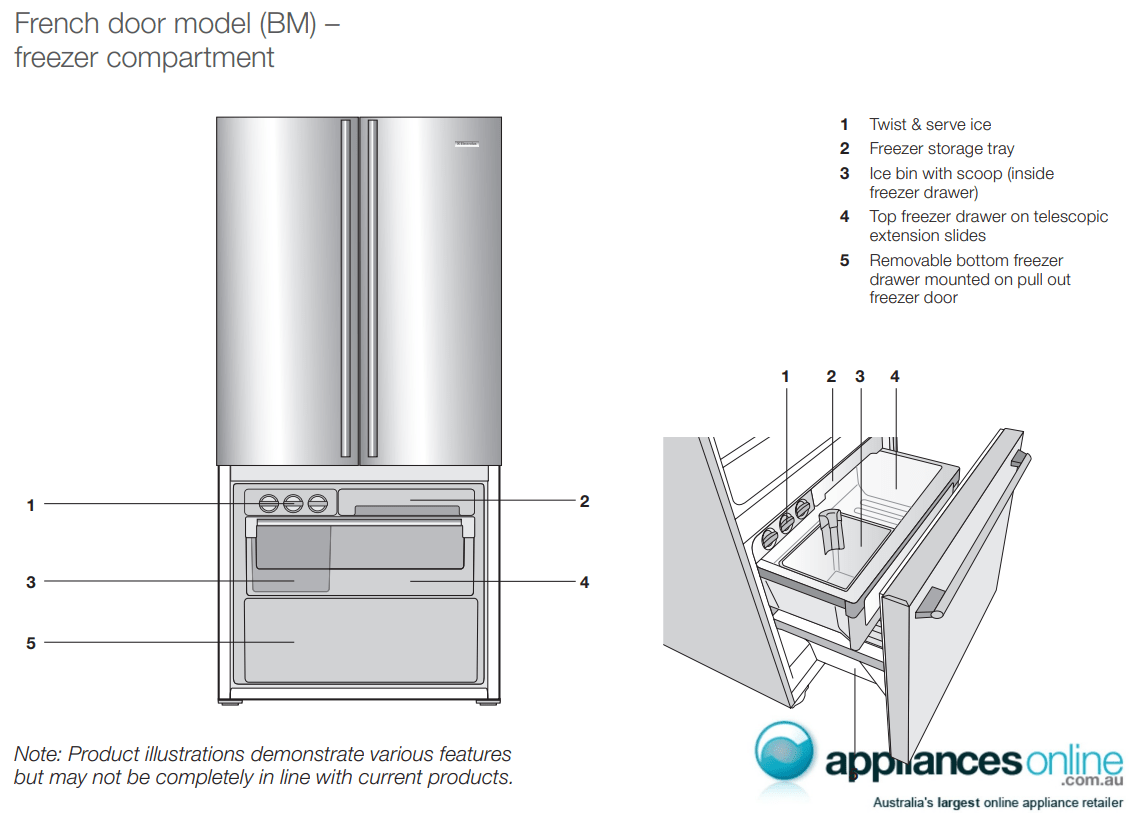
Freezer drawers
The drawer is mounted on telescopic extension slides, to enable full access to the contents. A clear plastic front provides easy visibility.
To remove the drawer for cleaning,
To replace the drawer
When replacing the drawers after cleaning, we recommend fitting the freezer bottom bin first.
Freezer bottom bin
To remove the bin, pull the drawer out until it is open all the way then lift bin out from the front of the bin. When refitting insert the rear of the bin first then lower into position.
Spillsafe™ glass shelves
Spillsafe™ glass shelves keep spills on the shelf. A shelf retaining system minimises accidental movement of shelves and they can be adjusted to various heights. Spillsafe™ glass shelves are not to be used as slide out shelves. To remove the shelves, gently pull them forward until the shelf comes clear of the shelf guides. To return the shelf, make sure there is nothing behind that may obstruct movement. Gently push the shelf into the cabinet and back into position.
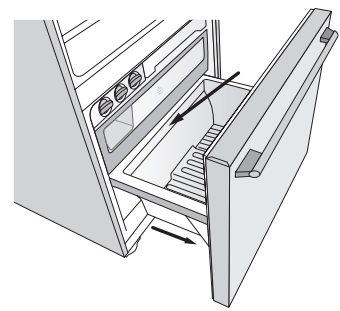
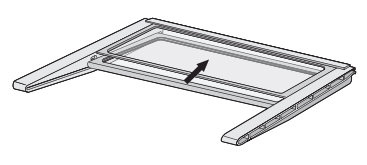
Slide away glass shelf (where fitted)
This shelf can be used either as a full depth shelf or when tall items need to be stored at the front of the appliance it can be collapsed to half its original depth.
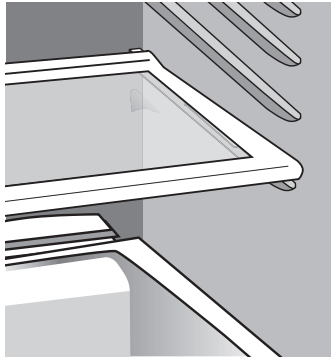
1. Pull the front half of the shelf forward.
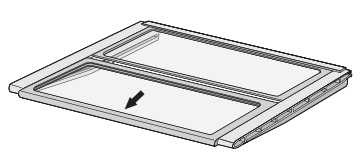
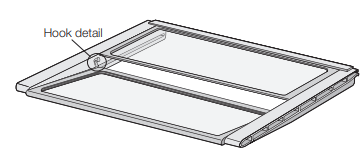
2. Then, from the underside, lift the front half of the shelf by raising the rear edge over the recessed hook detail.
3. Pull the shelf forward and allow the rear to drop into the side channels.
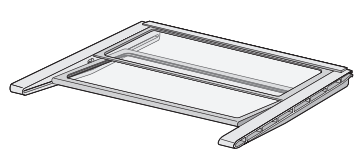
4. Push the front shelf backwards (3,4) until it reaches the rear stops.
The shelf can be repositioned within the appliance unit by pulling the whole assembly out until the side panels are free to pivot down, then pivoting the rear of the shelf until the shelf is free from the liner runners. The shelf can then be positioned in any of the runners – this is a very useful feature if your appliance door happens to have limited access.
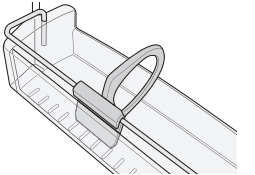
Bottle twist holder
The bottle twist holder is used to prevent bottles from falling over. The bottle twist holder consists of two parts, a sliding front, and a rotating retainer ring. The bottle twist holder can be used in two positions:
When the bottle twist holder ring is horizontal, any item that fits within the ring can simply be placed inside it.
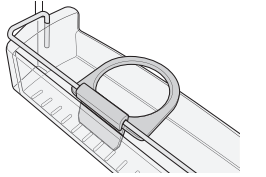
When the bottle twist holder ring is vertical, it is possible to simply slide the bottle twist holder along the bottle retainer bar until it is pushed up against a bottle.
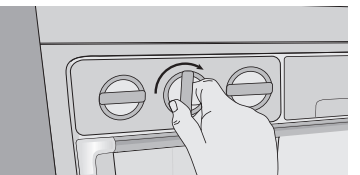
Twist Ice & Serve
To use, remove the tray, fill with water and place back in the freezer. Once ice has formed (approximately 3 hours) simply twist the knob at the front clockwise until the ice drops into the bin below
Lighting
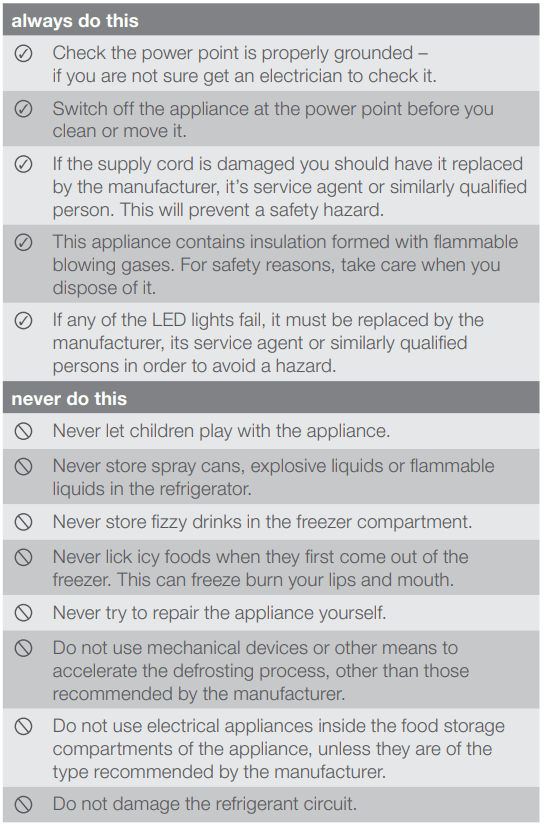
These models are fitted with long life LED lights. If any of the LED lights fail, they must be replaced by the manufacturer, its service agent or similarly qualified persons in order to avoid a hazard.
Cleaning the appliance
Before cleaning: Turn appliance off at the power point, then remove power cord from socket. This will make sure there is no chance of getting an electric shock.
This stainless steel has a special advanced protective coating that eases the removal of marks such as finger prints and water spots. To keep your stainless steel appliance looking at its best, you should clean it regularly. You should only clean the stainless steel doors with luke-warm soapy water and a soft cloth, rinsing with clean water and then wipe the surface with clean water and a soft clean cloth to remove soap residue.
Clean outside of door only with the anti-static cleaner supplied (ACL Staticide #2003). It is designed to reduce dust accumulation on acrylic surfaces. Alternatively, only use lukewarm soapy water and a soft cloth, rinsing with clean water and then wipe the surface with a soft clean cloth to remove soap residue.
caution
Do not use stainless steel cleaners, abrasive pads or other cleaners as they are likely to scratch the surface. Damage to this product after delivery is not covered by your warranty.
You should clean the appliance interior regularly. It will be easiest to clean when the food supply is low. Wash the interior with a soft cloth and use an unscented mild soap with lukewarm water. Thoroughly dry all surfaces and removable parts. Avoid getting water on appliance controls. If you have taken out any removable parts, replace them and switch the power on before restocking the appliance with food. Naturally, you should keep the interior of your appliance hygienic by promptly and thoroughly wiping up any food spills.
Don’t use a steam cleaner. If live components come into contact with condensing steam, they may short-circuit or cause an electric shock.
Take care to keep door seals clean. Sticky food and drink can cause seals to stick to the cabinet and tear when you open the door. Wash seal with a mild detergent and warm water. Rinse thoroughly and dry.
Safety
It is important to use your appliance safely. This means you need to supervise young children and infirm persons when they use it. You need to make sure that young children do not play with the appliance. Follow the tips below.
Switching off your appliance
If the appliance needs to be switched off for an extended period, the following steps should be taken to reduce the symptoms of mould:
If you think something may be wrong with your refrigerator, you can carry out some easy checks before calling for service. You may locate the problem, sparing yourself from inconvenience, saving time and money
| problem | solution |
|---|---|
| Refrigerator is not operating | Check that the power cord is plugged into the power outlet properly and that the outlet is switched ‘ON’. |
| Try running another appliance from the power outlet. If no power is coming from the outlet you may have blown a fuse or tripped a circuit of your household power supply. | |
| Try adjusting the temperature control to a slightly “colder” position. | |
| It is normal for the freezer fan NOT to operate during the automatic defrost cycle, or for a short time after the appliance is switched on. | |
| When there is refrigerator/ freezer noise | Modern refrigerators/freezers with increased storage capacity use high speed compressors. These can provide a seemingly high level of sound which is quite normal. Normal operational sounds include:
|
Other strange sounds may mean that you need to check and take action. For example, noises may mean that:
| |
| Remember it is quite normal for noise to seem louder just after the refrigerator starts operating. | |
| If there are odours inside the refrigerator | The interior may need cleaning. |
| Some foods produce odours | |
| Some containers and wrapping can cause odours. | |
| Ask yourself if the odour started about the same time you started storing something unusual. | |
| When the motor seems to run more than expected | Your new refrigerator has a large fridge and freezer section to keep cool. So it is normal to frequently hear the sound of the motor. However, to keep operation to a minimum check the following:
|
| If the day is hot or the room is very warm, the refrigerator will need to run more than normal. | |
| The refrigerator will run more that normal just after you install it or when it has been turned off for a long time. | |
| If the temperature in the refrigerator is too warm | If the temperature in the refrigerator is too warm |
| Refer to ‘Controlling the temperature | |
| You may have kept the door open too long or too frequently. | |
| Food containers or packaging may be holding a door open. | |
| If the temperature in the refrigerator is too cold | Refer to ‘Controlling the temperature’ |
| Increase the temperature to avoid high energy consumption. | |
| If heavy frosting occurs in the freeze | Make sure you fully close the freezer and fridge doors. If the doors are left open, a heavy frost will coat the inside of the freezer. If a frost develops, remove it and take care to properly close the doors. |
| If water drips on the floor | The defrost water tray, (located at the back or underneath of the cabinet) may not be properly positioned, or the drain tube may not be properly positioned to direct water into this tray. You may need to pull the refrigerator away from the wall to check the tray and tube. |
| Fridge does not exit vacation mode | Turn appliance off at the power point. Leave off for three (3) minutes for the memory to clear, then turn back on. |
| If the doors will not close | Check whether the top of the refrigerator is tilted back 10-15mm to allow the doors to self close. |
| Check whether something is holding the door open. |
If you still require service
If you have a problem, and the problem persists after you have made the checks mentioned above, contact your nearest Electrolux approved Service Centre or the dealer you bought the refrigerator from. Be ready to quote the model number, 9-digit PNC and 8-digit serial number, which is stated on the label inside the refrigerator compartment.