Loading ...
Loading ...
Loading ...

11
EN
everyday maintenance by the customer
must be performed by an authorised ser-
vice centre.
• The power cord must never be close to or
in contact with the hot parts of your appli-
ance, near a source of heat or over a sharp
edge.
• For your safety, only use the manufactur-
er’s accessories and spare parts designed
for your appliance.
• Do not pull on the cord to unplug the
appliance.
• Never put your coee jug in a microwave
oven, on a flame or a electric cooking
plates.
• Do not ll the appliance with water if it is
still hot.
• All appliances are subject to strict quality
control procedures. These include actual
usage tests on randomly selected appli-
ances, which would explain any traces of
use.
• Always close the lid when running the cof-
fee maker.
• Do not use the jug without the lid.
• Do not pour hot water in the tanks.
• Do not immerse the appliance, power cord
or plug in water or any other liquid.
• Place the appliance on a at, stable, heat
resistant surface away from water splashes
and any other sources of heat.
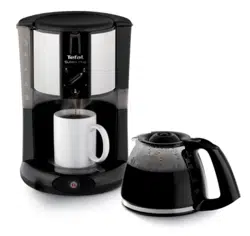
SELECTOR DESCRIPTION
Position Description Use
Coee pot
Use to prepare 4 to
10 cups of coee
Infusion or
Drip-Stop
Mug
This function is ideal
for good infusion of
your coee when
using a mug: after
having prepared the
water and coee
for a mug, set the
selector to this
position, turn on
your machine and
then set the selector
to 'Mug' when there
is no water left in
the water tank.
This function also
enables users to
stop the ow of
drips on the heating
plate when using
a mug.
Mug
This position
enables the ow
of infused coee
into your mug.
Set the selector to
this position after
having used the
Infusion function.
FIRST USE
• Before using your coee maker for the rst
time, run it without coee using the equiv-
alent of a coee pot of water to rinse it.
• Plug the appliance into the mains socket
outlet.
• Fill the water tank with cold water without
exceeding the maximum level indicated.
• Place the coee pot on the heating plate
correctly.
• Put the selector in the position.
• Start the cycle by pushing the On button
. The indicator light turns on.
Loading ...
Loading ...
Loading ...