Loading ...
Loading ...
Loading ...
SEWING BUTTONHOLES AND BUTTONS ————————————————————————————————————————————————————————————————————————————————————————————————————————————————————————————————
—
———————————————————————————————————————
—————
39
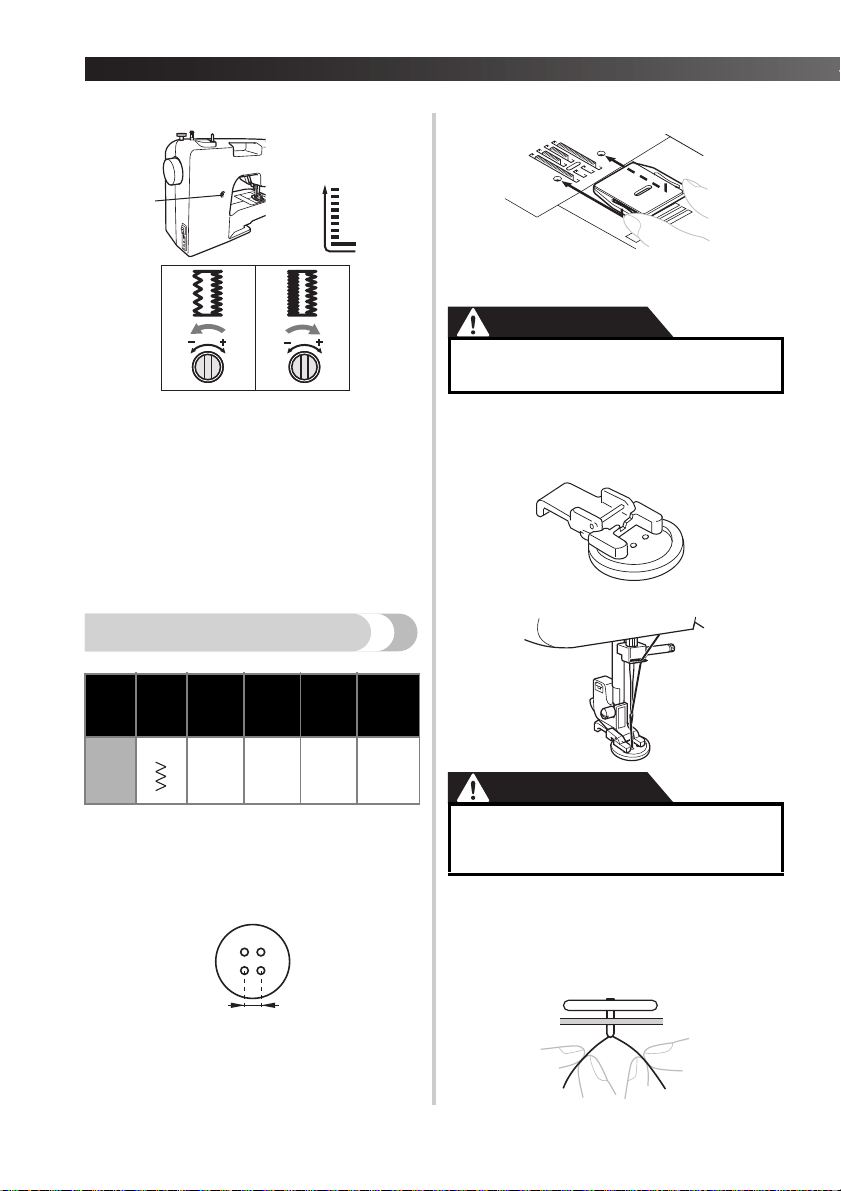
1 Buttonhole fine-adjustment screw
2 Left side
3 Buttonhole appearance
If the left side is too open, turn the buttonhole
fine-adjustment screw with a large
screwdriver in the
“–” direction.
If the left side is too tight, turn the buttonhole
fine-adjustment screw with a large
screwdriver in the
“+” direction.
• This adjustment ensures both sides of the
buttonhole are the same.
Sewing buttons
1
Measure the distance between the
buttonholes and mark the fabric. Then
adjust the stitch width so that it is the
same as the distance between the holes in
the button.
2
Turn off the machine.
3
Change the foot to the button sewing foot
“M”.
4
Place the darning plate on the needle plate.
5
Turn on the machine.
CAUTION
6
Put a button between the foot and the
fabric and make sure that the needle enters
the holes without hitting the button. If it
hits, see step
1
.
7
At a slow speed, sew about 10 stitches.
CAUTION
8
Pull the upper thread at the end of the
stitching to the wrong side of the fabric,
and then tie it with the bobbin thread.
X Use scissors to cut the upper thread and
the bobbin thread at the beginning of the
stitching.
Stitch
Name
Pattern
Stitch
Length
[mm
(inch)]
Stitch
Width
[mm
(inch)]
Foot Other
Zigzag
Stitch
F
(1/64)
Any
Button
Sewing
Foot
“M”
Darning
Plate
2
3
3
1
3
● Do not turn on the machine while
pressing down the foot controller.
● Make sure the needle does not hit the
button during sewing. The needle may
break and you may be injured.
Loading ...
Loading ...
Loading ...