Operating Instructions for Alarm Clock Radio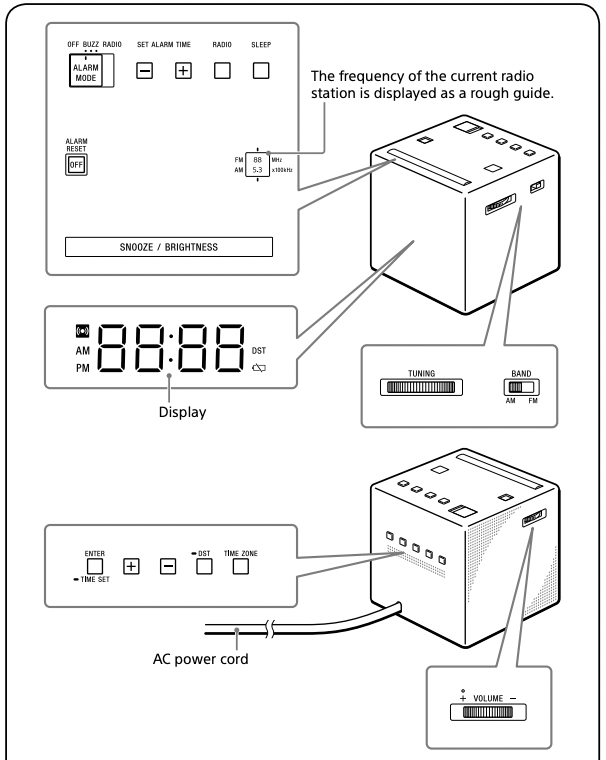
There is a tactile dot beside VOLUME + to show the direction to go to turn up the volume.
Getting Started
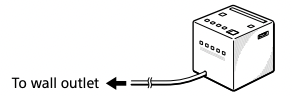
Connecting to an AC power source
Connect the AC power cord to a wall outlet.
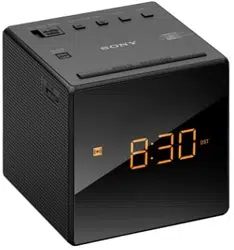
The current EST (Eastern Standard Time) appears on the display.
(This unit is preset to the current date and time at the factory, and is powered by the back-up battery.)
Setting the clock for the first time
All you need to do to set the clock for the first time is select your time zone.
If you live in the Eastern Standard Time zone, you do not need to adjust the area setting.
- Press TIME ZONE. Area number “2” appears on the display.
- Press TIME ZONE repeatedly to select a number as follows:
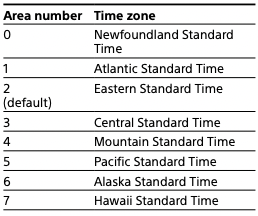
The clock display switches to the current time of selected time zone in about 4 seconds.
Note
- During shipment and your first use, a clock error may occur. In this case, refer to “Setting the clock manually” to set the correct time.
About Automatic DST/ summer time adjustment
This unit automatically adjusts for daylight saving time (summer time). “DST” automatically appears on the display at the beginning of daylight saving time (summer time), and disappears at the end of daylight saving time (summer time).
- Daylight saving time (summer time) begins at 2:00 AM on the second Sunday of March.
- Standard time begins at 2:00 AM on the first Sunday of November.
Notes
- The implementation of DST/summer time and its beginning/ending date and time are subject to circumstances and laws in each country/region. Should this interfere with the desired adjustment, cancel the Automatic DST/summer time adjustment and set the clock manually as necessary. Customers living in a country/region that does not use daylight saving time (summer time) should cancel the Automatic DST/summer time adjustment before using the unit.
- When Hawaii Standard Time is set, the default Automatic DST/summer time adjustment setting is off.
To cancel Automatic DST/ summer time adjustment
The Automatic DST/summer time adjustment can be canceled.
Press and hold DST for more than 3 seconds while the clock is displayed.
A beep sounds, and “Aut  OFF” appears on the display to show that the Automatic DST/summer time adjustment has been canceled. The clock display returns.
To reactivate Automatic DST/ summer time adjustment
Press and hold DST for more than 3 seconds. A beep sounds, and “Aut On” appears on the display to show that Automatic DST/summer time adjustment has been activated. The clock display returns.
Operations
Setting the clock manually
To change the clock setting manually, operate the unit as follows.
- Press and hold ENTER/TIME SET for more than 2 seconds. You will hear a beep and the last two digits of the year will start to flash on the display.
- Press + or – repeatedly to select the year, and then press ENTER/TIME SET.
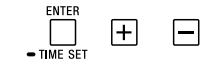
- Repeat step 2 to set the month, day and time. After setting the time, two short beeps will sound and the seconds will start incrementing from zero.
Note
- If you do not press any button for about 1 minute while setting the clock, clock setting mode will be canceled.
When daylight saving time (summer time) begins/ends while Automatic DST/summer time adjustment is set to off
Change the clock setting manually if you have canceled the Automatic DST/summer time adjustment.
Playing the radio
- Press RADIO to turn on the radio.
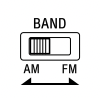
- Set BAND to the desired band (AM or FM).
- Tune to the desired station using TUNING.
- Adjust the volume using VOLUME +/–. To turn off the radio, press ALARM RESET/ OFF.
Setting the alarm
The alarm sound can be selected from RADIO (radio) or BUZZ (buzzer).
Before setting the alarm
- Make sure to set the clock. (See “Setting the clock manually.”)
- To set the radio alarm, first tune to a station and adjust the volume. (See “Playing the radio.”)
To set the alarm
1 Set ALARM MODE to the desired alarm sound (RADIO or BUZZ).
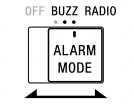
The alarm time appears for a few seconds, and then  appears on the display. (It does not appear when the switch is set to OFF.)

2 Press SET ALARM TIME + or – repeatedly to set the desired time while the alarm time appears on the display.
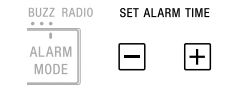
While setting the alarm time, flashes on the display.

When the alarm time setting operation is complete, the clock display returns after a few seconds and changes from flashing to fully lit.
At the set time, the radio will turn on, or the buzzer will sound gradually increasing in volume. (flashes on the display.)
To stop the alarm
Press ALARM RESET/OFF to turn off the alarm.
The alarm will sound again at the same time the next day
To doze for a few more minutes
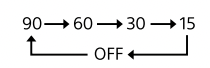
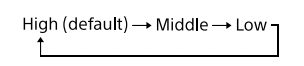
Press SNOOZE/BRIGHTNESS. The sound turns off, but will automatically come on again after about 10 minutes. Each time you press SNOOZE/BRIGHTNESS, the snooze time changes as follows:

The display shows the snooze time for about 4 seconds and returns to show the current time. ( flashes on the display.)
To deactivate the alarm
Set ALARM MODE to OFF. disappears from the display.
Notes
- The alarm time setting cannot be changed if ALARM MODE is set to OFF. If SET ALARM TIME + or – is pressed, “OFF” appears on the display for about 0.5 seconds.
- ENTER/TIME SET, DST, and TIME ZONE are unavailable while the alarm is sounding or the snooze function is turned on.
- If no operation is performed while the alarm is sounding, the alarm will stop after about 60 minutes.
- The alarm function works as usual on the first and last day of daylight saving time summer time). When Automatic DST/ summer time adjustment is set, if the alarm is set for a time that is skipped when daylight saving time (summer time) begins, the alarm is skipped, or if the alarm is set for a time that overlaps the end of daylight saving time summer time), the alarm sounds twice.
Notes on the alarm in the event of a power interruption
If the set alarm time comes in the event of a power interruption or a power interruption occurs while the alarm is sounding, the display will turn off and the alarm will not sound, and the alarm status will be as follows:
- If power returns within 60 minutes from the alarm set time, the alarm will sound.
- If the power interruption occurred while the snooze function was operating, the snooze function will continue.
- If the snooze time had passed when the power interruption occurred, the alarm will sound after power returns.
In this status, if  does not light up, ALARM RESET/OFF, SNOOZE/BRIGHTNESS and alarm mode functions are available. The snooze time will be fixed to only 10 minutes if SNOOZE/ BRIGHTNESS has been pressed.
Setting the sleep timer
You can fall asleep to the radio using the sleep timer, which turns off the radio automatically after a preset duration.
Press SLEEP.
The radio turns on. Each time you press SLEEP, the duration (in minutes) changes as follows:
The radio will play for the duration you set, then shut off.
To deactivate the sleep timer, press SLEEP repeatedly to set the sleep timer to “OFF.”
To turn off the radio before the preset time
Press ALARM RESET/OFF.
To use both the sleep timer and alarm
You can fall asleep to the radio and also be awakened by the radio or buzzer alarm at the preset time.
Set the alarm, then set the sleep timer.
Note
- When the alarm is set to sound during the sleep timer duration, the sleep timer will be deactivated automatically when the alarm sounds.
Setting the brightness of the display
Three levels of brightness are available.
Press SNOOZE/BRIGHTNESS.
Each time you press SNOOZE/BRIGHTNESS, the brightness of the display changes as follows:
Note
- When the alarm is sounding or the snooze function is active, the brightness of the display cannot be changed.
Troubleshooting
Should any problems persist after you have made the following checks, consult your nearest Sony dealer.
The clock flashes “AM 12:00” after a power interruption.
- The battery is discharged. Remove the old battery and insert a new one.
Unsatisfactory reception
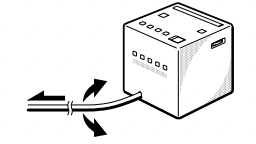
- The AC power cord functions as an FM antenna. Extend the AC power cord fully to increase reception sensitivity
- Rotate the unit horizontally for optimum reception. A ferrite bar AM antenna is built into the unit.
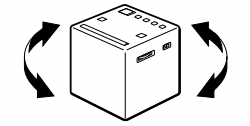
- Do not operate the unit over a steel desk or metal surface, as this may lead to interference.
The radio or buzzer alarm does not sound at the preset alarm time.
- Check that appears on the display.
The radio alarm is activated but no sound is emitted at the preset alarm time.
- Adjust the volume using VOLUME +/–.
When daylight saving time (summer time) begins, the clock does not switch to daylight saving time (summer time) automatically.
- Make sure the clock is set correctly.
- When “Aut On” appears on the display after pressing and holding DST for more than 3 seconds, the Automatic DST/summer time function becomes active.
About the battery as a backup power source
This unit contains a CR2032 battery as a backup power source to keep the clock operating during a power interruption.
When to replace the battery
When the battery is discharged, appears on the display. If a power interruption occurs while the battery is discharged, the current time and alarm will be erased.
Notes for customers
- This unit includes a preinstalled Lithium battery (CR2032) as a backup power source for the clock, which is preset to EST (Eastern Standard Time) at the factory.
- If “AM 12:00” flashes on the display when the unit is connected to an AC outlet for the first time, the battery may be discharged. In this case, consult your nearest Sony dealer.
- The preinstalled CR2032 battery is considered part of the product, and is covered by the warranty. You are required to show “Notes for customers” (in this instruction) to a Sony dealer in order to validate the warranty for this product.
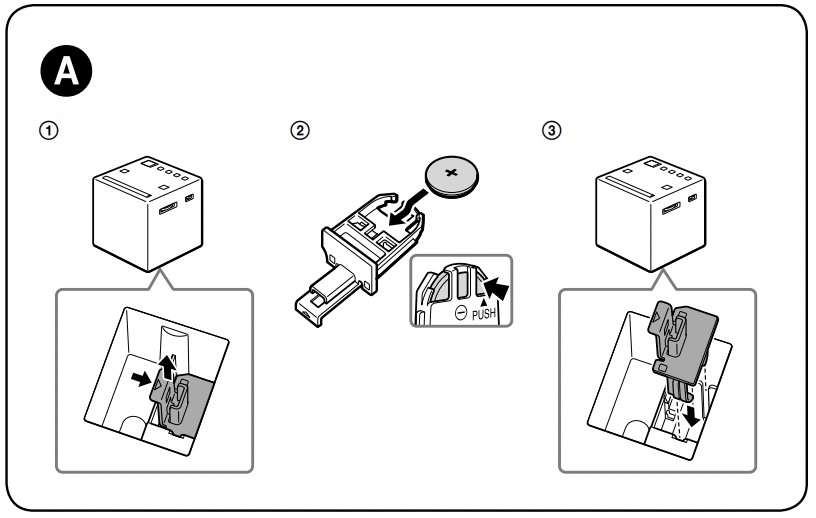
Replacing the backup battery
- Keep the AC plug connected to the wall outlet and remove the battery compartment on the bottom of the unit by pulling it up while sliding the tab. (See Fig.
 .)
.) - Insert a new battery into the battery compartment with the
 side facing up. To remove the battery from the battery compartment, push it out from the side marked PUSH. (See Fig.
  )
) - Insert the battery compartment back into the unit along the groove and push it from above until it clicks. (See Fig.
 ) The tab locks the battery compartment.
 - Press RADIO to remove from the display.
Notes
- When you replace the battery, do not disconnect the AC plug from the wall outlet. Otherwise, the current date, current time and alarm will be erased.
- If the unit will be left unplugged for a long time, remove the battery to avoid any damage that may be caused by leakage or corrosion.