Cosori CO294-CW Coffee Mug Warmer
Product's Documents
Below are documents related to this product, you can read online or download:
- Owner's manual - (English) Read Online | Download pdf


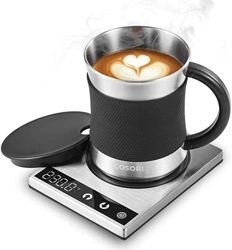
A. | Power Button | E. | Heating Plate |
B. | Decrease Temperature | F. | DC Port |
C. | Increase Temperature | G. | Adapter |
D. | Temperature Display | H. | Gravity Induction Switch |
ATTENTION
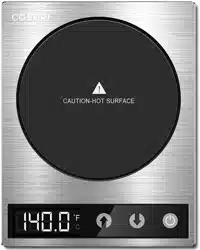
The coffee warmer should only be used to keep drinks warm. The warmer cannot effectively heat up cold or lukewarm drinks. For best results, use heat-safe cups that are thin and have a flat bottom.

Flat Bottom

Recessed Bottom

Double Walled

Not Heat-Safe
 will turn red..
 or
or  to set a custom temperature from 77°-194°F / 25°-90°C.
 at any time to turn off the coffee warmer.
Note: If you remove your cup from the coffee warmer, the heating plate will hold its temperature for 60 seconds before turning off for safety reasons.
Temperature Conversion
To change temperature units, turn on the coffee warmer and press and hold  and
and  simultaneously for 3 seconds.
Automatic Shutoff
The coffee warmer will automatically turn off after 8 hours.
Coffee Warmer Sounds
To turn coffee warmer sounds on/off.
1. Turn the coffee warmer off.
2. Press and hold and simultaneously for 3 seconds.
Cleaning
Adapter | |
Input | AC 100-240V, 50-60HZ |
Output | DC 12V, 2.5A |
Coffee Warmer | |
Input | DC 12V, 2.5A |
Rated Power | 24W |
Temperature Range | 77°-194°F / 25°-90°C |
Auto-Off | 8 hours |
Dimensions | 5.4 x 4.3 x 0.7 in / 13.7 x 10.9 x 1.8 cm |
Weight | 0.5 lb / 220 g |
Problem | Possible Solution |
The coffee warmer does not heat up. | Make sure the coffee warmer is plugged in and the power button light is on. |
Place a cup that weighs at least 10.4 oz / 295 g on the heating plate to activate the gravity induction switch, then tap | |
All lights are flashing. | Place a cup on the heating plate to activate the gravity induction switch. The lights will stop flashing and the coffee warmer will resume heating. |
The coffee warmer doesn't beep. | Tap |
"El" or "E2" appears on the display. | Internal temperature sensor is damaged or broken. Contact Customer Support. |
Follow basic safety precautions when using your coffee warmer. Read all instructions.
Product | Original Automatic Coffee Warmer |
Model | C0294-CW |
Default Warranty Period | 1 year |
For your own reference, we strongly recommend that you record your order ID and date of purchase. | |
Order ID |
|
Date of Purchase |
|
TERMS & POLICY
Arovast Corporation warrants all products to be of the highest quality in material, craftsmanship, and service, effective from the date of purchase to the end of the warranty period.
Arovast Corporation will replace any product found to be defective due to manufacturer flaws based on eligibility. Refunds are available within the first 30 days of purchase. Refunds are only available to the original purchaser of the product. This warranty extends only to personal use and does not extend to any product that has been used for commercial, rental, or any other use for which the product is not intended. There are no warranties other than the warranties expressly set forth with each product.
This warranty is non-transferrable. Arovast Corporation is not responsible in any way for any damages, losses, or inconveniences caused by equipment failure or by user negligence, abuse, or use noncompliant with the user manual or any additional safety or use warnings included in the product packaging and manual.
This warranty does not apply to the following:
• Damage due to abuse, accident, alteration, misuse, tampering, or vandalism.
• Improper or inadequate maintenance.
• Damage in return transit.
• Unsupervised use by children under 18 years of age.
Arovast Corporation and its subsidiaries assume no liability for damage caused by the use of the product other than for its intended use or as instructed in the user manual. Some states do not allow this exclusion or limitation of incidental or consequential losses so the foregoing disclaimer may not apply to you. This warranty gives you specific legal rights and you may also have other rights which may vary from state to state.
ALL EXPRESSED AND IMPLIED WARRANTIES, INCLUDING THE WARRANTY OF MERCHANTABILITY, ARE LIMITED TO THE PERIOD OF THE LIMITED WARRANTY.
Extend Your Warranty by 1 Year
Register your product at www.cosori.com/warranty to extend your 1-year warranty by an additional year.
Please fill out all required fields and include your order ID, place of purchase, and purchase date, if applicable.
Defective Products & Returns
If you discover your product is defective within the specified warranty period, please contact Customer Support via [email protected] with a copy of your invoice and order ID. DO NOT dispose of your product before contacting us. Once our Customer Support Team has approved your request, please return the product with a copy of the invoice and order ID.