Loading ...
Loading ...
Loading ...

10
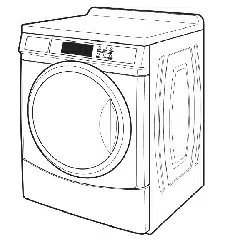
Complete Installation
1. Check the electrical requirements. Be sure that you have the
correct electrical supply and the recommended earthing
method. See “Electrical Requirements.”
2. Check that all
parts are now installed. If there is an extra part,
go back through the steps to see which step was skipped.
3. Check that you
have
all of your tools.
4. Dispose
of/recycle all packaging materials.
5. Check that the water taps are on.
6. Check for leaks around taps and inlet hoses.
7. Plug into an earthed socket outlet.
8. To test and to clean your washer, measure 1/2 the detergent
manu
facturer’s recommended amount for a medium-size
load. Pour the detergent into the detergent dispenser. Select
any cycle and allow the washer to complete one whole cycle.
CONTROL SET-UP INSTRUCTIONS
1. Door must be closed before cycle selection is made.
2. Press fabric setting key pad for the wash cycle desired. After
the cycle is started, the time will display and count down.
General Information
Scrolling ‘out of order’ showing in display, followed by a
failure code
This condition indicates the washer is inoperative.
“0 Minutes” showing in display
This condition indicates the washer cannot be operated. If a door
swit
ch fails, it mu
st be replaced before normal operation can be
restored.
Cold Start (initial first use)
Washer is programmed at the factory as follows:
■ 9-minute wash period
■ 3 rinses (extra rinse not enabled)
Warm Start (after power failure)
A few seconds after power is restored, if a cycle was in progress
at the time of the
power failure, “RESELECT CYCLE” will flash in
the display, indicating the need for a key press to restart washer.
Control Set-up Procedures
IMPORTANT: Read all instructions before operating.
Set-up procedures can be entered by using the Service Access
Code (see
service Access Code section).
The washer is now in the set-up mode. The
lower fabric setting
key pads and the digital display are used to set up the controls.
The display can contain 4 numbers and/or letters and a decimal
point. These are used to indicate the set-up codes and related
code values available for use in programming the washer.
How to use the key pads to program controls
1. The PERM PRESS key pad is used to adjust the
values associated with set-up codes. Pressing
this key pad
will change the value by increment
s. Rapid adjustment
is possible by holding the key pad down.
2. The WOOLENS key
pad advances you through the set-up
codes. Pressing this key pad will advance you to the next
available set-up code. Holding the key pad down will
automatically advance through the set-up codes at a rate
of 1 per second.
3. The DELICATES/KNITS key pad is used to select or deselect
options.
Start Operating Set-up
Before proceeding, it is worth noting that, despite all of the
options available, an owner can simply choose to un-crate a new
semi-pro washer, hook it up, plug it in, and have a washer that
operates. Washers are preset at the factory for a 9-minute wash
period and 3 rinses (no extra rinse).
Loading ...
Loading ...
Loading ...