
Loading ...
Loading ...
Loading ...
11
Operation
The cordless grass trimmer is designed to cut grass and
weeds under bushes, and on slopes that cannot be reached
with the lawn mower. The trimmer must be used outdoors only,
at an ambient temperature between 41ºF (5ºC) and
113ºF (45ºC).
mWARNING! Remove stones, small sticks and other
objects from the cutting area. The nylon blade will continue
to rotate for a few seconds after the trimmer is switched o.
Let the motor come to a complete stop before switching the
trimmer back on. Do not rapidly switch the trimmer o and on.
mWARNING! Rocks or debris may ricochet or be thrown
into eyes and face, cause blindness, or other serious injury.
Never lean over the trimmer head and always wear eye
protection.
ON/OFF Switch
1. Insert the battery into the battery compartment on the
back of the machine. Press until it clicks into position.
Press and hold the safety lock button, then squeeze the
ON/OFF switch. When the machine runs steadily, release
the safety lock button (Fig. 8).
2. To switch OFF, release the ON/OFF switch (Fig. 8).
Remove the battery.
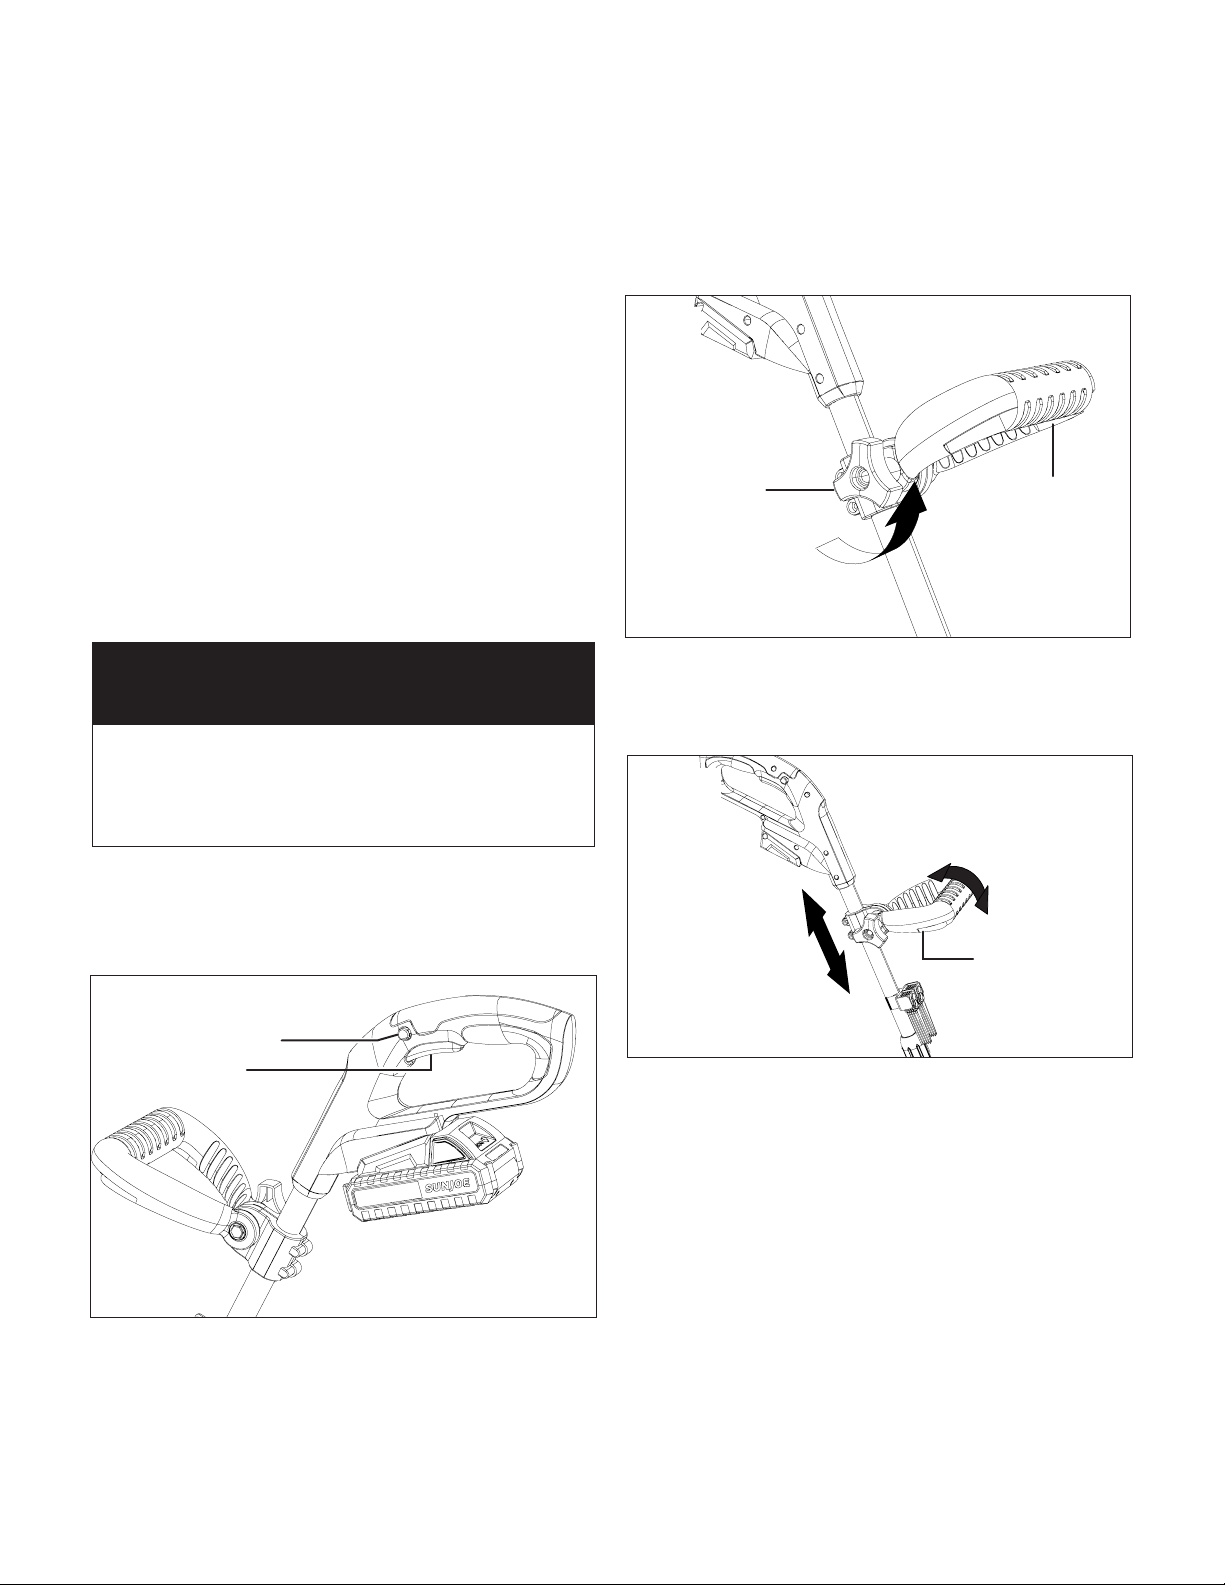
Adjusting the Auxiliary Handle
1. Switch o the machine and remove the battery. Wait until
the blade comes to a complete stop.
2. Rotate the auxiliary handle knob counterclockwise to
loosen the auxiliary handle (Fig. 9).
3. Adjust the position of the auxiliary handle as needed by
sliding it along the upper pole (Fig. 10).
4. Adjust the angle of the auxiliary handle as needed by
pivoting it as shown (Fig. 10).
5. Lock the auxiliary handle by rotating the knob clockwise.
In order to operate this cordless grass trimmer you will need
and a iON+ 24V System battery and charger. See page 15
for battery and charger options and specications, or for
more information visit sunjoe.com.
TOOL ONLY
BATTERY + CHARGER SOLD SEPARATELY
Safety lock button
Fig. 8
On/O switch
Auxiliary
handle knob
Fig. 9
Auxiliary handle
Fig. 10
Auxiliary
Handle
Loading ...
Loading ...
Loading ...