Loading ...
Loading ...
Loading ...
14
Info
Installation Source7 8
AV1
AV2
TV
HDMI1
HDMI2
Side
PC
AV3
Language
Autoprogram
Source
Clock
Weak channel installation
Current software info
Reset AV settings
Info
Installation Clock7
Language
Autoprogram
Source
Clock
Weak channel installation
Current software info
Reset AV settings
Info
Installation Reset AV settings7
Language
Autoprogram
Source
Clock
Weak channel installation
Current software info
Reset AV settings
AM
:
Start now
Select Source in the Installation menu.
Press the cursor right to enter the list, and press up/down key to
the selected input.
Press OK button to confi rm.
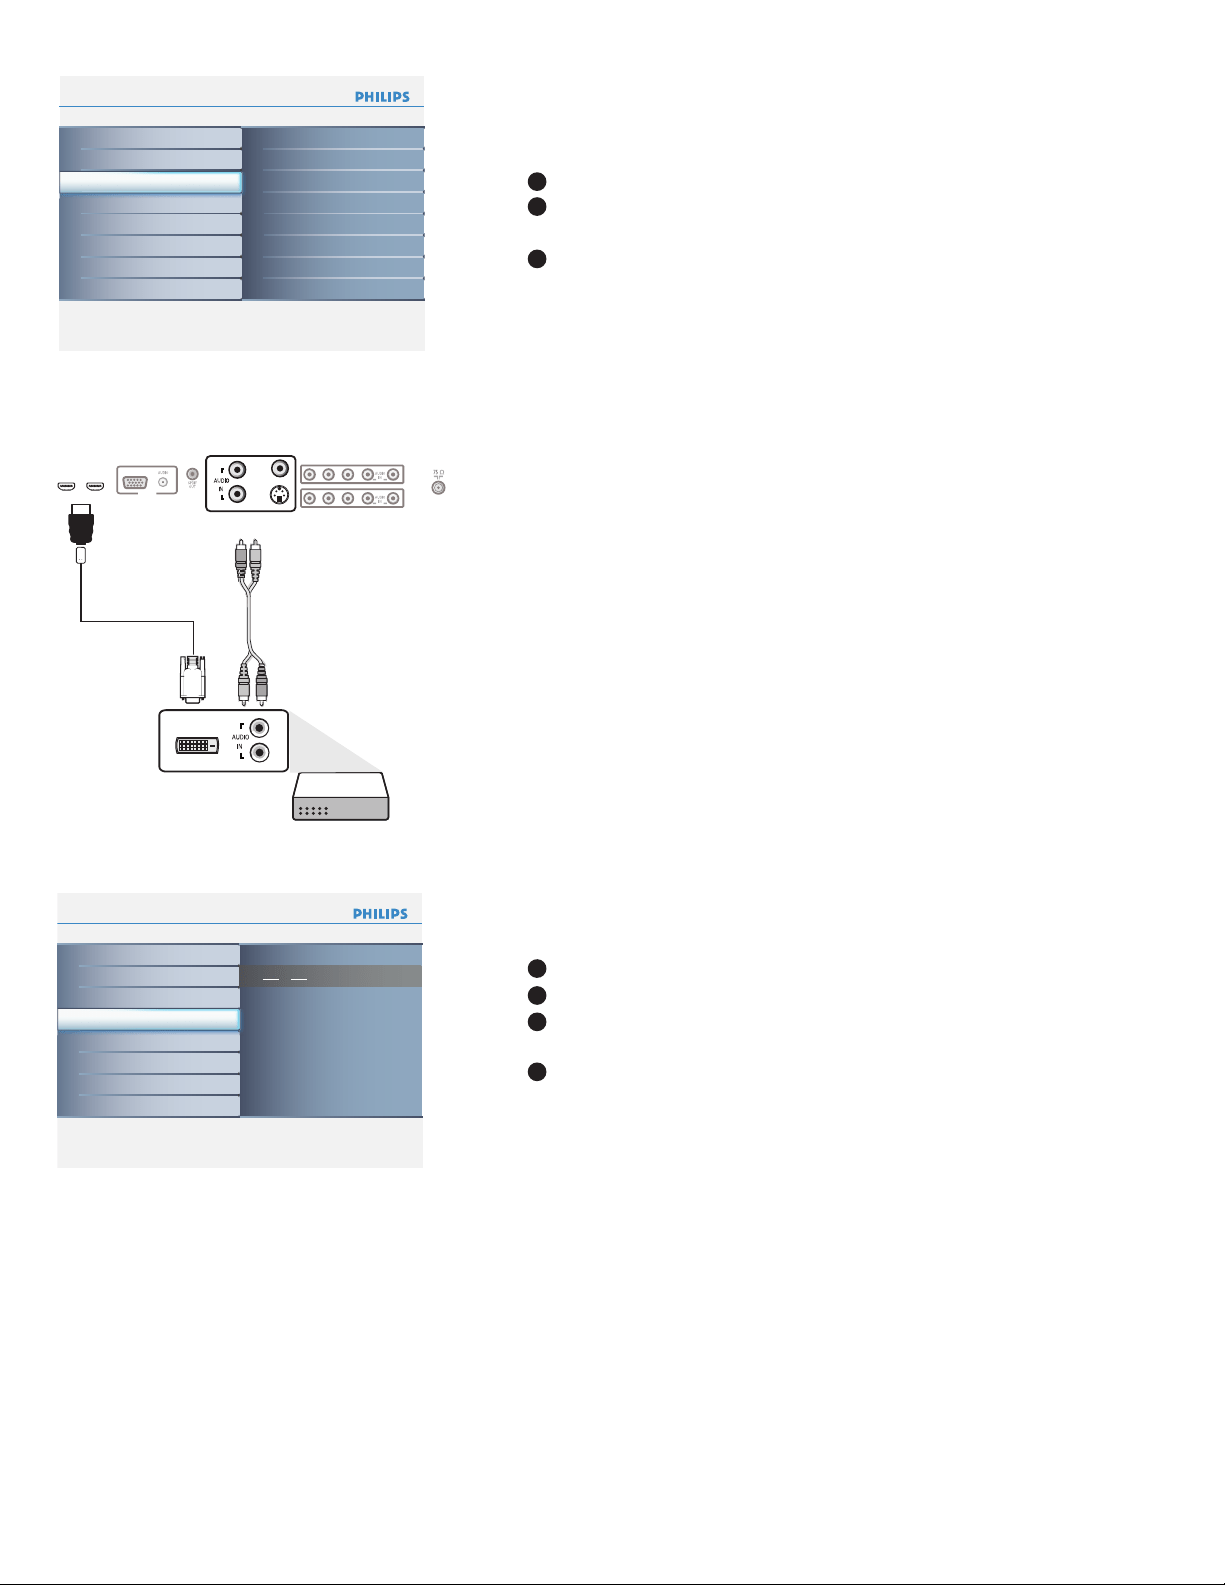
Analog Audio In
If your accessory device has a DVI output connector, only the
video signal is transmitted in digital format. To input an audio signal,
please connect the analog audio L and R outputs to the TV’s L and
R AV3 audio input plugs.
Digital Audio Out
In addition to accepting audio input through HDMI, the TV can
output Digital audio through the DIGITAL AUDIO OUT
(SPDIF OUT) connector to an external amplifi er or receiver.
If your amplifi er or receiver has a matching connector for Digital
Audio In, you can connect it with a single cable to the TV’s
DIGITAL AUDIO OUT (SPDIF OUT). See Cover and Connection.
Source
HDMI
DVI
AV3:
Audio L/R
R
L
DVI
VIDEO
IN
R
L
S-VIDEO
PC I N
VGA
HDMI2 HDMI1
Y
Y
P
P
b
Pr
R
L
Y
Y
P
P
b
Pr
R
L
AV1
AV2
AV3
1
2
3
Clock
Info
Installation Source7 8
AV1
AV2
TV
HDMI1
HDMI2
Side
PC
AV3
Language
Autoprogram
Source
Clock
Weak channel installation
Current software info
Reset AV settings
Info
Installation Clock7
Language
Autoprogram
Source
Clock
Weak channel installation
Current software info
Reset AV settings
Info
Installation Reset AV settings7
Language
Autoprogram
Source
Clock
Weak channel installation
Current software info
Reset AV settings
AM
:
Start now
This menu allows you to identify the accessory devices you have
connected to the external inputs/outputs.
This allows you to use your TV as a clock.
Press the MENU button on the remote control.
Use the cursor down to select Installation in the Settings menu.
Press the cursor right to enter the list, and press up/down key to
set the time. (hour/ minute/ AM or PM)
Press OK button to confi rm.
1
2
3
4
Loading ...
Loading ...
Loading ...