Loading ...
Loading ...
Loading ...
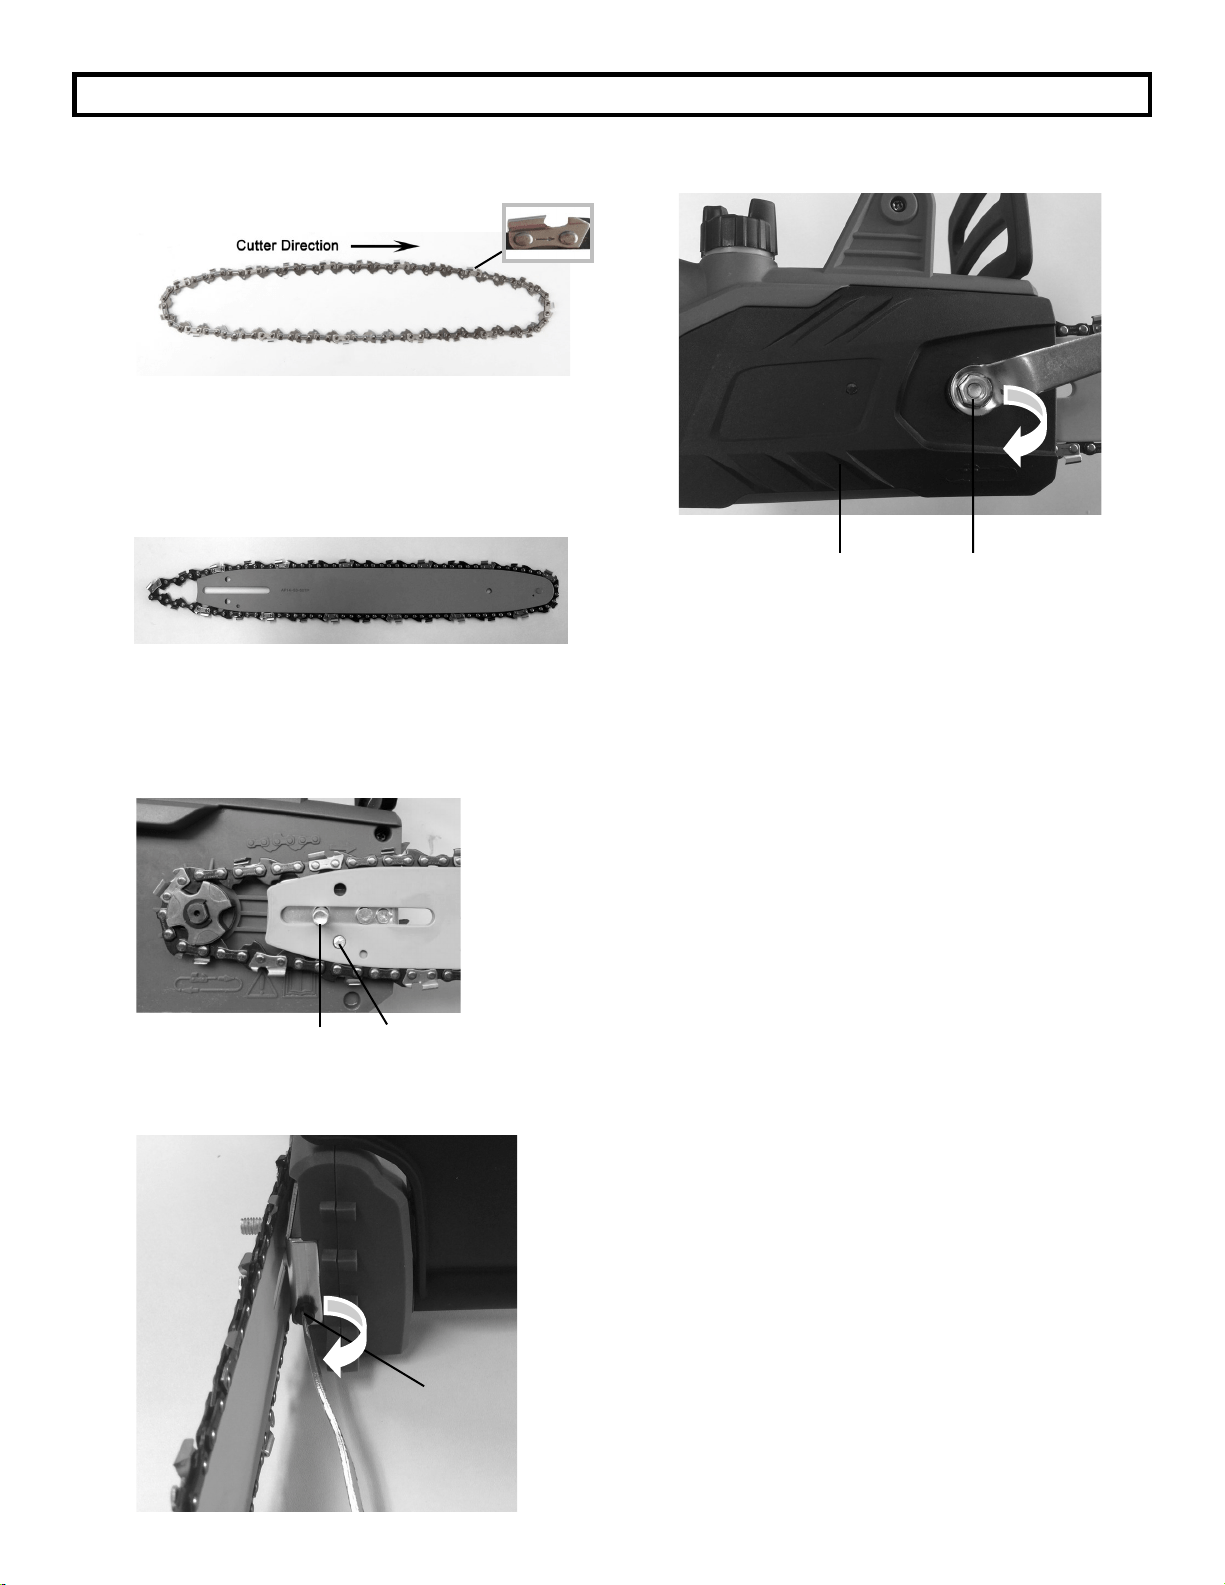
INSTALLING/ REPLACING THE GUIDE BAR AND CHAIN
7
• Lay out the new saw chain in a loop and straighten any
kinks. The cutters should face in the direction of the chain
rotation. If they face backwards, turn the loop over.
• Place the chain drive links into the bar groove.
NOTE: Make certain of the direction of chain.
• Position the chain so there is a loop at the back of the
bar.
• Place the loop around the sprocket and the bar so that it
is seated correctly on the guide bolt and tensioning bolt.
Turn the chain tensioning screw counterclockwise with
the screw driver provided, if the hole in the bar doesn’t fit
the tensioning bolt.
• Turn the chain tensioning screw clockwise with the screw
driver provided until there is approximately 2mm of slack
in the chain.
• Replace the chain cover and fully tighten the locknut with
the hex key provided.
TENSIONING THE SAW CHAIN
• Unscrew the locknut counterclockwise from the chain
cover with the hex key provided.
• To tighten the chain, turn the tensioning screw clockwise.
To loosen the tension, turn the tensioning screw
counter-clockwise.
• Tighten the chain cover by turning the locknut clockwise
with the hex key provided.
• Re-adjust tension of the saw chain when necessary.
The chain is correctly tensioned when there is no sag on the
underside of the bar, the chain is snug, but it can be turned by
hand without binding.
NOTE: If chain is too tight, it will not rotate. Ensure that the
chain will rotate without binding.
NOTE: A new chain tends to stretch, check chain tension
frequently and tension as required.
Tensioning Bolt Guide Bolt
Chain Tensioning
Screw
Chain Cover Locknut
Loading ...
Loading ...
Loading ...