
Loading ...
Loading ...
Loading ...
MFL38290501
49-40553
4
Installation Instructions
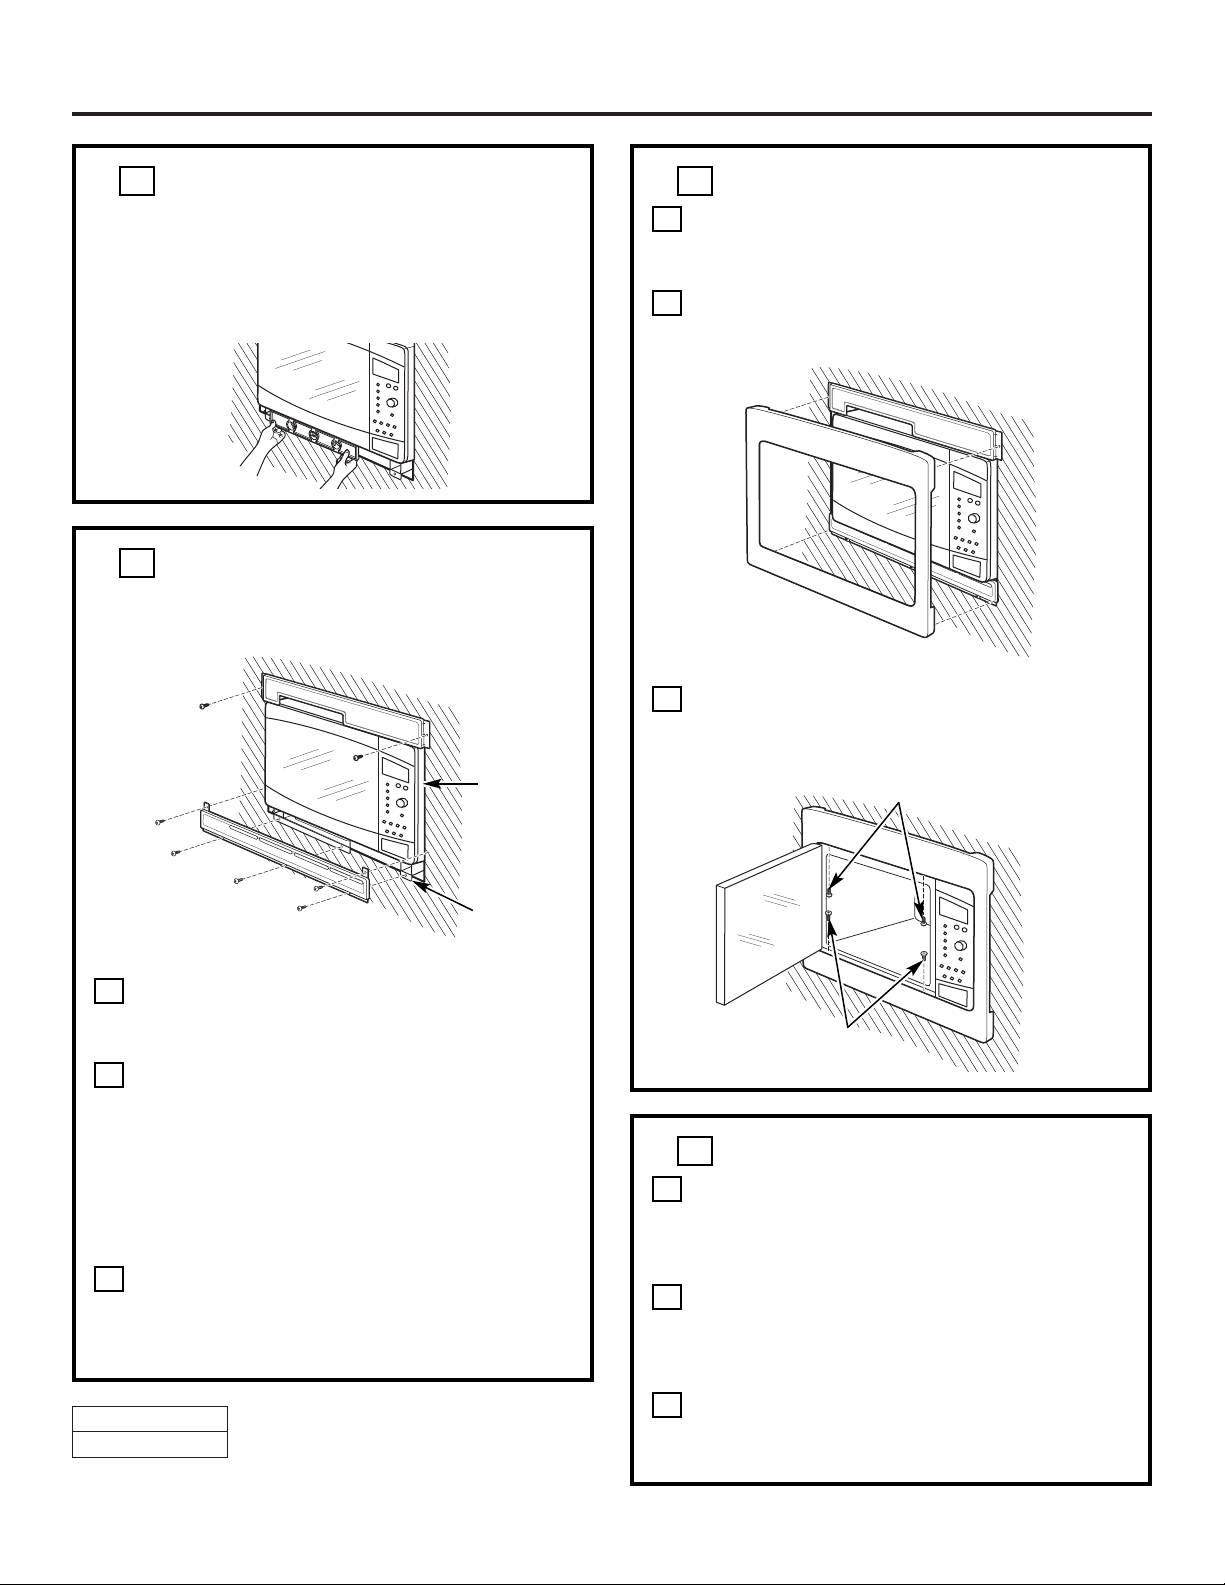
❒
INSTALL THE BOTTOM
BRACKET AND SECURE
THE TOP BRACKET
Drill pilot holes through the three holes
on the front flange of the bottom duct
assembly.
Hold the bottom bracket against the front
flange of the bottom duct assembly, lining
up the three holes in the bottom bracket
with the three holes in the bottom duct.
Screw in three round-head screws. Drill
pilot holes through the two holes in the
tabs on the sides of the bottom bracket.
Screw in two round-head screws.
Drill pilot holes through the side holes
in the top bracket. Secure the top bracket
to the cabinet using two round-head
screws.
C
B
A
7
❒
INSTALL THE TRIM FRAME
Place the trim frame over the microwave
oven with the vent openings at the
bottom.
Press the trim frame into the opening
until all sides snap into place.
Open the microwave oven door. Secure
the trim frame using four flat-head
screws (two on the inside top and two
on the inside bottom).
C
B
A
8
❒
REPLACE ANY LOOSE ITEMS
Your trim kit is now fully installed.
Replace the turntable and turntable
support that were removed from the
inside of the microwave oven.
Keep these installation instructions and
extra screws for future reference and
need. Do not place them in the
microwave oven.
Replace house fuse or close circuit
breaker to restore power at the service
panel.
C
B
A
9
Round-Head
Screws
Cutout
Opening
Positioning
Flange
Flat-Head
Screws
Flat-Head Screws
❒
CHECK LEVELING
Check the leveling by placing a level at the
front and sides of the microwave. It may be
necessary to add wood shims under the
bottom duct to level the microwave front-to-
back or side-to-side.
6
04-07 JR
Printed in Korea