Loading ...
Loading ...
Loading ...
4. SERVICE CENTRE
Before calling the Service Centre.
If the oven is not working, we recommend that:
•Check that, if the oven is properly plugged into the power supply.
If the cause of the fault cannot be detected:
•Disconnect the oven from the mains, do not touch the oven and call
the after sales service.
Before calling the Service Centre remember to make a note of the
serial number on the serial number specifications plate.
The oven is supplied with a guarantee certificate that ensures that it
will be repaired free of charge by the Service Centre whilst under
guarantee.
This appliance is marked according to the European
directive 2002/96/EC on Waste Electrical and
Electronic Equipment (WEEE).
By ensuring this product is disposed of correctly, you
will help prevent potential negative consequences for
the environment and human health, which could
otherwise be caused by inappropriate waste handling
of this product.
The symbol on the product indicates that this product
may not be treated as household waste.
Instead it shall be handed over to the applicable collection point for the
recycling of electrical and electronic equipment Disposal must be
carried out in accordance with local environmental regulations for
waste disposal.
For more detailed information about treatment, recovery and recycling
of this product, please contact your local city office, your household
waste disposal service or the shop where you purchased the product.
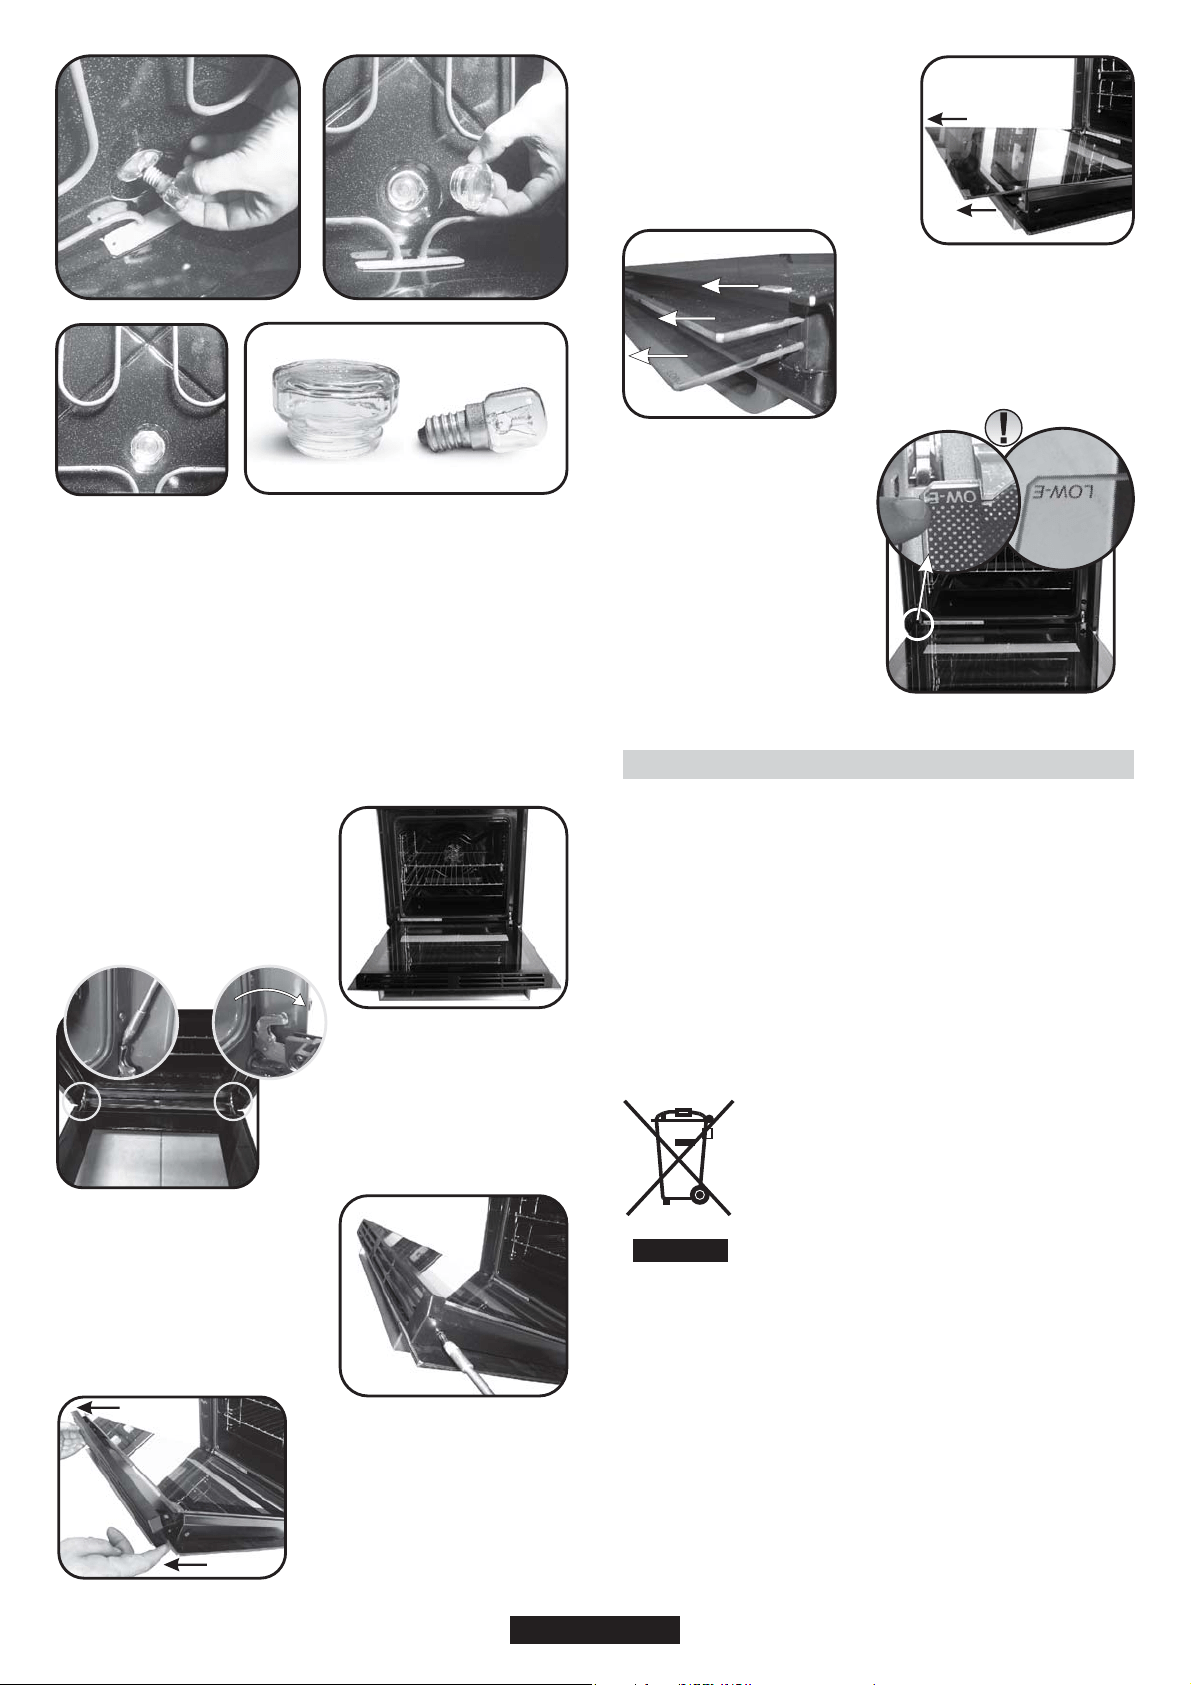
Bulb characteristics:
230 V AC - 25W- E 14 base Temperature 300°C to change a defective
bulb, just :
•Unscrew the glass cover,
•Unscrew the bulb,
•Replace it with the same type: see characteristics above,
•After replacing the defective bulb, screw back the
protective glass cover.
07 GB
CLEANING THE DOOR GLASS
Internal door glass of this oven can be removed and cleaned.
In order to clean the internal glass follow these instructions;
Picture 1
Picture 3
Picture 4
Picture 5
• Open the door of the oven.
(Picture1)
• Remove the top metallic cover by
pulling it (4upwards. Picture
• pulling it Remove the glass by gently
out of the door frame Picture (5)
• Remove the screws as shown in
Picture Picture (3)
• Lock the hinges as shown in Picture
2 before starting the cleaning
operation.
Unlock the hinges when the cleaning
operation is finished. Picture (2)
Picture 2
Picture 7
• ON ALL GLASES LOW-E
sign must be properly
readable and must be
positioned on the left corner of
the door, close to the left side
hinge. In this way the printed
st
surface of the 1 glass will
remain INSIDE the door.
•
After cleaning the glass re-
assemble the parts in the
reverse order of removal.
1
2
3
• *For ovens, please Pyrolytic
nd rd
remove also 2 and 3 glasses .
(
Picture 6)
Picture 6
Loading ...
Loading ...
Loading ...