Loading ...
Loading ...
Loading ...
31-1000543 Rev. 0 11
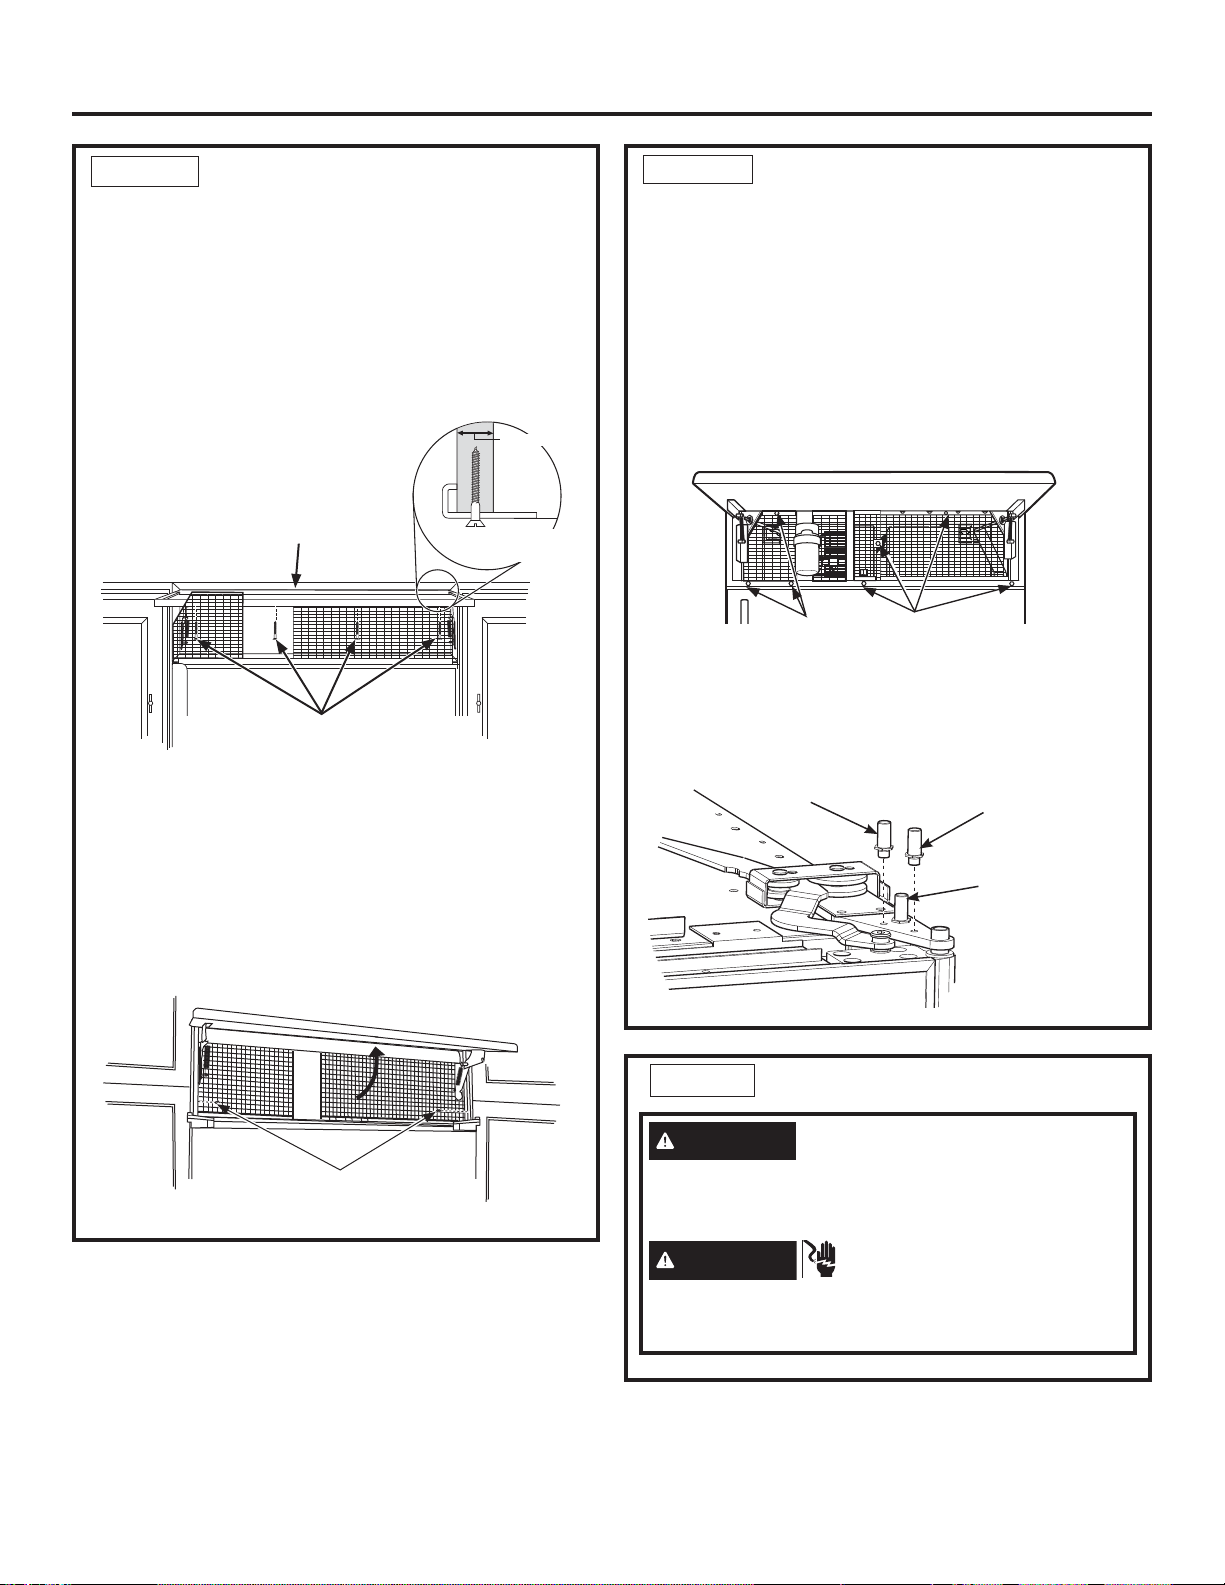
STEP 8 ADJUST DOOR SWING
NOTE: This refrigerator has a 3-position door stop.
When space does not allow the door to swing open
fully to 115°, you may change the door swing to a 90°
opening. A 130° door swing is available for standard
installation only. If used for flush installation, damage
will occur to wood panels. Skip this step if door opening
is satisfactory for your installation situation.
• Lift the grille panel to access the wire cover trim.
• Remove screws on both sides of the wire cover trim
and rotate off.
• Use pliers to unscrew door stop and reinstall into the
90° or 130° (standard only) position.
• Reinstall the wire cover trim.
STEP 9 CONNECT WATER SUPPLY
Pin Location
for 90°
Door Swing
Pin Location for
130° Door Swing
(Standard Only)
Pin Location
as Shipped for
115°
Door Swing
Installation Instructions - Stainless Steel Installation
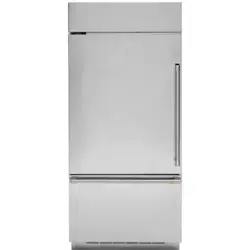
STEP 7 ALTERNATE ANTI-TIP
PROCEDURE
The refrigerator must be secured to prevent
tipping. When the anti-tip bracket cannot be used,
this alternate method can be used to prevent the
refrigerator from tipping.
• Raise the grille panel to access case trim.
• Use a 3/16” bit to drill four evenly spaced clearance
holes through the metal top case trim.
• Use a 1/16” bit to drill to pilot holes through the metal
clearance holes and into the wood soffit. The holes
should be centered in the soffit or a 3/4” (1.90 cm)
min. wood brace. The brace spanning the enclosure
must be securely fastened to cabinets on both sides.
• Install four, 1-1/2” (3.81 cm) drywall screws into the
pilot holes.
• If no soffit above the unit, drill screws into adjacent
cabinets through the side case trim.
Top Case Trim
Install four 1-1/2” drywall screws through
trim and into soffit or 3/4” min. wood brace
3/4” Min.
Side View Top
Case Trim
Raise grille panel to
stop position
Drive screws through case
trim into adjacent cabinets
Remove grille screws
WARNING
Connect to potable water supply
only. A cold water supply is required for automatic
icemaker operation. The water pressure must be
between 40 and 120 psi (275-827 kilopascals).
WARNING
ELECTRIC SHOCK HAZARD
Attach tubing clamp using existing hole only. DO NOT
drill into the refrigerator.
Loading ...
Loading ...
Loading ...