Loading ...
Loading ...
Loading ...
OPERATION - CONTINUOUS FEED DISPOSERS
www.xoappliance.com
1. Remove the sink stopper and turn on a medium flow of cold water.
2. Turn the switch “ON”.
3. Scrape in food waste.
4. Disposal process can be speeded up by breaking up larger bones, cobs and rinds. Large bones, fiberous
husks and similar waste may be more easily disposed of as trash.
5. During grinding, the Disposer motor may slow down. This is normal. As the disposer slows down, torque
(power to grind) increases.
6. After grinding allow the cold water to run for 15 to 30 seconds to ensure that waste is flushed through the
trap and down the drain.
7. DO NOT USE HOT WATER. Cold water helps keep fats solid so they are readily flushed down the drain.
1. Remove the Safety Feed Guard that doubles as a sink stopper and turn on a medium flow of cold water.
2. Scrape in food waste.
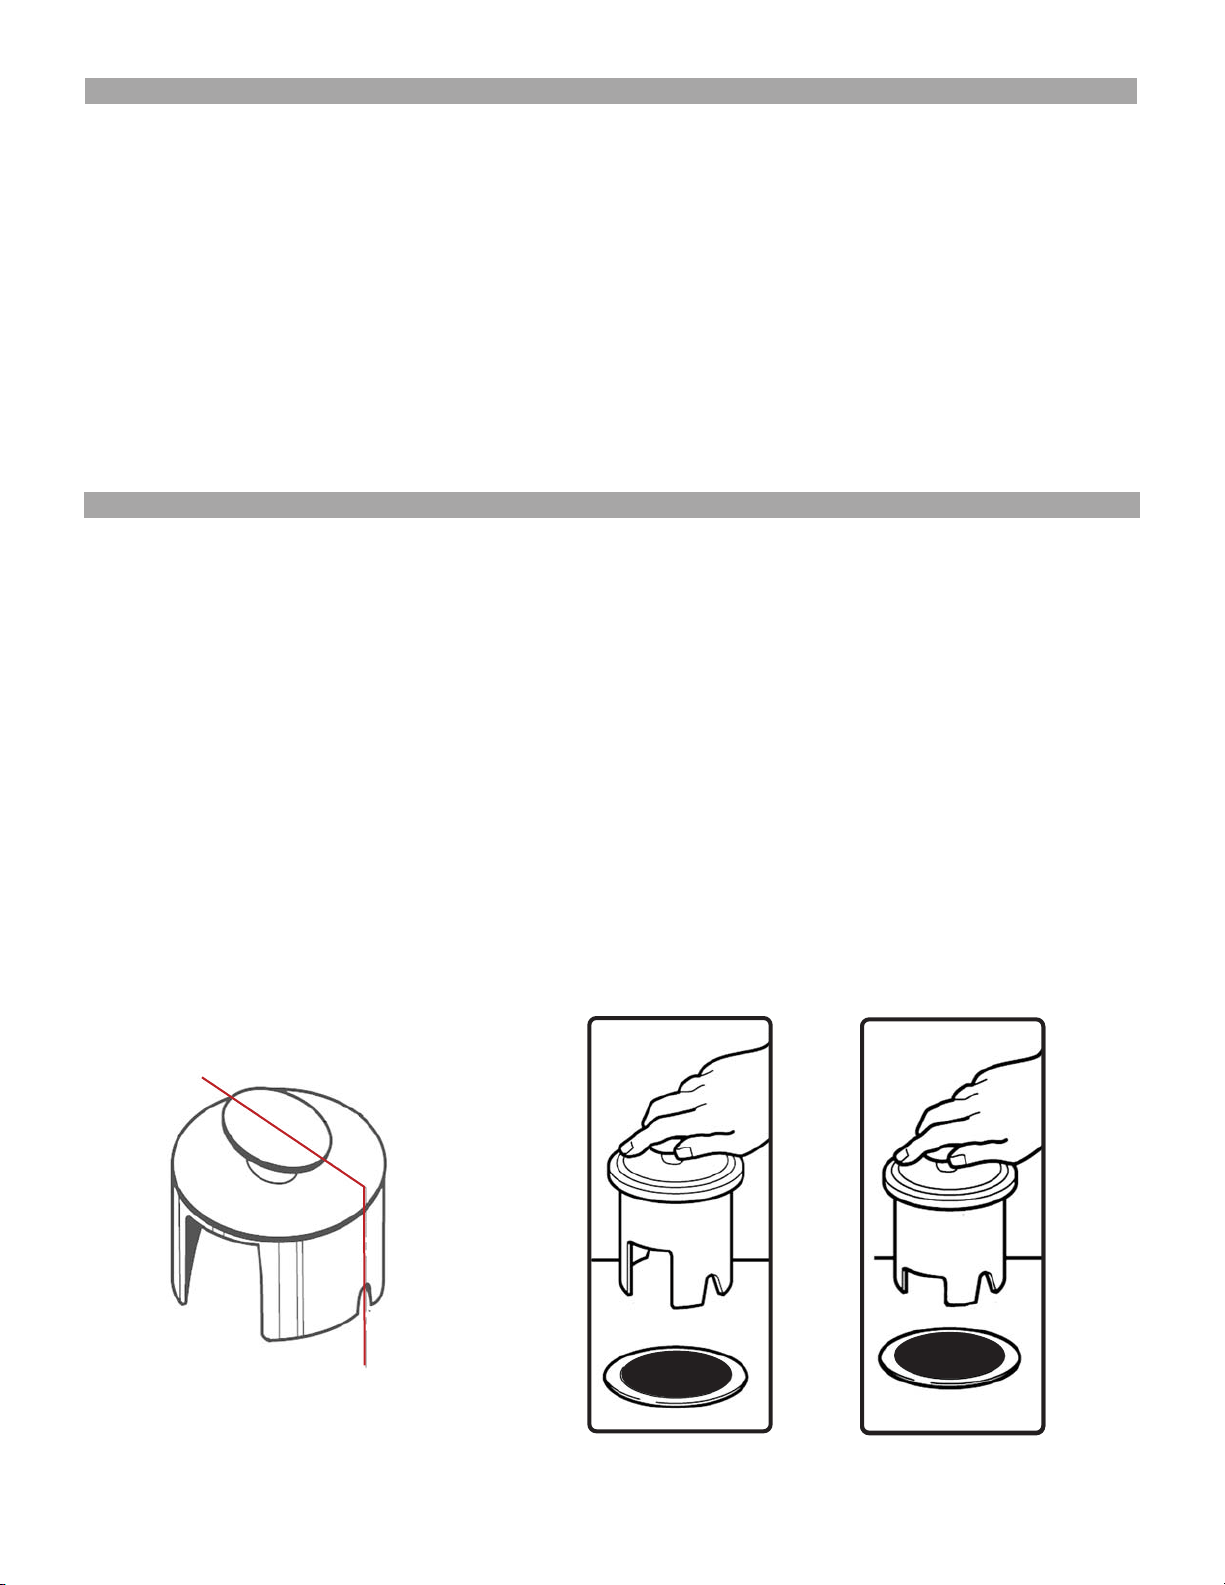
3. Insert the Safety Feed Guard, aligning the two smaller notches with the plunger switch mounted inside
the drain opening of the Disposer.
(NOTE: The oval shaped handle is molded to indicate the location of the notches)
4. Push the Safety Feed Guard down firmly to start the Disposer.
5. Run the Disposer for 15 to 30 seconds after grinding stops to ensure that all waste is flushed through the
trap and down the drain.
6. Lift the Safety Feed Guard to stop the Disposer.
IMPORTANT NOTE:
The Safety Feed Guard has 4 notched sections in it.
Two small notches which are used to operate the Disposer, as well as a large cut out and a medium cut out.
Placing the large cut out over the plunger switch allows the Safety Feed Guard to act as a stopper to seal
the drain so that the sink can be filled. The medium sized cutout will allow the Safety Feed Guard to be
parially inserted so that the sink may drain but it will prevent foreign material from being dropped into the
Disposer accidentally.
OPERATION - BATCH FEED DISPOSERS
OVAL HANDLE
ALIGNS WITH
NOTCHES
LARGE NOTCH
STOPPER
MEDIUM NOTCH
DRAIN
Loading ...
Loading ...
Loading ...