
WARNING - FCC Regulations state that any unauthorized changes or modifications to this equipment not
expressly approved by the manufacturer could void the user’s authority to operate this equipment.
Note: This equipment has been tested and found to comply with the limits for a Class B digital
device, pursuant to Part 15 of the FCC Rules.These limits are designed to provide reasonable
protection against harmful interference in a residential installation.This equipment generates, uses
and can radiate radio frequency energy and, if not installed and used in accordance with the
instructions, may cause harmful interference to radio communications. However, there is no
guarantee that interference will not occur in a particular installation. If this equipment does cause
harmful interference to radio or television reception, which can be determined by turning the
equipment off and on, the user is encouraged to try to correct the interference by one or more of the
following measures:
- Reorient or relocate the receiving antenna.
- Increase the separation between the equipment and the receiver.
- Connect the equipment into an outlet on a circuit different from that to which the receiver is
connected.
- Consult the dealer or an experienced radio/TV technician for help.
ABOUT THE TELEPHONE CONSUMER PROTECTION ACT OF 1991
"The Telephone Consumer Protection Act of 1991 makes it unlawful for any person to use a
computer or other electronic device to send any message via a telephone facsimile machine unless
such message clearly contains in a margin at the top or bottom of each transmitted page or on the
first page of the transmission the following information:
(1) The date and time of transmission.
(2) Identification of either the business, business entity or individual sending the message.
(3) Telephone number of either the sending machine, business, business entity or individual.
In order to program this information into your facsimile machine, please refer to the appropriate
instructions in the operation manual."
As an ENERGY STAR
®
partner, SHARP has determined
that this product meets the ENERGY STAR
®
guidelines for
energy efficiency.
This product meets the applicable Industry Canada technical
specifications
The Ringer Equivalence Number is an indication of the maximum number of devices
allowed to be connected to a telephone interface. The termination on an
interface may consist of any combination of devices subject only to the
requirement that the sum of the RENs of all the devices does not exceed five.
U.S.A.
Canada

1
Introduction
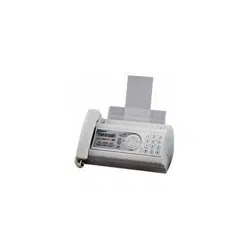
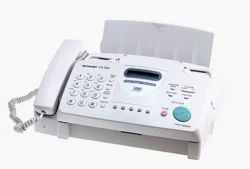
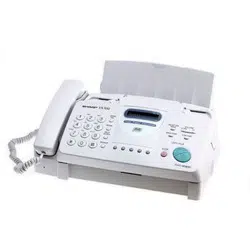
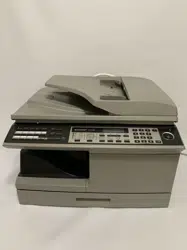
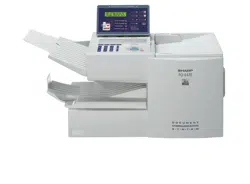
Welcome, and thank you for choosing a Sharp facsimile machine. The features
and specifications of your new Sharp fax machine are shown below.
Automatic dialing Conventional Auto Dialing:
Rapid Key Dialing: 59 numbers
Speed Dialing: 75 numbers
Personal Auto Dial Books: 10 books
(59 Rapid Keys, 16 Speed Dial numbers
per book)
Memory size* 8 MB (approx. 500 pages )
Optional memory: FO-8MK (8 MB; approx. 500
pages)
Modem speed 33,600 bps (max.) with automatic fallback to lower
speeds.
Transmission time* Approx. 2 seconds
Toner cartridge yield**
(continuous printing,
4% page coverage,
letter paper)
Initial starter cartridge (included with fax machine):
Approx. 3000 pages
Replacement cartridge FO-44ND/FO-50ND:
Approx. 6000 pages
Drum cartridge yield**
(continuous printing,
4% page coverage,
letter paper)
Initial starter cartridge (included with fax machine):
20,000 pages (ave.)
Replacement cartridge (FO-47DR): 20,000 pages
(ave.)
Resolution Horizontal: 203 pels/inch (8 pels/mm)
Vertical:
Standard: 98 lines/inch (3.85 lines/mm)
Fine /Halftone:
196 lines/inch (7.7 lines/mm)
Super fine: 391 lines/inch (15.4 lines/mm)
Automatic document feeder Letter paper (20 lb): Max. 50 pages
Legal paper: Max. 20 pages
(Note: 11” x 17” paper must be loaded one page at a
time.)
*Based on Sharp Standard Chart at standard resolution, excluding time
for protocol signals (i.e., ITU-T phase C time only).
**The yields may vary depending on coverage and operating conditions.

2
Paper capacity 250 sheets (20 lb)
(500-sheet cassette available as option)
Compression scheme MMR, MR, MH, Sharp (H2), JBIG
Halftone (grayscale) 64 levels
Applicable telephone line Public switched telephone network
Compatibility ITU-T (CCITT) G3 mode, Super G3 mode
Printing resolution Horizontal: 406 lines/inch (16 lines/mm)
Vertical: 391 lines/inch (15.4 lines/mm)
Input document size Automatic feeding:
Width: 5.8 to 10.1" (148 to 257 mm)
Length: 5.0 to 14.3" (128 to 364 mm)
Manual feeding:
Width: 5.8 to 11.0" (148 to 279 mm)
Length: 5.0 to 38.0" (128 to 966 mm)
Effective Scanning width 8.2" (208 mm) max.
Effective Printing width 8.0" (203 mm) max.
Reception modes Auto/Manual
Instascan speed 1.3 sec/page (letter paper; scan time only,
excludes document feeding time)
Full Dual Access Ye s
Copy function Single/Multi/Sort (99 copies/page)
Power requirements 120 V AC, 60 Hz
Operating temperature 50 - 86°F (10 - 30°C)
Humidity 20 to 85% RH
Power consumption Standby: 9 W
Maximum: 760 W
Dimensions Width: 21.5" (546 mm)
Depth: 16.2" (412 mm)
Height: 13.6" (346 mm)
(Not including paper tray or attachments)

3
As a part of our policy of continuous improvement, SHARP reserves the right to make
design and specification changes for product improvement without prior notice. The
performance specification figures indicated are nominal values of production units.
There may be some deviations from these values in individual units.
Important safety information
Be sure to save these instructions!
When using your facsimile equipment, basic safety precautions should always be
followed to reduce the risk of fire, electric shock and injury to persons, including
the following:
• CAUTION: To reduce the risk of fire, use only No. 26 AWG or larger
telecommunication line cord.
• Do not disassemble this machine or attempt any procedures not described in
this manual. Refer all servicing to qualified service personnel.
• This machine must only be connected to a 120 V, 60 Hz, grounded (3-prong)
outlet. Connecting it to any other kind of outlet will damage the machine and
invalidate the warranty.
• Do not install or use the machine near water, or when you are wet. For example,
do not use the machine near a bath tub, wash bowl, kitchen sink or laundry tub,
in a wet basement, or near a swimming pool. Take care not to spill any liquids
on the machine.
• Use only the power cord provided with the facsimile machine. Do not use an AC
extension cord.
• Unplug the machine from the telephone jack and then the power outlet and
consult a qualified service representative if any of the following situations occur:
- Liquid has been spilled into the machine or the machine has been
exposed to rain or water.
- The machine produces odors, smoke, or unusual noises.
- The power cord is frayed or damaged.
- The machine has been dropped or the housing damaged.
• Do not allow anything to rest on the power cord, and do not install the machine
where people may walk on the power cord.
Weight
Approx. 31.3 lbs. (14.2 kg)
(Not including supplies, paper tray or attachments)

4
• Never insert objects of any kind into slots or openings on the machine. This
could create a risk of fire or electric shock. If an object falls into the machine that
you cannot safely remove, unplug the machine and consult a qualified service
representative.
• Do not place this machine on an unstable cart, stand or table. The machine
could be seriously damaged if it falls.
• Avoid using a telephone (other than a cordless type) during an electrical storm.
There may be a remote risk of electric shock from lightning.
• Do not use a telephone to report a gas leak in the vicinity of the leak.
• The power outlet must be installed near the equipment and must be easily
accessible.
Important:
• This facsimile machine is not designed for use on a line which has call waiting,
call forwarding, or certain other special services offered by your telephone
company. If you attempt to use the fax machine in conjunction with any of these
services, you may experience errors during transmission and reception of
facsimile messages.
• This machine is not compatible with digital telephone systems.

5
Table of Contents
Introduction 1
Important safety information . . . . . . . . . . . . . . . . . . . . . . . . . . . . . . . . 3
Table of Contents 5
A Look at the Operation Panel 7
1. Installation 12
Unpacking Checklist . . . . . . . . . . . . . . . . . . . . . . . . . . . . . . . . . . . . . 12
Connections . . . . . . . . . . . . . . . . . . . . . . . . . . . . . . . . . . . . . . . . . . . 13
Installing the Print Cartridges . . . . . . . . . . . . . . . . . . . . . . . . . . . . . . 17
Loading Printing Paper . . . . . . . . . . . . . . . . . . . . . . . . . . . . . . . . . . . 21
Entering Your Name and Fax Number . . . . . . . . . . . . . . . . . . . . . . . 24
Setting the Date and Time . . . . . . . . . . . . . . . . . . . . . . . . . . . . . . . . 26
Administrator Password . . . . . . . . . . . . . . . . . . . . . . . . . . . . . . . . . . 28
Volume Adjustment . . . . . . . . . . . . . . . . . . . . . . . . . . . . . . . . . . . . . 31
2. Sending Documents 33
Transmittable Documents. . . . . . . . . . . . . . . . . . . . . . . . . . . . . . . . . 33
Loading the Document . . . . . . . . . . . . . . . . . . . . . . . . . . . . . . . . . . . 35
Adjusting the Resolution and Contrast . . . . . . . . . . . . . . . . . . . . . . . 36
Sending a Fax by Normal Dialing . . . . . . . . . . . . . . . . . . . . . . . . . . . 38
Programming Auto-Dial Numbers. . . . . . . . . . . . . . . . . . . . . . . . . . . 39
Sending a Fax by Automatic Dialing. . . . . . . . . . . . . . . . . . . . . . . . . 44
Creating and Using Personal Books. . . . . . . . . . . . . . . . . . . . . . . . . 53
Cover Sheet . . . . . . . . . . . . . . . . . . . . . . . . . . . . . . . . . . . . . . . . . . . 58
Batch Page Numbering . . . . . . . . . . . . . . . . . . . . . . . . . . . . . . . . . . 60
3. Receiving Documents 61
Using AUTO Reception Mode . . . . . . . . . . . . . . . . . . . . . . . . . . . . . 61
Using MANUAL Reception Mode . . . . . . . . . . . . . . . . . . . . . . . . . . . 62
Substitute Reception to Memory . . . . . . . . . . . . . . . . . . . . . . . . . . . 63
4. Making Copies 64

Table of Contents
6
5. Special Functions 66
Broadcasting . . . . . . . . . . . . . . . . . . . . . . . . . . . . . . . . . . . . . . . . . . . 66
Confidential Operations . . . . . . . . . . . . . . . . . . . . . . . . . . . . . . . . . . 70
Polling . . . . . . . . . . . . . . . . . . . . . . . . . . . . . . . . . . . . . . . . . . . . . . . . 74
Timer Operations . . . . . . . . . . . . . . . . . . . . . . . . . . . . . . . . . . . . . . . 78
Batch Transmission . . . . . . . . . . . . . . . . . . . . . . . . . . . . . . . . . . . . . 84
Entering and Using Programs. . . . . . . . . . . . . . . . . . . . . . . . . . . . . . 86
Duplex Scanning for Two-sided Documents. . . . . . . . . . . . . . . . . . . 95
Print Hold . . . . . . . . . . . . . . . . . . . . . . . . . . . . . . . . . . . . . . . . . . . . . 96
Department Control. . . . . . . . . . . . . . . . . . . . . . . . . . . . . . . . . . . . . 100
Blocking Reception of Unwanted Faxes . . . . . . . . . . . . . . . . . . . . . 102
Telephone Billing . . . . . . . . . . . . . . . . . . . . . . . . . . . . . . . . . . . . . . 103
Distinctive Ring . . . . . . . . . . . . . . . . . . . . . . . . . . . . . . . . . . . . . . . . 105
6. Optional Settings 107
7. Printing Lists and Reports 116
8. Maintenance 122
Cleaning the Scanning Glass and Rollers . . . . . . . . . . . . . . . . . . . 122
The Housing . . . . . . . . . . . . . . . . . . . . . . . . . . . . . . . . . . . . . . . . . . 122
Replacing the Verification Stamp . . . . . . . . . . . . . . . . . . . . . . . . . . 123
9. Troubleshooting 124
Problems and Solutions . . . . . . . . . . . . . . . . . . . . . . . . . . . . . . . . . 124
Messages and Signals . . . . . . . . . . . . . . . . . . . . . . . . . . . . . . . . . . 128
Clearing Paper Jams . . . . . . . . . . . . . . . . . . . . . . . . . . . . . . . . . . . 131
FCC Regulatory Information . . . . . . . . . . . . . . . . . . . . . . . . . . . . . . 134
QUICK REFERENCE GUIDE 138
GUÍA DE CONSULTA RÁPIDA 139
GUIDE DE RÉFÉRENCE RAPIDE 140
Index 141
7
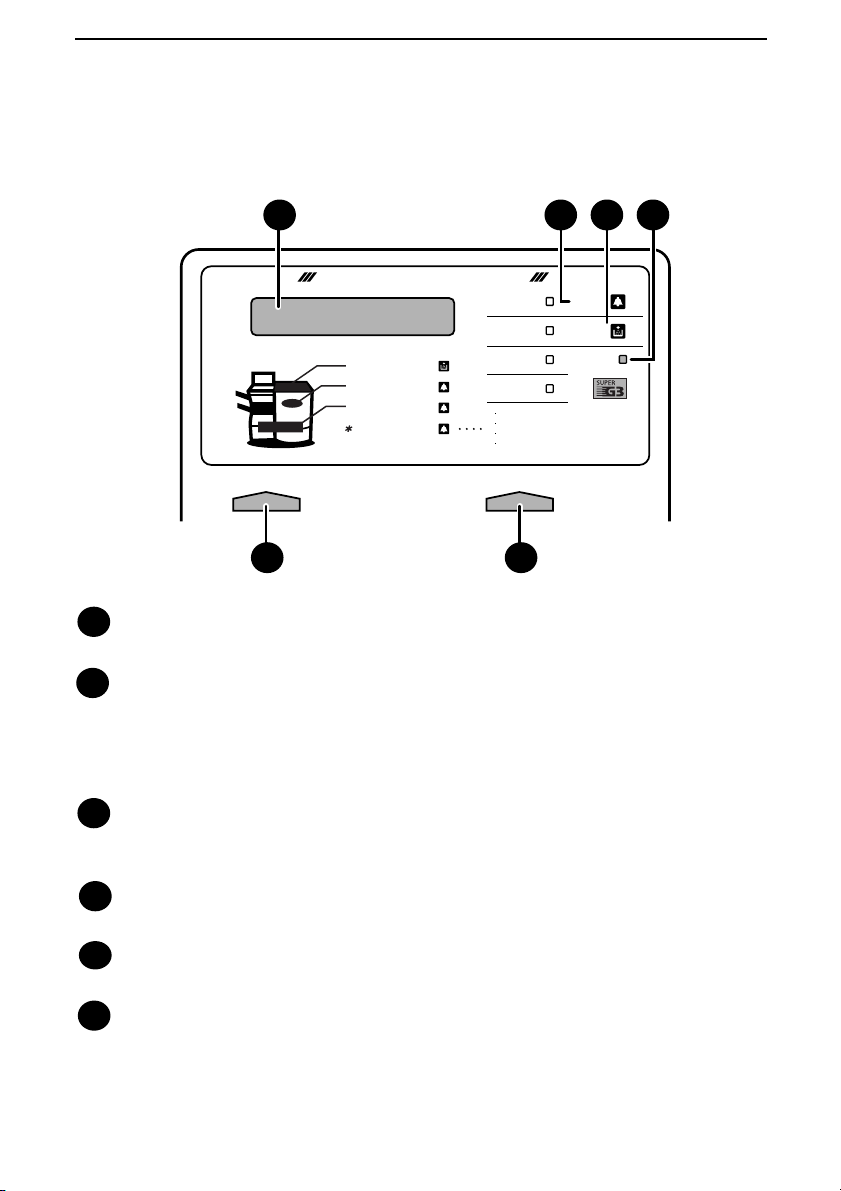
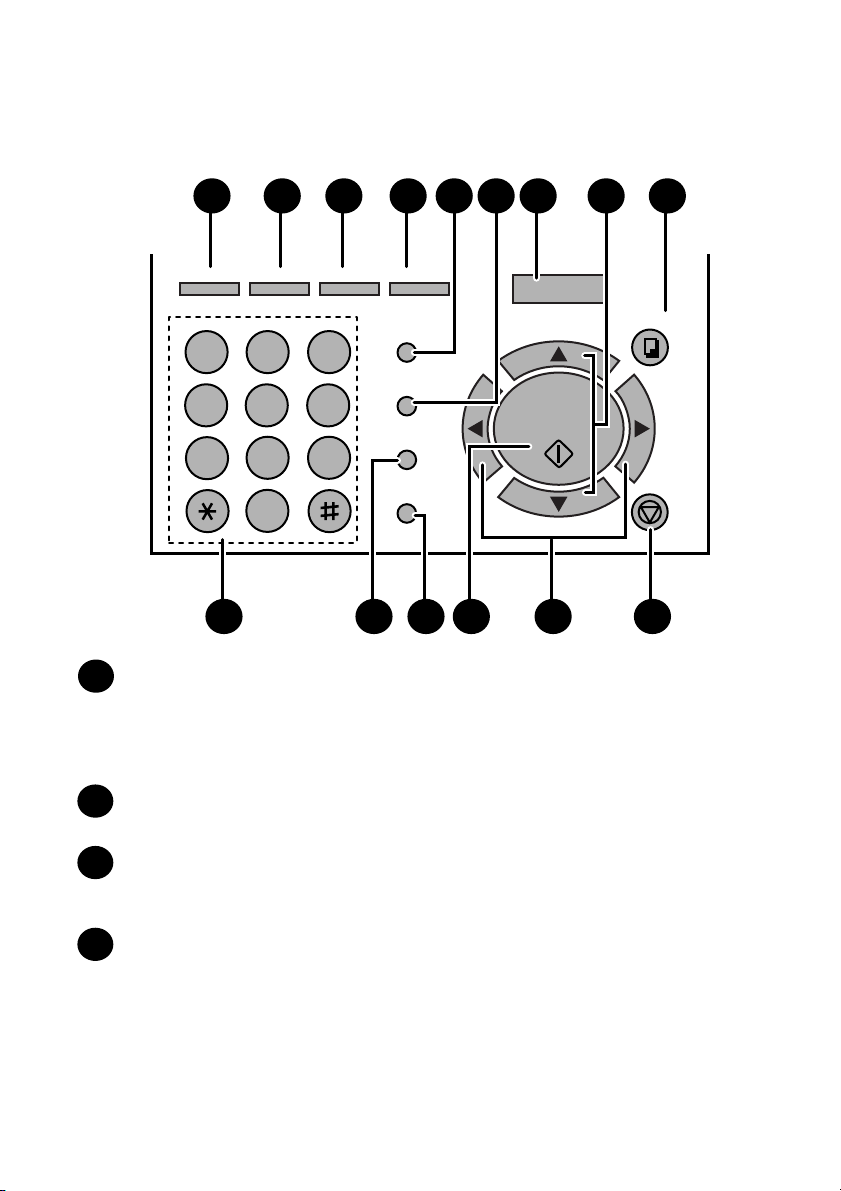
Display
This displays messages and prompts to help you operate the machine.
ALARM indicator
This blinks when one of the paper sources is empty, or the drum cartridge is
near or at the end of its life. This lights steadily when all paper sources are
empty, the print compartment cover is open, or a paper jam has occurred. A
message will appear in the display to indicate the problem.
TONER indicator
This blinks when the toner cartridge nears empty, and lights steadily when the
toner cartridge needs replacement.
LINE IN USE light
This lights when the fax machine is using the telephone line.
CONTRAST key
Press this key to adjust the contrast before sending or copying a document.
RESOLUTION key
Press this key to adjust the resolution before sending or copying a document.
An indicator will light next to the selected setting (HALFTONE, STANDARD,
FINE or SUPER FINE).
A Look at the Operation Panel
Upper panel
1
2
3
4
5
6
PLAIN PAPER LASER FACSIMILE
HALF TONE
Toner Cartridge
Drum Cartridge
Paper Supply
Paper Jam
Paper Size Error
Printer Cover Open
Out Put Tray Error
ALARM Guide
ALARM
TONER
LINE IN USE
CONTRAST RESOLUTION
STANDARD
FINE
SUPER FINE
1
5
2 3 4
6
8
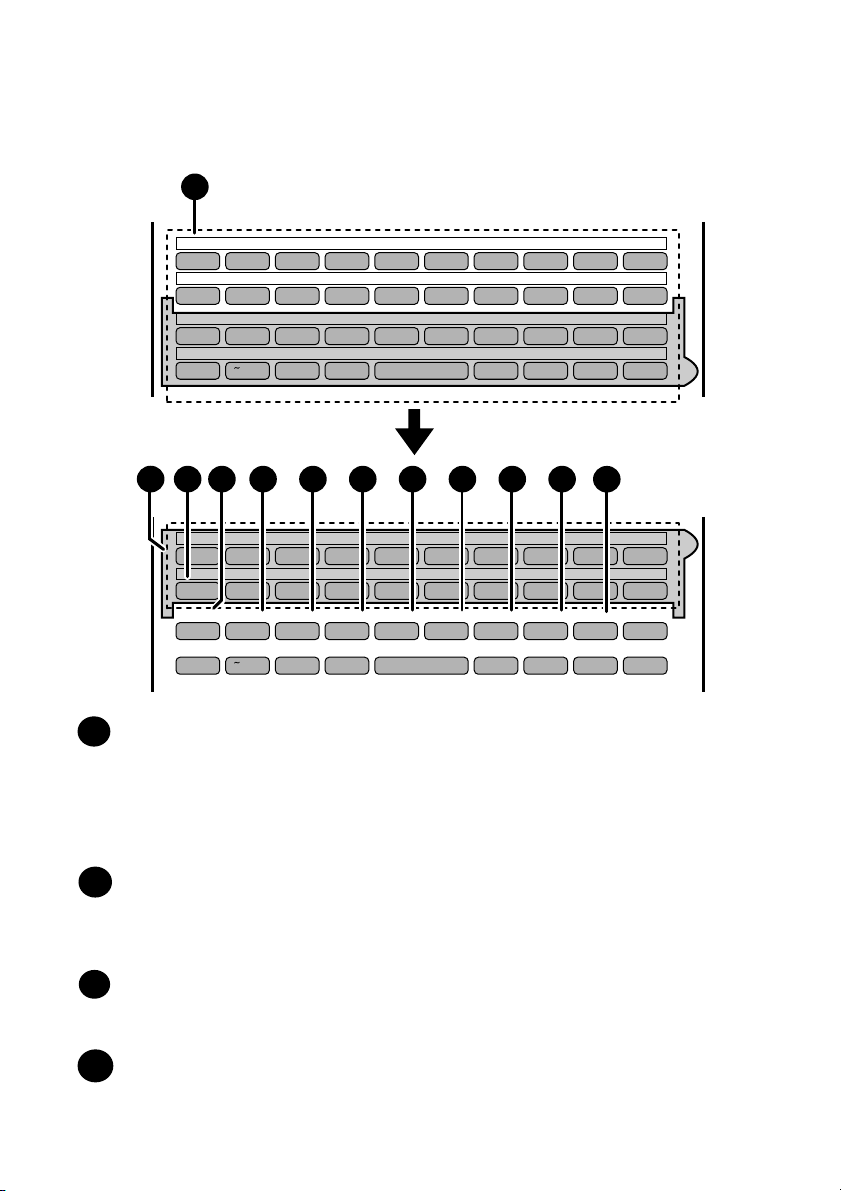
Rapid Dial Keys
Press one of these keys to dial a fax number automatically. (Note that you
must attach the Rapid Key labels.) When navigating through the display
menu, a Rapid Key can also be pressed in place of the numeric keys to enter
a two-digit number (for example, you can press Rapid Key 01 to enter the
number “01”).
SYMBOL key
When entering a name, press this key to enter the symbol on a letter key (the
character to the right of the slash). Press the key again to turn off symbol
entry mode.
PAGE COUNTER key
Press this key to include a slash and the total number of pages after each
page number on the pages of a transmitted document.
CONFIDENTIAL key
Press this key to send or print out a confidential document.
10
9
8
7
Q / ! W / " E / # R / $ T / % Y / & U / ' I / ( O / ) P / =
SYMBOL
A /
|
S D F G / { H / } J / [ K / ] L / +
Caps Lock
Z / < X / > C V B N / * M / ? @ .com
SHIFT
/ ^ / / \ ; / :
Space
_
- . / , DEL
Q / ! W / " E / # R / $ T / % Y / & U / ' I / ( O / ) P / =
SYMBOL
A /
|
S D F G / { H / } J / [ K / ] L / +
Caps Lock
PAGE COUNTER
CONFIDENTIAL
TIMER
COVER SHEET
LIFE
MEM.STATUS
REPORT
DOCUMENT
Z / < X / > C V B N / * M / ? @ .com
SHIFT
/ ^ / / \ ; / :
Space
_
- . / , DEL
01 02 03 04 05 06 07 08 09 10
11 12 13 14 15 16 17 18 19 20
40 41 42 43 44 45 46 47 48 49
50 51 52 53 54 55 56 57 58 59
21 22 23 24 25 26 27 28 29 30
31 32 33 34 35 36 37 38 39
7
PRINT HOLD
7
1098 11 12 13 14 15 16
17
Middle panel (Rapid Key pad)

9
TIMER key
Press this key to set up an operation to be performed automatically at a later
time.
COVER SHEET key
Press this key to include a cover sheet when sending a fax.
LIFE key
Press this key, followed by , to check the total number of pages printed by
the fax machine.
MEM. STATUS key
Press this key to check the status of fax transmission jobs, copy jobs, and fax
receptions. This key can also be used to cancel a job.
REPORT key
Press this key before sending a fax to have a transaction report printed out
after the transmission is finished.
DOCUMENT key
Press this key to transmit a document directly from the feeder without reading
it into memory.
PRINT HOLD key
This key is used to set up and use the Print Hold function, which holds
received faxes in memory instead of printing them as they are received. To
print the faxes, the programmed Print Hold code must be entered.
1
14
15
12
11
11
13
16
17
10
JOB STATUS key
Two types of information appear in the display: prompts related to operations
you are performing, and information about how the fax machine is using the
telephone line (transmitting, receiving, etc.). Press this key to change
between the two types of information.
DUPLEX SCAN key
Press this key to transmit or copy a two-sided document.
PRIORITY key
Press this key when you need to transmit a document ahead of other
documents waiting in memory for transmission.
BROADCAST key
Press this key to send a fax to a group of receiving fax machines.
JKL
ABC
1
DEF
WXYZ
9
GHI
4
5
MNO
6
PQRS
7
TUV
8
0
2 3
OPER
PERSONAL
BOOK
SPEED DIAL
REDIAL
SPEAKER
JOB STATUS
DUPLEX SCAN
PRIORITY
BROADCAST
MENU
UP
ZA
DOWN
START/
ENTER
COPY/HELP
STOP
18 2519 20 21 26
27 31 3228 30
24
29
2322
Lower panel
18
19
20
21

11
PERSONAL BOOK
Press this key to use or store an auto-dial number in a personal book. If the
book has a passcode, enter the passcode; otherwise, select the book with
or and press .
SPEED DIAL key
Press this key to dial a Speed Dial number.
MENU key
Press this key to select special functions and settings.
UP and DOWN arrow keys
Volume setting: Press these keys to change the speaker volume when the
SPEAKER key has been pressed, or the ringer volume at any other time.
COPY/HELP key
When a document is in the feeder, press this key to make a copy of a
document. At any other time, press this key to print out the Help List, a quick
reference guide to the operation of your fax machine.
Dial keypad (numeric keys)
Use these keys to dial and program fax numbers.
REDIAL key
Press this key to automatically redial the last number dialed.
SPEAKER key
Press this key when transmitting a document by Normal Dialing to listen to the
line and verify the response of the receiving fax machine.
START/ENTER key
Press this key to begin fax transmission when using Speed Dialing, Direct
Keypad Dialing, or Normal Dialing. This key is also used to select settings and
complete entries when storing names and numbers.
Left and right arrow keys
Auto-dial numbers: Press these keys to search for an auto-dial number
when sending a fax.
MENU key settings: Press these keys after pressing the MENU key to scroll
through the MENU key settings.
STOP key
Press this key to cancel an operation before it is completed.
START/
ENTER
23
24
25
26
27
28
29
30
22
31
32
12
1. Installation
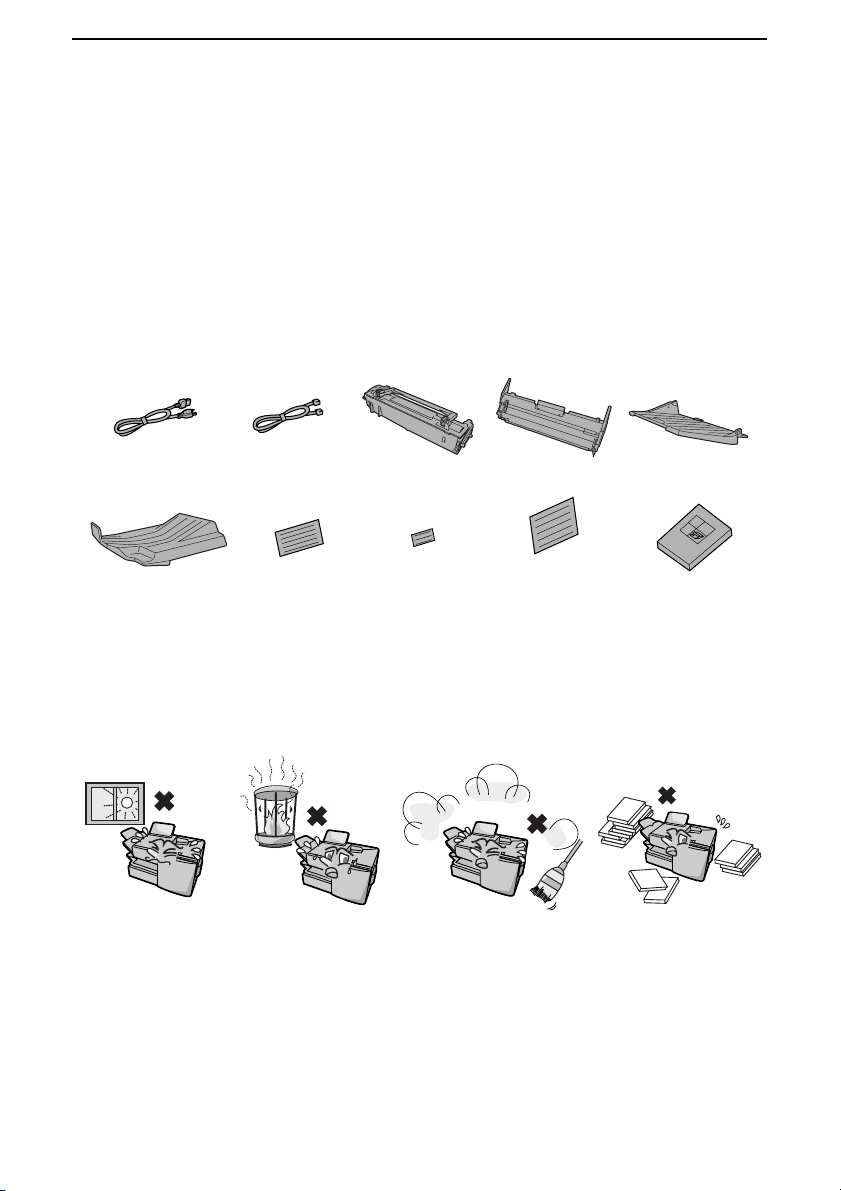
Unpacking Checklist
Before setting up, make sure you have all of the following items. If any are
missing, contact your dealer.
Telephone
line cord
Toner
cartridge
Rapid Key
labels
ADF exit tray
Operation
manual
Received
document tray
Power cord
Paper size
labels
Drum
cartridge
Points to keep in mind when setting up
Do not place the
machine in direct
sunlight.
Do not place the
machine near
heaters or air
conditioners.
Keep dust away from
the machine.
Keep the area
around the
machine clear.
About condensation
If the machine is moved from a cold to a warm place, it is possible that
condensation may form on the scanning glass, preventing proper scanning of
documents for transmission. To remove the condensation, turn on the power
and wait approximately two hours before using the machine.
National
character
labels for
French
Connections
13
1. Installation
Connections
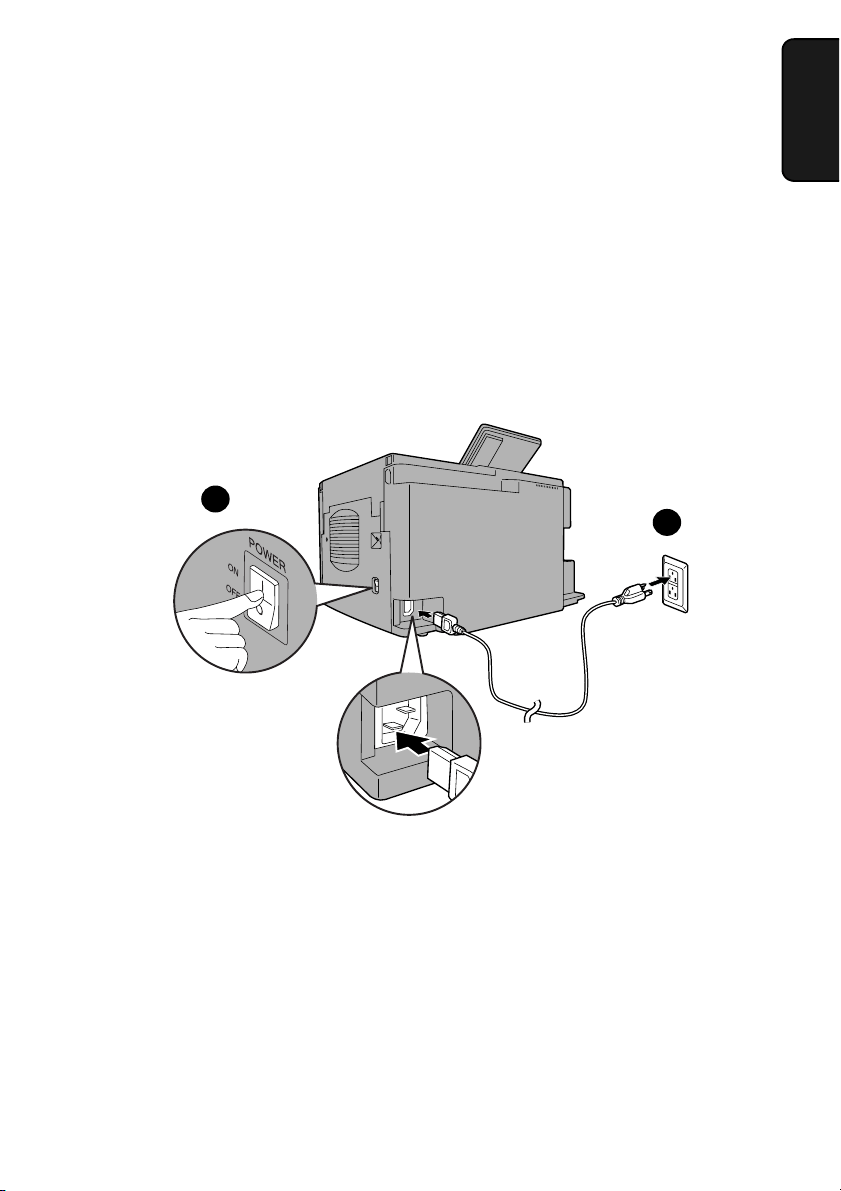
Connecting the power cord
Connect the female end of the power cord to the fax machine as shown. Insert
the male end into a 120 V, 60 Hz, grounded (3-prong) AC outlet.
Important!
The fax machine requires its own dedicated power outlet. The power outlet
must not be shared with any other devices. In particular, do not use an
extension cord to connect multiple devices to the outlet.
Note: If your area experiences a high incidence of lightning or power surges, we
recommend that you install surge protectors for the power and telephone lines.
Surge protectors can be purchased at most telephone specialty stores.
1
2
Press the power
switch to turn on
the power.
Connections
14
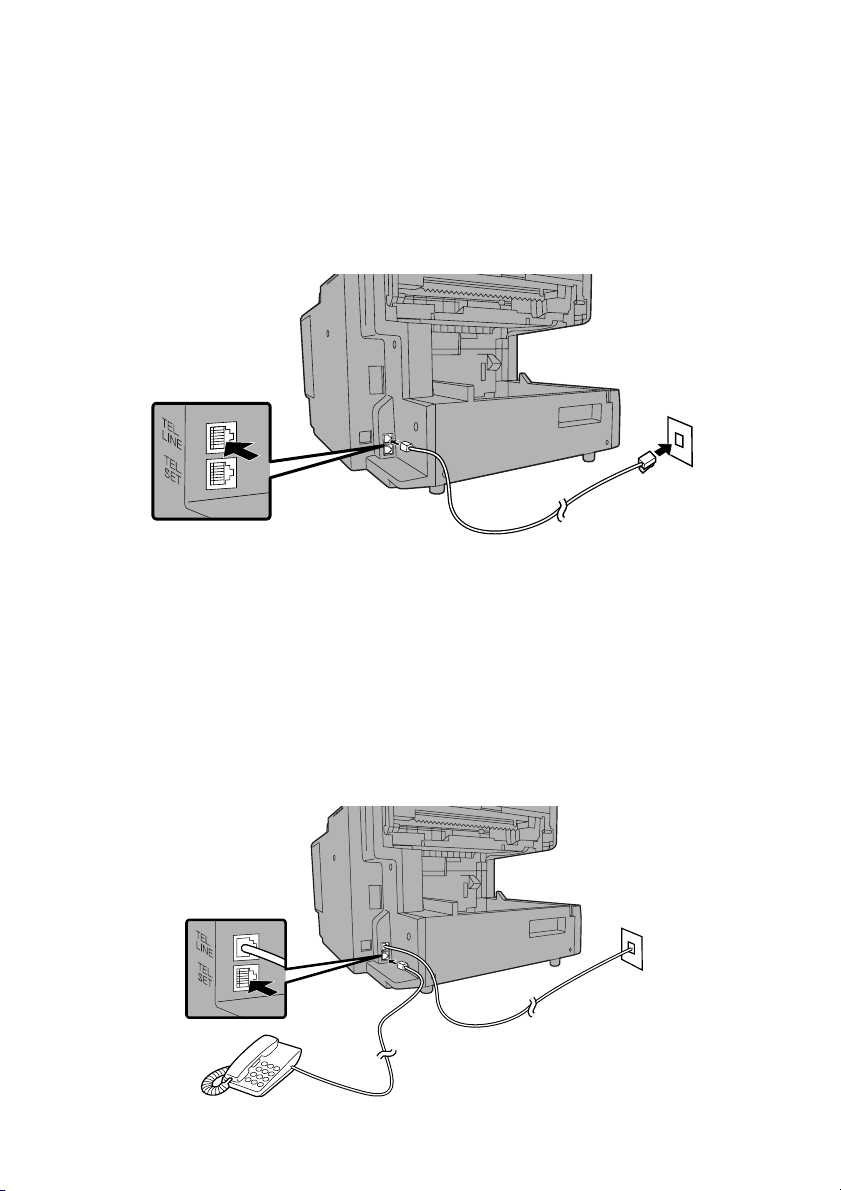
Connecting the telephone line cord
Insert one end of the line cord into the jack on the back of the machine
marked TEL. LINE. Insert the other end into a standard (RJ11C) single-line
wall telephone jack.
Note: The fax machine is set for touch-tone dialing. If you are on a pulse dial
(rotary) line, you must set the fax machine for pulse dialing by changing Option
Setting 22. See page 112.
Connecting a telephone (optional)
If desired, you can connect a telephone to the TEL. SET jack on the back of
the machine.
Connections
15
1. Installation
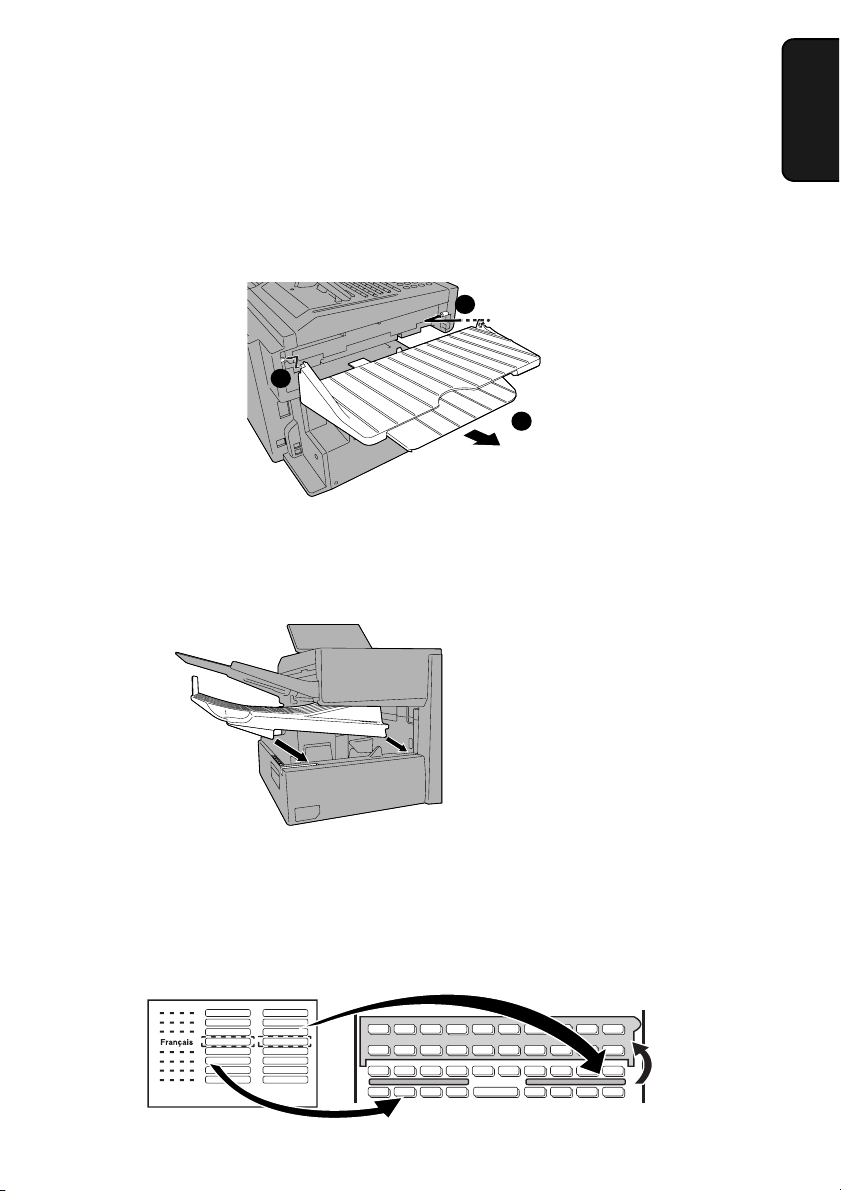
Attaching the ADF exit tray
Insert the protrusion on the right side of the machine into the hole in the right
side of the ADF exit tray ➊, then bend the tray slightly and insert so that the
protrusion on the left side of the machine goes into the hole on the left side of
the ADF exit tray ➋. Pull out the tray extension ➌.
Attaching the received document tray
Slide the received document tray into the machine as shown. When it stops,
lift the end slightly and push in so that the tray locks into place.
Important!
The received document tray must
be attached for the fax machine
to operate properly.
1
3
2
Attaching the national character labels
If French will be used for the display language (see LANGUAGE SELECT on
page 115) attach the national character labels for French as shown below.
During procedures that require the entry of text, the keys below the labels can
be pressed to enter the corresponding characters.
Flip up the
Rapid Key
overlay

Connections
16
Verification Stamp option
Note: This feature is available as an option. Consult your dealer if you wish to
use this feature.
When transmitting a document, you can have the fax machine stamp each
document page as it is scanned. After scanning, you can check to see if all
documents have been stamped to verify that no double feeds occurred. (A
double feed occurs when two pages are fed through the scanner at once,
which means that one of the pages is not scanned.)
To use this function, have your dealer install the Verification Stamp option, and
then set Option Setting 29 to ON as explained on page 114.
Installing the Print Cartridges
17
1. Installation
Installing the Print Cartridges
Follow the steps below to install or replace the toner and drum cartridges.
♦ The initial starter toner cartridge included with the fax machine can print
approximately 3000 letter-size pages (4% coverage of each page;
continuous printing).
♦ The replacement toner cartridge (FO-44ND/FO-50ND) can print
approximately 6000 letter-size pages.
♦ The drum cartridge (FO-47DR) can print approximately 20,000 letter-size
pages.
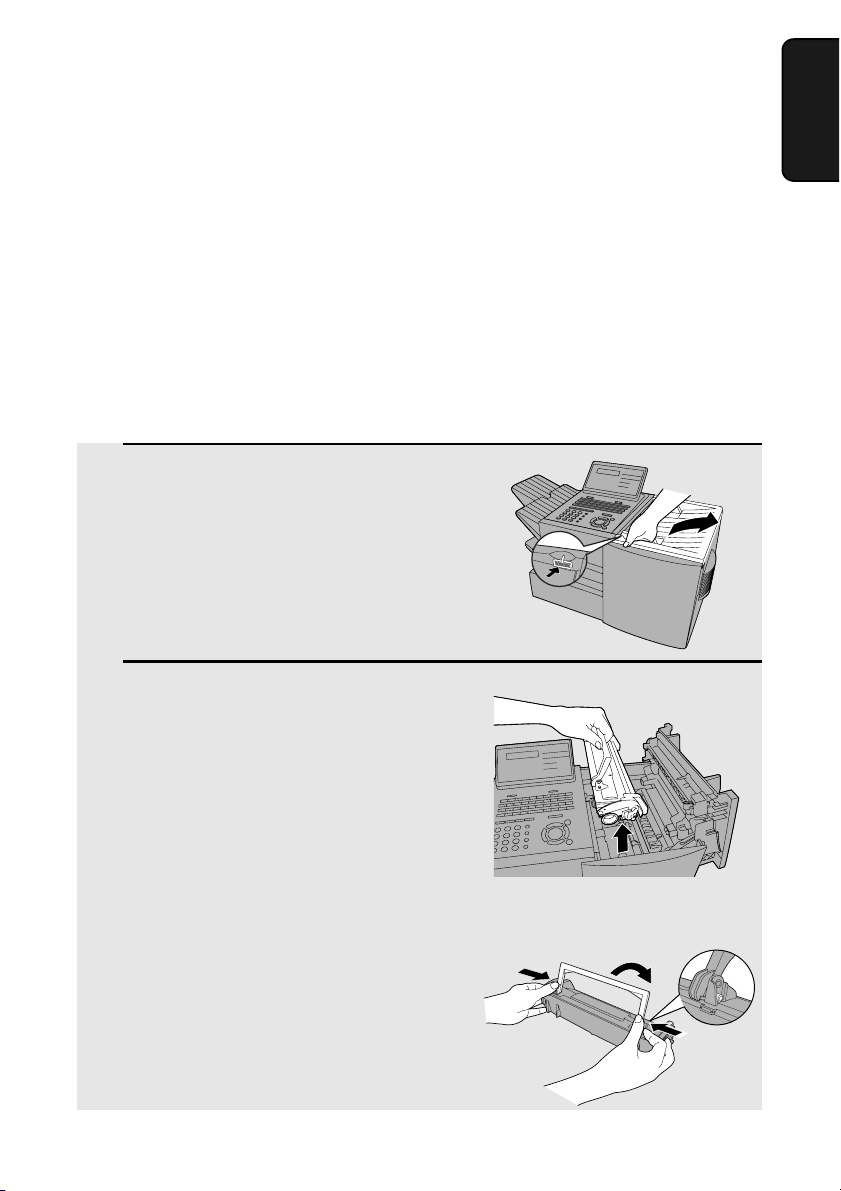
1 Press the cover release to open the
print compartment cover.
• Caution!
The fusing unit inside the print
compartment becomes very hot during
operation. Be careful not to touch the
inside of the compartment.
2 If you are replacing the toner cartridge,
remove the old cartridge and dispose
of it according to local regulations.
Go directly to Step 5 if you are only
replacing the toner cartridge and not
the drum cartridge.
• If you are replacing the drum cartridge
but not the toner cartridge, remove the
toner cartridge and place it on a sheet
of paper.
To make the cartridge more
compact for disposal, press
the buttons on the ends of the
handle and fold the handle
down.
Installing the Print Cartridges
18
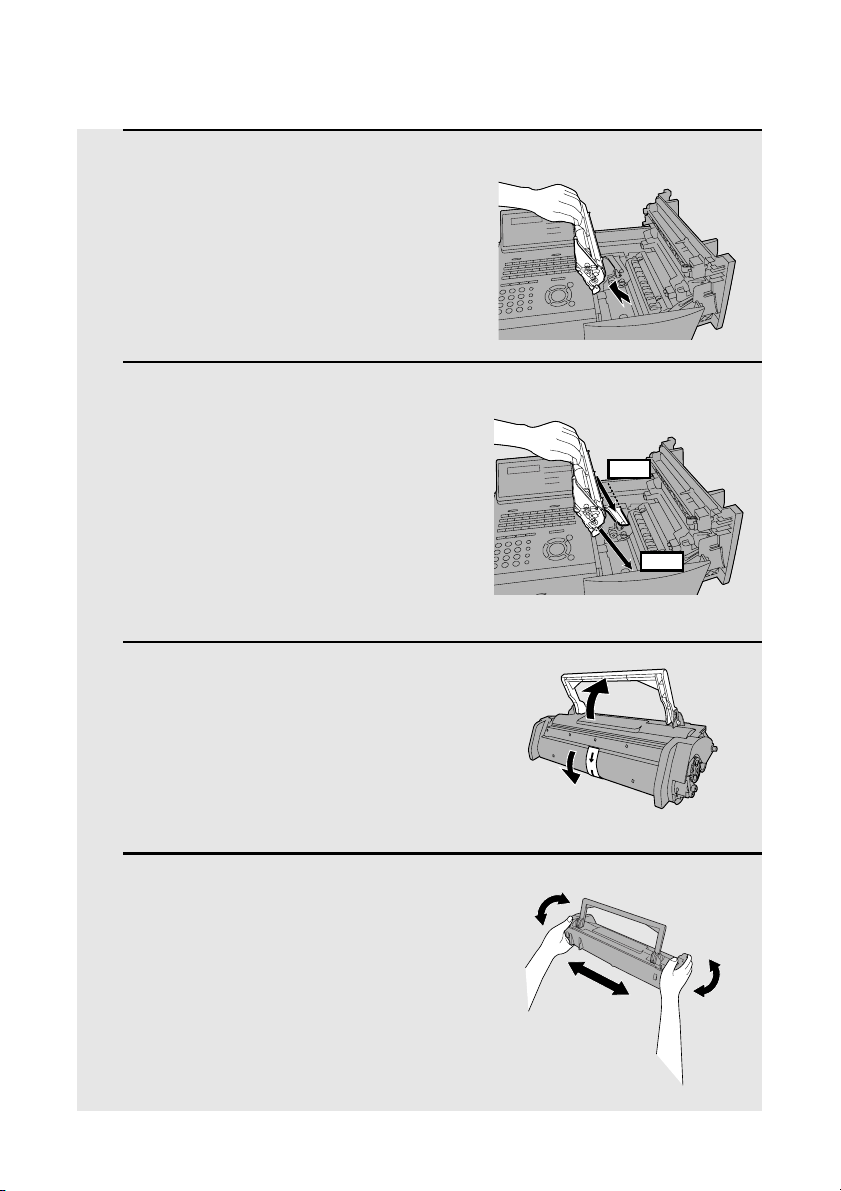
3 If you are replacing the drum cartridge,
remove the old cartridge and dispose
of it according to local regulations.
4 Remove the new drum cartridge from
its packaging. Insert the drum
cartridge into the print compartment.
• Caution! Excessive exposure to light
will damage the drum cartridge. Install
the cartridge promptly after removing it
from its packaging.
• Make sure the drum cartridge is
inserted in as far as it will go.
5 If you are installing a new toner
cartridge, remove the new toner
cartridge from its packaging. Remove
the tape from the cartridge and then
open the cartridge handle so that it
stands straight up.
6 Shake as indicated by the arrows to
distribute the toner evenly within the
cartridge.
• If the toner is still lumpy after shaking,
the gears in the cartridge may make a
noticeable sound when the print
compartment cover is closed after
installing the cartridge. This is normal
and does not indicate a problem.
GREEN
BLUE

Installing the Print Cartridges
19
1. Installation
7 Hold the toner cartridge by the handle
and insert it into the print
compartment.
• Make sure the toner cartridge clicks
into place.
• The handle can be left standing up.
8 Close the print compartment cover.
9 Reset the drum counter by pressing (flip up the Rapid Key
overlay), , and .
• Note: The toner counter automatically resets each time you replace the
toner cartridge. There is normally no need to reset the toner counter
manually. Should you find it necessary to manually reset the toner counter,
press (flip up the Rapid Key overlay), , and .
LIFE
V
3
START/
ENTER
LIFE
V
2
START/
ENTER
GREEN
BLUE
Note: The print compartment cover may become noticeably warm if a large
number of pages are successively printed. This is normal and does not indicate a
problem in the machine.

Installing the Print Cartridges
20
When to replace the toner cartridge
When the toner cartridge nears empty (about 100 pages can still be printed),
the toner cartridge indicator on the operation panel will blink. When the toner
cartridge is empty, the toner cartridge indicator will light steadily and
REPLACE TONER will appear in the display. Printing will no longer be
possible. Use the following replacement toner cartridge:
Sharp FO-44ND or FO-50ND toner cartridge
Hint:
When the toner cartridge nears empty, try taking it out of the machine and
shaking it. This may increase the number of pages that can be printed before
the toner runs out.
When to replace the drum cartridge
When the drum cartridge nears the end of its life, the ALARM indicator on the
operation panel will blink and DRUM LIFE REACHED will appear in the
display (this message first appears approximately 1000 pages before the
drum needs replacement). Use the following replacement drum cartridge:
Sharp FO-47DR drum cartridge
Loading Printing Paper
21
1. Installation
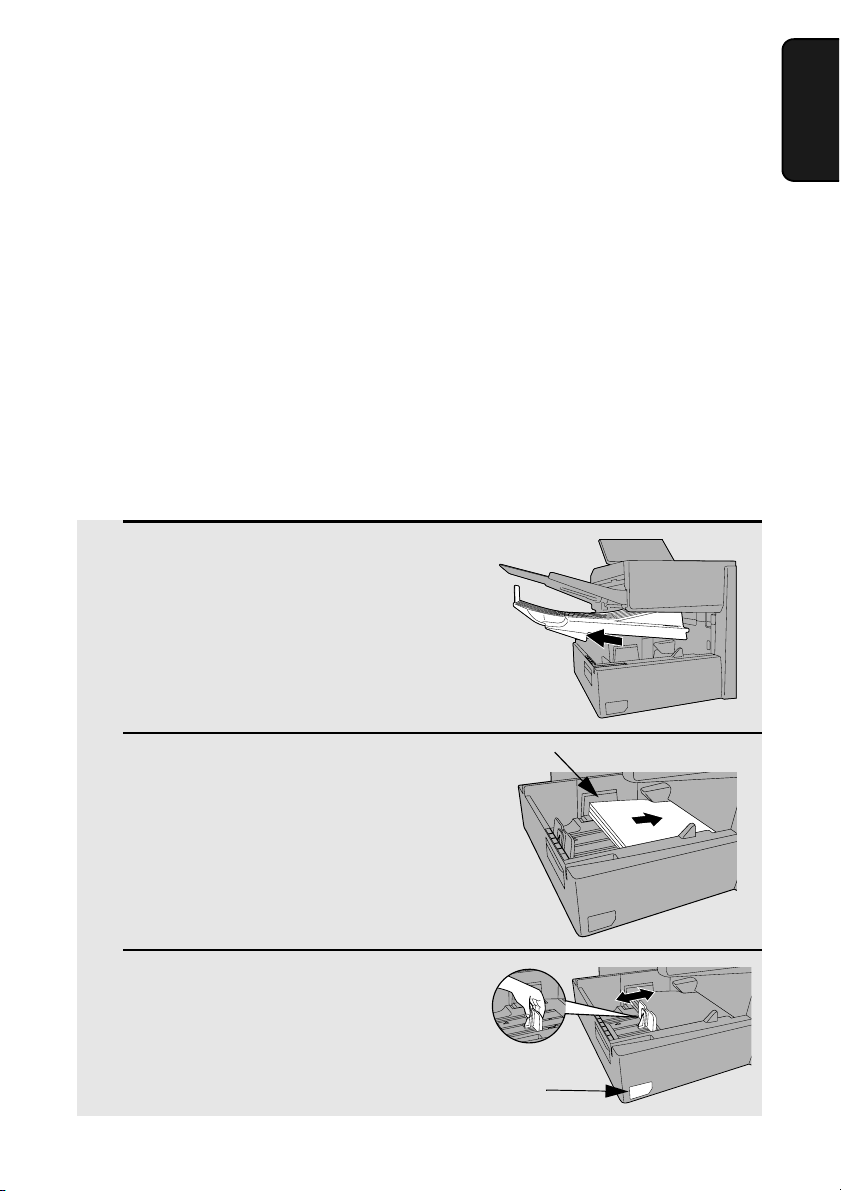
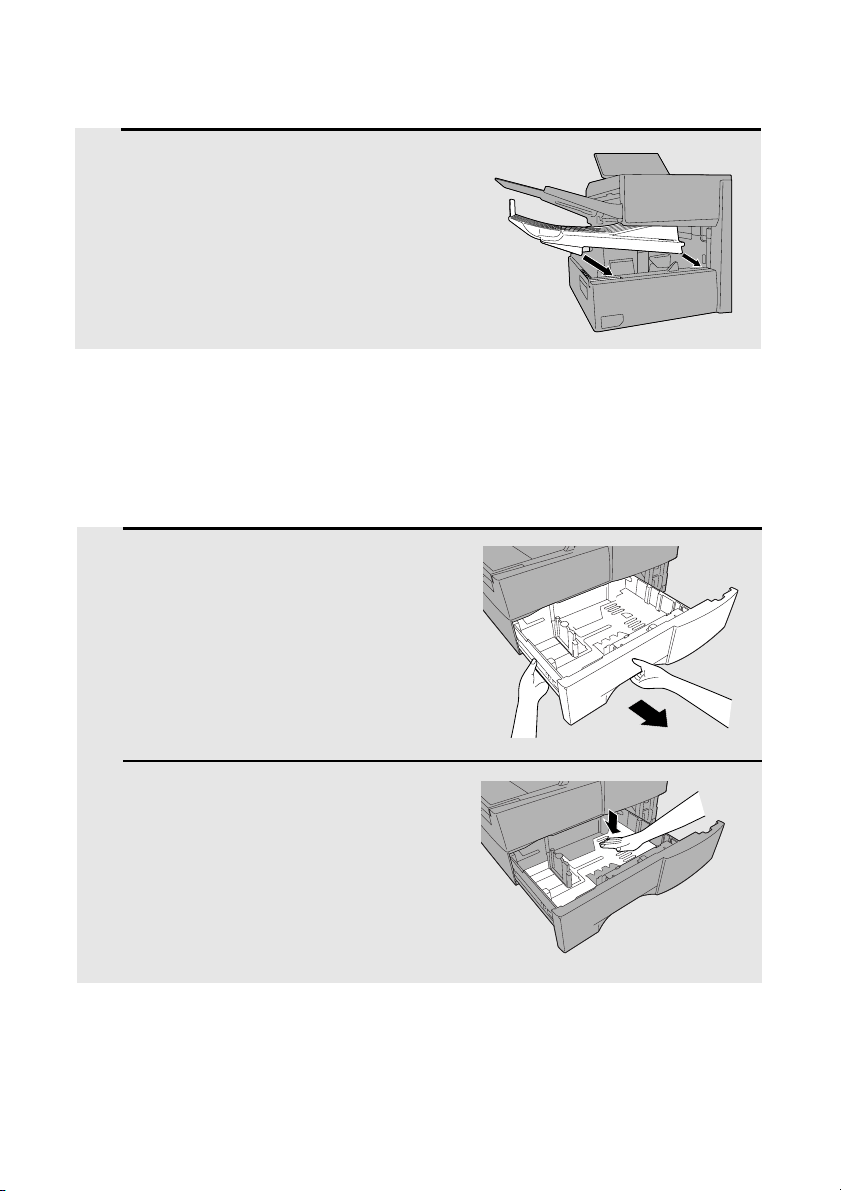
1 Remove the received document tray.
2 Insert a stack of paper into the tray,
print side up.
• Important! The stack of paper must not
be higher than the red line on the paper
tray.
3 Squeeze the paper guide and move it
to match the length of the paper you
are loading.
Loading Printing Paper
You can load up to 250 sheets of letter or legal paper (max. 20 lbs.) in the
paper tray.
♦ A paper cassette is available as an option. Up to 500 sheets of letter or
legal paper can be loaded in the paper cassette.To have the cassette
installed, consult your dealer.
Important: Do not use the back side of paper that has already been printed
on.
Note: If you need to add paper to the tray or cassette while paper still
remains, remove the remaining paper and combine it into a single stack with
the new paper.
Loading paper in the paper tray
Attach a letter or legal label
here to indicate the paper size
Red line
Loading Printing Paper
22
4 Replace the received document tray.
• The received document tray must be
attached for the fax machine to operate
properly.
Loading paper in the paper cassette (if installed)
Note: To use A4 paper in the paper cassette, you must have a service
technician adjust the cassette.
1 Grasp the hand-hold on the cassette
and pull the cassette out until it stops.
2 Push the pressure plate down until it
locks into position.
Loading Printing Paper
23
1. Installation
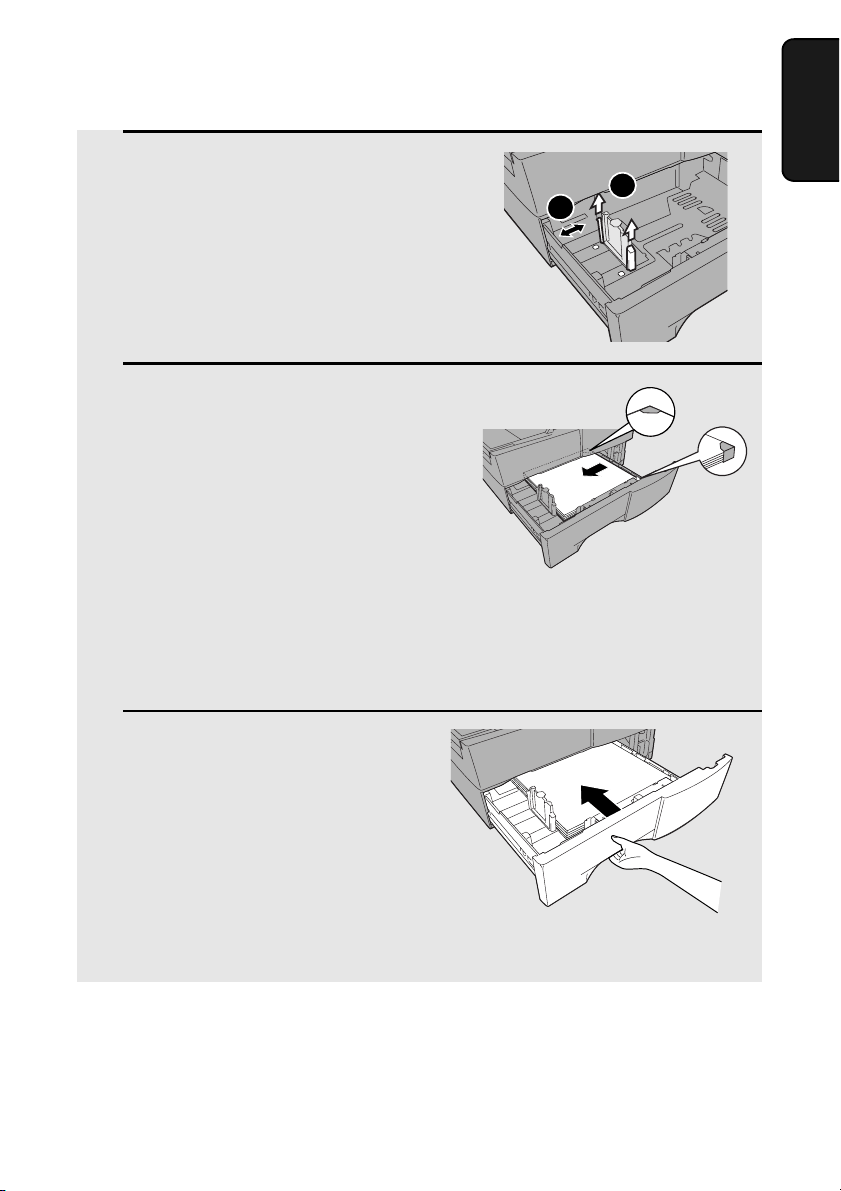
3 Squeeze the paper guide and pull up to
move it to the appropriate holes for the
length of the paper. Push the guide
down into the holes.
4 Place a stack of paper in the cassette,
print side up.
• Make sure the stack of paper is not
higher than the two tabs on the paper
guide and the two metal tabs. If it is,
remove some of the paper.
• If you find it difficult to load the paper,
remove the cassette from the machine.
(Pull the cassette out as far as it will go,
grasp the left side of the cassette with
your left hand, and then lift it up and out
with both hands.)
5 Push the cassette back into the
machine, making sure it clicks into
place.
1
2
Entering Your Name and Fax Number
24
Entering Your Name and Fax Number
Before you can begin using the fax machine, you must program your name
and fax number. Once you program this information, it will appear
automatically at the top of each fax page you send.
Important!
FCC regulations require that your name, telephone/fax number, and the date
and time appear on each fax message you send. Enter your name and fax
number here and set the date and time as explained in the following section to
have the fax machine include this information automatically at the top of your
fax messages.
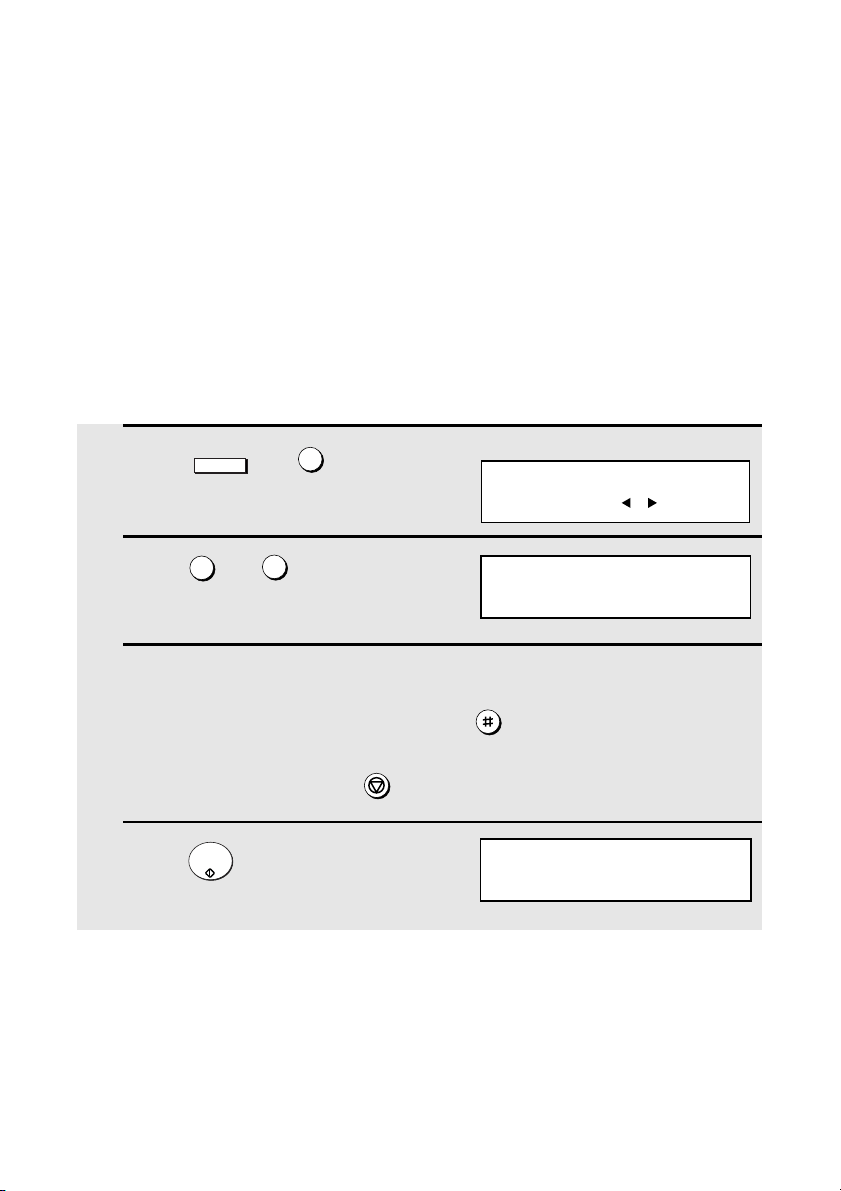
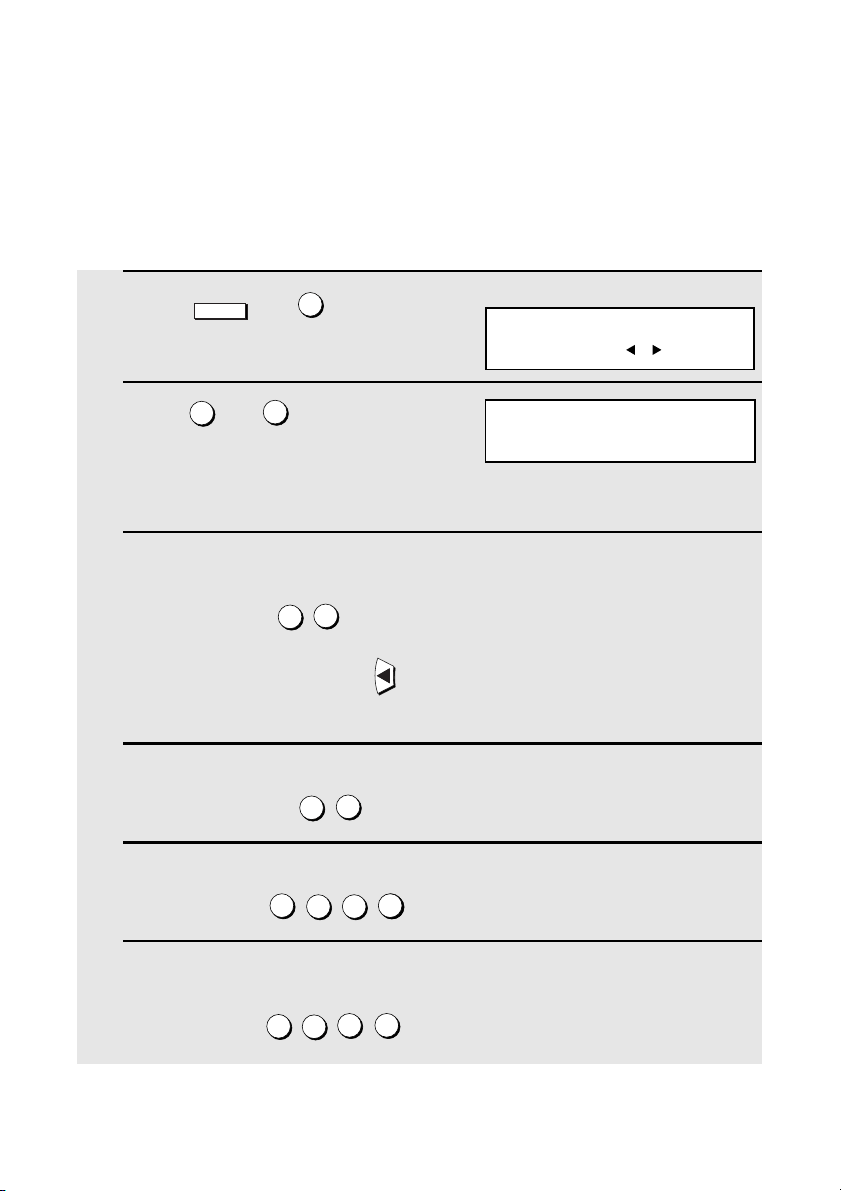
1 Press and .
2 Press and .
3 Enter your fax number (max. of 20 digits) by pressing the numeric keys.
• To insert a space between digits, press .
• To clear a mistake, press .
4 Press .
MENU
3
0
3
STOP
START/
ENTER
Display:
3:ENTRY MODE
ENTER #(01-08, , )
03:OWN PASSCODE SET
ENTER FAX #
ENTER SENDER’S NAME
Entering Your Name and Fax Number
25
1. Installation
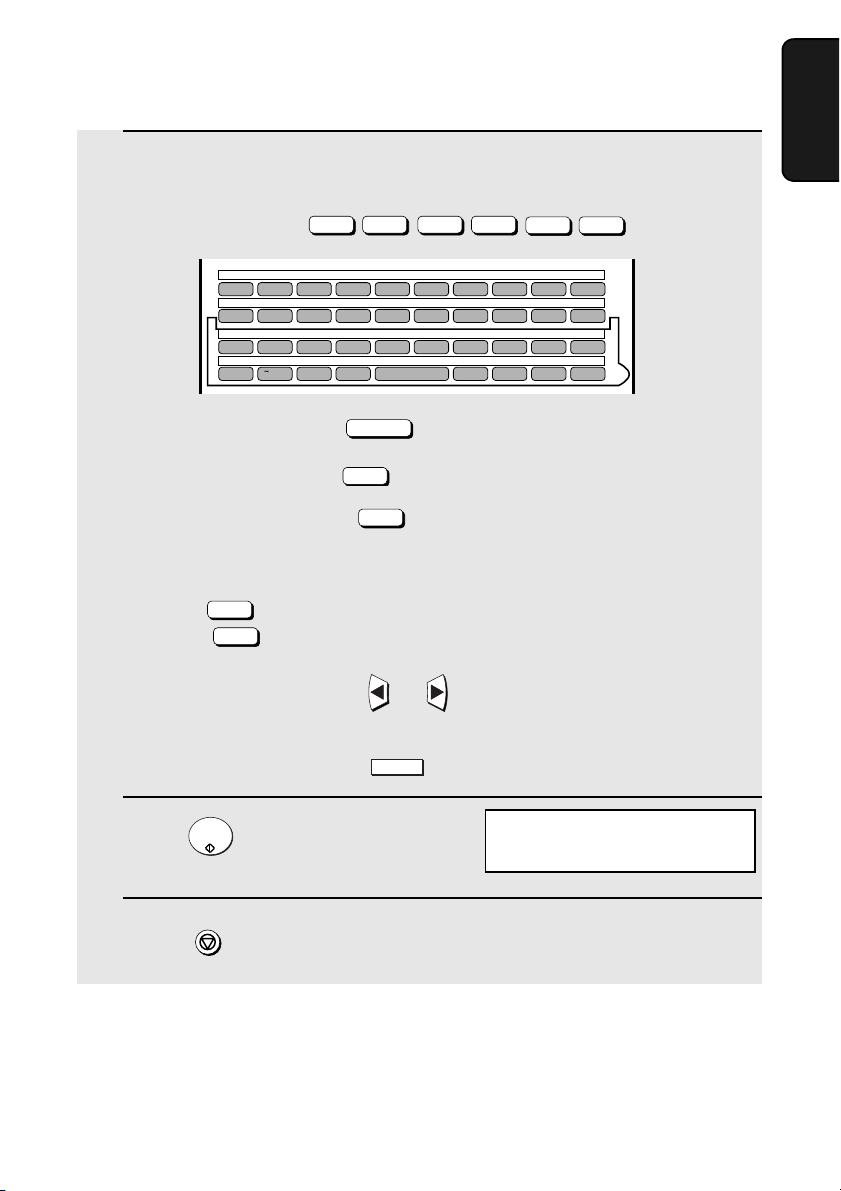
5 Flip the Rapid Key overlay down (if it is up), and enter your name by
pressing the appropriate letter keys as shown below. (Max. of 24
characters.)
Example: SHARP =
• To enter a space, press .
• To change case, press .
• To clear a mistake, press .
• To enter a number as part of a name, press the appropriate numeric key. To
enter the symbol on a letter key (the character to the right of the slash),
press (“SYM” will appear in the display) and then the letter key
(press again to turn off symbol entry mode).
• To move the cursor, press or . To switch between letter insertion
and letter replacement mode when the cursor is in the middle of a
sequence of letters, press .
6 Press .
7 Press twice to return to the date and time display.
Caps Lock
S H / }
A /
|
R / $
P / =
Space
Caps Lock
DEL
SYMBOL
SYMBOL
MENU
START/
ENTER
STOP
04: DATE &TIME SET
PRESS START KEY
Q / ! W / " E / # R / $ T / % Y / & U / ' I / ( O / ) P / =
SYMBOL
A /
|
S D F G / { H / } J / [ K / ] L / +
Caps Lock
Z / < X / > C V B N / * M / ? @ .com
SHIFT
/ ^ / / \ ; / :
Space
_
- . / , DEL
01 02 03 04 05 06 07 08 09 10
11 12 13 14 15 16 17 18 19 20
21 22 23 24 25 26 27 28 29 30
31 32 33 34 35 36 37 38 39
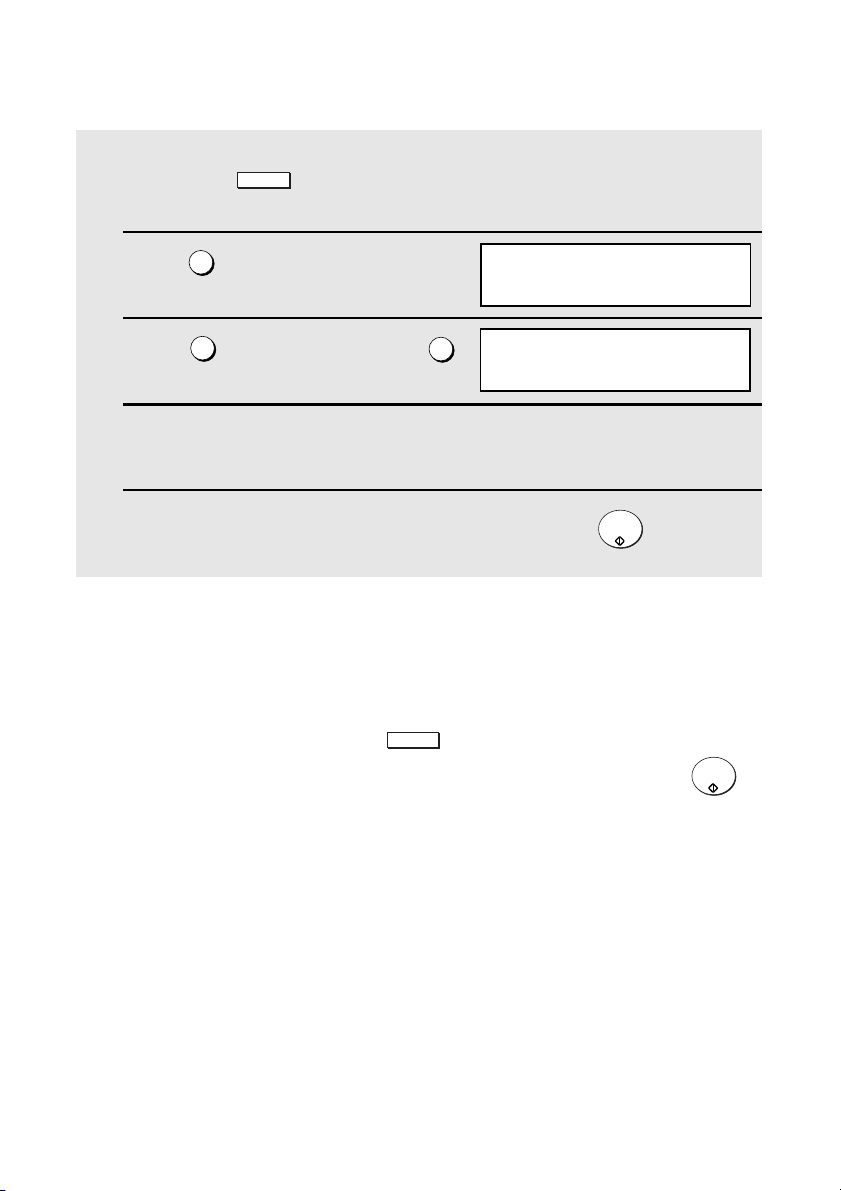
Setting the Date and Time
26
Setting the Date and Time
The date and time appear in the display, in reports, and at the top of each
page you transmit. Set the date and time by pressing the keys on the
operation panel as shown below.
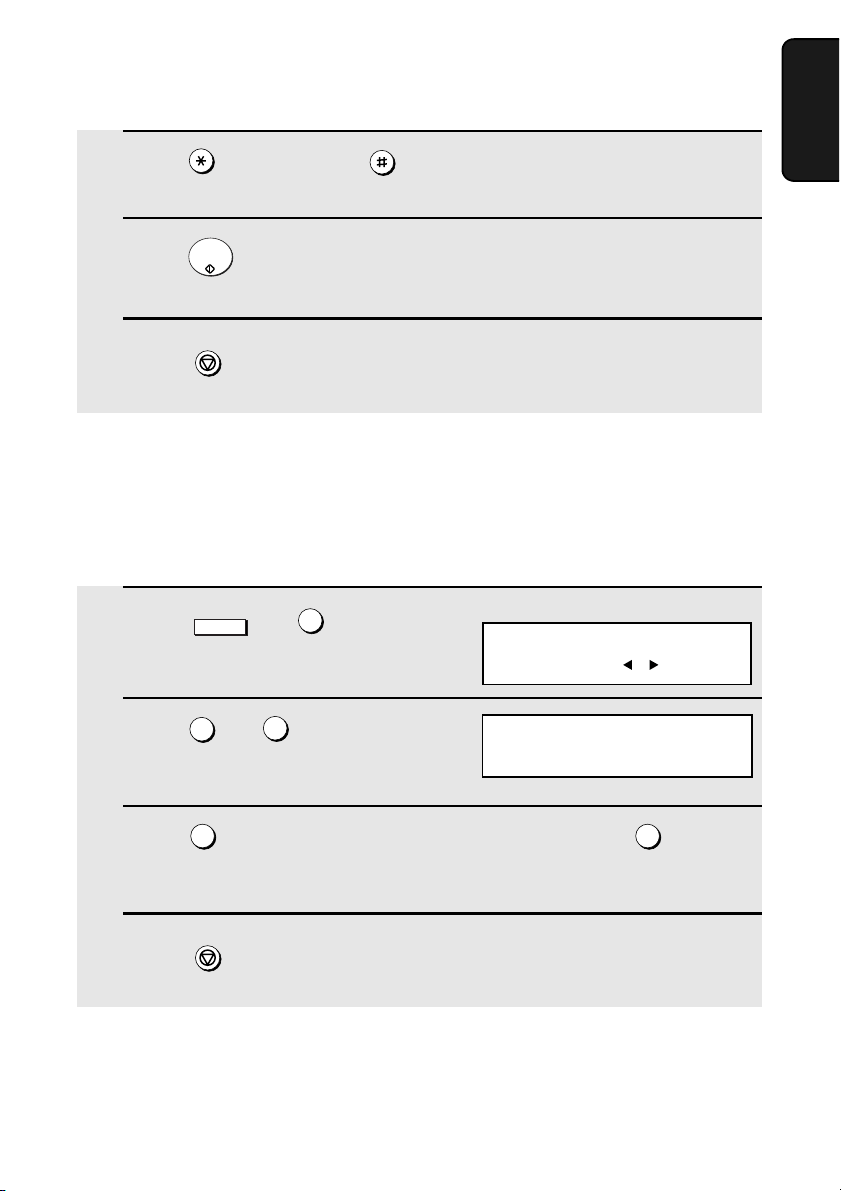
1 Press and .
2 Press and .
3 Enter a two-digit number for the month (“01” for January, “02” for
February, “12” for December, etc.).
Example: March
• To correct a mistake, press to move the cursor back to the mistake and
then enter the correct number.
4 Enter a two-digit number for the day (“01” to “31”).
Example: The 5th
5 Enter the year (four digits).
Example: 2006
6 Enter a two-digit number for the hour (“01” to “12”) and a two-digit
number for the minute (“00” to “59”).
Example: 9:25
MENU
3
0
4
0
3
0
5
2
0 0
5
6
0
9
2
5
(The currently set date will appear
to the right of “DATE”)
Display:
3:ENTRY MODE
ENTER #(01-08, , )
04:DATE&TIME SET
DATE 06-08-2006
Setting the Date and Time
27
1. Installation
7 Press to select A.M. or to select P.M.
8 Press to start the clock.
9 Press twice to return to the date and time display.
START/
ENTER
STOP
1 Press and .
2 Press and .
3 Press to turn on the Daylight Saving Time function, or to turn it
off.
4 Press twice to return to the date and time display.
MENU
3
0
5
1 2
STOP
Daylight Saving Time
If desired, you can set the clock to move forward and backward automatically
at the beginning and end of Daylight Saving Time.
Display:
3:ENTRY MODE
ENTER #(01-08, , )
05:DAY LIGHT SAVING
1=YES, 2=NO
Administrator Password
28
Administrator Password
The administrator of the machine can set a password to protect the settings
that are accessed with the key. When the password is set and
protection is enabled, the display will prompt you to enter the administrator
password each time you press to configure a MENU setting.
Setting an administrator password
MENU
MENU
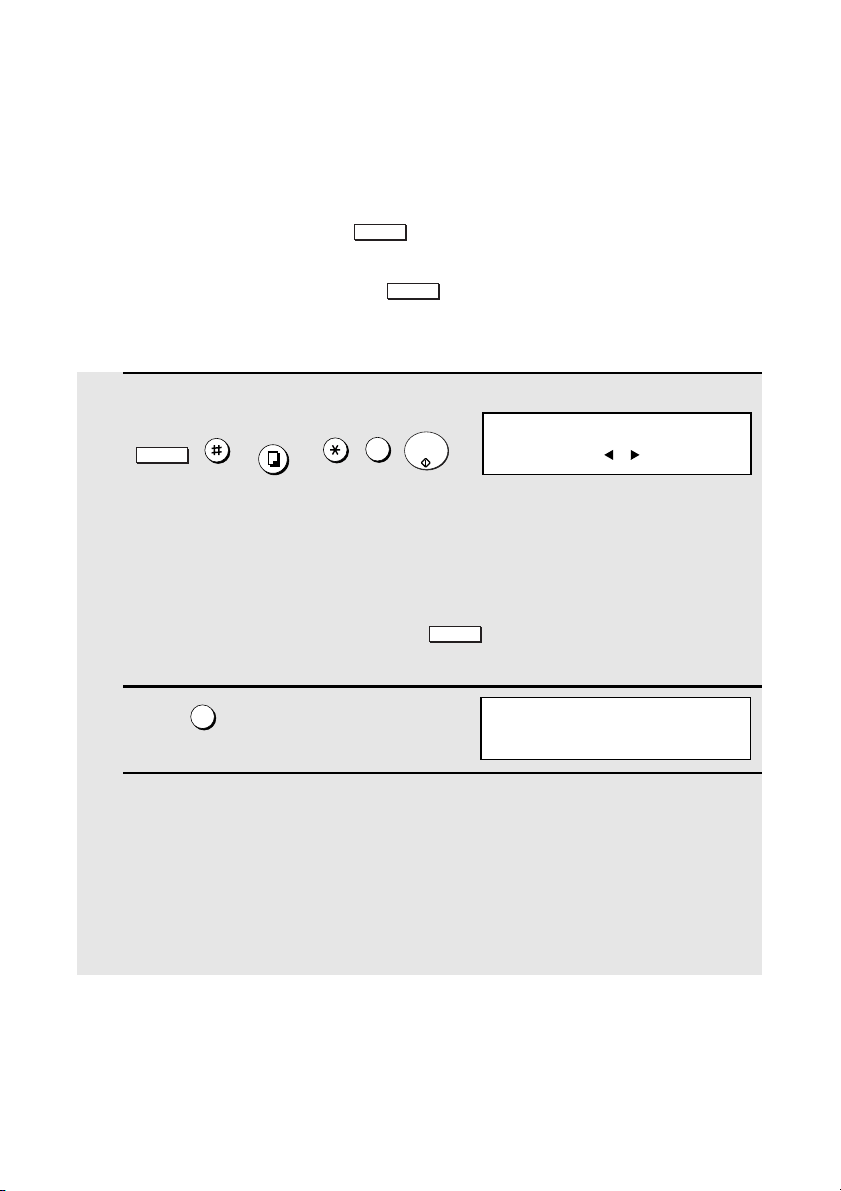
1 Press the following sequence of keys:
, , , , , .
• This is a hidden operation, and therefore error beeps may sound and the
display may not respond normally when you press several of the above
keys. Disregard the error beeps and display while pressing the keys.
• If password protection (page 29) is already enabled, a password entry
screen will appear after you press . Continue to press the above
keys without entering the password.
2 Press to set the password.
3 Press the numeric keys and/or the letter keys to enter the old (currently
set) password.
• If you are setting the password for the first time, enter “Sharp” (this is the
initial factory-set password).
• Each character/digit that you enter will be displayed as “+“.
MENU
COPY/HELP
1
START/
ENTER
MENU
1
Display:
ADMIN PASSWORD
ENTER #(1-2, , )
1:ADMIN PASSWORD SET
ENTER OLD PASSWORD
Administrator Password
29
1. Installation
4 When you have finished entering the
current password, press .
• If you entered the wrong password, WRONG PASSWORD will appear. Re-
enter the correct password. If you enter the wrong password 3 times in a
row, you will return to the date and time display.
5 Enter the new password.
• The characters #, &, <, > cannot be used in the password.
6 Press .
7 Press if you wish to enable protection (require entry of the
password) now. Press if you do not wish to enable protection yet
(you can enable protection later using the procedure below).
• The machine will print out the password for your records. Take care not to
forget the password or lose the print-out. In the event that you forget the
password and have kept no record, contact your dealer.
START/
ENTER
START/
ENTER
1
2
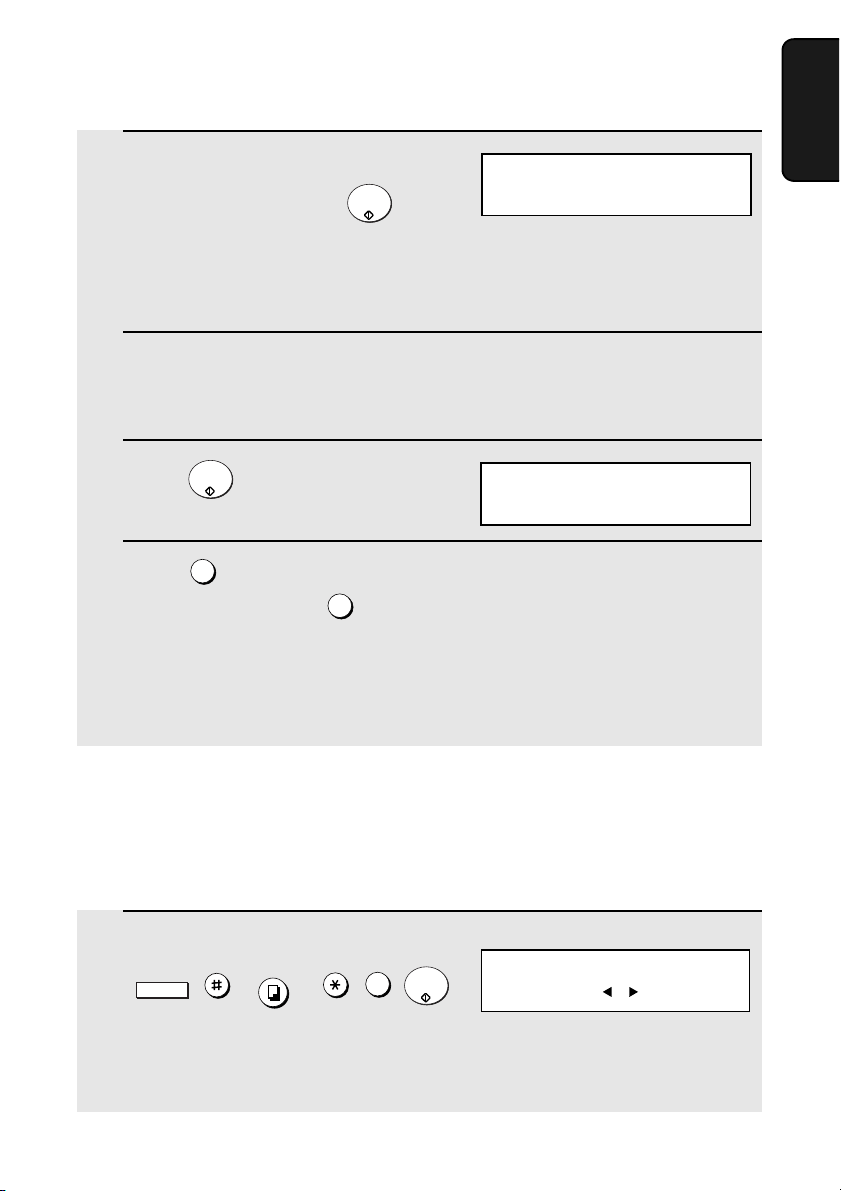
1 Press the following sequence of keys:
, , , , , .
• This is a hidden operation, and therefore error beeps may sound and the
display may not respond normally when you press several of the above
keys. Disregard the error beeps and display while pressing the keys.
MENU
COPY/HELP
1
START/
ENTER
Changing the Password Protect setting
Follow the steps below if you need to change the Password Protect setting
(enable or disable password protection).
PASSWORD PROTECT
1=YES, 2=NO
Display:
ADMIN PASSWORD
ENTER #(1-2, , )
ENTER NEW PASSWORD
[ ]
Administrator Password
30
• If password protection is enabled, a password entry screen will appear after
you press . Continue to press the above keys without entering the
password.
2 Press to select PASSWORD
PROTECT.
3 Press to enable protection, or
to disable protection.
4 Press the numeric keys and/or the letter keys to enter the current
password.
5 When you have finished entering the password, press .
MENU
2
1
2
START/
ENTER
When password protection is enabled
When password protection enabled, you will be prompted to enter the
password each time you press to configure a MENU setting. Enter
the password with the numeric and/or letter keys as appropriate, press ,
and then continue as usual.
MENU
START/
ENTER
2:PASSWORD PROTECT
1=YES, 2=NO
ENTER PASSWORD
[ ]
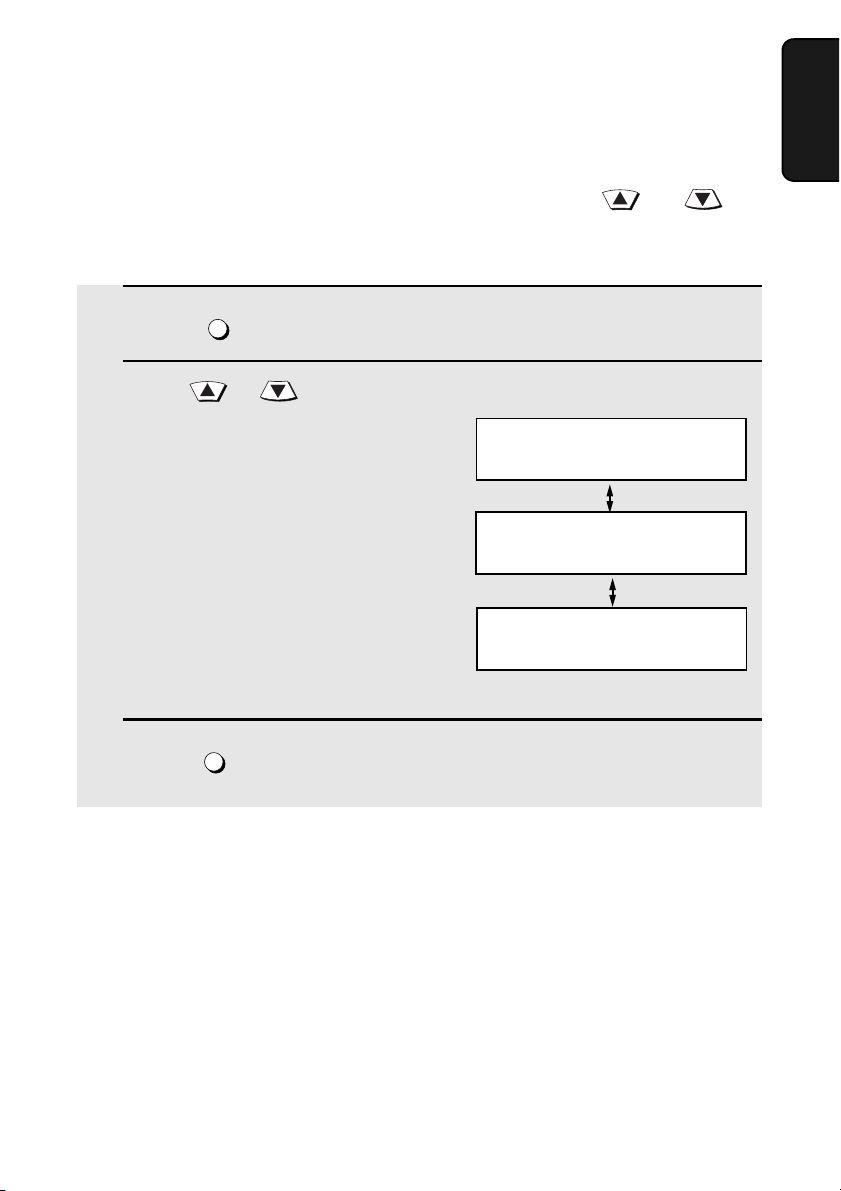
Volume Adjustment
31
1. Installation
Volume Adjustment
You can adjust the volume of the speaker and ringer using and .
Speaker
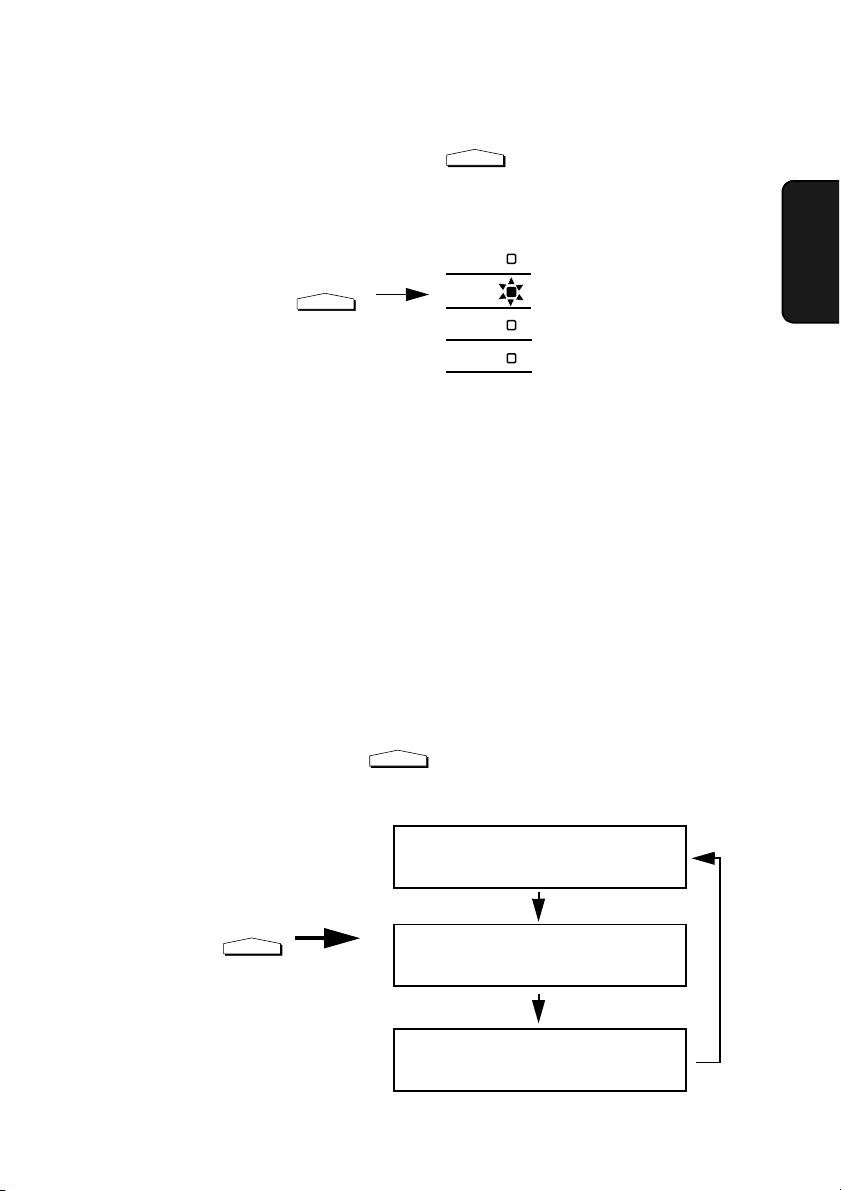
1 Press .
2 Press or to select the
desired volume level.
3 Press to turn off the speaker.
SPEAKER
SPEAKER
Display:
SPEAKER VOLUME
HIGH
SPEAKER VOLUME
MIDDLE
SPEAKER VOLUME
LOW

Volume Adjustment
32
Ringer
1 Press the or to select the
desired volume level. (Make sure
has not been pressed.)
• The ringer will ring once at the selected
level, and then the date and time will
reappear in the display.
2 If you selected “RINGER VOLUME OFF: OK?” to turn off the ringer,
press to confirm your selection.
SPEAKER
START/
ENTER
Display:
RINGER VOLUME
HIGH
RINGER VOLUME
MIDDLE
RINGER VOLUME
LOW
RINGER VOLUME
OFF OK?(PRESS START)
33
2. Sending
Documents
5.0"
(128 mm)
5.8"
(148 mm)
11"
(279 mm)
38"
(966 mm)
14 lbs.
(52 g/m²)
36 lbs.
(157 g/m²)
14.3"
(364 mm)
10.1"
(257 mm)
20 lbs.
(80 g/m²)
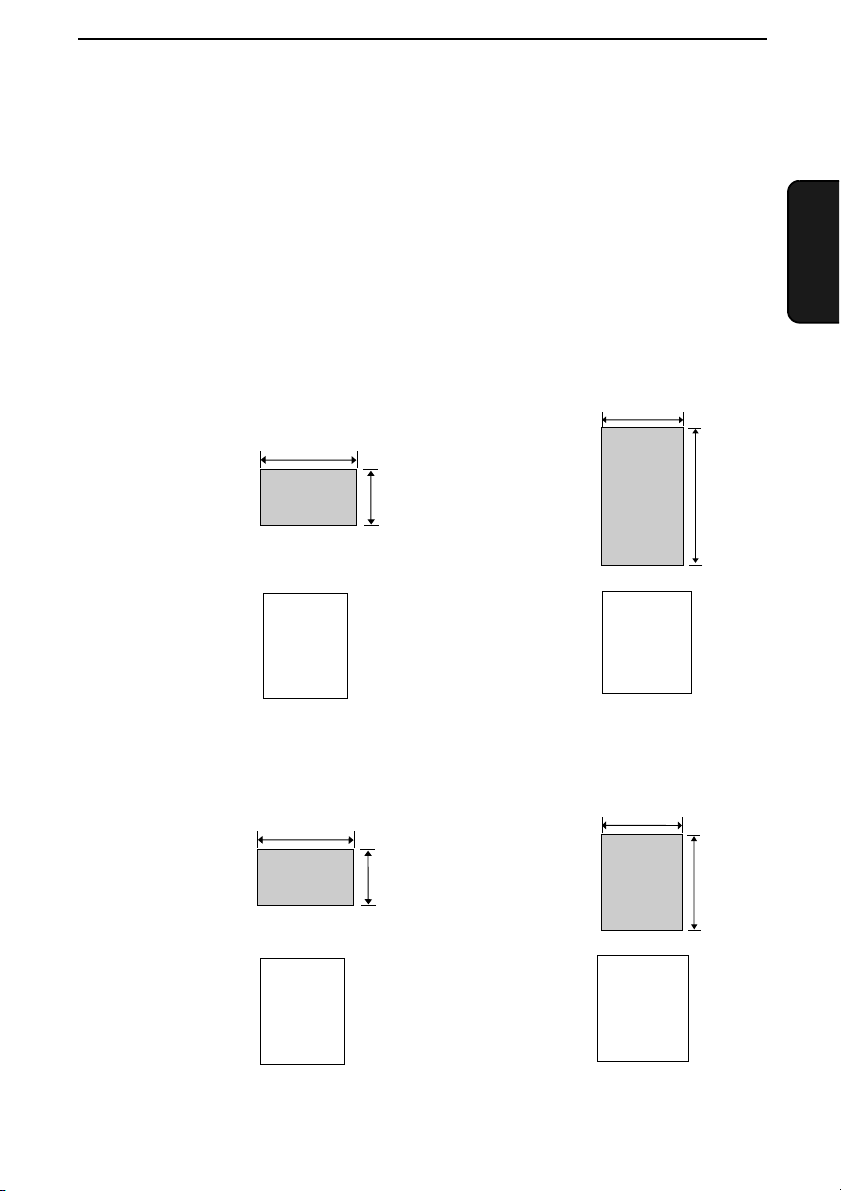
2. Sending Documents
Transmittable Documents
Size and weight
The size and weight of documents that you can load in the document feeder
depend on whether you load one page at a time or several pages at once.
Loading one page at a time:
Loading multiple pages at once (letter-size: max. 50 pages, legal-size:
max. 20 pages):
Minimum
size
Maximum
size
Minimum
weight
Maximum
weight
Minimum
size
Maximum
size
Minimum
weight
Maximum
weight
5.0"
(128 mm)
5.8"
(148 mm)
14 lbs.
(52 g/m²)
Note: 11” x 17” paper must be loaded one page at a time.

Transmittable Documents
34
Maximum scanning area
The area of the document that the fax machine can scan is slightly smaller
than the actual document size. Any letters or graphics outside this area will
not be scanned.
Maximum scanning width: 8.2 inches (208 mm)
Maximum scanning length: The length of the document minus 0.16
inches (4 mm) from the top and bottom of
the document.
Other restrictions
♦ The scanner cannot recognize yellow, greenish yellow, or light blue ink.
♦ Ink, glue, and correcting fluid on documents must be dry before they pass
through the document feeder.
♦ All clips, staples, and pins must be removed from documents before loading
in the feeder. If these are not removed, they may damage the machine.
♦ Documents which are patched, taped, torn, smaller than the minimum size,
carbon backed, easily smudged, or have a slick, coated surface should be
photocopied, and the copy loaded in the feeder.
Loading the Document
35
2. Sending
Documents
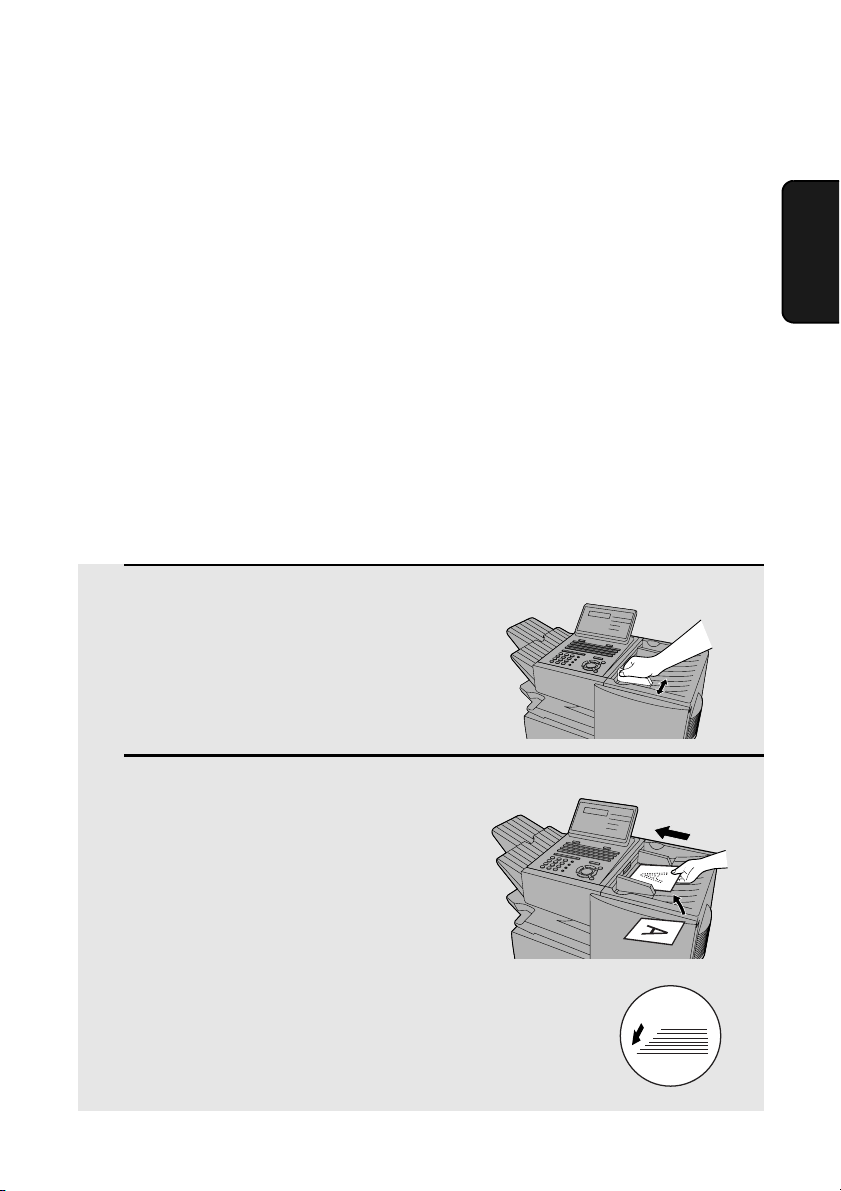
Loading the Document
Up to 50 letter-sized pages (20 legal-sized pages) can be placed in the feeder
at one time. The pages will automatically feed into the machine starting from
the bottom page.
♦ If you need to send or copy more than 50 pages, place the additional pages
gently and carefully in the feeder just before the last page is scanned. Do
not try to force them in, as this may cause double-feeding or jamming.
♦ If your document consists of several large or thick pages which must be
loaded one at a time, insert each page into the feeder as the previous page
is being scanned. Insert gently to prevent double-feeding.
♦ If there are folds on the document, smooth out the folds before loading the
document. Unsmoothed folds may prevent correct scanning.
♦ When scanning a very long document, gently hold the sides of the
document while it feeds into the scanner to prevent skewing.
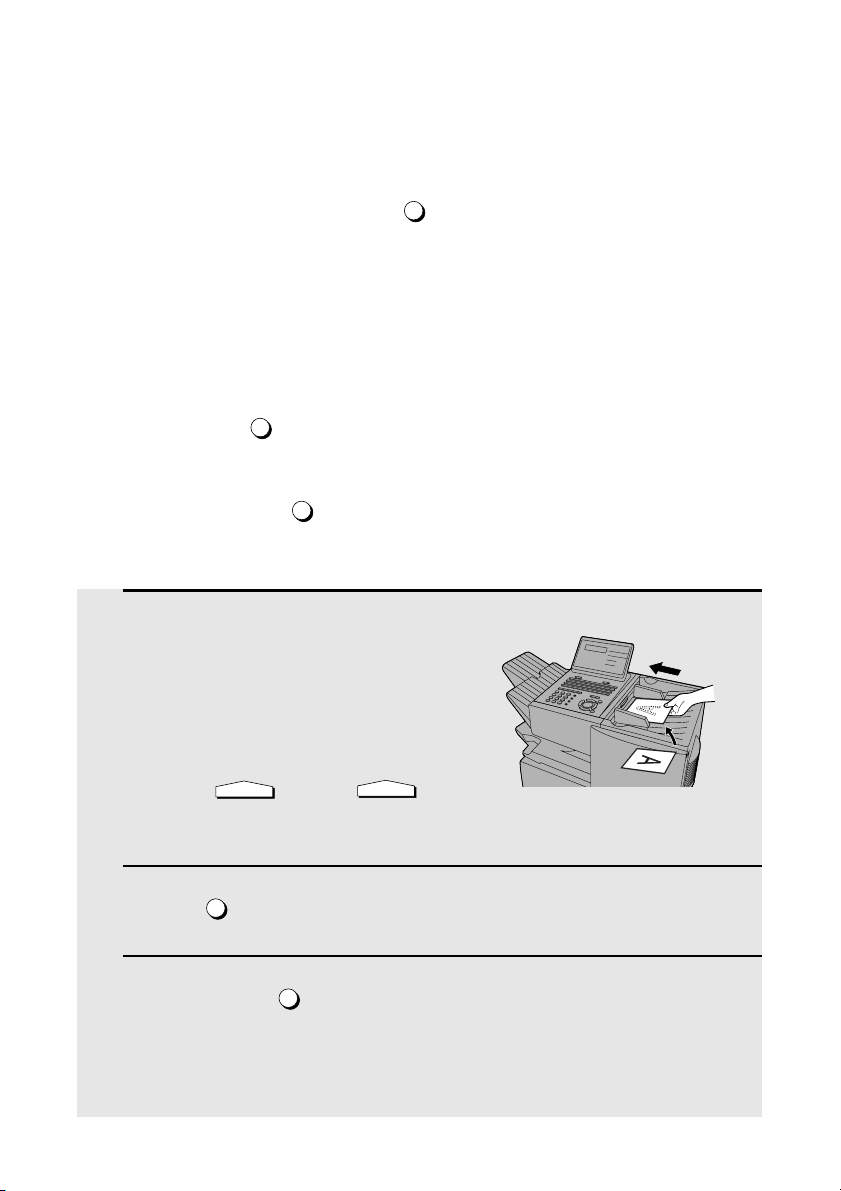
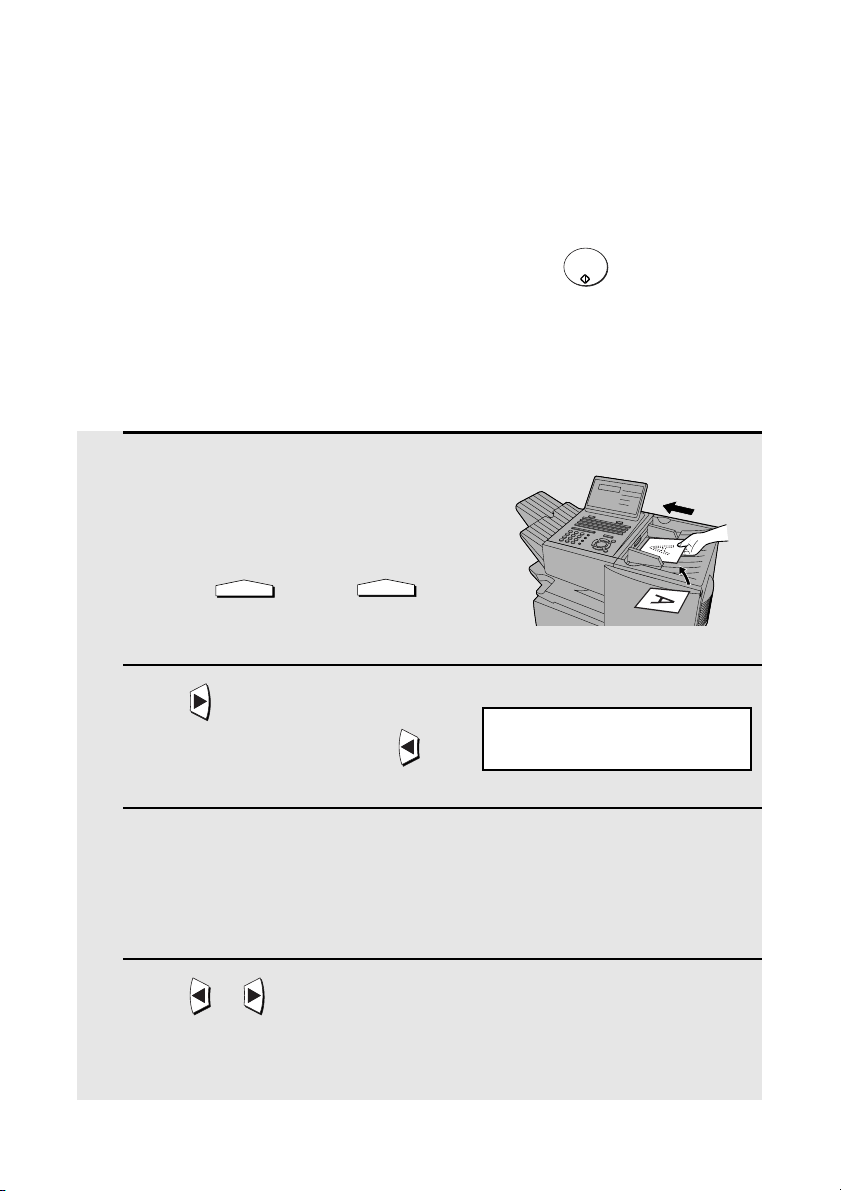
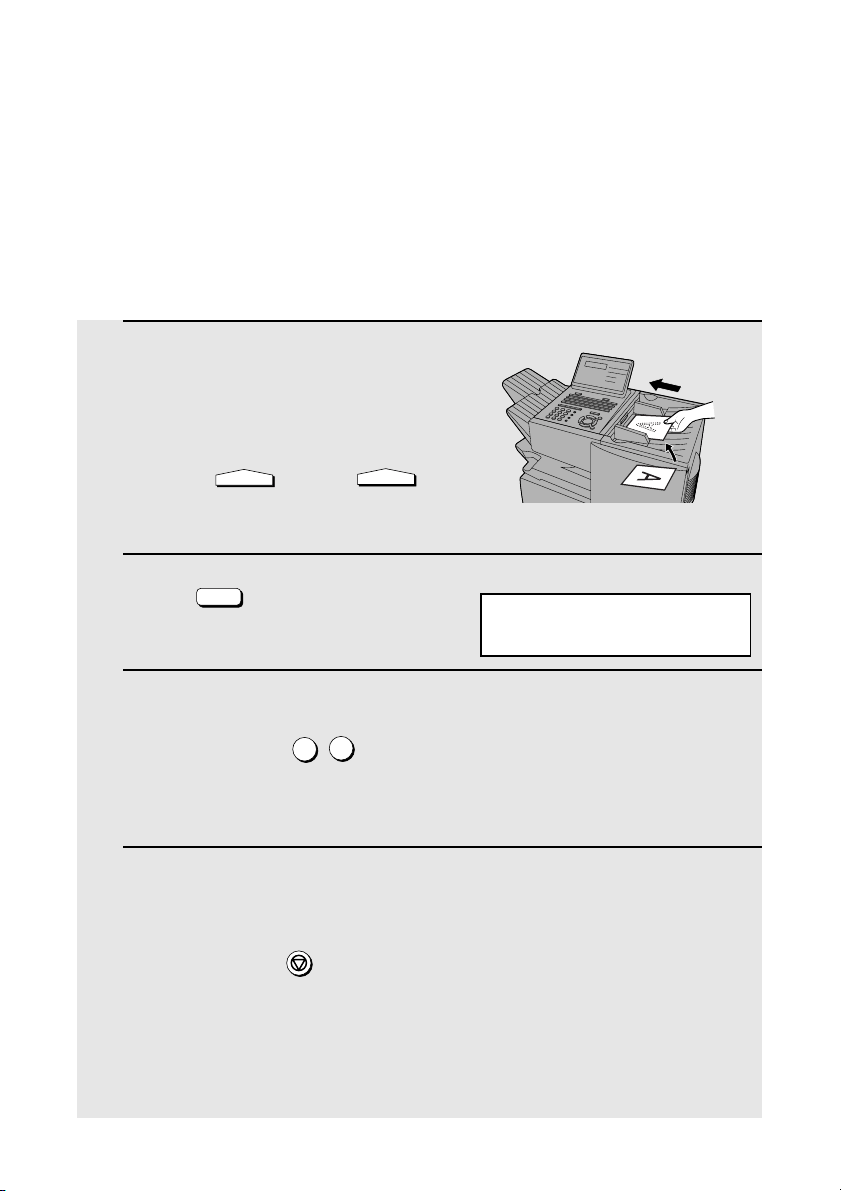
1 Adjust the document guides to the
width of your document.
2 Place the document face down and
push it gently into the document
feeder. The top edge of the document
should enter the machine first.
• The feeder will draw the leading edge of
the document into the machine. SEND
READY will appear in the display.
Note: When inserting a large number
of pages in the feeder, slant the front
end of the stack so that the bottom
pages enter first.

Adjusting the Resolution and Contrast
36
Adjusting the Resolution and Contrast
If desired, you can adjust the resolution and contrast before sending a
document.
Resolution
The fax machine has four resolution settings:
The default resolution setting is STANDARD. If you don’t adjust the resolution
before sending a document, the fax machine will automatically use
STANDARD resolution.
♦ In order to transmit in FINE or SUPER FINE resolution, the receiving fax
machine must also have that resolution. If it doesn’t, the next best available
setting will be used.
♦ The resolution settings are only effective for transmitting and copying a
document. They are not effective for receiving a document.
STANDARD Use STANDARD for ordinary documents. This
setting gives you the fastest and most
economical transmission.
FINE Use FINE for documents containing small letters
or fine drawings.
SUPER FINE Use SUPER FINE for documents containing
very small letters or very fine drawings.
HALF TONE Use HALF TONE for photographs and
illustrations. The original will be reproduced in
64 shades of gray.
3 Adjust the resolution and/or contrast settings (if desired) and then dial
the receiving machine as explained in the following sections.
Adjusting the Resolution and Contrast
37
2. Sending
Documents
Contrast
The fax machine has three contrast settings:
The default setting is AUTO.
To adjust the contrast, press until the desired setting appears in the
display.
AUTO Use AUTO for normal documents.
DARK Use DARK for faint documents.
LIGHT Use LIGHT for documents with a dark
background.
CONTRAST
CONTRAST
HALF TONE
STANDARD
FINE
SUPER FINE
RESOLUTION
(LIGHT)
M:00% SEND READY
( DARK)
M:00% SEND READY
( AUTO)
M:00% SEND READY
To adjust the resolution setting, press one or more times until the
indicator light next to the desired setting comes on.
RESOLUTION
Sending a Fax by Normal Dialing
38
Sending a Fax by Normal Dialing
With Normal Dialing, you press and then dial by pressing the numeric
keys.
♦ Normal Dialing allows you to listen to the line through the speaker to make
sure the other fax machine is responding. (Note that the speaker is not a
speakerphone; it cannot be used for talking.)
♦ If you have connected an extension telephone to the fax machine, you can
also pick up the extension phone and dial using the extension phone (do
not press on the fax machine). If a person answers, you will be able
to speak to them through the phone before sending a fax.
Note: If you press to dial, you will not be able to speak using an extension
phone connected to the fax machine in the event that a person answers.
SPEAKER
SPEAKER
SPEAKER
1 Load the document(s). (Note: If
desired, you can load the document
after dialing in Step 3, below.)
• SEND READY will appear in the
display.
• Press and/or to
set the resolution and contrast if
needed.
2 Press or pick up an extension phone connected to the fax
machine. Listen for the dial tone.
3 If you pressed , dial the number of the receiving machine by
pressing the numeric keys on the fax machine.
If you are using an extension phone, dial using the keypad on the
extension phone.
RESOLUTION
CONTRAST
SPEAKER
SPEAKER

Programming Auto-Dial Numbers
39
2. Sending
Documents
• If Option Setting 26 (TEL. BILLING CODE, page 113) has been set to ON
and BILLING CODE DIAL has been set to AFTER, press after
dialing.
4 Wait for the connection. When you hear a fax tone, press on the
fax machine.
• If a person answers and you are using an extension phone, ask them to
press their Start key. When you hear the fax tone, press on your fax
machine.
REDIAL
START/
ENTER
START/
ENTER
Using the REDIAL key
You can press to redial the last number dialed. To send a document,
press when you hear the fax tone after the connection is established.
Note that the speaker is automatically activated when you press .
REDIAL
START/
ENTER
REDIAL
Programming Auto-Dial Numbers
You can dial a fax number by simply pressing a Rapid Key, or by pressing
and entering an abbreviated Speed Dial number.
To use a Rapid Key or Speed Dial number, you must first program the full fax
number in the Rapid Key or Speed Dial number. It is usually convenient to
program your most frequently dialed numbers in Rapid Keys.
♦ Up to 59 Rapid Keys can be programmed for shared use.
♦ Up to 75 Speed Dial numbers can be programmed for shared use.
You can also create personal books for auto-dial numbers. Up to 59 Rapid
Keys and 16 Speed Dial numbers can be stored in each personal book. For
information on creating and using personal books, see page 53.
SPEED DIAL

Programming Auto-Dial Numbers
40
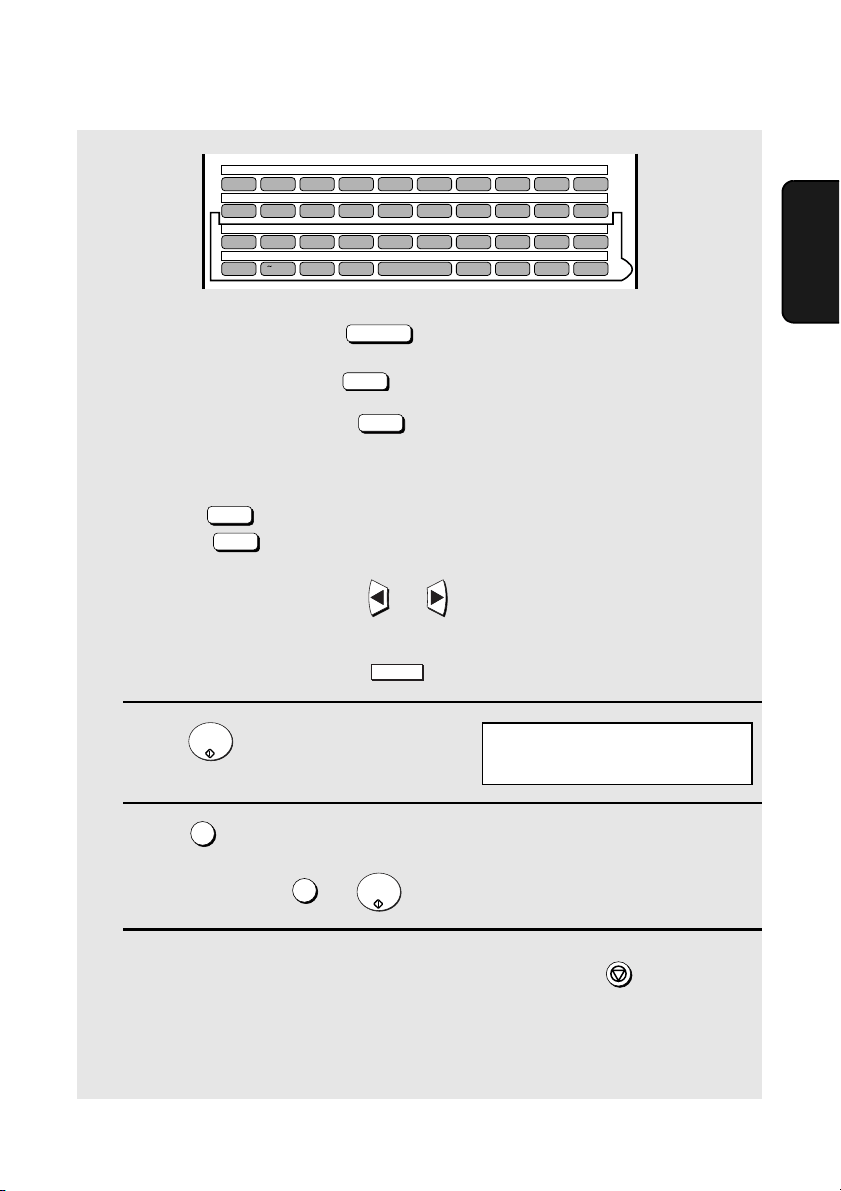
1 Press and .
2 Press and .
3 Press to select SET.
4 To program a Rapid Key number, press the Rapid Key that you wish to
use. (To select Rapid Keys 40 through 59, flip up the Rapid Key overlay.)
To program a Speed Dial number, press and then enter the
number from “1” to “75” that you wish to use. (If you enter less than two
digits, press to complete the entry.)
5 Enter the fax number by pressing the numeric keys (max. of 60 digits
including pauses).
• To clear a mistake, press .
• If a pause is required between any of the digits to access a special service
or an outside line, press (two seconds per pause). The pause will
appear as a hyphen. Several pauses can be entered in a row.
6 Press .
7 Enter the name of the party by pressing the letter entry keys
(max. of 20 characters). (Make sure the Rapid Key overlay is flipped
down.)
Example: SHARP =
• If you don’t want to enter a name, go directly to Step 8.
MENU
3
0
1
1
SPEED DIAL
START/
ENTER
DEL
REDIAL
START/
ENTER
Caps Lock
S H / }
A /
|
R / $
P / =
Display:
3:ENTRY MODE
ENTER #(01-08, , )
01: DESTINATION
1=SET, 2=CLEAR
1: DESTINATION SET
ENTER RAPID OR SPEED
Programming Auto-Dial Numbers
41
2. Sending
Documents
• To enter a space, press .
• To change case, press .
• To clear a mistake, press .
• To enter a number as part of a name, press the appropriate numeric key. To
enter the symbol on a letter key (the character to the right of the slash),
press (“SYM” will appear in the display) and then the letter key
(press again to turn off symbol entry mode).
• To move the cursor, press or . To switch between letter insertion
and letter replacement mode when the cursor is in the middle of a
sequence of letters, press .
8 Press .
9 Press if the number programmed is an area code or access code to
be used for Chain Dialing (see Chain Dialing at the end of this
procedure). Press (or ) if the number is a regular fax number.
10 Return to Step 4 to program another number, or press repeatedly
to return to the date and time display.
• If you programmed a Rapid Key number, you can write the name of the
party on the label above the Rapid Key.
Space
Caps Lock
DEL
SYMBOL
SYMBOL
MENU
START/
ENTER
1
2
START/
ENTER
STOP
Q / ! W / " E / # R / $ T / % Y / & U / ' I / ( O / ) P / =
SYMBOL
A /
|
S D F G / { H / } J / [ K / ] L / +
Caps Lock
Z / < X / > C V B N / * M / ? @ .com
SHIFT
/ ^ / / \ ; / :
Space
_
- . / , DEL
01 02 03 04 05 06 07 08 09 10
11 12 13 14 15 16 17 18 19 20
21 22 23 24 25 26 27 28 29 30
31 32 33 34 35 36 37 38 39
CHAIN DIAL
1=SET, 2=CANCEL
Programming Auto-Dial Numbers
42
Chain Dialing for area and access codes
You can also program an area code or access code in a Rapid Key or Speed
Dial number using the above programming procedure. In Step 9, press to
set the number as a Chain Dialing number.
After you dial an area code or access code using a Rapid Key or Speed Dial
number set for Chain Dialing, the fax machine will wait for you to dial the
remainder of the number (you can dial the remainder of the number by
pressing a Rapid Key, by pressing the Speed Dial key and entering a Speed
Dial number, or by pressing numeric keys). Note that the remainder of the
number should not be set as a Chain Dial number if programmed in a Rapid
Key or Speed Dial number.
♦ The maximum number of digits that can be dialed at one time by Chain
Dialing is 60.
Editing auto-dial numbers
To make changes in a number previously stored, repeat the programming
procedure. Select the Rapid Key or Speed Dial number for which you want to
make changes in Step 4, and then change the number(s) and/or name(s)
when they appear in the display (Steps 5 and 7).
Clearing auto-dial numbers
Note: You cannot clear a number if it is used in a program or timer operation, or if
it is included in a Group Key. First clear the number from the operation or group,
then perform the following clearing procedure. To check where the number is
used, print out the Program/Group List or the Timer List as explained on page 116.
1
1 Press and .
2 Press and .
3 Press to select CLEAR.
MENU
3
0
1
2
Display:
3:ENTRY MODE
ENTER #(01-08, , )
01: DESTINATION
1=SET, 2=CLEAR
2: DESTINATION CLEAR
ENTER RAPID OR SPEED
Programming Auto-Dial Numbers
43
2. Sending
Documents
4 To clear a Rapid Key, press the Rapid Key.
To clear a Speed Dial number, press and then enter the number
with the numeric keys. (If you enter less than two digits, press to
complete the entry.)
5 Press .
6 Return to Step 4 to clear another number, or press repeatedly to
return to the date and time display.
SPEED DIAL
START/
ENTER
START/
ENTER
STOP

Sending a Fax by Automatic Dialing
44
Sending a Fax by Automatic Dialing
Dual Access
The fax machine features full dual access, which means that you can load a
document and dial by automatic dialing even when the fax machine is
occupied with another job. After you dial, your document will be immediately
scanned into memory and then transmitted once all previously stored jobs
have been completed.
If more than one document has been scanned into memory for transmission,
the documents (jobs) will be transmitted in the order in which they were
scanned. If you have an urgent transmission and do not want to wait until
previously stored jobs are completed, you can press after loading
your document. Your document will be transmitted immediately after the
current job is finished.
If you don’t want the document to be transmitted from memory, you can press
after loading the document. Your machine will call the receving fax
machine immediately after the current job is finished (ahead of any previously
stored jobs in memory), and the document will be scanned as soon as the
connection is established.
♦ Approximately 500 pages of average content can be held in memory. Less
pages can be held if any were scanned using fine or halftone resolution.
♦ The amount of memory currently occupied appears as a percentage
("M:00%") in the display.
PRIORITY
DOCUMENT
M/?
Sending a Fax by Automatic Dialing
45
2. Sending
Documents
Rapid Key Dialing
If the number you want to dial has been programmed in a Rapid Key, you can
dial it by pressing the Rapid Key.
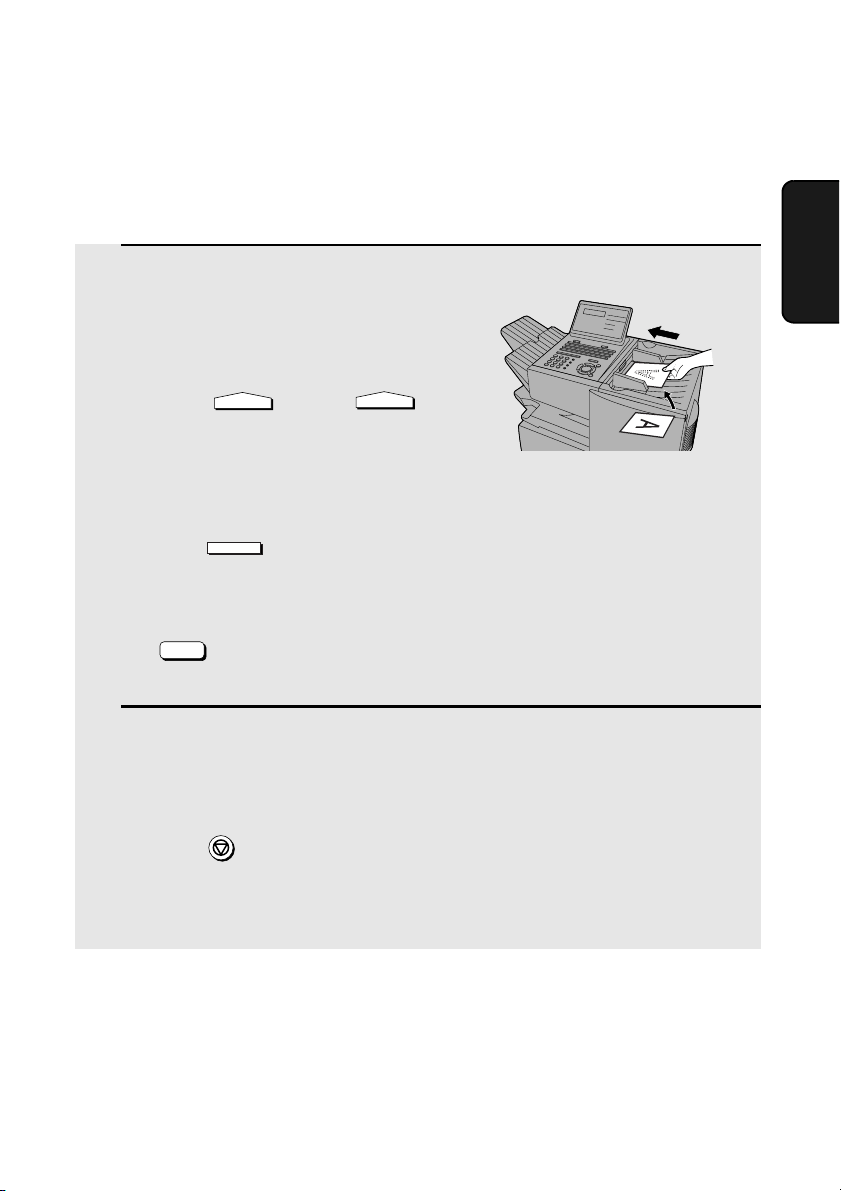
1 Load the document(s).
SEND READY will appear in the
display.
• Press and/or to
set the resolution and contrast if
needed.
• To send the document ahead of other
documents waiting for transmission,
press .
• To send the document directly from the
feeder (not through memory), press
. (Flip up the Rapid Key overlay
if it is down.)
2 Press the appropriate Rapid Key.
• The name of the receiving party will appear in the display. If no name was
stored, the fax number will appear. (If the name or number is incorrect,
press .)
• The document will be automatically transmitted once the connection is
established.
RESOLUTION
CONTRAST
PRIORITY
DOCUMENT
M/?
STOP
Sending a Fax by Automatic Dialing
46
Speed Dialing
If the number you want to dial has been programmed in a Speed Dial number,
you can dial it by pressing and then entering the Speed Dial number.
SPEED DIAL
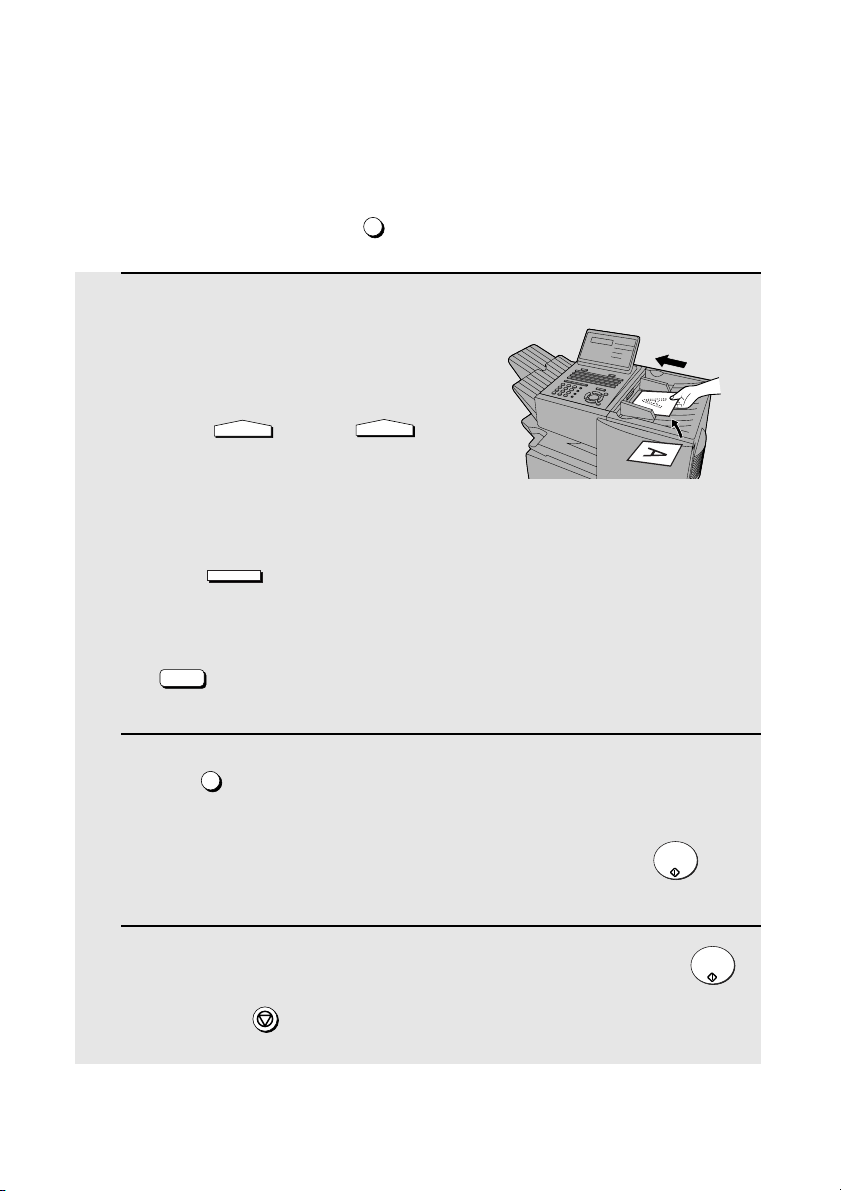
1 Load the document(s).
SEND READY will appear in the
display.
• Press and/or to
set the resolution and contrast if
needed.
• To send the document ahead of other
documents waiting for transmission,
press .
• To send the document directly from the
feeder (not through memory), press
. (Flip up the Rapid Key overlay
if it is down.)
2 Press and then enter the Speed Dial number by pressing the
numeric keys.
• If you enter less than 2 digits for the Speed Dial number, press to
complete the entry.
3 Check the display. If the name or number shown is correct, press .
(If not, press and then repeat Step 2.)
RESOLUTION
CONTRAST
PRIORITY
DOCUMENT
M/?
SPEED DIAL
START/
ENTER
START/
ENTER
STOP
Sending a Fax by Automatic Dialing
47
2. Sending
Documents
Direct Keypad Dialing
You can also enter a full number with the number keys and then press
to begin dialing.
START/
ENTER
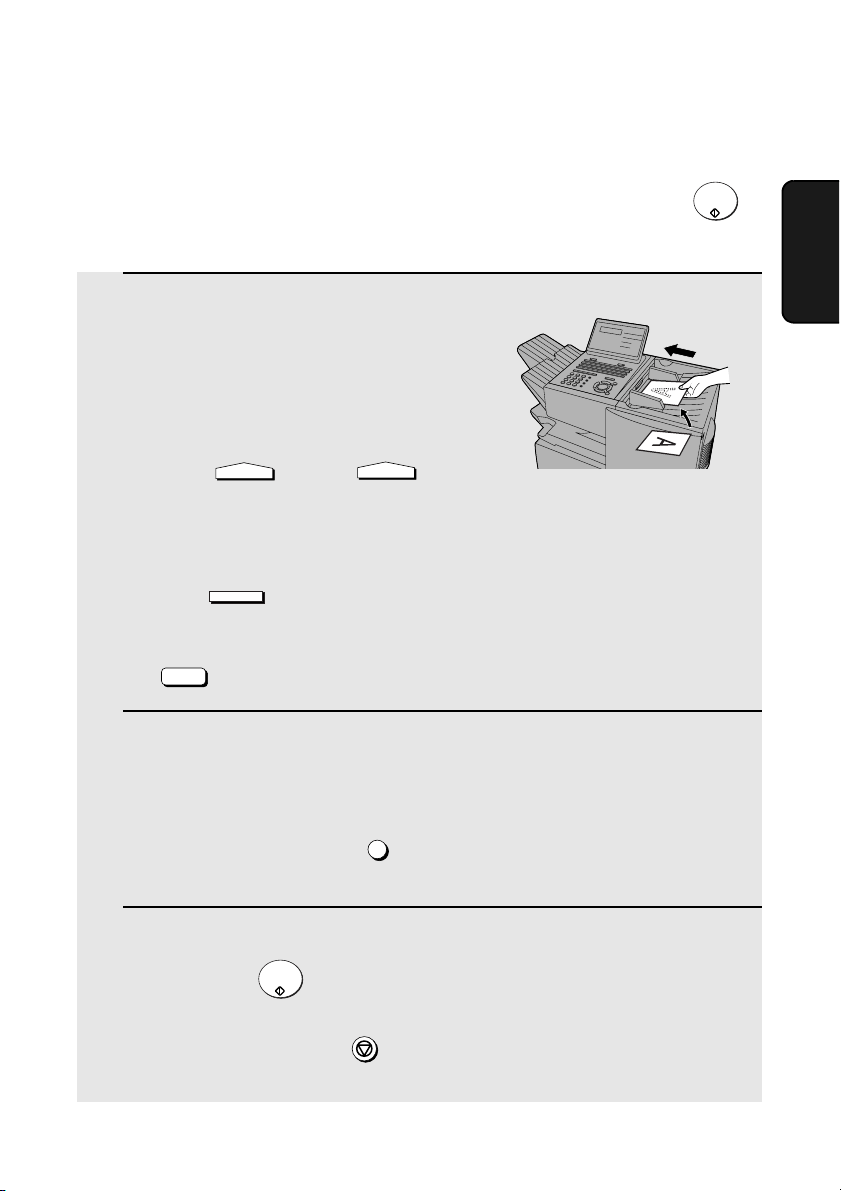
1 Load the document(s). (Note: If
desired, you can load the document
after dialing in Step 2, below.)
SEND READY will appear in the
display.
• Press and/or to
set the resolution and contrast if
needed.
• To send the document ahead of other documents waiting for transmission,
press .
• To send the document directly from the feeder (not through memory), press
. (Flip up the Rapid Key overlay if it is down.)
2 Enter the number of the receiving machine by pressing the numeric
keys.
• If a pause is required between any of the digits to access a special service
or an outside line, press (two seconds per pause). The pause will
appear as a hyphen. Several pauses can be entered in a row.
3 Check the display. If the number of the receiving machine shown is
correct, press .
• If it is not correct, press to backspace and clear one digit at a time,
and then re-enter the correct digit(s).
RESOLUTION
CONTRAST
PRIORITY
DOCUMENT
M/?
REDIAL
START/
ENTER
STOP
Sending a Fax by Automatic Dialing
48
Searching for an auto-dial number
If you don’t remember the Rapid Key or Speed Dial number in which you have
programmed a particular fax number, you can search for the number by
following the steps below. Once you have found the number, you can dial it
and transmit the loaded document by simply pressing .
♦ You can also use this procedure to search for Group Keys and Program
Keys (the name you programmed for the Group or Program key will
appear). This can be done at any point in a transmission or polling
procedure where you need to press a Group Key or a Program Key.
START/
ENTER
1 Load the document(s).
SEND READY will appear in the
display.
• Press and/or to
set the resolution and contrast if
needed.
2 Press to search from the
beginning of the alphabet, or to
search from the end.
3 Enter the first character of the stored name by pressing the appropriate
letter entry key.
• If you don’t remember the first letter, go to Step 4 (you will scroll through the
list from the beginning).
4 Press or to scroll through the names. Stop when the desired
name appears in the display.
• If no numbers have been stored under the entered letter, NOT FOUND will
appear.
RESOLUTION
CONTRAST
A
Z
Display:
SEARCH DIAL

Sending a Fax by Automatic Dialing
49
2. Sending
Documents
5 Press . The document will be automatically transmitted once the
connection is established.
START/
ENTER
Chain Dialing
An auto-dial number set for Chain Dialing can be combined with another auto-
dial number or digits entered manually with the numeric keys to dial one
phone number up to 60 digits long. The following are some examples of how
this can be done:
♦ Press appropriate Rapid Keys in the proper order. For example, press
Rapid Key 01 (set for Chain Dialing), then Rapid Key 02 (not set for Chain
Dialing).
♦ Press a Rapid Key (set for Chain Dialing) and then manually enter a
number by pressing appropriate numeric keys. Press after the final
numeric key to begin transmission.
If the memory becomes full...
If the memory becomes full while a document is being scanned, MEMORY
FULL will appear in the display. If Option Setting 23 (Quick On-line) is set to
ON, scanning will automatically resume when memory becomes free again as
pages are transmitted. (Note: Quick On-Line is initially set to ON at the
factory. To change the setting, see page 113.)
If Quick On-Line is set to OFF the transmission will be canceled and
MEMORY FULL ERROR will appear in the display. Press to clear the
message. Try the transmission again later when memory is free.
START/
ENTER
STOP
Sending a Fax by Automatic Dialing
50
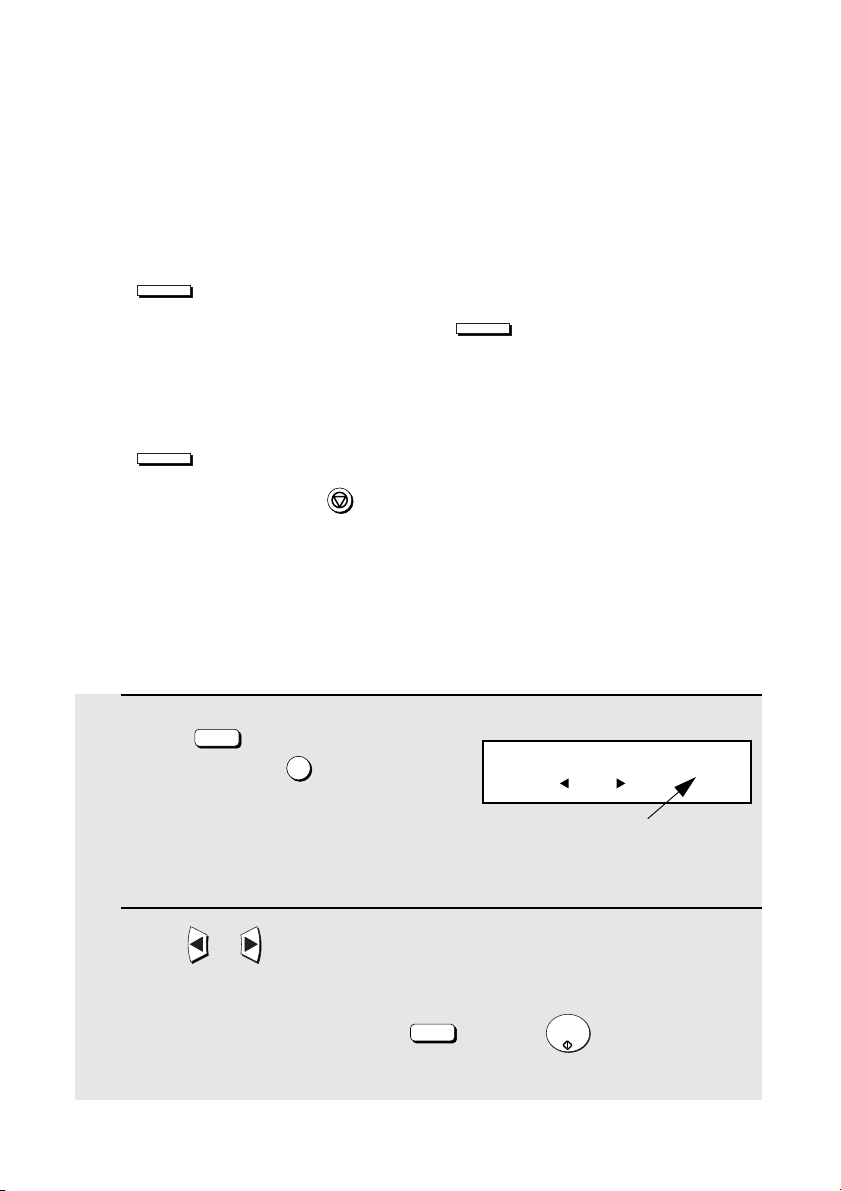
Checking the status of the current job
The display normally shows the date and time and prompts related to
operations you are performing. To check and see what number the fax
machine is currently calling or transmitting to, or what number the fax machine
is currently receiving a document from (if this information is available), press
. Information on the current job will appear in the display. To switch
back to the date and time display, press again.
To cancel a fax transmission or reception
To cancel a fax transmission or reception that is currently in progress, press
so that the status of the transmission or reception appears in the
display, and then press .
Checking and canceling stored transmission jobs
To display information on jobs that are waiting in memory for transmission,
follow the steps below. You can also cancel a transmission job with this
procedure.
JOB STATUS
JOB STATUS
JOB STATUS
STOP
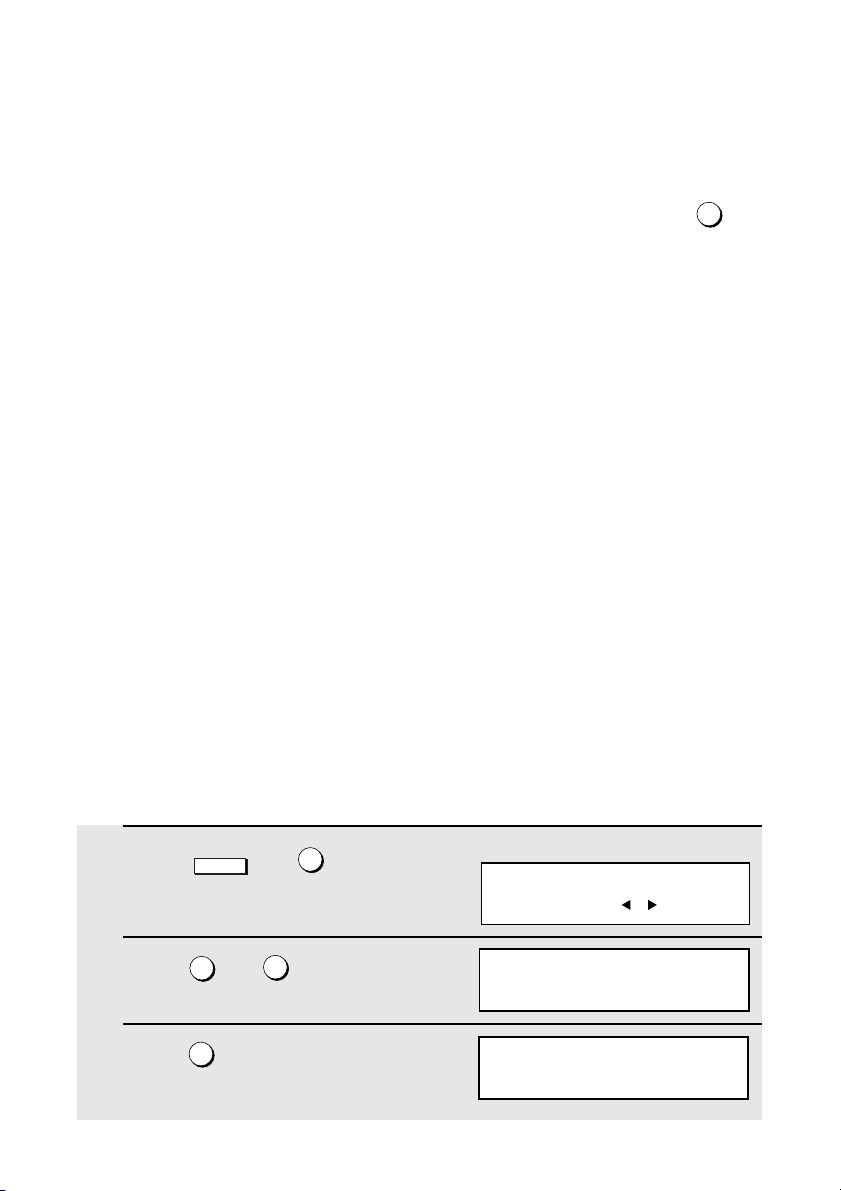
1 Press (flip up the Rapid Key
overlay) and then .
2 Press or to scroll through the list of transmission jobs. The name
(or number) of each receiving party will appear in the display, together
with the 3-digit memory number assigned to the transmission.
To cancel a transmission, press and then while the
transmission appears in the display.
MEM.STATUS
B
2
DEL
START/
ENTER
Display:
TX STATUS (005)
PRESS OR
The number of
stored transmission
jobs appears here
Sending a Fax by Automatic Dialing
51
2. Sending
Documents
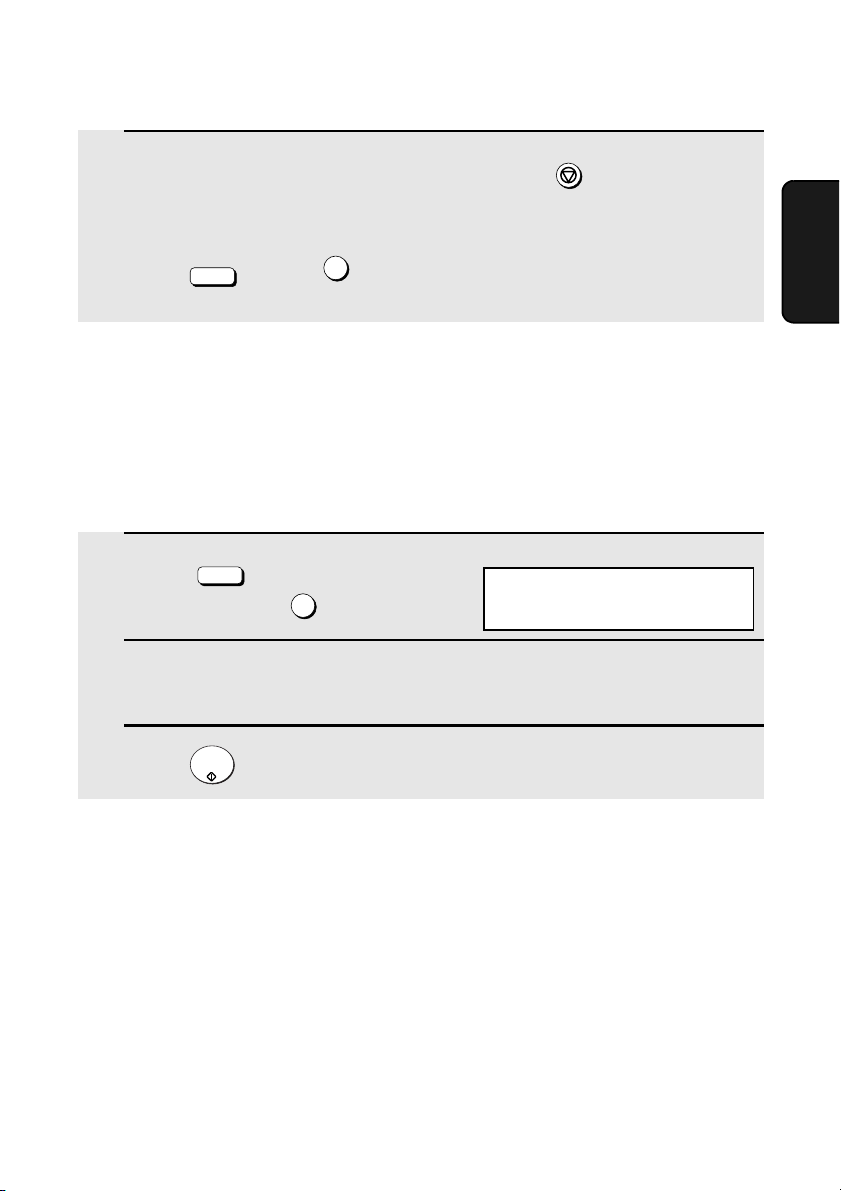
Canceling a memory transmission by number
If you know the memory number assigned to a memory transmission, you can
cancel it with the following procedure. (If you don’t know the memory number,
use the preceding procedure.)
1 Press (flip up the Rapid Key
overlay) and then .
2 Enter the 3-digit memory number assigned to the transmission you wish
to cancel.
3 Press .
MEM.STATUS
B
4
START/
ENTER
4: MESSAGE CLEAR
ENTER MESSAGE #
Display:
3 When you have finished checking the list, press twice to return to
the date and time display.
Note: To print out a list of the documents waiting in memory for transmission,
press and then .
STOP
MEM.STATUS
B
5

Sending a Fax by Automatic Dialing
52
Memory Retransmission
If a line error occurs during any type of memory transmission, your fax will
automatically redial the number and attempt to complete the transmission.
Retransmission will begin from the page which was being transmitted when
the error occurred.
The fax machine has been set at the factory to make 10 attempts at
retransmission, with each attempt made immediately after the previous
attempt. If desired, you can change the number of attempts by changing
Option Setting 17, and have the fax wait a selected number of minutes
between each attempt by changing Option Setting 18 (see page 111).
♦ The numbering of pages retransmitted will begin from "1" again.
♦ If an error or power failure occurs during transmission of a cover sheet,
retransmission will not take place.
♦ To cancel retransmission, press to show the job status in the
display (make sure that RETRY MODE appears on the top line of the
display and the number of the receiving party appears on the bottom line to
the right), and then press .
JOB STATUS
STOP
Automatic redialing
If you use automatic dialing (including Direct Keypad Dialing) and the line is
busy, the fax machine will automatically redial the number. The fax machine is
set at the factory to make 2 redialing attempts at intervals of 5 minutes.
To cancel automatic redialing, press to show the job status in the
display (make sure that RECALL MODE appears on the top line of the display
and the number of the receiving party appears on the bottom line to the right),
and then press .
If desired, you can change the number of redial attempts with Option Setting
6, and the interval at which redialing takes place with Option Setting 7 (see
page 109).
♦ Under certain conditions (for example if a person answers the call on a
telephone), automatic redialing may stop before the set number of redialing
attempts are made.
JOB STATUS
STOP
Creating and Using Personal Books
53
2. Sending
Documents
Creating and Using Personal Books
Up to 10 personal books can be created that allow inviduals to program Rapid
Key and Speed Dial numbers for their own personal use.
♦ Up to 59 Rapid Key numbers and 16 Speed Dial numbers can be
programmed in each personal book.
♦ If desired, you can program a 4-digit passcode for a personal book. When
this is done, the passcode must be entered to use or edit the book.
You can open a personal book by pressing and then entering the
book’s 4-digit passcode if it has a passcode, or by selecting the book with
or and pressing . After opening the book, simply follow the desired
procedure for programming or using a Rapid Key or Speed Dial number as
explained elsewhere in this manual.
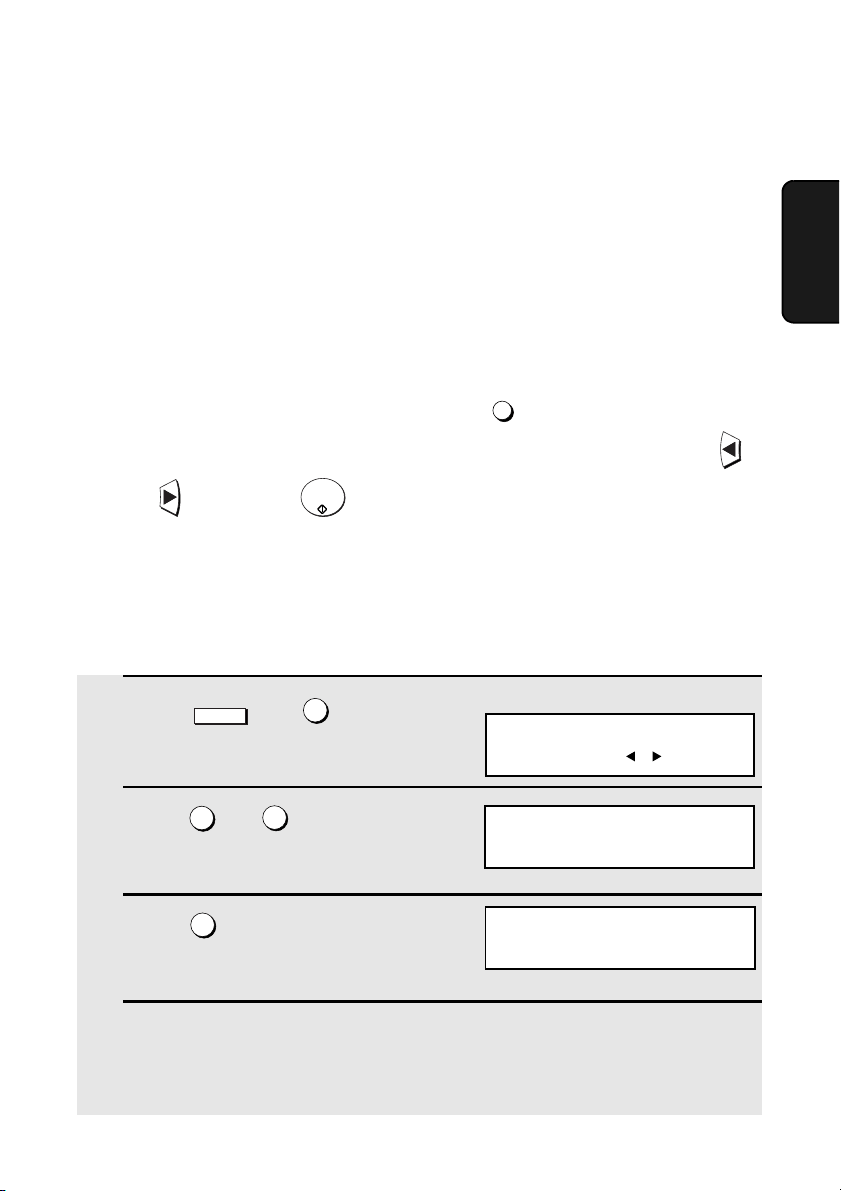
Creating a personal directory book
To create a new personal directory book, follow the steps below:
PERSONAL
BOOK
START/
ENTER
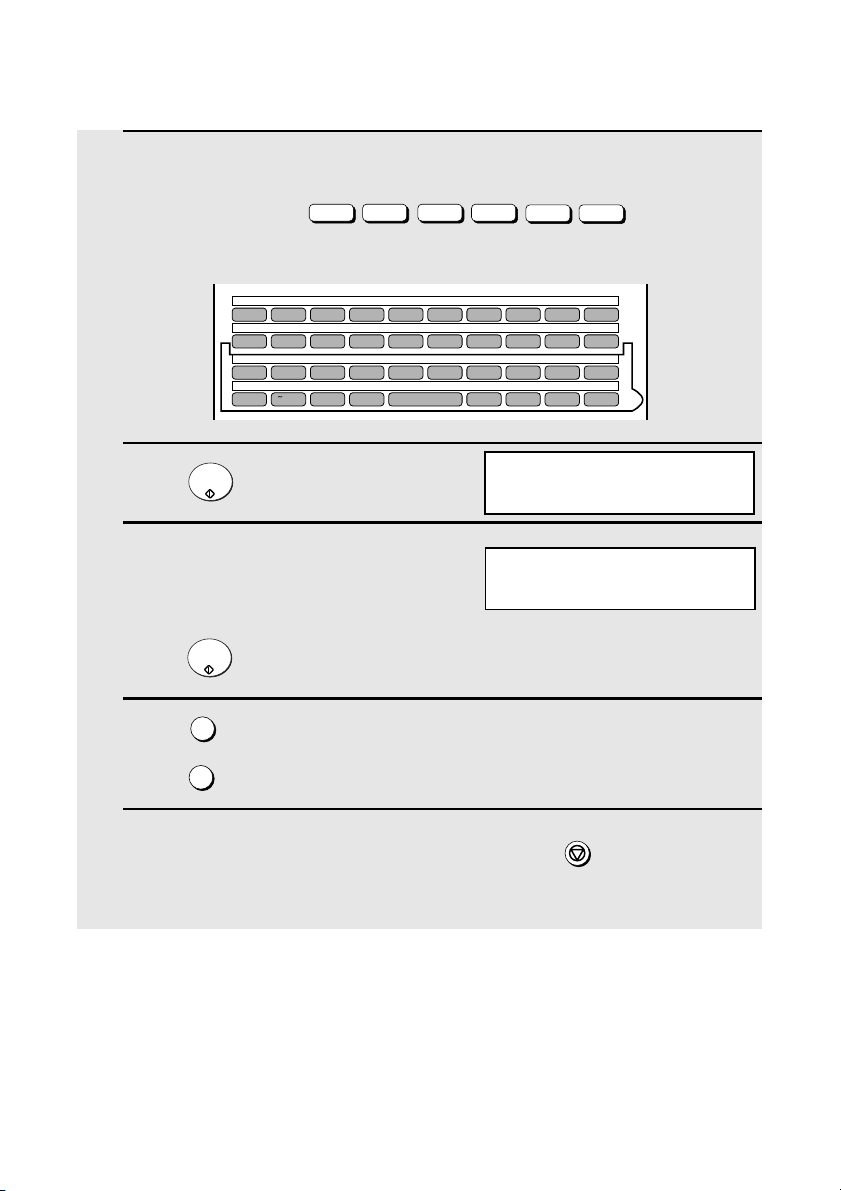
1 Press , and .
2 Press and .
3 Press to select SET.
4 Enter a 2-digit number from 01 to 10.
• This number will identify the personal directory book.
MENU
3
0
8
1
Display:
3:ENTRY MODE
ENTER #(01-08, , )
1:BOOK SET MODE
ENTER # (01 - 10)
08: BOOK ENTRY MODE
1=SET, 2=CLEAR
Creating and Using Personal Books
54
5 Enter a name for the personal directory book by pressing the letter entry
keys. (Make sure the Rapid Key overlay is down.)
Example: SHARP =
• For more information on entering letters, see Step 5 on page 25.
6 Press .
7 Enter a four-digit passcode for the
personal directory book (this can be
any four-digit number you like).
If you do not wish to use a passcode,
press to skip this step.
8 Press if you wish to use the book name in the header of faxes sent
using the book.
Press to use the sender’s name entered on page 24.
9 Return to Step 4 to create another book, or press repeatedly to
return to the date and time display.
Caps Lock
S H / }
A /
|
R / $
P / =
START/
ENTER
START/
ENTER
1
2
STOP
Q / ! W / " E / # R / $ T / % Y / & U / ' I / ( O / ) P / =
SYMBOL
A /
|
S D F G / { H / } J / [ K / ] L / +
Caps Lock
Z / < X / > C V B N / * M / ? @ .com
SHIFT
/ ^ / / \ ; / :
Space
_
- . / , DEL
01 02 03 04 05 06 07 08 09 10
11 12 13 14 15 16 17 18 19 20
21 22 23 24 25 26 27 28 29 30
31 32 33 34 35 36 37 38 39
ENTER PASSCODE
OR START TO SKIP
USE NAME AS FAX HDR
1=YES, 2=NO
Creating and Using Personal Books
55
2. Sending
Documents
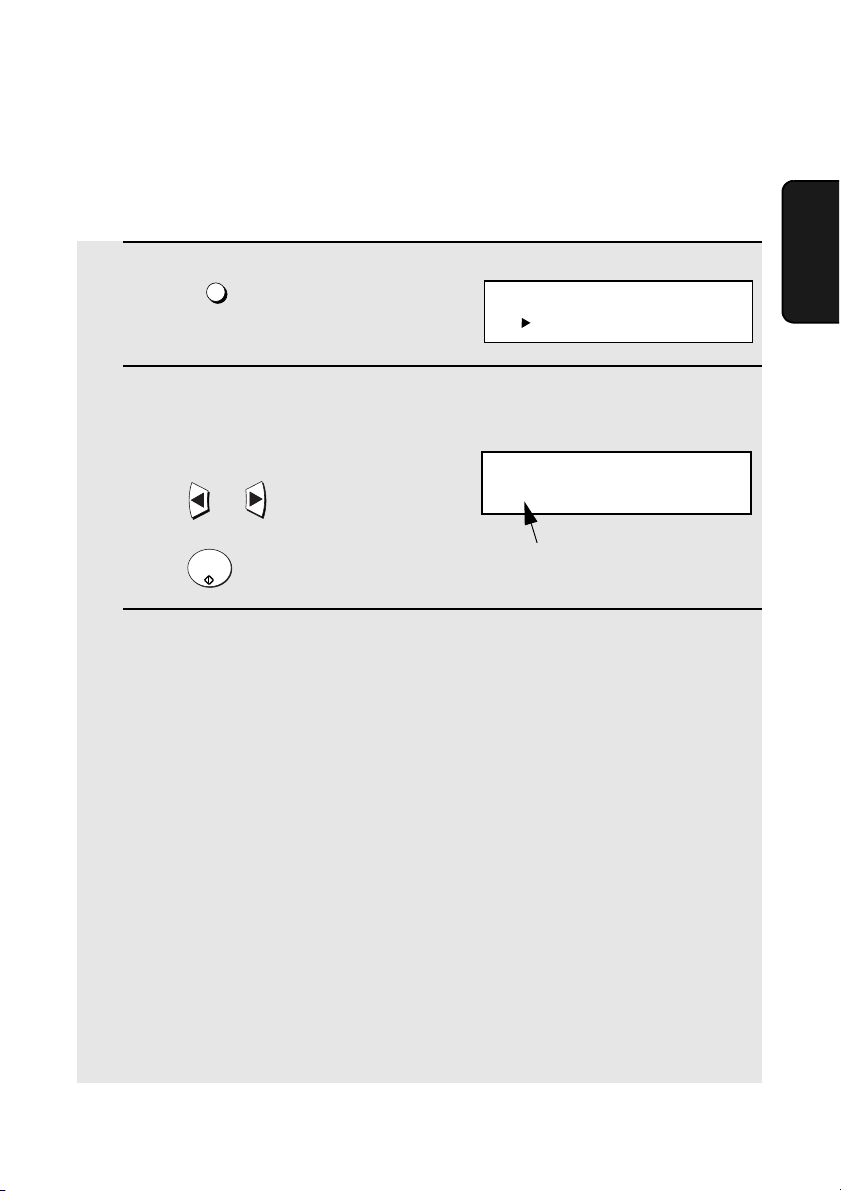
1 Press .
2 Enter the 4-digit passcode of your
book.
If the book doesn’t have a passcode,
press or until the name of the
book appears in the display and then
press .
3 When your book is open, all of the Rapid Keys on the operation panel
automatically convert to keys for use in your book. Speed Dial numbers
1 through 16 are also available for use in your book.
You can perform the following operations in a book:
♦ Program any Rapid Key, or a Speed Dial number from 1 to 16, as explained
on page 39.
♦ Use a Rapid Key to fax a document as explained on page 45.
♦ Use a Speed Dial number to fax a document as explained on page 46.
♦ Program a Group Key in your book using Rapid Key and Speed Dial
numbers from your book (see page 68).
♦ Broadcast a fax to multiple destinations using Rapid Keys, Speed Dial
numbers, or a Group Key in your book (see page 66).
♦ Set up a Program Key in your book (see page 86). (Note: Only Rapid Keys
and Speed Dial numbers from your book can be used.)
PERSONAL
BOOK
START/
ENTER
The name of your book
appears on the bottom line.
Using a personal book
To program or use a Rapid Key or Speed Dial number in a personal book, you
must first open the book. Follow these steps:
Display:
SELECT PERSONAL BOOK
BY KEY OR PASSCODE
** PERSONAL BOOK **
SUSAN
The display briefly shows the
following and then reverts to the
date and time:
Creating and Using Personal Books
56
♦ Poll one or more fax machines using Rapid Keys and Speed Dial numbers
from your book (see page 74).
♦ Set up a timer operation using a Rapid Key or Speed Dial number from your
book (see page 78).
♦ Print out the Destination List, Program/Group List, or Timer List (see page
116). When printed from your book, these lists will show the corresponding
information in your book.
♦ Press to redial the last number dialed from your book.
REDIAL
Closing a book
A book will automatically close when the operation performed from the book is
completed. If you need to close a book before performing an operation, press
.
The display shows:
Press to confirm that you want to close the book. Note that a book will
also close automatically after one minute if no operation is performed.
STOP
1
CANCEL BOOK?
1=YES, 2=NO
Canceling an operation performed from a book
To cancel an operation that was set up from a book, you must first open the
book (as explained on page 55) and then cancel the operation.
For example, if you need to cancel a fax transmission that was performed from
a book, open your book and then cancel the operation as explained on page
50 or 51. Note that the job status of the fax can be checked without opening
your book.
To clear a Rapid Key or Speed Dial number in a book, open the book and then
clear the key or number.

Creating and Using Personal Books
57
2. Sending
Documents
Clearing a book
Note: Before you can clear a personal book, you must clear all Rapid Keys,
Speed Dial numbers, Group Keys, and Program Keys that are in the book. If a
transmission or timer operation is pending that uses a number in a book, the
book cannot be cleared until the operation is completed or canceled.
1 Press , and .
2 Press and .
3 Press to select CLEAR.
4 Enter the 2-digit number of the book you wish to clear.
5 If the book has a passcode, enter the passcode.
6 Press .
7 Press repeatedly to return to the date and time display.
MENU
3
0
8
2
START/
ENTER
STOP
Display:
3:ENTRY MODE
ENTER #(01-08, , )
2: BOOK CLEAR MODE
ENTER # (01 - 10)
08: BOOK ENTRY MODE
1=SET, 2=CLEAR
Cover Sheet
58
Cover Sheet
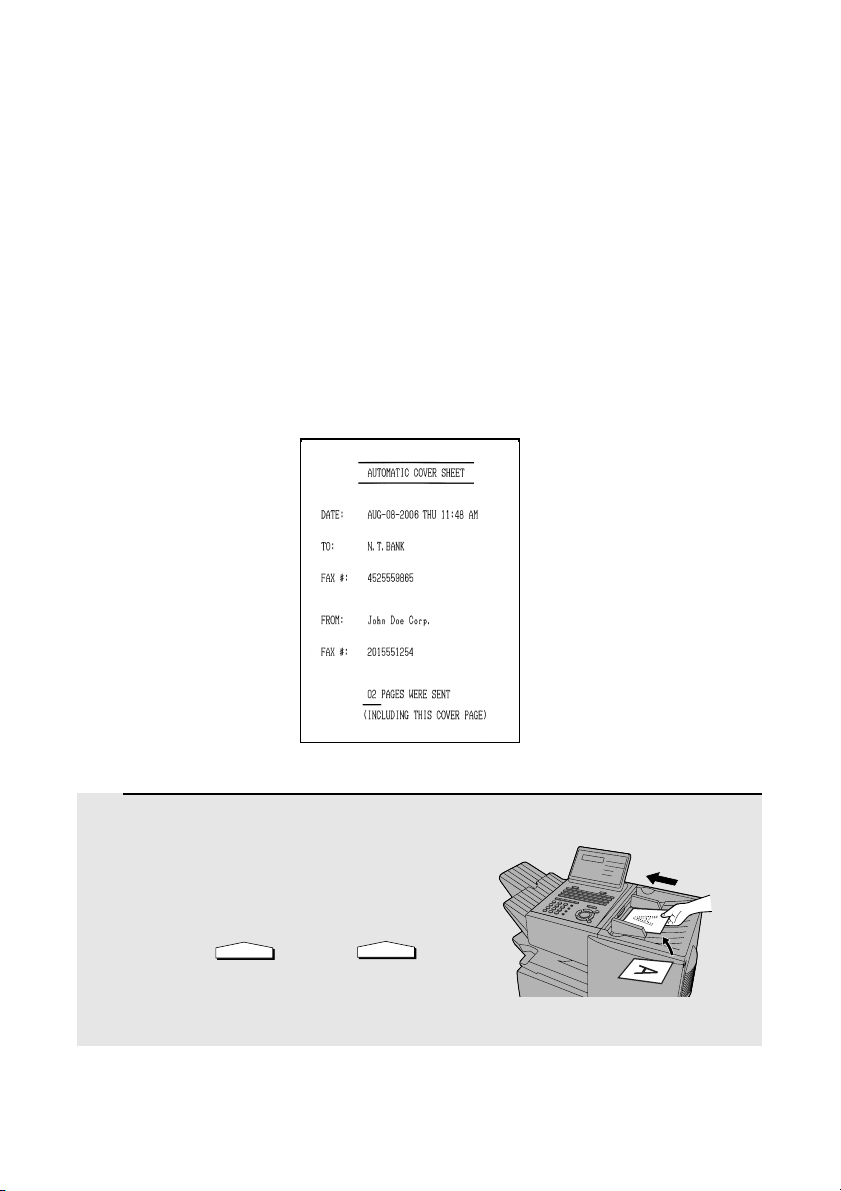
You can have the fax machine generate a cover sheet and send it as the last page
of your fax transmission. The cover sheet includes the date and time, the receiver’s
name and number if a Rapid Key or Speed Dial number is used, the sender’s
name and number, and the total number of pages.
♦ Your name and number must be programmed in order for them to appear
on the cover sheet (see page 24).
♦ To have the recipient’s name appear, you must dial using a Rapid Key or
Speed Dial number with the name programmed.
1 Load the document(s).
• SEND READY will appear in the
display.
• Press and/or to
set the resolution and contrast if
needed.
RESOLUTION
CONTRAST
(Example)
Cover Sheet
59
2. Sending
Documents
2 Press . (Flip up the Rapid Key
overlay if it is down.)
• The display will briefly show COVER SHEET MODE ENTERED and then
revert to SEND READY.
• To cancel the cover sheet selection, press .
3 Dial the receiving party and transmit the fax.
COVER SHEET
C
STOP
If desired, you can set your fax to automatically send a cover sheet with every
transmission (you do not have to press each time). This is
accomplished by setting Option Setting 10 (Auto Cover Sheet) to YES as
explained on page 110.
COVER SHEET
C
Batch Page Numbering
60
Batch Page Numbering
You can change the page numbering of the transmitted document from simple
numbering ("P.01", "P.02", etc.) to batch numbering, which means that a slash
and the total number of pages being sent are added after each page number
(for example, "P. 01/05", "P.02/05", etc.). This allows the receiver to check for
missing pages.
1 Load the document(s).
• SEND READY will appear in the
display.
• Press and/or to
set the resolution and contrast if
needed.
2 Press . (Flip up the Rapid Key
overlay if it is down.)
3 Enter the total number of pages (“01” to “99”) by pressing the numeric
keys.
Example: 5 pages
• If you are sending a cover sheet, do not include it in the total number of
pages (the number will be adjusted automatically).
4 Dial the receiving machine and transmit the document.
♦ If you need to cancel a batch number entry, remove the document from the
feeder or press .
♦ If the number of pages actually transmitted does not coincide with the batch
number entered, the alarm will sound and PAGE COUNT ERROR will
appear in the display. PAGE E. will also appear in the NOTE column of the
Transaction Report if printed.
RESOLUTION
CONTRAST
Caps Lock
PAGE COUNTER
0
5
STOP
ENTER # OF PAGE(S)
ENTER # (01-99)
Display:

61
3. Receiving
Documents
3. Receiving Documents
The fax machine has two modes for receiving calls:
AUTO mode:
Select this mode when you only want to receive faxes on the line connected to
the fax machine. The fax machine will answer all calls automatically and
receive incoming faxes.
MANUAL mode:
Select this mode when you have an extension phone connected to the same
line as the fax machine and you want to receive both faxes and voice calls. All
calls, including faxes, must be answered by picking up the extension
phone.
Setting the reception mode
The reception mode is initially set to AUTO. To change the reception mode,
follow these steps:
1 Press and .
2 Press to select AUTO, or to select MANUAL.
MENU
1
1 2
1:RECEIVE MODE
1=AUTO, 2=MANUAL
Using AUTO Reception Mode
In AUTO reception mode, the fax machine automatically answers all calls on
one ring and receives incoming faxes.
♦ You can change the number of rings on which the machine answers calls
by changing Option Setting 2 (see page 108).
♦ If you pick up an extension phone before the fax machine answers, you can
talk to the other party and/or receive a fax as explained in the following
section, Using MANUAL Reception Mode.
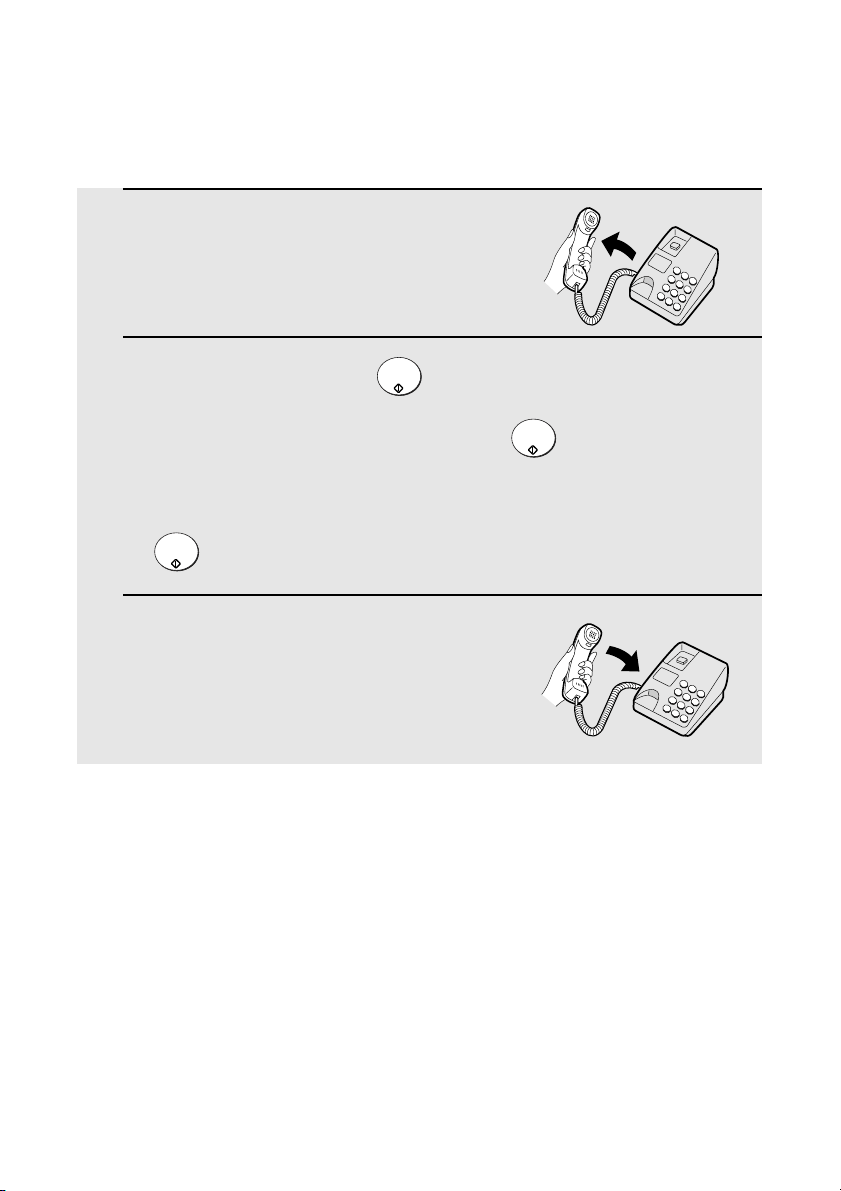
Using MANUAL Reception Mode
62
1 When the fax machine rings, answer
the call on an extension phone
connected to the same line.
2 If you hear a fax tone, press on the fax machine.
• If the other party first speaks with you, press after speaking. (Press
your START key before the sender presses their Start key.)
• If there is a document in the feeder, remove the document before pressing
(otherwise the document will be transmitted).
3 When RECEIVING appears in the
display, hang up.
START/
ENTER
START/
ENTER
START/
ENTER
Using MANUAL Reception Mode
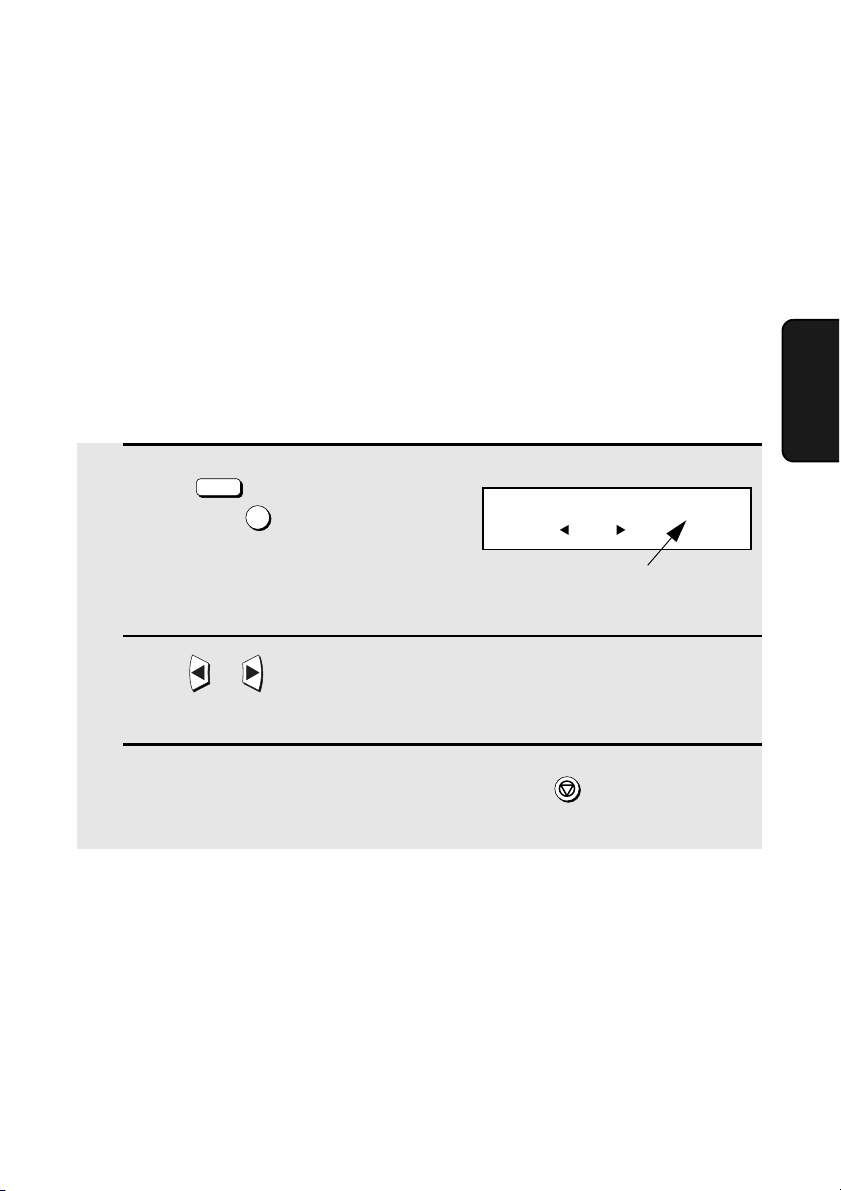
Substitute Reception to Memory
63
3. Receiving
Documents
1 Press (flip up the Rapid Key
overlay) and .
2 Press or to scroll through the list of received faxes. The name (or
number) of the sender of each document will successively appear in the
display.
3 When you have finished checking the list, press twice to return to
the date and time display.
MEM.STATUS
B
3
STOP
Display:
RX STATUS (003)
PRESS OR
The number of received
faxes appears here
Substitute Reception to Memory
In situations where printing is not possible, such as when the fax machine
runs out of paper or toner, or a paper jam occurs, incoming faxes will be
received to memory.
When you have received a fax to memory, FAX RCVD IN MEMORY will
appear in the display, alternating with NO PAPER, REPLACE TONER, or
PAPER JAM. When you add paper, replace the toner cartridge, or clear the
jam, the stored faxes will automatically print out.
You can display information on faxes received to memory by following these
steps:
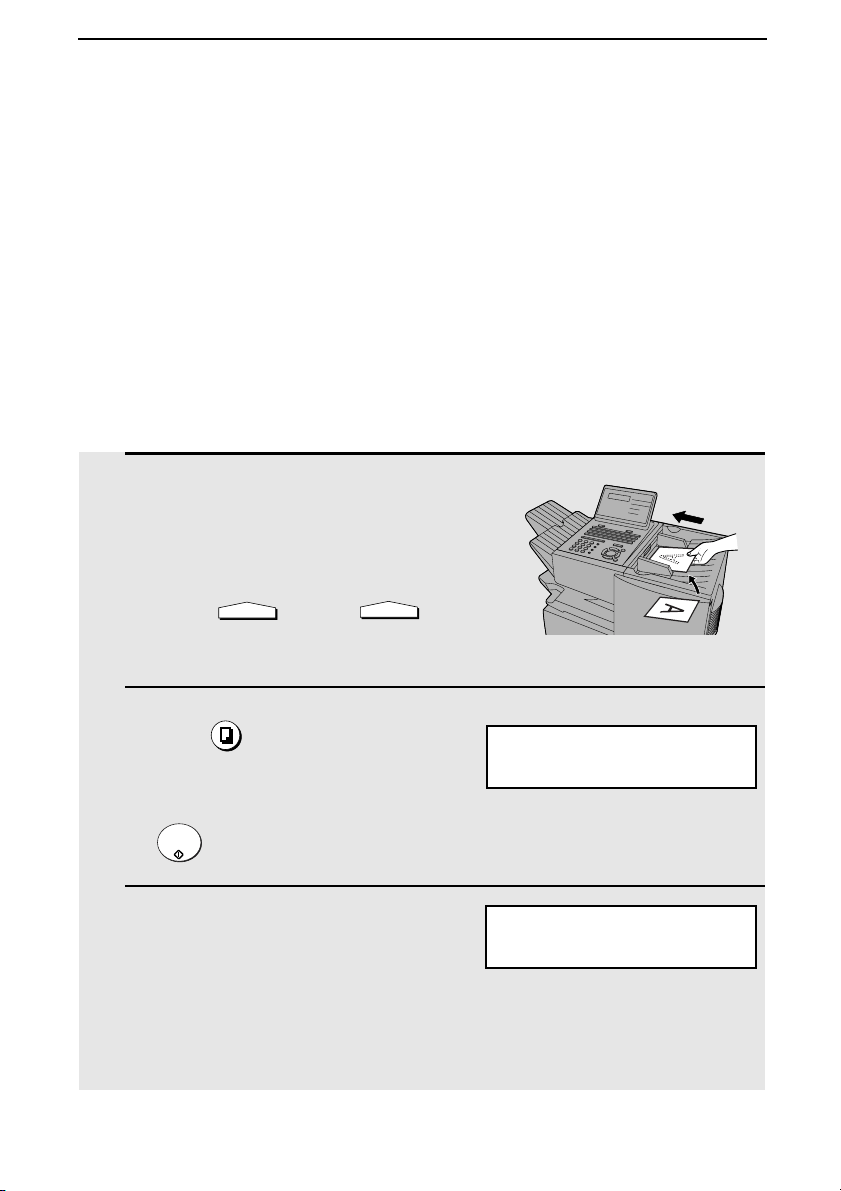
64
4. Making Copies
Your fax machine can also be used to make copies. Single and multiple copies
(up to 99 per original) can be made, enabling the fax machine to double as an
office copier.
♦ You can perform all steps of a copy job even when the fax machine is busy
printing other copy jobs, or when it is printing a received fax after the line
has been disconnected. Your copy job will be automatically stored in
memory and then printed when all previous printing jobs are completed.
♦ The default resolution for copying is FINE. If desired, you can change the
default resolution to SUPER FINE by changing Option Setting 30 (see page
114).
1 Load the document.
• SEND READY will appear in the
display.
• Press and/or to
set the resolution and contrast if
needed.
2 Press .
• If you are only making a single copy of
the original (or of each original), press
. Copying will begin.
3 Enter the desired number of copies per
original with the numeric keys.
• If the desired number of copies is from
1 to 9, enter “0” first.
RESOLUTION
CONTRAST
COPY/HELP
START/
ENTER
COPY MODE
ENTER #(01-99) 01
Display:
MULTI/SORT COPY MODE
1=MULTI, 2=SORT
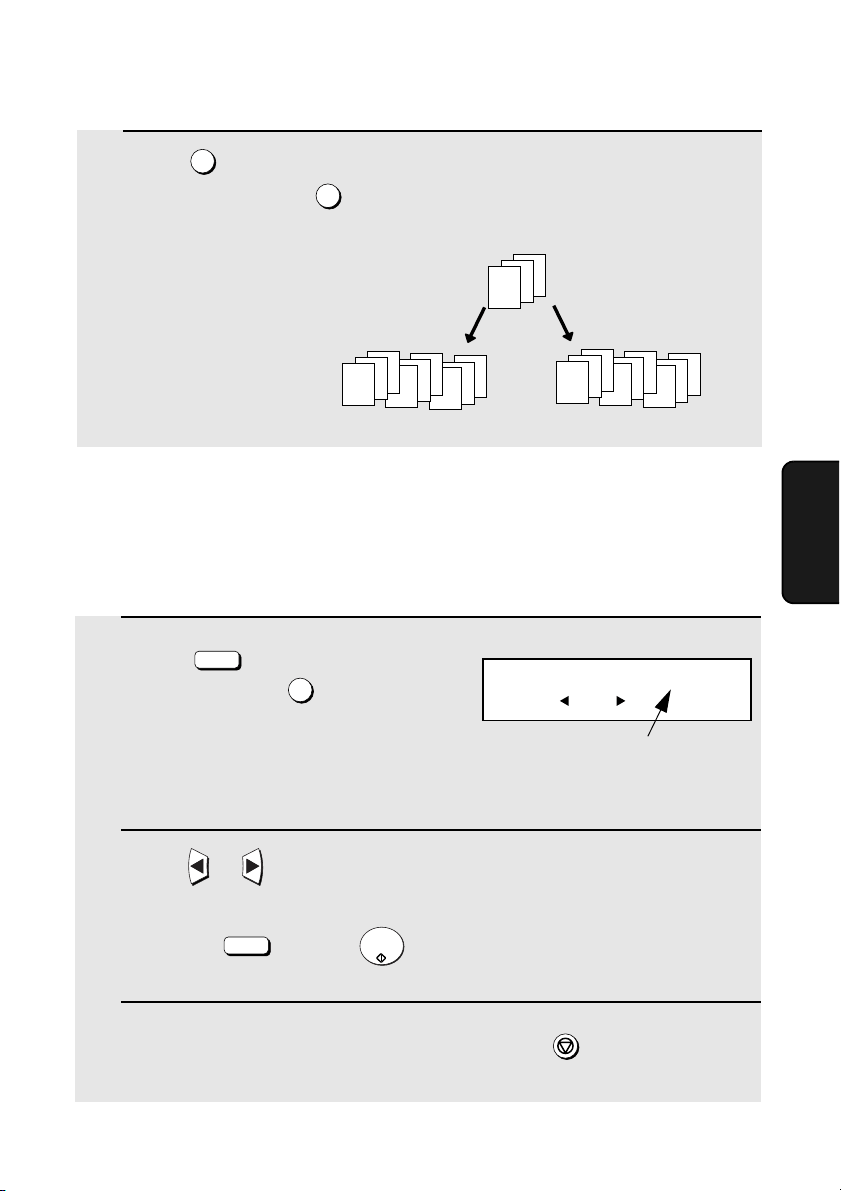
Making Copies
65
4. Making
Copies
4 Press (MULTI) if you do not want
the copies sorted, or (SORT) if you
want the copies sorted.
• Copying will begin.
1
2
Checking and canceling copy jobs in memory
You can display the status of copy jobs in memory by following the steps
below. You can also cancel a copy job with this procedure.
Example of three copies
each of three originals
A
B
C
A
B
C
A
B
C
A
B
C
C
C
C
B
B
B
A
A
A
Originals
Sorted
(SORT COPY)
Not sorted (MULTI COPY)
1 Press (flip up the Rapid Key
overlay) and then .
2 Press or to scroll through the list of copy jobs. The time the
original was scanned into memory will appear in the display, together
with the 3-digit memory number assigned to the job. To cancel a copy
job, press and then while the copy job appears in the
display.
3 When you have finished checking the list, press twice to return to
the date and time display.
MEM.STATUS
B
1
DEL
START/
ENTER
STOP
Display:
COPY STATUS (005)
PRESS OR
The number of
stored copy jobs
appears here
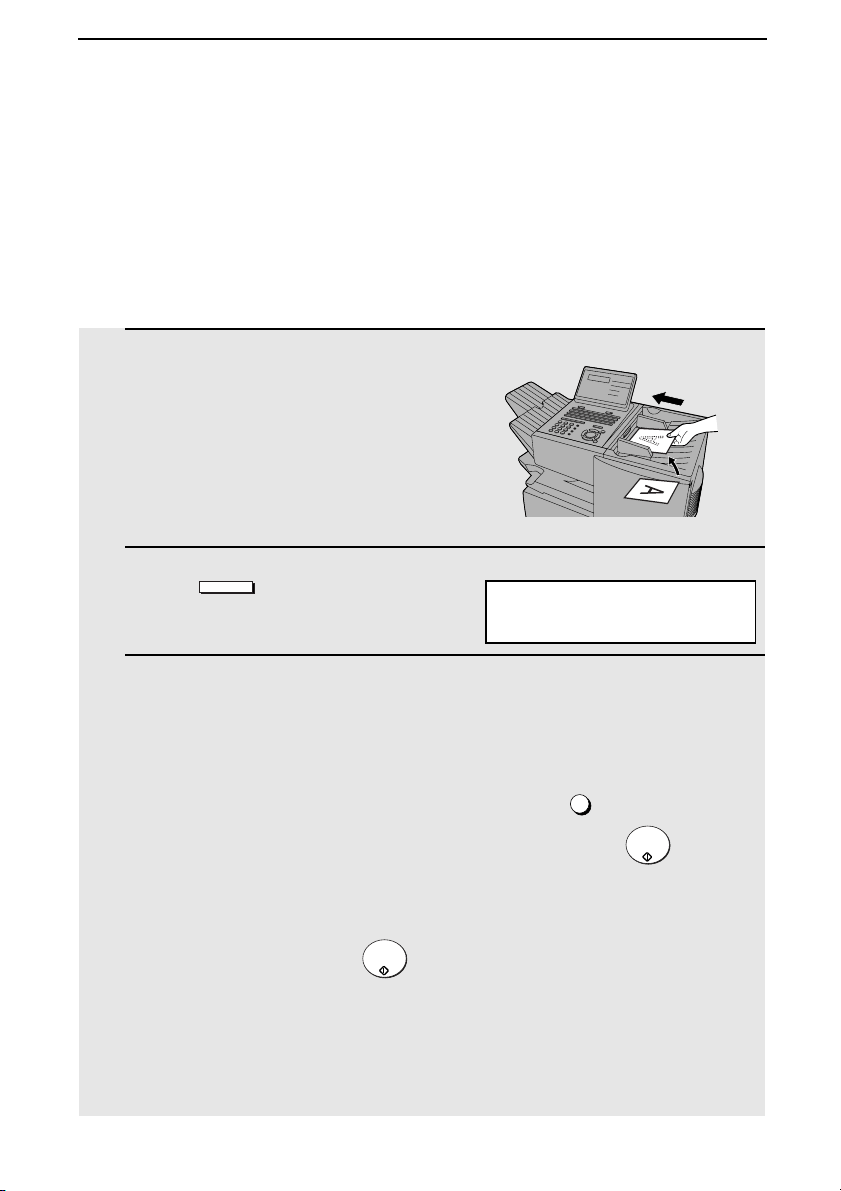
66
5. Special Functions
Broadcasting
The Broadcasting function allows you to send the same fax to as many as 154
destinations in a single operation. First load the document, then enter the
numbers of the receiving machines. The document will be automatically
transmitted to each destination.
1 Load the document (s).
• SEND READY will appear in the
display.
2 Press .
3 Dial the receiving machines using one or more of the following
methods:
• Press one or more Rapid Keys.
• Enter one or more Speed Dial numbers, pressing before each
number. (If you enter less than 2 digits for a number, press to
complete the entry.)
• Enter one or more full fax numbers with the numeric keys (max. 60 digits
per full number), pressing after each full number. (Maximum of 20 full
numbers; less if a large number of programs, timer operations, and/or
group keys have been stored.)
• Press one or more Group Keys. (See Storing numbers in Group Keys on
page 68.)
BROADCAST
SPEED DIAL
START/
ENTER
START/
ENTER
BROADCAST MODE
ENTER STATION #
Display:
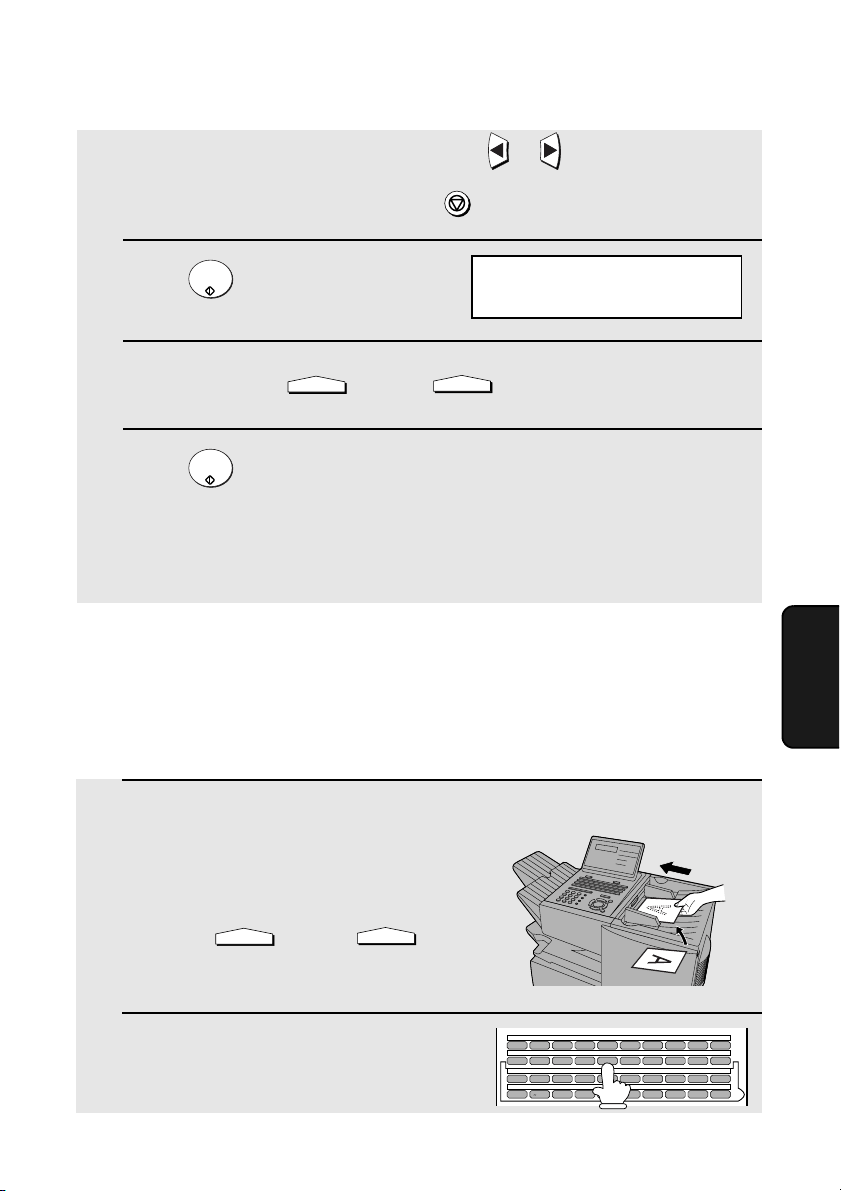
Broadcasting
67
5. Special
Functions
Note: If you need to delete a number, press or until the destination
appears in the display and then press .
4 Press .
5 If desired, press and/or to set the resolution and
contrast.
6 Press twice. Transmission will begin.
• A Transaction Report is automatically printed out after Broadcasting is
completed. Check the "Note" column of the report to see if any of the
locations are marked "Busy" or have a communication error code. If so,
send the document to those locations again.
STOP
START/
ENTER
RESOLUTION
CONTRAST
START/
ENTER
Broadcasting using a Group Key
If the fax machines to which you want to broadcast have all been programmed
into one Group Key (see Storing numbers in Group Keys which follows), you
can perform the broadcasting operation using the following simplified
procedure:
1 Load the document(s).
• SEND READY will appear in the
display.
• Press and/or to
set the resolution and contrast if
needed.
2 Press the appropriate Group Key.
Transmission will begin.
RESOLUTION
CONTRAST
BROADCAST MODE
SELECT THE MODE
Q / ! W / " E / # R / $ T / % Y / & U / ' I / ( O / ) P / =
SYMBOL
A /
|
S D F G / { H / } J / [ K / ] L / +
Caps Lock
Z / < X / > C V B N / * M / ? @ .com
SHIFT
/ ^ / / \ ; / :
Space
_
- . / , DEL
01 02 03 04 05 06 07 08 09 10
11 12 13 14 15 16 17 18 19 20
21 22 23 24 25 26 27 28 29 30
31 32 33 34 35 36 37 38 39
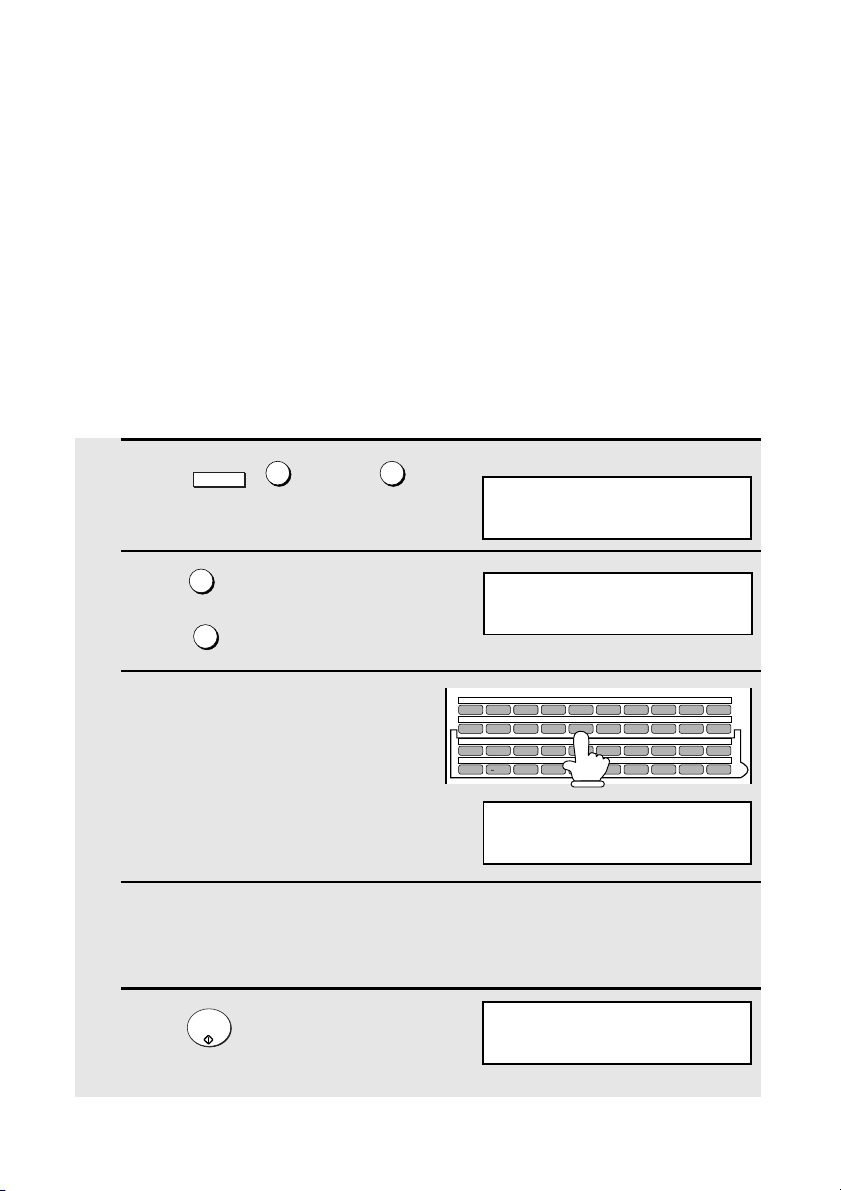
Broadcasting
68
Storing numbers in Group Keys
Group Keys allow you to dial a group of fax numbers by simply pressing the
appropriate Group Key once. To store a group of numbers in a Group Key,
follow the steps below.
♦ Any Rapid Key that is not already programmed as a Rapid Key or a
Program Key can be used as a Group Key.
♦ Up to 133 numbers can be stored in one Group Key.
♦ Only Rapid Key and Speed Dial numbers (excluding numbers set for Chain
Dialing) can be stored in a Group Key. Full numbers cannot be stored.
1 Press , and then .
2 Press to program a Group Key.
(Press to clear a Group Key.)
3 Press any Rapid Key not already
programmed to select it as a Group
Key.
(If you are clearing a Group Key,
press it and go to Step 5.)
4 Enter a name for the Group Key by pressing the letter entry keys (see
Step 5 on page 25). (Maximum of 20 characters.)
If you don’t want to enter a name, go directly to Step 5.
5 Press .
MENU
5
2
1
2
START/
ENTER
Display:
2:GROUP ENTRY MODE
1=SET, 2=CLEAR
1:GROUP SET
PRESS GROUP KEY
Q / ! W / " E / # R / $ T / % Y / & U / ' I / ( O / ) P / =
SYMBOL
A /
|
S D F G / { H / } J / [ K / ] L / +
Caps Lock
Z / < X / > C V B N / * M / ? @ .com
SHIFT
/ ^ / / \ ; / :
Space
_
- . / , DEL
01 02 03 04 05 06 07 08 09 10
11 12 13 14 15 16 17 18 19 20
21 22 23 24 25 26 27 28 29 30
31 32 33 34 35 36 37 38 39
ENTER GROUP NAME
STATION # =
ENTER STATION #
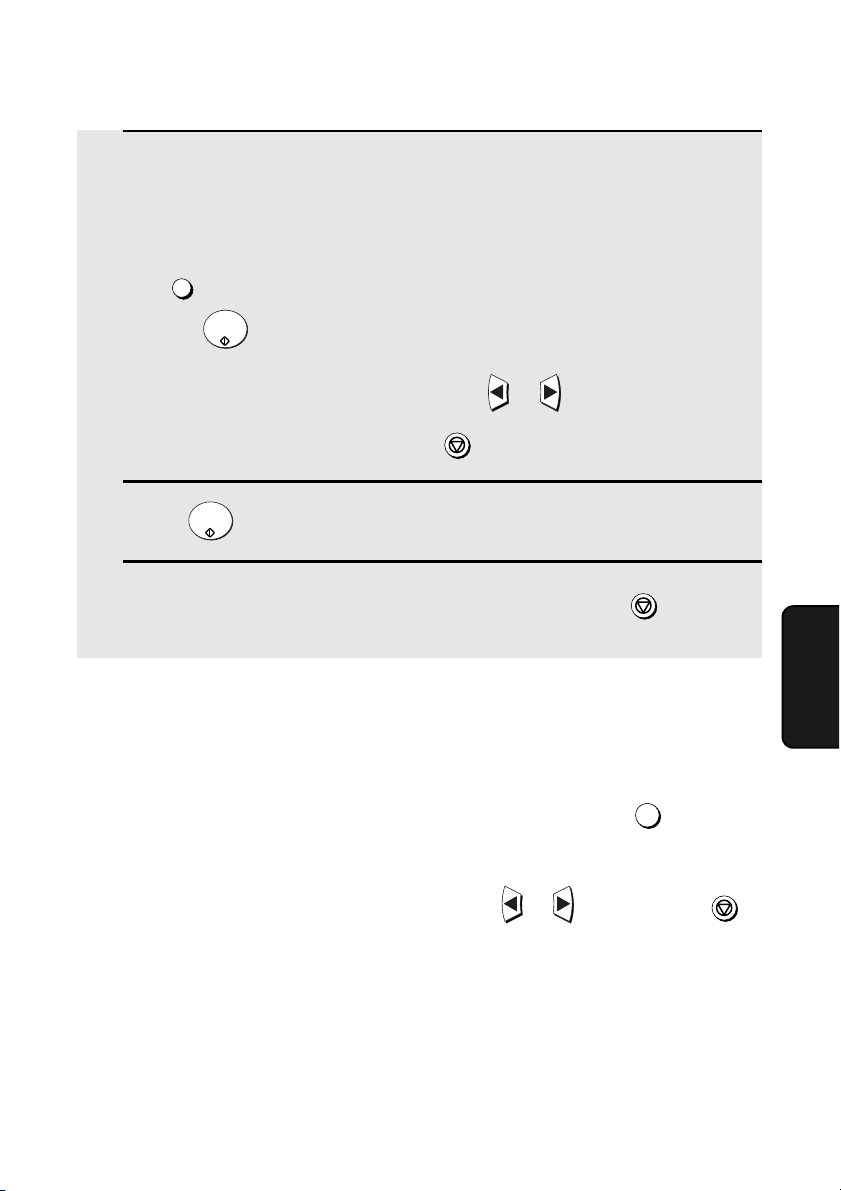
Broadcasting
69
5. Special
Functions
Editing a group
If necessary, you can add numbers to or delete numbers from a group by
repeating the programming procedure for the Group Key. Press for SET in
Step 2 and select the Group Key in Step 3. Add or delete numbers in Step 6.
To add a number, press a Rapid Key or enter a Speed Dial number. To delete
a number, move the cursor to the number with or and then press .
1
STOP
6 Enter fax numbers using one or both of the following methods:
• Press one or more Rapid Keys.
• Enter one or more Speed Dial numbers with the numeric keys, pressing
before each number (if you enter less than 2 digits for a number,
press to complete the entry).
Note: If you need to delete a number, press or until the destination
appears in the display and then press .
7 Press .
8 Return to Step 3 to program another Group Key, or press
repeatedly until you return to the date and time display.
SPEED DIAL
START/
ENTER
STOP
START/
ENTER
STOP

Confidential Operations
70
Confidential Operations
The Confidential function can be used to transmit and receive confidential
documents.
Confidential transmission
When you send a document using the Confidential function, the receiving
machine holds it in memory instead of immediately printing it out. When the
receiving party enters the correct passcode, the document is printed out.
♦ Confidential transmission is only possible when the receiving machine is a
Sharp model with confidential reception capability.
♦ To use this function, your name and fax number (OWN PASSCODE) must
be entered in your fax machine as explained on page 24.
♦ Some fax machines have multiple mailboxes for receiving confidential
faxes. If you are sending to a machine with multiple confidential mailboxes,
contact the receiving party in advance for the appropriate mailbox number.
1 Load the document (s).
• SEND READY will appear in the
display.
• Press and/or to
set the resolution and contrast if
needed.
2 Press (flip up the Rapid Key
overlay if it is down) and then .
RESOLUTION
CONTRAST
CONFIDENTIAL
Z/<
1
1:CONF. TX
ENTER BOX # OR START
Display:
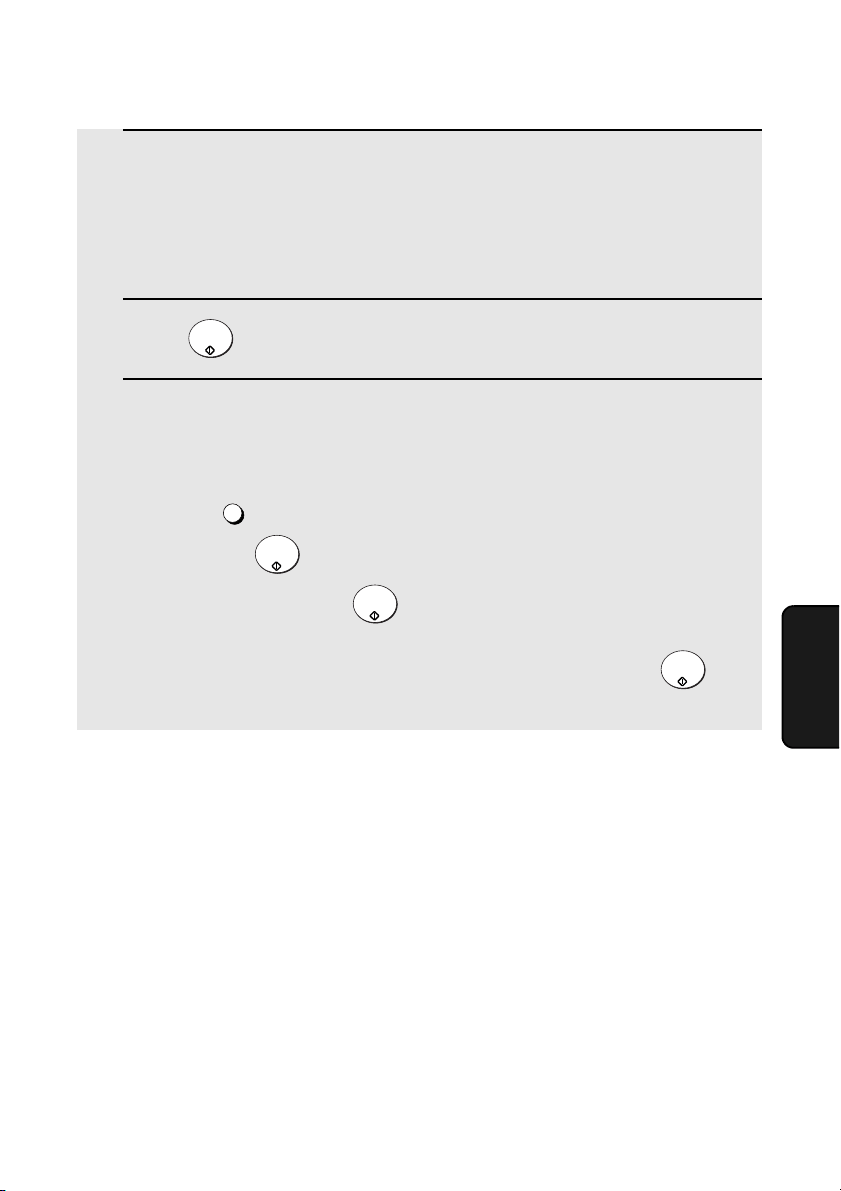
Confidential Operations
71
5. Special
Functions
3 If the receiving machine has multiple confidential mailboxes, enter the
appropriate mailbox number with the numeric keys (this step is required
for machines with multiple mailboxes).
If the receiving machine doesn’t have multiple mailboxes, go directly to
Step 4.
4 Press .
5 Dial the receiving machine using one of the following methods:
• Press a Rapid Key.
• Press and enter a Speed Dial number (if you enter less than 2
digits, press to complete the entry). Check the name or number that
appears, and then press .
• Enter a full telephone number with the numeric keys, and press .
Transmission will take place once the connection is established.
START/
ENTER
SPEED DIAL
START/
ENTER
START/
ENTER
START/
ENTER
Confidential reception
When another fax machine sends you a document by confidential
transmission, your fax machine holds it in memory instead of immediately
printing it out. The document cannot be printed out until you enter the correct
passcode.
Your fax has 10 "mailboxes" in which confidential documents can be received.
Each mailbox has its own passcode, allowing up to 10 different people or
groups to each receive their own confidential documents. The mailboxes are
identified by 2-digit numbers.

Confidential Operations
72
1 Press (flip up the Rapid Key
overlay if it is down) and then .
2 Enter a 2-digit number (from "00" to "99") by pressing the numeric keys.
This number identifies the mailbox.
3 Enter a 4-digit passcode for the mailbox with the numeric keys.
4 Press .
5 Enter a name for the mailbox (max. of 20 characters) by pressing the
letter entry keys (make sure the Rapid Key overlay is down).
Example: SHARP =
• For more information on entering letters, see Step 5 on page 25.
6 Press .
Note: After entering the passcode, the fax machine will print it out for your
records. If you forget the passcode and have kept no record, contact your Sharp
dealer.
CONFIDENTIAL
Z/<
3
START/
ENTER
Caps Lock
S H / }
A /
|
R / $
P / =
START/
ENTER
Programming the confidential passcode
To receive a confidential document, you must first program a 2-digit mailbox
number and a 4-digit passcode.
Note: Be sure to inform the transmitting party of your 2-digit mailbox number in
advance. The transmitting party will need this number to send you confidential
faxes.
.
3:CONF. CODE SET
ENTER BOX # (00-99)
Display:
Q / ! W / " E / # R / $ T / % Y / & U / ' I / ( O / ) P / =
SYMBOL
A /
|
S D F G / { H / } J / [ K / ] L / +
Caps Lock
Z / < X / > C V B N / * M / ? @ .com
SHIFT
/ ^ / / \ ; / :
Space
_
- . / , DEL
01 02 03 04 05 06 07 08 09 10
11 12 13 14 15 16 17 18 19 20
21 22 23 24 25 26 27 28 29 30
31 32 33 34 35 36 37 38 39

Confidential Operations
73
5. Special
Functions
Clearing a passcode
1 Press (flip up the Rapid Key
overlay if it is down) and then .
2 Enter the 2-digit number that identifies the mailbox you want to clear.
3 Enter the 4-digit passcode of the mailbox with the numeric keys.
4 Press .
CONFIDENTIAL
Z/<
4
START/
ENTER
Printing out received documents
When you have received a confidential document, RCVD CONF. FAX will
appear in the display. Print out the Confidential Reception List as explained on
page 116 to see which mailbox has received the document, and then follow
the steps below to print out the document.
4:CONF. CODE CLEAR
ENTER BOX # (00-99)
1 Press (flip up the Rapid Key
overlay if it is down) and .
2 Enter your mailbox number.
3 Enter your confidential passcode.
4 Press .
• Printing will begin. After printing, the document will be erased from memory.
CONFIDENTIAL
Z/<
2
START/
ENTER
2:CONF. DATA PRINT
ENTER BOX # (00-99)
Display:
Display:
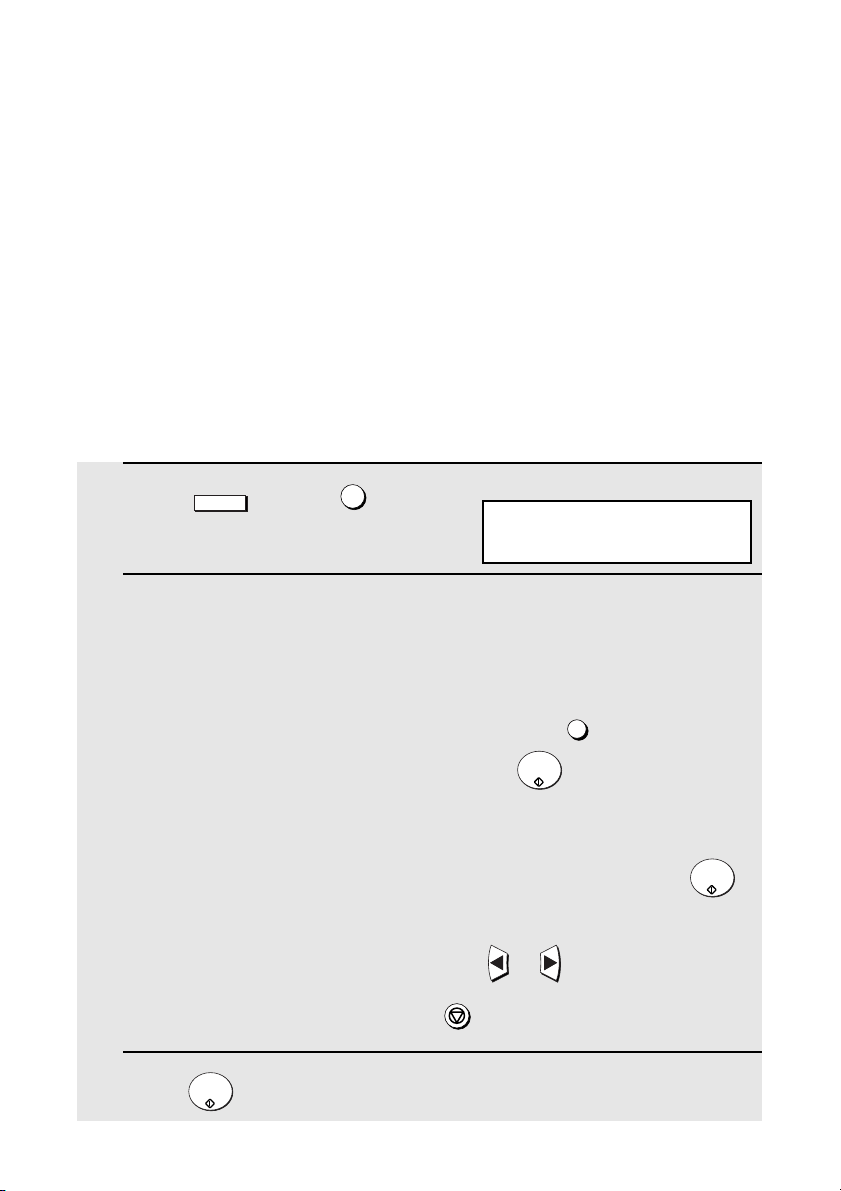
Polling
74
Polling
Polling allows you to call another fax machine and have it send a document to
your machine without operator assistance. In other words, the receiving fax
machine, not the transmitting fax machine, initiates the transmission. You can
use your fax machine to both poll and be polled by others.
Polling others
To poll another fax machine, follow the steps below.
♦ If desired, you can dial more than one fax number to receive documents
consecutively from a group of fax machines (this is called "Serial Polling"; a
maximum of 154 fax machines can be polled in one operation).
1 Press and then .
2 Dial the number(s) of the fax machine(s) you want to poll using one (or
more) of the following methods:
• Press one or more Rapid Keys.
• Enter one or more Speed Dial numbers, pressing before each
number. (If you enter less than 2 digits, press to complete the entry.)
• Press one or more Group Keys.
• Enter one or more full fax numbers with the numeric keys, pressing
after each full number.
Note: If you need to delete a number, press or until the destination
appears in the display and then press .
3 Press . Reception will begin.
MENU
6
SPEED DIAL
START/
ENTER
START/
ENTER
STOP
START/
ENTER
Display:
6: SERIAL POLL. MODE
ENTER STATION #
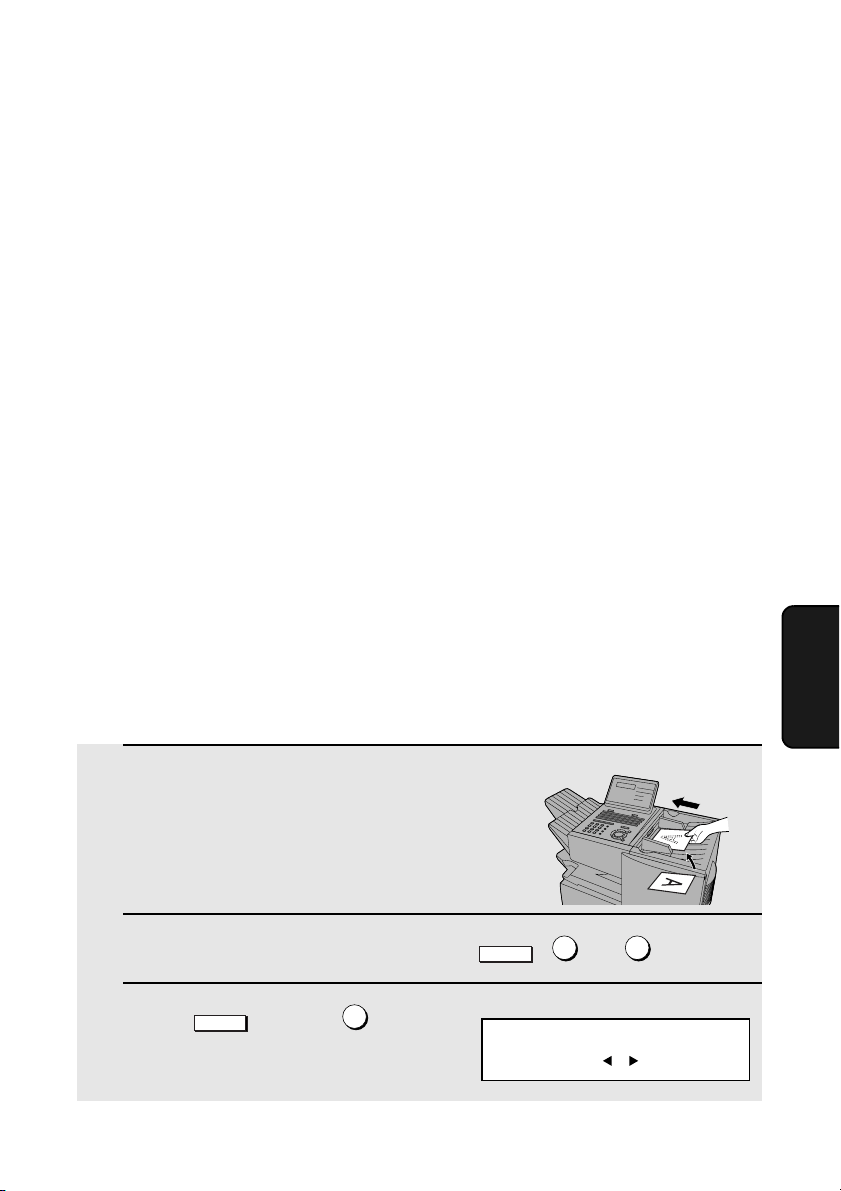
Polling
75
5. Special
Functions
Serial Polling using a Group Key
If the fax machines you want to poll have all been programmed into one Group
Key, you can poll them by simply pressing that Group Key. (The procedure for
programming Group Keys is explained on page 68.)
♦ Make sure no documents are in the feeder before you press the Group Key.
Being polled (Memory polling)
To let another fax machine poll your fax machine, you must first store the
document(s) in memory using the following procedure. Transmission will take
place when the other fax machine calls your fax machine and activates
polling. You can choose whether to allow polling only once, or an unlimited
number of times. In the latter case, your fax machine can be used as an
electronic "bulletin board".
♦ Multiple documents can be stored for memory polling. To add a document
to others already stored, simply repeating the storing procedure (note that if
Department Control is activated, documents cannot be added by a
department other than that which stored the first document). When polling
is initiated, the polling machine will receive all documents stored.
♦ If you allow polling only once, the document(s) will be automatically cleared
from memory after polling. If you allow polling an unlimited number of times,
the document will remain in memory until you clear it as explained in the
following section, Clearing a document.
1 Load the document.
2 Set the reception mode to AUTO (press , and ).
3 Press and then .
MENU
1 1
MENU
7
Display:
7:MEMORY POLL MODE
ENTER #(1-2, , )
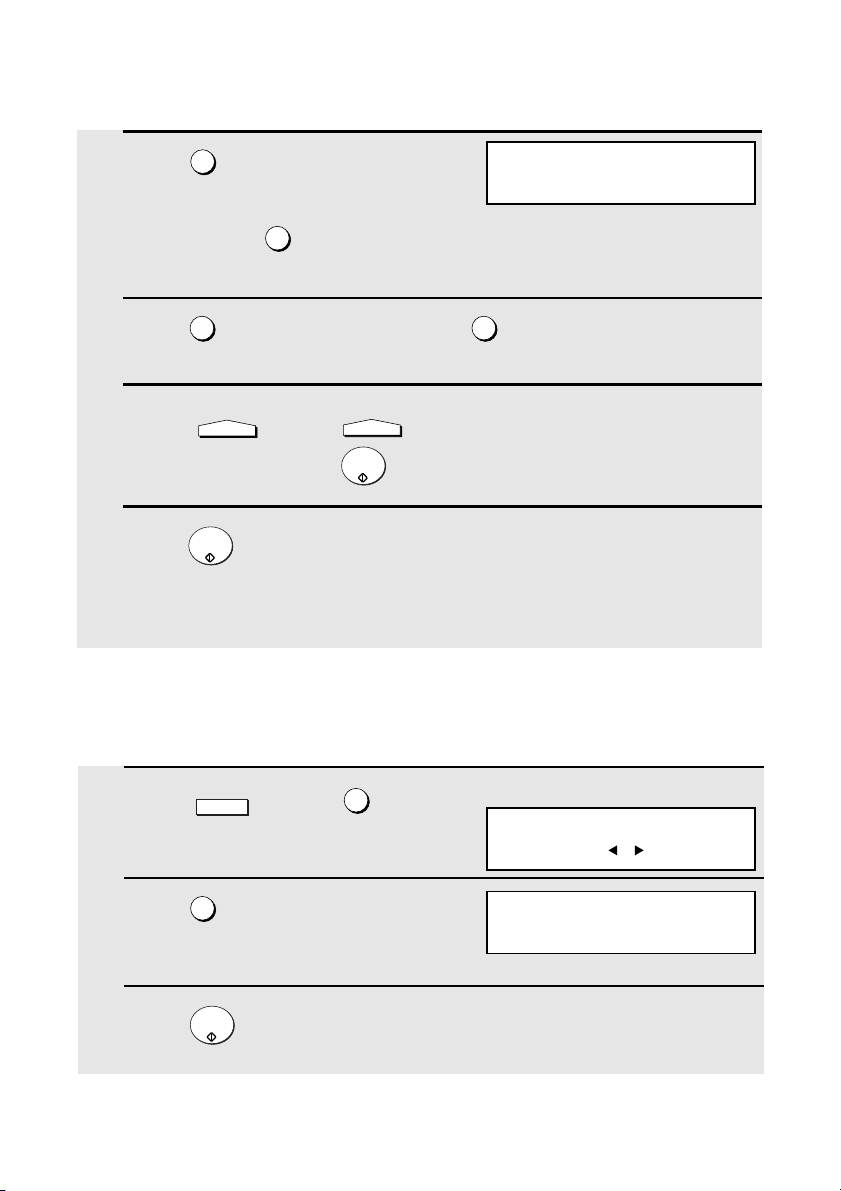
Polling
76
4 Press to select SET.
• If another document has already been
stored, press to select APPEND,
and go to Step 6.
5 Press to allow polling only once, or to allow polling an unlimited
number of times.
6 Press and/or to adjust the resolution and contrast if
desired, and then press .
7 Press .
• The document will be scanned into memory, and your fax will go on polling
standby.
1
1
1 2
RESOLUTION
CONTRAST
START/
ENTER
START/
ENTER
1 Press and then .
2 Press to select CLEAR.
3 Press to clear the documents.
MENU
7
2
START/
ENTER
Clearing a document
To clear a memory poll document from memory, follow the steps below:
1:MEMORY POLL SET
1=1 TIME, 2=REPEAT
Display:
7:MEMORY POLL MODE
ENTER #(1-2, , )
2:MEMORY POLL CLEAR
PRESS START TO CLEAR

Polling
77
5. Special
Functions
Polling Security
Polling Security allows you to prevent unauthorized polling of your machine.
When this function is activated, polling will only take place when the fax
number of the polling fax machine has been stored in your machine’s list of
permitted fax numbers (called "passcode numbers"). The polling machine
must also have its fax number programmed in itself, as explained in Entering
Your Name and Fax Number in Chapter 1.
Turning Polling Security on and off
Polling Security is turned on or off with Option Setting 8 as explained on page
109.
Storing and clearing fax numbers for polling permission
You can store up to 10 fax numbers in your machine’s list of permitted
numbers.
1 Press , , , .
2 Press to set a number.
(Press to clear a number.)
3 Storing: Enter a 2-digit number (from 01 to 10).This number identifies
the fax number you will enter in the next step.
Clearing: Enter the 2-digit number which identifies the fax number you
want to clear, and go to Step 5.
4 Enter the fax number (max. 20 digits) by pressing the numeric keys.
5 Press .
6 Return to Step 3 to enter (or clear) another number, or press
repeatedly to return to the date and time display.
MENU
3
0
2
1
2
START/
ENTER
STOP
02:PASSCODE # MODE
1=SET, 2=CLEAR
1:PASSCODE SETTING
ENTER # (01-10)
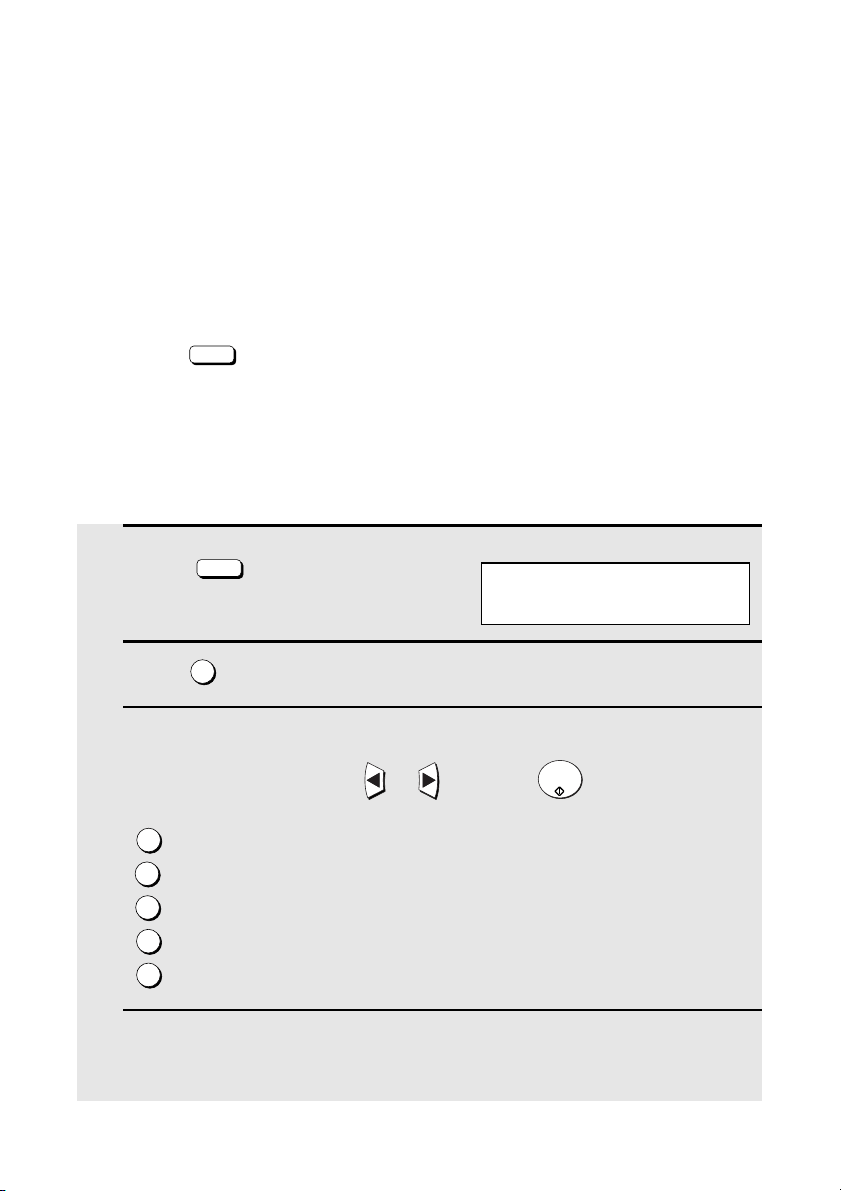
Timer Operations
78
Timer Operations
The Timer function allows you to store a job to be performed automatically at
a specified time. Up to 59 timer jobs can be stored at any one time, and the
time of each can be specified up to a week in advance.
You can use this function to take advantage of lower off-peak rates without
having to be there when the operation is performed.
Note: cannot be used for a timer transmission.
Initial procedure
To store a timer job, first perform the following procedure. After you have
completed this procedure, go to the procedure for the specific job you want to
store (see the following pages).
DOCUMENT
M/?
1 Press . (Flip up the Rapid Key
overlay if it is down.)
2 Press to select SET.
3 Enter a number as follows to select the desired operation (or scroll to
the desired operation with or and press ).
Transmission (SEND MODE)
Confidential transmission
Polling
Serial Polling
Broadcasting
4 Enter a two-digit number for the hour (“01” to “12”) and a two-digit
number for the minute (“00” to “59”).
TIMER
X/>
1
START/
ENTER
1
2
3
4
5
Display:
TIMER MODE
1=SET, 2=CLEAR
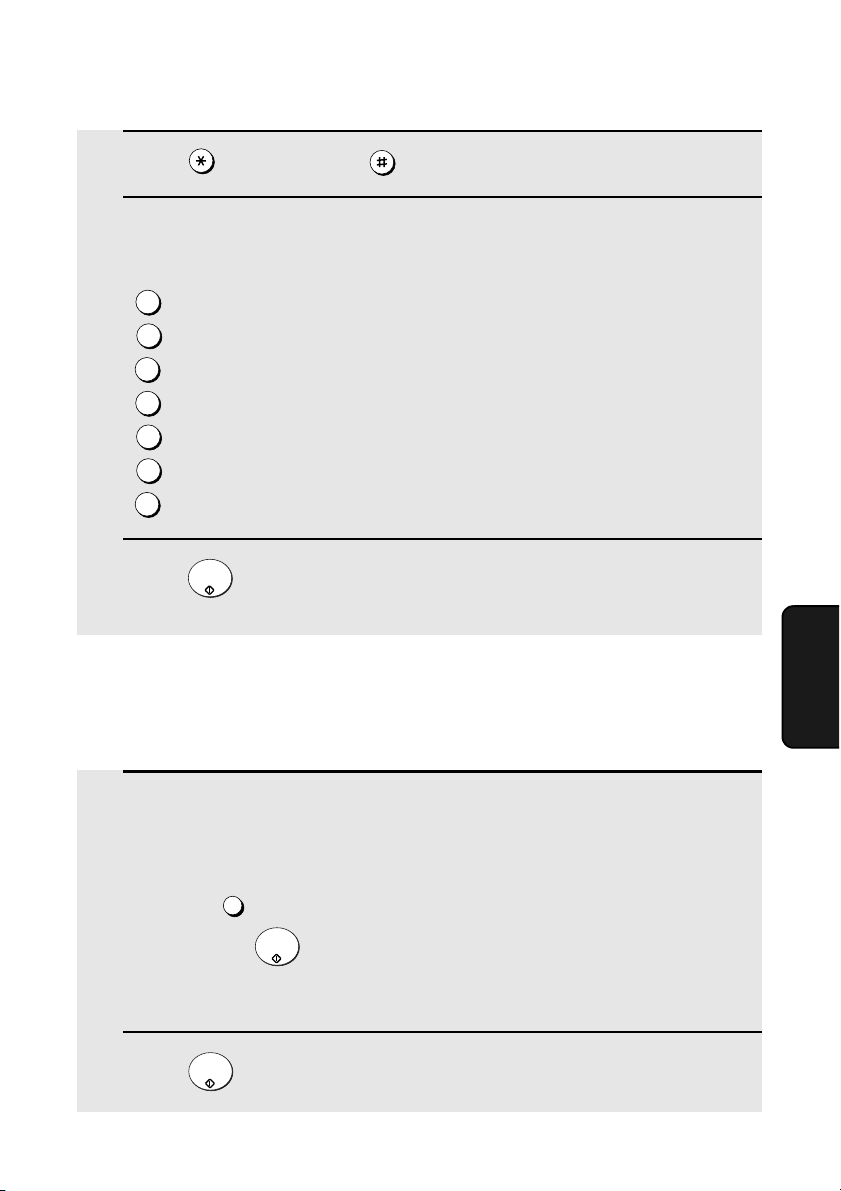
Timer Operations
79
5. Special
Functions
5 Press to select A.M. or to select P.M.
6 Enter a number as follows to select the day of the operation (skip this
step if the operation will be performed within the next 24 hours):
Sunday
Monday
Tuesday
Wednesday
Thursday
Friday
Saturday
7 Press and go to the specific procedure for your operation (see the
following pages).
0
1
2
3
4
5
6
START/
ENTER
Transmission
(Continued from Initial procedure.)
8 Dial the receiving machine using one of the following methods:
• Press a Rapid Key.
• Press and enter a Speed Dial number (if you enter less than 2
digits, press to complete the entry).
• Enter a full fax number with the numeric keys.
9 Press .
SPEED DIAL
START/
ENTER
START/
ENTER
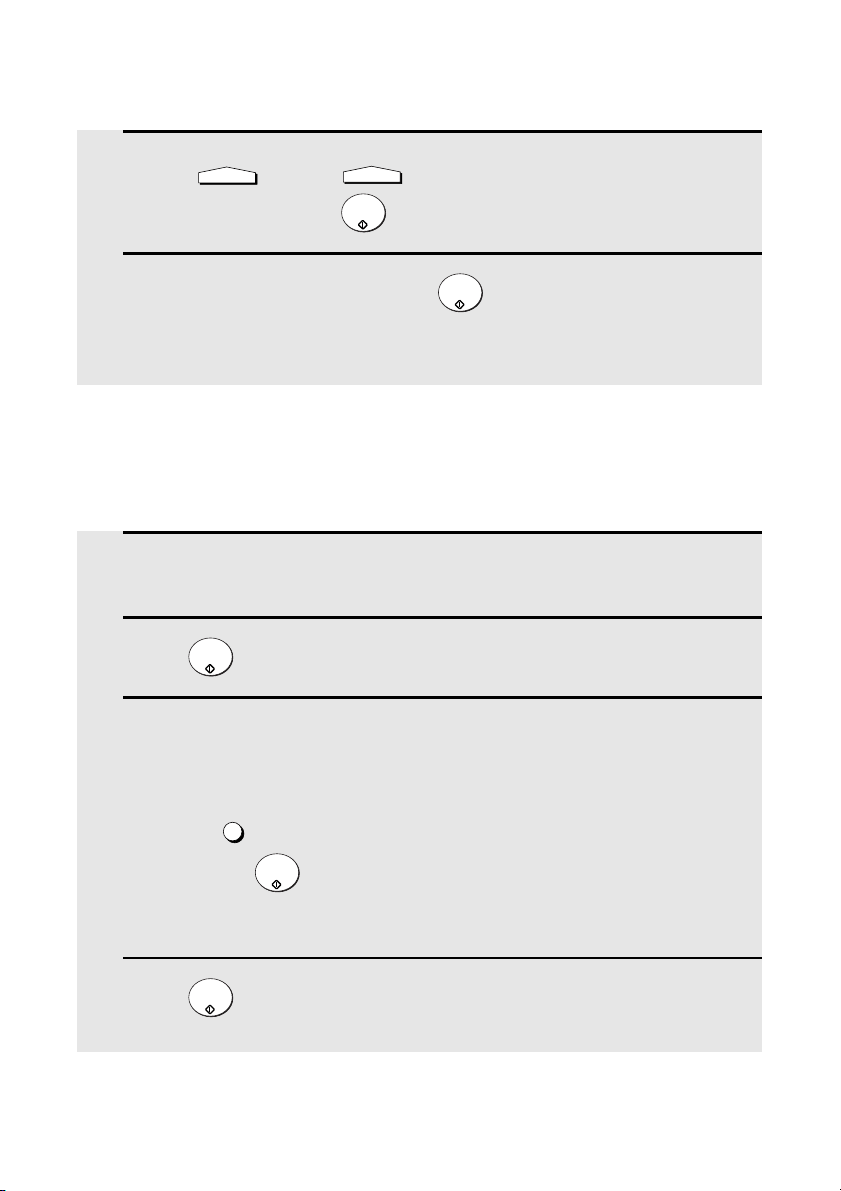
Timer Operations
80
10 Press and/or to adjust the resolution and contrast if
desired, and then press .
11 Load the document and then press .
• The document will be scanned into memory.
RESOLUTION
CONTRAST
START/
ENTER
START/
ENTER
.
Confidential transmission
(Continued from Initial procedure.)
8 Enter the mailbox number (2 digits). (Go directly to Step 9 if the
receiving machine does not have mailboxes.)
9 Press .
10 Dial the receiving machine using one of the following methods:
• Press a Rapid Key.
• Press and enter a Speed Dial number (if you enter less than 2
digits, press to complete the entry).
• Enter a full fax number with the numeric keys.
11 Press .
START/
ENTER
SPEED DIAL
START/
ENTER
START/
ENTER

Timer Operations
81
5. Special
Functions
12 Press and/or to adjust the resolution and contrast if
desired, and then press .
13 Load the document and then press .
• The document will be scanned into memory.
RESOLUTION
CONTRAST
START/
ENTER
START/
ENTER
Polling
(Continued from Initial procedure.)
8 Dial the machine to be polled using one of the following methods:
• Press a Rapid Key.
• Press and enter a Speed Dial number (if you enter less than 2
digits, press to complete the entry).
• Enter a full fax number with the numeric keys.
9 Press .
SPEED DIAL
START/
ENTER
START/
ENTER
Serial Polling
(Continued from Initial procedure.)
8 Dial the machines to be polled using one or more of the following
methods:
• Press one or more Rapid Keys.
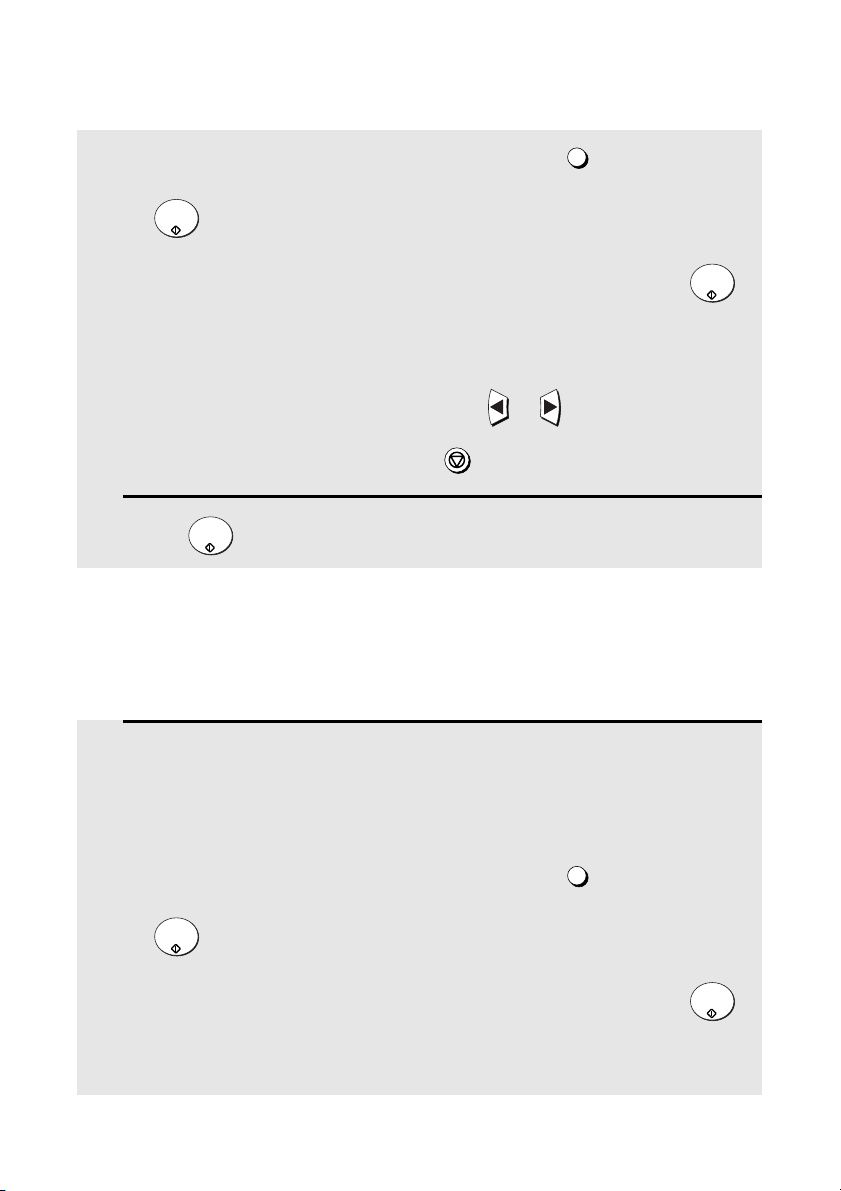
Timer Operations
82
• Enter one or more Speed Dial numbers, pressing before each
number. (If you enter less than 2 digits for a Speed Dial number, press
to complete the entry.)
• Enter one or more full fax numbers with the numeric keys, pressing
after each full number.
• Press one or more Group Keys.
Note: If you need to delete a number, press or until the destination
appears in the display and then press .
9 Press .
SPEED DIAL
START/
ENTER
START/
ENTER
STOP
START/
ENTER
Broadcasting
(Continued from Initial procedure.)
8 Dial the receiving machines using one or more of the following
methods:
• Press one or more Rapid Keys.
• Enter one or more Speed Dial numbers, pressing before each
number. (If you enter less than 2 digits for a Speed Dial number, press
to complete the entry.)
• Enter one or more full fax numbers with the numeric keys, pressing
after each full number.
• Press one or more Group Keys.
SPEED DIAL
START/
ENTER
START/
ENTER
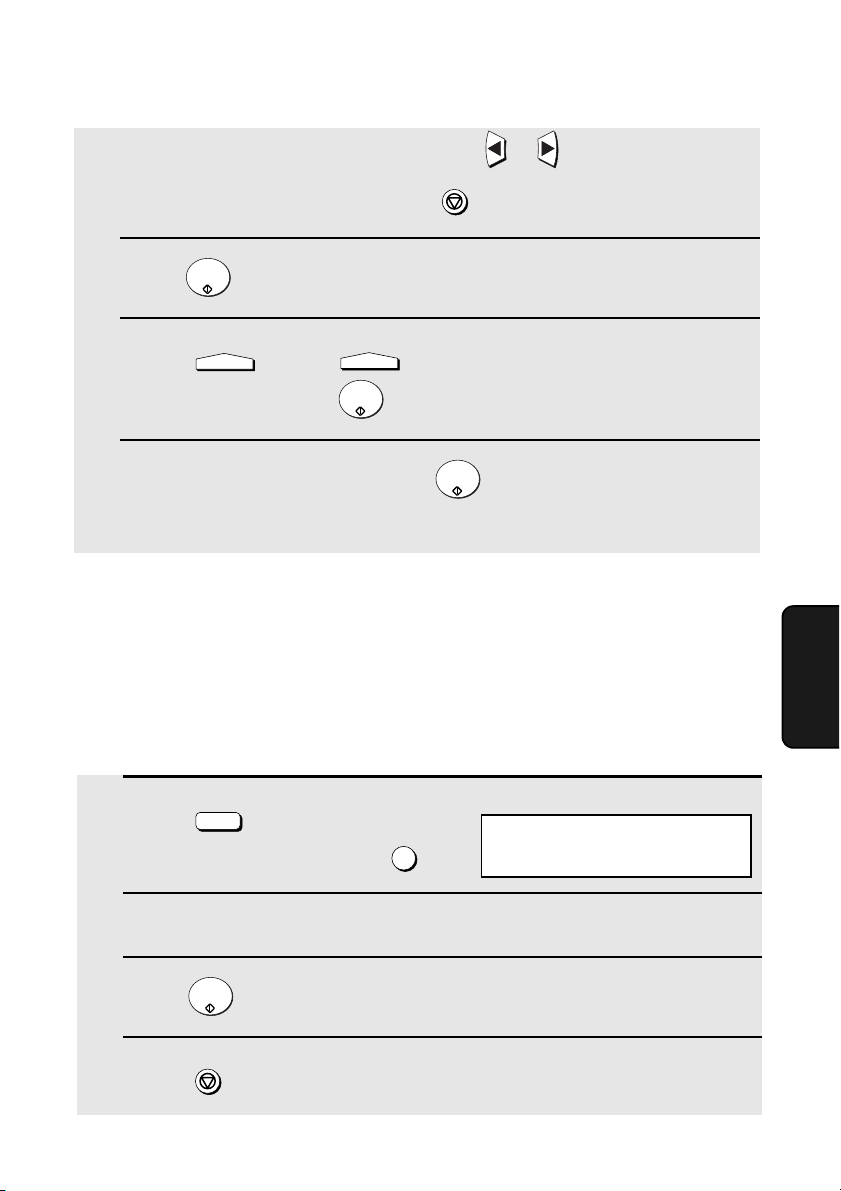
Timer Operations
83
5. Special
Functions
Note: If you need to delete a number, press or until the destination
appears in the display and then press .
9 Press .
10 Press and/or to adjust the resolution and contrast if
desired, and then press .
11 Load the document and then press .
• The document will be scanned into memory.
STOP
START/
ENTER
RESOLUTION
CONTRAST
START/
ENTER
START/
ENTER
Canceling a timer operation
If you need to cancel a timer operation before it is performed, follow the steps
below.
♦ You will need to know the number assigned to the operation in order to
cancel it. If you don’t remember the number (it appears in the display when
you set the operation), print out the Timer List. (See page 116.)
1 Press (flip up the Rapid Key
overlay if it is down) and then .
2 Enter the 2-digit number assigned to the operation.
3 Press .
4 Press repeatedly until you return to the date and time display.
TIMER
X/>
2
START/
ENTER
STOP
2:TIMER COMM. CLEAR
ENTER #(01-59)
Display:

Batch Transmission
84
Batch Transmission
Batch transmission allows you to store multiple fax jobs in memory for
automatic transmission to one destination at a set time. If you often send
faxes to a particular destination, this function helps reduce telephone costs by
allowing you to conveniently send multiple faxes on one connection.
Note: If the telephone billing function is turned on, the batch transmission function
cannot be used.
Programming a Batch Key
To perform a batch transmission, you must first program the number of the
receiving machine and the time of transmission into a Batch Key. Any Rapid
Key which has not already been programmed can be used as a Batch Key.
If you specify a day-of-the-week in your program, the transmission will be
performed every week on that day. If you do not specify a day-of-the-week, the
transmission will be performed every day.
To program a Batch Key, follow the procedure for entering programs explained
in Entering and Using Programs on page 86. In Step 10 of the initial
procedure, select “Batch transmission”.
Clearing a Batch Key
To clear a Batch Key, follow the procedure on page 93.
Storing documents for transmission
Follow the steps below to store a document under a Batch Key for
transmission. When you store the document, it is given a message number to
distinguish it from other jobs stored in the same batch.
♦ If no jobs have been stored under a Batch Key when the time for
transmission arrives, transmission will not take place.
1 Load the document (s).
• SEND READY will appear in the
display.
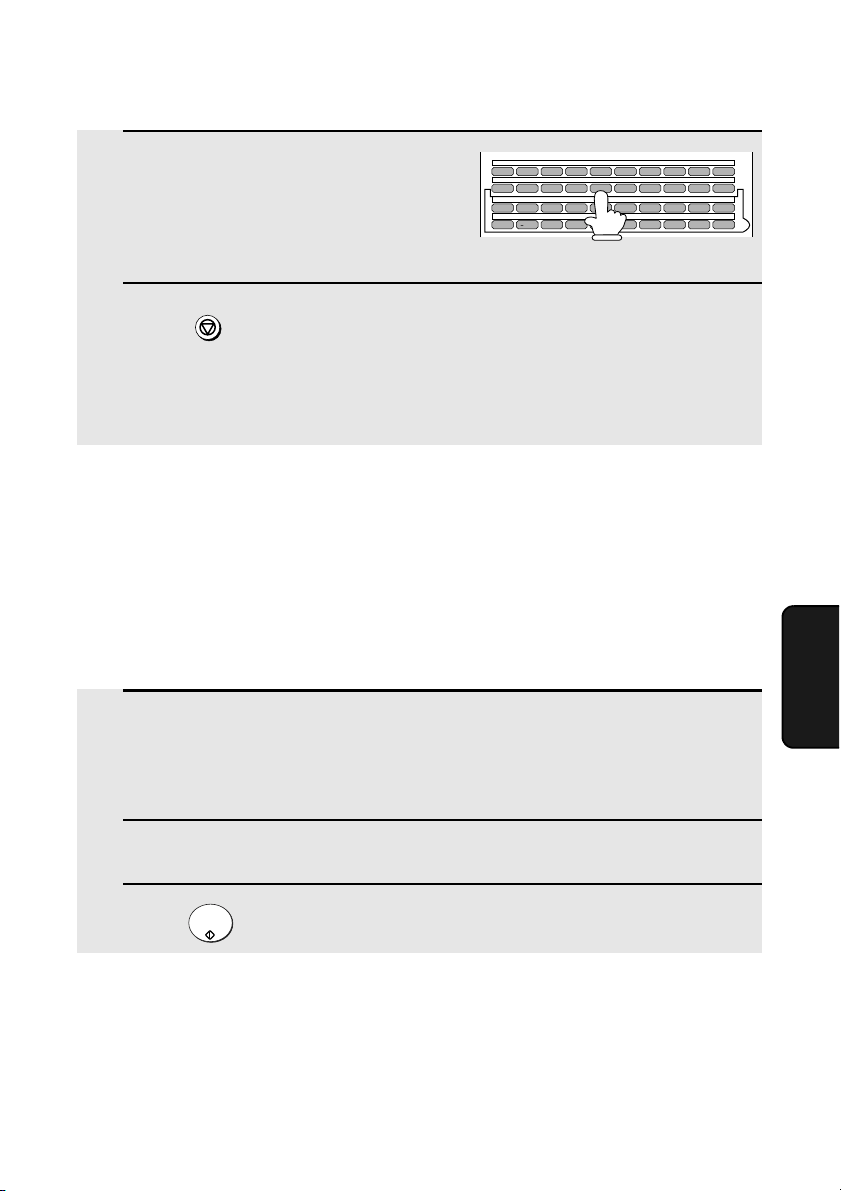
Batch Transmission
85
5. Special
Functions
2 Press the appropriate Batch Key.
• After scanning, the message number
assigned to your document will appear
in the display.
3 Press .
• The document will be transmitted at the designated time along with any
other jobs stored under the same key. After transmission, all jobs in the
batch will be cleared from memory.
STOP
Canceling a document stored for batch transmission
If necessary, you can cancel a document stored for a batch transmission
before transmission takes place. To do so, you will need to know the message
number assigned to the document.
♦ If you don’t remember the message number, print out the Batch
Transmission List (see page 116).
Q / ! W / " E / # R / $ T / % Y / & U / ' I / ( O / ) P / =
SYMBOL
A /
|
S D F G / { H / } J / [ K / ] L / +
Caps Lock
Z / < X / > C V B N / * M / ? @ .com
SHIFT
/ ^ / / \ ; / :
Space
_
- . / , DEL
01 02 03 04 05 06 07 08 09 10
11 12 13 14 15 16 17 18 19 20
21 22 23 24 25 26 27 28 29 30
31 32 33 34 35 36 37 38 39
1 Press the Batch Key in which the document you want to clear has been
stored.
• Make sure no documents are in the feeder.
2 Enter the 3-digit message number assigned to the document.
3 Press .
START/
ENTER
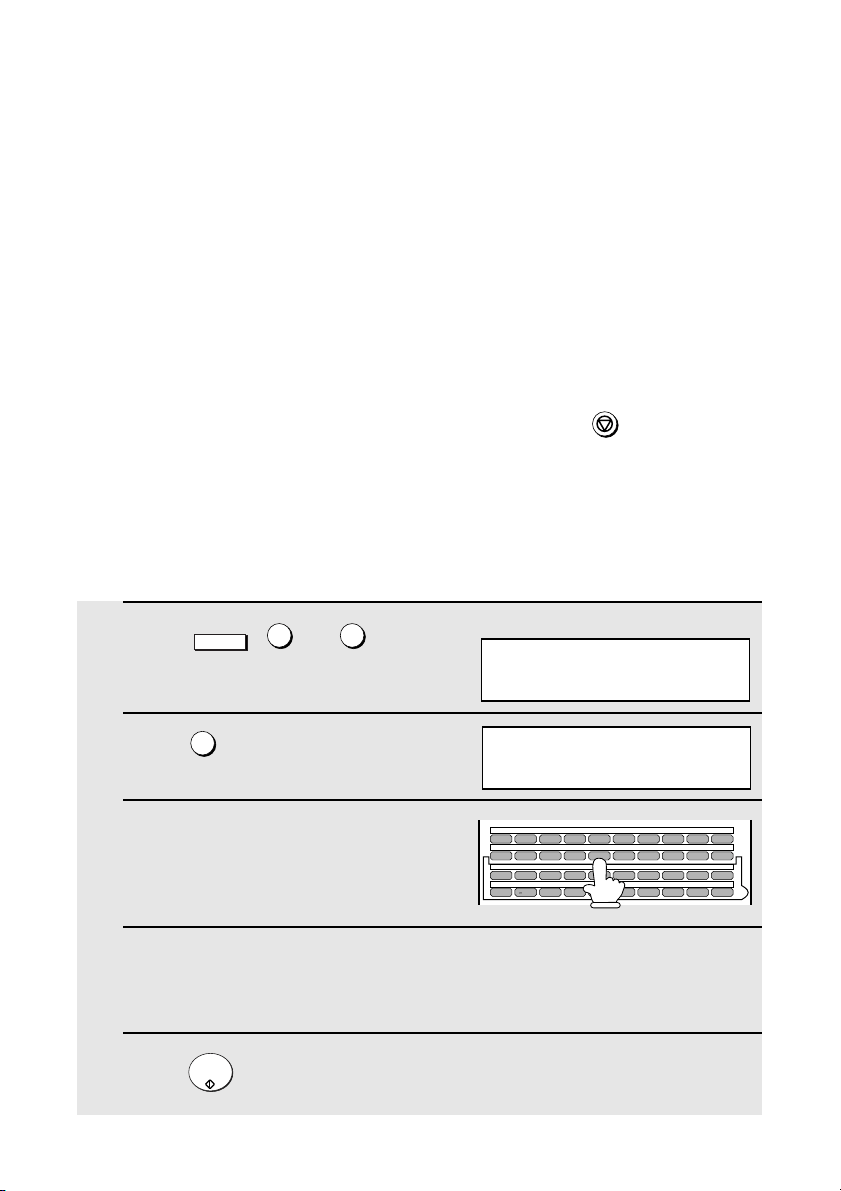
Entering and Using Programs
86
Entering and Using Programs
If you frequently perform the same operation involving the same party, you can
program all the steps of the operation into one Program Key. This allows you to
perform the operation by simply pressing that key.
♦ Any Rapid Key which is not already programmed as a Rapid Key or a
Group Key can be used as a Program Key.
♦ You can include a timer setting in the program to have the operation
performed automatically at a selected time.
♦ To clear a mistake in the procedures that follow, press .
Initial procedure
To program a Program Key, first perform the following procedure. After you
have completed this procedure, go to the procedure for the specific operation
you want to program (see the following pages).
STOP
1 Press , and .
2 Press to select SET.
3 Select a Program Key by pressing any
Rapid Key that has not yet been
programmed.
4 Enter a name for the program by pressing the letter entry keys (see Step
5 on page 25). (Maximum of 20 characters.)
If you don’t want to enter a name, go directly to Step 5.
5 Press .
MENU
5
1
1
START/
ENTER
Display:
1:PROGRAM ENTRY MODE
1=SET, 2=CLEAR
1:PROGRAM SET
PRESS PROGRAM KEY
Q / ! W / " E / # R / $ T / % Y / & U / ' I / ( O / ) P / =
SYMBOL
A /
|
S D F G / { H / } J / [ K / ] L / +
Caps Lock
Z / < X / > C V B N / * M / ? @ .com
SHIFT
/ ^ / / \ ; / :
Space
_
- . / , DEL
01 02 03 04 05 06 07 08 09 10
11 12 13 14 15 16 17 18 19 20
21 22 23 24 25 26 27 28 29 30
31 32 33 34 35 36 37 38 39

Entering and Using Programs
87
5. Special
Functions
6 If you want to include a timer setting, enter a two-digit number for the
hour (“01” to “12”) and a two-digit number for the minute (“00” to “59”).
(If not, go directly to Step 9.)
7 Press to select A.M. or to select P.M.
8 Enter a number as follows to select the day of the operation (skip this
step if the operation will be performed within the next 24 hours):
Sunday
Monday
Tuesday
Wednesday
Thursday
Friday
Saturday
9 Press .
10 Enter a number as follows to select the desired operation (or scroll to
the desired operation with or and press ).
Transmission (SEND MODE)
Confidential transmission
Polling
Serial Polling
Broadcasting
Batch transmission (only possible if a timer setting was made)
Memory Polling (only possible if a timer setting was not made)
0
1
2
3
4
5
6
START/
ENTER
START/
ENTER
1
2
3
4
5
6
6
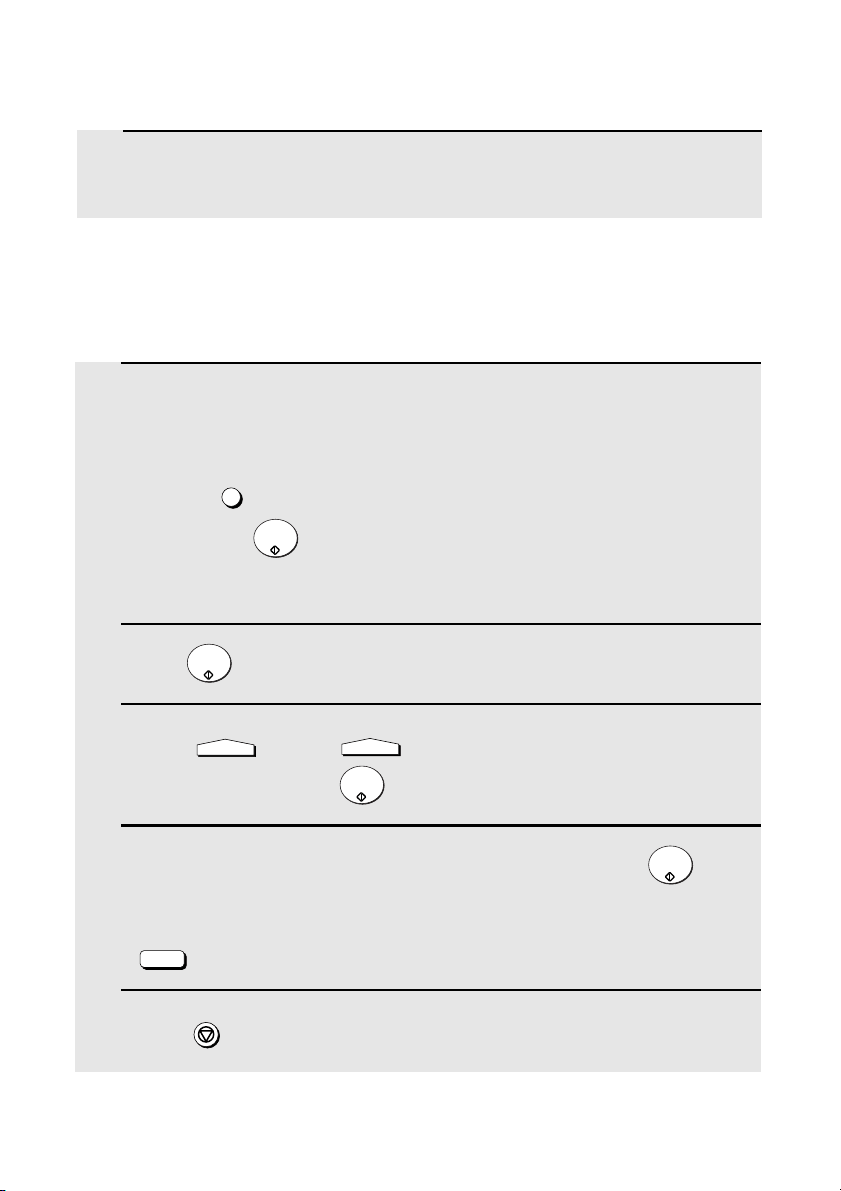
Entering and Using Programs
88
12 Dial the receiving machine using one of the following methods:
• Press a Rapid Key.
• Press and enter a Speed Dial number (if you enter less than 2
digits, press to complete the entry).
• Enter a full fax number with the numeric keys.
13 Press .
14 Press and/or to adjust the resolution and contrast if
desired, and then press .
15 If you want the document to be sent through memory, press .
If you want the document to be sent directly from the feeder, press
. (This is not possible if you included a timer setting.)
16 Press repeatedly until you return to the date and time display.
SPEED DIAL
START/
ENTER
START/
ENTER
RESOLUTION
CONTRAST
START/
ENTER
START/
ENTER
DOCUMENT
M/?
STOP
11 Go to the specific procedure for your operation (see the following
pages).
Transmission
(Continued from Initial procedure.)
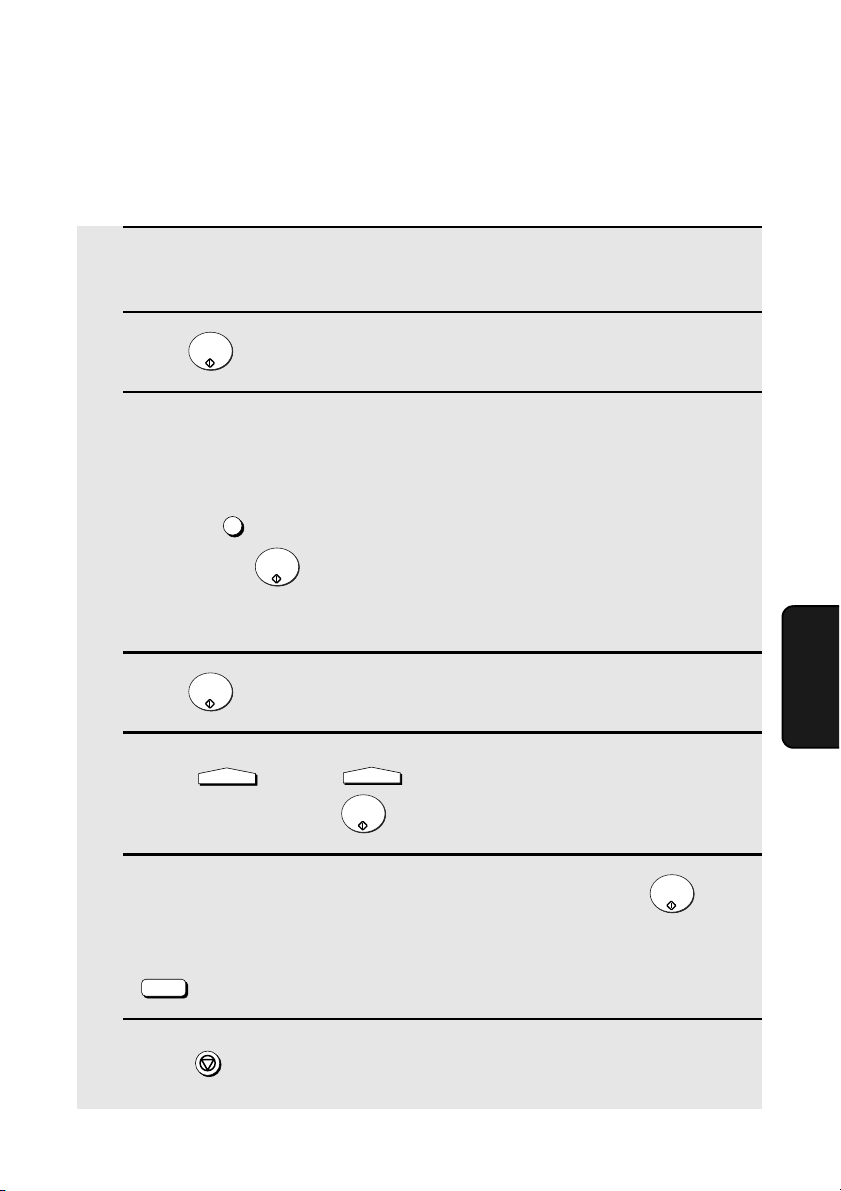
Entering and Using Programs
89
5. Special
Functions
12 Enter the mailbox number (2 digits). (Go directly to Step 13 if the
receiving machine does not have mailboxes.)
13 Press .
14 Dial the receiving machine using one of the following methods:
• Press a Rapid Key.
• Press and enter a Speed Dial number (if you enter less than 2
digits, press to complete the entry).
• Enter a full fax number with the numeric keys.
15 Press .
16 Press and/or to adjust the resolution and contrast if
desired, and then press .
17 If you want the document to be sent through memory, press .
If you want the document to be sent directly from the feeder, press
. (This is not possible if you included a timer setting.)
18 Press repeatedly until you return to the date and time display.
START/
ENTER
SPEED DIAL
START/
ENTER
START/
ENTER
RESOLUTION
CONTRAST
START/
ENTER
START/
ENTER
DOCUMENT
M/?
STOP
Confidential transmission
(Continued from Initial procedure.)
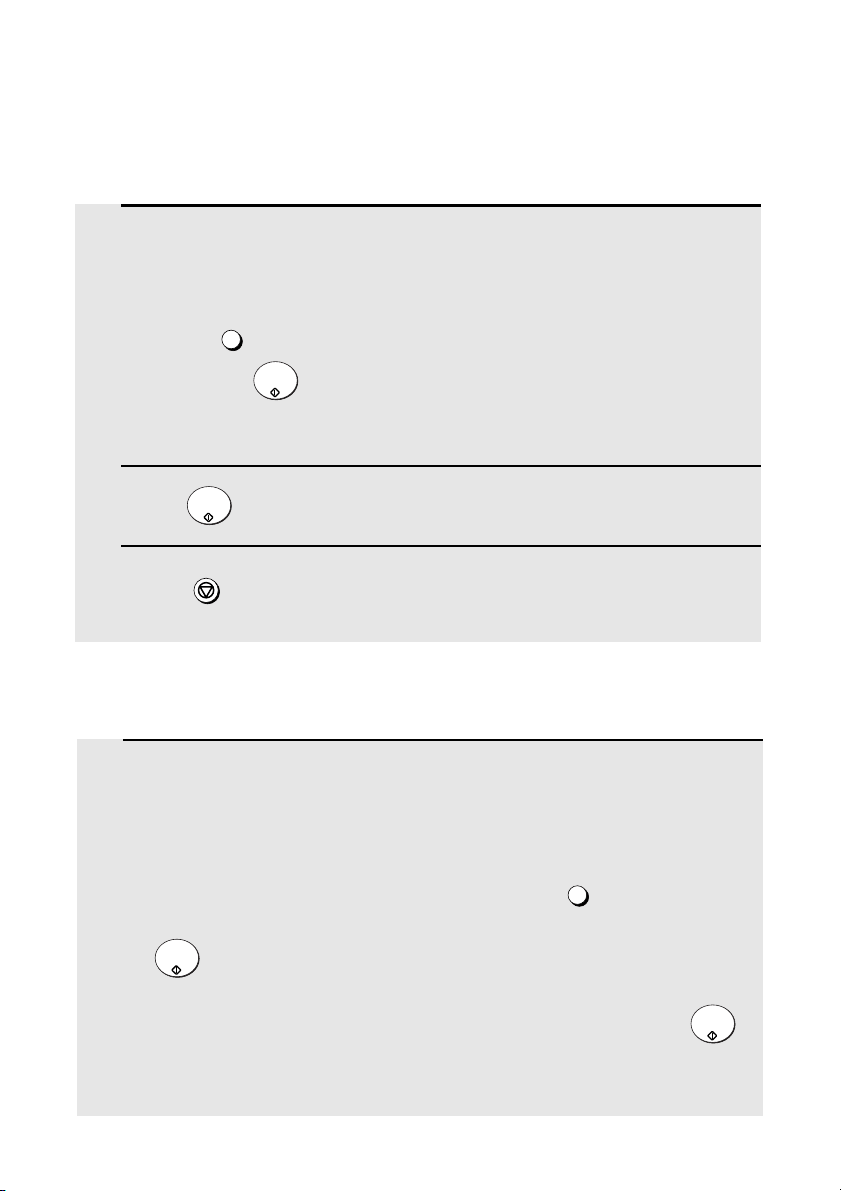
Entering and Using Programs
90
Serial Polling
(Continued from Initial procedure.)
Polling
(Continued from Initial procedure.)
12 Dial the machine to be polled using one of the following methods:
• Press a Rapid Key.
• Press and enter a Speed Dial number (if you enter less than 2
digits, press to complete the entry).
• Enter a full fax number with the numeric keys.
13 Press .
14 Press repeatedly until you return to the date and time display.
SPEED DIAL
START/
ENTER
START/
ENTER
STOP
12 Dial the machines to be polled using one or more of the following
methods:
• Press one or more Rapid Keys.
• Enter one or more Speed Dial numbers, pressing before each
number. (If you enter less than 2 digits for a Speed Dial number, press
to complete the entry.)
• Enter one or more full fax numbers with the numeric keys, pressing
after each full number.
• Press one or more Group Keys.
SPEED DIAL
START/
ENTER
START/
ENTER
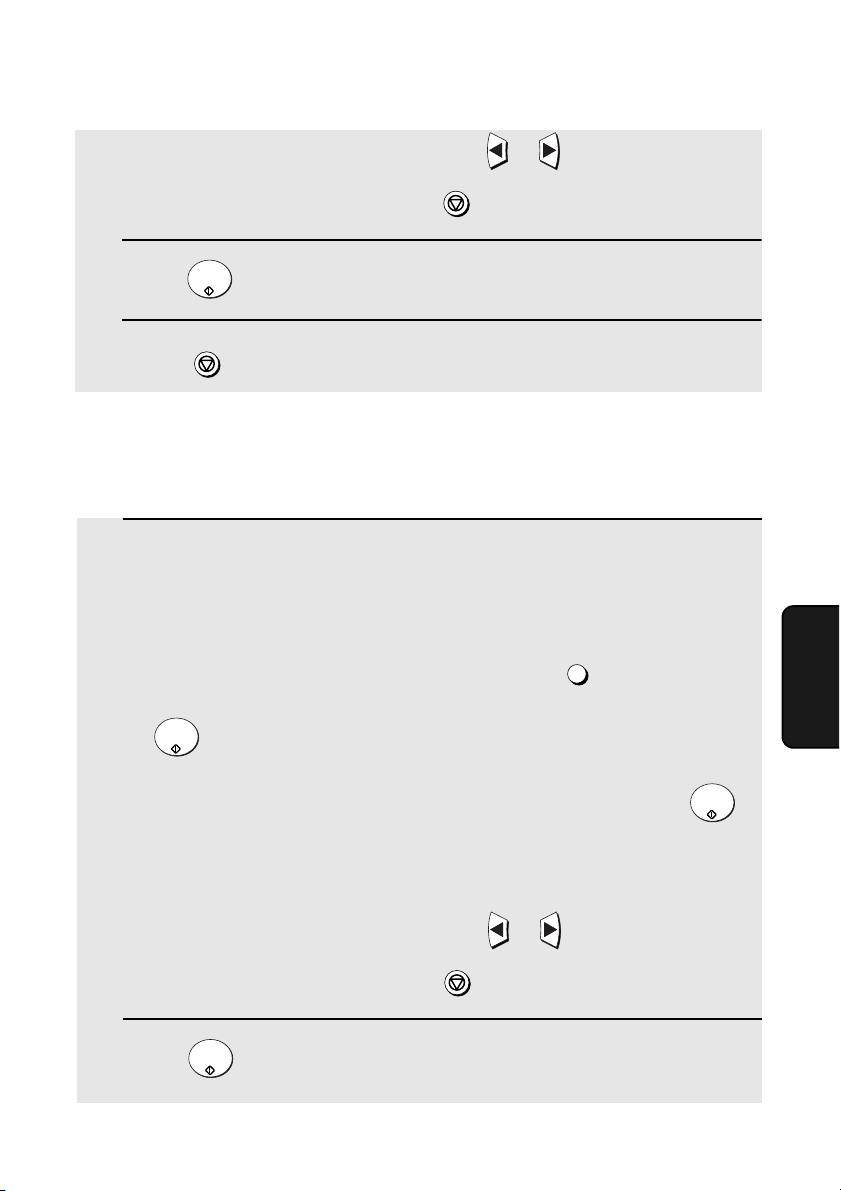
Entering and Using Programs
91
5. Special
Functions
Note: If you need to delete a number, press or until the destination
appears in the display and then press .
13 Press .
14 Press repeatedly until you return to the date and time display.
STOP
START/
ENTER
STOP
Broadcasting
(Continued from Initial procedure.)
12 Dial the receiving machines using one or more of the following
methods:
• Press one or more Rapid Keys.
• Enter one or more Speed Dial numbers, pressing before each
number. (If you enter less than 2 digits for a Speed Dial number, press
to complete the entry.)
• Enter one or more full fax numbers with the numeric keys, pressing
after each full number.
• Press one or more Group Keys.
Note: If you need to delete a number, press or until the destination
appears in the display and then press .
13 Press .
SPEED DIAL
START/
ENTER
START/
ENTER
STOP
START/
ENTER
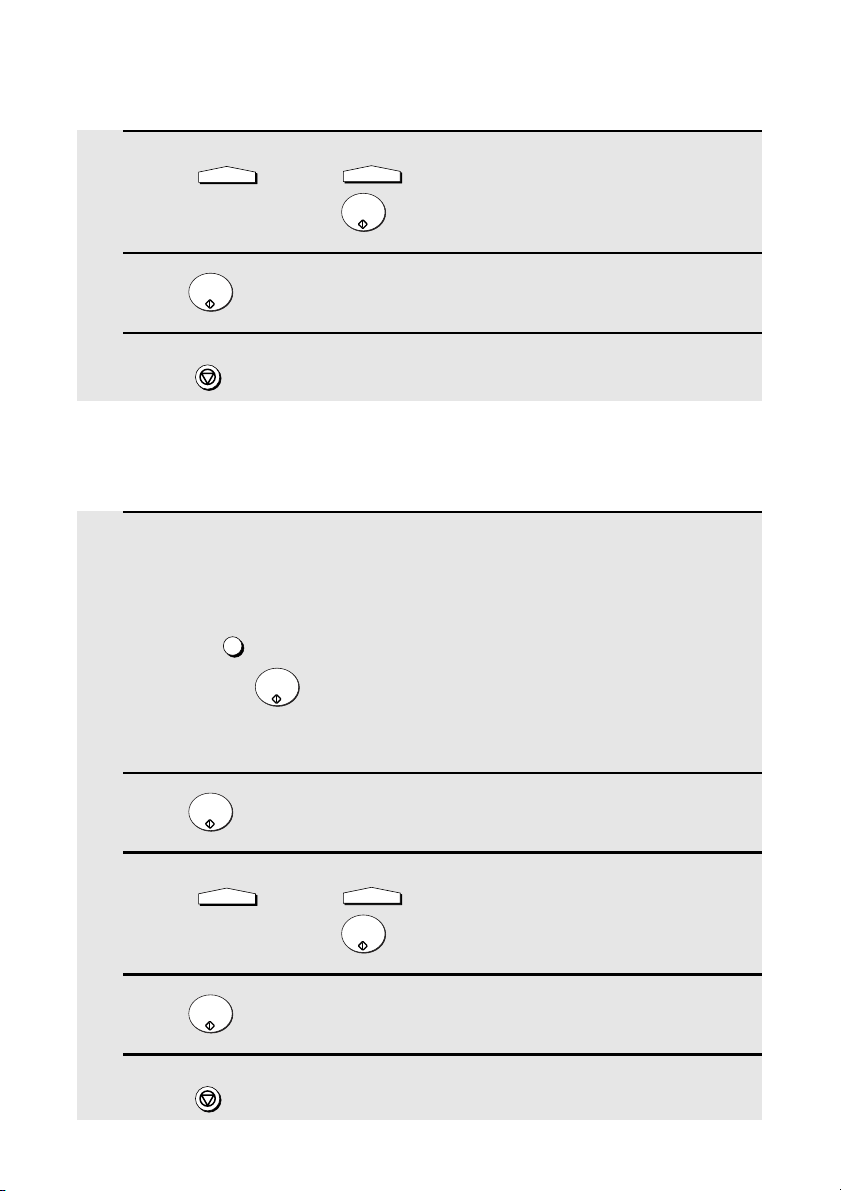
Entering and Using Programs
92
Batch transmission
(Continued from Initial procedure.)
12 Dial the receiving machine using one of the following methods:
• Press a Rapid Key.
• Press and enter a Speed Dial number (if you enter less than 2
digits, press to complete the entry).
• Enter a full fax number with the numeric keys.
13 Press .
14 Press and/or to adjust the resolution and contrast if
desired, and then press .
15 Press .
16 Press repeatedly to return to the date and time display.
SPEED DIAL
START/
ENTER
START/
ENTER
RESOLUTION
CONTRAST
START/
ENTER
START/
ENTER
STOP
14 Press and/or to adjust the resolution and contrast if
desired, and then press .
15 Press .
16 Press repeatedly until you return to the date and time display.
RESOLUTION
CONTRAST
START/
ENTER
START/
ENTER
STOP
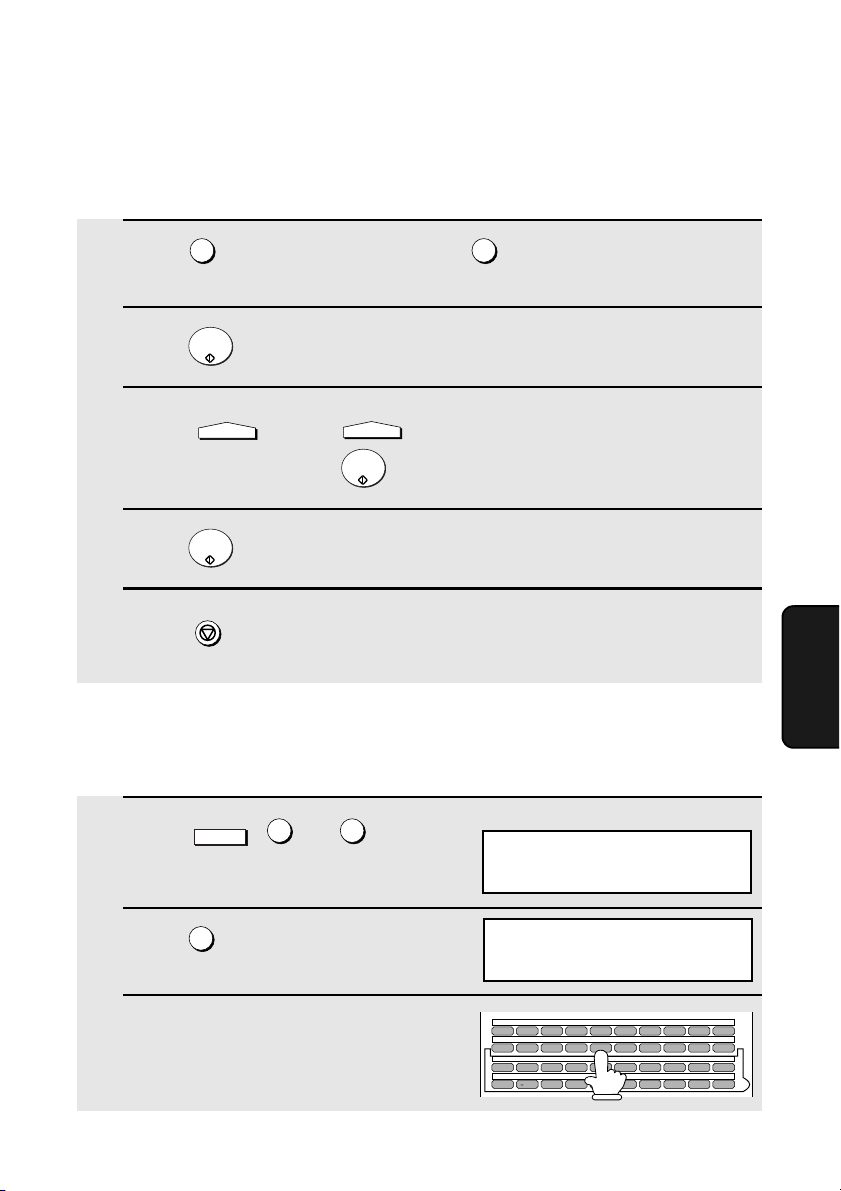
Entering and Using Programs
93
5. Special
Functions
Being Polled (Memory polling)
(Continued from Initial procedure.)
12 Press to allow polling only once, or to allow polling an unlimited
number of times.
13 Press .
14 Press and/or to adjust the resolution and contrast if
desired, and then press .
15 Press .
16 Press repeatedly until you return to the date and time display.
1 2
START/
ENTER
RESOLUTION
CONTRAST
START/
ENTER
START/
ENTER
STOP
Clearing a Program Key
To clear a Program Key, follow these steps:
1 Press , and .
2 Press to select CLEAR.
3 Press the Program Key you want to
clear.
MENU
5
1
2
Display:
1:PROGRAM ENTRY MODE
1=SET, 2=CLEAR
2:PROGRAM CLEAR
PRESS PROGRAM KEY
Q / ! W / " E / # R / $ T / % Y / & U / ' I / ( O / ) P / =
SYMBOL
A /
|
S D F G / { H / } J / [ K / ] L / +
Caps Lock
Z / < X / > C V B N / * M / ? @ .com
SHIFT
/ ^ / / \ ; / :
Space
_
- . / , DEL
01 02 03 04 05 06 07 08 09 10
11 12 13 14 15 16 17 18 19 20
21 22 23 24 25 26 27 28 29 30
31 32 33 34 35 36 37 38 39
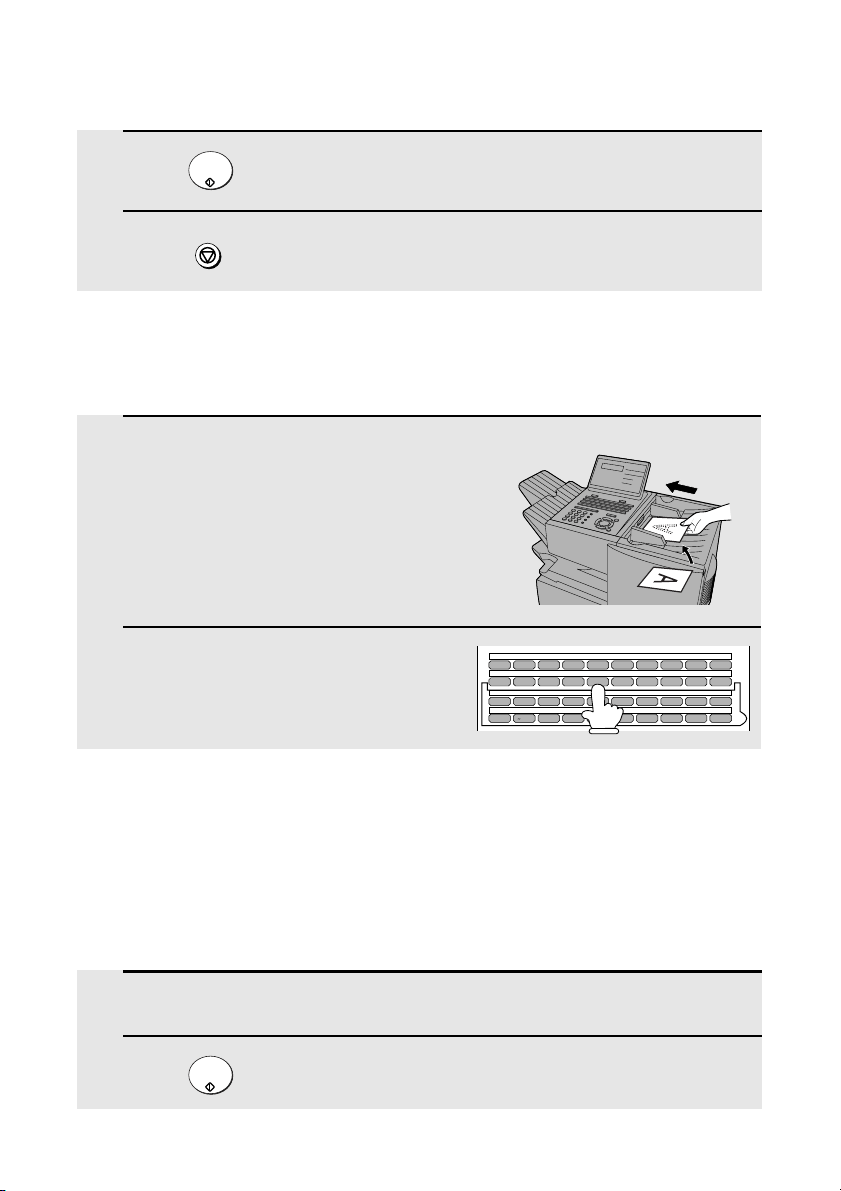
Entering and Using Programs
94
4 Press .
5 Press repeatedly until you return to the date and time display.
START/
ENTER
STOP
Using a Program Key
Follow the steps below to perform a programmed operation.
1 If this is a transmission operation or
memory polling operation, load the
document.
2 Press the appropriate Program Key.
Q / ! W / " E / # R / $ T / % Y / & U / ' I / ( O / ) P / =
SYMBOL
A /
|
S D F G / { H / } J / [ K / ] L / +
Caps Lock
Z / < X / > C V B N / * M / ? @ .com
SHIFT
/ ^ / / \ ; / :
Space
_
- . / , DEL
01 02 03 04 05 06 07 08 09 10
11 12 13 14 15 16 17 18 19 20
21 22 23 24 25 26 27 28 29 30
31 32 33 34 35 36 37 38 39
Canceling a programmed timer operation
If a Program Key has been pressed for a timer operation and you need to
cancel the operation before it is performed, follow the steps below.
Note: This procedure will not work for a document stored for a batch transmission.
To cancel a batch transmission operation, see Canceling a document stored for
batch transmission on page 85.
1 Press the Program Key.
2 Press .
START/
ENTER
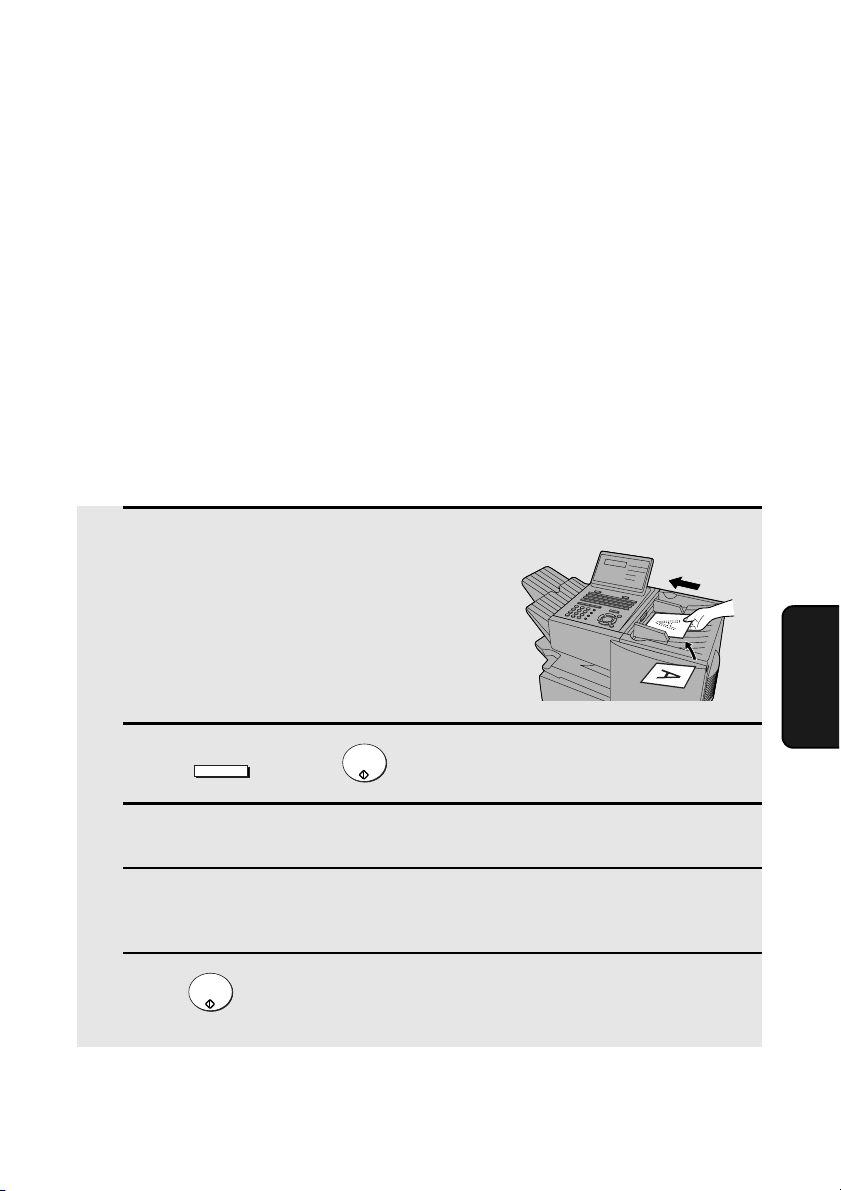
Duplex Scanning for Two-sided Documents
95
5. Special
Functions
Duplex Scanning for Two-sided Documents
To transmit or copy documents which have printing or graphics on both sides
of the page or pages, use Duplex Scanning. With this function, you simply
feed the document (all pages) through the machine once, turn the stack of
pages over, and feed it through again.
♦ The machine will automatically sort the pages into the correct order (front of
1st page, back of 1st page, front of 2nd page, back of 2nd page, etc.).
♦ Duplex Scanning can be used for copying (single copies and sorted
multiple copies only) and any type of transmission from memory.
♦ Note that any blank sides must be included when scanning the pages (if the
number of pages is not equal each time the machine scans the stack, an
error will result). The blank sides will not, however, be printed out.
1 Load the document (s).
• Make sure the page(s) are front face
down, with the first page on the bottom.
• SEND READY will appear in the
display.
2 Press and then .
3 Perform all steps of the desired copy or memory transmission.
4 When all pages of the document have been scanned, turn the stack over
(do not change the page order) and load it again.
5 Press .
DUPLEX SCAN
START/
ENTER
START/
ENTER
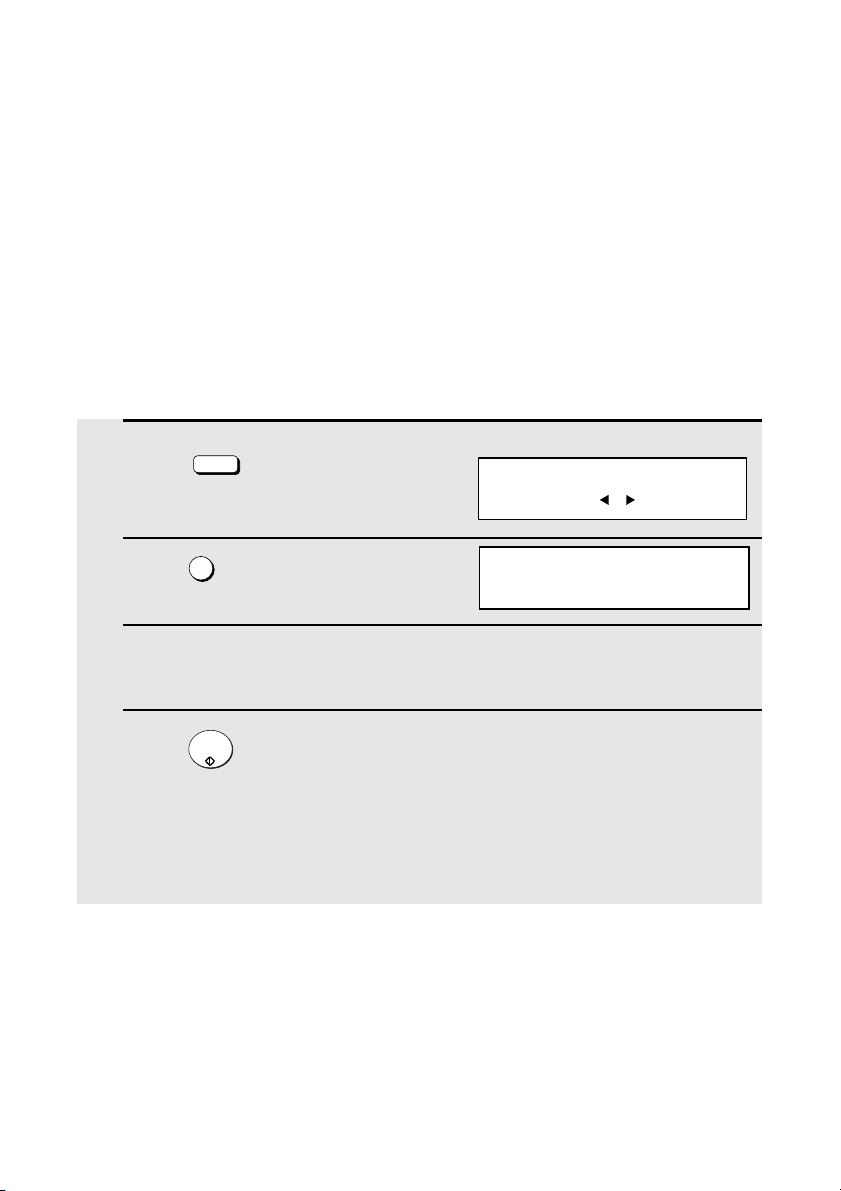
Print Hold
96
Print Hold
The Print Hold function is used to hold received faxes in memory instead of
printing them as they are received. To print the faxes, the programmed Print
Hold code must be entered.
To use the Print Hold function, program a Print Hold code as explained below
and then activate the Print Hold function as explained on the following page.
Programming the Print Hold code
Follow the steps below to program a Print Hold code.
1 Press .
2 Press .
3 Press the numeric keys to enter the desired Print Hold code (any 4-digit
number).
4 Press .
• The machine will print out the Print Hold code for your records.
• In the event that you forget the code and have kept no record, contact your
Sharp dealer.
PRINT HOLD
@
2
START/
ENTER
Display:
PRINT HOLD
ENTER #(1-4, , )
2:PRT. HOLD CODE SET
ENTER PASSCODE #
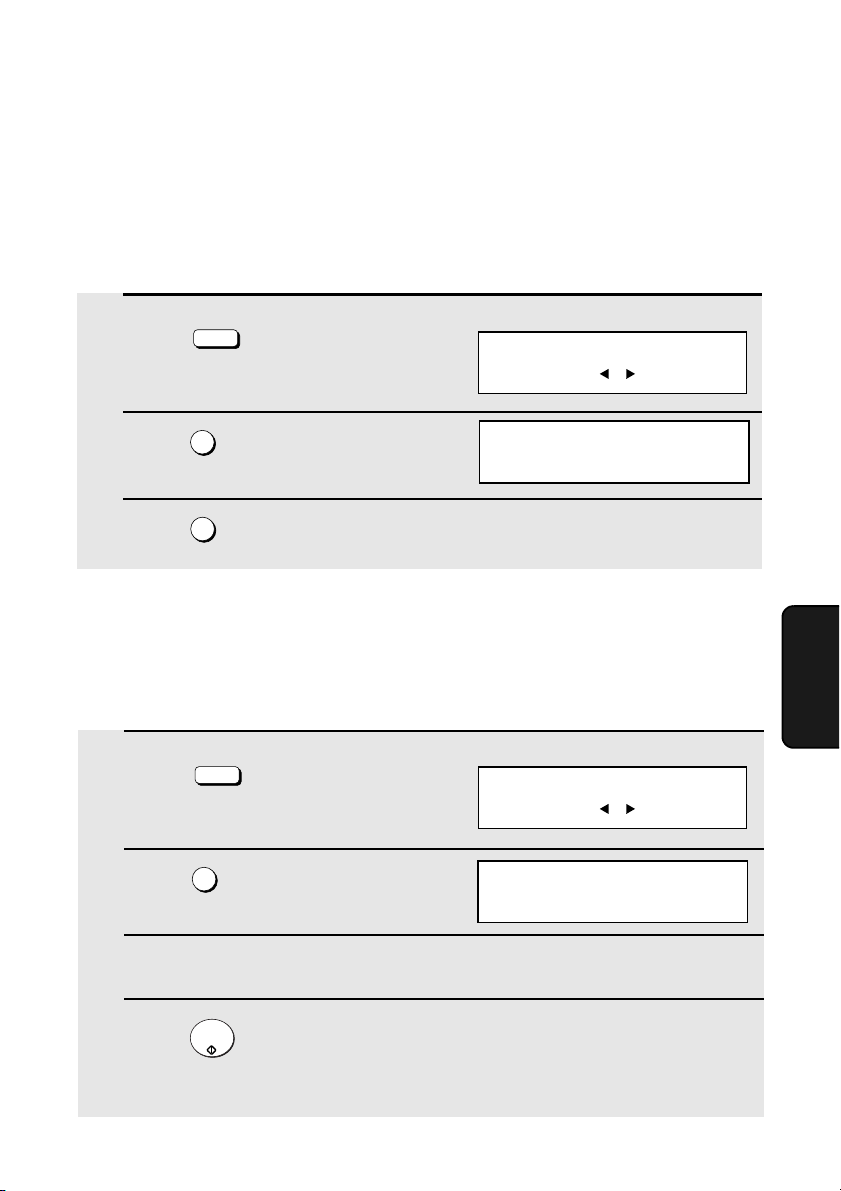
Print Hold
97
5. Special
Functions
Activating the Print Hold function
Once you have programmed a Print Hold code, follow the steps below to
activate the Print Hold function.
♦ A Print Hold code must be programmed before the Print Hold function can
be activated.
1 Press .
2 Press .
3 Press to select YES.
PRINT HOLD
@
4
1
Display:
PRINT HOLD
ENTER #(1-4, , )
4: ACTIVATE PRT. HOLD
1=YES, 2=NO
1 Press .
2 Press .
3 Press the numeric keys to enter the Print Hold code.
4 Press .
• The received fax will print out.
PRINT HOLD
@
1
START/
ENTER
Printing received faxes
When the Print Hold function is activated, RCVD PRINT HOLD FAX will
appear in the display when a fax has been received to memory. Follow the
steps below to print the fax (or faxes).
Display:
PRINT HOLD
ENTER #(1-4, , )
1:HOLD DATA PRINT
ENTER PASSCODE #
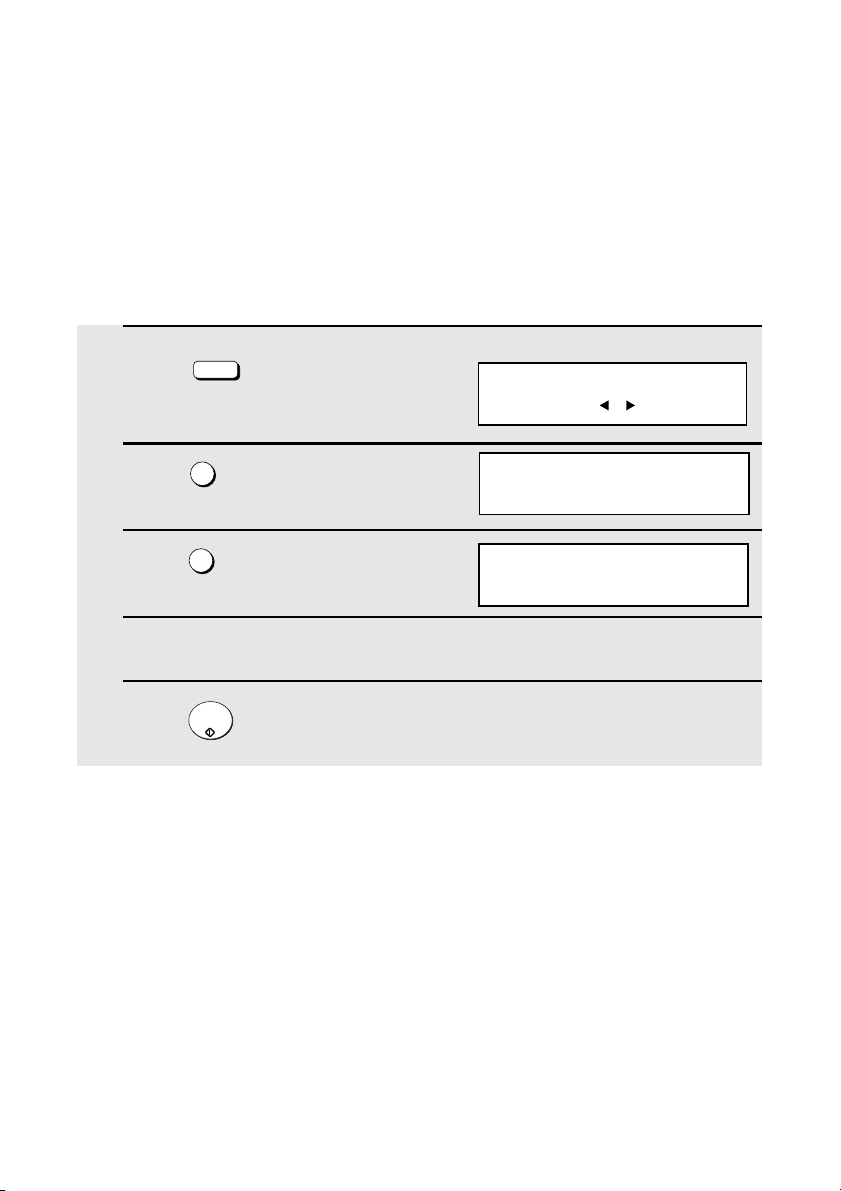
Print Hold
98
Turning off the Print Hold function
In the event that you need to turn off the Print Hold function, follow the steps
below.
♦ The Print Hold function cannot be turned off if a received fax is being held
in memory by the Print Hold function. First print the fax and then turn off
Print Hold.
1 Press .
2 Press .
3 Press to select NO.
4 Press the numeric keys to enter the Print Hold code.
5 Press .
PRINT HOLD
@
4
2
START/
ENTER
Display:
PRINT HOLD
ENTER #(1-4, , )
4: ACTIVATE PRT. HOLD
1=YES, 2=NO
PRT. HOLD CODE=
ENTER PASSCODE #
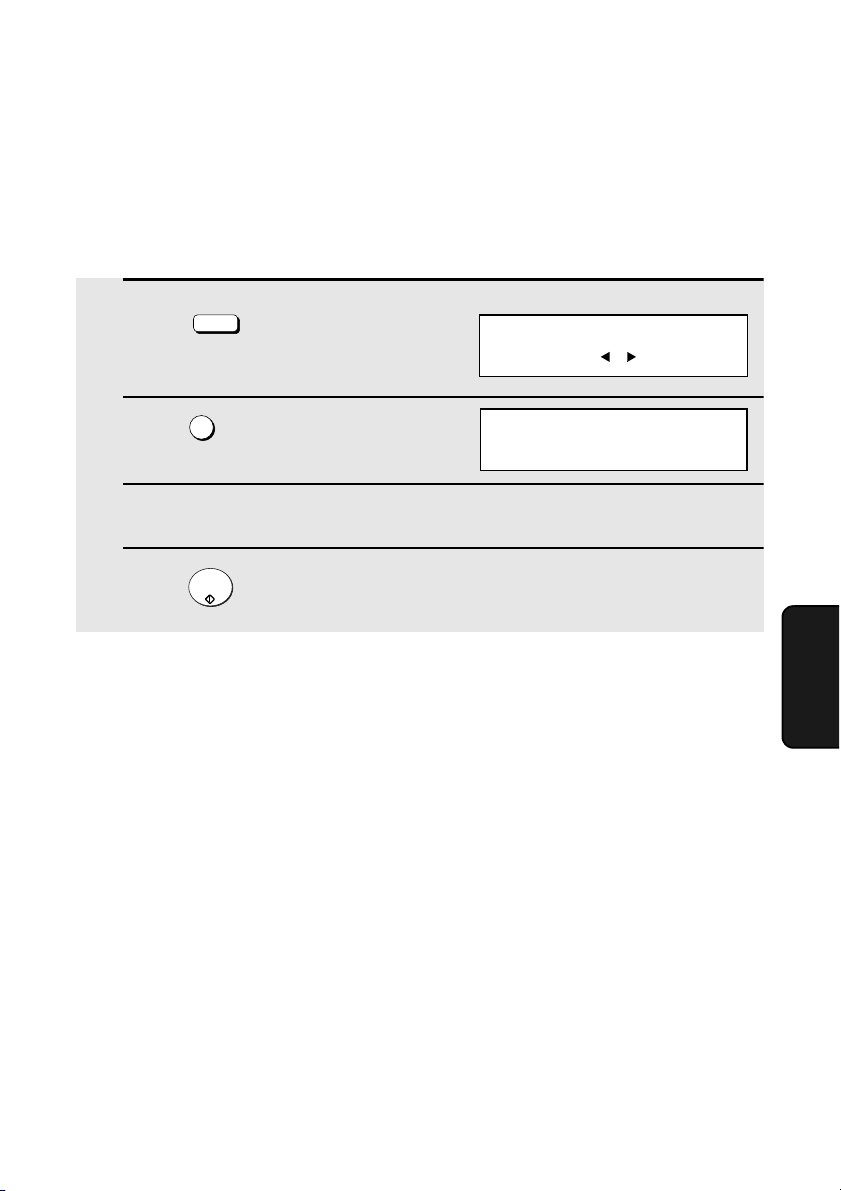
Print Hold
99
5. Special
Functions
Clearing the Print Hold code
Follow the steps below if you need to clear the Print Hold code.
Note: To clear the Print Hold code, the Print Hold function must first be turned
off as explained on the previous page.
1 Press .
2 Press .
3 Press the numeric keys to enter the Print Hold code.
4 Press .
PRINT HOLD
@
3
START/
ENTER
Display:
PRINT HOLD
ENTER #(1-4, , )
3:PRT. HOLD CODE CLR
ENTER PASSCODE #

Department Control
100
Department Control
Department Control is used to restrict use of the machine to authorized users.
When it is activated, a department code must be entered before an operation
can be performed.
♦ Department Control can only be activated by your Sharp dealer. If you wish
to use this function, contact your dealer.
♦ Department Control allows you to track the number of pages transmitted as
well as the transmission time for each authorized department or person.
See Department Usage List on page 119.
Programming Department Codes
Up to 99 different Department Codes can be programmed to allow access to
the fax machine. Transmitted pages and transmission time will be kept track of
separately for each code. After you enter a code, inform the appropriate group
or individual.
♦ A name must be assigned to each code. Only the name, not the code, will
appear on the Department Usage List.
♦ Be sure to keep a record of each code and name. If you misplace the
record, contact your dealer.
1 Press and .
2 Press and .
3 Press to program a Department Code, or to clear a Department
Code.
4 Programming: Enter a 2-digit number from “01” to “99” with the numeric
keys. This number identifies the Department Code that you will enter in
the next step.
MENU
3
0
7
1 2
Display:
3:ENTRY MODE
ENTER #(01-08, , )
07:DEPT. CODE MODE
1=SET, 2=CLEAR
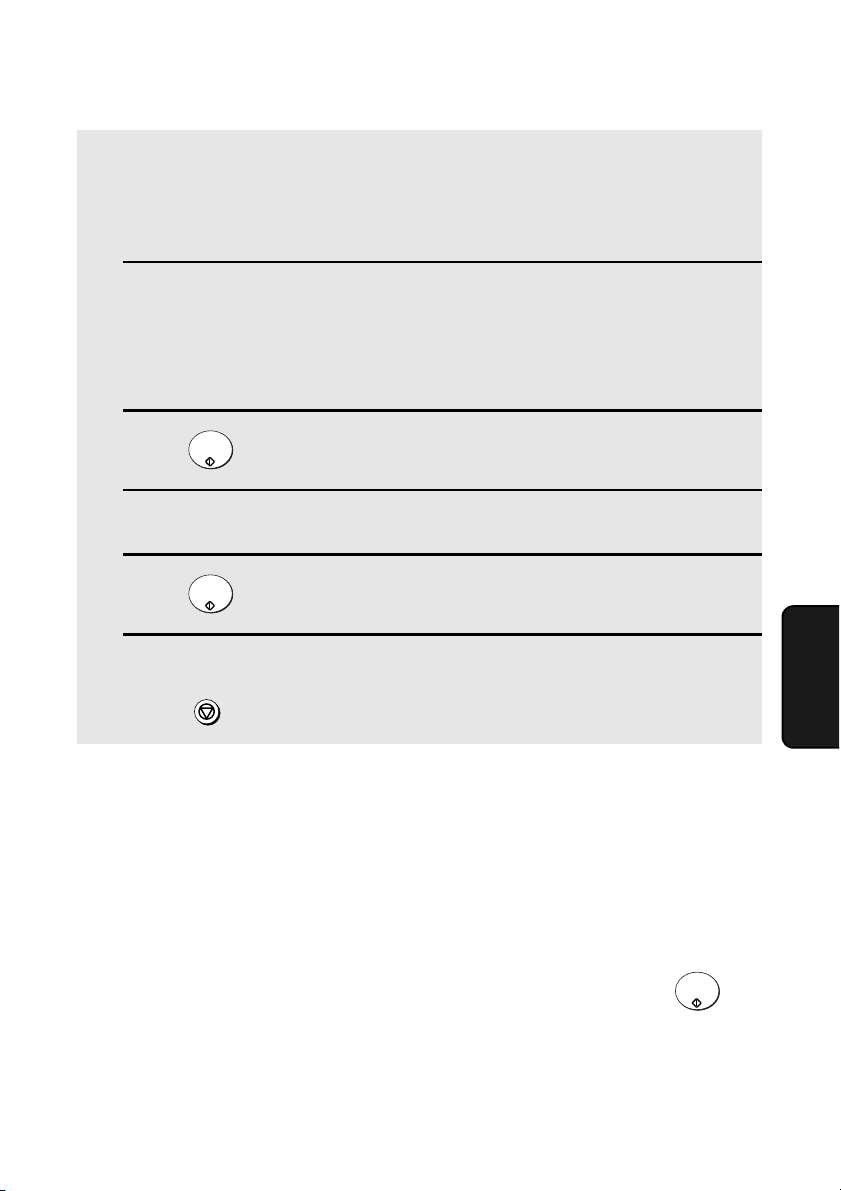
Department Control
101
5. Special
Functions
Clearing: Enter the 2-digit number that identifies the Department Code
you want to clear.
Note: It is not possible to clear the Department Code that you currently used to
access the machine. It is also not possible clear a Department Code if only one
code is programmed.
5 Programming: Enter a Department Code (4 digits or the number of digits
set by Option Setting 27 as explained on page 114).
Clearing: Enter the Department Code that you wish to clear, and go to
Step 8.
6 Press .
7 Press the letter entry keys to enter a name for the Department Code.
8 Press .
9 Return to Step 4 to program (or clear) another Department Code, or
press repeatedly to return to the date and time display.
START/
ENTER
START/
ENTER
STOP
Accessing the machine
When Department Control is activated, you must enter your Department Code
before using the machine.
♦ If you do not begin the operation within one minute after entering the code,
the machine will return to controlled access mode.
Note: You do not need to enter a Department Code to receive faxes manually (by
picking up an extension phone connected to the same line and pressing on
the fax machine).
START/
ENTER
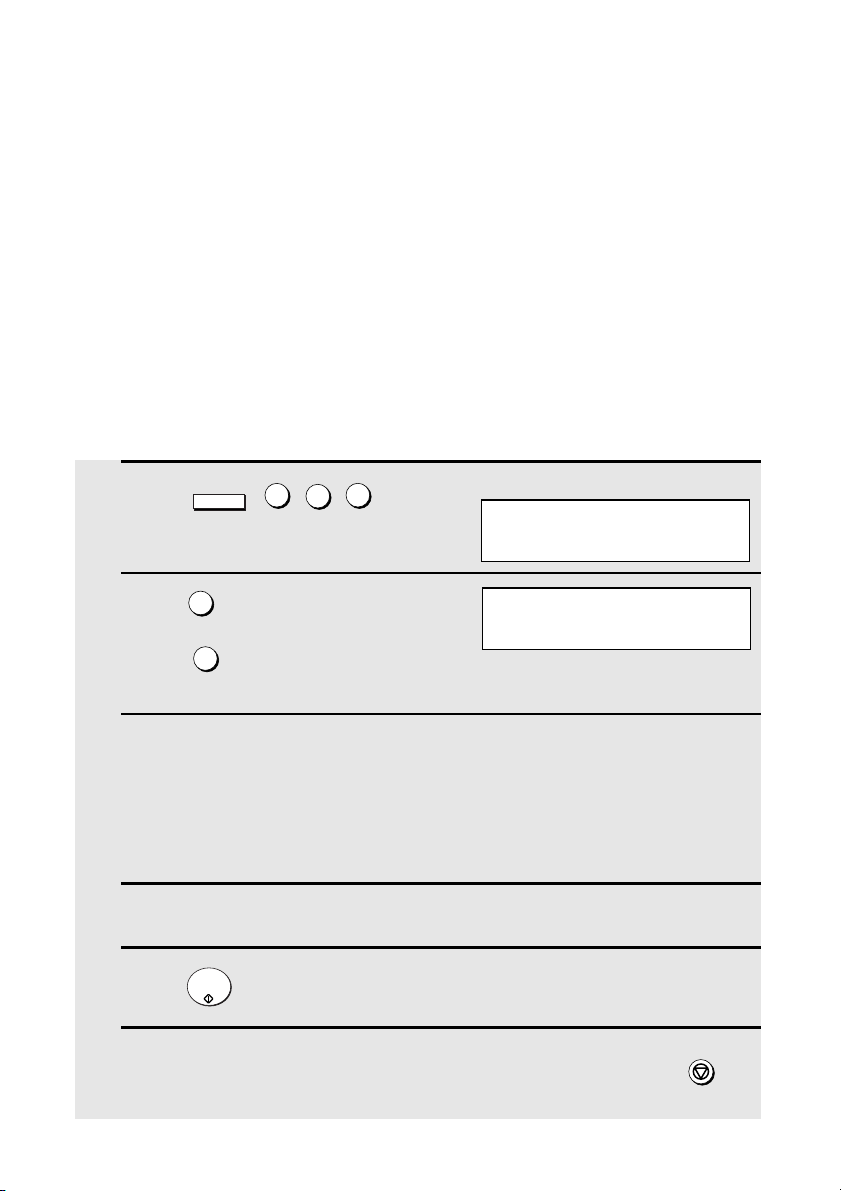
Blocking Reception of Unwanted Faxes
102
Blocking Reception of Unwanted Faxes
The Anti Junk Fax function allows you to block reception of faxes from parties
that you specify. This saves paper by not printing out unwanted "junk" faxes.
To use this function, first turn it on by setting Option Setting 20 (Anti-Junk Fax)
to ON as explained on page 112, and then enter the fax numbers from which
you do not want to receive faxes as explained below.
♦ Up to 50 numbers can be entered in the Anti Junk Number List.
♦ To clear a number from the Anti Junk Number List, you need to know the 2-
digit number that identifies it. If you have forgotten this number, print out the
Anti Junk Number List as explained on page 116.
1 Press , , , .
2 Press to enter a number in the Anti
Junk Number List.
(Press to clear a number from the
list.)
3 Entering: Enter a 2-digit number from “01” to “50” with the numeric
keys. This number identifies the fax number that you will enter in the
next step.
Clearing: Enter the 2-digit number that identifies the fax number you
want to clear, and go to Step 5.
4 Enter the fax number.
5 Press .
6 Return to Step 3 to enter (or clear) another fax number, or press
repeatedly to return to the date and time display.
MENU
3
0
6
1
2
START/
ENTER
STOP
Display:
06:STORE JUNK FAX #
1=SET, 2=CLEAR
1:JUNK FAX # SET
ENTER # (01-50)

Telephone Billing
103
5. Special
Functions
Telephone Billing
If you are on a PBX, you can have the fax machine send a code to the PBX
that identifies the sender for billing purposes each time a fax is sent.
Telephone billing is possible in two ways: using Department Control and by
direct billing code entry.
Using Department Control
If you are using the Department Control function, you can use Department
Codes for telephone billing. In this case, the fax machine will automatically
send the Department Code that a department member enters to access the
fax machine to the PBX. The PBX can then use the Department Code to bill
the call to that department.
To use Department Control for telephone billing, program a Department Code
for each group that will use the fax machine (see Department Control on page
100), and then have your dealer activate Department Control. After this, set
Option Setting 26 (Telephone Billing Code) to ON as explained on page 113.
Direct billing code entry
If you don’t want to use Department Control for telephone billing, you can
have users enter an assigned billing code (any number up 9 digits long) each
time they use the fax machine. The fax machine will automatically send this
code to the PBX for billing purposes. To use this function, have your dealer
activate the function and then set Option Setting 26 (Telephone Billing Code)
to ON as explained on page 113.
Note: The billing code should be assigned by your PBX administrator. Billing
codes are not programmed into the fax machine.
Users should enter their billing code as follows when performing an operation
on the fax machine. The code need only be entered when calling outside of
the PBX.
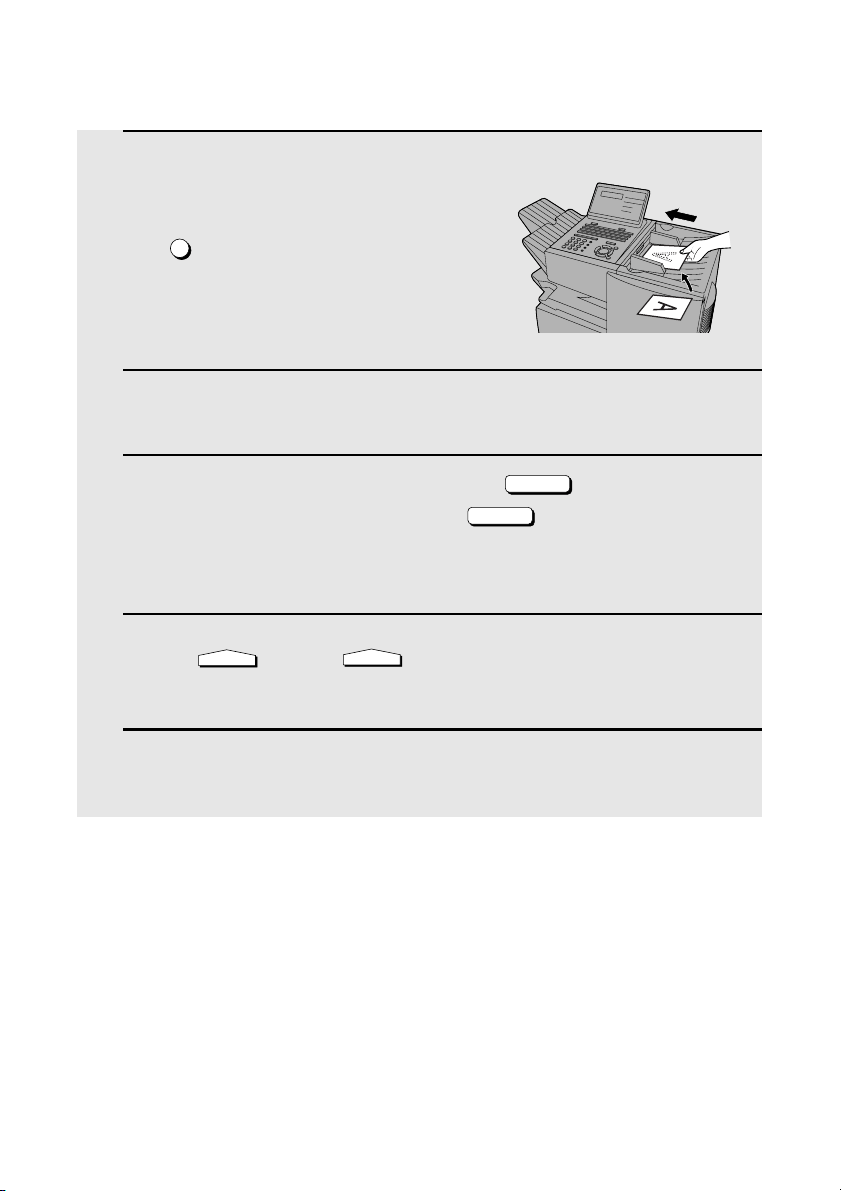
Telephone Billing
104
1 Load the document (s).
• If you are using Normal Dialing, press
or pick up an extension phone
connected to the same line.
• SEND READY will appear in the
display.
2 Enter your number to access an outside line (max. of 3 digits).
3 Flip down the Rapid Key overlay and press , enter the billing
code (max. of 9 digits), and then press again.
• Note: The code will appear as asterisks in the display and will not appear in
the Activity List or Transaction Report.
4 Press and/or to adjust the resolution and contrast if
desired.
5 Dial the other party by the desired method and transmit the document.
SPEAKER
Space
Space
RESOLUTION
CONTRAST
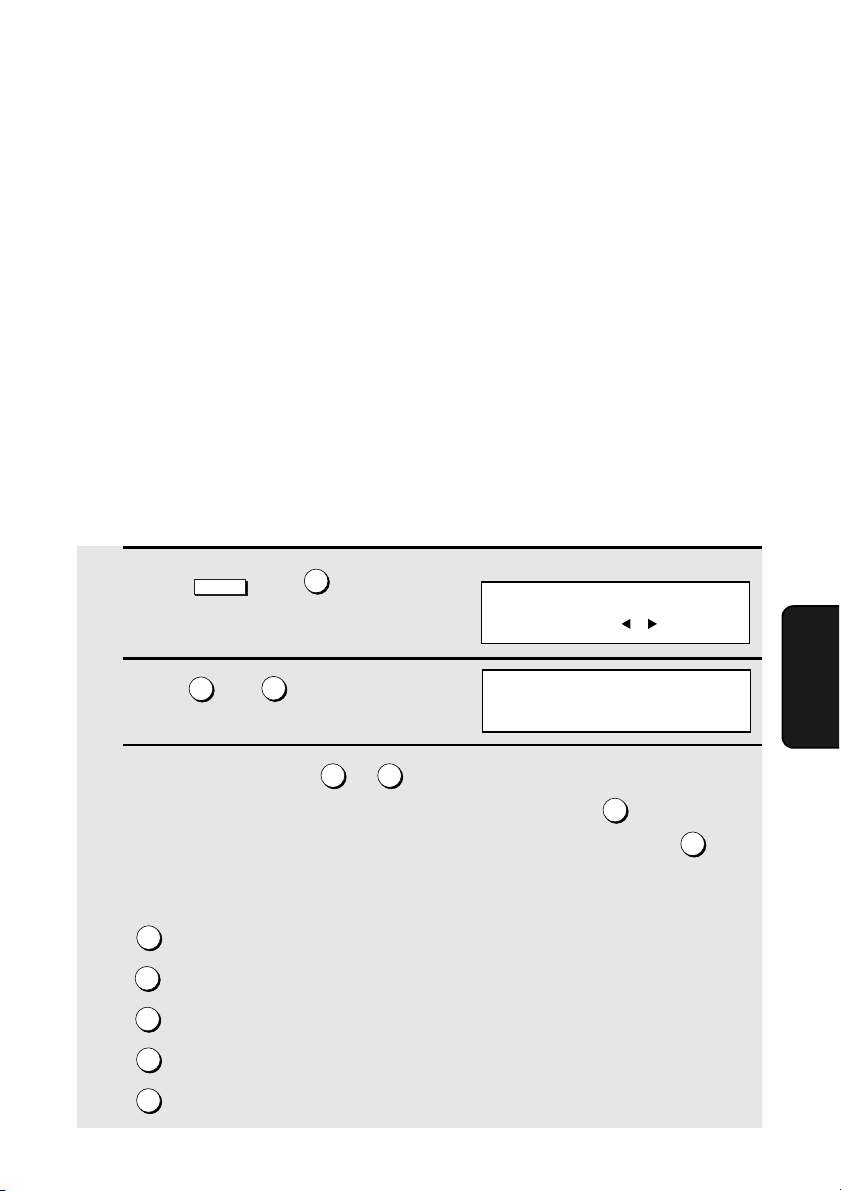
Distinctive Ring
105
5. Special
Functions
Distinctive Ring
Important:
♦ To use distinctive ring, you must subscribe to a distinctive ring service from
your local phone company.
♦
Your fax machine may not be compatible with some distinctive ring services.
Distinctive ring is a service offered by some local telephone companies
whereby they assign an additional second number to your regular single line.
The second number rings differently from your normal number.
If you subscribe to a distinctive ring service, you can set the fax machine to
automatically answer when your second number is called. This allows you to
use the second number as an exclusive fax number.
To have your fax automatically answer when your second number is called,
follow the steps below:
1 Press , and .
2 Press and .
3 Press a number from to to select the ring pattern below that
matches your second number’s ring pattern. Or, press to have your
fax automatically answer your normal telephone number. Press to
turn off the distinctive ring function.
In the U.S.A.:
RING PATTERN 1
Two short rings
RING PATTERN 2
One short, one long, and one short ring
RING PATTERN 3
Two short rings and one long ring
STANDARD RING
Your standard (normal) ring pattern
OFF SETTING
Turn distinctive ring off
MENU
4
2
8
1 3
4
5
1
2
3
4
5
Display:
4:OPTIONAL SETTING
ENTER #(01-34, , )
28: DISTINCTIVE RING
ENTER # (1-5) (5)
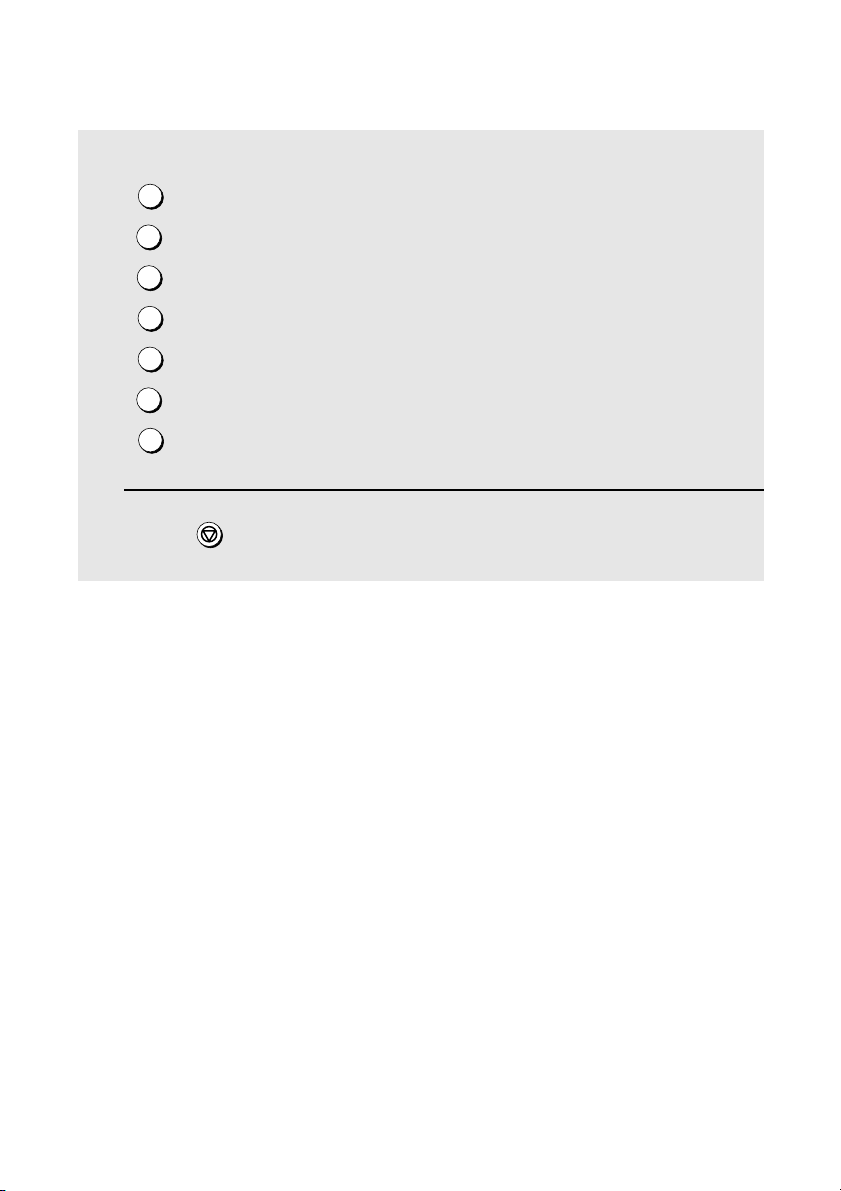
Distinctive Ring
106
In Canada:
4 Press repeatedly to return to the date and time display.
RING PATTERN 1
Two short rings
RING PATTERN 2
One short, one long, and one short ring
RING PATTERN 3
Two short rings and one long ring
RING PATTERN 4
Three very short rings
RING PATTERN 5
Two very short rings
STANDARD RING
Your standard (normal) ring pattern
OFF SETTING
Turn distinctive ring off
1
2
3
4
5
6
7
STOP
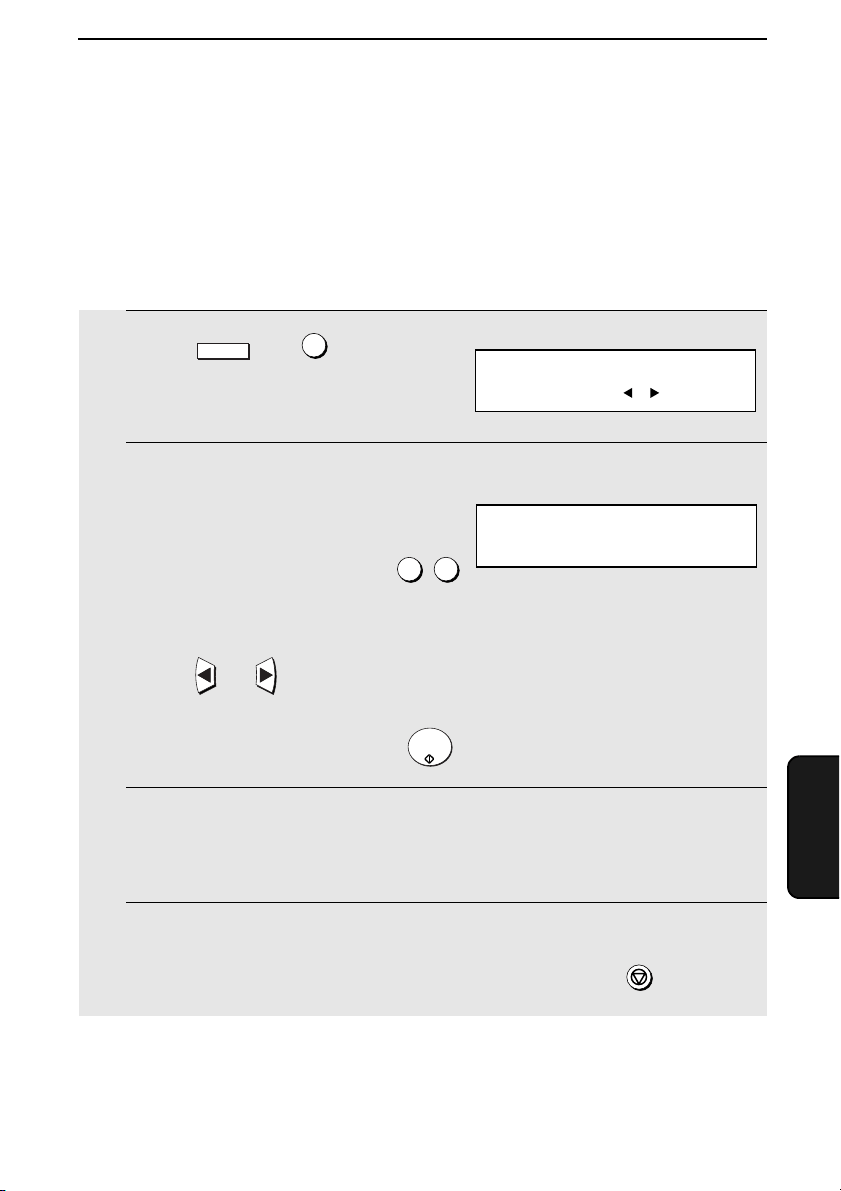
107
6. Optional
Settings
6. Optional Settings
The optional settings allow you to customize the fax machine to better suit
your needs.
An initial setting has been made for each optional setting at the factory. To
change a setting, follow the steps below to access it, and then change the
setting as explained in the list that follows.
1 Press and .
2 Press the numeric keys to enter the 2-
digit number (“01” to “34”) of the
optional setting that you wish to
change.
Example: Optional Setting 01
OR
Press or to scroll through the
optional settings. When the desired
optional setting appears, press .
3 Enter a selection for the optional setting by pressing the numeric keys.
See the list that follows for an explanation of each of the optional
settings.
4 After entering a selection, the subsequent optional setting will appear in
the display. To return to the date and time display, press twice.
MENU
4
0
1
START/
ENTER
STOP
Example: Option Setting 01
selected
Display:
4:OPTIONAL SETTING
ENTER #(01-34, , )
01: DEFAULT FAX RES.
ENTER # (1-3) (1)

Optional Settings
108
Optional Settings
Setting 01: DEFAULT FAX RESOLUTION
This option sets the default resolution (the resolution used if a setting is not
selected with ) for transmitting documents. Press for
STANDARD, for FINE, or for SUPER-FINE.
♦ Initial setting: 1
Setting 02: NUMBER OF RINGS AUTO RECEPTION
This sets the number of rings the fax machine waits before answering an
incoming call in AUTO receive mode. Enter a number from to (if
is entered, the fax machine will answer without ringing).
♦ Initial setting: 1
Setting 03: NUMBER OF RINGS MANUAL RECEPTION
You can also have the fax machine automatically answer a call after a certain
number of rings in MANUAL reception mode. To turn on this function, enter
the desired number of rings (any number from to ). To turn off the
function, enter .
♦ Initial setting: 0 (off)
Setting 04: AUTO LISTING
Press (YES) to have the fax machine automatically print an Activity
Report once every 30 send/receive operations. (The report can still be printed
on demand at any time.) Press (NO) to turn the function off.
♦ Initial setting: 2
RESOLUTION
1
2 3
0
9
0
1
9
0
1
2
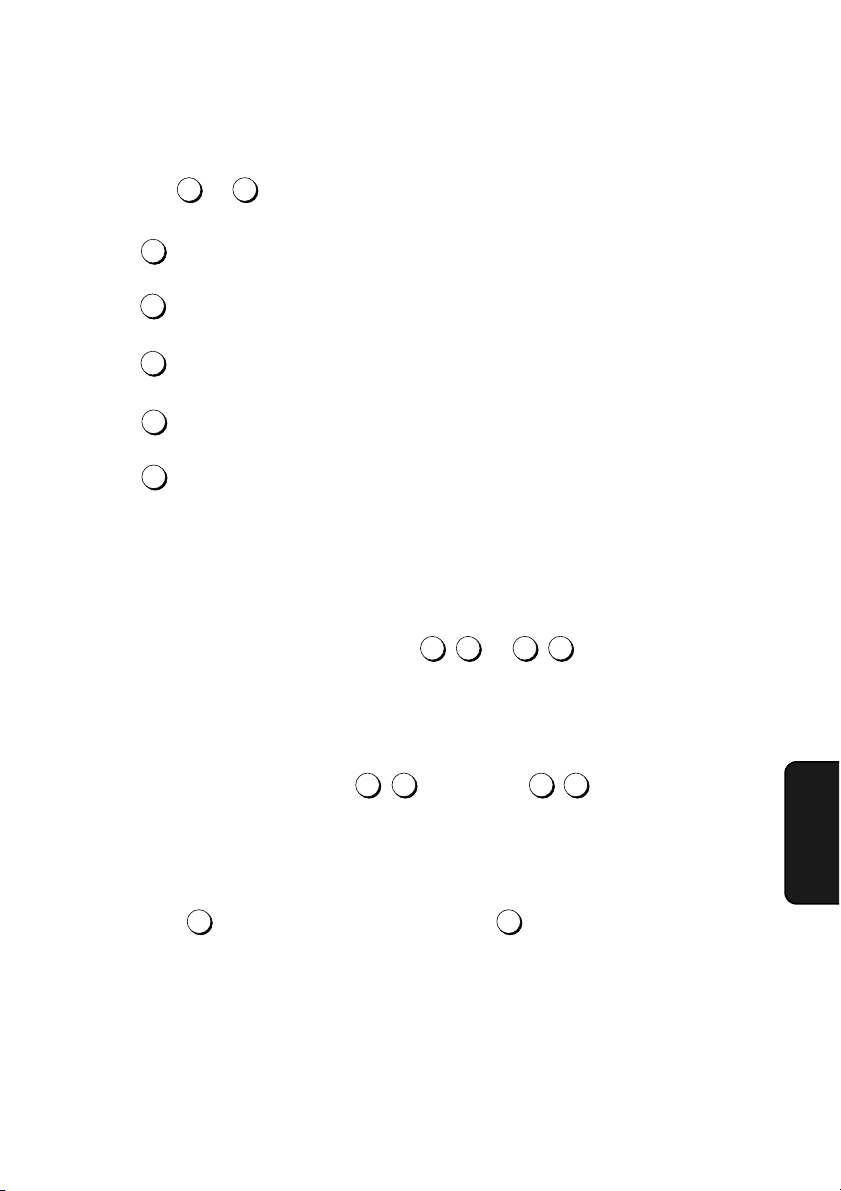
Optional Settings
109
6. Optional
Settings
Setting 05: TRANSACTION REPORT PRINT SELECTION
This sets the condition for printing out a Transaction Report. Enter a number
from to as follows:
♦ Initial setting: 5
Setting 06: RECALL TIMES
This sets the maximum number of times your fax will automatically redial if the
line is busy. Enter any number from to .
♦ Initial setting: 02
Setting 07: RECALL INTERVAL
This sets the amount of time your fax will wait between automatic redials
when the line is busy. Enter for 1 minute, for 2 minutes, etc.,
up to a maximum of 15 minutes.
♦ Initial setting: 05
Setting 08: SECURITY SELECTION
Press (ON) to turn polling security on, or (OFF) to turn it off.
♦ Initial setting: 1
(ERROR/TIMER
MEMORY):
A report will be printed after an error, timer
operation, or memory operation
(SEND ONLY) A report will be printed only after a
transmission
(ALWAYS PRINTS) A report will be printed after each
transmission, reception, or error
(NEVER PRINTS) A report will never be printed.
(ERROR ONLY) A report will be printed only after an error
occurs
1
5
0 0
1
4
0
1
0
2
1 2
.
5
1
2
4
3

Optional Settings
110
Setting 09: ERROR CORRECTION MODE (ECM)
Press (YES) to have any distortions in a transmission due to noise on the
telephone line corrected before print-out at the receiving end. This is only
effective when the other machine has ECM as well. Press (NO) to turn
the function off.
Note: If the transmission or reception is taking place in Super G3 mode, ECM
will operate regardless of the ECM setting.
♦ Initial setting: 1
Setting 10: AUTO COVER SHEET
Press (YES) to have the fax automatically generate a cover sheet and
send it as the last page of each transmission. Press (NO) to turn the
function off.
♦ Initial setting: 2
Note: In North America, Setting 11 is not used.
Setting 12: COPY SCANNING
This setting is used to reduce copies slightly before printing to ensure that
data on the edges are not cut off. Press (AUTO) for automatic reduction,
or (100%) for no reduction.
♦ Initial setting: 2
Setting 13: COPY CUT-OFF
This setting determines how the fax machine will copy documents that are
longer than the printing paper. Press (CONTINUE) to have the remainder
of the document printed on a second page, or (CUT-OFF) to cut off (not
print) the remainder.
♦ Initial setting: 2
Setting 14: RECEIVE REDUCE
This setting is used to reduce received documents slightly before printing to
ensure that data on the edges are not cut off. Press (AUTO) for automatic
reduction, or (100%) for no reduction.
♦ Initial setting: 1
1
2
1
2
1
2
1
2
1
2

Optional Settings
111
6. Optional
Settings
Setting 15: IMAGE MEMORY PRINT
Press (YES) to include a copy of the first page of the transmitted
document on the Transaction Report. Press (NO) to turn the function off.
This setting is only effective when transmitting from memory.
♦ Initial setting: 1
Setting 16: CASSETTE SELECTION
Press (AUTO SELECTION) if you want the fax machine to automatically
select the printing paper source (tray or cassette) according to the size of
each page received or copied. (If a document consists of multiple pages of
different sizes, each page will be printed on the paper that best matches its
size.)
Press (AUTO SELECTION 2) if you want the fax machine to automatically
select the printing paper source (tray or cassette) according to the size of the
first page of the document received or copied. (If the document consists of
multiple pages of different sizes, all pages will be printed on the same size of
paper based on the size of the first page.)
Press (MANUAL SELECTION) if you want to set a fixed order of priority
for the paper sources. When the 1ST PRIORITY setting appears, press
to have paper always drawn from the tray regardless of the size of the
received or copied document, or to have paper always drawn from the
cassette. When the 2ND PRIORITY setting appears, press to have paper
drawn from the other source in the event that the “1st priority” source runs out
of paper, or (NONE) to have the incoming fax received to memory.
Note: This setting will only appear if your dealer has installed the paper
cassette option and Option Setting 31 (Seperate Mode) is turned off.
♦ Initial setting: 1
Setting 17: RETRANSMISSION TIMES
This sets the number of times the fax will reattempt a memory transmission
which has been interrupted by a line error or power failure. Enter any 2-digit
number from to , or enter to turn off the function.
♦ Initial setting: 10
1
2
1
2
3
1
2
1
2
0
1 1
4
0 0

Optional Settings
112
Setting 18: RETRANSMISSION INTERVAL
You can select the number of minutes the fax waits between each memory
retransmission attempt. Enter for 1 minute, for 2 minutes,
etc., up to a maximum of 15 minutes. If you do not want the fax to wait
between attempts, enter .
♦ Initial setting: 02
Setting 19: POWER SAVE MODE
To conserve power, you can have the laser printer heater in your fax machine
turn off when not in use. When this is done, the heater will turn on
automatically when you receive a document (there will be a slight delay before
printing while the heater warms up) and turn off when printing is completed.
Press to turn on Power Save mode, or to turn it off.
♦ Initial setting: 1
Setting 20: ANTI-JUNK FAX
Press to block reception from fax numbers entered in the Anti Junk Fax
List. Press to allow reception from all numbers.
♦ Initial setting: 2
Setting 21: ALARM VOLUME
This sets the volume of the beep sound that alerts you to error conditions and
informs you that operations have been completed. Press for HIGH,
for LOW, or for OFF.
♦ Initial setting: 2
Setting 22: DIAL MODE
This sets the dial mode. Press if you are on a touch-tone line, or if
you are on a pulse dial (rotary) line.
♦ Initial setting: 1
0
1
0
2
0 0
1 2
1
2
1 2
3
1 2

Optional Settings
113
6. Optional
Settings
Setting 23: QUICK ON-LINE
When you transmit a multi-page document, this setting determines whether
the fax machine will dial the receiving party and begin transmitting while
scanning is still in progress, or wait until all pages have been scanned before
dialing. Press to have the fax machine dial and begin transmission while
scanning is still in progress, or to have the fax machine wait until all pages
have been scanned.
♦ Initial setting: 1
Setting 24: MULTI TTI
If you are using Department Control, you can press to have the
department name (the name associated with the department code entered by
an operator to access the fax) appear at the top of each transmitted
document. This will appear in place of the name entered in Entering Your
Name and Fax Number in Chapter 1. Press to turn Multi TTI off (the
sender’s name entered in Chapter 1 will appear).
♦ Initial setting: 2
Setting 25: BEEP LENGTH
This sets the duration of the beep that signals the end of transmission,
reception, or copying. Press for 3 seconds, for 1 second, or for
no beep.
♦ Initial setting: 1
Setting 26: TELEPHONE BILLING CODE
This setting allows you to use Department Codes or direct billing codes for
telephone billing on a PBX. (Your dealer must first activate Department
Control or direct billing code entry.) Press to turn telephone billing on, or
to turn it off.
♦ Initial setting: 2
If you pressed , the BILLING CODE DIAL selection will subsequently
appear. Press if your PBX must receive the billing code before dialing a
telephone number, or if it must receive the billing code after dialling a
telephone number. (Refer to your PBX manual or consult your PBX
adminstrator for this information.)
1
2
1
2
1 2 3
1
2
1
1
2

Optional Settings
114
Note: If you select AFTER for the BILLING CODE DIAL selection, you must press
after dialing if you use .
Setting 27: DEPARTMENT CODE DIGITS
Use this setting if you are using Telephone Billing and need to change the
number of digits of Department Codes to accord with your PBX’s telephone
billing system. Enter any number from to .
♦ Initial setting: 4
Setting 28: DISTINCTIVE RING
This sets the ring pattern to which your fax will answer if you subscribe to a
distinctive ring service. Enter a number from to ( to in
Canada) to select a pattern. See page 105 for more details.
♦ Initial setting: 5
Setting 29: VERIFICATION STAMP
Press if you want the fax machine to stamp each original document page
as it is scanned. After scanning, you can check to see if all pages have been
stamped to verify that no double feeds occurred. Press to turn the
function off.
Note: To use this function, your dealer must install the Verification Stamp
option.
♦ Initial setting: 2
Setting 30: COPY RESOLUTION
Use this setting to select the default copying resolution (the resolution used for
copying if a setting is not made with ). Press for STANDARD,
for FINE, or for SUPER-FINE.
♦ Initial setting: 2
REDIAL
SPEAKER
3
9
1
5
1
7
1
2
RESOLUTION
1
2 3

Optional Settings
115
6. Optional
Settings
Setting 31: SEPARATE MODE
If desired, you can have the fax draw a sheet of paper from one of the paper
sources after each fax reception. By loading colored (or large) paper in that
source, each colored sheet drawn will act as a separator that makes it easy to
distinguish where one multi-page document ends and another begins. A
Transaction Report printed after a reception will also be printed from that
paper source to act as a separator sheet. To turn on this function, press
and then select the paper source for the separator paper by pressing for
the paper tray or for the paper cassette. After turning on the function, be
sure to load appropriate paper in the selected paper source. To turn off
Seperate mode, press . (Note that the function will turn off automatically if
the selected paper source runs out of paper.)
Note: This setting is only available if your dealer has installed the paper cassette
option.
♦ Initial setting: 2
Note: If you turn off the Separate Mode setting, Option Setting 16 will
subsequently appear in the display to allow you make an appropriate setting for
cassette selection. If you don’t make a selection, 1:AUTO SELECTION will be
automatically selected.
Note: Settings 32 and 33 are not used.
Setting 34: LANGUAGE SELECT
This setting is used to select the language that appears in the display. Press
to select English or to select French.
♦ Initial setting: 1
Note: Settings 35 through 38 are not used.
1
1
2
2
1 2
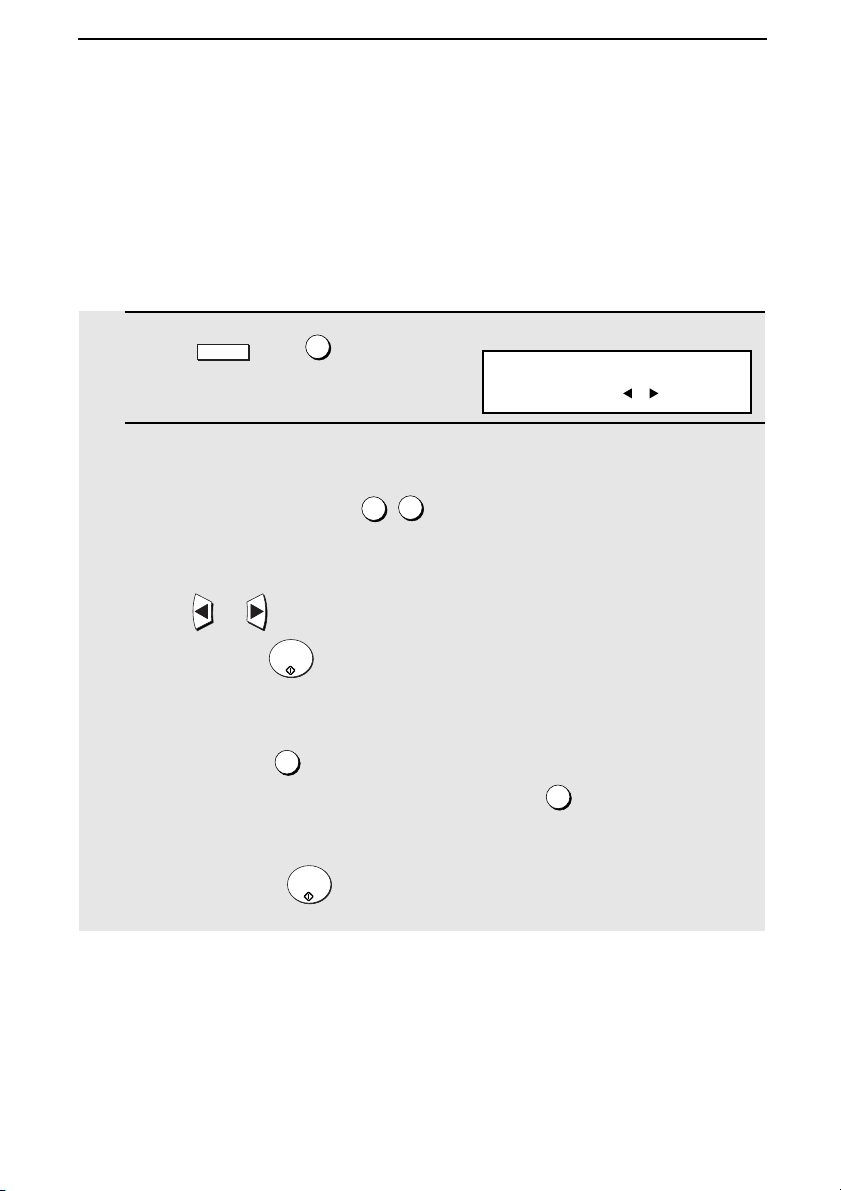
116
7. Printing Lists and Reports
You can print lists showing settings and information entered in the fax
machine. You can also print out reports on recent activity and individual
operations after they are completed. The lists and reports are described on
the following pages.
To print a list, follow the steps below.
1 Press , and .
2 Press the numeric keys to enter the 2-digit number (“01” to “11”) of the
list you want to print.
Example: Activity Report
OR
Press or to scroll through the lists. When the desired list
appears, press .
• If you selected the Destination List (03): You can select the order in
which the destinations (the fax numbers programmed for automatic dialing)
appear. Press (NUMBER) to have the destinations appear in the order
of the Rapid Key and Speed Dial numbers. Press (ALPHABET) to have
the destinations appear in alphabetical order (any destinations that do not
have a name programmed will appear at the end of the list). After selecting
the order, press to print the list.
MENU
2
0
1
START/
ENTER
1
2
START/
ENTER
Display:
2:LISTING MODE
ENTER #(01-11, , )
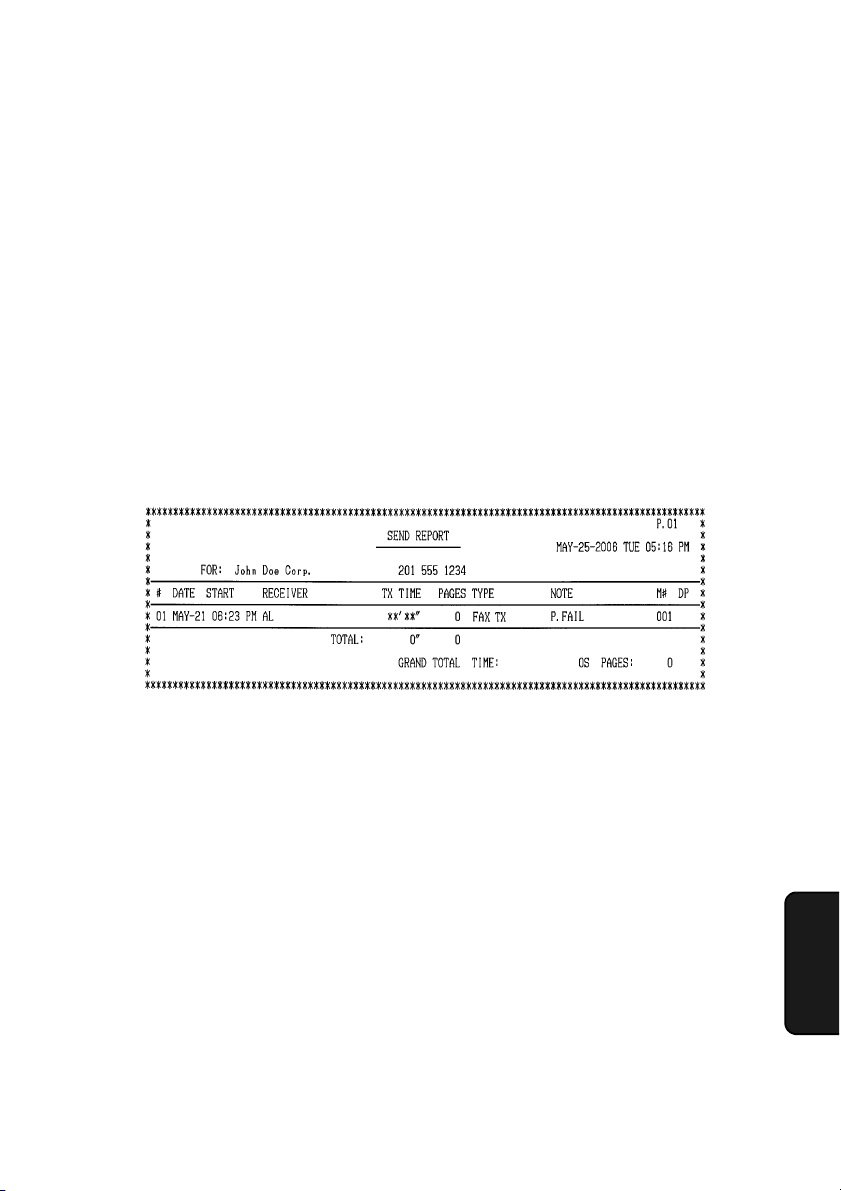
Printing Lists and Reports
117
7. Printing
Lists
Explanation of headings
SENDER/
RECEIVER
The name or fax number of the other machine involved in the
transaction.
START The time at which transmission/reception started.
TX/RX TIME Total time taken for transmission/reception.
PAGES Number of pages transmitted/received.
TYPE CONF. TX - A confidential operation was performed.
(T) - A timer operation was performed.
(D) - The document was sent directly from the feeder, not
from memory.
Activity Report (List 01)
This report shows information on your most recently performed send and
receive operations (a combined maximum of 30 operations can appear). The
report is divided into two parts: the SEND REPORT, which shows information
on transmissions, and the RECEIVE REPORT, which shows information on
receptions.
♦ If Option Setting 4 (Auto Listing) is set to YES, a report will be automatically
printed out whenever information on 30 operations has accumulated. (A
report can still be printed on demand at any time.)
♦ All information is erased after a report is printed out. If automatic print-out is
turned off and the report is not printed manually for 30 operations, the
information on the oldest operation will be overwritten each time a new
operation is performed.

Printing Lists and Reports
118
Timer List (List 02)
This list shows the timer operations that are currently set.
Destination List (List 03)
This list shows the fax numbers that have been programmed for automatic
dialing.
Passcode List (List 04)
This list shows your settings for polling security, your name and fax number as
programmed in the fax machine, and a sample of the header printed at the top
of every page you fax (HEADER PRINT).
NOTE (One of the following notes will appear under NOTE in the
report to indicate whether the transaction was successful,
and if not, the reason for the failure.)
OK - Transmission/reception was successful.
P.FAI L - A power failure prevented the transaction.
JAM - The printing paper or document jammed, preventing
the transaction.
BUSY - The fax was not sent because the line was busy.
COM.E-0 to COM.E-31 - A telephone line error prevented
the transaction. See Line Error in Problems and Solutions in
Chapter 9.
CANCEL - The transaction was cancelled because the
STOP key was pressed, no document was in the feeder, or
the other machine requested transmission using a function
which your fax machine does not have.
CANCEL 3 - (Used for confidential transmission only)
A confidential transmission was cancelled because the
receiving machine does not have a confidential function, a
confidential passcode is not programmed in the receiving
machine, its memory is full, or it is not a Sharp model.
CANCEL 4 - (Used for confidential transmission only)
A confidential ransmission was cancelled because an
incorrect mailbox number was entered for a fax machine with
confidential mailboxes, or the other machine’s memory is full.

Printing Lists and Reports
119
7. Printing
Lists
Optional Setting List (List 05)
This list shows the current status of the option settings.
Program and Group List (List 06)
The top part of this list shows the programs that have been entered. The
bottom part shows the fax numbers that have been programmed into Group
Keys.
Batch Transmission List (List 07)
The Batch Transmission List shows the documents that are currently stored
for batch transmission.
Department Usage List (List 08)
This list shows total transmission time and pages transmitted (including
polling time and pages polled) for each department during the period
indicated on the list. The information is only available if Department Control
has been activated.
♦ Each time you print out the report, the data is cleared and a new period
begins.
Confidential Reception List (List 09)
This list shows which mailboxes have received confidential documents and
the total number of pages received. Print this list out whenever RCVD CONF.
FAX appears in the display.
Anti Junk Number List (List 10)
This list shows the fax numbers from which reception is not allowed.
Personal Book List (List 11)
This list shows the personal books that have been created.
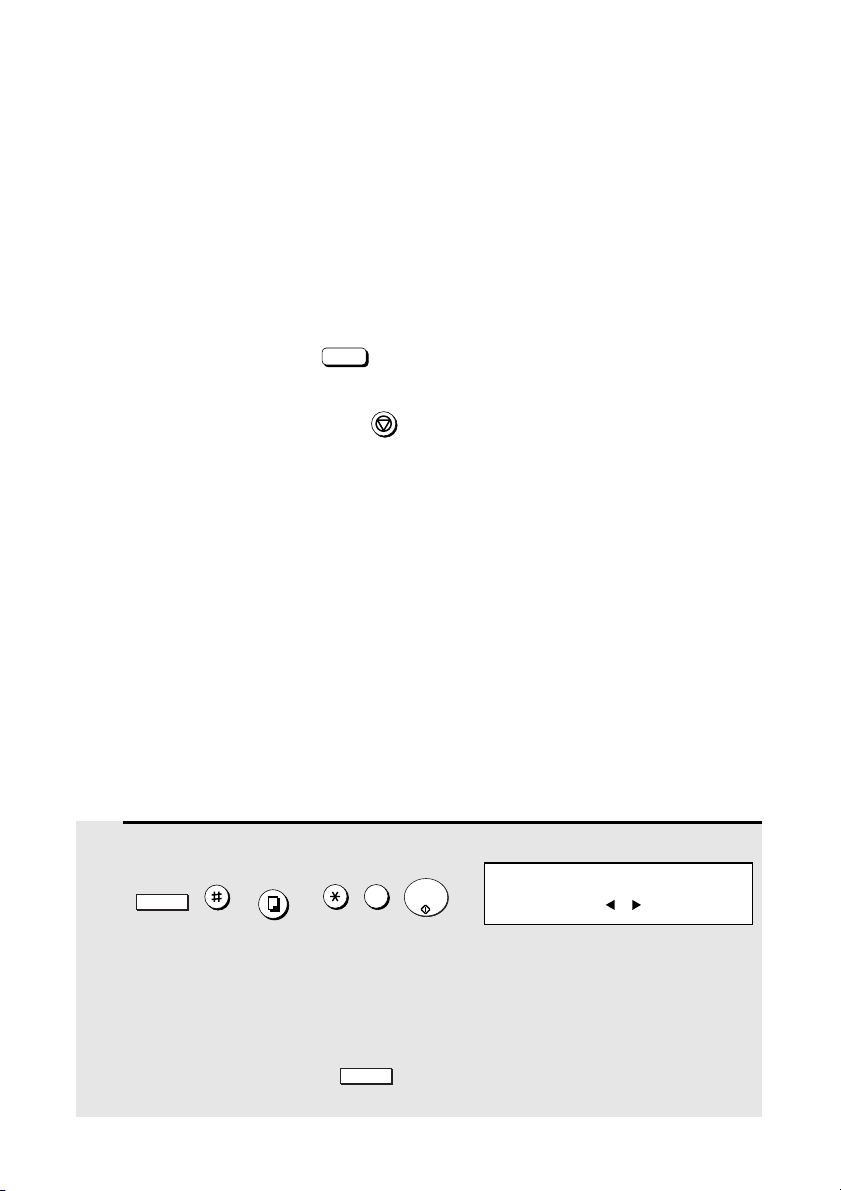
Printing Lists and Reports
120
Transaction Report
This report is printed out automatically after an operation is completed to
allow you to check the result. The fax machine is set at the factory to print out
the report only when an error occurs. If desired, you can change the setting to
have it printed out under a variety of other conditions. See Option Setting 5
(Print Selection) in Chapter 6.
♦ If you wish to have the Transaction Report printed after a particular fax
transmission, press (flip up the Rapid Key overlay if it is down)
before performing the steps of the transmission. (To cancel printing of the
Transaction Report, press .)
♦ The same headings appear in the Transaction Report as in the Activity
Report. See Activity Report in this chapter for an explanation of the
headings.
♦ The first page of the document will also appear below the report if the
document was sent from memory. If confidentiality is required, you can
prevent printing of the first page of the document by setting Option Setting
15 (Image Memory Print) to NO.
REPORT
N/*
STOP
Printing the Scan/Print Counter List
The machine keeps counts of the number of pages scanned for fax
transmission and copying, and the number of received fax pages, copies, and
list pages printed. To print out a list showing these counts, follow the steps
below.
1 Press the following sequence of keys:
, , , , , .
• This is a hidden operation, and therefore error beeps may sound and the
display may not respond normally when you press several of the above
keys. Disregard the error beeps and display while pressing the keys.
• If password protection (page 28) is enabled, a password entry screen will
appear after you press . Continue to press the above keys without
entering the password.
MENU
COPY/HELP
9
START/
ENTER
MENU
Display:
SCAN/PRINT COUNTER
ENTER #(1-2, , )

Printing Lists and Reports
121
7. Printing
Lists
Clearing the scan/print counts
To clear all counts that appear in the Scan/Print Counter List, follow the steps
below.
1 Press the following sequence of keys:
, , , , , .
• This is a hidden operation, and therefore error beeps may sound and the
display may not respond normally when you press several of the above
keys. Disregard the error beeps and display while pressing the keys.
• If password protection (page 28) is enabled, a password entry screen will
appear after you press . Continue to press the above keys without
entering the password.
2 Press .
3 Press to clear the counts.
• A list of the current counts will be printed and then the counts will be
cleared.
MENU
COPY/HELP
9
START/
ENTER
MENU
2
START/
ENTER
Display:
SCAN/PRINT COUNTER
ENTER #(1-2, , )
2: SCN/PRNT CNT CLEAR
OK? (PRESS START KEY)
2 Press print the list.
1
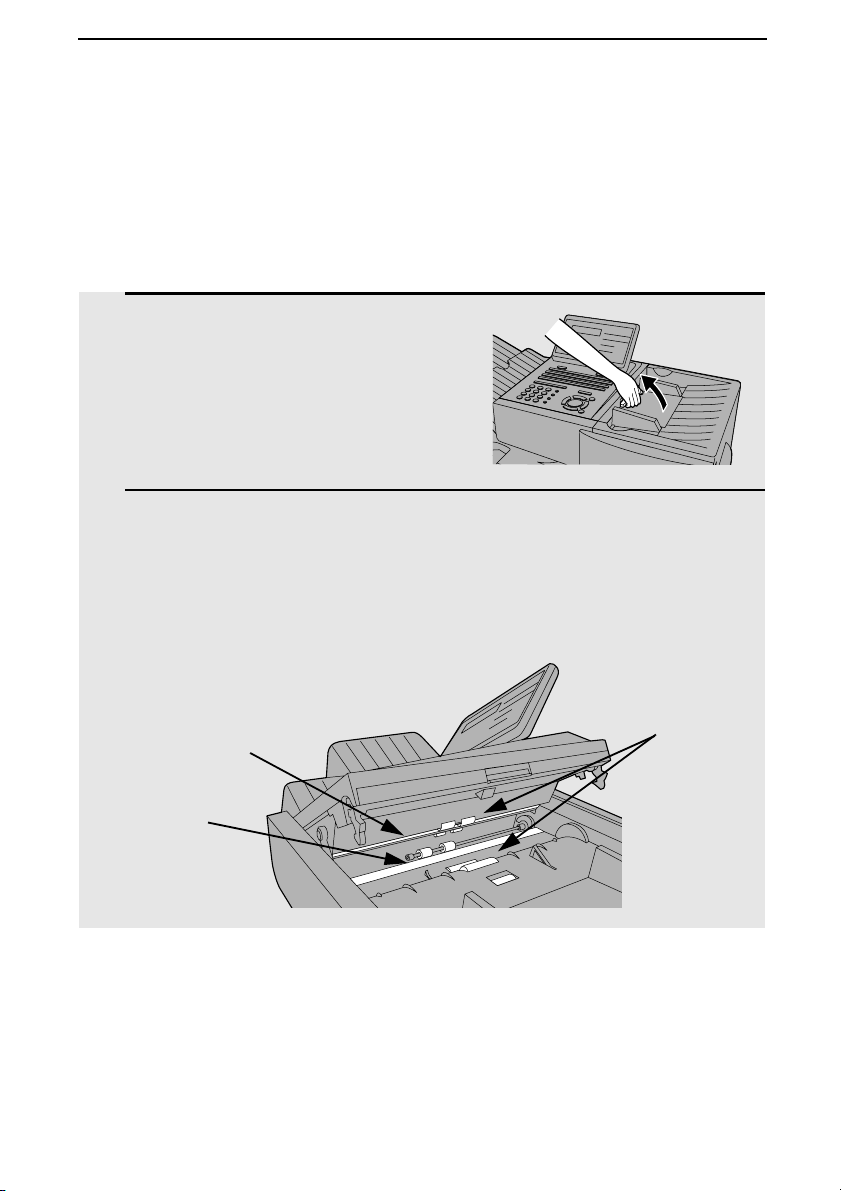
122
8. Maintenance
Cleaning the Scanning Glass and Rollers
Clean the reading glass and rollers frequently to ensure the quality of your
transmitted images and copies.
1 Open the operation panel.
• Squeeze the release marked PANEL
RELEASE and pull up.
2 Wipe the scanning glass, white backplate, and rollers with a soft cloth.
• Make sure that all dirt and stains (such as correcting fluid) are removed, as
dirt will cause vertical lines on transmitted images and copies. (If
necessary, wipe with denatured alcohol.)
Scanning
glass
White
backplate
The Housing
Wipe the external parts and surface of the machine with a dry cloth.
Caution!
Do not use benzene or thinner. These solvents may damage or discolor the
machine.
Rollers
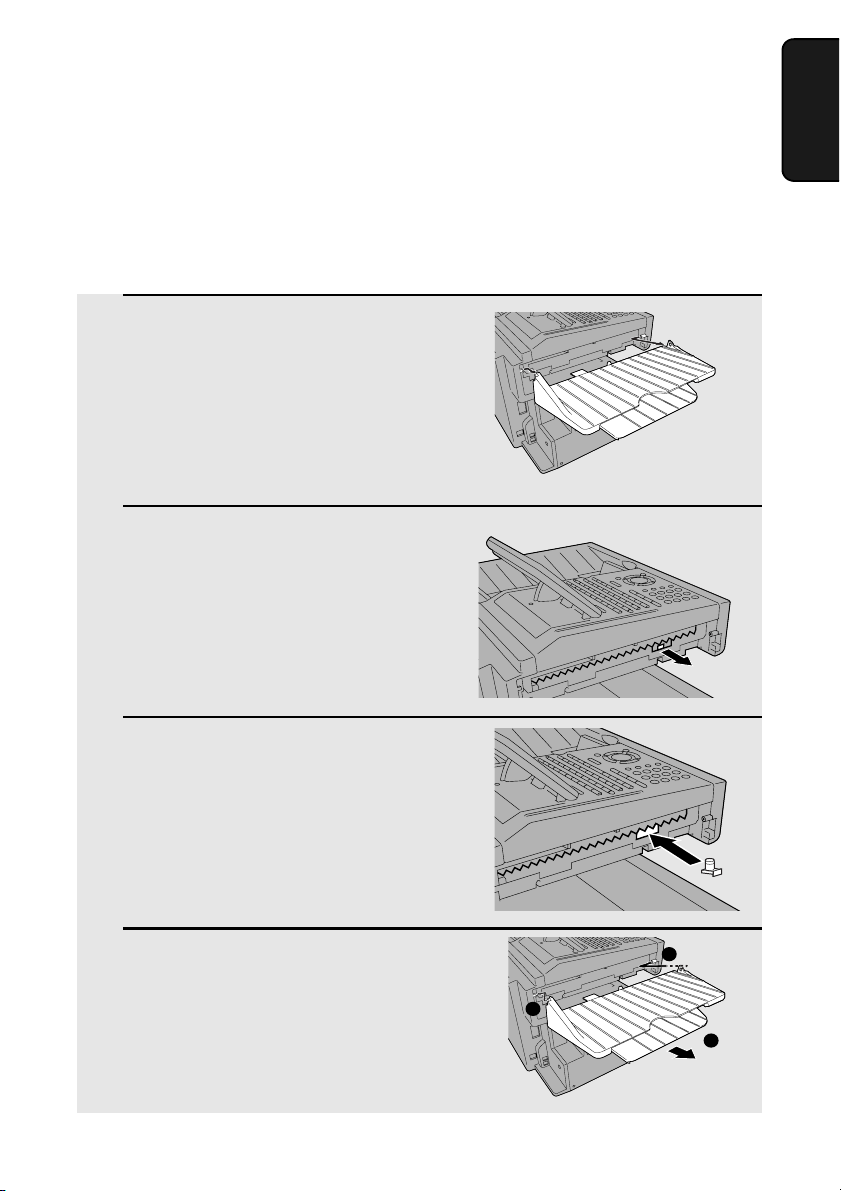
Replacing the Verification Stamp
123
8. Maintenance
Replacing the Verification Stamp
If you are using the Verification Stamp function, you will need to replace the
ink cartridge in the stamp unit when it runs out of ink (when the stamped mark
on original documents becomes faint). A new ink cartridge can be obtained
from your dealer.
1 Remove the ADF exit tray.
2 Press down on the protruding tab of
the green ink cartridge and pull the
cartridge out with your fingers.
3 Insert the new ink cartridge into the
machine (make sure that the tab is
facing out).
4 Replace the ADF exit tray.
1
3
2

124
9. Troubleshooting
Problems and Solutions
Line error
Problem Solution
LINE ERROR appears in
the display, and/or a
transaction report is
printed out with COM. E-
and a number from 0 to 31
in the NOTE column.
Try the transaction again. If the error persists, check
the following:
• Check the hookup. The cord from the TEL. LINE
jack to the wall jack should be no longer than six
feet.
• Make sure there are no modem devices sharing the
same telephone line.
• Check with the other party to make sure their fax
machine is functioning properly.
• Have your telephone line checked for line noise.
• Try connecting the fax machine to a different
telephone line.
• If the problem still occurs, your fax machine may
need service.

Problems and Solutions
125
9. Trouble-
shooting
Dialing and transmission problems
Problem Solution
Dialing is not possible. • Make sure the power cord is properly plugged into
a power outlet.
• Make sure that the telephone line is properly
connected to both the TEL. LINE jack and the wall
jack.
• Make sure that the fax machine is set to the correct
dialing mode for your telephone line. See Option
Setting 22 in Chapter 6.
The power is on, but no
transmission takes place.
• Make sure that the receiving machine has paper.
• Make sure that the telephone line cord is plugged
into the TEL. LINE jack, and not the TEL. SET jack.
• If the receiving machine is in manual mode with no
attendant, reception will not be possible.
• If the receiving machine is not a Sharp model,
make sure it is G3 compatible.
• Check the display for error messages.
• Press the SPEAKER key and check for a dial tone.
Nothing is printed at the
receiving end.
• Make sure that the document for transmission is
placed face down in the feeder.
A distorted image is
received at the other end.
• If ECM mode (Option Setting 9) is turned off, noise
on the telephone line may cause distortion. Try
sending the document again.
• Make a copy of the document on your fax machine.
If the copy is also distorted, your fax machine may
need service.

Problems and Solutions
126
Reception and copying problems
Problem Solution
The fax machine doesn’t
receive documents
automatically.
• Make sure that the reception mode is set to AUTO.
If you subscribe to a distinctive ring service, make
sure that the Distinctive Ring function is set to the
correct ring pattern. If you do not subscribe to a
distinctive ring service, make sure that Distinctive
Ring is set to OFF SETTING. (See Distinctive Ring
in Chapter 5.)
The received document is
faint.
• Ask the other party to send higher contrast
documents. If the contrast is still too low, your fax
machine may need service. Make a copy or print a
report to check your machine’s printing ability.
• The toner cartridge may need replacement.
The printed image
appears dirty and/or the
paper jams frequently.
• Have a service technician clean the print
compartment.
The power is on, but no
reception takes place.
• Make sure that the wall jack is connected to the
TEL. LINE jack, and not the TEL. SET jack.
Received images are
distorted.
• If ECM mode (Option Setting 9) is turned off, noise
on the telephone line may cause distortion. Have
the other party try sending the document again.
• If the other machine has ECM mode, make sure
this feature is turned on in both fax machines (see
Option Setting 9).
• Make a copy or print a report on your fax machine.
If the copy or report is also distorted, your fax
machine may need service.
• The drum cartridge may be damaged. Try a new
drum cartridge.
• The fusing unit and transfer roller may need to be
replaced during the life of the machine if print
quality begins to deteriorate. This must be done by
a service technician.

Problems and Solutions
127
9. Trouble-
shooting
The quality of copies is
poor and/or black lines
appear.
• Any dirt or material on the scanning glass will
cause lines to appear on copies and transmitted
faxes. Clean the scanning glass as explained in
Chapter 8.
Dots appear at regular
intervals on received
documents and copies.
• The drum cartridge may be damaged. Replace the
drum cartridge.
The printing paper comes
out blank when you try to
receive a document.
• Make sure that the document is loaded properly in
the feeder of the transmitting machine. Make a
copy or print a report to confirm the printing ability
of your machine.
General problems
Problem Solution
Nothing appears in the
display.
• Make sure the power cord is properly plugged into
a power outlet and the power switch is turned on.
• Connect another electrical appliance to the outlet to
see if it has power.
The machine does not
respond when you press
any of its keys.
• If a beep sound is not made when you press the
keys, turn off the power switch and then turn it on
again several seconds later.
Automatic document
feeding does not work for
transmission or copying.
• Check the size and weight of the document (see
Transmittable Documents in Chapter 2).
No reception occurs when
polling is attempted.
• Make sure you have not run out of paper.
• Make sure the transmitting machine is in automatic
reception mode.
• If the transmitting machine has polling security,
make sure that your fax number has been entered
both in your machine and in the transmitting
machine.

Messages and Signals
128
Messages and Signals
Display messages
CHECK CASSETTE This indicates that the cassette is not installed
properly.
CONF. REFUSED A confidential transmission has been denied
because you entered an incorrect mailbox number
for a machine with mailboxes.
CONF. RX ERROR Confidential reception was cancelled because the
mailbox number specified by the transmitting
machine is not programmed in your fax machine.
CHECK COVER OR DRUM The print compartment cover is open or the drum
cartridge has not been installed. Close the cover
or install the drum cartridge.
DRUM LIFE REACHED The drum cartridge must be replaced soon (this
message appears when approximately 1000
pages can still be printed).
FAX RCVD IN MEMORY A fax has been received in memory because the
toner cartridge needs replacement, you have run
out of printing paper, or the paper is jammed. The
fax will automatically print out when the problem is
fixed.
LINE ERROR Transmission or reception was not successful.
Press STOP to clear the message and then try
again. If the error persists, see Line Error in
Problems and Solutions in this chapter.
MEMORY FULL ERROR An internal memory error occurred. You may need
to resend one or more pages of the document
being transmitted when the error occurred.
MEMORY FULL ERROR
PRESS STOP KEY
The memory is full and the transmission has been
canceled (this message appears when Option
Setting 23, Quick On-line, is set to NO). Press the
STOP key to clear the message .
MENU MODE The MENU key has been pressed.

Messages and Signals
129
9. Trouble-
shooting
NO CONF. FUNCTION Confidential transmission was cancelled because
the receiving machine does not have a
confidential function, a confidential passcode is
not programmed in it, its memory is full, or it is not
a Sharp model.
NO PAPER This message will be followed by one of the paper
sources in parentheses, and informs you that the
paper source is out of paper. If no paper source is
indicated, both paper sources are out of paper.
ONHOOK DIAL MODE The SPEAKER key has been pressed and the fax
machine is waiting for you to dial.
OUTPUT TRAY OFF The received document tray is not attached.
Attach it as explained in Connections in Chapter 1
(the tray must be attached for the fax machine to
operate properly.)
PAPER JAM The printing paper is jammed. See the following
section, Clearing Paper Jams.
RCVD CONF. FAX A confidential fax has been received in memory.
Print the fax as explained in Confidential
Operations in Chapter 5.
REMOVE ORIGINAL(S) The original document is jammed. See the
following section, Clearing Paper Jams.
SIZE ERROR This message will be followed by one of the paper
sources in parentheses, and informs you that the
paper loaded in that source is not all the same
size.
REPLACE TONER The toner cartridge must be replaced.
WAITING<MEMORY FULL> The memory has become full and scanning has
stopped during scanning of a multi-page
document. Scanning will automatically resume
when sufficient memory becomes free (for
example, after several pages are transmitted).

Messages and Signals
130
Audible signals
Continuous tone 3 seconds Indicates the end of transmission,
reception, or copying.
Intermittent tone
(3 beeps)
5 seconds
(1 second on, 1
second off)
Indicates incomplete transmission,
reception, or copying.
Rapid intermittent
tone
35 seconds
(0.7 seconds on,
0.3 seconds off)
Indicates that an extension phone
connected to the fax is off hook.

Clearing Paper Jams
131
9. Trouble-
shooting
Clearing Paper Jams
Clearing a jammed document
If the original document doesn’t feed properly during transmission or copying,
or REMOVE ORIGINAL(S) appears in the display, first try pressing . If
the document doesn’t feed out, open the operation panel and remove it.
Important:
Do not try to remove a document without opening the operation panel. This
may damage the feeder mechanism.
START/
ENTER
1 Open the operation panel.
• Squeeze the release marked PANEL
RELEASE and pull up.
2 Remove the document.
3 Close the operation panel, making sure
it clicks into place.
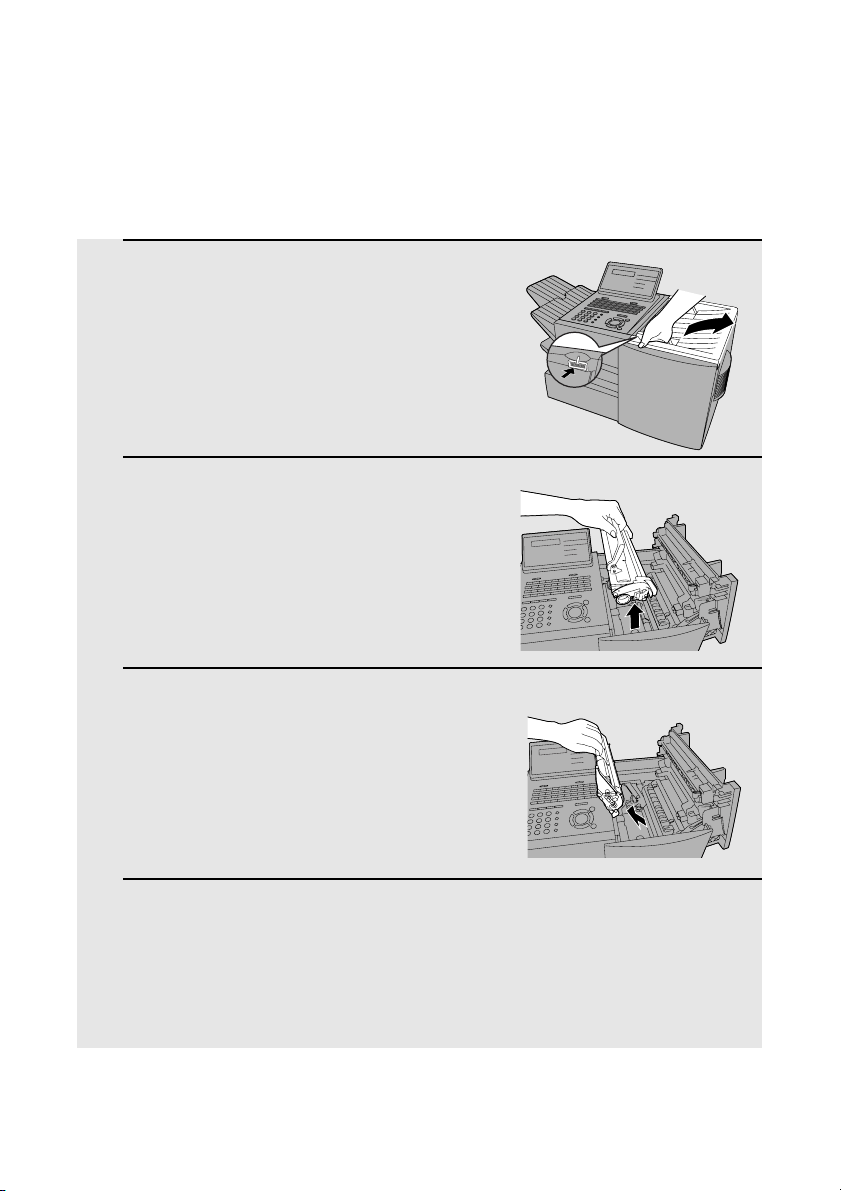
Clearing Paper Jams
132
1 Press the green release and open the
print compartment cover.
• Caution!
The fusing unit inside the print
compartment becomes very hot during
operation. Be careful not to touch the
inside of the compartment.
2 Remove the toner cartridge and place
it on a sheet of paper.
3 Remove the drum cartridge.
4 Remove the jammed paper.
• Make sure no torn pieces of paper remain in the print compartment and
rollers.
Clearing jammed printing paper
If the printing paper jams, PAPER JAM will appear in the display. Follow the
steps below to clear the jam.
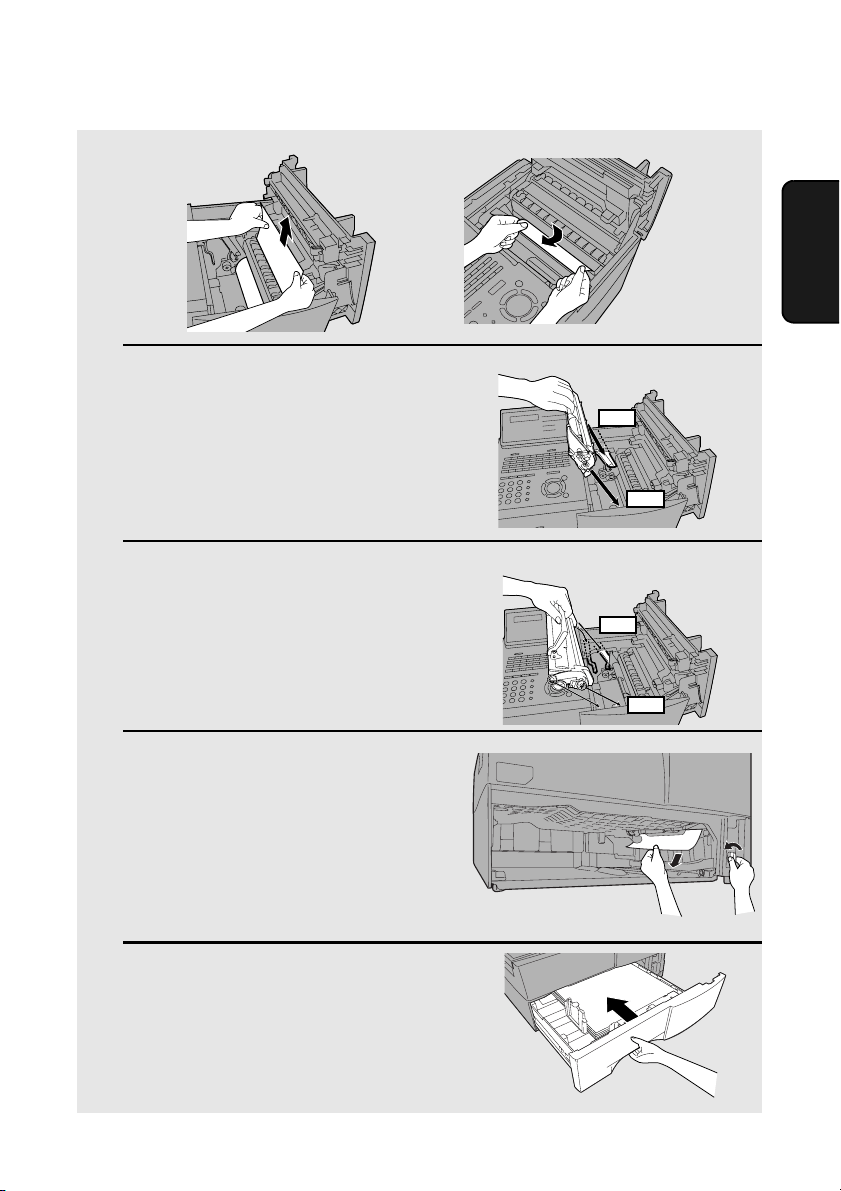
Clearing Paper Jams
133
9. Trouble-
shooting
5 Replace the drum cartridge.
• Make sure the drum cartridge is
inserted in as far as it will go.
6 Replace the toner cartridge and then
close the print compartment cover.
7 If you have a paper cassette and the
display still indicates that paper is
jammed, pull out the cassette and
remove the jammed paper.
8 Replace the paper cassette.
OR
GREEN
BLUE
GREEN
BLUE

FCC Regulatory Information
134
FCC Regulatory Information
This equipment complies with Part 68 of the FCC rules and the requirements adopted
by the ACTA. On the rear of this equipment is a label that contains, among other
information, a product identifier in the format US:AAAEQ##TXXXX. If requested, this
number must be provided to the telephone company.
A plug and jack used to connect this equipment to the premises wiring and telephone
network must comply with the applicable FCC Part 68 rules and requirements adopted
by the ACTA. A compliant telephone cord and modular plug is provided with this
product. It is designed to be connected to a compatible modular jack that is also
compliant. See installation instructions for details. This equipment connects to the
telephone network through a standard USOC RJ-11C network interface jack.
The REN is used to determine the number of devices that may be connected to a
telephone line. Excessive RENs on a telephone line may result in the devices not
ringing in response to an incoming call. In most but not all areas, the sum of RENs
should not exceed five (5.0). To be certain of the number of devices that may be
connected to a line, as determined by the total RENs, contact the local telephone
company. For products approved after July 23, 2001, the REN for this product is part of
the product identifier that has the format US:AAAEQ##TXXXX. The digits represented
by ## are the REN without a decimal point (e.g., 03 is a REN of 0.3). For earlier
products, the REN is separately shown on the label.
If this equipment causes harm to the telephone network, the telephone company will
notify you in advance that temporary discontinuance of service may be required. But if
advance notice isn't practical, the telephone company will notify the customer as soon
as possible. Also, you will be advised of your right to file a complaint with the FCC if you
believe it is necessary.
The telephone company may make changes in its facilities, equipment, operations or
procedures that could affect the operation of the equipment. If this happens the
telephone company will provide advance notice in order for you to make necessary
modifications to maintain uninterrupted service.
If trouble is experienced with this equipment, or for repair or warranty information,
please contact your authorized Sharp dealer. If the equipment is causing harm to the
telephone network, the telephone company may request that you disconnect the
equipment until the problem is resolved.
This equipment may not be used on coin service provided by the telephone company.
Connection to party line service is subject to state tariffs. Contact the state public utility
commission, public service commission or corporation commission for information.
If your home has specially wired alarm equipment connected to the telephone line,
ensure that the installation of this equipment does not disable your alarm equipment. If
you have questions about what will disable alarm equipment, consult your telephone
company or a qualified installer.
When programming and/or making test calls to emergency numbers:
♦ Remain on the line and briefly explain to the dispatcher the reason for the call.
♦ Perform such activities in the off-peak hours, such as early morning or late evening.
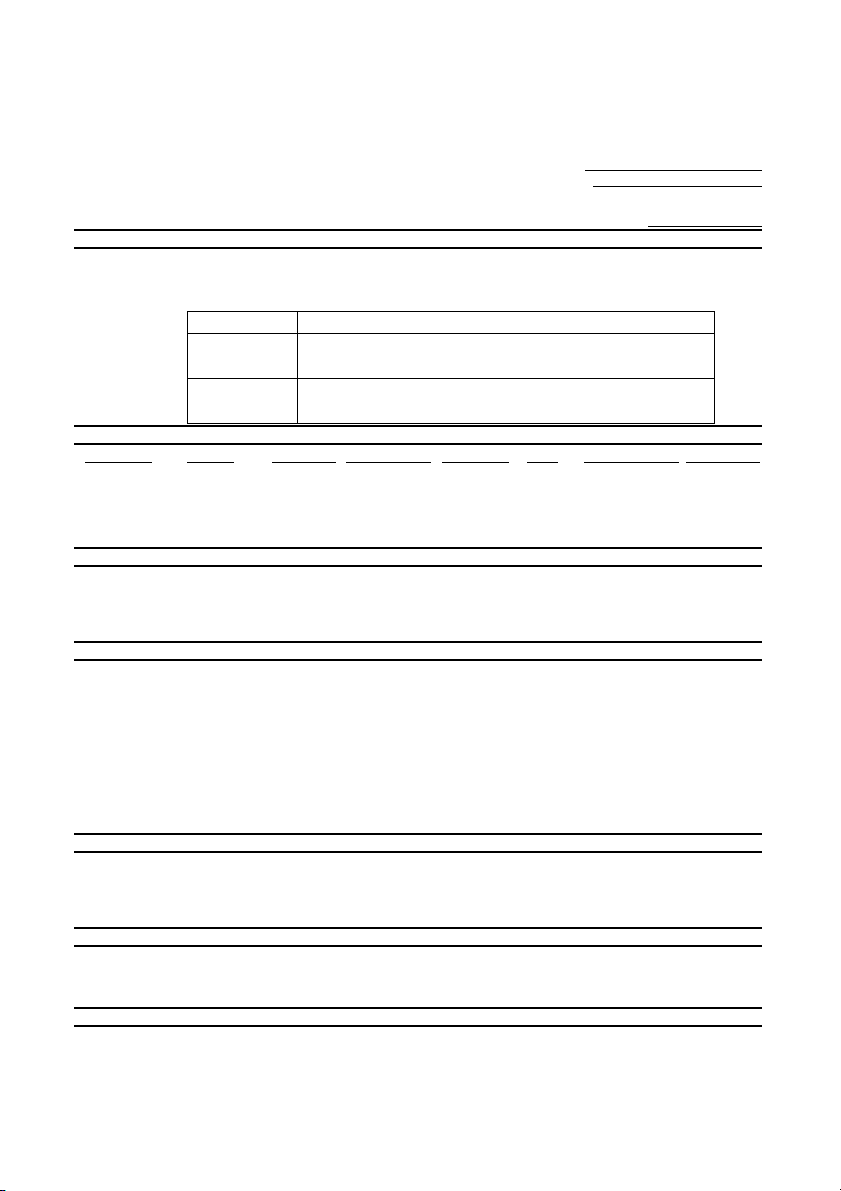
135
S H A R P
Date Revised :July. 22, 2002
Date Issued :May. 28, 1998
MATERIAL SAFETY DATA SHEET (1/3)
MSDS No. B-1020
Section 1. Product and Company Identification
Product Name: Toner Cartridge of FO-44ND / FO-50ND / DUNT-455BSCZZ
Supplier Identification: Sharp Corporation
22-22 Nagaike-cho, Abeno-ku, Osaka, Japan
Local suppliers are listed below. Please contact the nearest supplier for additional information.
S e ct io n 2 . In gre di en ts
Ingredients Cas No. Proportion
OSHA Z-Tables
ACGIH TLV IARC DFG-MAK(GER) Other Limits
Polyester resin Trade Secret >90% --- --- --- --- ---
(Trade secret No. 361615 -5042-P in New Jersey)
Carbon black 1333-86-4 1 - 5% 3.5 mg/m
3
3.5 mg/m
3
2B III 3B
TWA(Austl) : 3 mg/m
3
Polyolefin wax 9003-07-0 1 - 5% --- --- --- --- ---
Organic pigment Trade Secret 1 - 5% --- --- --- --- ---
(Trade secret No. 361615 -5025-P in New Jersey)
Section 3. Hazardous Identification
Most Important Hazards and Effects of the Products
For Human Health:
This toner is not classified as a human carcinogen. No symptoms expected with intended use.
For the Environment: No data are available on the adverse effects of this product on the environment.
For others: None
Specific hazards: Dust explosion (like most finely divided organic powders)
Section 4. First-Aid Measures
Symptoms of Overexposure: No symptoms expected with intended use.
Routes of Entry: Eye contact, inhalation, ingestion
Information
Inhalation: If symptoms are experienced, remove source of contamination or move victim to fresh air and
obtain medical advice.
Skin Contact:
Flush with gently flowing water (preferably lukewarm) and soap for 15 minutes or until particle is removed.
If irritation does occur, obtain medical advice.
Eye Contact:
Do not allow victim to rub eye(s). Flush with gently flowing water (preferably lukewarm) for 15 minutes or
until particle is removed. Have victim look right and left, and, then up and down. If irritation does occur,
obtain medical attention. DO NOT attempt to manually remove anything stuck to the eye(s).
Ingestion: If irritation or discomfort occurs, obtain medical attention immediately.
Note to Physician: None
Section 5. Fire-Fighting Measures
Suitable Extinguishing Media: CO2, water spray, foam and dry chemical
Extinguishing Media to Avoid: Full water jet
Special Firefighting Procedures:
None
Fire and Explosion Hazards: If dispersed in air, toner, like most finely divided organic powders, may form an explosive mixture.
Protection of Firefighters:
Use self-contained breathing apparatus (SCBA).
Section 6. Accidental Release Measuress
Personal Precautions: None
Environmental Precautions: None
Methods for Cleaning Up:
Wipe off with paper or cloth. DO NOT use vacuum cleaner when a large amount is
released. It, like most finely divided organic powders, may create a dust explosion.
Section 7. Handling and Storage
Handling
Technical Measures: None
Precautions: None
Safe Handling Advice: Try not to disperse the particles.
Storage
Technical Measures: None
Storage Conditions: Keep container closed. Store in a cool and dry place. Keep out of reach of children.
Incompatible Products: None
(Country) (Name and Telephone Number)
U.S.A. Sharp Electronics Corporation
Telephone number for information: 1-800-237-4277
Emergency telephone number : 1-800-255-3924
Canada Sharp Electronics of Canada Ltd.
Telephone number for information: 905-890-2100
Emergency telephone number : 1-800-255-3924

136
S H A R P
Date Revised :July. 22, 2002
Date Issued :May. 28, 1998
MATERIAL SAFETY DATA SHEET (2/3)
MSDS No. B-1020
Se c t i o n 8 . E x p o s ure C o n t r ol / P e rs o n a l P r ot e c t i o n
Engineering Measures
Ventilation: None required with intended use.
Control Parameters(As total dust)
OSHA-PEL(USA): 15mg/m
3
ACGIH-TLV(USA): 10mg/m
3
DFG-MAK(GER): 6mg/m
3
Worksafe-TWA(Austl.): 10mg/m
3
Personal Protective Equipment
Personal Protective Equipment
None required when used as intended in Sharp equipment. For use other than normal customer-operating procedures
(such as in bulk toner processing facilities), goggles and respirators may be required.
Hygiene Measures: Wash hands after handling.
Se ct ion 9. P hys ica l an d Ch emica l Pr o pe rti es
Appearance
Physical State: Solid Form: Powder Color: Black
Odor: Faint odor Explosion Properties: No data available
Particle Size(
µm): 5 - 15 Density(g/cm
3
): 1.2 (bulk density: 0.5)
Boiling Point: Not applicable Solubility in water: Negligible
Melting Point(°C): No data available Oxidizing Properties: No data available
Softening Point(°C): 120 - 130 * Ignition Temperature(°C): 450 *
Flash Point: Not applicable Vapor Pressure: Not applicable
pH: Not applicable
Partition Coefficient, n-Octanol/Water:
Not applicable
Section 10. Stability and Reactivity
Stability: Stable [ X ] Unstable [ ]
Hazardous Reactions: Dust explosion, like most finely divided organic powders.
Conditions to avoid: Electric discharge, throwing into fire.
Materials to Avoid: Oxidizing materials.
Hazardous Decomposition Products: CO, CO2
Section 11. Toxicological Information
Health Effects from Exposure: No symptoms expected with intended use.
Toxicological Data
Acute Toxicity:
Inhalation, LC50(mg/l): >0.74 (Rats,4hour exposure) * (This was the highest attainable concentration.)
Ingestion(oral), LD50(mg/kg): >5000 (Rats) *
Dermal, LD50(mg/kg): >2000 (Rats) *
Eye irritation: Non irritant (Rabbits) *
Skin irritation: Non irritant (Rabbits) *
Skin sensitizer: No data available
Mutagenicity: Negative * (AMES test)
(*= Based on data for other Products with similar ingredients)
Local Effects: see Chronic Toxicity or Long term Toxicity
Chronic Toxicity or Long Term Toxicity: Prolonged inhalation of excessive dust may cause lung damage.
It is attributed to "lung overloading", a generic response to excessive amounts of any
dust retained in the lungs for a prolonged interval. Use of this product, as intended,
does not result in inhalation of excessive dust.
In a study in rats by chronic inhalation exposure to a typical toner, a mild to moderate degree of
lung fibrosis was observed in 92% of rats in the high concentration(16mg/m
3
) exposure group,
and a minimal to mild degree of fibrosis was noted in 22% of the animals in the middle(4mg/m
3
)
exposure group. But no pulmonary change was reported in the lowest(1mg/m
3
) exposure group,
the most relevant level to potential human exposures.
Carcinogenicity
IARC Monographs: Not listed
NTP(USA): Not listed
OSHA Regulated(USA): Not listed
In 1996 the IARC reevaluated carbon black as a Group 2B carcinogen (possible human
carcinogen). This valuation is given to Carbon Black for which there is inadequate human
evidence, but sufficient animal evidence. The latter is based upon the development of lung
tumors in rats receiving chronic inhalation exposures to free carbon black at levels that induce
particle overload of the lung.
Studies performed in animal models other than rats have not demonstrated an association
between carbon black and lung tumors. Moreover, a two-year cancer bioassay using a typical
toner preparation containing carbon black demonstrated no association between toner
exposure and tumor development in rats.

137
S H A R P
Date Revised :July. 22, 2002
Date Issued :May. 28, 1998
MATERIAL SAFETY DATA SHEET (3/3)
MSDS No. B-1020
Section 12. Ecological Information
No data are available on the adverse effects of this material on the environment.
Section 13. Disposal Consideration
Appropriate Methods of Disposal
Preparation(community provisions): Waste may be disposed or incinerated under conditions which meet all
federal, state and local environmental regulations.
Contaminated Packaging: Waste may be disposed or incinerated under conditions which meet all federal,
state and local environmental regulations.
Precautions: Do not throw the toner cartridge or toner into a n open flame. The hot toner may scatter and
cause burns or other damage.
Section 14. Transport Information
Special Precautions: None
Information on Code and Classifications According to International Regulations
UN Classification: None
Section 15. Regulatory Information
US Information
Information on the label: Not required
TSCA(Toxic Substances Control Act):
All chemical substances in this product comply with all applicable rules or order under TSCA.
SARA(Superfund Amendments and Reauthorization Act) Title III
302 Extreme Hazardous Substance: None
311/312 Hazard Categories: None
313 Reportable Ingredients: None
California Proposition 65:
This product contains no chemical substances subject to California Proposition 65.
EU Information
Information on the label (88/379/EEC) and 67/548/EEC) :
Symbol & Indication : Not required
R-phrase : Not required
S-phrase : Not required
76/769/EEC:
All chemical substances in this product comply with all applicable rules or order under 76/769/EEC.
Section 16. Other Information
NFPA Hazard Rating: The National Fire Protection Agency(USA): Health: 1 Flammability: 1 Reactivity: 0
HMIS Rating: The National Paint and Coating Association(USA): Health: 1 Flammability: 1 Reactivity: 0
Recommended Uses: Toner for Electrophotographic Equipment
Restrictions: This information relates only to the specific material designated as supplied by the
manufacturer. This information is supplied to us by the manufacturer and Sharp offers no
warranties as to its accuracy and accepts no responsibilities for any typographical errors which
may appear on these sheets. It is the responsibility of the user to determine the suitability of
this product for each particular use.
Literature References:
ANSI Z400.1-1993
ISO 11014-1
Commission Directive 91/155/EEC
The Material Safety Data sheet: A Practical Guide to First Aid: Canadian Centre for Occupational Health and Safety's publication
HMIS IMPLEMENTATION MANUAL: National Paint & Coatings association
IARC(1996): IARC monographs on the Evaluation of the Carcinogenic Risk of Chemicals to Humans, Vol.
65, Printing Process and Printing Inks, Carbon Black and Some Nitro Compounds, Lyon, pp.149-261
H.Muhle, B.Bellmann, O.Creutzenberg, C.Dasenbrock, H.Ernst, R.Kilpper, J.C.MacKenzie, P.Morrow,
U.Mohr, S.Takenaka, and R.Mermelstein(1991) Pulmonary Response to Toner upon Chronic Inhalation
Exposure in Rats. Fundamental and Applied Toxicology 17, pp.280-299.
Rivision Record:
July / 22/2002 Addition : Product Name FO-44ND / FO-50ND
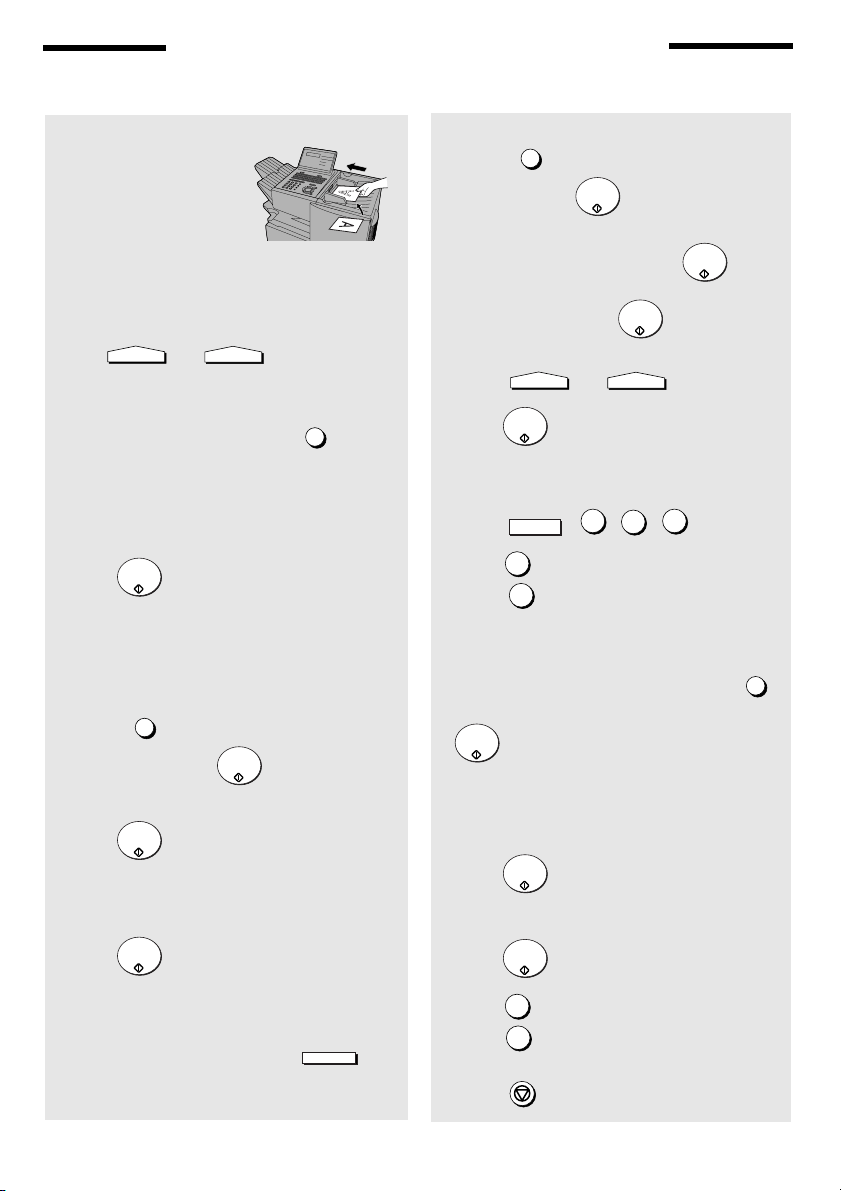
138
QUICK REFERENCE GUIDE
SENDING FAXES
Place the document (up to
50 letter-size pages) face
down in the document
feeder.
(Note: For Normal Dialing and Direct Keypad
Dialing, you can also load the document after
dialing the number.)
Press or if needed.
Normal Dialing
1. Lift extension phone or press .
2. Dial the fax number (if using an extension
phone, dial on the extension phone keypad).
3. Wait for the reception tone (if a person
answers, ask them to press their Start key).
4. Press .
Rapid Key Dialing
Press the desired Rapid Key.
Speed Dialing
1. Press and enter the desired Speed
Dial number (press if you entered a 1-
digit number).
2. Press .
Direct Keypad Dialing
1. Dial the fax number.
2. Press .
BROADCASTING
1. Load the document and press .
2. Dial destination numbers:
Press a Rapid Key.
RESOLUTION
CONTRAST
SPEAKER
START/
ENTER
SPEED DIAL
START/
ENTER
START/
ENTER
START/
ENTER
BROADCAST
Press a Group Key.
Press and enter a Speed Dial
number (press to complete entry if
only one digit is entered).
Enter a full number and press .
3. When finished, press .
4. Press or if needed.
5. Press
STORING AUTO DIAL NUMBERS
1. Press , , , .
2. Press
to store a number.
(Press
to clear a number.)
3. To store a Rapid Key number, press the
desired Rapid Key.
To store a Speed Dial number, press
and enter a number from 1 to 75 (press
if you entered a 1-digit number).
(If clearing a number, select it as explained
above and then perform Steps 7 and 9.)
4. Enter the full fax number.
5. Press .
6. Enter a name by pressing the letter keys.
7. Press .
8. Press
if this is a Chain Dial number.
Press if this is a regular number.
9. Press repeatedly to exit.
SPEED DIAL
START/
ENTER
START/
ENTER
START/
ENTER
RESOLUTION
CONTRAST
START/
ENTER
MENU
3
0
1
1
2
SPEED DIAL
START/
ENTER
START/
ENTER
START/
ENTER
1
2
STOP
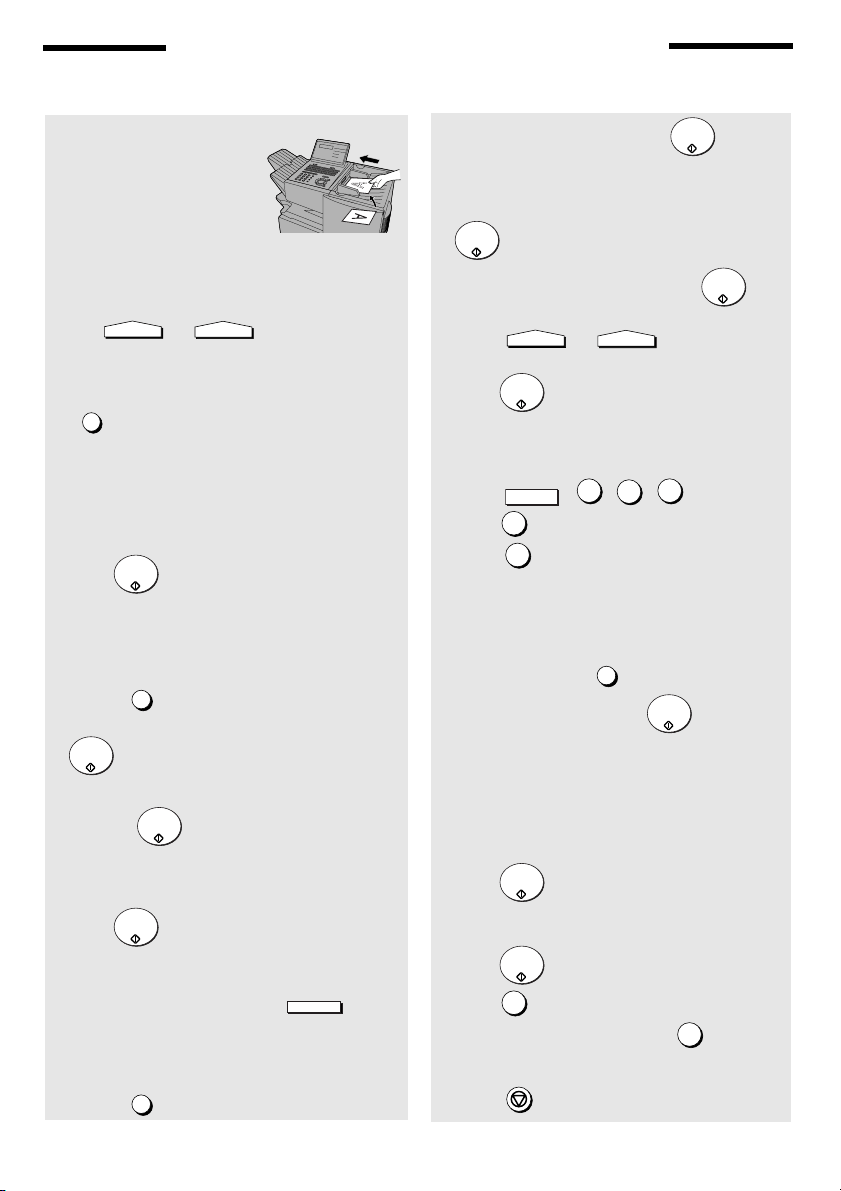
139
GUÍA DE CONSULTA RÁPIDA
ENVÍO DE FAXES
Coloque el documento (hasta
50 páginas tamaño carta)
boca abajo en la bandeja
alimentadora de documentos.
(Nota: con la Marcación Normal y la Marcación
Directa desde el Teclado, también puede cargar
el documento después de marcar el número.)
Pulse o si resulta necesario.
Marcación Normal
1. Descuelgue el teléfono supletorio o pulse
.
2. Marque el número de fax (si utiliza un teléfono
supletorio, márquelo en el teclado numérico del
teléfono supletorio).
3. Espere hasta escuchar el tono de recepción (si
responde una persona, pídale que pulse la
tecla Inicio de su fax).
4. Pulse .
Marcación por Tecla de Marcación Rápida
Pulse la Tecla de Marcación Rápida deseada.
Marcación Abreviada
1. Pulse e introduzca el número de
Marcación Abreviada deseado (presione
, en caso de que haya introducido un
número de un solo dígito.
2. Presione .
Marcación Directa desde el Teclado
1. Marque el número de fax.
2. Pulse .
TRANSMISIÓN A GRUPOS
1. Cargue el documento y pulse .
2. Marque los números de destino:
Pulse una Tecla de Marcación Rápida.
Pulse una Tecla de Grupo.
Pulse
e introduzca un número de
RESOLUTION
CONTRAST
SPEAKER
START/
ENTER
SPEED DIAL
START/
ENTER
START/
ENTER
START/
ENTER
BROADCAST
SPEED DIAL
Marcación Abreviada (pulse para
completar la entrada, en caso de que haya
introducido un número de un solo dígito).
Introduzca un número completo y presione
.
3. Cuando haya terminado, presione .
4. Pulse o , si resulta
necesario
5. Pulse
ALMACENAMIENTO DE NÚMEROS
PARA MARCACIÓN AUTOMÁTICA
1. Pulse
,
, , .
2. Pulse
para almacenar un número.
(Pulse
para eliminar un número.)
3. Para almacenar un número en una Tecla de
Marcación Rápida, pulse la Tecla de
Marcación Rápida deseada.
Para almacenar un número de Marcación
Abreviada, pulse
e introduzca un
número del 1 al 75 (pulse , en caso de
que haya introducido un número de un solo
dígito).
(Si desea eliminar un número, selecciónelo
como se ha explicado anteriormente y, a
continuación, siga los Pasos 7 y 9.)
4. Introduzca el número de fax completo.
5. Pulse .
6. Introduzca un nombre pulsando las teclas de
letras.
7. Pulse .
8. Pulse
si se trata de un número de
Marcación en Cadena. Pulse si se trata
de un número normal.
9. Pulse
repetidamente para salir.
START/
ENTER
START/
ENTER
START/
ENTER
RESOLUTION
CONTRAST
START/
ENTER
MENU
3
0
1
1
2
SPEED DIAL
START/
ENTER
START/
ENTER
START/
ENTER
1
2
STOP
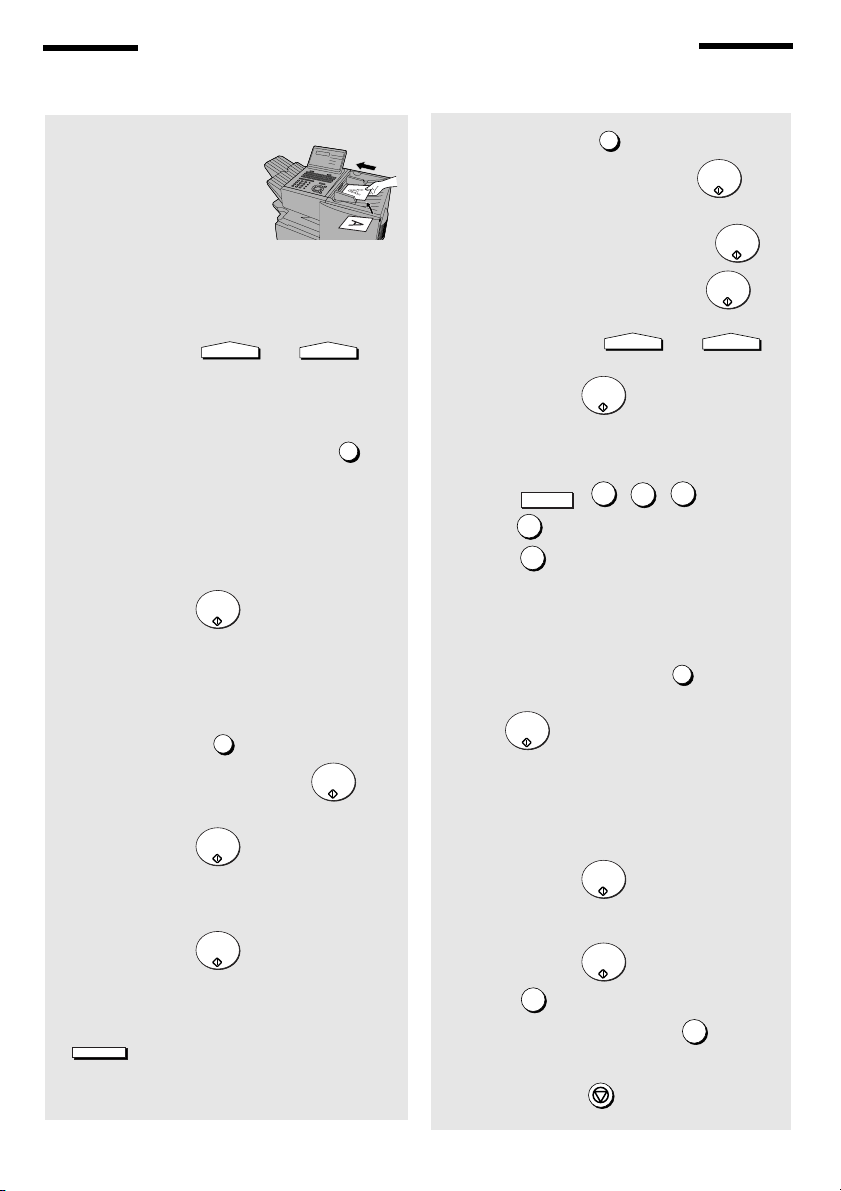
140
GUIDE DE RÉFÉRENCE RAPIDE
ENVOIS DE FAC-SIMILéS
Placez votre document
(jusqu'à 50 pages de format
papier à lettre) face imprimée
vers le bas dans le chargeur
de documents.
(Remarque : Pour la composition normale et la
composition directe au clavier, vous pouvez
également charger le document après avoir procédé
à la composition du numéro.
Pressez les touches ou si
nécessaire.
Composition normale
1. Décrochez le combiné du téléphone
supplémentaire ou pressez la touche .
2. Composez le numéro du fac-similé (si vous
utilisez un téléphone supplémentaire, composez
le numéro sur son clavier).
3. Attendez la tonalité de réception (si une personne
décroche, demandez-lui de presser la touche
Start).
4. Pressez la touche .
Composition par touche rapide
Pressez la touche rapide souhaitée.
Composition accélérée
1. Pressez la touche et entrez le numéro
de composition accélérée (pressez si
vous avez entré un numéro à un chiffre).
2. Pressez la touche .
Composition directe au clavier
1. Composez le numéro de fac-similé.
2. Pressez la touche .
DIFFUSION
1. Chargez le document et pressez la touche
.
2. Composez les numéros des destinataires :
Pressez une touche rapide.
Pressez une touche de groupe.
RESOLUTION
CONTRAST
SPEAKER
START/
ENTER
SPEED DIAL
START/
ENTER
START/
ENTER
START/
ENTER
BROADCAST
Pressez la touche et entrez un numéro
de composition accélérée (pressez pour
conclure s'il s'agit d'un numéro à un chiffre).
Entrez un numéro complet et pressez .
3. Lorsque vous avez terminé, pressez .
4. Pressez les touches ou si
nécessaire.
5. Pressez la touche
ENREGISTREMENT DE NUMÉROS
À COMPOSITION AUTOMATIQUE
1. Pressez
,
, , .
2. Pressez pour enregistrer un numéro.
(Pressez pour effacer un numéro.)
3. Pour enregistrer un numéro à composition par
touche rapide, pressez la touche rapide
souhaitée.
Pour enregistrer un numéro à composition
accélérée, pressez la touche et entrez
un numéro compris entre 1 et 75 (pressez la
touche
si vous avez entré un numéro à un
chiffre).
(Si vous désirez effacer un numéro, sélectionnez-
le selon la méthode décrite ci-avant et exécutez
les étapes 7 et 9.)
4. Entrez le numéro de fac-similé complet.
5. Pressez la touche .
6. Entrez un nom à l'aide des touches comportant
des lettres.
7. Pressez la touche .
8. Pressez s'il s'agit d'un numéro à
composition enchaînée. Pressez s'il s'agit
d'un numéro standard.
9. Pressez la touche de manière répétée
pour quitter le menu.
SPEED DIAL
START/
ENTER
START/
ENTER
START/
ENTER
RESOLUTION
CONTRAST
START/
ENTER
MENU
3
0
1
1
2
SPEED DIAL
START/
ENTER
START/
ENTER
START/
ENTER
1
2
STOP

141
A
Activity Report, 117
Auto Listing, 108
Administrator password, 28
Alarm volume, 112
Anti Junk Fax, 102, 112
Anti Junk Number List, 119
Audible signals, 130
Auto Cover Sheet, 110
Auto reception mode, 61
Auto-dial numbers, programming, 39
B
Batch page numbering, 60
Batch transmission, 84-85
Batch Transmission List, 119
Beep length, 113
Broadcasting, 66-67
C
Canceling a fax, 50, 51
Cassette Selection, 111
Chain Dialing, 42, 49
Confidential operations, 70-73
Confidential Reception List, 119
Contrast, 37
Copies, making, 64
Copy Cut-off, 110
Copy resolution, 114
Copying Scanning, 110
Cover Sheet, 58
Auto Cover Sheet, 110
D
Date, setting, 26
Daylight Saving Time, 27
Department Code Digits, 114
Department Control, 100-101
Department Usage List, 119
Destination List, 118
Dial mode, 112
Dialing
Chain, 42, 49
Direct Keypad, 47
Normal, 38
Rapid Key, 45
Speed, 46
Direct Keypad Dialing, 47
Distinctive ring, 105
Document feeder, 35
Document guides, 35
Document restrictions, 34
Document sizes, 33
Document, maximum scanning area, 34
Drum cartridge
Installing and replacing, 17-20
Duplex Scanning, 95
E
Error Correction Mode (ECM), 110
F
Fine Resolution Priority, 108
G
Group Keys, 68-69
H
Halftone setting, 36
Housing, cleaning, 122
I
Image Memory Print, 111
J
Jams, clearing, 131-133
Job status, checking, 50
L
Language, selecting, 115
Index

Index
142
Letters, entering, 25
Line error, 124
Loading the document, 35
M
Manual reception mode, 61, 62
Memory
Checking documents in, 50, 63
Sending faxes from, 44
Substitute reception to, 63
Memory retransmission, 52
Multi TTI, 113
N
Normal Dialing, 38
Number of rings in AUTO reception, 108
Number of rings in manual reception, 108
O
Optional Setting List, 119
P
Page numbering, batch, 60
Paper jams, clearing, 131-133
Paper, loading, 21
Passcode List, 118
Password Protect setting, 29
Pauses in automatic dialing, 40
Personal Book List, 119
Personal books, 53-57
Polling, 74-77
Security Selection, 109
Power Save mode, 112
Print Hold, 96
Program and Group List, 119
Programs, 86-94
Q
Quick On-line, 113
R
Rapid Key Dialing, 45
Recall Interval, 109
Recall Times, 109
Receive Reduce, 110
Reception mode
Auto, 61
Manual, 61, 62
Setting, 61
Redialing, 39, 52
Resolution, 36
Retransmission interval, 112
Retransmission times, 111
Ringer volume, 32
S
Scan/Print Counter List, 121
Scan/print counts, clearing, 121
Scanning glass, cleaning, 122
Search Dial, 48
Separate Mode, 115
Speaker volume, 31
Speed Dialing, 46
T
TEL. LINE jack, 14
TEL. SET jack, 14
Telephone billing, 103
Telephone Billing Code, 113
Telephone line cord, 14
Telephone, connecting, 14
Time, setting, 26
Timer, 78
Timer List, 118
Toner cartridge
Installing and replacing, 17-20
Toner cartridge indicator, 20
Transaction Report, 120
Print Selection, 109
V
Verification Stamp, 16, 114
Replacing, 123


NOTICE
BE SURE TO ASK YOUR AUTHORIZED SHARP DEALER
ABOUT THE WARRANTY THAT YOUR SELLING DEALER
EXTENDS TO YOU. In order to assure you, the end-user, of
warranty protection, Sharp extends a limited warranty to each
of its authorized dealers and, in turn, requires each of its
authorized dealers to extend its own warranty to you on terms
that are no less favorable than those given to the dealer by
Sharp. You should be aware, however, that Sharp does not
itself extend any warranties, either express or implied, directly
to you, the end-user, and no one is authorized to make any
representations or warranties on behalf of Sharp. Specifically,
SHARP DOES NOT EXTEND TO YOU, THE END-USER,
ANY EXPRESS WARRANTY OR ANY IMPLIED WARRANTY
OF MERCHANTABILITY, FITNESS FOR USE OR FITNESS
FOR ANY PARTICULAR PURPOSE IN CONNECTION WITH
THE HARDWARE, SOFTWARE OR FIRMWARE EMBODIED
IN, OR USED IN CONJUNCTION WITH THIS PRODUCT.
Sharp is not responsible for any damages or loss, either
direct, incidental or consequential, which you, the end-user,
may experience as a result of your purchase or use of the
hardware, software or firmware embodied in or used in
conjunction with this Product. Your sole remedy, in the event
that you encounter any difficulties with the Product, is against
the authorized dealer from which you purchased the
Product.In the event that this authorized dealer does not
honor its warranty commitments, please contact the Vice
President, Sharp Electronics Corporation, Sharp Plaza,
Mahwah, NJ 07430-1163 or Sharp Electronics of Canada
Ltd., 335 Britannia Road East, Mississauga, Ontario L4Z
1W9, so that Sharp can try to help assure complete
satisfaction of all the warranty rights to which you are entitled
from the authorized dealer.

PRINTED IN THAILAND
(TINSE4516XHTZ)
SHARP ELECTRONICS CORPORATION
Sharp Plaza, Mahwah, New Jersey 07430-1163
1-800-BE-SHARP
http://www.sharpusa.com
SHARP ELECTRONICS OF CANADA LTD.
335 Britannia Road East, Mississauga, Ontario L4Z 1W9
http://www.sharp.ca
SHARP CORPORATION
FOR YOUR RECORDS
Please record the model number and serial number below, for easy
reference, in case of loss or theft. These numbers are located on the
rear side of the unit.Space is also provided for other relevant
information.
Model Number FO-4470
Serial Number
Date of Purchase
Place of Purchase