Loading ...
Loading ...
11
13
4
2
7
9
6
3
(not shown)
12
8
10
1
5
WDF75RC – 120V, 1800W
WDF75B – 208V, 2700W
WDF75 – 120V, 2400W
3
4
SHORT CORD INSTRUCTIONS
CAUTION: A short power supply cord is provided to
reduce the risk of personal injury resulting from becoming
entangled in or tripping over a long cord.
EXTENSION CORD USE
An extension cord or longer detachable cord is not
recommended for use with deep-fat fryers.
ELECTRIC POWER
If the electrical circuit is overloaded with other appliances,
your appliance may not operate. It should be operated on
an electrical circuit that is free from the other appliances. If
you are not sure of the reason for overloading or cannot nd
a separate circuit, contact a qualied electrician.
HOW TO USE YOUR WARING™ COMMERCIAL
PROFESSIONAL DEEP FRYER
1. This appliance is designed for commercial
use only.
2. Before the Waring™ Commercial
Professional Deep
Fryer is used for the rst time, remove all packaging
materials and follow cleaning instructions in this book.
3. Remove baskets from oil container.
4. Pour approximately 1
1
/4 gallon of good quality vegetable,
corn, canola, soybean, or peanut oil into reservoir until
it reaches between the MIN and MAX marks inside
container. DO NOT OVER- OR UNDER-FILL.
VERY IMPORTANT: If solid shortening is used, be certain
the shortening is pre-melted.
5. Plug cord into outlet.
6. Turn on the Waring™ Commercial
Professional
Deep Fryer by ipping the toggle switch up. The
“On” light will glow to show the unit is on.
7. Set the temperature control knob to the desired
temperature. The oil “Ready” light will turn green once
the oil has reached the desired temperature.
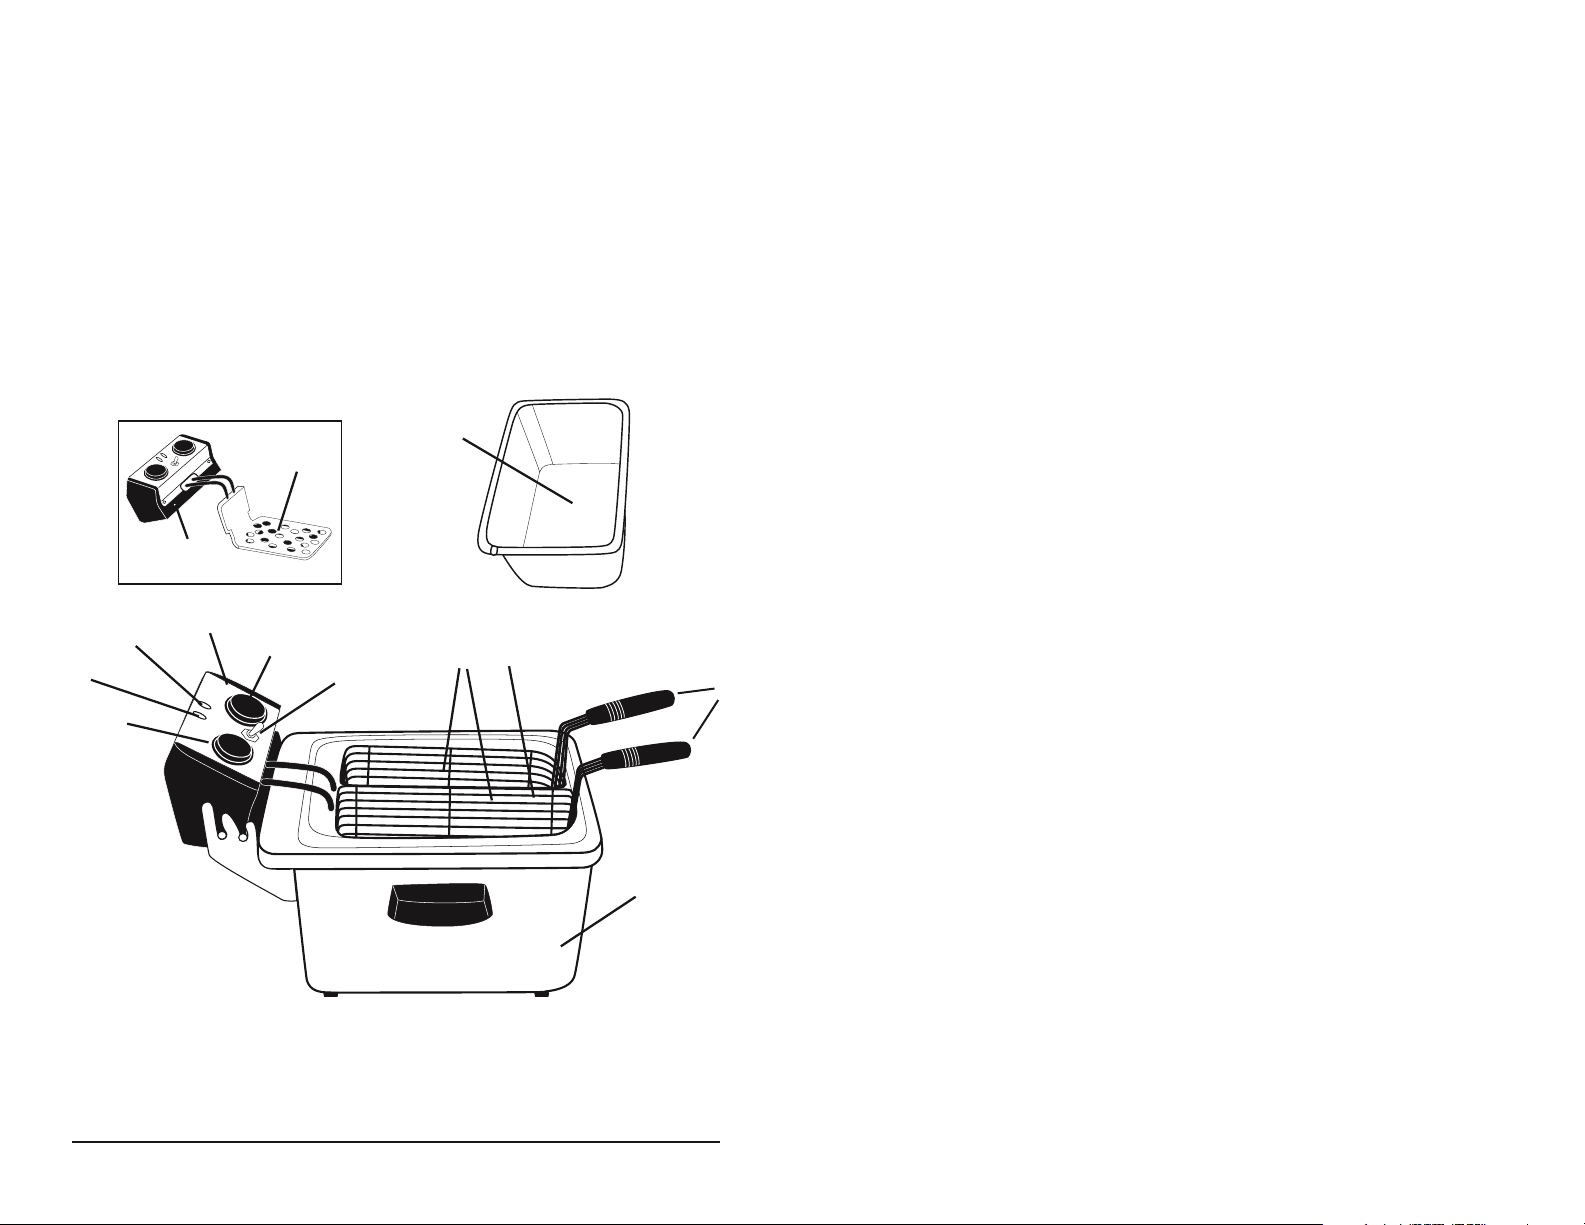
PARTS
1. Stainless steel body
2. Baskets
3. Basket hook
(not shown)
4. Oil container with
pouring spout
5. Basket handle
6. Mechanical timer
7. Temperature control
8. On/Off toggle switch
9. Power “On” indicator
light
10. Oil “Ready” indicator
light
11. Heating element with
diffuser
12. Control panel
13. Reset button
Loading ...
Loading ...
Loading ...