Loading ...
Loading ...

- To avoid all risks, point the laser beam away
from your eyes and do not stare directly into
the laser beam (Fig. 5).
Preparing for use
Before first use, lubricate the teeth of the trimming
head with a few drops of the oil supplied (Fig. 6).
Charging
Charge the appliance fully before you use it for the
first time and after a long period of disuse.
Charging takes about 60 minutes if the appliance is
completely empty.
1 Make sure the appliance is switched off and the
laser guide is in 'off' position.
2 Insert the small plug into the appliance and put
the supply unit in the wall socket (Fig. 7).
- First the bottom battery light flashes orange
and white alternately (Fig. 8).
- After about 3 minutes, the battery light flashes
white only. At this point the battery contains
enough energy for one cordless trimming
session.
- As the charging process continues, more
battery lights start flashing to show that the
charge level of the battery increases (Fig. 9).
- When the appliance is fully charged, all battery
lights light up solid white.
If the appliance is still connected to the wall socket
when it is fully charged, the battery lights go out
after 30 minutes.
Battery low and battery empty signals
- When the battery is almost empty, the bottom
battery light starts flashing orange. When you
switch off the appliance, the bottom battery
light continues to flash orange for a few
seconds (Fig. 10).
- The battery light at the bottom of the appliance
flashes orange at a higher frequency when the
battery is empty and if you:
-
Press the on/off button
-
Turn the zoom wheel
-
Activate the laser guide
Corded trimming
You can also operate the appliance from the wall
socket.
1 Insert the small plug into the socket of the
appliance (Fig. 7).
2 Put the supply unit in the wall socket.
3 Press the on/off button to switch on the
appliance (Fig. 11).
Using the appliance
You can use the appliance to trim facial hair
(beard, moustache and sideburns). This appliance
is not intended for trimming lower body parts or
scalp hair.
Trimming with the laser guide
You can use the laser guide to define the edges of
your beard, sideburns and moustache. The laser
guide can be used with the 32mm (1.25in) side as
well as the 15mm (0.6in) side of the trimming head.
Note: The laser guide can only be used when
you trim without comb.
Note: Although the light from the laser guide is
not harmful to the eyes, we advise you not to
stare into the light and to avoid shining the light
into your eyes.
1 Press the on/off button once to switch on the
appliance (Fig. 11).
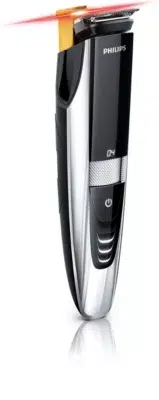
2 To trim with the laser guide, press the top of the
laser guide to switch it on (Fig. 12).
- The laser guide pops up and its light shines over
the top of the trimming head.
Note: If you trim with the laser guide, make sure
you push the laser guide to ‘off ’ position before
you turn the trimming head. You may damage
the laser guide if you try to turn the trimming
head while the laser guide is still popped up
(Fig. 13).
3 Start trimming where you want to define the
edges of your beard and use the laser guide to
guide you during trimming (Fig. 14).
Tip: Hold the appliance so that the laser light
shines exactly on the edge you want to trim
and then place the trimming head on your skin.
4 When you are finished, press the on/off button
to switch off the appliance (Fig. 11).
Tip: When the motor of the appliance is not
operating, the laser guide switches off
automatically within 3 minutes. In the 3 minutes
before the automatic switch-off of the laser
guide, you can use the laser guide to check if
the contours of your beard are symmetrical or
straight.
5 Push down the top of the laser guide to lock it
in ‘off’ position (‘click’) (Fig. 15).
Trimming without comb
If you trim without comb, your hair is cut off close
to the skin. The trimming head has a 32mm (1.25in)
side and a 15mm (0.6in) side. The 15mm (0.6in)
side of the trimming head allows more precise
styling and contouring than the 32mm (1.25in) side.
1 If one of the combs is still on the trimming head,
pull it off (Fig. 16).
- Never pull at the flexible top of the comb.
Always pull at the sides.
2 Turn the trimming head until the side you want
to use points to the front of the appliance (Fig.
13).
3 Press the on/off button to switch on the
appliance (Fig. 11).
4 Hold the appliance in the position that is most
convenient for the area you want to trim and
make strokes in the desired direction.
Tip: For a comfortable trim close to your skin,
place the flat side of the trimming head against
your skin and make strokes in the desired
direction.
5 When you are finished, press the on/off button
to
switch off the appliance (Fig. 11).
Loading ...
Loading ...
Loading ...
