2
Appendix
TipsSettingsPlaybackConnections
Front panel Display Rear panel Index
Contents
Accessories ························································································ 3
Features ······························································································ 4
High quality sound ············································································ 4
High performance ············································································ 4
Part names and functions
Front panel ························································································ 5
Display ································································································ 6
Rear panel ·························································································· 7
Connections
Placing this unit ··············································································· 9
Horizontal placement ······································································· 9
Vertical placement ·········································································· 10
Connecting devices ······································································· 11
Connecting the AC adapter ························································ 12
Playback
Basic operation ·············································································· 14
Turning the power on ····································································· 14
Selecting the input source ····························································· 14
Adjusting the headphone volume ·················································· 14
Connecting and playing back from a computer (USB-DAC) ··········· 15
Connect and playback from a digital device
(COAXIAL/OPTICAL-1/OPTICAL-2) ················································ 21
Contents
Settings
Setting the Auto Standby mode ··············································· 22
Turning Auto Standby mode on ····················································· 22
Turning Auto Standby mode o ····················································· 22
Tips
Contents ··························································································· 23
Tips ································································································· 24
Troubleshooting ············································································· 25
Appendix
Types of digital audio input signals available for playback········ 28
Input signals available for USB-DAC playback ································ 28
Input signals available for COAXIAL/OPTICAL-1/OPTICAL-2
playback ························································································· 28
Explanation of terms ······································································· 29
Trademark information ···································································· 30
Specifications ··················································································· 31
Index ·································································································· 32
3
Appendix
TipsSettingsPlaybackConnections
Contents
Front panel Display Rear panel Index
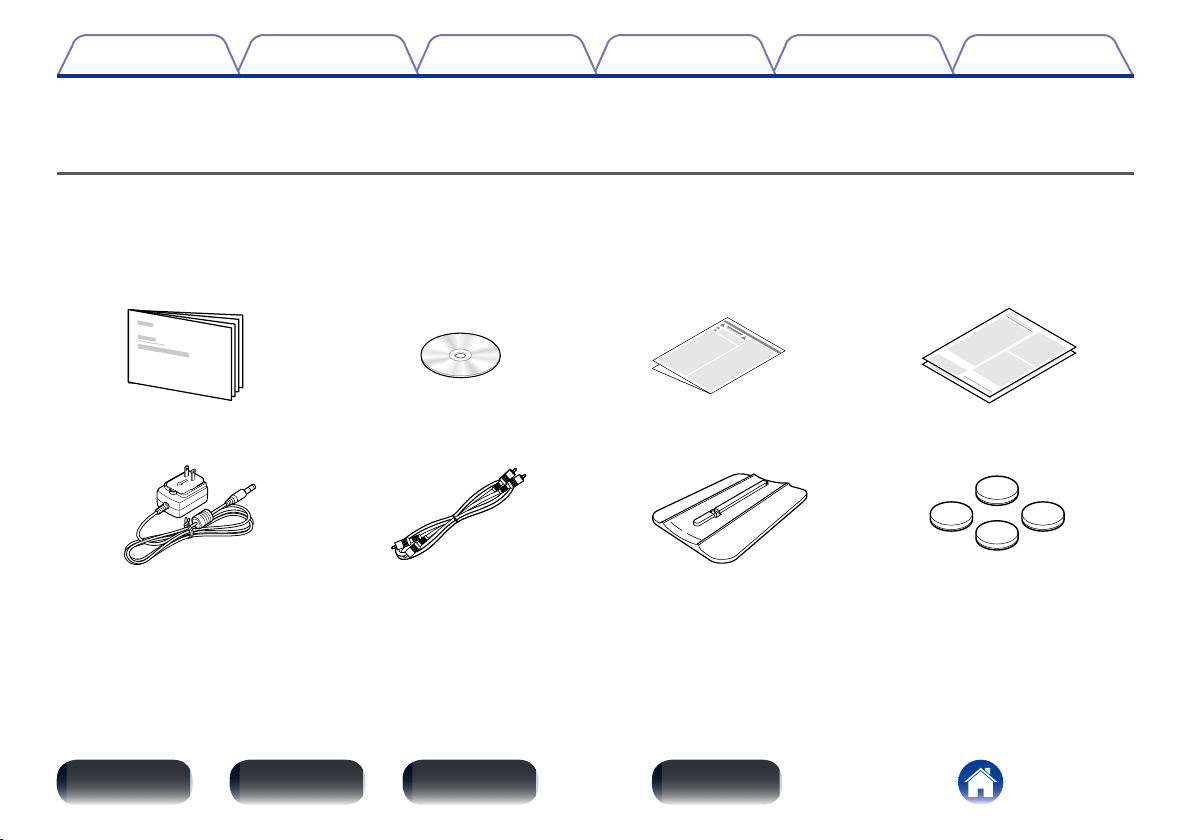
Accessories
Check that the following parts are supplied with the product.
q Getting Started w CD-ROM (Owner’s Manual) e Safety Instructions r Warranty
(for USA)
(for CANADA)
t AC adapter y Audio cable u Stand for vertical placement i Feet for horizontal placement
Thank you for purchasing this Denon product. To ensure proper operation, please read this owner’s manual carefully before using the product.
After reading them, be sure to keep them for future reference.
4
Appendix
TipsSettingsPlaybackConnections
Contents
Front panel Display Rear panel Index
High quality sound
•Advanced AL32 Processing and High-precision 32 bit D/A Converter
Equipped with Advanced AL32 Processing, Denon’s own analog
waveform reproduction technology.
The reproducibility of weak signals is enhanced by expanding 16 bit
digital data to 32 bit.
Also equipped with a high-performance, 32 bit/192 kHz-compatible D/A
converter for analog signal conversion of the digital data expanded with
Advanced AL32 Processing.
•Isolation design
To prevent audio quality from degrading due to noise from external
devices when this unit is connected to external devices such as
computers, the ground circuit for the USB input interface device is
isolated from the audio circuit.
High performance
•Playback of high resolution audio files supported
DSD signals and PCM signals up to 192kHz/24bit are supported. You
can experience high audio quality when you play back music by inputting
music files with DSD or PCM signals stored on your computer to this unit
through a USB connection.
•Equipped with headphone amplifier
This unit is equipped with a high quality headphone amplifier circuit. This
allows you to enjoy playback with high quality audio when you listen to
music with headphones as well.
•Vertical placement supported
This unit can be placed either vertically or horizontally. The display
automatically rotates according to the placement orientation.
•Equipped with a high visibility organic EL display
•Equipped with auto standby function that reduces power
consumption (vpage22)
Features
5
Appendix
TipsSettingsPlaybackConnections
Contents
Front panel Display Rear panel Index
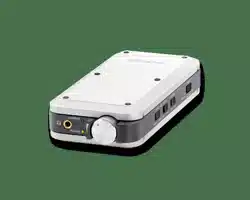
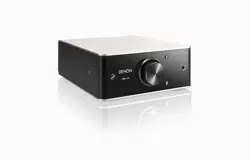
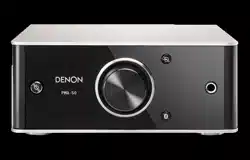
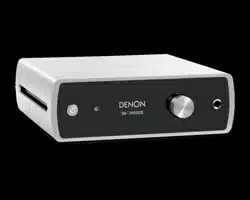
Part names and functions
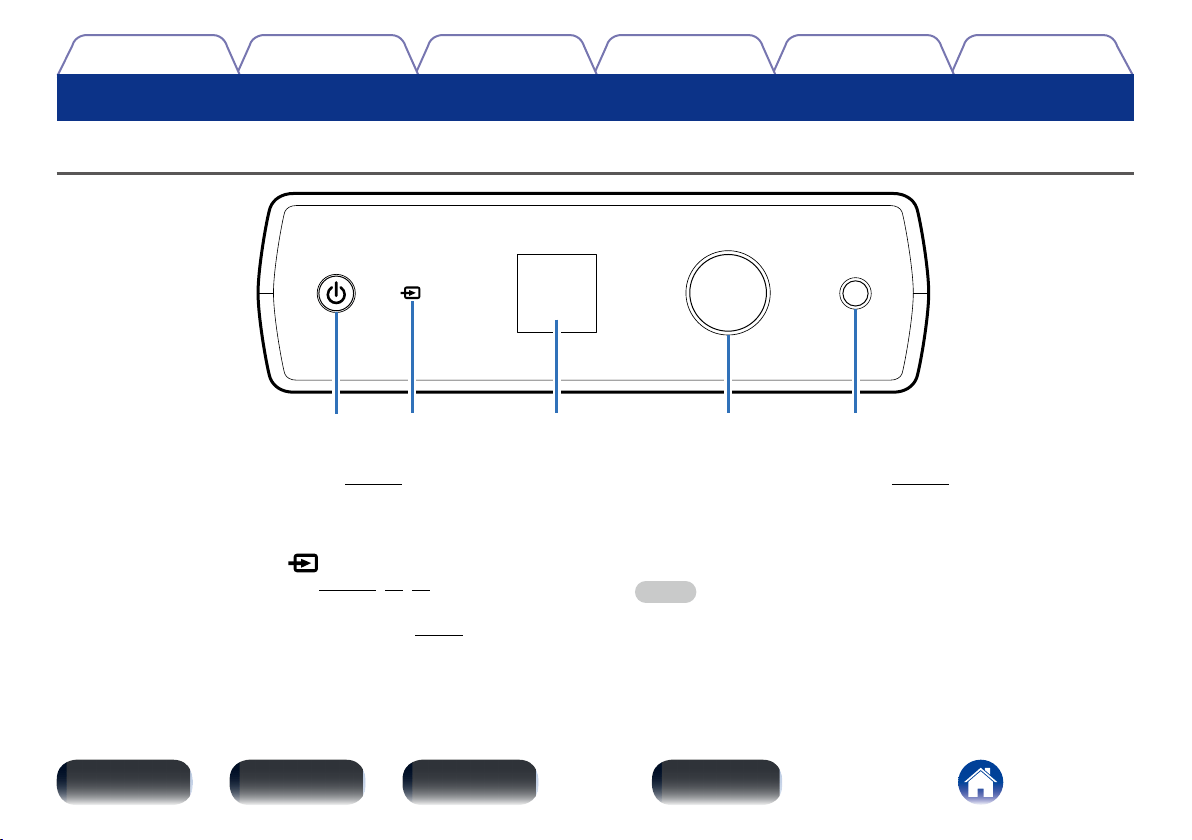
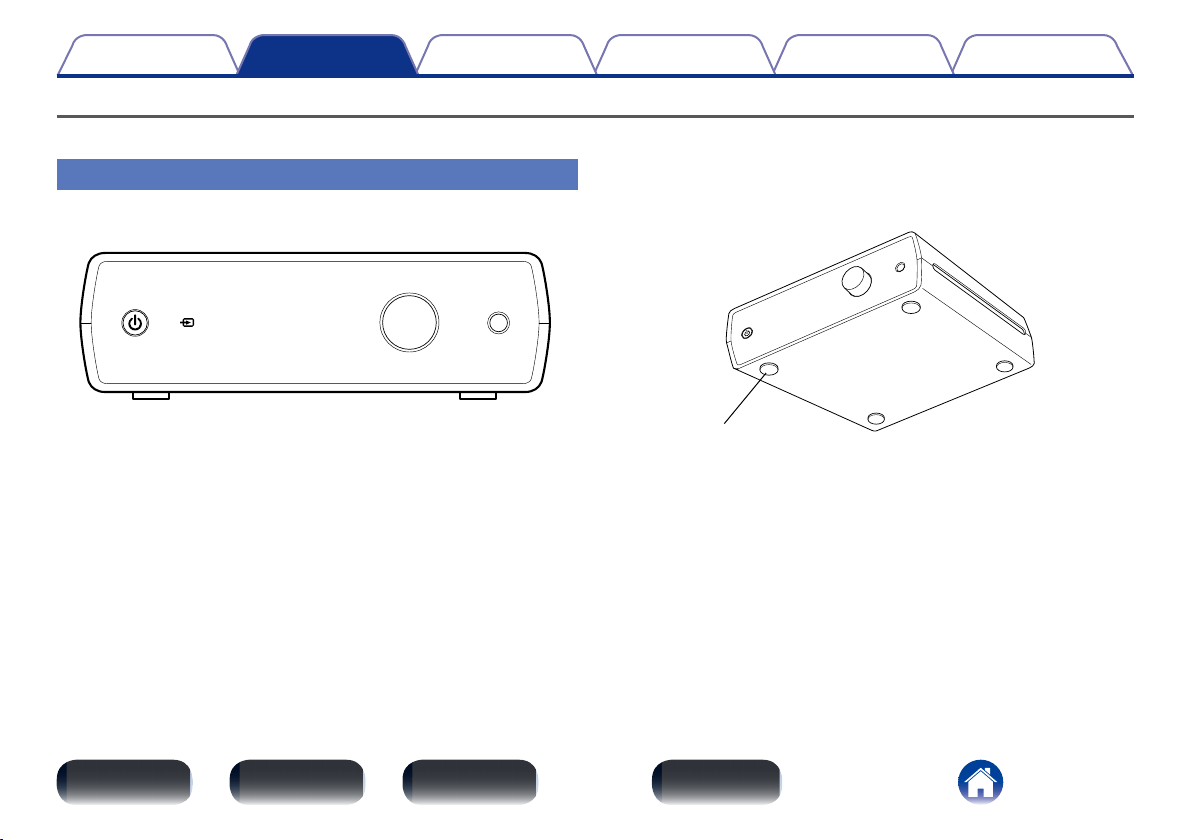
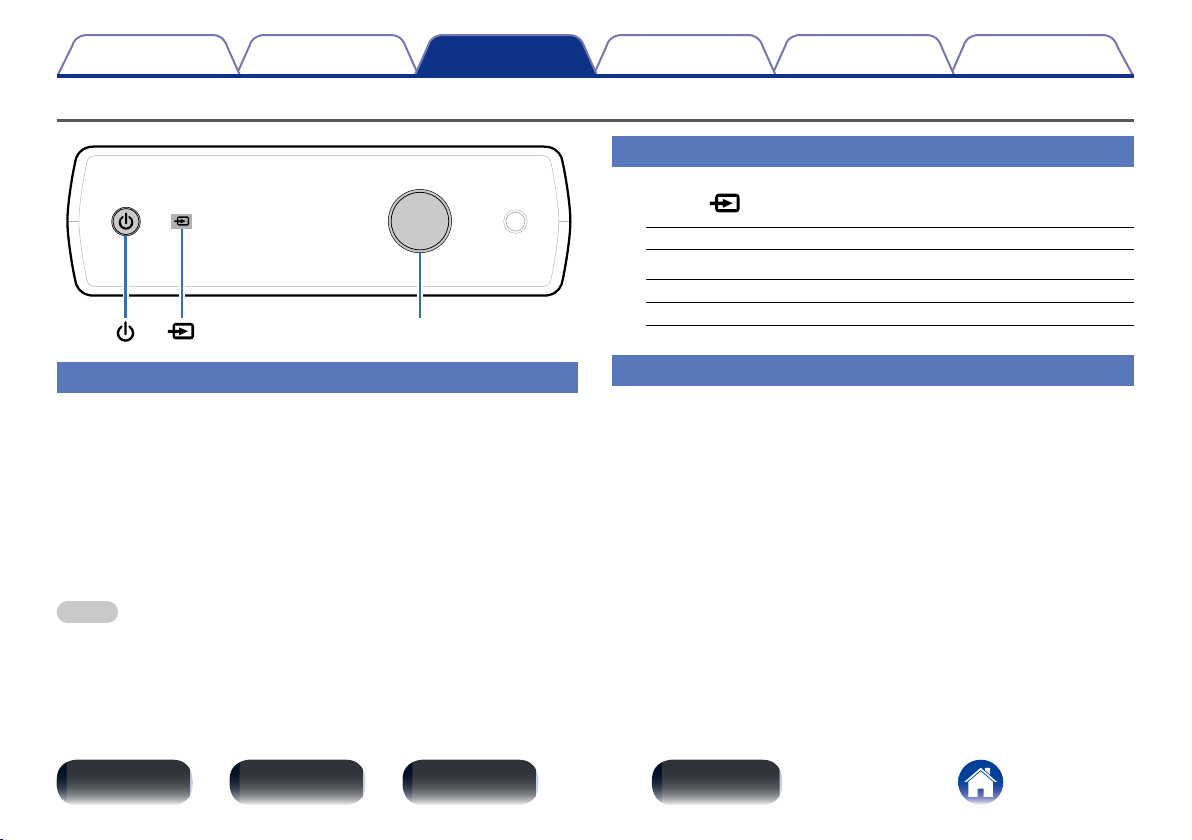
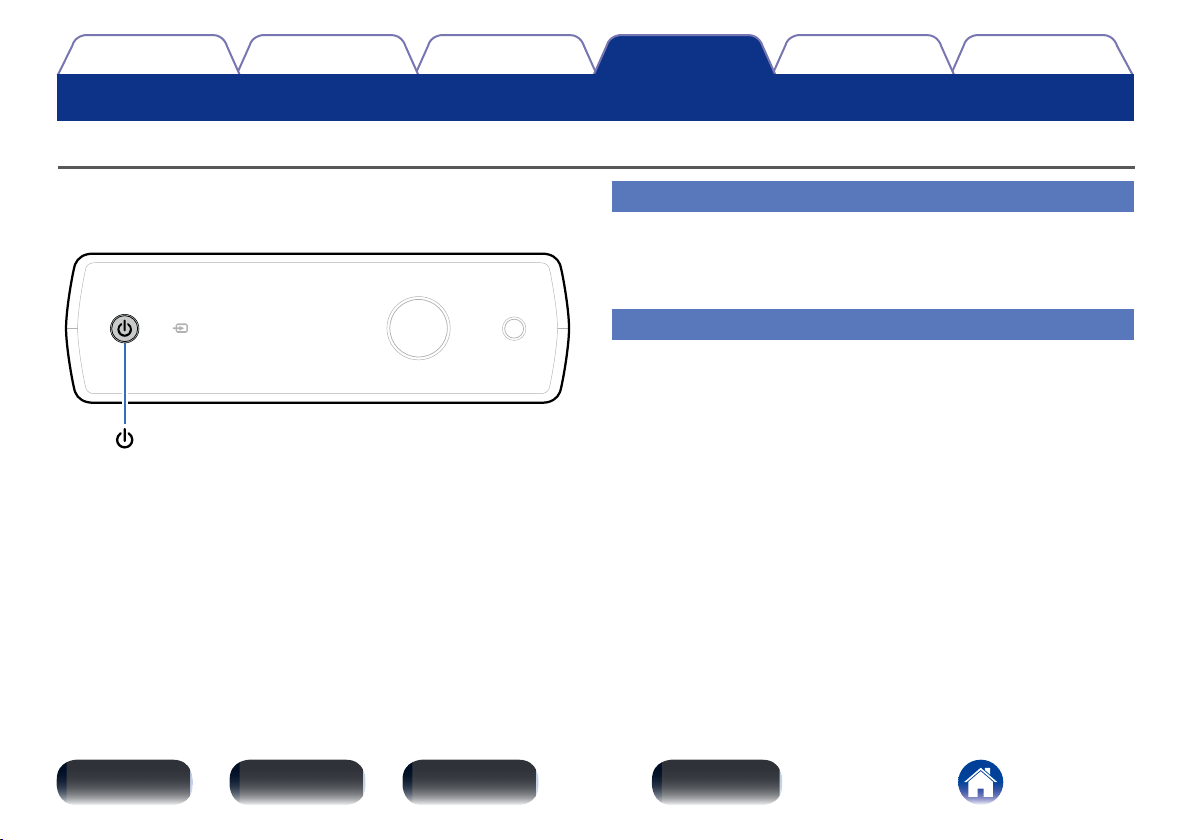
Front panel
r tq w e
q Power operation button/indicator (X)
This turns the power on/standby (vpage14).
This is lit as follows according to the power status:
•Power on : Lit
•Standby : O
w Input source select switch ( )
This selects the input source (vpage14, 20, 21).
e Display
This displays various pieces of information (vpage6).
r Headphone volume control knob
Adjusts the headphone volume (vpage14).
•Even when the headphones are connected or the volume is adjusted,
the volume from the analog audio output connector does not change.
t Headphones jack
Used to connect headphones.
NOTE
•To prevent hearing loss, do not raise the volume level excessively when using
headphones.
6
Appendix
TipsSettingsPlaybackConnections
Contents
Front panel Display Rear panel Index
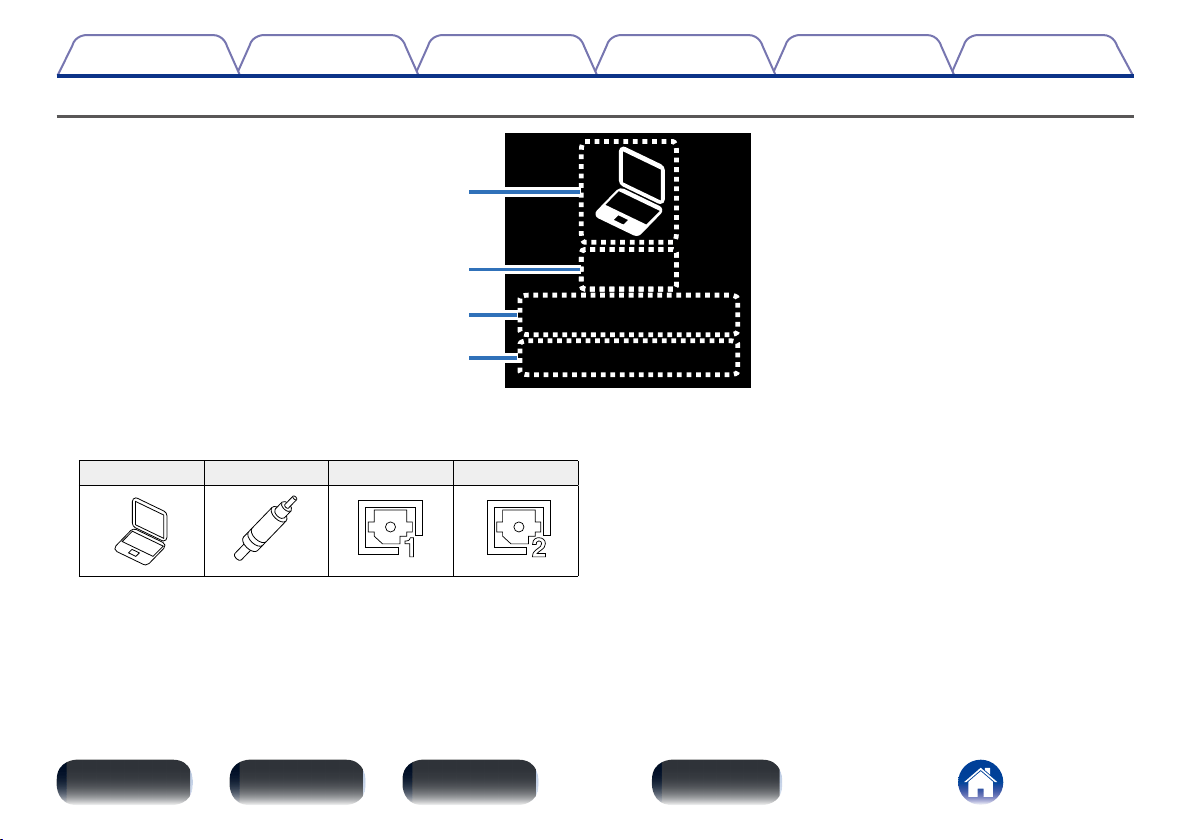
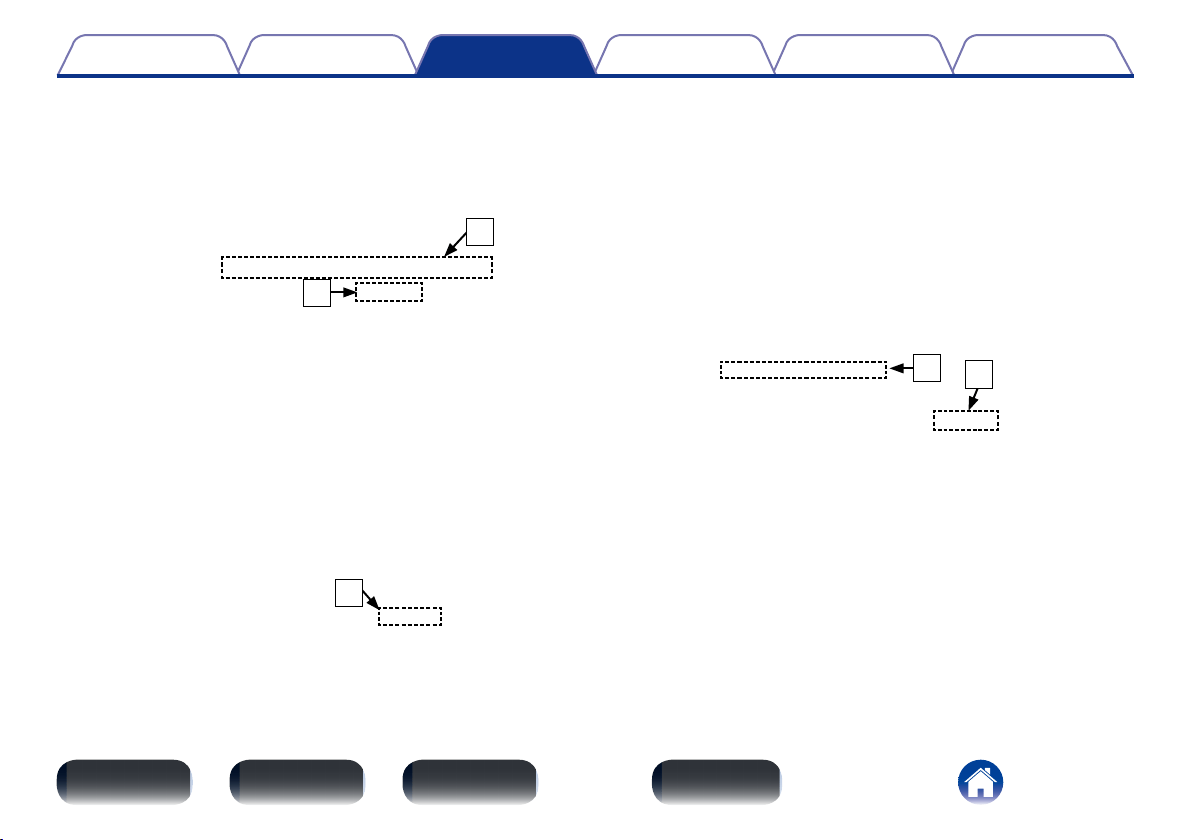
Display
DSD
5.6448MHz
VOL.---dB
q
w
e
r
q Input source indicator
The following is displayed according to the selected input source.
USB-DAC COAXIAL OPTICAL-1 OPTICAL-2
w Input signal format indicator
The input audio signal format is displayed.
e Sampling frequency indicator
The input audio signal sampling frequency is displayed.
r Headphone volume indicator
The headphone volume level is displayed.
•By default, the volume level is displayed as “– – –dB” (muted).

7
Appendix
TipsSettingsPlaybackConnections
Contents
Front panel Display Rear panel Index
Rear panel
wq e
q AUDIO OUT connectors
Used to connect a amplifier (vpage11).
w DIGITAL IN connectors
Used to connect a PC or devices equipped with digital audio output
connectors (vpage11).
e AC adapter inlet (DC IN)
Used to connect the AC adapter (vpage12).
Connections
8
Appendix
TipsSettingsPlayback
Contents
Front panel Display Rear panel Index
Connections
Placing this unit (vpage9)
Connecting devices (vpage11)
Connecting the AC adapter (vpage12)
NOTE
•Do not plug in the power cord until all connections have been completed.
•Do not bundle power cords together with connection cables. Doing so can result
in humming or noise.
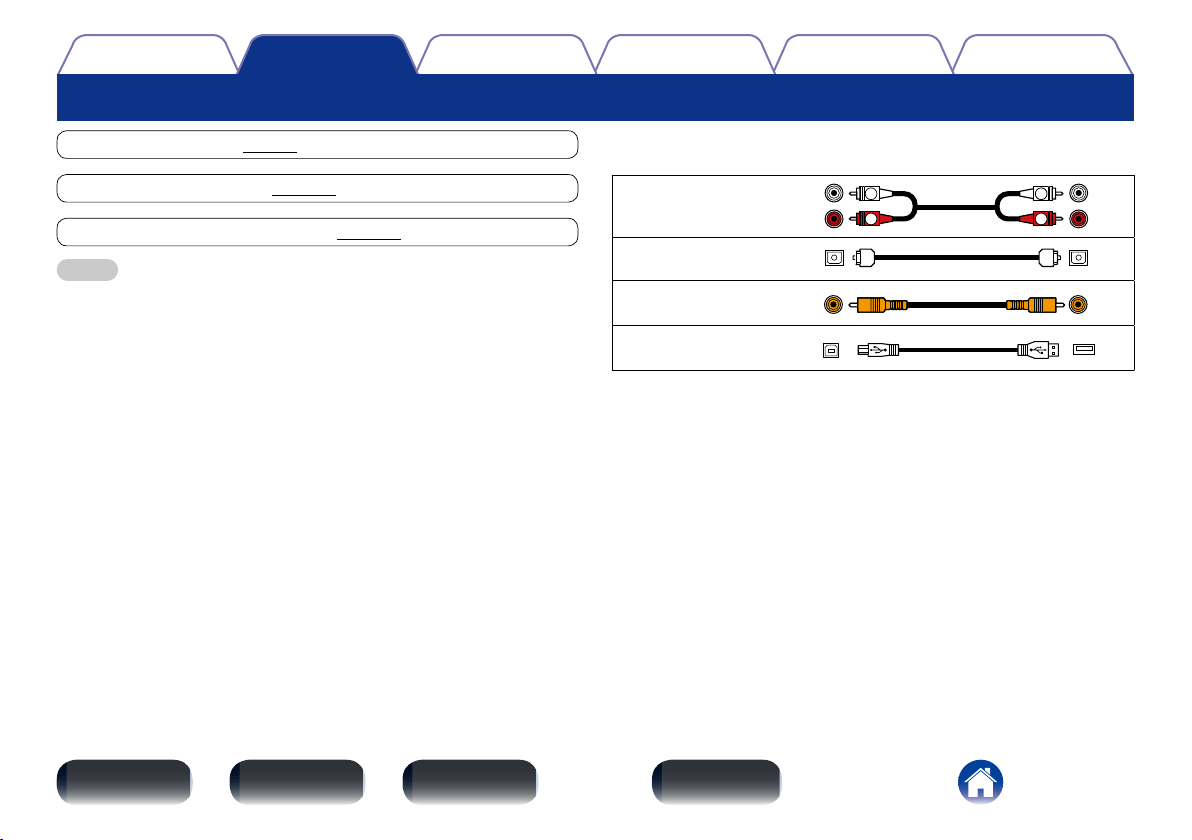
2 Cables used for connections
Provide necessary cables according to the devices you want to connect.
Audio cable
(Supplied)
R
L
R
L
Optical cable
(Sold separately)
Coaxial digital cable
(Sold separately)
USB cable
(Sold separately)
R
L
R
L
9
Appendix
TipsSettingsPlayback
Contents
Front panel Display Rear panel Index
Connections
Placing this unit
Place this unit horizontally or vertically according to the location and your preferences.
Horizontal placement
When placing this unit horizontally, attach the provided feet for horizontal
placement to the bottom.
2 How to attach the feet for horizontal placement
Attach the feet for horizontal placement to this unit as shown in the
diagram below.
Feet for horizontal
placement
10
Appendix
TipsSettingsPlayback
Contents
Front panel Display Rear panel Index
Connections
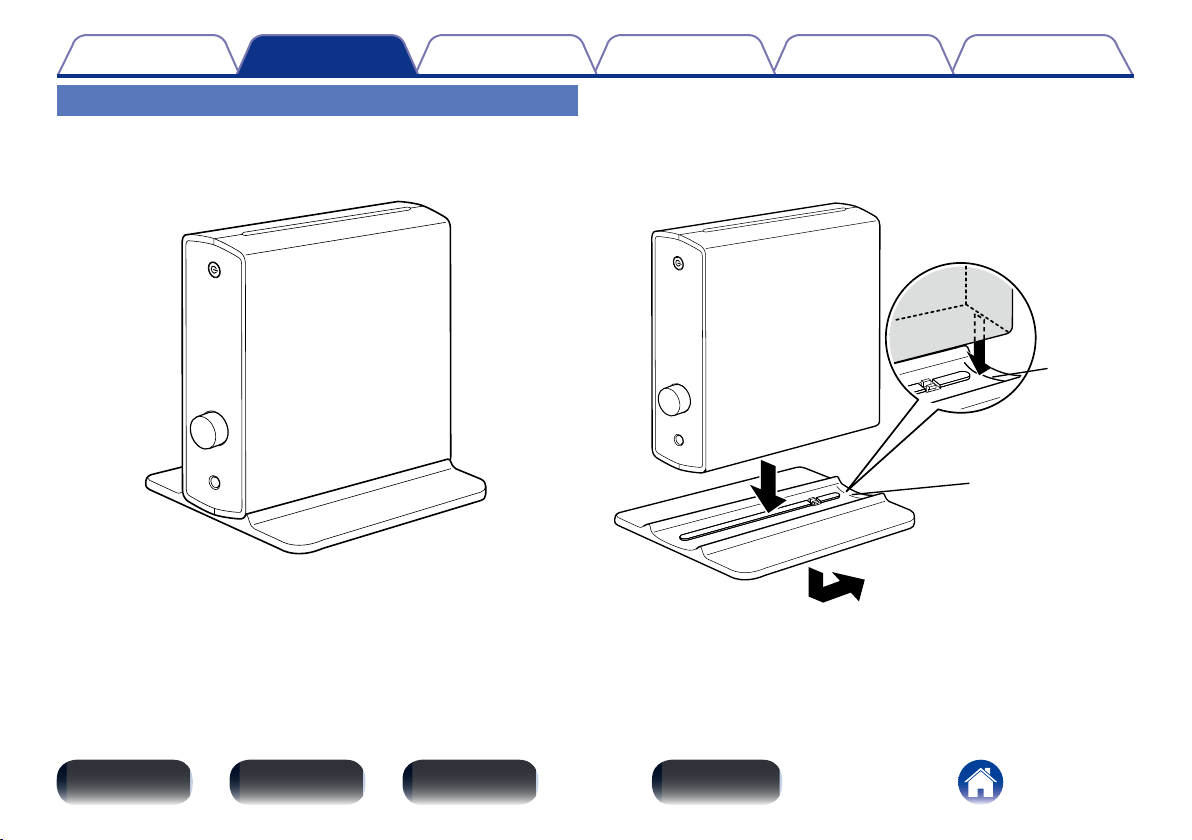
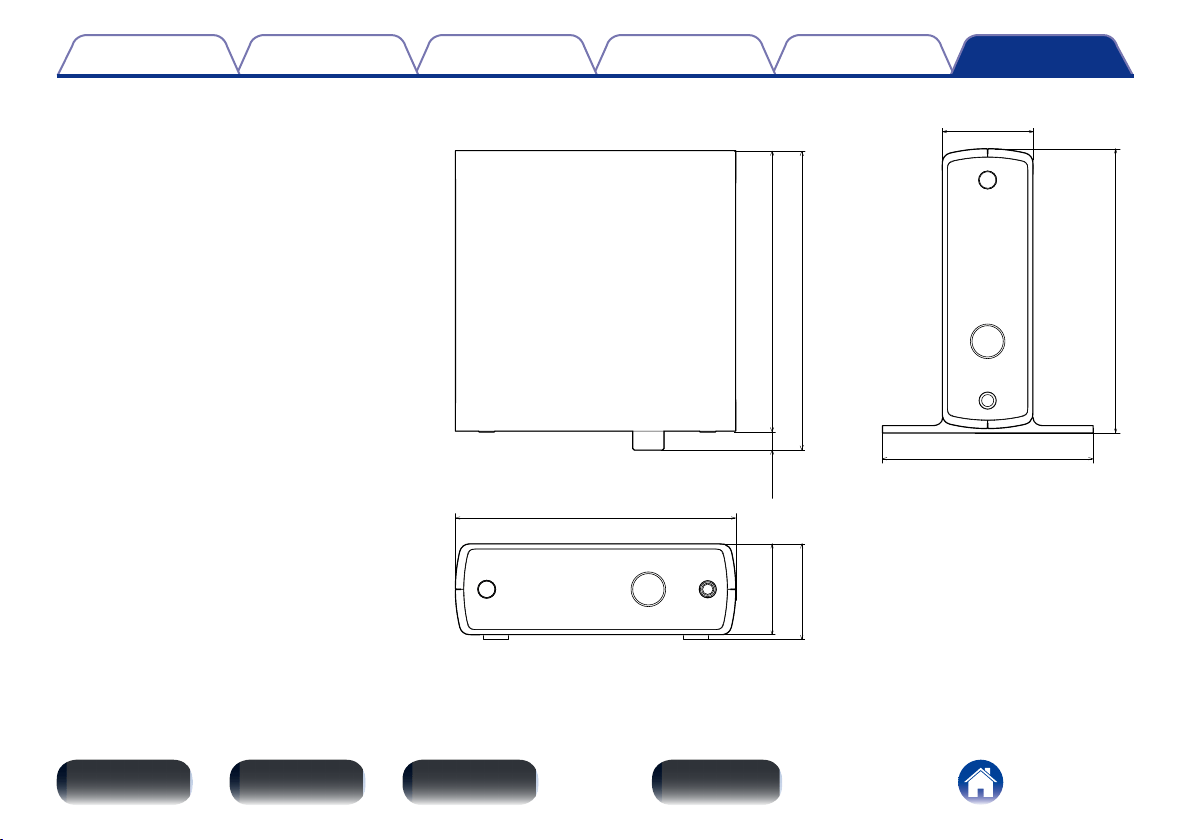
Vertical placement
When placing this unit vertically, attach the stand for vertical placement
to this unit with the power button in the upper position as shown in the
diagram.
2 How to attach the stand for vertical placement
q Align the rear edge of this unit to the guide position.
w Press down this unit onto the stand until it clicks.
e Slide this unit in the arrow direction to align the edge of this unit
with that of the stand.
q
w
e
Guide
Guide
•To remove the stand from this unit, follow the above steps for attaching
the stand in the reverse order.
11
Appendix
TipsSettingsPlayback
Contents
Front panel Display Rear panel Index
Connections
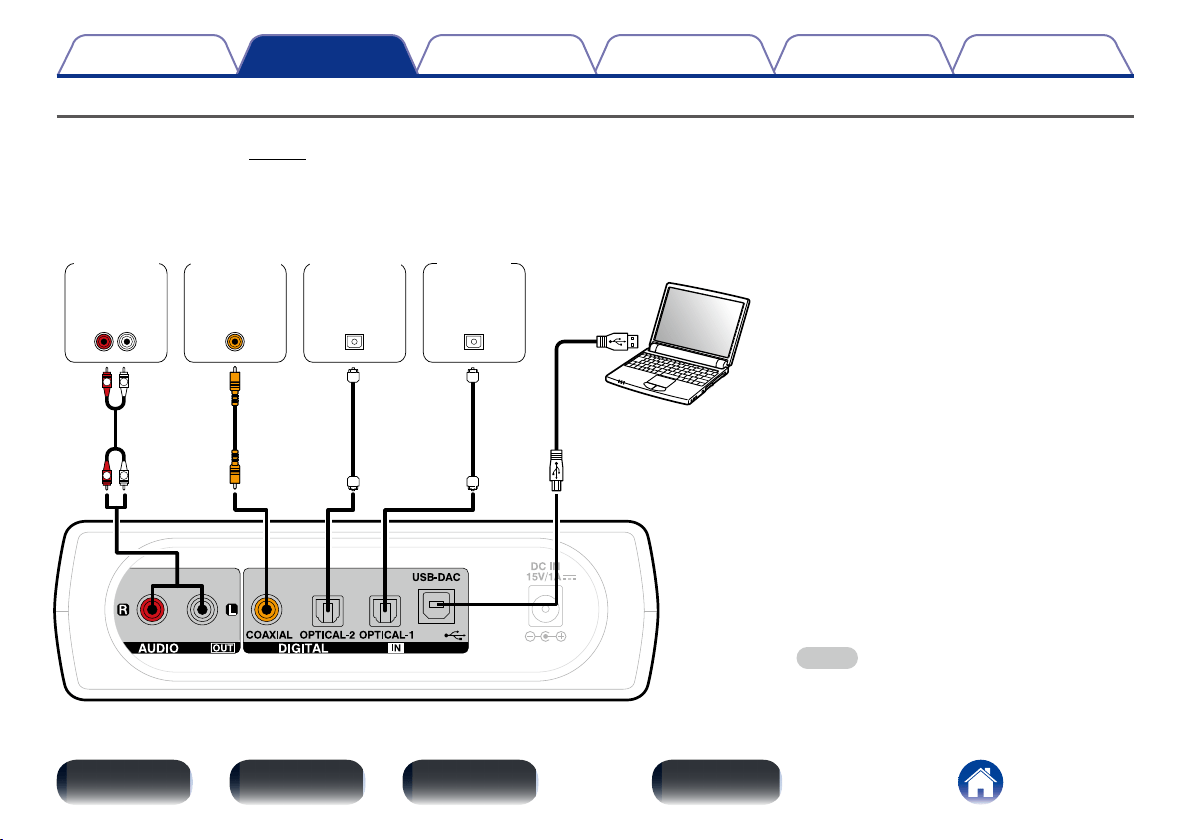
Connecting devices
•For USB-DAC playback, install the dedicated driver software and player software on your computer before connecting (“Installing the dedicated driver
(Windows OS only)” (vpage15)).
•Download the driver software from the DA-300USB page of the Denon website.
AUDIO
LR
IN
OUT
COAXIAL
OPTICAL
OUT
OPTICAL
OUT
L
R
R
L
Computer on which the driver
software and audio player
software are installed
USB 2.0 cable
(sold separately)
Type B
Type A
Amplifier
CD player
Satellite
tuner
TV
NOTE
•Use a cable that is 10 ft (3 m) or less to connect to
the computer.
12
Appendix
TipsSettingsPlayback
Contents
Front panel Display Rear panel Index
Connections
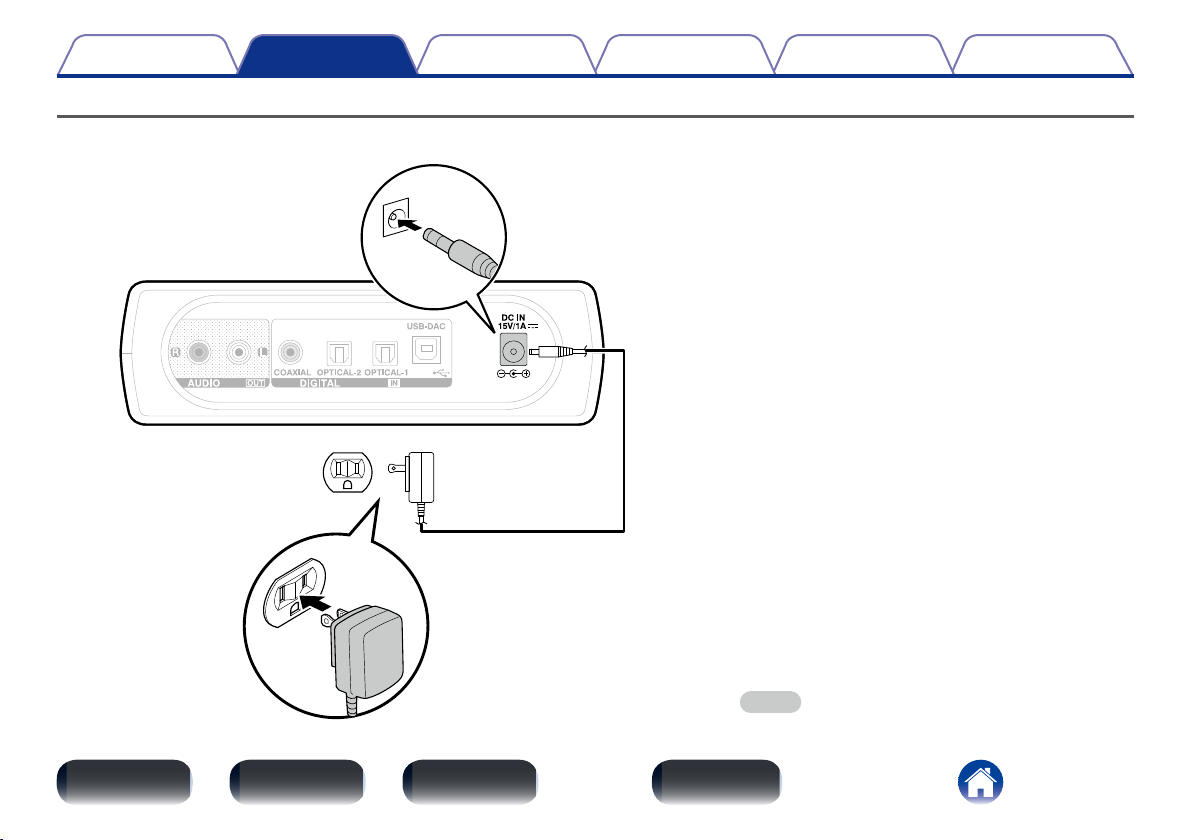
Connecting the AC adapter
After completing all the connections, insert the AC adapter into the power outlet.
To household power outlet
(AC 100 – 240 V, 50/60 Hz)
AC adapter (supplied)
NOTE
•Do not use an AC adapter other than the provided one.
13
Appendix
TipsSettingsConnections
Contents
Front panel Display Rear panel Index
Playback
Playback
Turning the power on (vpage14)
Selecting the input source (vpage14)
Adjusting the headphone volume (vpage14)
Connecting and playing back from a computer (USB-DAC)
(vpage15)
Connect and playback from a digital device (COAXIAL/
OPTICAL-1/OPTICAL-2) (vpage21)
14
Appendix
TipsSettingsConnections
Contents
Front panel Display Rear panel Index
Playback
Selecting the input source
1
Touch to switch the input source for playback.
USB-DAC : Plays music files on your computer.
COAXIAL : Plays devices connected to the COAXIAL connector.
OPTICAL-1 : Plays devices connected to the OPTICAL-1 connector.
OPTICAL-2 : Plays devices connected to the OPTICAL-2 connector.
Adjusting the headphone volume
1
Turn the headphone volume control knob to adjust the
volume.
The display shows the volume level.
Basic operation
Headphone volume control knob
Turning the power on
1
Press X to turn on power to the unit.
The power indicator turns on.
2 Switching the power to standby
1
Press X.
The power indicator turns o.
NOTE
•Power continues to be supplied to some of the circuitry even when the power is in
the standby mode. When leaving home for long periods of time or when going on
vacation, unplug the AC adapter from the power outlet.
15
Appendix
TipsSettingsConnections
Contents
Front panel Display Rear panel Index
Playback
Connecting and playing back from a
computer (USB-DAC)
Enjoy music playback with high audio quality by inputting music files with
DSD or PCM signals stored on your computer to this unit through a USB
connection.
•Before connecting this unit to your computer, install the driver software
in your computer.
•Drivers do not need to be installed for Mac OS.
•As a playback player on your computer, use a commercially available or
downloadable player software of your choice that supports the playback
of high resolution audio sources.
2 Computer (recommended system)
OS
•Windows® XP Service Pack3, Windows® Vista, Windows 7 or
Windows 8
•Mac OS X 10.6.3 or later
USB
•USB 2.0: USB High speed/USB Audio Class Ver.2.0
2 Installing the dedicated driver (Windows OS only)
n Installing the driver software
1
Disconnect the USB cable between your PC and the
unit.
•The driver software cannot be installed correctly if your PC is
connected to the unit by a USB cable. When your PC was started
with the USB cable connected, disconnect the USB cable and
restart your PC.
2
Download the dedicated driver from the “Download”
section of the DA-300USB page of the Denon website
onto your PC.
3
Unzip the downloaded file.
4
Select the 32 bit or 64 bit exe file that matches your
Windows operating system, and double-click the file.
16
Appendix
TipsSettingsConnections
Contents
Front panel Display Rear panel Index
Playback
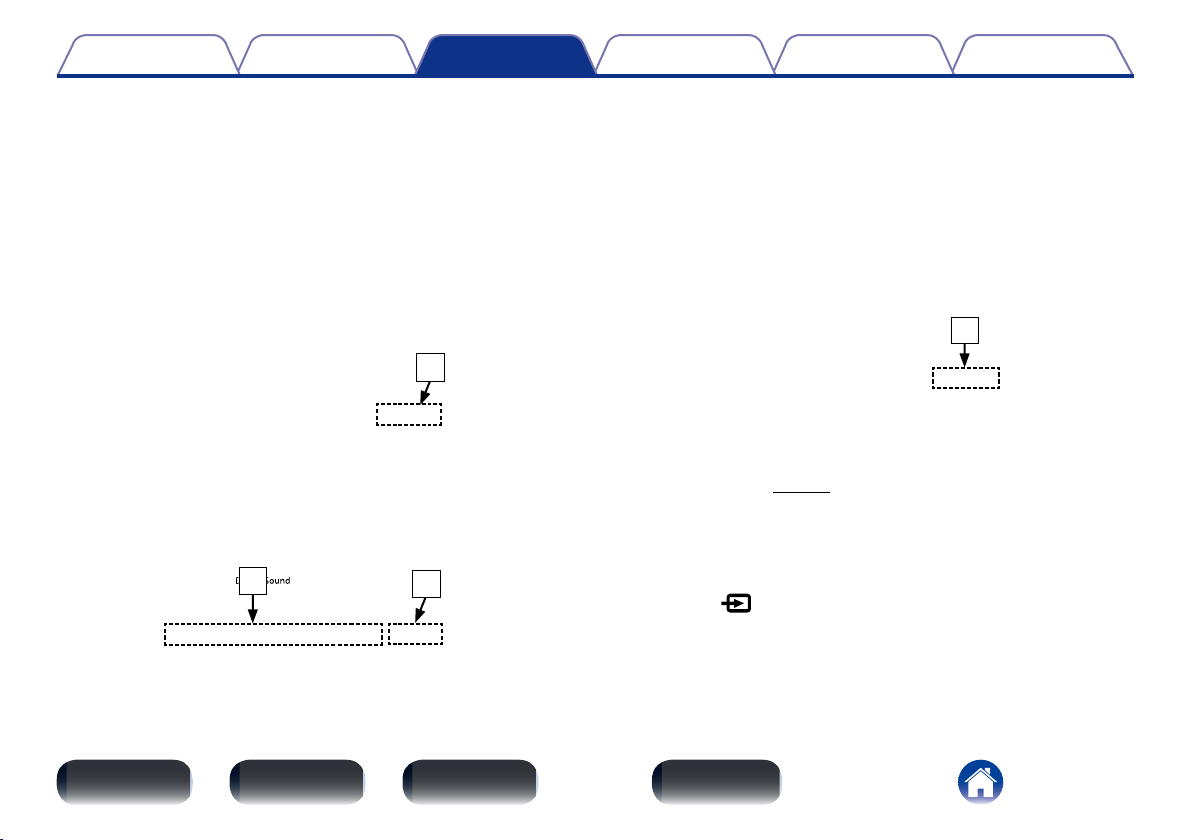
5
Install the driver.
q Select the language to use for the installation.
w Click “OK”.
q
w
e The wizard menu is displayed. Click “Next”.
e
r Read the Software Licensing Agreement, and click “I accept
the terms in the license agreement”.
t Click “Next”.
SOFTWARE LICENSING AGREEMENT
t
r
17
Appendix
TipsSettingsConnections
Contents
Front panel Display Rear panel Index
Playback
y Click “Install” on the installation start dialog.
•The installation starts. Do not perform any operation on the
PC until the installation is completed.
y
u In the Windows security dialog, select “Always trust software
from DandM Holdings Inc.”.
i Click “Install”.
i
u
o When the installation is completed, click “Finish”.
o
6
With the unit power o, connect the unit and PC using
a USB cable (sold separately).
•For the connection procedure, refer to the “Connecting
devices” (vpage11) section.
7
Press X on this unit.
•When the unit power is turned on, the PC automatically finds
and connects to the unit.
8
Touch to change the input source to “USB-DAC”.
18
Appendix
TipsSettingsConnections
Contents
Front panel Display Rear panel Index
Playback
9
Checking the installed driver.
q Click the “Start” button and click “Control Panel” on the PC.
•The control panel setting list is displayed.
w Click the “Sound” icon.
•The sound menu window is displayed.
e Check that there is a checkmark next to “Default Device”
under in “Digital Audio Interface” of the “Playback” tab.
•When there is a checkmark for a dierent device, click
“Denon USB Audio” and “Set Default”.
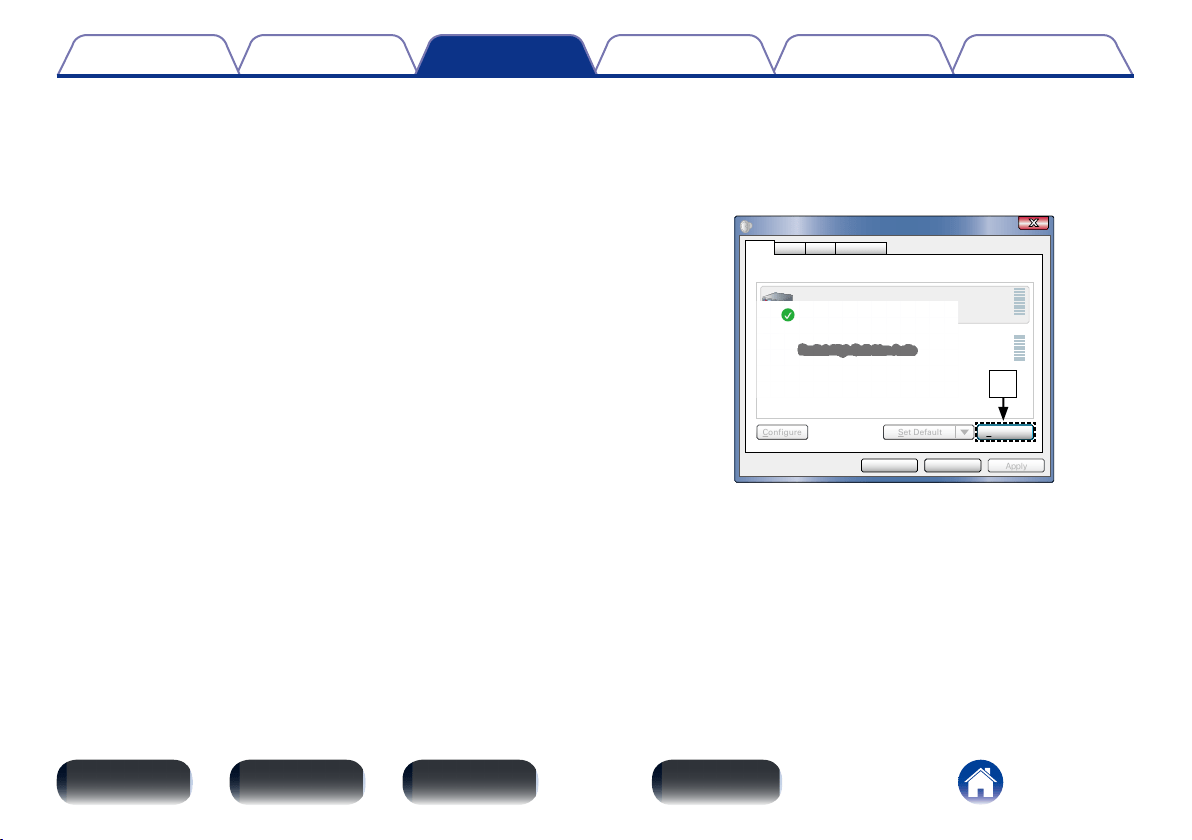
10
Checking audio output.
Outputs a TEST signal from the PC and checks the audio output
from the USB-DAC function.
q Select “Digital Audio Interface” and click “Properties”.
•The Digital Audio Interface Properties window is displayed.
ApplyCancelOK
Properties
Select a playback device below to modify its settings:
Digital Audio Interface
Denon USB Audio
Default Device
Speakers
Ready
Sound
Configure Set Default
Playback
Recording CommunicationsSounds
q
19
Appendix
TipsSettingsConnections
Contents
Front panel Display Rear panel Index
Playback
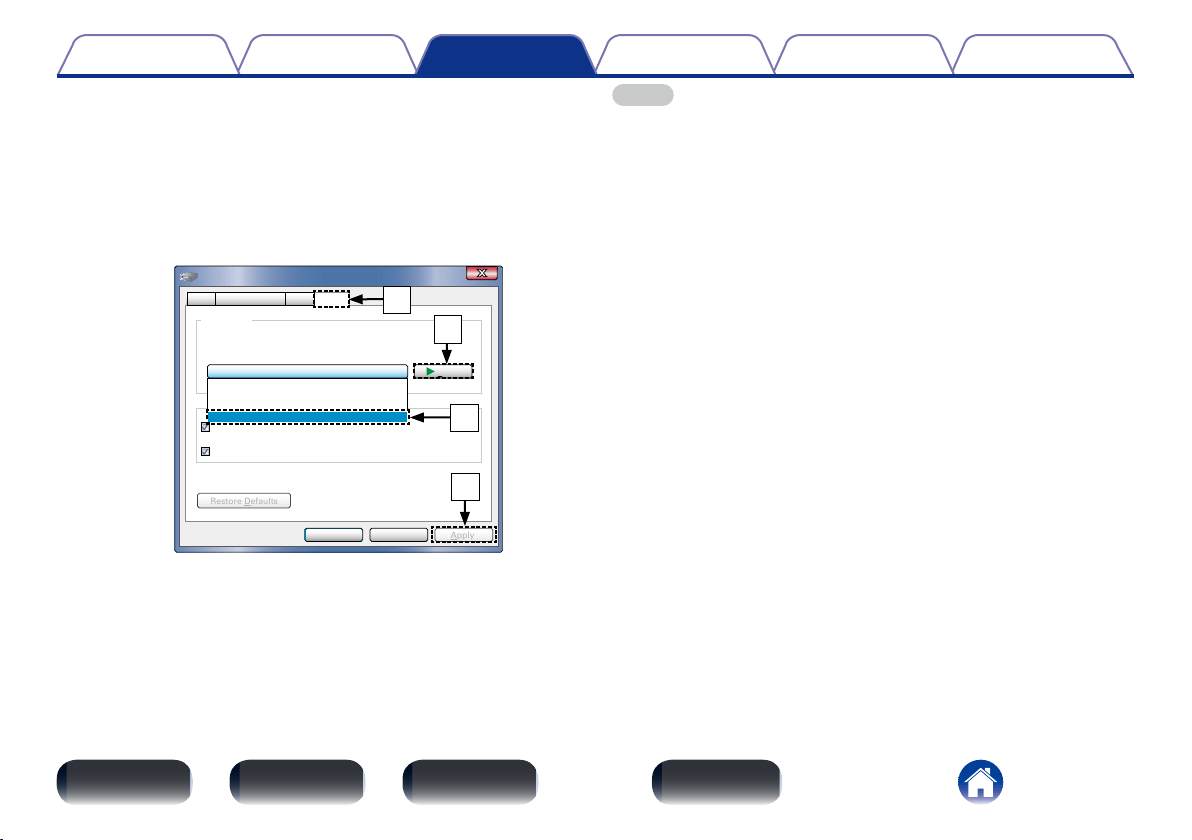
w Click the “Advanced” tab.
e Select the sampling rate and bit rate to be applied to the D/A
converter.
•It is recommended that “24 bit, 192000 Hz (Studio Quality)”
is selected.
r Click “Apply”.
t Click “Test”.
•Check that audio from this unit is output from the PC.
ApplyCancel
Test
OK
2 channel, 24 bit, 192000 Hz ( Studio Quality)
Give exclusive mode applications priority
Default Format
Select the sample rate and bit depth to be used when running
in shared mode.
Digital Audio Interface Properties
Allow applications to take exclusive control of this device
Restore Defaults
General Supported Formats Levels Advanced
2 channel, 24 bit, 44100 Hz ( Studio Quality)
2 channel, 24 bit, 48000 Hz ( Studio Quality)
2 channel, 24 bit, 96000 Hz ( Studio Quality)
2 channel, 24 bit, 192000 Hz ( Studio Quality)
w
t
e
r
NOTE
•The dedicated driver must be installed in the PC before this unit is connected to a
PC. Operation will not occur correctly if connected to the PC before the dedicated
driver has been installed. Moreover, if the PC is running Windows XP as its OS, the
PC’s speed will decrease significantly, and a PC restart may be required.
•Operation may fail in some PC hardware and software configurations.
20
Appendix
TipsSettingsConnections
Contents
Front panel Display Rear panel Index
Playback
2 Playback
•Install the desired player software on your computer beforehand.
•Use the rear panel USB-DAC port to connect this unit to a computer.
For the connection procedure, refer to the “Connecting devices”
(vpage11) section.
1
Touch to change the input source to “USB-DAC”.
2
Start playback on the computer’s player software.
The digital audio signal that is being input is shown as
follows in the display.
“PCM
xxxxxkHz”
or
“DSD
xxxxxMHz”
(xxxxx is the sampling frequency.)
•If the sampling frequency cannot be detected, “Unlock” will be
displayed.
•“Unsupported” is displayed when audio signals that are not
supported by this unit are input.
2 Files that can be played back
See “Input signals available for USB-DAC playback” (vpage28).
NOTE
•Perform operations such as playback and pause on the computer.
•You can also control the volume and equalizer on the computer. Enjoy playing
music at the desired volume.
•No audio is output from the speakers of your computer while this unit is in
operation.
•If the computer is disconnected from this unit while the computer music playback
software is running, the playback software may freeze. Always exit the playback
software before disconnecting the computer.
•When an abnormality occurs on the computer, disconnect the USB cable and
restart the computer.
•The sampling frequency of the music playback software and sampling frequency
displayed on this unit may dier.
•Use a cable that is 10 ft (3 m) or less to connect to the computer.
21
Appendix
TipsSettingsConnections
Contents
Front panel Display Rear panel Index
Playback
Connect and playback from a digital
device (COAXIAL/OPTICAL-1/OPTICAL-2)
1
Connect digital device to this unit (vpage11).
2
Touch to select the input source to “COAXIAL”,
“OPTICAL-1” or “OPTICAL-2” (vpage14).
The digital audio signal that is being input is shown as follows in
the display.
“PCM
xxxxxkHz”
(xxxxx is the sampling frequency.)
•If the sampling frequency cannot be detected, “Unlock” will be
displayed.
•“Unsupported” is displayed when audio signals that are not
supported by this unit are input.
2 Files that can be played back
See “Input signals available for COAXIAL/OPTICAL-1/OPTICAL-2
playback” (vpage28).
NOTE
•Do not input non-PCM signals, such as Dolby Digital, and DTS. This causes noise
and could damage the speakers.
•If the sampling frequency switches, muting may operate for 1 – 2 seconds, cutting
the sound.
22
Appendix
TipsPlaybackConnections
Contents
Front panel Display Rear panel Index
Settings
Settings
You can set the unit to automatically switch to standby mode if the unit is
not operated for 30 minutes when there is no audio input.
Auto Standby mode is set to o by default.
Turning Auto Standby mode on
1
Press and hold X for more than 5 seconds.
The display shows “Auto Standby On”.
Turning Auto Standby mode o
1
Press and hold X for more than 5 seconds.
The display shows “Auto Standby O”.
Setting the Auto Standby mode
23
Appendix
SettingsPlaybackConnections
Contents
Front panel Display Rear panel Index
Tips
Tips
Contents
2 Tips ....................................................................(24)
I want to play audio from the TV with the amplifier
connected to this unit .......................................................................(24)
I am not satisfied with the audio quality of the headphones
connector on the TV .........................................................................(24)
I want to reduce power consumption ..............................................(24)
2 Troubleshooting ..............................................(25)
Power does not turn on / Power is turned o ..................................(25)
No sound comes out ........................................................................(26)
Sound is interrupted or noise occurs ................................................(26)
Files on my computer cannot be played back ..................................(27)
Audio from digital devices cannot be played
(COAXIAL/OPTICAL-1/OPTICAL-2) ...................................................(27)
The input source does not switch ....................................................(27)
24
Appendix
SettingsPlaybackConnections
Contents
Front panel Display Rear panel Index
Tips
Tips
I want to play audio from the TV with the amplifier connected to this unit
•Connect the digital audio output connector on the TV to the digital audio input connector on this unit (COAXIAL, OPTICAL-1, or OPTICAL-2), and then
switch the input source on this unit to the connector being used (COAXIAL, OPTICAL-1, or OPTICAL-2) (vpage14).
•2-channel linear PCM digital audio signals can be played back on this unit.
I am not satisfied with the audio quality of the headphones connector on the TV
•Input audio from the TV to this unit, and connect the headphones to the headphones connector on this unit to enjoy high quality audio.
Connect the digital audio output connector on the TV to the digital audio input connector on this unit (COAXIAL, OPTICAL-1, or OPTICAL-2), and then
switch the input source on this unit to the connected connector (COAXIAL, OPTICAL-1, or OPTICAL-2) (vpage14).
•2-channel linear PCM digital audio signals can be played back on this unit.
I want to reduce power consumption
•Set the Auto Standby mode to on (vpage22).
•When not using this unit for a long time, disconnect the AC adapter from the power outlet.
25
Appendix
SettingsPlaybackConnections
Contents
Front panel Display Rear panel Index
Tips
Troubleshooting
If a problem should arise, first check the following:
1. Are the connections correct?
2. Is the set being operated as described in the owner’s manual?
3. Are the other devices operating properly?
If this unit does not operate properly, check the items listed in the table below. Should the problem persist, there may be a malfunction.
In this case, disconnect the power immediately and contact your store of purchase.
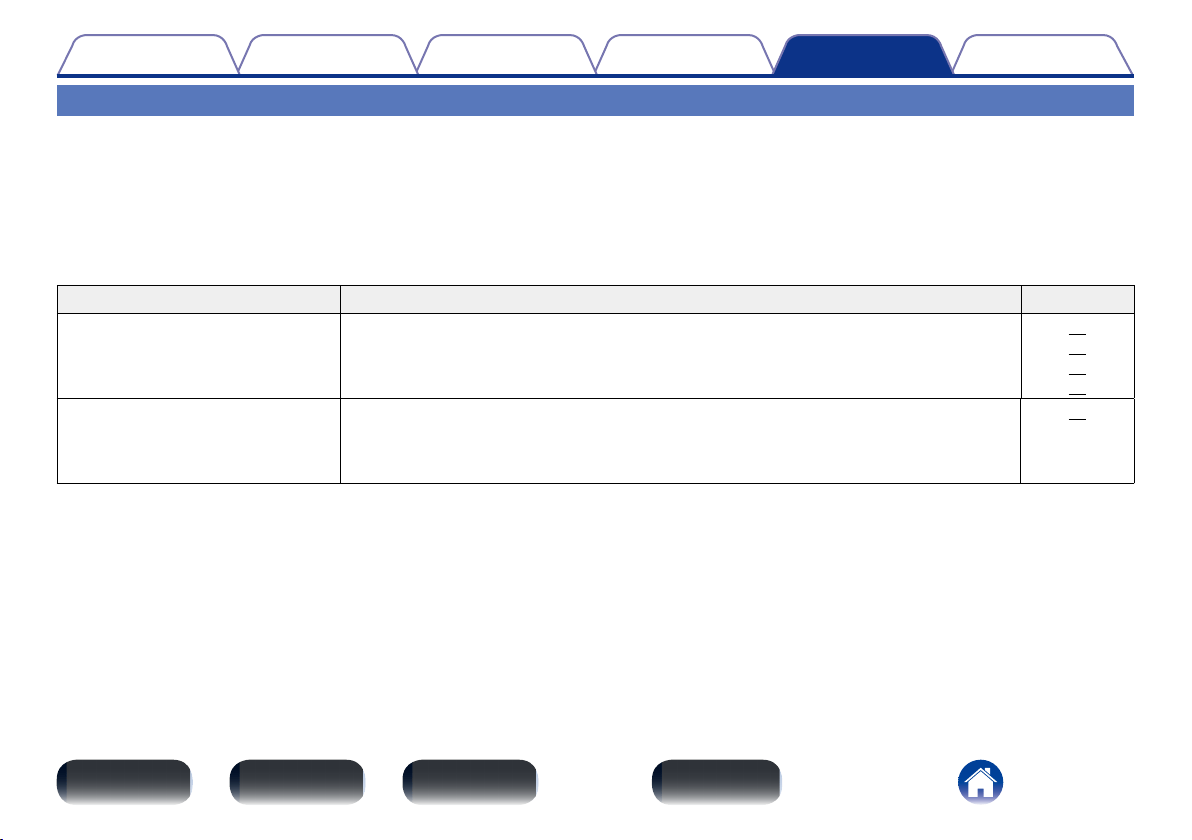
2 Power does not turn on / Power is turned o
Symptom Cause / Solution Page
Power is not turned on. •Check whether the AC adapter is correctly inserted into the power outlet.
•Check that this unit is connected to the AC adapter.
•This unit is in standby mode. Press power operation button (X).
•Use the AC adapter provided with this unit.
12
12
14
12
Power automatically turns o. •The Auto Standby mode is set. The Auto Standby mode switches the unit to standby mode
when the unit is not operated for approximately 30 minutes. To disable the Auto Standby
mode, press and hold the power operation button (X) for more than 5 seconds when the Auto
Standby mode is enabled.
22
26
Appendix
SettingsPlaybackConnections
Contents
Front panel Display Rear panel Index
Tips
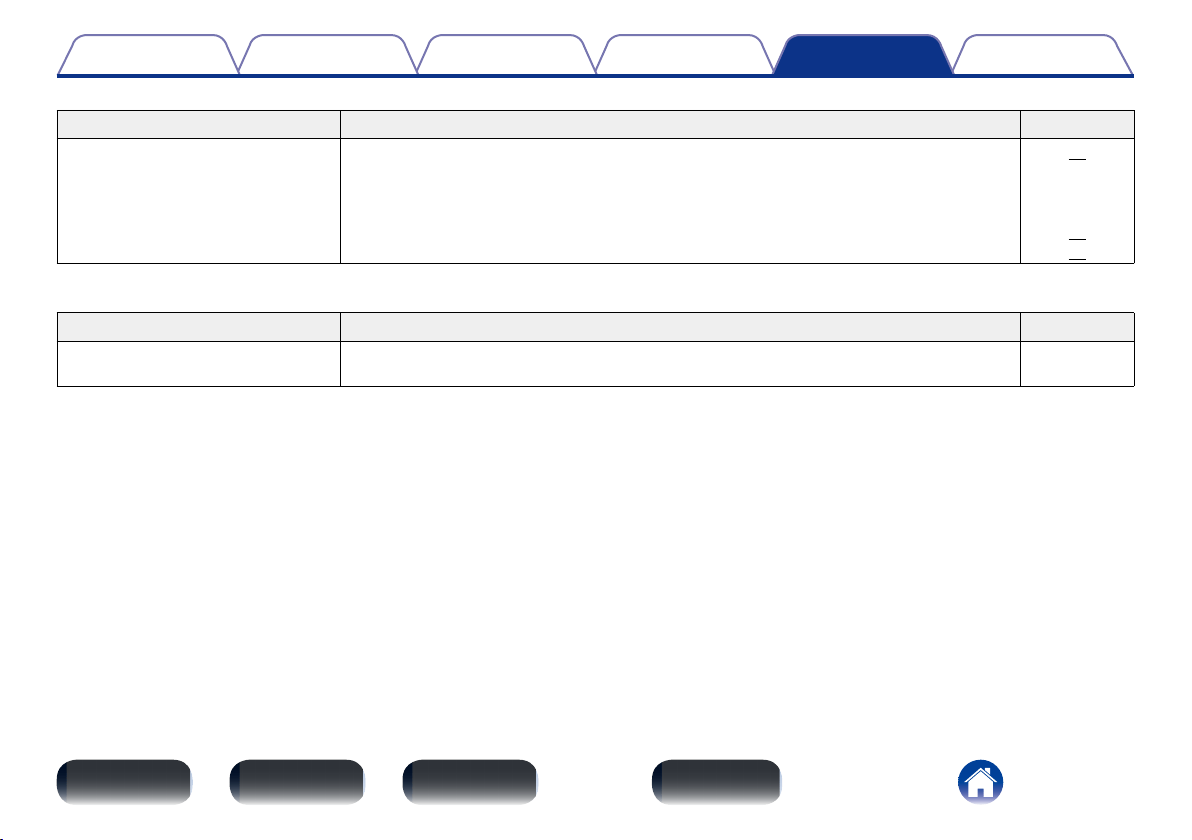
2 No sound comes out
Symptom Cause / Solution Page
No sound is produced or sound is
distorted.
•Check the connections for all devices.
•Insert connection cables all the way in.
•Check cables for damage.
•Check the amplifier input source and switch to the connector that is connected to this unit.
•Check if the appropriate input source is selected.
•The headphone volume is set to the minimum level. Adjust the volume level properly.
11
–
–
–
14
14
2 Sound is interrupted or noise occurs
Symptom Cause / Solution Page
Sound is interrupted during playback
of tracks saved on a computer.
•Do not start applications other than the player software while playing music on your computer. –
27
Appendix
SettingsPlaybackConnections
Contents
Front panel Display Rear panel Index
Tips
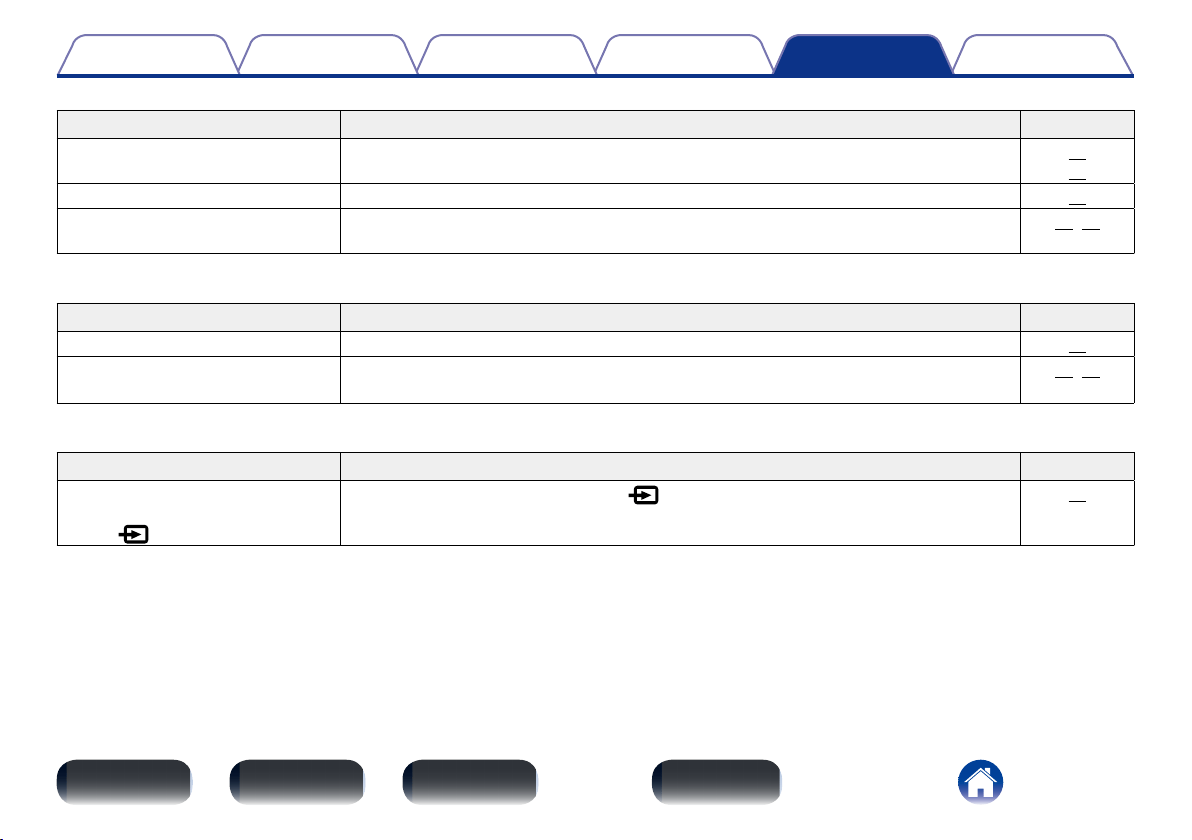
2 Files on my computer cannot be played
Symptom Cause / Solution Page
This unit is not recognized by my
computer.
•Check the OS of your computer.
•When your computer is running on Windows, a dedicated driver software should be installed.
15
15
“Unlock” is displayed. •When digital audio signals cannot be detected properly, “Unlock” is displayed.
20
“Unsupported” is displayed. •“Unsupported” is displayed when audio signals that are not supported by this unit are input.
Check the settings on your computer or player software.
20, 28
2 Audio from digital devices cannot be played back (COAXIAL/OPTICAL-1/OPTICAL-2)
Symptom Cause/Solution Page
“Unlock” is displayed. •When digital audio signals cannot be detected properly, “Unlock” is displayed.
21
“Unsupported” is displayed. •“Unsupported” is displayed when audio signals that are not supported by this unit are input.
Check the audio output signal format from your digital device.
21, 28
2 The input source does not switch
Symptom Cause/Solution Page
The input source does not switch
even when the input source select
switch (
) is touched.
•Touch the input source select switch (
) correctly with your finger.
14
28
TipsSettingsPlaybackConnections
Contents
Front panel Display Rear panel Index
Appendix
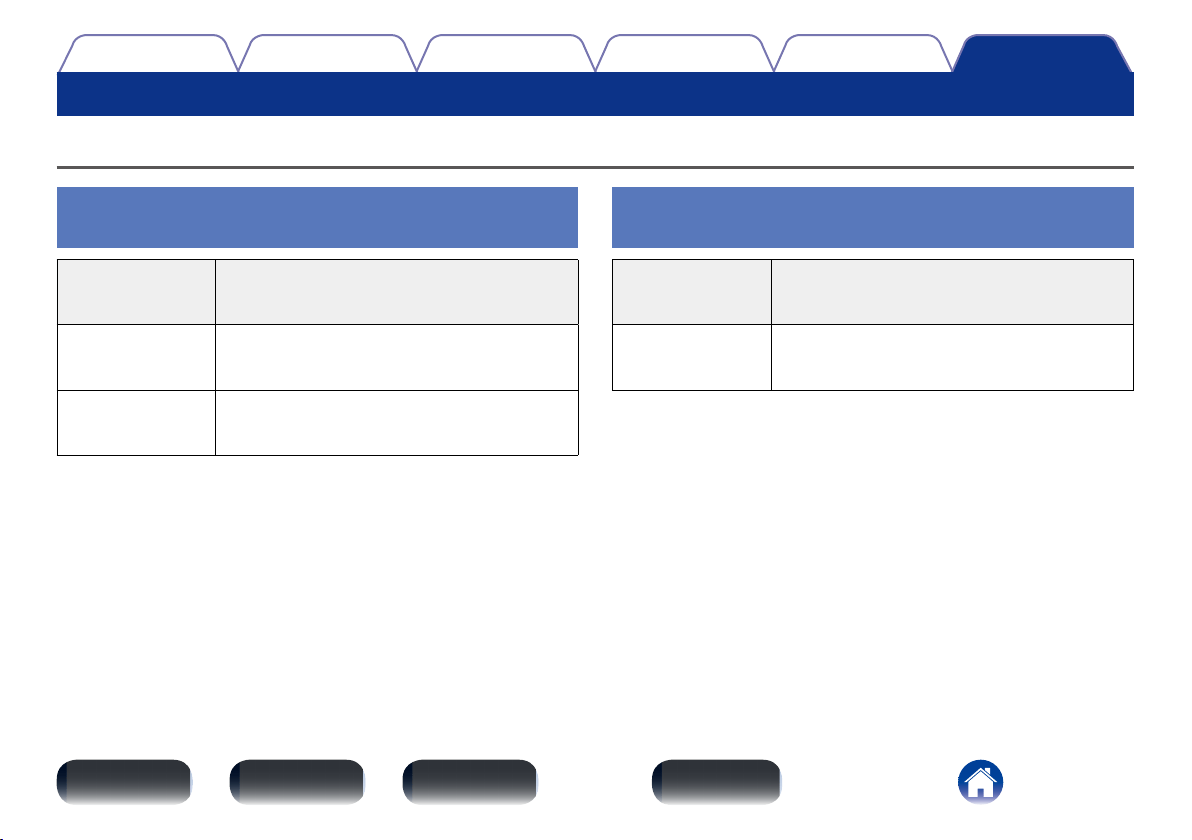
Types of digital audio input signals available for playback
Input signals available for COAXIAL/
OPTICAL-1/OPTICAL-2 playback
Types of input
signals available
for playback
Input signal specifications
Linear PCM
(2-channel)
•Sampling frequency :
32/44.1/48/64/88.2/96/176.4/192 kHz
•Bit length : 16/24 bit
Appendix
Input signals available for USB-DAC
playback
Types of input
signals available
for playback
Input signal specifications
DSD
(2-channel)
•Sampling frequency : 2.8224/5.6448 MHz
•Bit length : 1 bit
•Transmission system : Native/DoP
Linear PCM
(2-channel)
•Sampling frequency :
32/44.1/48/88.2/96/176.4/192 kHz
•Bit length : 16/24 bit
29
TipsSettingsPlaybackConnections
Contents
Front panel Display Rear panel Index
Appendix
Explanation of terms
A
Advanced AL32 Processing
Equipped with Advanced AL32 Processing, Denon’s own analog waveform
reproduction technology.
The reproducibility of weak signals is enhanced by expanding 16 bit digital
data to 32 bit.
D
DSD (Direct Stream Digital)
This is a digital audio recording technology used for Super Audio CD. This
enables recording and playback of audio very close to the original, allowing
you to enjoy high quality audio.
Dynamic range
The dierence between the maximum, undistorted sound level and the
minimum sound level that is discernible above the noise emitted by the
device.
L
Linear PCM
This is an uncompressed PCM (Pulse Code Modulation) signal. Unlike
lossy compression audio sources such as MP3, the audio quality and
dynamic range are not reduced.
S
Sampling frequency
Sampling involves taking a reading of a sound wave (analog signal) at
regular intervals and expressing the height of the wave at each reading in
digitized format (producing a digital signal).
The number of readings taken in one second is called the “sampling
frequency”. The larger the value, the closer the reproduced sound is to
the original.
31
TipsSettingsPlaybackConnections
Contents
Front panel Display Rear panel Index
Appendix
Specifications
2 Audio performance [DSD signal] [PCM signal]
•Analog output
Channels: 2 channels 2 channels
Playable frequency range: 2 Hz – 100 kHz 2 Hz – 96 kHz
Playable frequency response: 2 Hz – 50 kHz (–3 dB) 2 Hz – 20 kHz (±0.5 dB)
S/N: 112 dB (Audible range) 112 dB
Dynamic range: 105 dB (Audible range) 105 dB
Harmonic distortion: 0.0018 % (1 kHz, Audible range) 0.0018 % (1 kHz)
Output level: 2.0 V (10 kΩ/kohms) 2.0 V (10 kΩ/kohms)
Sampling frequency: 2.8224/5.6448 MHz 32/44.1/48/64/88.2/96/176.4/192 kHz
•Digital input
Format: Digital audio interface (Linear PCM)
Coaxial: 0.5 Vp-p / 75 Ω/ohms
Optical: –27 dBm or lator
Emission wavelength: 660 nm
2 General
AC adapter: Input : 100 – 240 V, 50/60 Hz
Output : DC 15 V, 1 A
For purposes of improvement, specifications and design are subject to change without notice.
32
TipsSettingsPlaybackConnections
Contents
Front panel Display Rear panel Index
Appendix
Index
v A
Accessories ······························································ 3
Adjusting the volume ············································· 14
Advanced AL32 Processing ··································· 29
Auto Standby mode ··············································· 22
v C
Cables used for connections ···································· 8
Computer ······························································· 15
Connection
AC adapter ·························································· 12
Amplifier ······························································ 11
CD player ····························································· 11
Computer ···························································· 11
Satellite tuner ······················································ 11
TV ········································································ 11
v D
Display······································································ 6
DSD ···························································· 20, 28, 29
Dynamic range ······················································· 29
v F
Feet for horizontal placement ·································· 9
Front Panel ······························································· 5
v H
Headphone ····························································· 14
v I
Installing the driver software·································· 15
v L
Linear PCM ·········································· 20, 21, 28, 29
v P
Playback
Computer (USB-DAC) ·········································· 15
Digital device ······················································· 21
Player software ······················································ 15
v R
Rear panel ································································ 7
v S
Sampling frequency ········································· 28, 29
Selecting the input source ····································· 14
Stand for vertical placement ·································· 10
v T
Tips ········································································ 24
Troubleshooting ····················································· 25
Turning the power on ············································· 14

D&M Holdings Inc.
3520 10323 00AD
www.denon.com