Loading ...
Loading ...
Loading ...
49-2000708 Rev. 2 11
INSTALLATION PREPARATION
Installation Preparation
PLAN THE INSTALLATION
CAUTION
To reduce risk of fire and to
properly exhaust air, be sure to duct the air outside.
Do not vent exhaust air into spaces within walls or
ceilings or into attics, crawl spaces, or garages.
PARTS SUPPLIED FOR INSTALLATION
■ 1 Hardware Package
■ 1 Literature Package
■ 1 Installation Template
PARTS NEEDED FOR INSTALLATION
■ 1 Strain Relief
■ 1 Wall or Roof Cap (for vented installation only)
■ All Metal Ductwork
WARNING
PERSONAL INJURY HAZARD
Because of the weight and size of the rangehood
canopy. It is recommended that 2 people are used
to install the range hood. Failure to properly lift
rangehood could result in damage to the product or
personal injury.
NOTE: This rangehood can be installed as either
ducted or recirculation. In a ducted application, this
rangehood can be vented through the wall or ceiling.
When installed for recirculation, the rangehood vents
out the sides of the duct cover.
NOTE: Before making any cuts or holes for
installation, determine which venting method will be
used and carefully calculate all measurements.
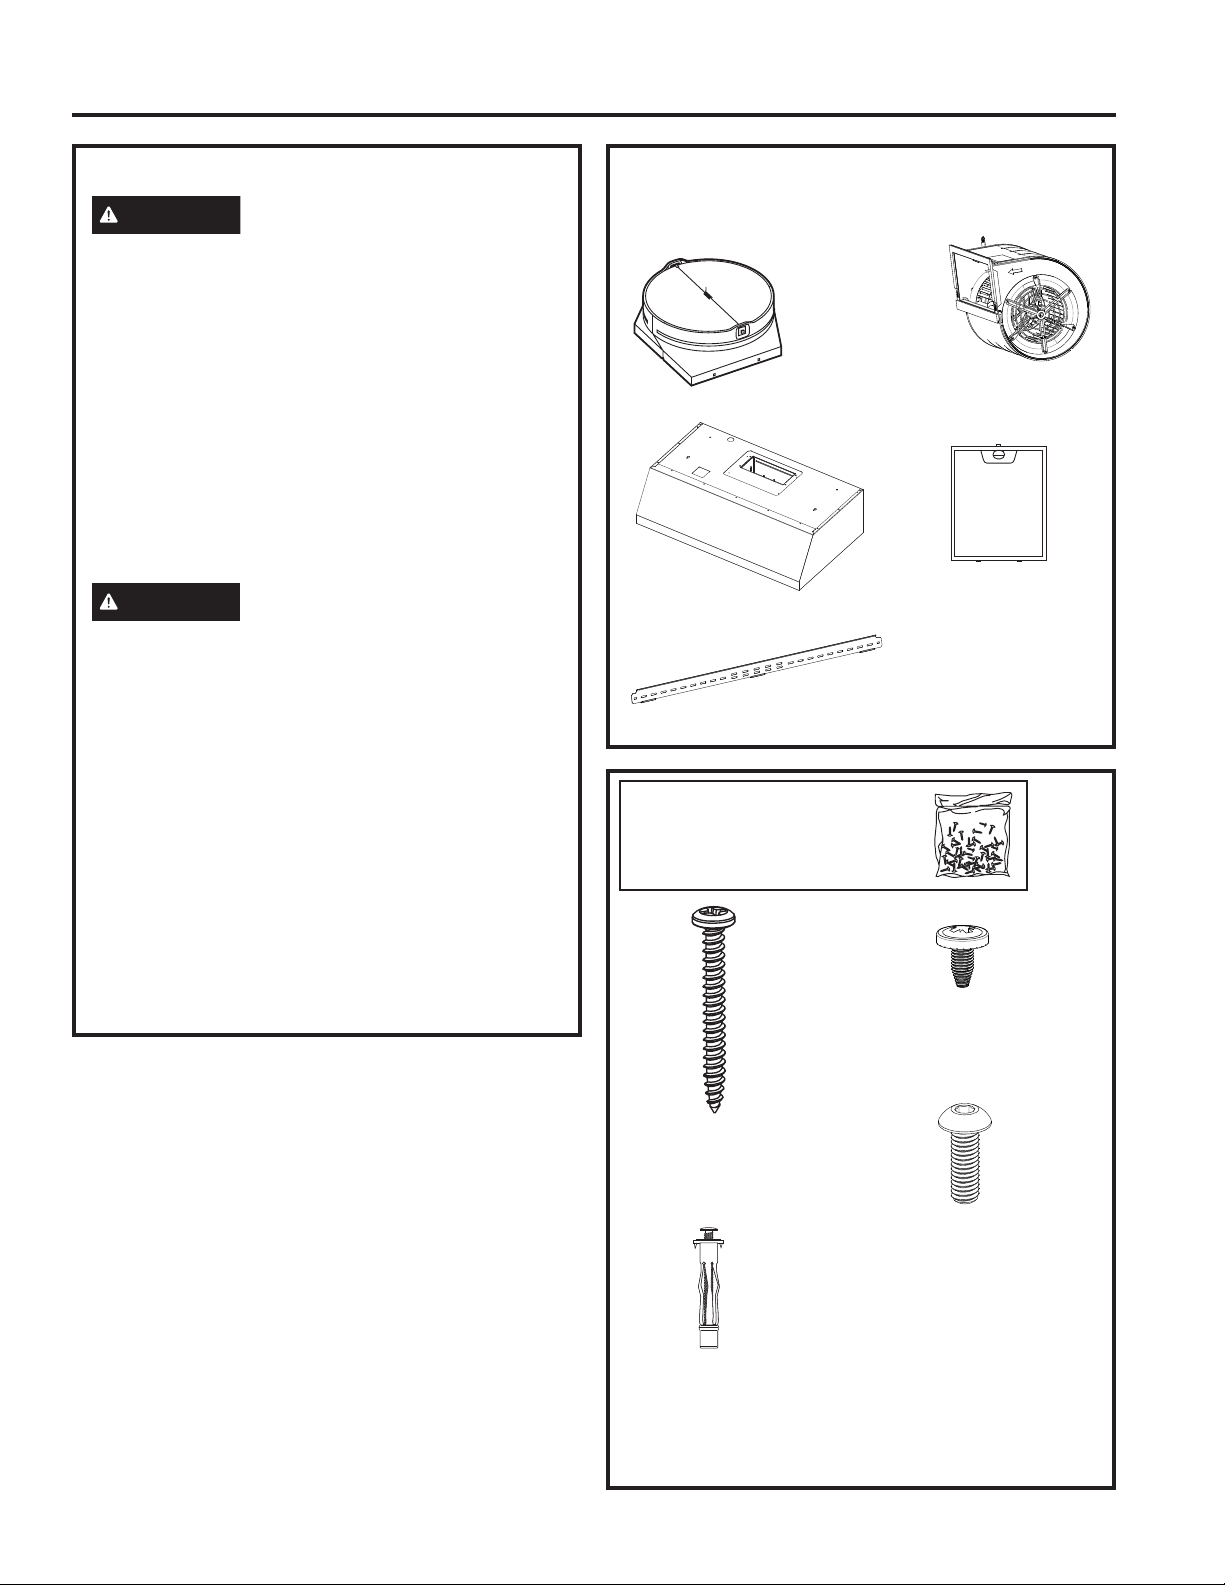
PARTS PROVIDED
Locate the parts packed with the hood.
Top Damper
761Dia28
Motor
Hood Body
Metal Installation Bracket
2 Grease Filters
(3 with 36" model)
HARDWARE PACKAGE
Locate and check contents.
(QTY: 2) 3/16” dry wall
anchors with screws. Used for
hood bottom mounting screw
holes. Use 5/16” drill for pilot
hole.
(QTY: 4) M4 screws.
Used to mount motor
(QTY: 4) 8 x 1-3/4" AB
Screw. Used to mount the
installation bar. Use 1/8"
drill for pilot hole.
(QTY: 4) 2.9mm x 6mm
PZ screws. Used to
attach the damper
A B
C
D
Loading ...
Loading ...
Loading ...