Loading ...
Loading ...
Loading ...
19
Various Playback
This chapter describes various functions for
playback.
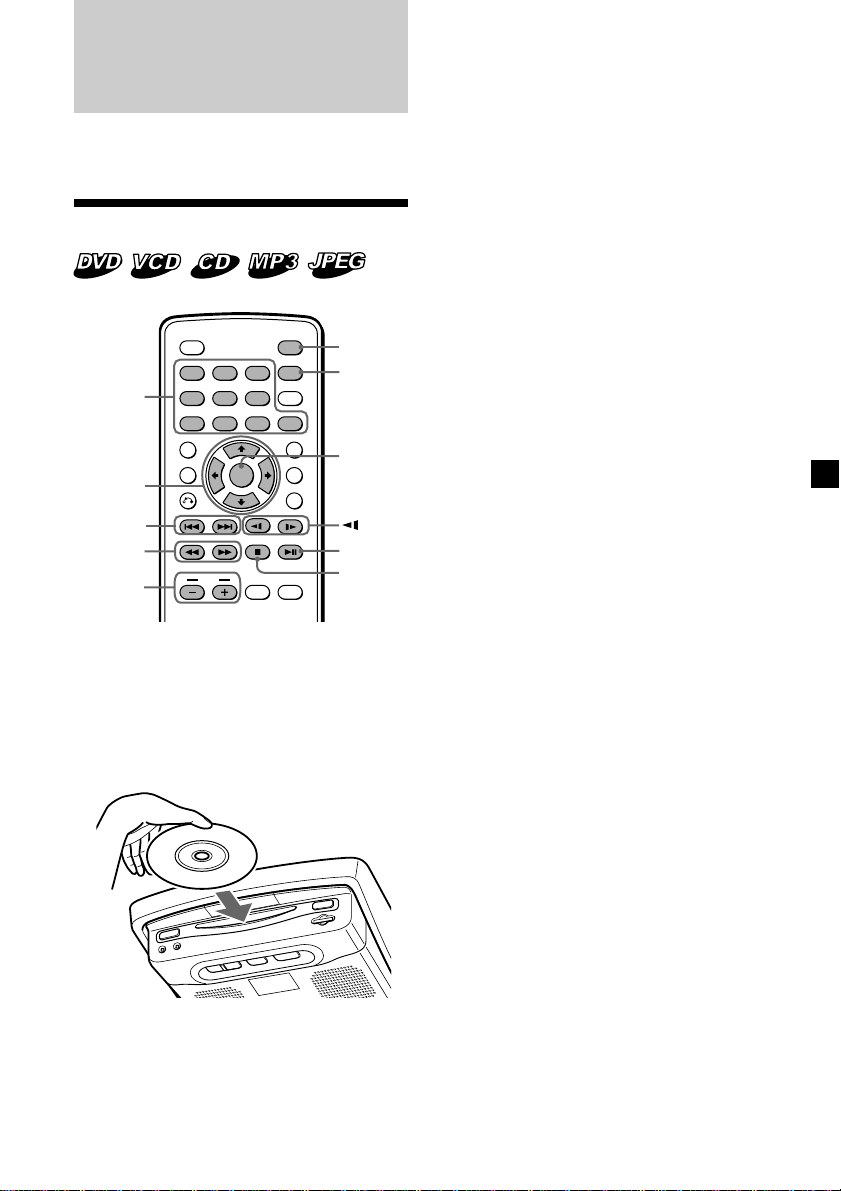
Playing a disc
1 Press (POWER) to turn on the player.
The monitor turns on and the green light of
the POWER button on the player lights up.
2 Insert the disc (labeled side up) into the
player.
Playback starts automatically.
If a disc is already inserted or playback
does not start automatically, press u to
start playback.
The JPEG files are displayed as a slide
show.
If the “SMART NAVI” menu display
appears, press the number buttons or M/
,/m/< buttons to select the desired
folder/file (page 21) (MP3/JPEG only).
3 Press (VOL) (+) or (VOL) (–) to adjust the
volume.
To turn off the power
Press (POWER) so that the green light of the
POWER button on the player turns off.
Notes
• The volume of the headphones cannot be
adjusted with the player or card remote
commander. Use the volume control on the
headphones.
• Even when the player is turned off, you can eject
a disc from the player, though you cannot insert
a disc.
• Read the instruction manual supplied with the
disc to play with this player.
• When you play an 8-cm disc (e.g., CD-single), be
sure to insert it to the center area of the disc slot.
• Depending on the recording method used on the
disc, it may take a minute or more before
playing.
• Depending on the condition of the disc, it may
not play back (page 40).
•A high-bit rate MP3 file such as 320 kbps may not
play back properly.
• When “SMART NAVI” is set to “NO MENU” (page
34), if the last track/file of an Audio CD/MP3/JPEG
disc has finished, playback restarts from the first
track/file.
ENTER
SEARCH
POWER
DISPLAY
CLEAR
SETUP
AUDIO
ANGLE
SUBTITLE
MENU
TOP MENU
INPUT
123
456
789
0
VOL
ENTER
SEARCH
POWER
DISPLAY
CLEAR
SETUP
AUDIO
ANGLE
SUBTITLE
MENU
TOP MENU
INPUT
123
456
789
0
VOL
./>
u
x
POWER
SEARCH
M/m
</,
/y
m/M
VOL –/+
ENTER
Number
buttons
continue to next page t
Loading ...
Loading ...
Loading ...