Loading ...
Loading ...
Loading ...
Operating Instructions
8
.devreser sthgir llA.cnI ,stcudorP emoH xulortcelE 9002
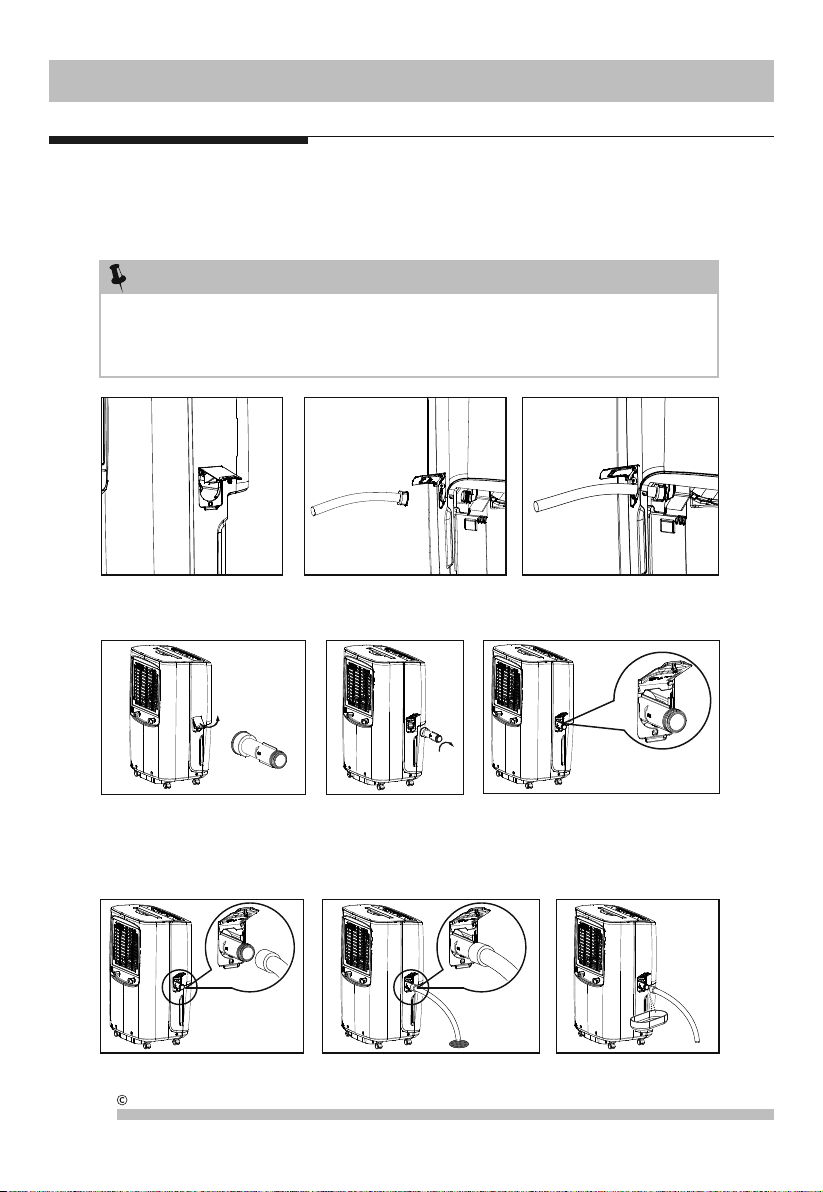
2. Continuous Drainage:
Removing Collected Water
(continued)
NOTE:
a. Open the drain cover at the side of the unit, so the drainage connector could be found inside. (fig.1) Take out
drainage adapter from the top of the styrofoam packaging. (fig.4)
b. Screw the drainage adapter onto the threaded portion of the drainage connector of the unit securely. (fig.5&6)
c. Screw the garden hose onto the threaded portion of the drainage adapter. (fig.7)
d. Make sure the hose is secure so there are no leaks.
e. Direct the hose toward the drain, making sure that there are no kinks that will stop the water flowing. (fig.8)
f. When you want to remove the garden hose, prepare a drip tray (not supplied) to collect the water from
the nozzle.(fig.9)
6 .gif5 .giffig. 4
fig. 1
fig. 2 fig. 3
fig. 7
fig. 8 fig. 9
The drainage adapter is just a helpful tool which facilitates the installation of dehumidifier drain hose (not
supplied), however it is not necessary for the operation of the continuous drainage feature. You can still use
this feature by inserting the dehumidifier drain hose through the side opening and connecting it to the
outlet. (fig.1&2&3) It may be helpful to remove the bucket so you can see the connection better.
Loading ...
Loading ...
Loading ...