Loading ...
Loading ...
Loading ...
Installation en
13
5Installation
Installation
Preparing the installation
Caution!
Ensure that there are no electric wires, gas or water
pipes in the area where holes are to be made.
1. Mark a vertical centre line on the wall from the
ceiling to the lower edge of the extractor hood.
2. Mark positions for the screws and the contour of the
attachment area.
3. Drill 8mm Ø holes to a depth of 80mm and press
the wall plugs flush with the wall. ¨
4. Screw on the fixing bracket for the flue duct. ©
5. Screw in 2 securing screws with washers to
approx.5mm. ª
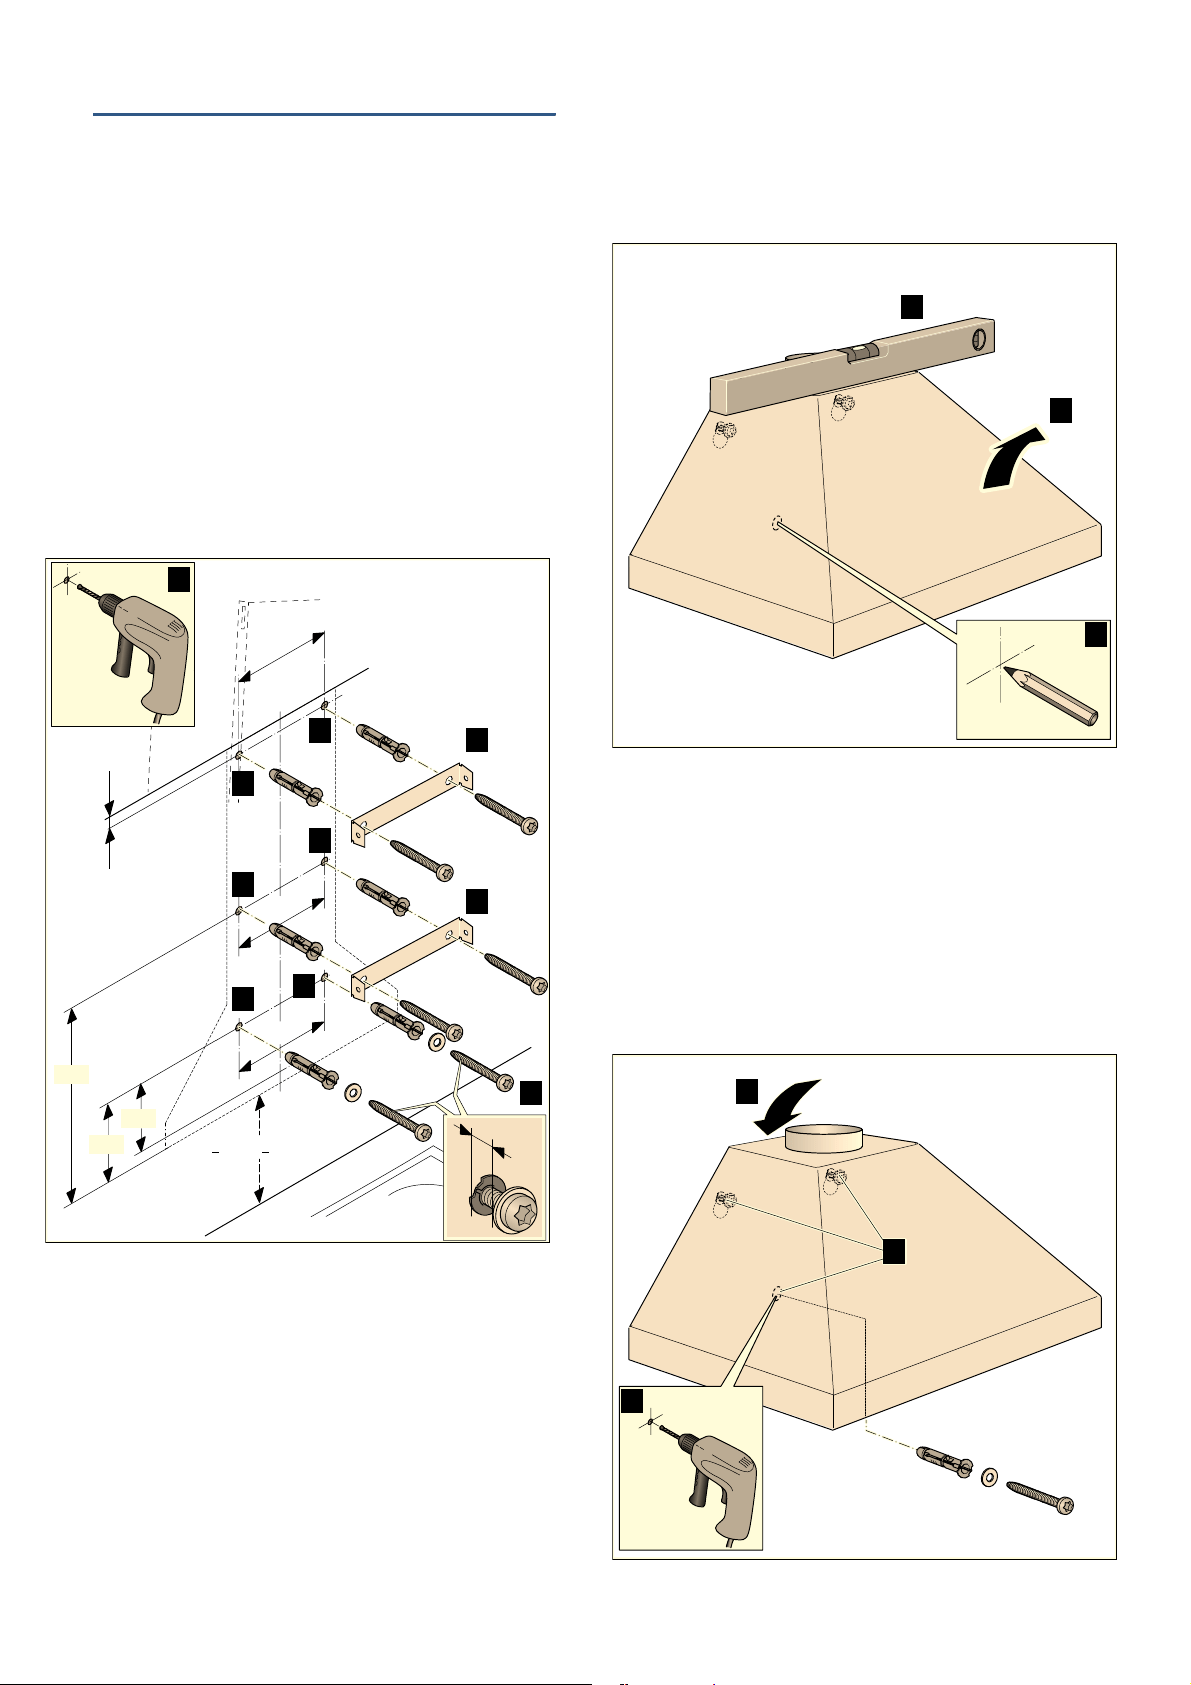
Installation
1. Attaching and aligning the appliance. ¨
2. Mark the hole for the safety screw. ©
3. Remove the appliance once more. ª
Finishing installation of the appliance
1. Drill an 8mm Øhole to a depth of 80mm for the
safety screw and press the wall plug flush into the
wall. ¨
2. First remove the protective foil from the back of the
appliance and, following installation, remove the foil
completely.
3. Connect the appliance. ©
4. Screw in the safety screw - and washer - and tighten
all the screws. ª
[
! !
$
$
$
$
$
$
$
%
%
&
%
&
$
$
%
&
Loading ...
Loading ...
Loading ...