
Loading ...
INTRODUCTION
Sonance Retrofit Speaker Enclosures reduce sound
transmission into rooms that are adjacent to speakers
mounted in walls or in ceilings. For the enclosures to be
eective it is important that they are installed according
the following directions to ensure a tight seal with
the speaker.
FOR STANDARD SPEAKER MODELS
Select one set of “+” and “-” terminals on the Retrofit
Enclosure and connect the wires to either set of “+” and
“-” terminals on the speakers. Make sure to connect the
red wire to the speaker’s “+” terminal and the black wire
to the speaker’s “-” terminal. Mark the set of terminals
selected on the outside of the enclosure. Use the
provided screws to attach the enclosure to the speaker,
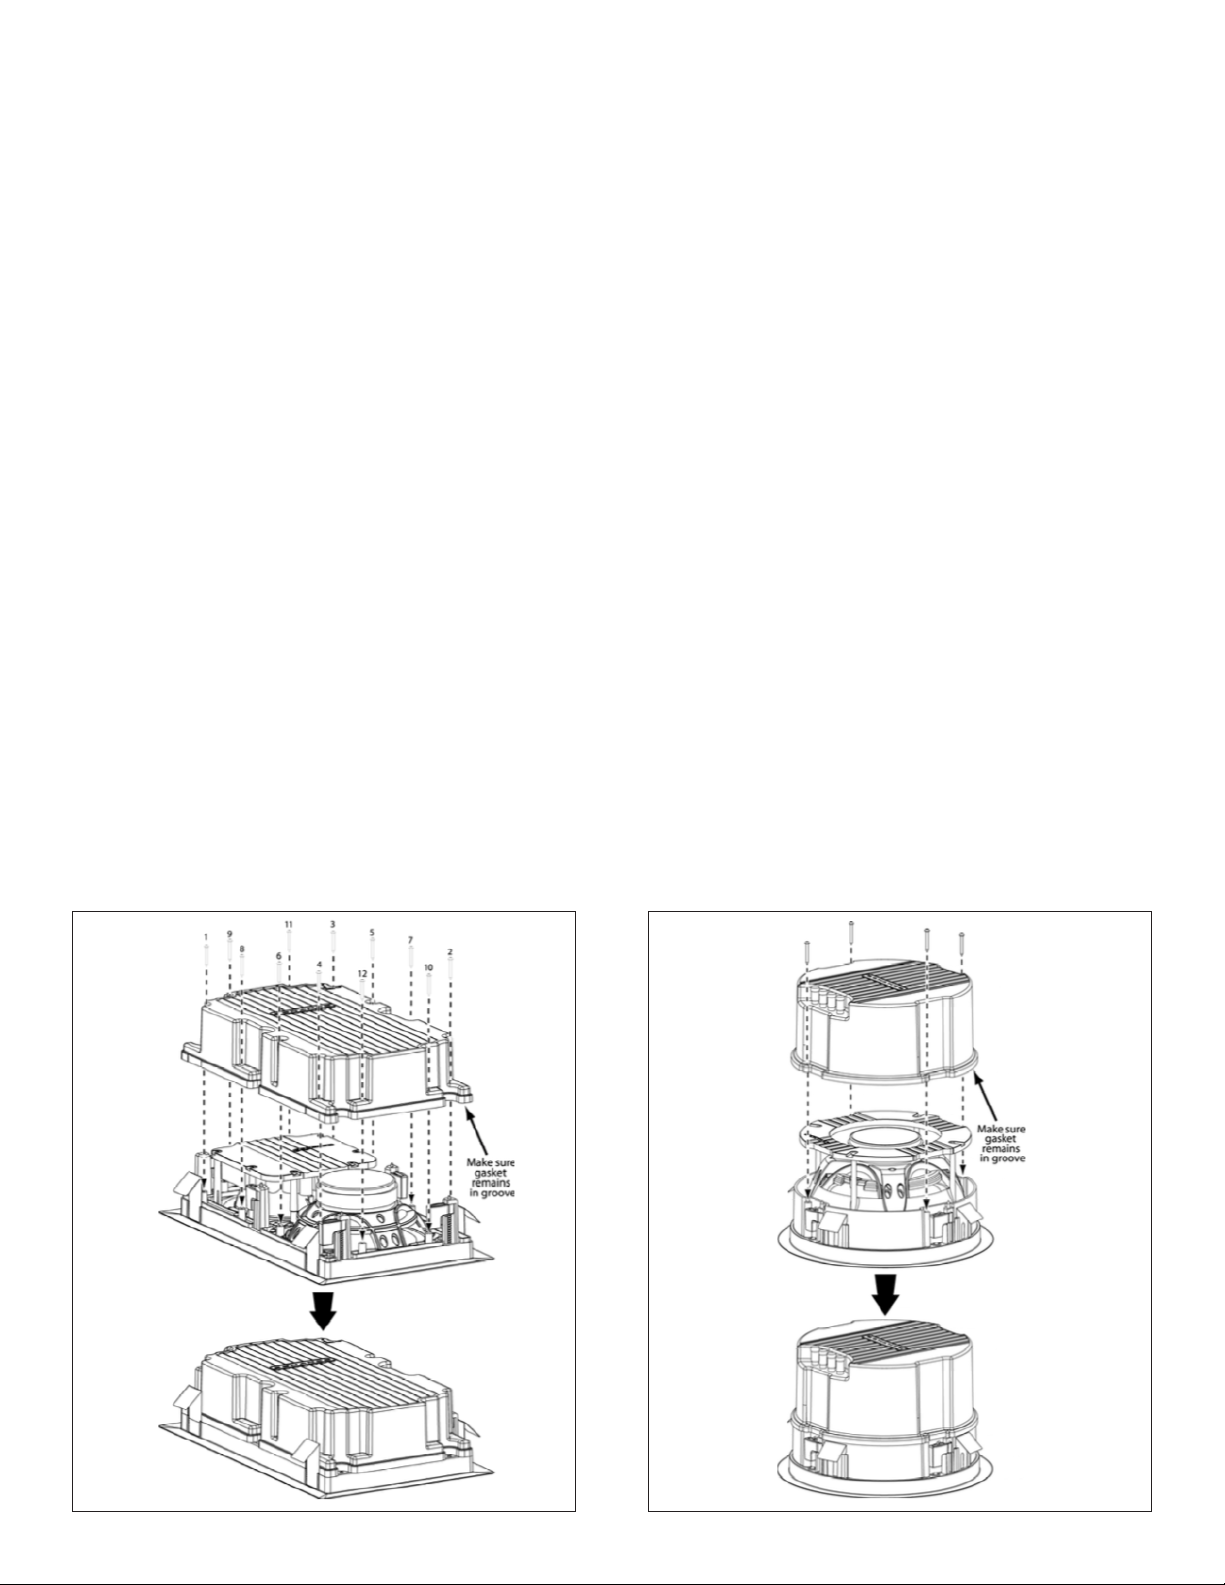
fitting the groove on the edge of the enclosure onto the
rim of the speaker.
NOTE: Make sure that the rubber gasket remains inside
of the groove on the enclosure.
To ensure that the gasket sits properly, tighten the
screws in a crisscross and diagonal pattern. See diagram
of large rectangle below. Apply an equal amount of
torque to each screw.
IMPORTANT: Always use low-torque setttings.
Never over tighten.
Connect the speaker wires from the amplifier to the
set of terminals on the enclosure that were previously
marked.
FOR BI-WIRED AND SINGLE STEREO
SPEAKERS
Remove the jumpers that connect the two sets of
terminals on the speaker for bi-wired models. Connect
one set of terminal wires from the Retrofit Enclosure
to one set of the “+” and “-” terminals on the speaker.
Connect the other set of terminal wires from the
enclosure to the remaining set of “+” and “-” terminals
on the speaker. Attach the enclosure to the speaker with
provided screws, fitting the groove on the edge of the
enclosure onto the rim of the speaker.
NOTE: make sure that the rubber gasket remains inside
of the groove on the enclosure.
To ensure that the gasket sits properly, tighten the
screws in a crisscross and diagonal pattern. Apply an
equal amount of torque to each screw.
IMPORTANT: Always use low-torque setttings.
Never over tighten.
Connect both sets of speaker wires to the two sets
of terminals on the enclosure. Make sure to check for
proper polarity.
ARCHITECTURAL SERIES BRACKETS
The installation is very similar except that the enclosure
will attach to the Architectural Series bracket instead of
the Architectural Series speaker.
NOTE: This must be accomplished prior to installing
the Architectural Series bracket in the wall or ceiling.
1
Loading ...
Loading ...