Loading ...
Loading ...
Loading ...
9
8
7
6
5
4
3
2
1
9
E-8
2011 February 24
HT-SL50
Note:
Make sure all screws are fully tightened. (screws are not
supplied)
Safety wires (not supplied) are useful to prevent the sound
bar from falling off the table.
Loop the safety wires (not supplied) into each hole as
shown and tie the safety wires to the LCD TV stand.
System preparation (continued)
1 Fix the pattern paper to the wall in horizontal
position as below.
2 Make a hole on the wall following the screw point
marks on the pattern paper by using a drill.
3 Fix a wall mount plug (not supplied) into the hole
using a hammer, until it is flush with the wall
surface.
4 Screw the wall mount angle to the wall as shown in
the illustration. (Total screw is 4 pieces)
Fixing wall mount angle
Pattern paper
Wall surface
30 mm
523 mm
30 mm
Wall surface
3/8" (8-9 mm)
1-1/4" (32 mm)
Wall surface
3/8" (8-9 mm)
1-1/4" (32 mm)
Wall surface
Wall mount angle
Wall mount
angle
Wall
surface
Wall surface
Wall
mount
angle
(screws x 2)
(screws x 2)
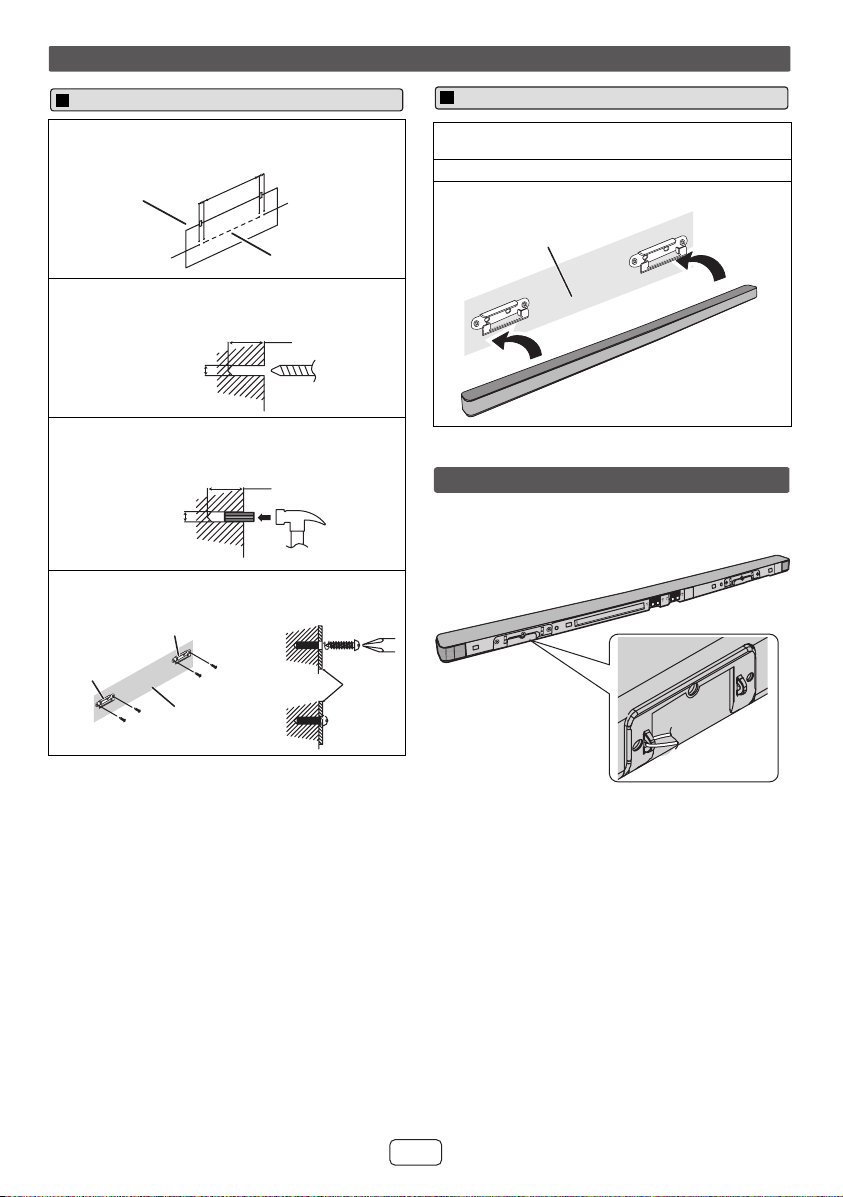
1 Align the wall mount slot at the sound bar to the
wall mount angle.
2 Slot the sound bar into the wall mount angle.
3 Fix them securely.
Installing the sound bar
Wall surface
Falling prevention
R
R
L
L
Loading ...
Loading ...
Loading ...