Loading ...
Loading ...
Loading ...

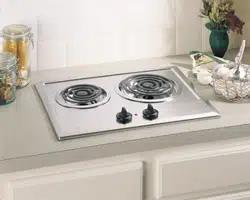
Installation of the cooktop.
Read these instructions completely and carefully.
Installation Instruction
Suggested mounting of an approved junction box.
Before installing the counter unit or moving it to another location
have the electrician verify:
■ That your home is provided with adequate electrical service.
■ That the addition of the counter unit will not overload the
household circuit on which it is used.
DANGER: Always disconnect the electrical
service to the unit before repairing or servicing the counter
unit. This can be done by disconnecting the fuse or circuit
breaker. Failure to do this could result in a dangerous or
even fatal shock. Know where your main disconnect switch
is located. If you don’t know, have your electrician show
you.
Install an approved junction box where it will be easily accessible
through the front of the cabinet where the counter unit will be
located.
IMPORTANT: The junction box must be located where it will
allow slack in the conduit for serviceability.
Install the counter unit in the cutout opening.
NOTE: ,IWKHXQLWLVEHLQJLQVWDOOHGLQDEOLQGFRXQWHURQHZLWKQR
FDELQHWRSHQLQJEHORZZLUHFRQQHFWLRQVPXVWEHPDGHEHIRUH
putting the unit into the cutout.
Secure the cooktop unit to the counter using the side retainers
and screws shipped with the unit.
■ For thicker counters (greater than 1"thick), hold down straps
should be used to install the cooktop. They are included
with some models, or can be ordered, GE model number
WB2K5328.
■ To attach the cooktop to the counter, insert the hold-down
strap into the slots on each side of the unit (see diagram).
■ Use suitable screws to attach the cooktop to the counter as
shown. The cooktop must rest on the metal flange around the
burner box.
Be sure this cut does not interfere with the cabinet structure at the front
5" Min.*
5" Min.*
Hold down retainer
Allow considerable
slack for serviceability
Self tapping screw
Mounting slot
Cabinet sides
Burner box sides
Use suitable
fasteners for
anchoring in
cabinet sides
Strap
12
Loading ...
Loading ...
Loading ...