
1
INSTRUCTION MANUAL
SPECIAL BREW
COFFEE MAKER
MODEL: BVCLDCG1

TABLE OF CONTENTS
Important Safeguards 3
Polarized Plug 4
Product Diagram 5
Usage instructions
1. Preparing Your Special Brew Coee Maker 6
2. Setting the Clock and Delay Brew Time 6
3. Adding Water and Coee 6
4. Brewing Coee 7
5. Suggested Coee Measurement 7
Cleaning & Maintenance 8
Decalcifying Your Calphalon® Special Brew Coee Maker 8
Troubleshooting 9
Warranty 10

3
IMPORTANT SAFEGUARDS
When using electrical appliances, basic safety precautions should always be followed, including
the following:
READ AND SAVE THESE INSTRUCTIONS
• READ ALL INSTRUCTIONS, PRODUCT LABELS AND WARNINGS BEFORE USING THE COFFEE MAKER.
• Do not touch hot surfaces. Use handles or knobs.
•
To protect against electric shock, do not place or immerse cord, plugs, or appliance in water
or other liquid.
•
This appliance is not to be used by children or by persons with reduced physical, sensory or
mental capabilities.
• Close supervision is necessary when any appliance is used near children. Children should not play
with the appliance.
•
Unplug from outlet when either the appliance or display clock is not in use, and before cleaning. Allow
to cool before putting on or taking o parts, and before cleaning the appliance.
•
Do not operate any appliance with a damaged cord or plug or after the appliance malfunctions, or has
been damaged in any manner. Return appliance to an Authorized Service Center for examination, repair
or adjustment. Do not attempt to replace or splice a damaged cord.
• The use of an accessory not recommended by the appliance manufacturer for use with this appliance
may result in fire, electric shock or injury to persons.
• Do not use outdoors.
• Do not let cord hang over edge of table or counter, or touch hot surfaces.
• Do not place on or near a hot gas or electric burner, or in a heated oven.
• To disconnect, turn any control to the o position, then remove plug from wall outlet.
• Do not use appliance for other than intended use. Misuse can cause injuries. Intended for household
countertop use only. Always use appliance on a dry, stable, level surface.
• All lids should be closed during use.
• Scalding may occur if the lid is removed or brew basket door is opened during or immediately after
the brewing cycles. Contents may be hot. Allow to cool before opening the lid.
• Do not touch the heating plate while using the coee maker or when you finish using it. After it is
turned o or unplugged, the heating plate may still be hot. Allow it to cool before touching.
For appliances with glass containers:
• The container is designed for use with this appliance. It must never be used on a range top or in any
oven, including a microwave oven.
• Do not set a hot container on a wet or cold surface.
• Avoid sudden temperature changes, such as rinsing, washing, filling, or immersing a hot container
with cold liquids.
• Do not use a cracked or chipped container or a container having a loose or weakened handle.
• Do not clean container with cleansers, steel wool pads, or other abrasive material.
4
SHORT POWER SUPPLY CORD INSTRUCTIONS
A short power-supply cord is provided to reduce the risk resulting from becoming entangled in or tripping
over a longer cord. An extension cord may be used if care is exercised in its use. If an extension cord is
used, the electrical rating of the cord must be at least as great as the electrical rating of the appliance.
The extension cord should be arranged so that it will not drape over the countertop or tabletop where it
can be pulled on by children or tripped over unintentionally. If the appliance is of the grounded type, the
cord set or extension cord should be a grounding-type 3-wire cord. Do not pull, twist or otherwise abuse
the power cord.
NOTICES
• Some countertop and table surfaces are not designed to withstand the prolonged heat generated by
certain appliances. Do not set the heated unit on a finished wood table. We recommend placing a hot
pad or trivet under your coee maker to prevent possible damage to the surface.
• During initial use of this appliance, some slight smoke and/or odor may be detected. This is normal
with many heating appliances and will not recur after a few uses.
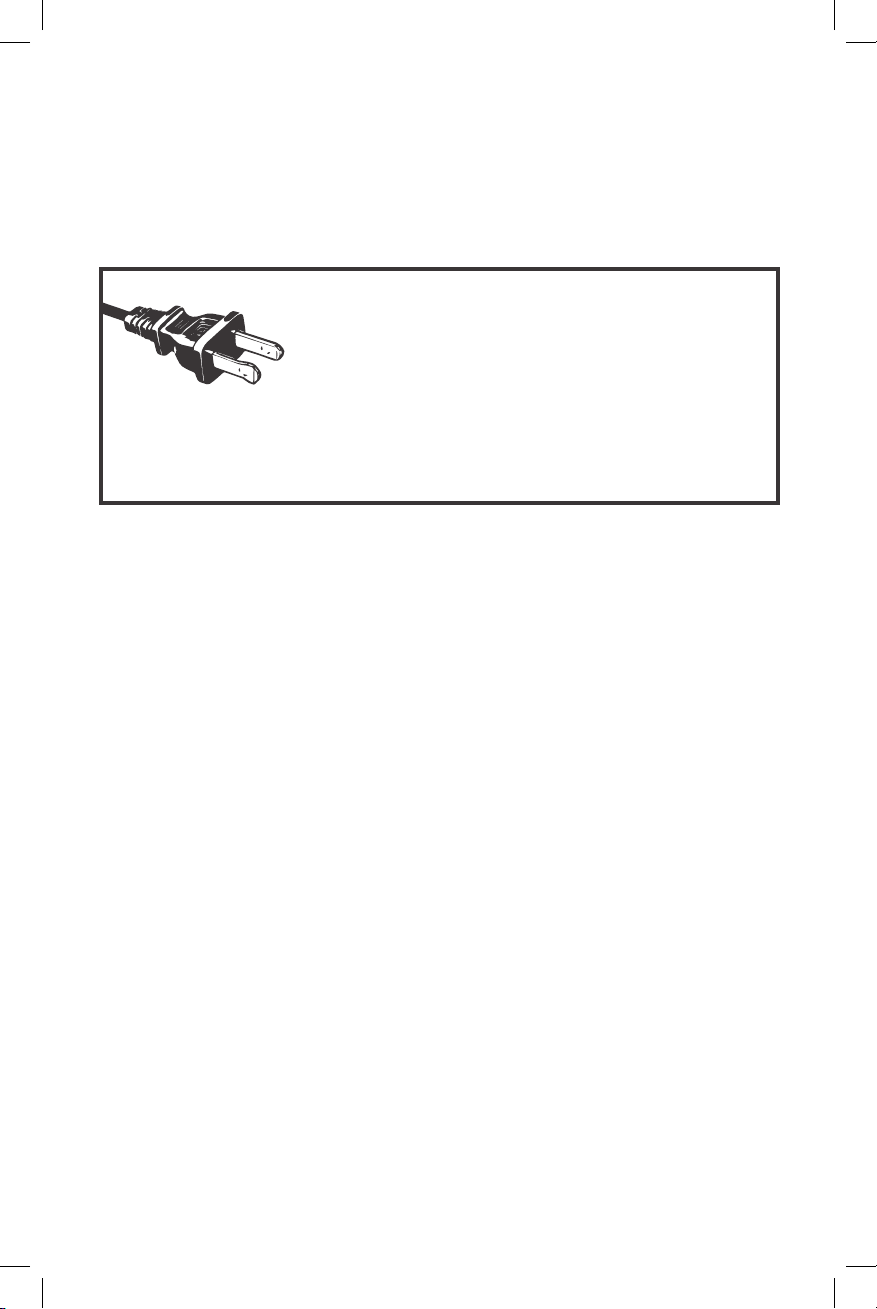
POLARIZED PLUG
This appliance has a polarized plug, (one blade is wider than the
other). As a safety feature to reduce the risk of electrical shock,
this plug is intended to fit in a polarized outlet only one way. If
the plug does not fit fully in the outlet, reverse the plug. If it still
does not fit, contact a qualified electrician. Do not attempt to defeat this safety feature
or modify the plug in any way. If the plug fits loosely into the AC outlet or if the AC outlet
feels warm do not use that outlet.
SAVE THESE INSTRUCTIONS
HOUSEHOLD USE ONLY
• Discard the container immediately if it is ever boiled dry.
• Protect the container from sharp blows, scratches or rough handling.
5
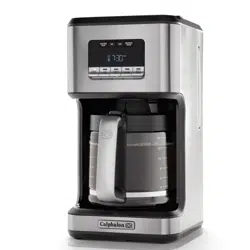
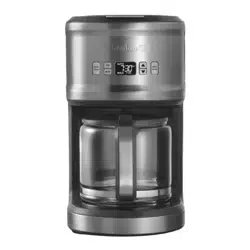
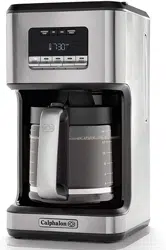
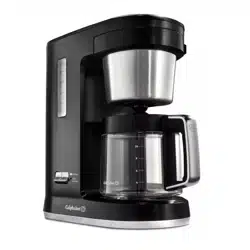
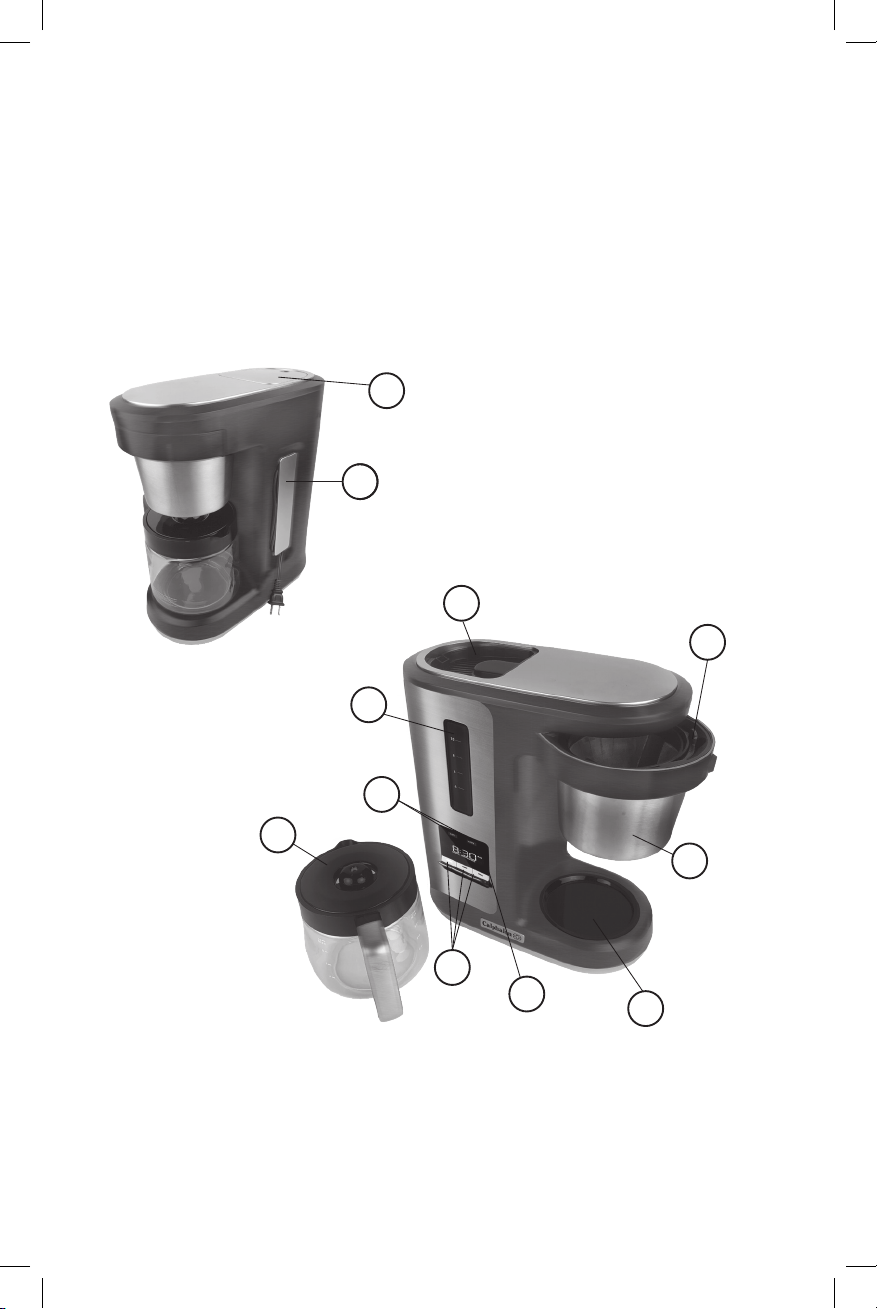
PRODUCT DIAGRAM
1. Water Reservoir Lid
2. Water Reservoir
3. Water Window
4. Removable Cone Style Filter Basket*
5. Brew Basket
6. 10 Cup Glass Carafe*
7. LCD Screen Display
8. BREW LATER, STRONG, and BREW/OFF Button
9. HR/Warming timer and MIN Selector Buttons
10. Warming Plate
11. Cord Storage
*These parts can be replaced on Calphalon.com
or at 1-800-809-7267
1
2
3
4
6
11
10
8
7
9
5

6
PREPARING YOUR SPECIAL BREW COFFEE MAKER
Cleaning your coee maker before using the first time
• Wash the Glass Carafe, Carafe Lid and the Removable Cone Style Filter Basket in a mixture of mild
detergent and water. Rinse each with clean water thoroughly. (Please refer to the parts diagram).
• Replace all the parts and close the lid. Then, run a brew cycle with water only, without adding
coee and coee filter.
• When brewing is complete, turn your coee maker o, discard the water in the Glass Carafe and
rinse the Glass Carafe, Carafe Lid and the Removable Cone Style Filter Basket.
SETTING THE CLOCK AND DELAY BREW TIME
• Plug the power cord into a standard electrical outlet. The clock will flash on indicating that the
time has not yet been set.
• Press the HR and MIN Buttons, until you reach the current time.
NOTE: Pressing any button before setting the clock will cause the clock to start keeping time from
12:00 a.m. You must set the clock if you want to use the Delay Brew feature.
USING THE BREW LATER FUNCTION
• To set Delay Brew, press the BREW LATER Button. Using the HR and MIN Buttons select the desired
delay brew time.
• To activate the BREW LATER cycle, press the BREW LATER Button once delay brew time is set.
• To check the programmed time for delay brew, press the BREW LATER Button, the programmed time
will appear on the LCD Screen.
• To switch back to clock, you can press the Brew/O Button and the screen will switch back.
ADDING WATER AND COFFEE
• Once coee maker is plugged in and clock is set, open the Brew Basket by swinging it all the way
to the left. Place disposable #4 cone-shaped filter into the Removable Cone Style Filter Basket,
add coee and swing Brew Basket all the way to the right to secure in place. (See the Suggested
Coee Measurement Chart.)
• Fill the Glass Carafe with cold fresh water to the desired capacity. For easy and accurate filling, the
water markings on the Glass Carafe and on the Water Window show the amount of water needed to
make the corresponding desired number of cups.
• Do not fill past the “10 cup line” or water will flow out of the overfill hole in the back of
the coee maker.
• Place the Glass Carafe on the Warming Plate.
• The amount of coee brewed will always be slightly less than the amount of water poured in the
Water Reservoir. This is due to the minimum absorption of water by the coee grounds.
NOTE: Make sure the Glass Carafe is fully placed on the Warming Plate or the water and the grounds
will overflow from the Filter Basket. An overflow may cause personal injury or damage to property.
7
CAUTION: To reduce the risk of damaging the Glass Carafe and/or the risk of personal injury, do not
add cold water to the Glass Carafe while hot. Allow Glass Carafe to cool before using.
BREWING COFFEE
CAUTION: Notice vents on top of the coeemaker. Do not set anything on top of the coeemaker and
be cautious when handling during and immediately after brewing. The precision brewing system design
allows fast brewing with tight temperature control by allowing excess steam to escape during brewing.
• After addition of water and coee and the Glass Carafe and the filter basket securely in place, turn
the coee maker on by pressing the BREW/OFF Button once. The LED light will illuminate signaling
that the coee maker is on and brewing.
• When brewing begins the LCD Screen will continue to show time of day.
• When brewing is complete, the audible alert will sound. The LCD Screen will say DONE, WARMING
and show time of day.
• To view the Fresh Brew
TM
timer, press the HOUR button. The LCD screen will change to display how
long ago the coee was brewed.
• Go back to real time on the LCD Screen by simply pressing the HOUR button.
• When the coee has finished brewing, the Coee Maker will continue to warm coee for 4 hours,
before automatically shutting o.
• Once finished, allow Coee Maker to cool before cleaning.
• To turn the coee maker o, press the BREW/OFF button once. Be sure to turn your coee maker
o when no longer using it.
USING THE STRENGTH AND FLAVOR ADJUSTMENT FUNCTION
• To enjoy a fuller and stronger cup of coee, press the STRONG BREW button. The light on the button
will illuminate to indicate that STRONG BREW has been selected. Press the button again to de-
select. If brewing to the SCA guidelines for Golden Cup Standard, do not use the STRONG setting.
SUGGESTED COFFEE MEASUREMENT
Water Ground Coe
10 Cups 17 Tbsp.*
8 Cups 13 Tbsp.
6 Cups 10 Tbsp.
4 Cups 6.5 Tbsp.
1 level tablespoon (tbsp.)=5gr./0.17 oz.
1 cup = 5 fl. oz. of brewed coee
Use more or less coee to suit your taste.
NOTE: For best results, use a level tablespoon for ground measurement. Make sure you use medium
grind coee for a perfect brew.
* Using fine coee or decaf coee may cause overflow.

8
CLEANING & MAINTENANCE
NOTE: Always unplug the coee maker and allow to cool before cleaning.
• Remove and wash the Glass Carafe, Carafe Lid, and Cone Style Filter Basket in a mixture of mild
detergent and water. Rinse each with clean water, and dry thoroughly. You can also place in the
dishwasher and wash (on the top rack only).
NOTE: Never use abrasive cleansers, steel wool pads or other abrasive materials. Dishwasher (top rack
only): Glass Carafe, lid and Removable Cone Style Filter Basket.
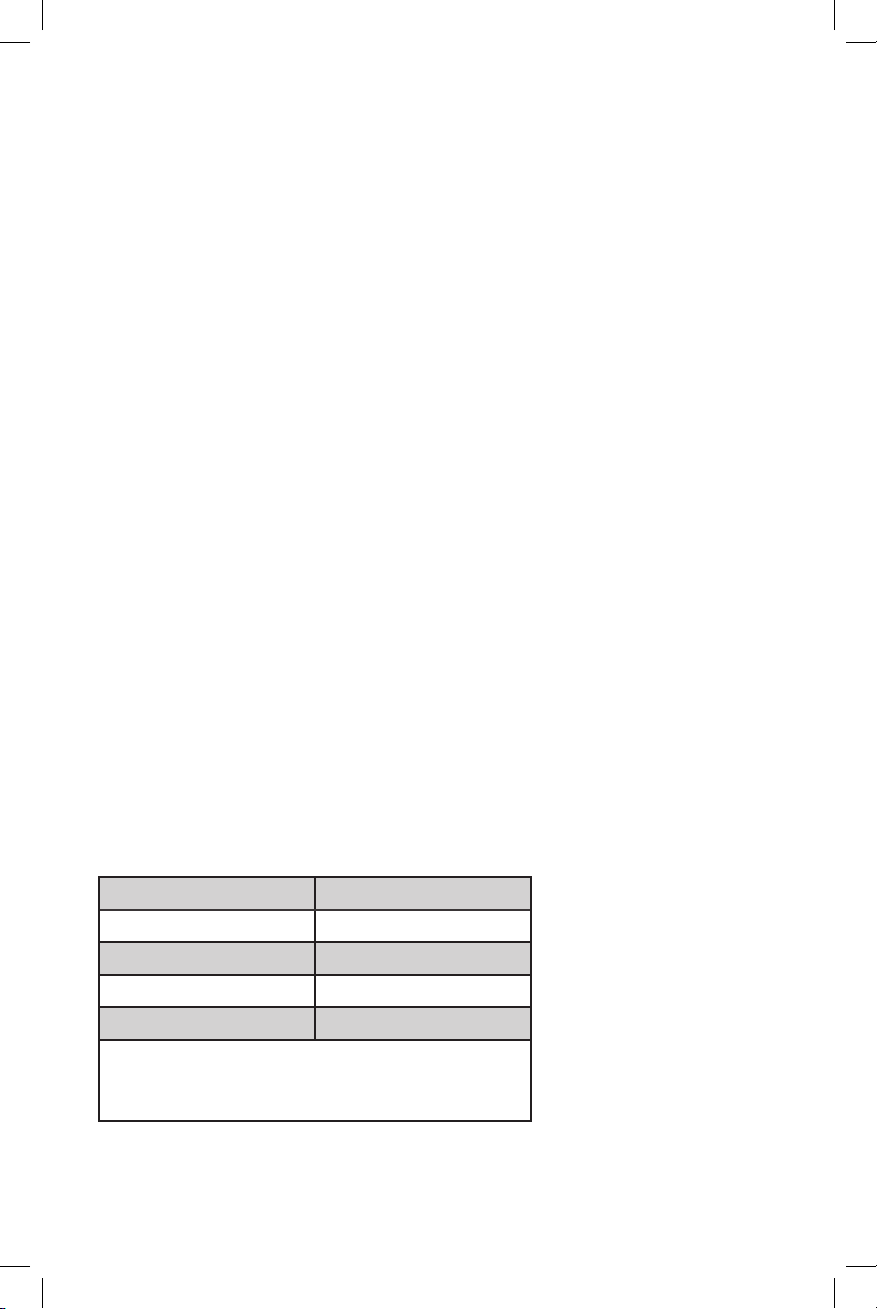
DECALCIFYING YOUR CALPHALON® SPECIAL BREW COFFEE MAKER
Type of Water Cleaning Frequency
Soft Water Every 80 Brew Cycles
Hard Water Every 40 Brew Cycles
Minerals (calcium/ limestone) found in water will leave deposits in your coee maker and can aect
performance.
• Fill Glass Carafe (10 cups) with a solution of equal parts water and vinegar and pour the solution
into the Water Reservoir.
•
Close the Carafe Lid on the Glass Carafe and place on the Warming Plate. Press the BREW/OFF button.
• Once the brewing cycle has completed, discard the contents in the Glass Carafe and rinse with
water. Fill the Glass Carafe with water only (10 cups) and pour the water into the water reservoir.
Press the BREW/OFF button to rinse the machine.
• Once the brewing cycle has completed, discard the contents in the Glass Carafe and clean the
Carafe per the above instructions.
CAUTION: Never immerse the coee maker itself in water, in any other liquid or place in the
dishwasher.
This appliance has no user serviceable parts. Any servicing beyond that described in the Cleaning
Section should be performed by an Authorized Service Representative only. See Warranty Section.
9
TROUBLESHOOTING
Brew cycle doesn’t start Check the Water Reservoir is filled.
Press BREW/OFF button.
Delay brew doesn’t start Check that delay brew time was set.
Check the clock is set to correct time
Press the BREW LATER Button once delay brew time is set.
Wanting a cup of coee before coee
is done brewing
Pause’N Serve feature stops the flow of coee for 20
seconds when the carafe is removed.
Coee is not hot Check that coee machine wasn’t shut o automatically
after being in keep warm for 4 hours. Brew fresh cycle.
Coee too strong or weak Check coee measurement table for suggested coee
to water ratio.
Press the STRONG Button for strong coee or Press the
button again to de-select strong coee option.
Coee tastes bad Use correct coee to water ratio.
Clean coee maker as per cleaning instructions.
Check that coee used was not expired or stale.
Use freshly ground coee.
Coee overflows from basket Check that the 10 Cup Glass Carafe is inserted.
Check that the right amount of water is used.
Check that the grind/amount size is correct.
Check that only one disposable #4 cone-shaped filter is
used.
Carafe overfills Check that the 10 cup line on the Coee maker Water
Window is not exceeded.
Ensure water runs through Carafe Lid.
Ensure Carafe is empty before starting a new brew cycle
Clock doesn’t show time the coee is
being kept warm
Press the HOUR button once.
Clock only show time the coee is
being kept warm
Press the HOUR button once.

10
WARRANTY
3 YEAR LIMITED WARRANTY
Calphalon (“Calphalon”) warrants that for a period of three year from the date of purchase, this product
will be free from defects in material and workmanship. Calphalon, at its option, will repair or replace
this product or any component of the product found to be defective during the guarantee period.
Replacement will be made with a new or remanufactured product or component. If the product is no
longer available, replacement may be made with a similar product of equal or greater value. This is
your exclusive guarantee. Do NOT attempt to repair or adjust any electrical or mechanical functions on
this product. Doing so will void this guarantee. This guarantee is valid for the original retail purchaser
from the date of initial retail purchase and is not transferable. Keep the original sales receipt. Proof of
purchase is required to obtain satisfaction guarantee performance. Calphalon dealers, service centers,
or retail stores selling Calphalon, do not have the right to alter, modify or any way change the terms
and conditions of this guarantee. This guarantee does not cover damage resulting from any of the
following: negligent use or misuse of the product, use on improper voltage or current, use contrary
to the operating instructions, disassembly, repair or alteration by anyone other than Calphalon or an
authorized Calphalon service center. Further, the guarantee does not cover: Acts of God, such as fire,
flood, hurricanes and tornadoes.
What are the limits on Calphalon’s Liability? Calphalon shall not be liable for any incidental or
consequential damages caused by the breach of any express, implied or statutory guarantee or
condition. Except to the extent prohibited by applicable law, any implied guarantee or condition of
merchantability or fitness for a particular purpose is limited in duration to the duration of the above
guarantee. Calphalon disclaims all other guarantees, conditions or representations, express, implied,
statutory or otherwise. Calphalon shall not be liable for any damages of any kind resulting from the
purchase, use or misuse of, or inability to use the product including incidental, special, consequential
or similar damages or loss of profits, or for any breach of contract, fundamental or otherwise, or for
any claim brought against purchaser by any other party. Some provinces, states or jurisdictions do not
allow the exclusion or limitation of incidental or consequential damages or limitations on how long
an implied guarantee lasts, so the above limitations or exclusion may not apply to you. This guarantee
gives you specific legal rights, and you may also have other rights that vary from province to province,
state to state or jurisdiction to jurisdiction.
For additional immediate assistance with the Calphalon Special Brew Coee Maker please call our
Customer Service Center at 1-800-809-7267.
BVCLDCG1_18EM1 GCDS-CAL369808-JC