Loading ...
Loading ...
Loading ...
Using Your Floor Steamer
12
Using Your Floor Steamer
The Steam Nozzles are meant to be used in steam “bursts” and should never be used
on a sustained basis. The Steam Nozzles will loosen especially diffi cult debris and will
assist in cleaning hard to reach areas such as fl oor edges.
*IMPORTANT*
D. Using Steam (continued)
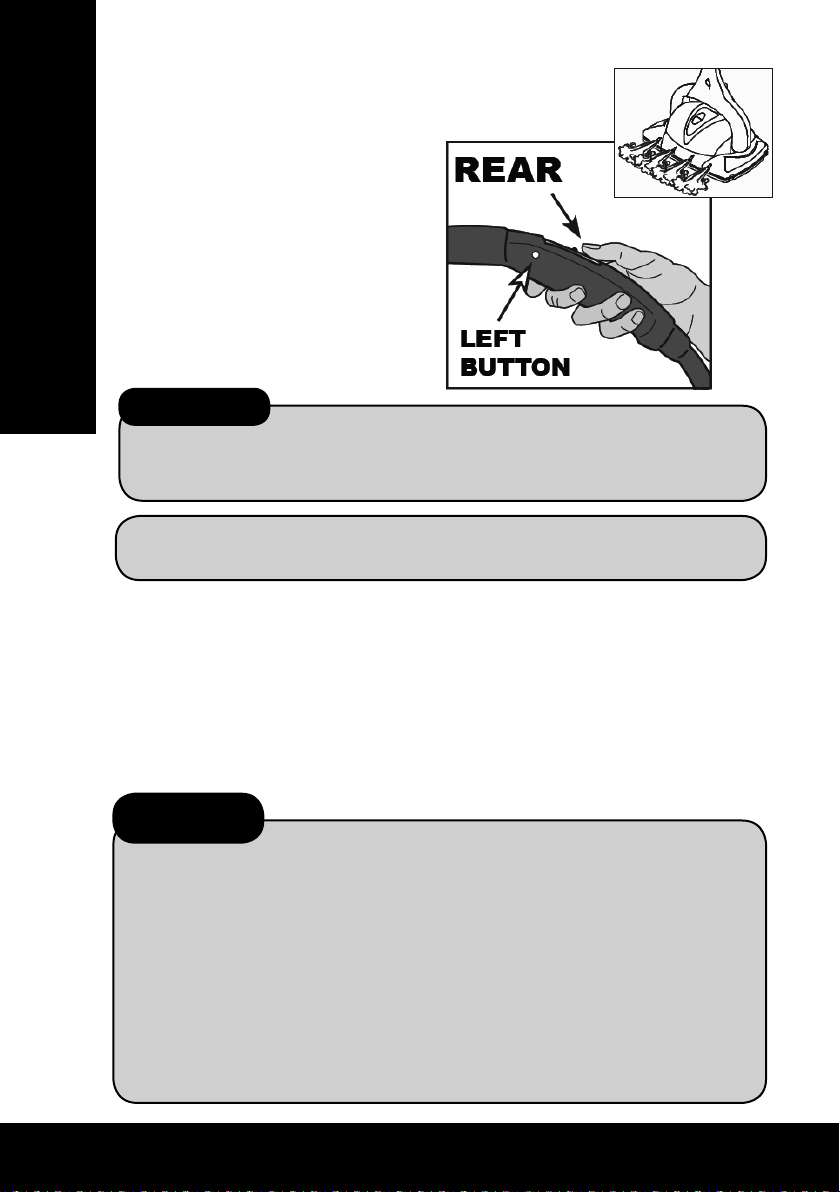
• To emit steam from the front
nozzles and the maximum
steam from the underside of
the steamer, press the REAR
button on the handle.
• IMPORTANT: at the end of
the cleaning task, press the
button on the left side to
lock the appliance in safety
mode.
The Floor Steamer has a Boiler that should not be overfi lled. To avoid the
potential for overfi lling, only refi ll the Boiler when it is completely run out of
water and only add 600ml. Always follow the practice of using the Floor
Steamer until it has run out of water and then refi ll 600ml only.
If fl oor cleaning is completed and water remains in the Boiler, the Floor
Steamer can be stored with the remaining water in the Boiler, there will be
no harm done to the unit. At the next cleaning session simply heat up the
unit and use the water already in the Boiler, then refi ll when empty.
Or alternatively at the next cleaning session, open the Boiler Cap when the
unit is still cold and pour out the water and then refi ll (if this alternative method
is used, it is recommended that only 500ml of water is added, because the
unit will not completely drain when the water is poured out from the Boiler).
*IMPORTANT*
NOTE: Your Steamer will not need refi lling for about 20-25 minutes
of usage.
The Floor Steamer will stop producing steam when the Boiler is
empty. When this happens unplug and store unit or refi ll with water
per instructions (below).
NOTE: If the Floor or Carpet Pad becomes too wet or too dirty,
replace with a clean, dry Pad and continue cleaning.
E. Refi lling Boiler During Use
When the Floor Steamer has run out of water, there will be no more
steam coming out of the unit. At this stage it is time to refi ll the Boiler.
Follow the refi lling instructions below.
Loading ...
Loading ...
Loading ...