
Loading ...
Loading ...
Loading ...
and cable should extend toward the front (open) end of
the telescope optical tube.If it does not, you will need to
remove the tube from the mounting rings, rotate the mount
180° about the Dec. axis (first loosen the Dec. lock knob),
and then replace the tube.
12.To place the finder scope in the finder scope bracket, first
unthread the two black nylon screws until the screw ends
are flush with the inside diameter of the bracket. Place
the O-ring that comes on the base of the bracket over
the body of the finder scope until it seats into the groove
on the middle of the finder scope.Slide the eyepiece end
(narrow end) of the finder scope into the end of the
bracket's cylinder that does not have the alignment
screws while pulling the chrome, spring-loaded tension-
er on the bracket with your fingers.Push the finder scope
through the bracket until the O-ring seats just inside the
front opening of the bracket’s cylinder. Now, release the
tensioner and tighten the two black nylon screws a cou-
ple of turns each to secure the finder scope in place.
13.Insert the base of the finder scope bracket into the dove-
tail slot near the focuser. Lock the bracket into position by
tightening the knurled thumb screw on the dovetail slot.
14.Remove the cap from the focuser and insert the chrome
barrel of one of the eyepieces into the drawtube.Secure
the eyepiece with the thumb screws on the drawtube.
Remember to always loosen the thumb screws before
rotating or removing the eyepiece.
The telescope system is now fully assembled. Keep the dust
cap over the front end of the telescope when it is not in use.
4. Getting Started
Balancing the Telescope
To insure smooth movement of the telescope on both axes of
the equatorial mount, it is imperative that the optical tube be
properly balanced. We will first balance the telescope with
respect to the R.A. axis, then the Dec. axis.
1. Keeping one hand on the telescope optical tube, loosen
the R.A. lock knob. Make sure the Dec. lock knob is
locked, for now. The telescope should now be able to
rotate freely about the R.A. axis. Rotate it until the coun-
terweight shaft is parallel to the ground (i.e., horizontal).
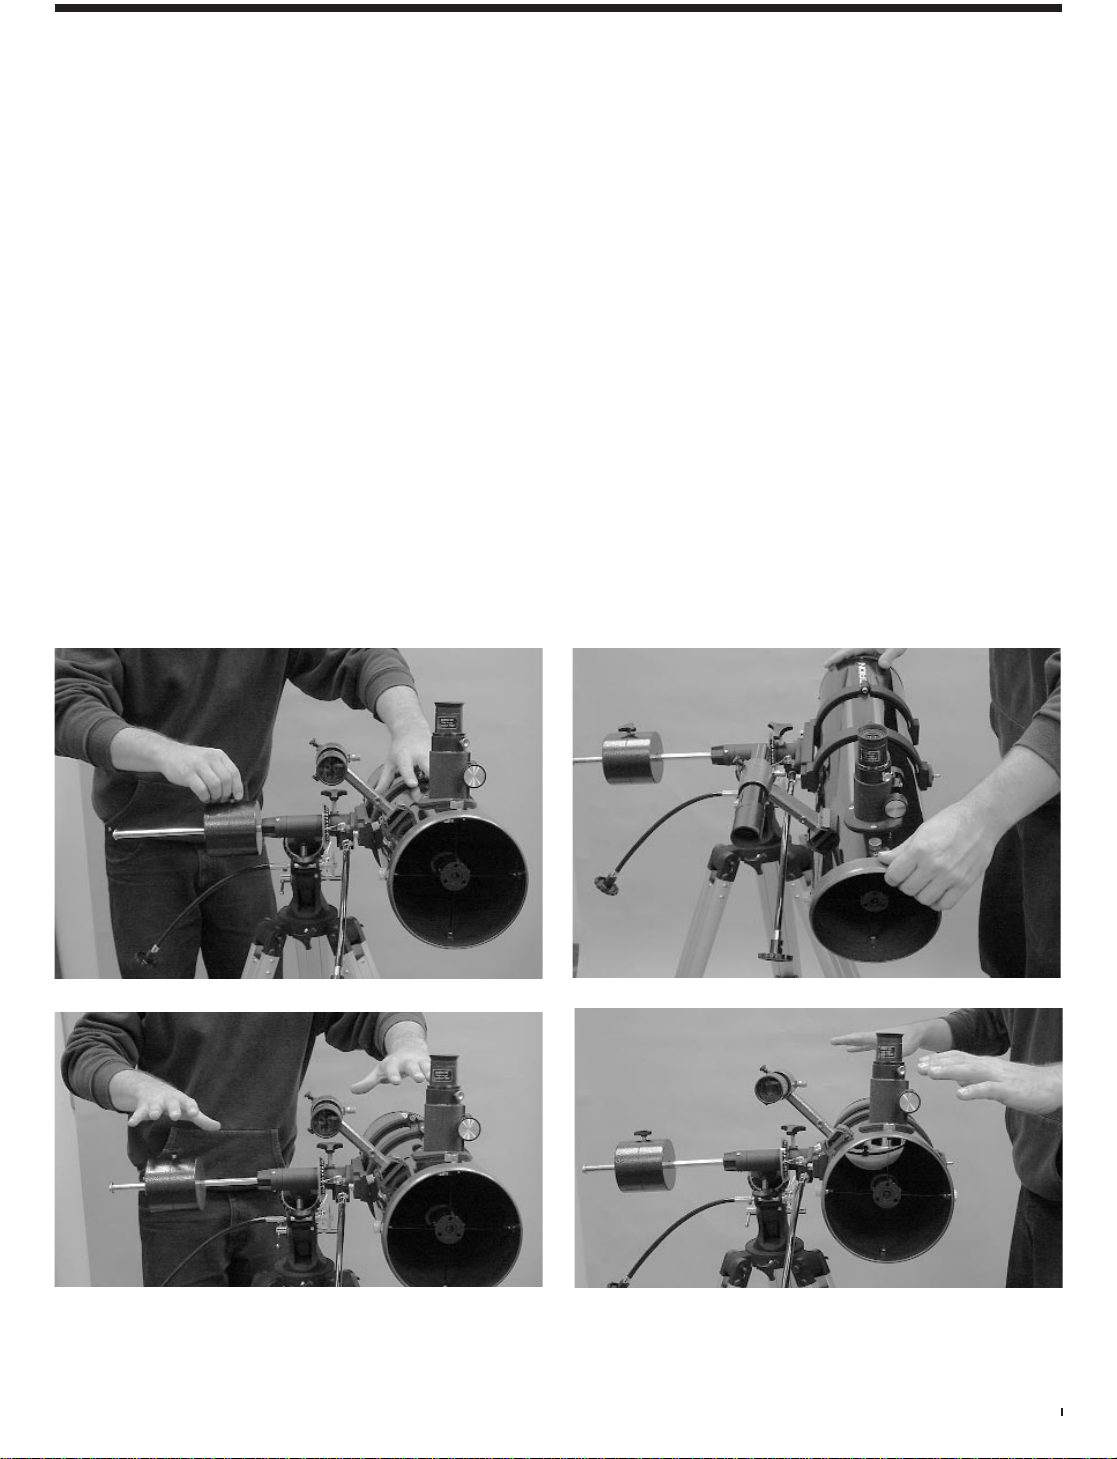
2. Now loosen the counterweight lock knob and slide the
weight along the shaft until it exactly counterbalances the
telescope (Figure 3a).That’s the point at which the shaft
remains horizontal even when you let go of the telescope
with both hands (Figure 3b).
5
b.
d.
c.
a.
Figure 3A, 3B, 3C, 3D: Proper operation of the equatorial mount requires that the telescope tube be balanced on both the R.A. and Dec. axes.
(a) With the R.A. lock knob released, slide the counterweight along the counterweight shaft until it just counterbalances the tube. (b) When you
let go with both hands, the tube should not drift up or down. (c) With the Dec. lock knob released, loosen the tube ring lock clamps a few turns
and slide the telescope forward or back in the tube rings. (d) When the tube is balanced about the Dec. axis, it will not move when you let go.
Loading ...
Loading ...
Loading ...