Loading ...
2
MICROWAVE HOOD COMBINATION SAFETY
INSTALLATION REQUIREMENTS
Tools and Parts
Tools Needed
Gather the required tools and parts before starting installation.
Read and follow the instructions provided with any tools listed
here.
■ Measuring tape
■ Pencil
■ Masking tape or thumbtacks
■ Scissors
■ No. 2 Phillips screwdriver
■ No. 3 Phillips screwdriver
for 1/4 - 20 x 3" (7.6 cm)
bolts
■ Drill
■ 3/16" (5 mm), 3/8" (1cm),
5/8" (1.6 cm) drill bits
■ 3/4" (1.9 cm) hole saw
■ Diagonal wire cutting pliers
■ Stud nder
■ 7⁄16" (1.1 cm) socket wrench (or box wrench) for 1/4" x 2"
(6.4 mm x 5.1cm) lag screws
■ 1
1
/
2
" (3.8 cm) diam. hole drill bit for wood or metal cabinet
■ Keyhole saw
■ Caulking gun and weatherproof caulking compound
■ Duct tape
Parts Needed
For information on reordering, see the “Replacement Parts”
section.
NOTE: The hardware items listed here are for wood studs.
For other types of wall structures, be sure to use appropriate
fasteners.
NOTE: Depending on model, aluminum grease lter and
charcoal lter may be combined.
Materials Needed
Standard ttings for wall or roof venting. See the “Venting Design
Specications” section.
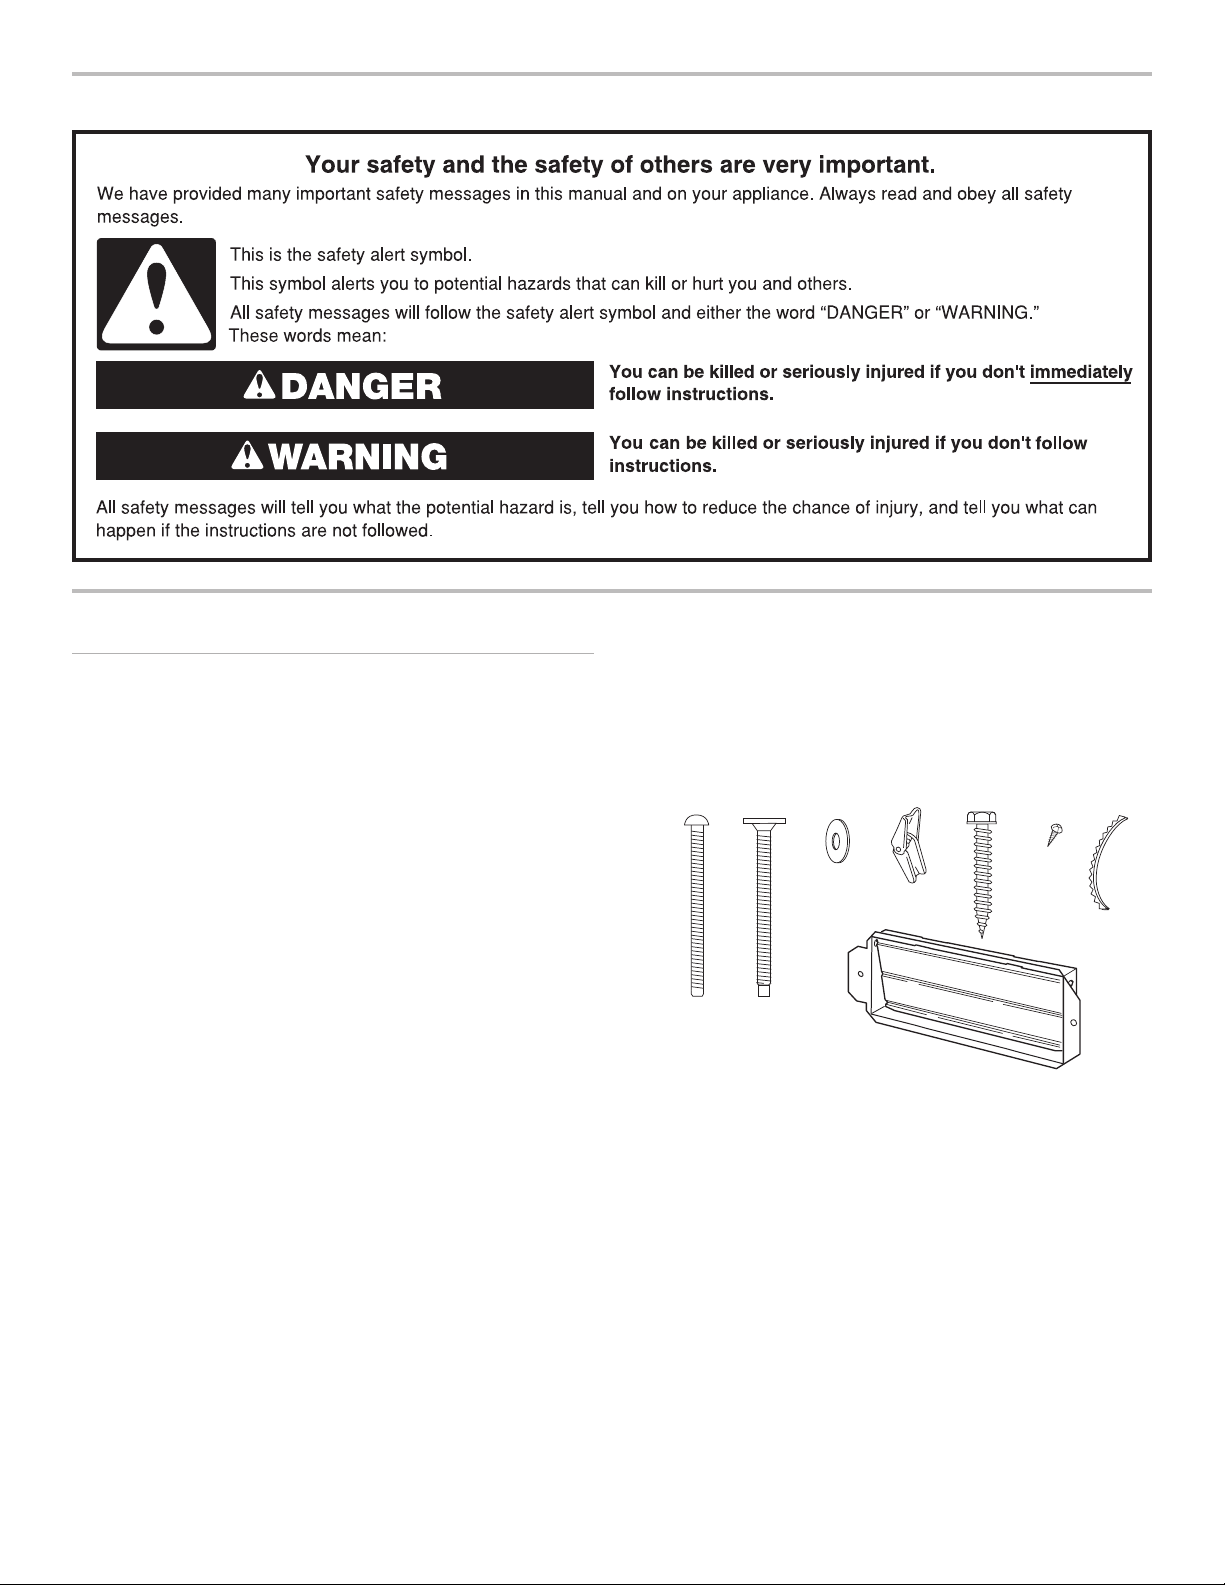
A
B
C
DEF
G
H
A. 3/16 - 24 x 3" round-head
bolts (2)
B. 1/4 - 20 x 3" at-head bolts (2)
C. Washers (2)
D. 3/16" toggle nuts (2)
E. 1/4" x 2" lag screws (2)
F. #6 x 3/8" Sheet metal screws (2)
G. Power supply cord bushing (1)
H. Damper assembly (for wall or
roof venting)
Not Shown:
■ Upper cabinet template
■ Mounting plate (attached to
back of microwave oven)
■ Cardboard template (part of
packaging) or wall template
■ Aluminum grease lters
■ Charcoal lters (Depending
on model, charcoal lters may
not be included. See User
Instructions.)
Loading ...
Loading ...
Loading ...