Loading ...
Loading ...
54
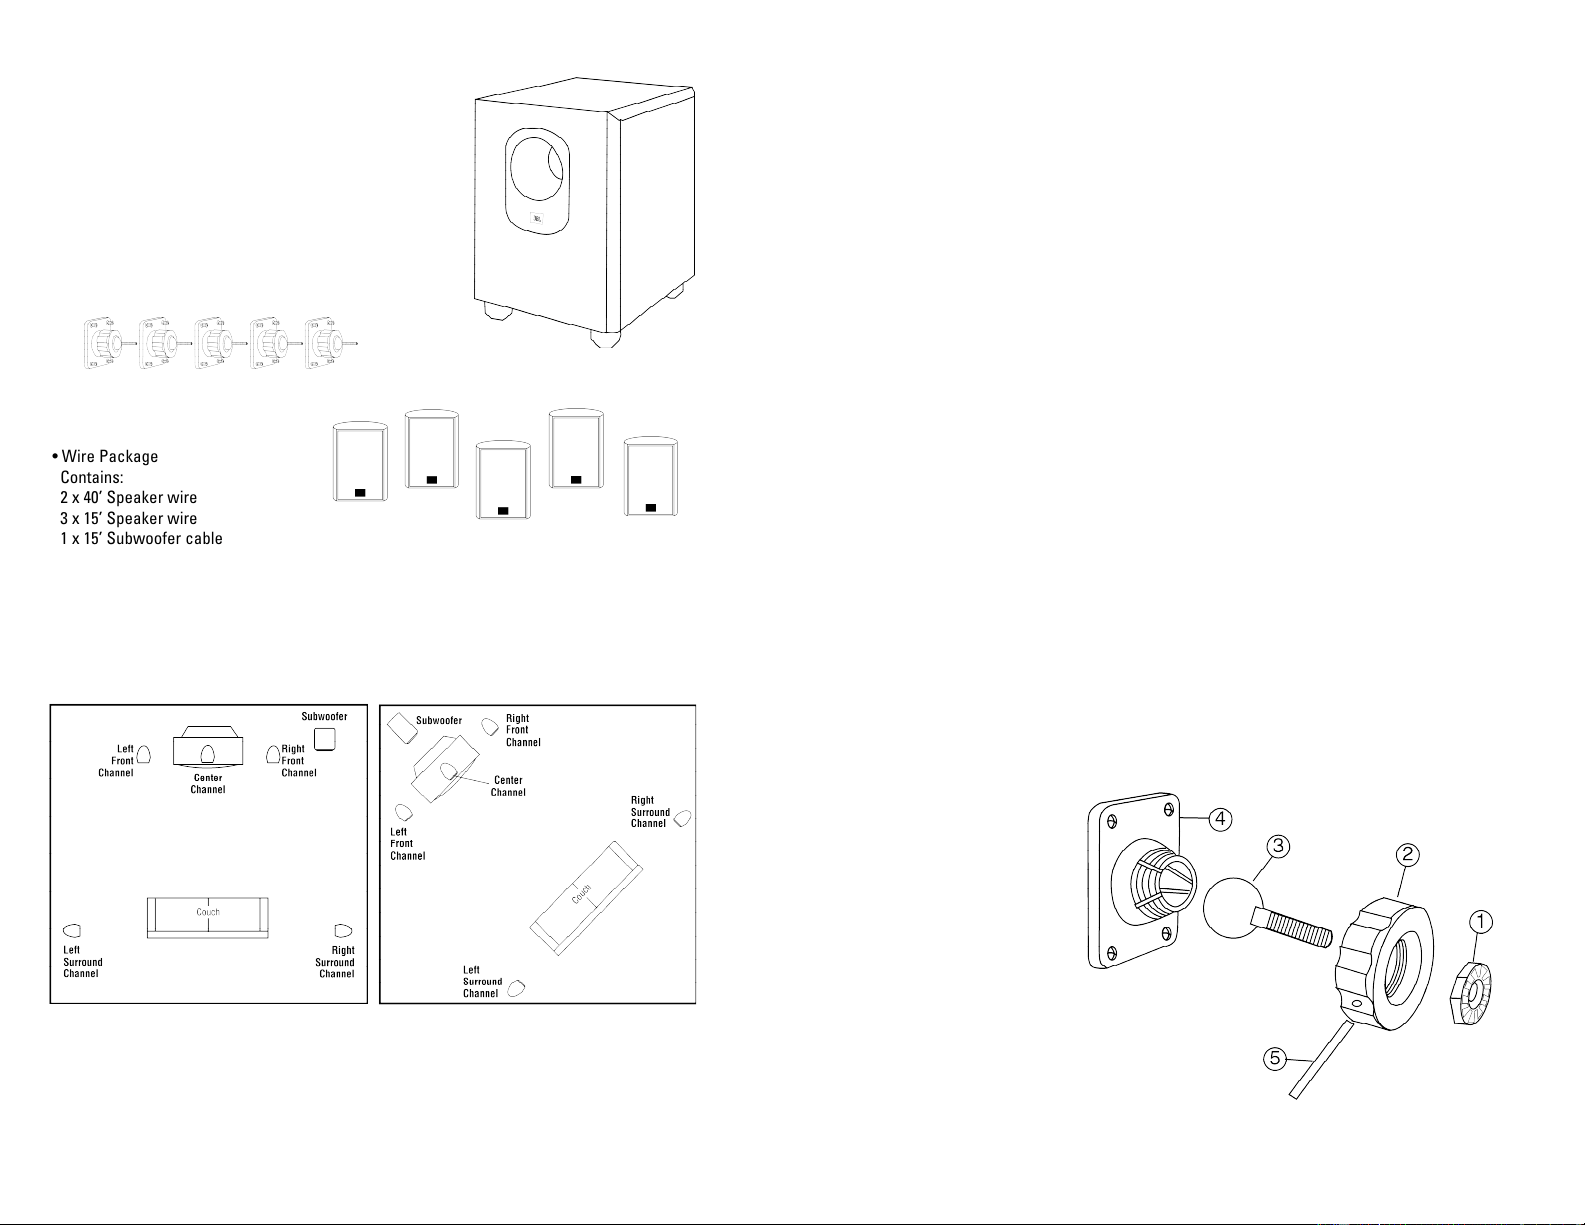
Carefully unpack the system. If you suspect damage
from transit, report it immediately to your supplier
and/or delivery service. Keep the shipping carton and
packing materials for future use. Open the package
and verify the following contents:
INTRODUCTION
UNPACKING THE SPEAKER
PLANNING YOUR SYSTEM
Before deciding where to best place your speakers, survey your room
and study Figures 1 and 2.
Figure 1. In this overhead view of a typical installation,
satellite speakers are used to reproduce sound for
the front and surround channels. The center channel
reproduces sound and dialogue. The powered
subwoofer provides bass for effects and music.
Figure 2. This figure shows an alternative layout, which
may be more suitable for some rooms.
HOME THEATER
AEH50 BRACKET ASSEMBLY AND MOUNTING
IMPORTANT SAFETY NOTE:
Proper selection of mounting
hardware not included
herein and proper assembly
and installation of brackets,
including but not limited to
selection of appropriate
weight bearing support
and bracket use with the
specified speaker only is the
exclusive responsibility of
the customer. Manufacturer
disclaims any liability for
the selection of mounting
hardware and or bracket
installation.
a. Loosen and remove the
molded nut (2) by turning
it counter clockwise. Use
the supplied metal bar (5)
if necessary by inserting
it in one of the holes on
the molded nut (2).
b. Pull the ball/shaft (3) out
of the wall bracket (4).
c. Slide the molded nut (2)
onto the ball/shaft (3)
with threaded opening
facing the ball, and
thread on the metal nut
(1) all the way onto the
ball/shaft (3), with the nut
(1)’s “knurled” surface
facing away from the
ball.
d. Screw on the ball/shaft
(3) into the threaded
insert on the back of the
speaker until it is fully
seated against the
bottom of the insert.
e. Tighten the “knurled” nut
(1) using a crescent
wrench until it is firmly
seated against the back
of the speaker and has
fully locked the ball/shaft
(3) and the speaker
cabinet together. Please
note that once this nut is
tightened, it may embed
some marks on the back
of the speaker where the
attachment is made.
However, these marks
will be covered by the
nut (1).
f. Mount the wall bracket
(4) onto a wood stud on
the wall, using #10,
minimum 1 inch long,
wood screws. Make sure
that all 4 screws are
driven into the stud and
not in drywall. If the
bracket needs to be
mounted on drywall, the
use of properly selected
and installed wall-
anchors and screws
is essential.
g. Holding the speaker
with both hands, reinsert
the ball portion of the
ball/shaft (3) into the
wall bracket (4).
h. Hand tighten the molded
nut (2) while positioning
the speaker for the
intended orientation.
i. Once the orientation of
the speaker is finalized,
use the metal bar (5) in
one of the holes on the
molded nut (2) and
tighten securely.
• Warranty Statement
• Wire Package
Contains:
2 x 40’ Speaker wire
3 x 15’ Speaker wire
1 x 15’ Subwoofer cable
Powered subwoofer
(5) Wall brackets for satellites
(5) Satellite speakers
Loading ...
Loading ...
Loading ...