
Owner’s Guide
Brugervejledning
Bedienungsanleitung
Gebruikershandleiding
Guía del usuario
Käyttöohje
Notice d’utilisation
Manuale di istruzioni
Kezelési útmutató
Brukerveiledning
Podręcznik użytkownika
Manual do Proprietário
Bruksanvisning
SOUNDTOUCH
®
SA-5
AMPLIFIER
2 - ENGLISH
IMPORTANT SAFETY INSTRUCTIONS
Please read and keep all safety and use instructions.
1. Read these instructions.
2. Keep these instructions.
3. Heed all warnings.
4. Follow all instructions.
5. Do not use this apparatus near water or moisture.
6. Clean only with a dry cloth.
7. Do not block any ventilation openings. Install in accordance with the manufacturer’s instructions.
8. Do not install near any heat sources, such as radiators, heat registers, stoves, or other apparatus (including
amplifiers) that produce heat.
9. Protect the power cord from being walked on or pinched, particularly at plugs, convenience receptacles, and the
point where they exit from the apparatus.
10. Only use attachments/accessories specified by the manufacturer.
11. Unplug this apparatus during lightning storms or when unused for long periods of time.
12. Refer all servicing to qualified service personnel. Servicing is required when the apparatus has been damaged
in any way: such as power supply cord or plug is damaged; liquid has been spilled or objects have fallen into the
apparatus; the apparatus has been exposed to rain or moisture, does not operate normally, or has been dropped.
WARNINGS/CAUTIONS
The lightning flash with arrowhead symbol within an equilateral triangle alerts the user to the presence of
uninsulated, dangerous voltage within the system enclosure that may be of sucient magnitude to constitute a
risk of electric shock.
The exclamation point within an equilateral triangle alerts the user to the presence of important operating and
maintenance instructions in the owner’s guide.
Contains small parts which may be a choking hazard. Not suitable for children under age 3.
• To reduce the risk of fire or electrical shock, do NOT expose this product to rain, liquids or moisture.
• Do not expose this apparatus to dripping or splashing, and do not place objects filled with liquids, such as vases, on or
near the apparatus. As with any electronic products, use care not to spill liquids into any part of the product. Liquids
can cause a failure and/or a fire hazard.
• Do not place naked flame sources, such as lighted candles, on or near the apparatus.
• The product must be used indoors. It is neither designed nor tested for use outdoors, in recreation vehicles, or
on boats.
• Make no modifications to the system or accessories. Unauthorized alterations may compromise safety, regulatory
compliance, and system performance.
NOTES:
• Where the mains plug or appliance coupler is used as the disconnect device, such disconnect device shall remain
readily operable.
• The product label is located on the bottom of the product.
• Refer to your local building codes for wire types suitable for your application.
• Changes or modifications not expressly approved by Bose Corporation could void the user’s authority to operate
this equipment.
• Operate this product within the temperature range of 32° F to 104° F (0° C to 40° C).
仅适用于 2000m 以下地区安全使用
Use at altitude less than 2000 meters only.

ENGLISH - 3
REGULATORY INFORMATION
Information about products that generate electrical noise
NOTE: This equipment has been tested and found to comply with the limits for a Class B digital device, pursuant to
Part 15 of the FCC Rules. These limits are designed to provide reasonable protection against harmful interference in a
residential installation. This equipment generates, uses, and can radiate radio frequency energy and, if not installed and
used in accordance with the instructions, may cause harmful interference to radio communications. However, there is no
guarantee that interference will not occur in a particular installation. If this equipment does cause harmful interference
to radio or television reception, which can be determined by turning the equipment o and on, the user is encouraged
to try to correct the interference by one or more of the following measures:
• Reorient or relocate the receiving antenna.
• Increase the separation between the equipment and receiver.
• Connect the equipment into an outlet on a circuit dierent from that to which the receiver is connected.
• Consult the dealer or an experienced radio/TV technician for help.
Changes or modifications not expressly approved by Bose Corporation could void the user’s authority to operate
this equipment.
This device when operating in the 5150 to 5250 MHz band is for indoor use only to reduce the potential for harmful
interference to co-channel mobile satellite systems.
Important USA and Canada compliance Information
This device complies with part 15 of the FCC rules and Industry Canada license-exempt RSS standard(s). Operation is
subject to the following two conditions: (1) this device may not cause harmful interference, and (2) this device must
accept any interference received, including interference that may cause undesired operation.
This equipment complies with FCC and Industry Canada radiation exposure limits set forth for an uncontrolled
environment. This equipment should be installed and operated with a minimum distance of 20 cm between radiator and
your body.
This equipment must not be co-located or be operating in conjunction with any other antennas or transmitters.
This device complies with Industry Canada license-exempt RSS standards(s).
This Class B digital apparatus complies with Canadian ICES-003.
CAN ICES-3 (B)/NMB-3(B)
4 - ENGLISH
REGULATORY INFORMATION
Bose Corporation hereby declares that this product is in compliance with the essential requirements and other
relevant provisions of Directive 2014/53/EU and all other applicable EU directive requirements. The complete
declaration of conformity can be found at: www.Bose.com/compliance
The product, in accordance with the Ecodesign Requirements for Energy Related Products Directive 2009/125/EC,
is in compliance with the following norm(s) or document(s): Regulation (EC) No. 1275/2008, as amended by
Regulation (EU) No. 801/2013.
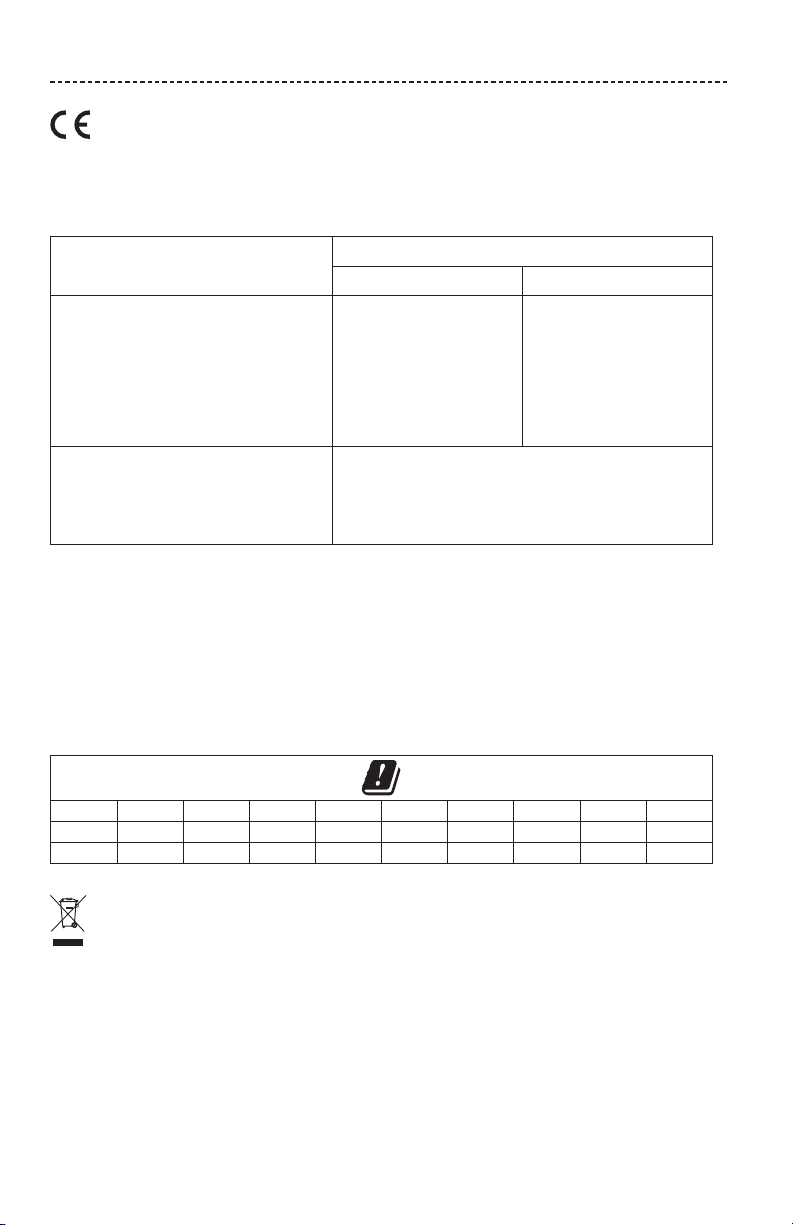
Required Power State Information
Power Modes
Standby Networked Standby
Power consumption in specified power mode, at
230V/50Hz input
≤ 0.5 W all network types ≤ 3.0 W
Time after which equipment is automatically
switched into mode
< 2.5 hours ≤ 20 minutes
Power consumption in networked standby if all wired
network ports are connected and all wireless network
ports are activated, at 230V/50Hz input
N/A ≤ 3.0 W
Network port deactivation/activation procedures.
Deactivating all networks will enable standby mode.
Wi-Fi® and Bluetooth®: Deactivate by pressing and holding the unit's
Control button until the Wi-Fi indicator turns o. Activate by pressing the
Control button.
Ethernet: Deactivate by removing the Ethernet cable. Activate by
inserting the Ethernet cable.
For Europe:
Frequency band of operation 2400 to 2483.5 MHz:
Bluetooth/Wi-Fi: Maximum transmit power less than 20 dBm EIRP.
Bluetooth Low Energy: Maximum power spectral density less than 10 dBm/MHz EIRP.
Frequency band of operation 5150 to 5350 MHz and 5470 to 5725 MHz:
Wi-Fi: Maximum transmit power less than 20 dBm EIRP.
This device is restricted to indoor use when operating in the 5150 to 5350 MHz frequency range in all EU Member States
listed in the table.
BE DK IE UK FR CY SK HU AT SE
BG DE PT EL HR LV LT MT PL
CZ EE FI ES IT RO LU NL SI
This symbol means the product must not be discarded as household waste, and should be delivered to an
appropriate collection facility for recycling. Proper disposal and recycling helps protect natural resources, human
health and the environment. For more information on disposal and recycling of this product, contact your local
municipality, disposal service, or the shop where you bought this product.

ENGLISH - 5
REGULATORY INFORMATION
Names and Contents of Toxic or Hazardous Substances or Elements
Toxic or Hazardous Substances and Elements
Part Name
Lead
(Pb)
Mercury
(Hg)
Cadmium
(Cd)
Hexavalent
(CR(VI))
Polybrominated
Biphenyl
(PBB)
Polybrominated
diphenylether
(PBDE)
PCBs X O O O O O
Metal Parts X O O O O O
Plastic Parts O O O O O O
Speakers X O O O O O
Cables X O O O O O
This table is prepared in accordance with the provisions of SJ/T 11364.
O: Indicates that this toxic or hazardous substance contained in all of the homogeneous materials for this part is below the limit
requirement of GB/T 26572.
X: Indicates that this toxic or hazardous substance contained in at least one of the homogeneous materials used for this part is above
the limit requirement of GB/T 26572.
Date of Manufacture: The eighth digit in the serial number indicates the year of manufacture; “9” is 2009 or 2019.
China Importer: Bose Electronics (Shanghai) Company Limited, Part C, Plan 9, No. 353 North Riying Road, China
(Shanghai) Pilot Free Trade Zone
EU Importer: Bose Products B.V., Gorslaan 60, 1441 RG Purmerend, The Netherlands
Taiwan Importer: Bose Taiwan Branch, 9F-A1, No.10, Section 3, Minsheng East Road, Taipei City 104, Taiwan
Phone Number: 886 2 2514 7977
Mexico Importer: Bose de México, S. de R.L. de C.V. , Paseo de las Palmas 405-204, Lomas de Chapultepec, 11000
México, D.F. Phone Number: +5255 (5202) 3545

LEGAL INFORMATION
Amazon, Kindle, Fire and all related logos are trademarks of Amazon, Inc. or its aliates.
Apple and the Apple logo are trademarks of Apple Inc., registered in the U.S. and other countries. App Store is a service
mark of Apple Inc.
Android, Google Play, and the Google Play logo are trademarks of Google LLC.
The Bluetooth® word mark and logos are registered trademarks owned by Bluetooth SIG, Inc. and any use of such marks
by Bose Corporation is under license.
This product contains the iHeartRadio service. iHeartRadio is a registered trademark of iHeartMedia, Inc.
SoundTouch and the wireless note design are registered trademarks of Bose Corporation in the U.S. and other countries.
This product incorporates Spotify software which is subject to 3rd party licenses found here:
www.spotify.com/connect/third-party-licenses
Spotify is a registered trademark of Spotify AB.
Wi-Fi is a registered trademark of Wi-Fi Alliance®.
Bose Corporation Headquarters: 1-877-230-5639
©2019 Bose Corporation. No part of this work may be reproduced, modified, distributed or otherwise used without prior
written permission.
Please complete and retain for your records
The serial and model numbers are located on the back or bottom of the product.
Serial number: ______________________________________________________________________
Model number: ______________________________________________________________________
Please keep your receipt with your owner’s guide. Now is a good time to register your Bose product.
You can easily do this by going to http://global.Bose.com/register

ENGLISH - 7
CONTENTS
Carton Contents
What’s in the carton.......................................................................................................... 9
Initial Setup
Placement guidelines ....................................................................................................... 10
Speaker connection guidelines .................................................................................... 10
Speaker wire length recommendations ............................................................ 10
Place your speakers .......................................................................................................... 11
Connect your speakers to the amplifier .................................................................... 11
Connect a second pair of speakers ................................................................... 13
Connect the amplifier to power ................................................................................... 14
Network standby ................................................................................................................ 14
SoundTouch® App Setup
Download and install the SoundTouch® app ........................................................... 15
SoundTouch® Owner’s Center ....................................................................................... 15
Existing SoundTouch® Users
Add the amplifier to an existing account ................................................................. 16
Connect the amplifier to a new network .................................................................. 16
Preset Personalization
Set a preset .......................................................................................................................... 17
Play a preset ........................................................................................................................ 17
Bluetooth® Technology
Connect your mobile device.......................................................................................... 18
Disconnect a mobile device ........................................................................................... 18
Connect using the Bluetooth feature on your mobile device .......................... 19
Amplifier Components
Connectors ........................................................................................................................... 20
Wired Connections
Connect to the AUX IN connector .............................................................................. 21

8 - ENGLISH
CONTENTS
Wi-Fi® Indicator
Wi-Fi status .......................................................................................................................... 22
Advanced Features
Disable Wi-Fi and Bluetooth technology ................................................................. 23
Re-enable Wi-Fi and Bluetooth technology ............................................................ 23
Overload protection ......................................................................................................... 23
Care and Maintenance
Clean the amplifier ............................................................................................................ 24
Customer service ............................................................................................................... 24
Limited warranty ................................................................................................................ 24
Technical information ....................................................................................................... 25
Troubleshooting
Common solutions ............................................................................................................ 26
Clear the amplifier’s Bluetooth pairing list .............................................................. 28
Reset the amplifier ............................................................................................................ 28
Wall-Mounting
Hardware specifications .................................................................................................. 29
Mount the bracket to the wall ....................................................................................... 29
Attach the amplifier to the mounting bracket ....................................................... 31
Appendix: Computer Setup
Set up your amplifier using a computer ................................................................... 32
Before you begin ....................................................................................................... 32
Computer setup ......................................................................................................... 32
ENGLISH - 9
CARTON CONTENTS
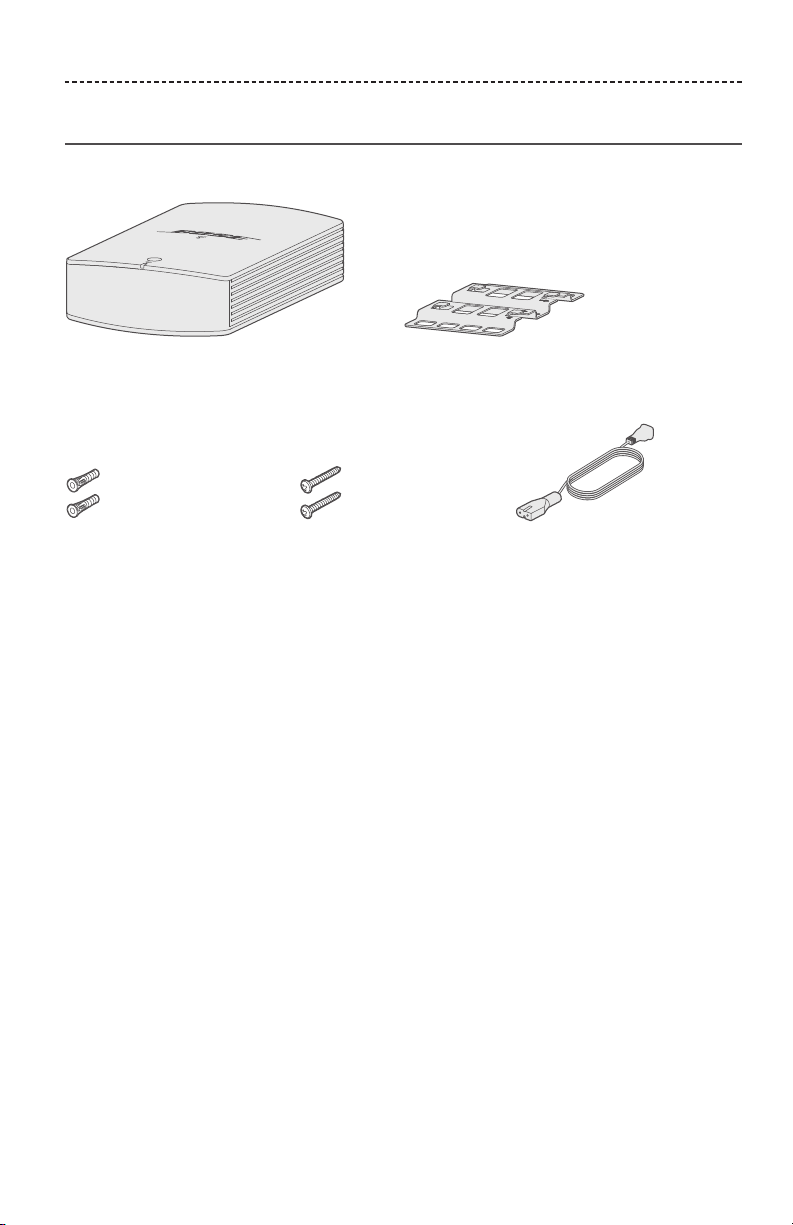
What’s in the carton
Carefully unpack the carton and confirm that the following parts are included.
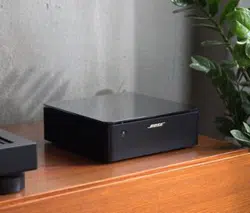
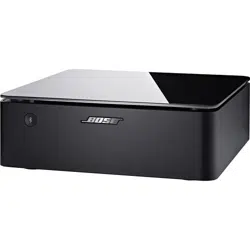
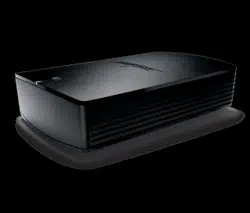
SoundTouch® SA-5 amplifier Mounting bracket
Anchors (2) Screws (2) Power cord*
*May ship with multiple power cords. Use the power cord for your region.
Note: If part of the amplifier is damaged, do not use it. Contact your authorized Bose®
dealer or Bose customer service. Visit: global.Bose.com/Support/SA5
for contact information.

10 - ENGLISH
INITIAL SETUP
Placement guidelines
To avoid interference, keep other wireless equipment 1 – 3 ft. (0.3 – 0.9 m) away from
your amplifier.
• Install the amplifier indoors.
• Make sure there is an AC (mains) outlet nearby.
• Place the amplifier on a shelf or mount it on a wall.
• For optimum performance, place the amplifier in a well-ventilated area.
CAUTIONS:
• Place the amplifier in an area where the maximum ambient temperature is less than
104°F (40°C).
• Place the amplifier with a minimum of 3 in. (75 mm) of ventilation around it.
• Do NOT place the amplifier in a completely enclosed area. Doing so may result in poor
performance.
• Do NOT stack multiple amplifiers on top of each other. If using multiple amplifiers,
place them side by side.
Note: To mount the amplifier on a wall, see page 29.
Speaker connection guidelines
• Use only unpowered speakers. Do NOT connect any make or model of powered
speakers. Doing so may cause damage to the equipment.
• One pair of speakers requires 4 ohm minimum each.
• Two pairs of speakers require 8 ohm minimum each.
Speaker wire length recommendations
Maximum Length Gauge
30 ft. (9 m) 18 (0.82 mm
2
)
45 ft. (14 m) 16 (1.3 mm
2
)
70 ft. (21 m) 14 (2.0 mm
2
)
ENGLISH - 11
INITIAL SETUP
Place your speakers
Place your speakers in their permanent location before connecting the speaker wires to
the amplifier.
Connect your speakers to the amplifier
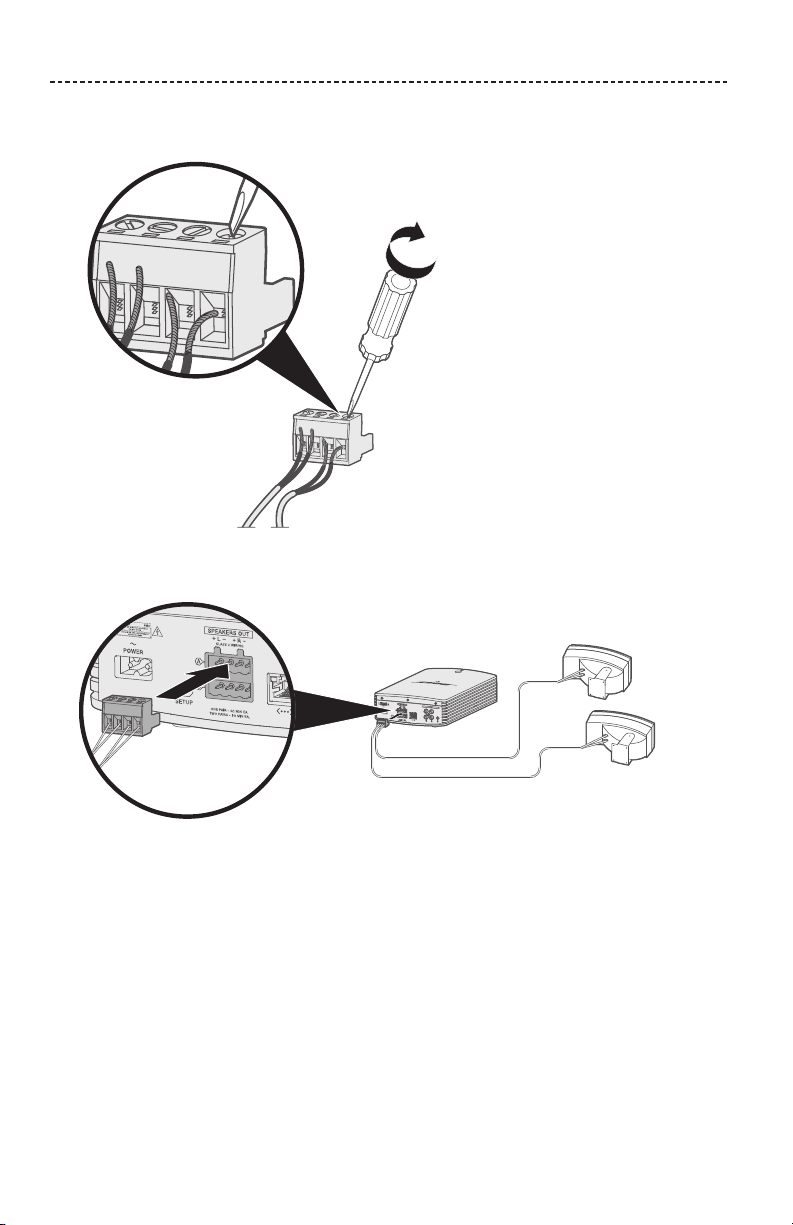
After you place your speakers, connect the speaker wires to the amplifier.
Speaker wires consist of two insulated wires:
• The marked wire (stripes, ribbing or color) connects to the positive (+) terminal.
• The plain wire connects to the negative (–) terminal.
Before connecting your speakers, make sure the amplifier is unplugged from an AC
(mains) power source.
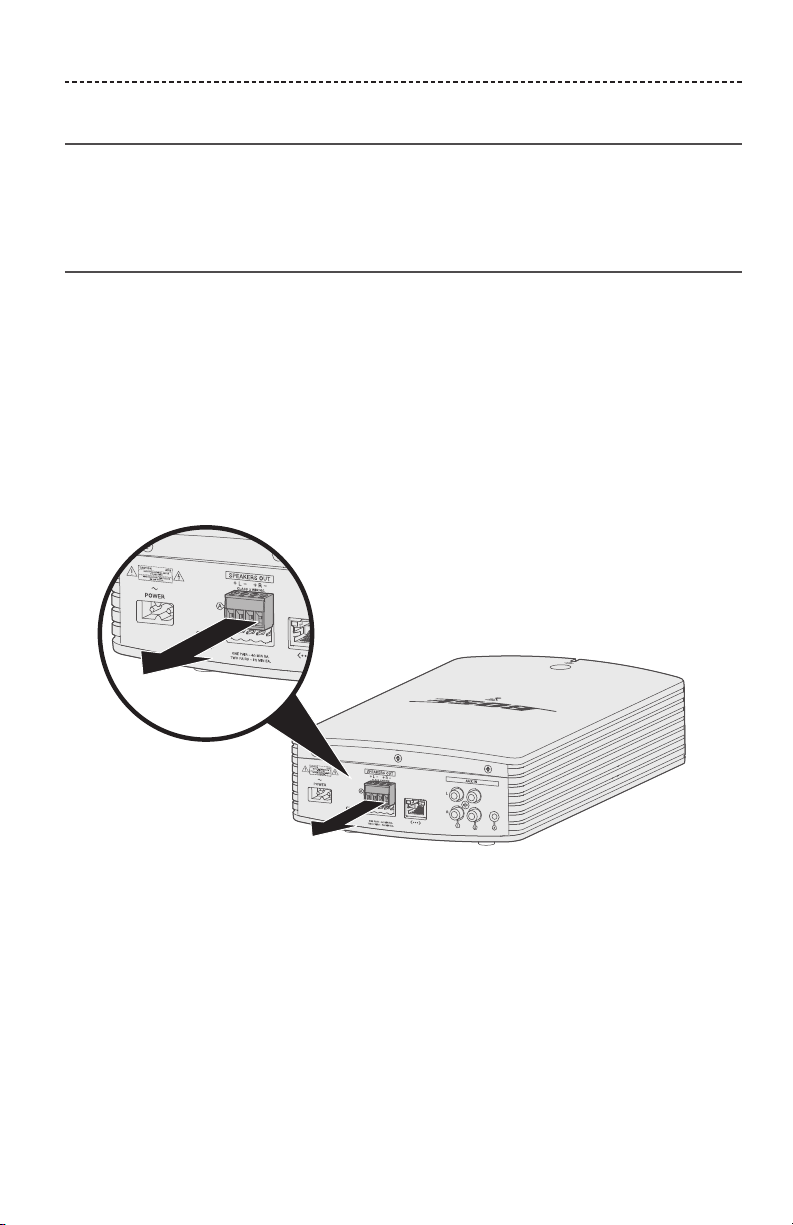
1. Remove terminal block A from the SPEAKERS OUT connector.
2. Connect the speaker wires to terminal block A:
A. Insert the left speaker’s marked wire into the + L positive terminal and the
plain wire into the L – negative terminal.
B. Insert the right speaker’s marked wire into the + R positive terminal
and the plain wire into the R – negative terminal.
12 - ENGLISH
INITIAL SETUP
3. Using a small, flat-head screwdriver, tighten the screws on the terminals clockwise to
secure the wires.
4. Reinsert the terminal block connector into the SPEAKERS OUT connector.
5. Follow the operating instructions for your unpowered speakers to connect
the other end of the speaker wires to the speakers.
Tip: Use a silicone caulking material such as RTV adhesive (available at hardware
stores) to protect the wiring at any outdoor speaker connections.
ENGLISH - 13
INITIAL SETUP
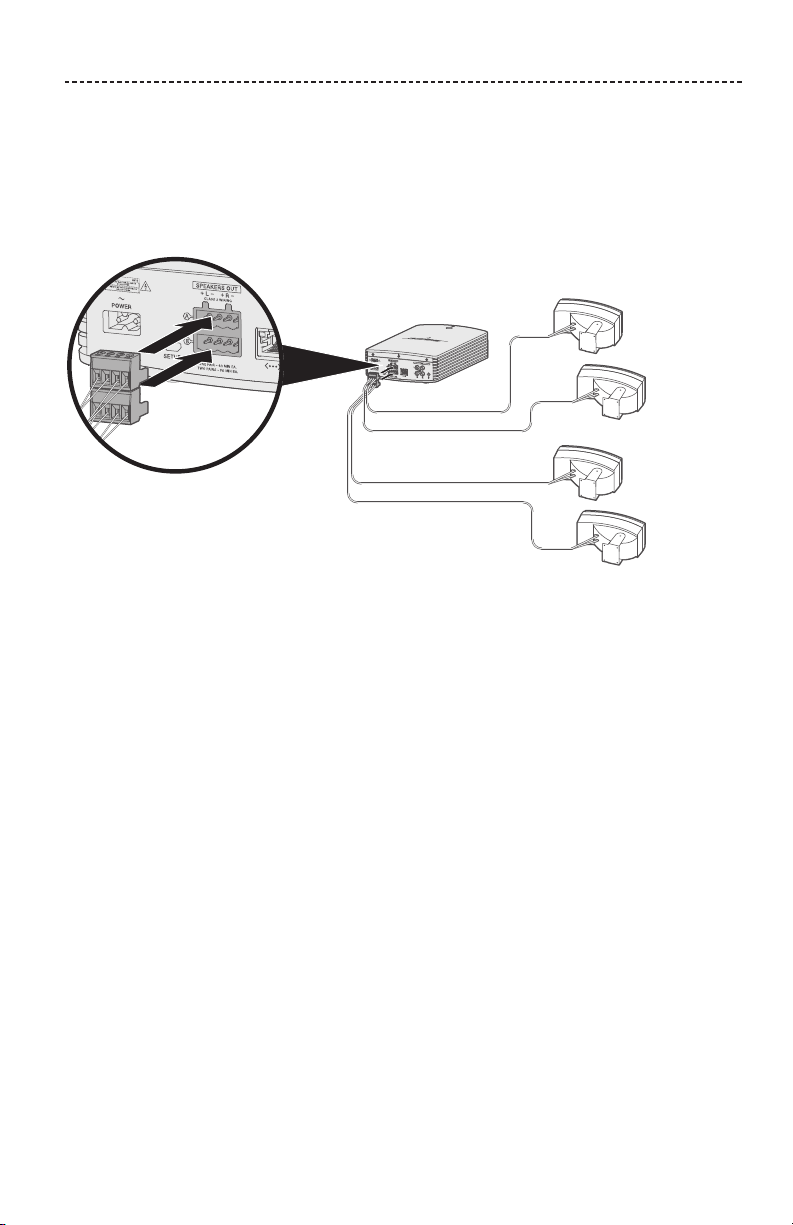
Connect a second pair of speakers
You can connect two pairs of speakers to the amplifier for full sound in a large space or
to play the same audio in dierent rooms.
To connect a second pair of speakers, repeat steps 1 - 5 in "Connect your speakers to the
amplifier" on page 11, using terminal block B.
14 - ENGLISH
INITIAL SETUP
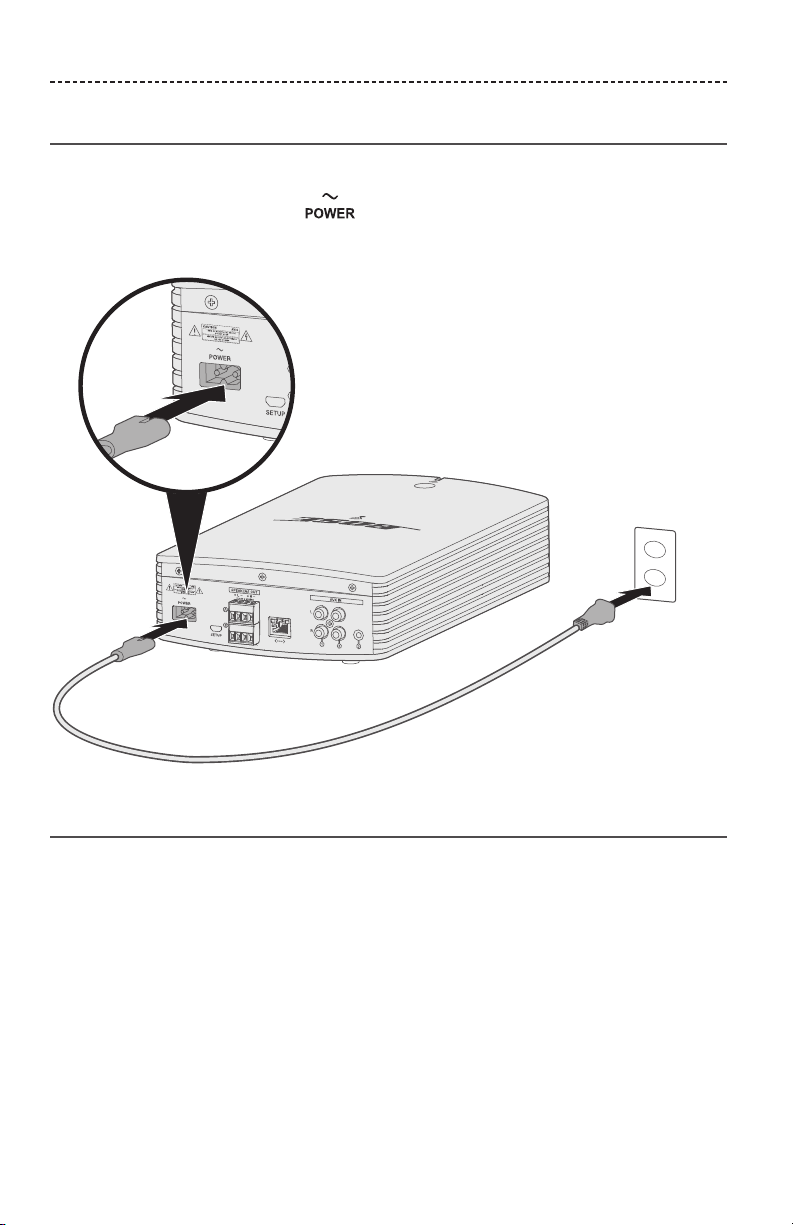
Connect the amplifier to power
Connect the amplifier to power after you connect the speaker wires to the amplifier.
1. Plug the power cord into the connector on the amplifier.
2. Plug the other end of the power cord into an AC (mains) power outlet.
Network standby
The amplifier transitions to network standby when audio has stopped and you have not
pressed any buttons for 20 minutes. To wake the amplifier from network standby:
• Play or resume audio using the SoundTouch® app on your mobile device.
• Press the Control button (see page 23).
• On the SoundTouch® remote control, press the Power button I, source button, or
preset button.
ENGLISH - 15
SOUNDTOUCH® APP SETUP
The SoundTouch® app lets you set up and control SoundTouch® from your smartphone,
tablet or computer. Using the app, your smart device acts as a remote for your amplifier.
From the app, you can manage your SoundTouch® settings, add music services, explore
local and global Internet radio stations, set and change presets and stream music. New
features are added periodically.
Note: If you have already set up SoundTouch® for another speaker, see page 16.
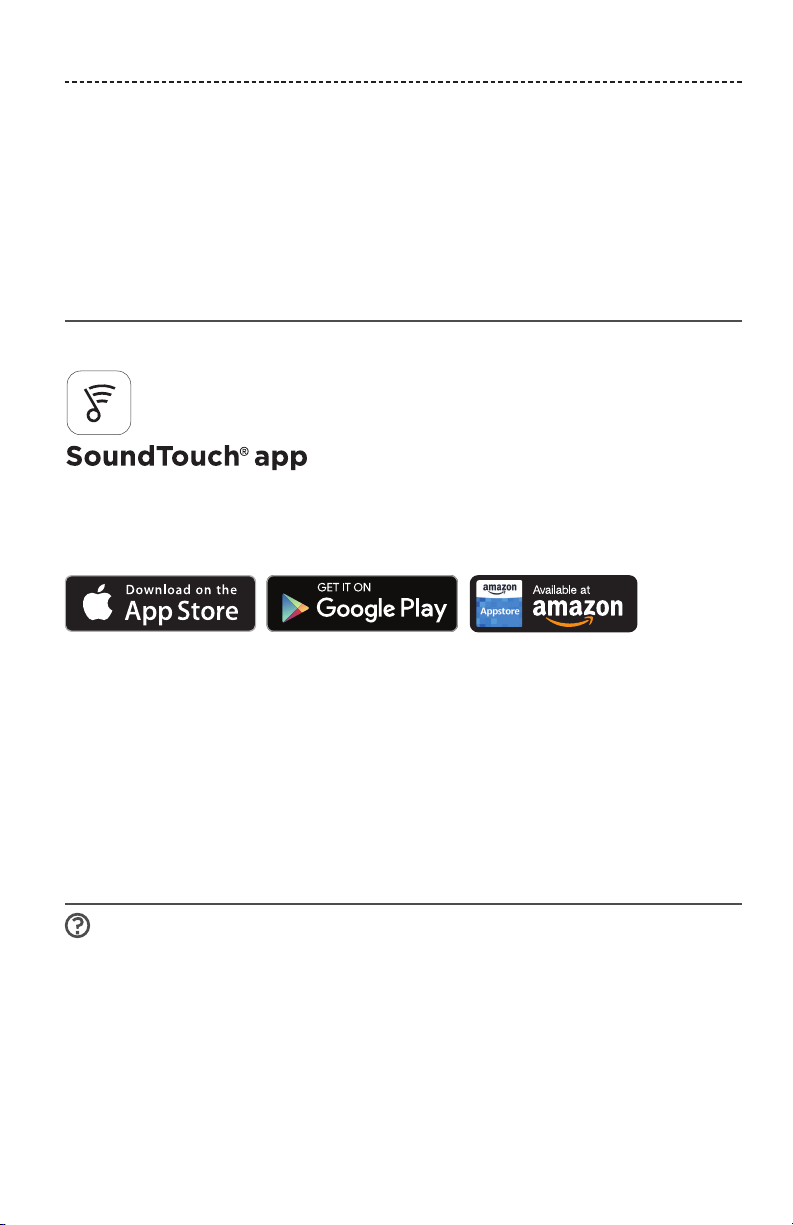
Download and install the SoundTouch
®
app
On your smartphone or tablet, download the Bose® SoundTouch® app.
• Apple users: download from the App Store
• Android™ users: download on the Google Play™ store
• Amazon Kindle Fire users: download from the Amazon Appstore for Android
Follow the instructions in the app to complete setup, including adding the amplifier to
your Wi-Fi network, creating a S oundTouch® account, adding a music library and using
music services.
Note: For instructions on using a computer for setup, see page 32.
Tip: Once you set up the amplifier on your home Wi-Fi network, you can control it from
any smartphone or tablet on the same network. Download the SoundTouch® app
on the smart device. You must use the same SoundTouch® account for all devices
connected to your amplifier.
SoundTouch
®
Owner’s Center
global.Bose.com/Support/SA5
This website provides access to the owner support center, which includes: owner’s
manuals, articles, tips, tutorials, a video library, and the owner community where you
can post questions and answers.

16 - ENGLISH
EXISTING SOUNDTOUCH® USERS
Add the amplifier to an existing account
If you have already set up SoundTouch® on another speaker, you do not need to
download the SoundTouch® app again.
From within the app, select > Settings > Add or Reconnect Speaker.
The app guides you through setup.
Connect the amplifier to a new network
If your network information changes, add your amplifier to your new network. You can
do this by putting your amplifier into setup mode.
1. From within the app, select > Settings > Speaker Settings and select
your amplifier.
2. Select CONNECT SPEAKER.
The app guides you through setup.

ENGLISH - 17
PRESET PERSONALIZATION
You can personalize six presets to your favorite streaming music services, stations,
playlists, artists, albums or songs from your music library. You can access your music, at
any time, with a simple touch of a button using the SoundTouch® app.
Before using presets, note the following:
• You can set presets from the app and the remote control.
• If the preset source is your music library, make sure the computer storing your music
library is on and connected to the same network as the SoundTouch® amplifier.
• You cannot set presets in Bluetooth mode or AUX mode.
Set a preset
1. Stream music using the app.
2. While the music is playing, press and hold a preset in the app.
Play a preset
Once you personalize your presets, press a preset in the app to play it.
18 - ENGLISH
BLUETOOTH TECHNOLOGY
Bluetooth wireless technology lets you stream music from Bluetooth smartphones,
tablets, computers or other devices to your amplifier. Before you can stream music from
a mobile device, you must connect the mobile device to your amplifier.
Connect your mobile device
1. From within the app, select your amplifier from the device tray.
2. Select Bluetooth .
3. Select CONNECT.
4. Select your SoundTouch® amplifier from the mobile device list.
Tip: Look for the name you entered for your amplifier in the SoundTouch® app. If
you didn’t name your amplifier, the default name appears.
Once connected, your SoundTouch® amplifier’s name appears connected in the
device list.
Disconnect a mobile device
Turn o the Bluetooth feature on your mobile device.

ENGLISH - 19
BLUETOOTH TECHNOLOGY
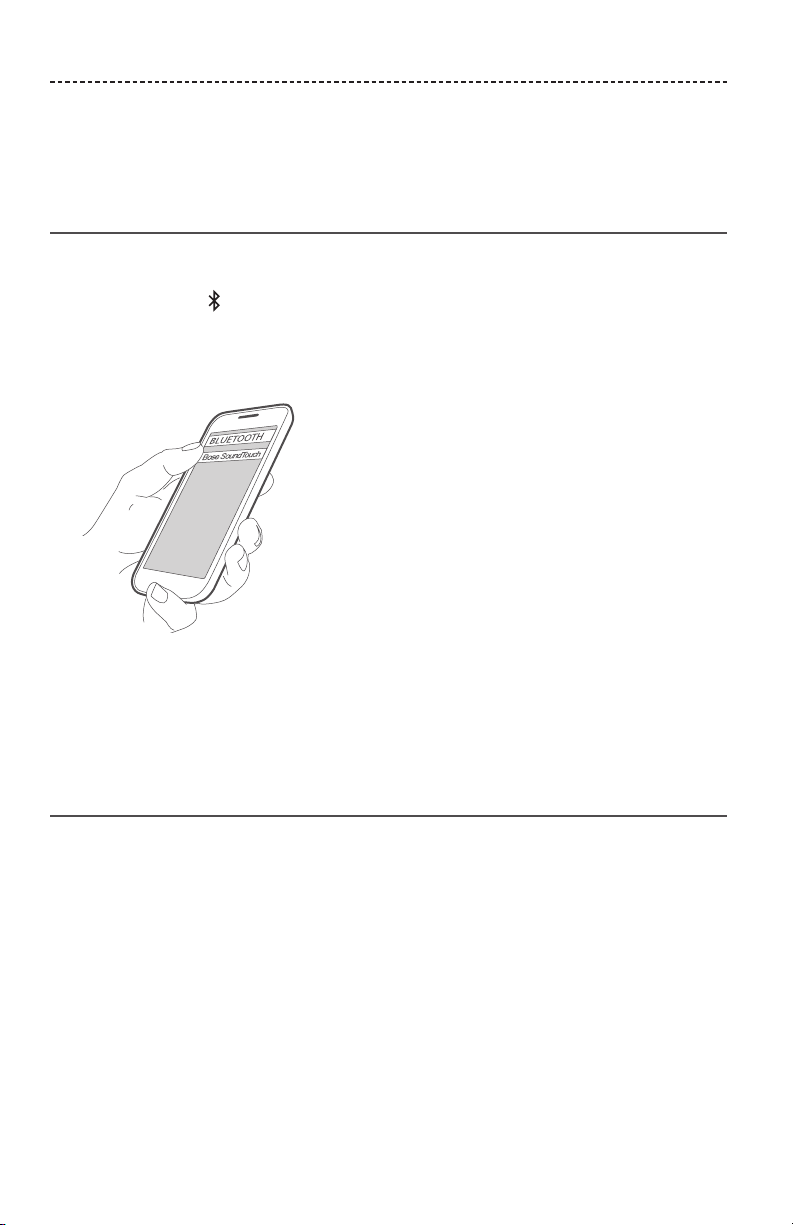
Connect using the Bluetooth feature on
your mobile device
1. On your mobile device, turn on the Bluetooth feature.
Tip: The Bluetooth menu is usually found in the Settings menu.
2. Select your amplifier from the mobile device list.
20 - ENGLISH
AMPLIFIER COMPONENTS
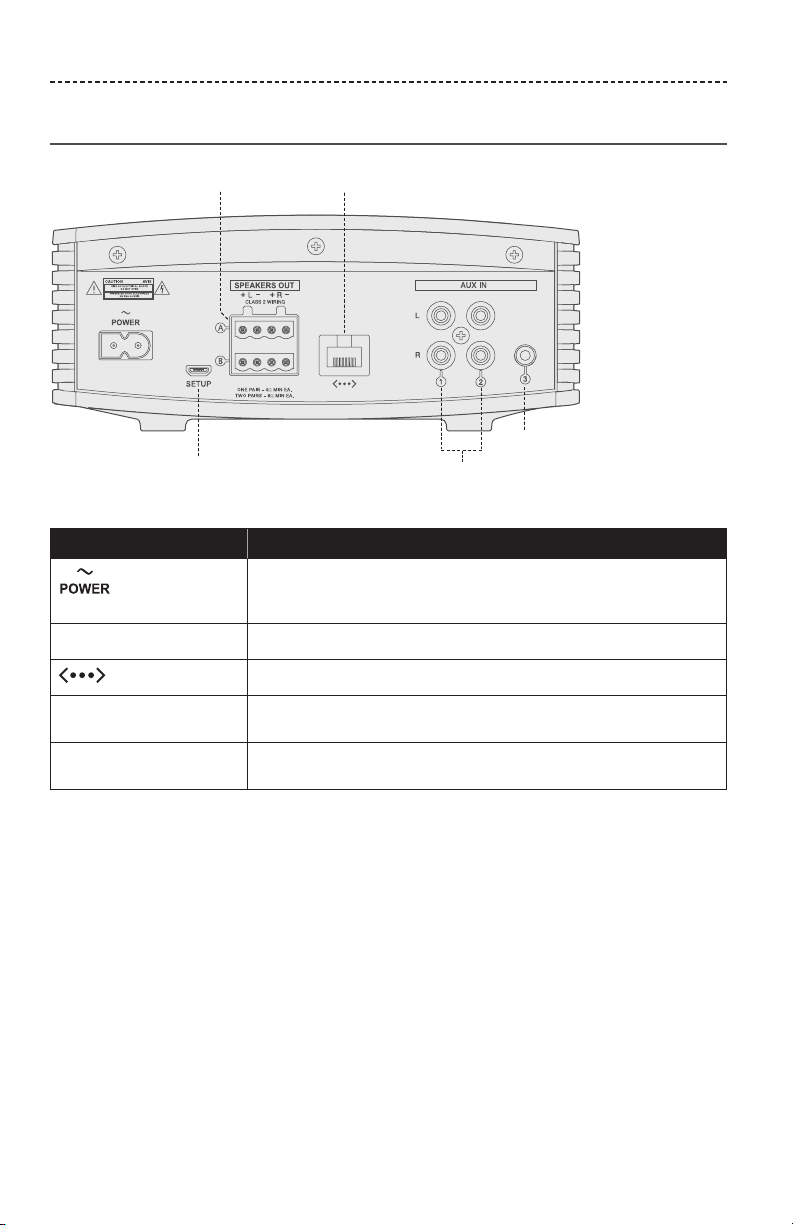
Connectors
Computer setup
Terminal connectors
Ethernet
RCA stereo
connectors
3.5 mm
connector
Connector Description
AC power cord connector. Power is applied when the power cord is
inserted and plugged into an AC (mains) outlet. There is no on/o
switch on the SoundTouch® amplifier.
SETUP USB connector for setup using a computer.
Ethernet connector enables wired access to your home network.
SPEAKERS OUT Two terminal block connectors enable you to connect two pairs
of speakers.
AUX IN Three AUX IN connectors enable playback from audio devices and
media players.
ENGLISH - 21
WIRED CONNECTIONS
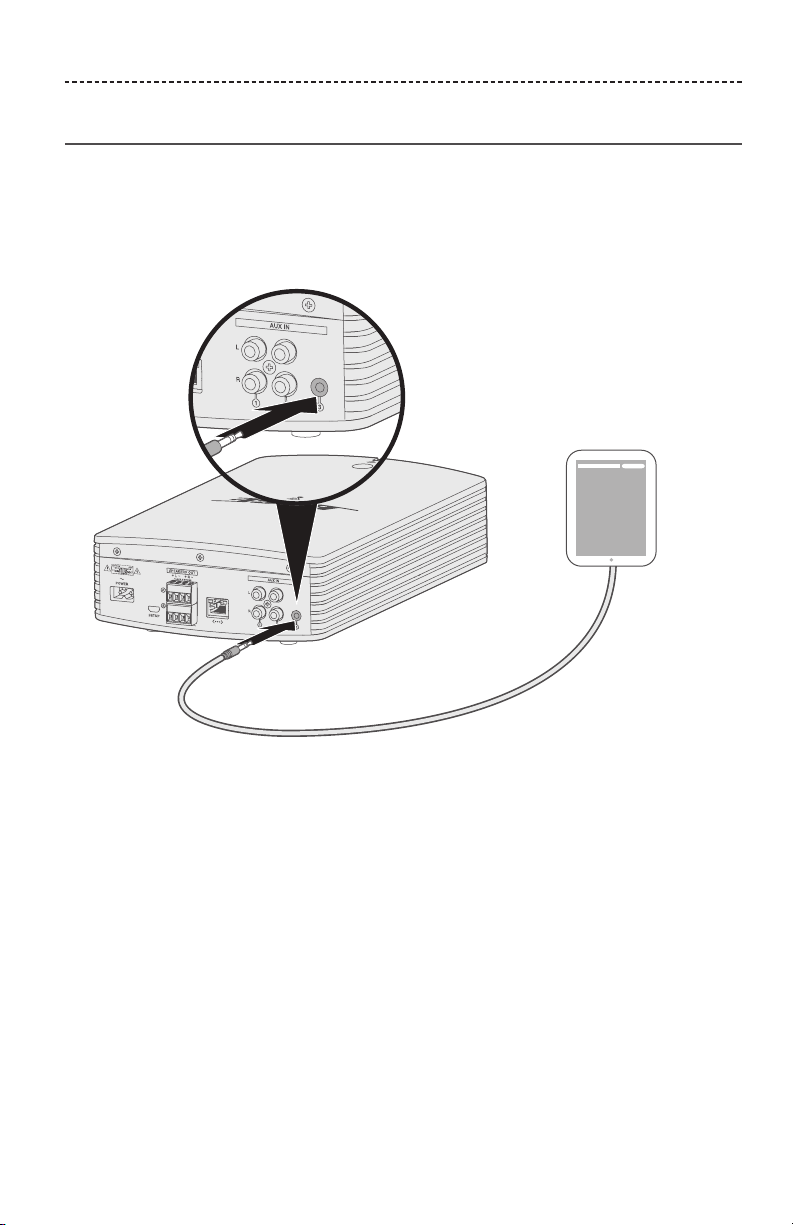
Connect to the AUX IN connector
You can connect the audio output of a smartphone, tablet, computer or other type of
audio device to your amplifier’s AUX IN connectors. The amplifier accepts 3.5 mm plugs
(not provided) or RCA (red and white) plugs (not provided).
1. Using a stereo cable, connect your audio device to one of the AUX connectors on
the amplifier.
2. From within the app, select your amplifier from the device tray.
3. Select AUX.
4. Select your AUX source to play music.
5. Start playing music on the mobile device.
22 - ENGLISH
WI-FI INDICATOR
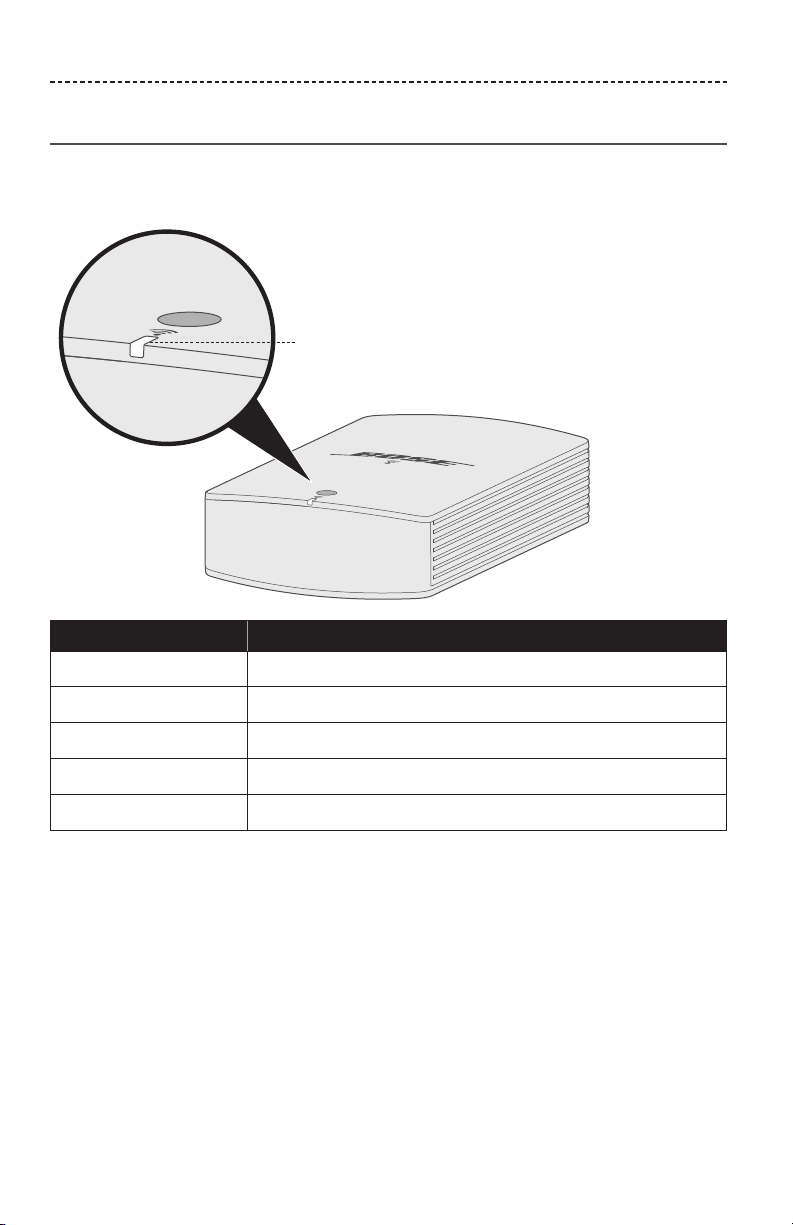
Wi-Fi status
The front of the amplifier has an indicator that shows Wi-Fi status. Lights under the
indicator glow according to the state of the amplifier.
Wi-Fi indicator
Indicator activity State
Blinking white Searching for Wi-Fi network
Solid white (bright) Amplifier is on and connected to Wi-Fi network
Solid amber Amplifier is in setup mode
Blinking fast amber Firmware error - contact Bose customer service
O Networking disabled or network standby (see page 14)
ENGLISH - 23
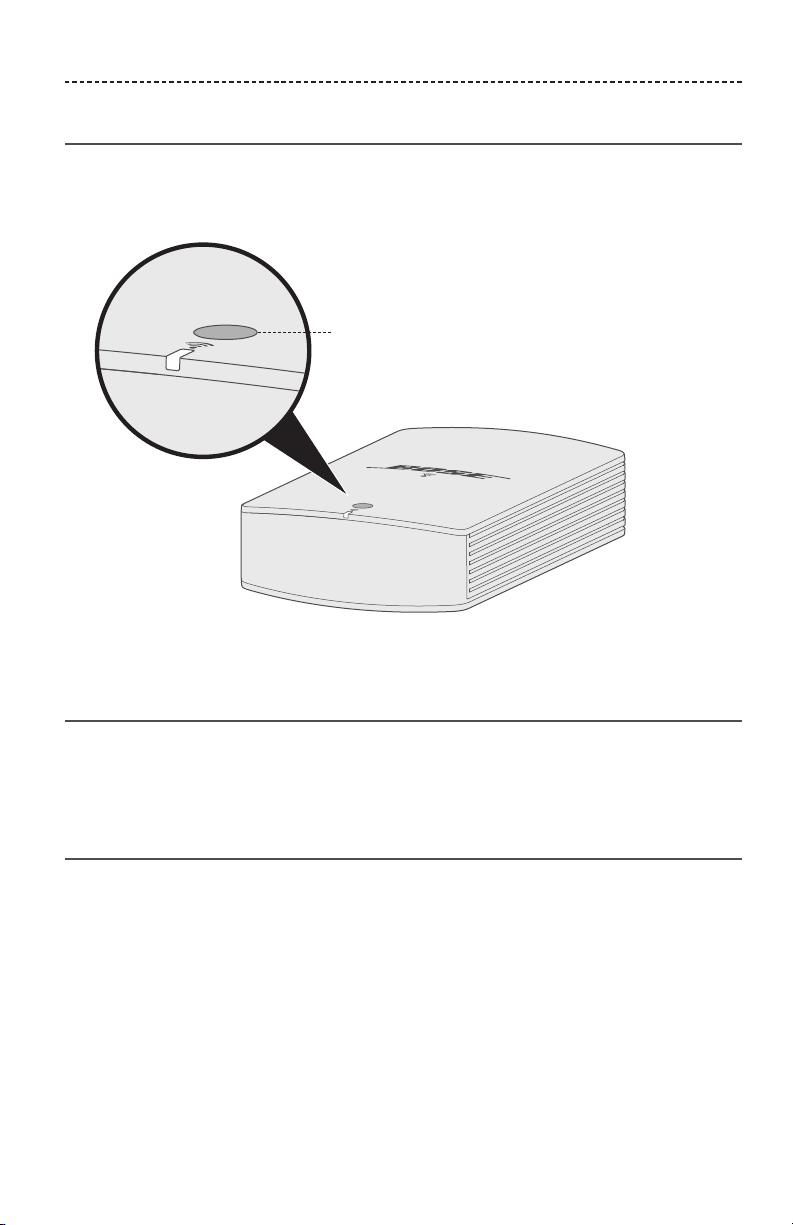
ADVANCED FEATURES
Disable Wi-Fi and Bluetooth technology
Disabling Wi-Fi also disables the Bluetooth feature.
1. Press and hold the Control button (8 - 10 seconds).
Control button
2. When the Wi-Fi indicator turns o, release the Control button.
Re-enable Wi-Fi and Bluetooth technology
Re-enabling Wi-Fi also re-enables the Bluetooth feature.
Press the Control button until the Wi-Fi indicator turns on (two seconds).
Overload protection
The amplifier’s overload protection feature automatically reduces maximum power
output to prevent the amplifier from getting too hot. This may occur when the amplifier
plays at high volume for a long duration or if it is installed in a location with limited
ventilation. Full maximum output automatically returns as the amplifier cools down.

24 - ENGLISH
CARE AND MAINTENANCE
Clean the amplifier
CAUTION: Disconnect the power cord from the AC (mains) power outlet before
cleaning.
• Clean the surface of your amplifier with a soft, dry cloth.
• Do not use any sprays near your amplifier. Do not use any solvents, chemicals, or
cleaning solutions containing alcohol, ammonia or abrasives.
• Do not allow liquids to spill into any openings.
• Use a brush attachment on a vacuum cleaner to clean the hard-to-reach areas.
Customer service
For additional help using your amplifier, visit: global.Bose.com/Support/SA5
Limited warranty
Your soundbar is covered by a limited warranty. Visit our website at
global.Bose.com/warranty for details of the limited warranty.
To register your product, visit global.Bose.com/register for instructions. Failure to
register will not aect your limited warranty rights.

ENGLISH - 25
CARE AND MAINTENANCE
Technical information
Dimensions and Weight
• 7
1
⁄4 in. wide x 12 in. deep x 3 in. high (18.4 cm x 30.0 cm x 7.7 cm)
• 3.3 lb (1.5 kg)
Power rating
100-240V 50/60 Hz, 400W
Input sensitivity
• 3.5 mm input: 1Vrms
• RCA inputs: 2Vrms
Signal to Noise ratio (S/N)
>100 dB
Output power (continuous average)
100W / channel minimum into 8 ohms, from 20 Hz to 20 kHz, with no more than
0.6% THD.
Temperature range
32° F to 104° F (0° C to 40° C)

26 - ENGLISH
TROUBLESHOOTING
If you experience problems with your amplifier:
• Connect your amplifier to AC (mains) power.
• Secure all cables and speaker wires.
• Verify the state of the Wi-Fi status indicator (see page 22).
• Move your amplifier and mobile device away from possible interference (wireless
routers, cordless phones, televisions, microwaves, etc.).
• Move your amplifier within the recommended range of your wireless router or mobile
device for proper operation.
If you could not resolve your issue, see the table below to identify symptoms and
solutions to common problems. If you are unable to resolve your issue, contact Bose
customer service.
Common solutions
The following table lists symptoms and possible solutions to common problems.
Symptom Solution
Cannot
complete
network setup
• Select correct network name and enter password.
• Connect the device and amplifier to the same Wi-Fi network.
• Place your amplifier within range of the router.
• Enable Wi-Fi on the device (mobile or computer) you are using
for setup .
• Close other open applications.
• If using a computer for setup, check firewall settings to make sure
that the SoundTouch® app and SoundTouch® Music Server are allowed
programs.
• Restart your mobile device or computer and your router.
• Reset your amplifier (see page 28).
• If your router supports both 2.4GHz and 5GHz bands, make sure both
the device (mobile or computer) and amplifier are connecting to the
same band.
• Uninstall the app, reset your amplifier (see page 28), and restart
setup.
Cannot connect to
network
• If your network information has changed or to connect your amplifier
to another network, see "Connect the amplifier to a new network" on
page 16.
• Connect to the network using an Ethernet cable.

ENGLISH - 27
TROUBLESHOOTING
Symptom Solution
Intermittent or no
audio
• Stop other audio or video streaming applications.
• Unmute or increase the volume on your amplifier and mobile device.
• Unplug the power cord; reconnect after one minute.
• Restart your mobile device or computer and your router.
• Ensure volume is not muted or too low.
• Unplug the power cord; reconnect after one minute.
Speakers don’t play • Play content using the SoundTouch® app.
• Disconnect AC power from the amplifier for three minutes. Reconnect
power to the amplifier.
One speaker doesn’t
play
• Make sure the speaker wires are in good condition.
• Disconnect the wire from the working speaker and attach it to the
non-working speaker. If the speaker does not play, the problem may
be with the speaker and not the speaker wire.
• Disconnect the speaker wire from the terminal block connector.
Connect it to the other terminal block connector. If the speaker plays,
the problem may be the other speaker wire. Replace the speaker wire.
If the speaker does not play, the problem may be in that channel of the
amplifier.
Right and left stereo
channels are heard
on the wrong
speakers
Confirm speaker wire connections:
– Connect speaker wires from the amplifier’s SPEAKERS OUT + L
- connector to your left speaker.
– Connect speaker wires from the amplifier’s SPEAKERS OUT + R
- connector to your right speaker.
Bass or treble is
weak
Check speaker wire connections. Confirm that the individual wires are
connected + to + and – to –.
Interference • Firmly insert the speaker wires into the terminals on the back of the
speakers and on the amplifier’s connector panel. Confirm that no
individual wires are touching across terminals.
• Keep the amplifier away from metal objects, other audio/video
components, and direct heat sources.
Cannot play
Bluetooth audio
• Set up the SoundTouch® app first and perform all updates.
• Connect a mobile device (see page 18).
• Try connecting a dierent mobile device.
• Clear the amplifier's pairing list (see page 28).
On your mobile device:
• Disable and re-enable the Bluetooth feature.
• Remove your amplifier from the Bluetooth menu. Connect again.
• Refer to your mobile device’s documentation.

28 - ENGLISH
TROUBLESHOOTING
Clear the amplifier’s Bluetooth pairing list
1. From within the app, select > Settings > Speaker Settings and select
your amplifier.
2. Open the Bluetooth menu item and clear the pairing list.
Reset the amplifier
Factory reset clears all source, volume, and network settings from the amplifier and
returns it to original factory settings.
Your SoundTouch® account and presets still exist, but are not associated with the
amplifier unless you use the same account to set up the amplifier again.
1. Unplug the power cable.
2. Press and hold the Control button while reconnecting the cable.
3. Release the button when the Wi-Fi indicator blinks.
ENGLISH - 29
WALL-MOUNTING
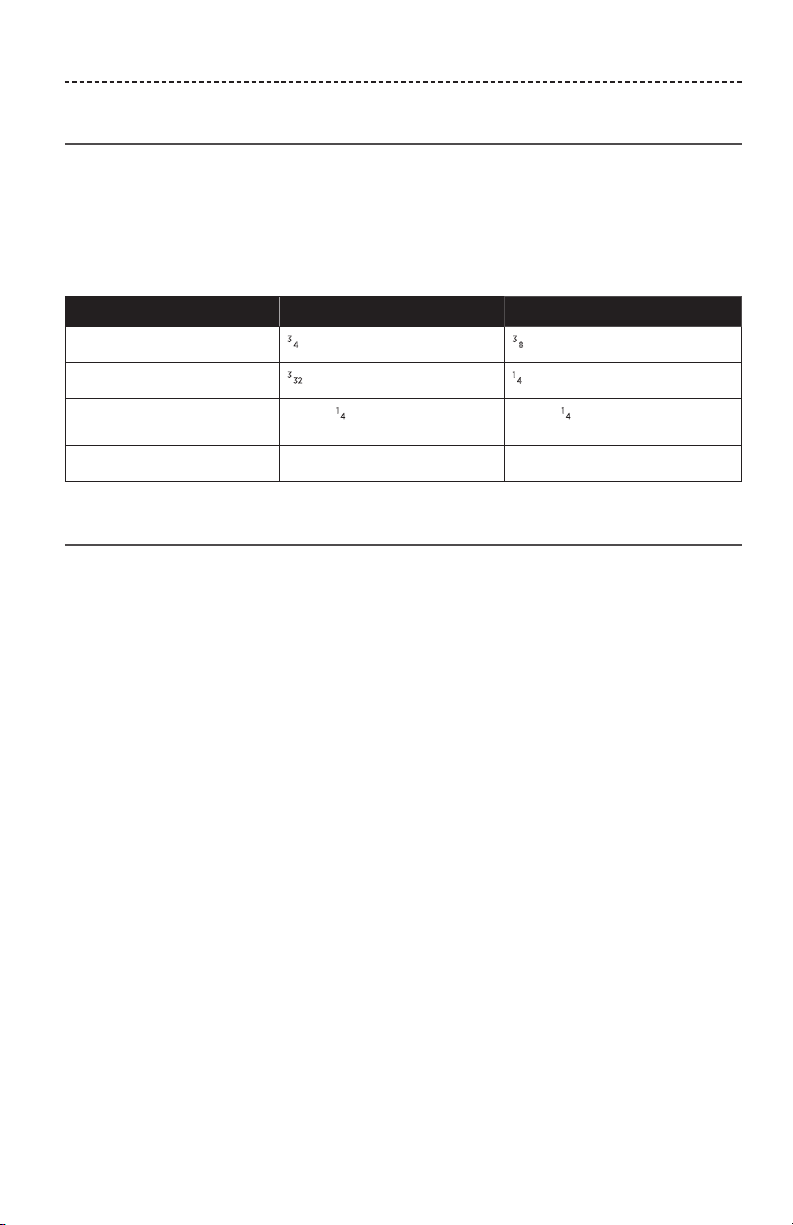
Hardware specifications
You can mount the amplifier on a wall with the mounting bracket and hardware.
WARNING: Do NOT mount on surfaces that are not sturdy enough, or that have haz-
ards concealed behind them, such as electrical wiring or plumbing. If you
are not sure about installing the bracket, contact a qualified professional
installer. Ensure the bracket is installed according to local building codes.
Item Wood Wallboard
Wall thickness
3
⁄4 in. (19 mm) or thicker
3
⁄8 in. (9.5 mm) or thicker
Drill bit
3
⁄32 in. (2.38 mm)
1
⁄4 in. (6.35 mm)
Phillips-head wood
screws (2)
#10 x 1
1
⁄4 in. (M5 x 32 mm) #10 x 1
1
⁄4 in. (M5 x 32 mm)
Plastic anchors (2) Not used #10 (M5) plastic anchors
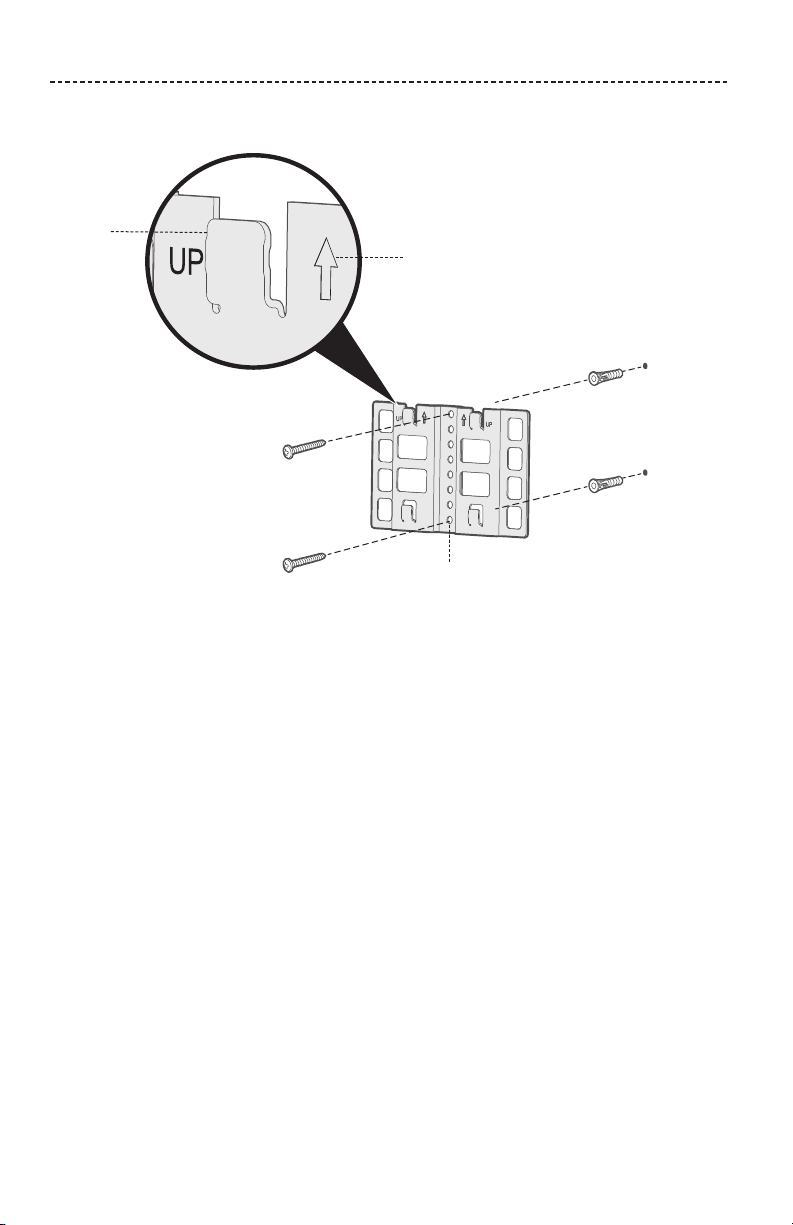
Mount the bracket to the wall
Use the mounting hardware to secure the mounting bracket to the wall.
CAUTIONS:
• Only wall mount the amplifier with the bracket provided with your amplifier.
• Do NOT mount the bracket on the ceiling.
• Do NOT place or install the bracket or amplifier near any heat sources, such as
fireplaces, radiators, heat registers or other apparatus ( including amplifiers) that
produce heat. Additionally when mounting near a TV consult your TV owner’s guide
for related mounting information.
30 - ENGLISH
WALL-MOUNTING
1. Position the mounting bracket on the wall with arrows visible and pointing up.
Tab
Arrow
Mounting holes
2. Mark the top and bottom mounting hole locations on the wall through the bracket’s
mounting holes.
3. Remove the bracket.
4. Drill two holes in the wall.
5. Align the bracket to the drilled holes.
Note: If mounting the bracket to wallboard, insert the anchors into the wall before
you attach the bracket.
6. If applicable, insert the anchors.
7. Insert and tighten the screws clockwise.
ENGLISH - 31
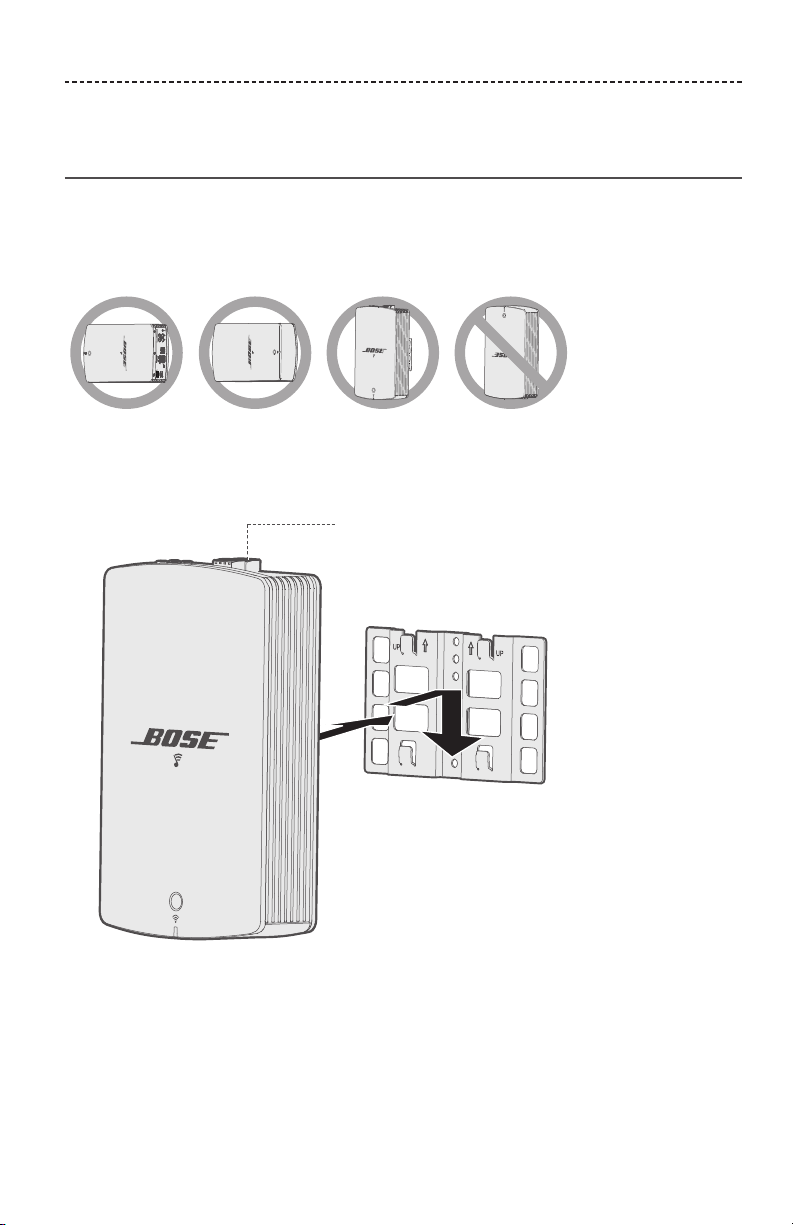
WALL-MOUNTING
Attach the amplifier to the mounting
bracket
You can attach the amplifier to the bracket vertically or horizontally.
• Do NOT mount the amplifier on the ceiling.
• Do NOT mount the amplifier with the connector panel at the bottom.
1. Align the four latches on the back of the amplifier with the bracket’s four tabs.
Tip: For vertical mounting, the connector panel must be on top.
Connector panel
2. Gently push the amplifier down onto the bracket’s tabs until the amplifier clicks
into place.

32 - ENGLISH
APPENDIX: COMPUTER SETUP
Set up your amplifier using a computer
You can set up your amplifier using a computer rather than a smartphone or tablet.
Before you begin
• Position your amplifier next to your computer.
• Make sure your computer is on your Wi-Fi network.
• Obtain a USB A to USB Micro B cable (not provided).
Notes:
• A USB A to USB Micro B cable is commonly used for charging mobile devices. You
can also purchase this at your local electronics store. If you don’t have this cable,
contact Bose customer service.
• The USB connector on the back of your amplifier is for computer setup only. The
USB connector is not designed to charge smartphones, tablets, similar devices or
the amplifier itself.
Computer setup
During setup, the app prompts you to temporarily connect the USB cable from the
computer to your amplifier. Do not connect the USB cable until the app instructs you to
do so.
1. Plug the power cord into an AC (mains) power outlet.
2. On your computer, open a browser and go to:
global.Bose.com/Support/SA5
Tip: Use the computer where your music library is stored.
3. Download and run the SoundTouch® app.
The app guides you through setup.
4. After setup is complete, disconnect the USB cable from your computer and from
your amplifier. Move your amplifier to its permanent location.

ENGLISH - 33
APPENDIX: COMPUTER SETUP

©2019 Bose Corporation, The Mountain,
Framingham, MA 01701-9168 USA
AM787179 Rev. 03